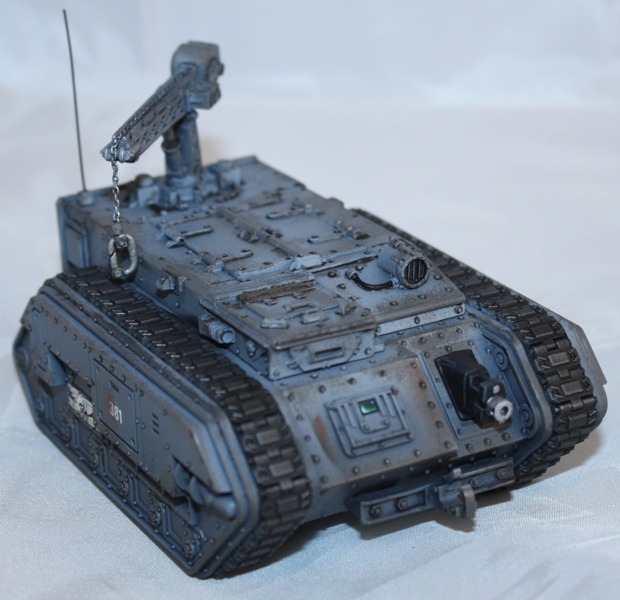
Hobby: Painting Heavy Armour – Part Two


In the first part of this article I showed my methods for applying basecoats, decals and the preliminary stages of weathering the vehicle.
Shading and Weathering
Luckily, the next step fulfills two roles nicely. We want to add some extra depth to the vehicle, and preferably – in my case – add some maturity to the vehicle. To do this, I mix up some oil paint and white spirit (also known as Mineral Spirits in the US). My basic mix is 1:1 black and burnt umber. We can tweak this mix according to need, by adding more brown, the tank will look dirtier and more used, by extension, older. I often use burnt umber on its own to give the look of oil and fuel around certain areas. The mix should be fairly runny, but dense in colour.
This in the scale modelling hobby is often called a pin-wash.
The reason we use oil paint and petroleum based thinner is twofold. First that it is quite dense (though not as dense as water) and the colour saturation in the thinner is high. Secondly, it has no surface tension which allows it to permeate through recesses and around rivets of its own accord and without the need for constant attention by brush.
Using a fine brush, dispense this mix around the rivet heads, along seams, between armour plates. It is a good idea to take your time with this. If you apply too much, dry the brush on a rag or piece of towel and use it to pick up the excess from the area.
Leave to dry, a good couple of hours usually.
Using burnt umber mixed with thinner, I add powder pigment, usually a mid-tone rust. You want a fairly runny mix, you can then dot this mix onto areas on the vehicle. Leave these dots to dry out a little bit, then taking a brush dipped in thinner (you may find using a flat brush helpful) drag it down the spots to create streaking effects. Do your utmost to make these streaks look completely vertical, the vehicle will have spent most of it’s time near enough horizontal, and gravity doesn’t change.
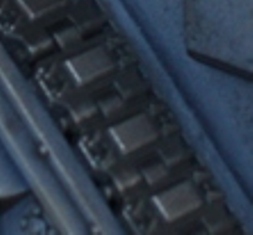
Painting the Tracks
My choice for painting the tracks is to keep the process as short as possible. I do not hold with painting them solid metallic but feel a metallic hue necessary.
Start by masking off the areas of the tank adjacent to the tracks, then spray them black. Allow this to dry then take a pencil. A soft graphite is best, I use 2b as it is still quite brittle it will break up fairly uniformly. Take the pencil and a craft knife and scrape the lead onto a piece of paper. After a small heap of filings has accrued, dip your finger into it then rub said finger over the tracks. The graphite is dispensed naturally over the higher points of the tracks.
This is usually enough for me, I prefer to keep the tracks stark in comparison to the colour of the vehicle.
Further Effects
Now, in the previous step we airbrushed black paint onto the tracks. At the same time you might like to spray some black on exhausts and gun muzzles.
Conclusion
Well the piece is now complete.

I hope you found this article informative.


