HOBBY: Building a Thrift Store Display Board

If you’ve got an old picture frame, you’re half way to your new display board! Here’s how…
Hey guys! Caleb with White Metal Games here. When most of us are getting ready for a tournament, the last thing on our mind is a display board, especially for new players. The cost of models, time to assemble (and convert) as well as time to paint eats up all our resources.
But a good display board can mean the difference between having a good looking army and having a great looking army! And building one can be easier than you think.
I recently volunteered to building a few Demo Board for my favorite FLGS. In practical terms there is very little that is different about a demo board to a display board, and in most instances they can be used interchangeably. In fact if you can build terrain, you can build a display/demo board.
Obviously every player is going to want something different out of their display board, and certain armies will look better on certain types of board than others. For example, if I build a creepy graveyard board for my Vampire Counts, then it might not work well for my Sisters of Battle army.
This tutorial is more intended to show newcomers to the hobby one way they might bang out a fairly generic display board in a day or two for their upcoming tournament. It’s not intended for veterans, nor is it the end all be all only way you can do this. So with that being said, on with the tutorial!
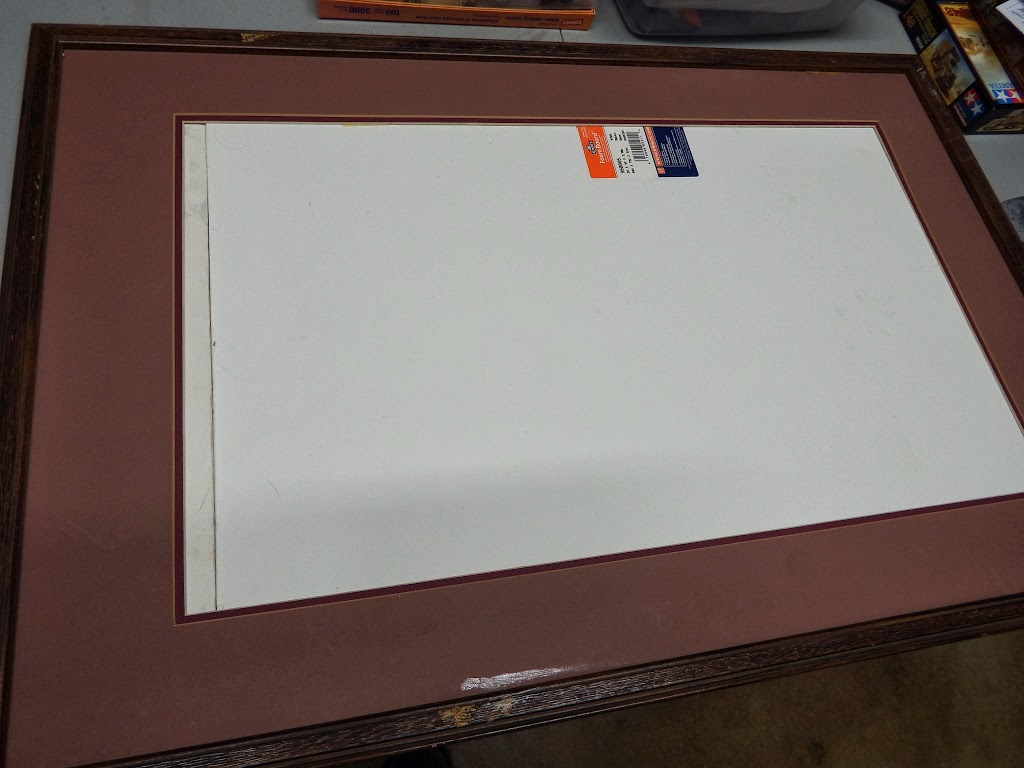 To start I grabbed a large frame from a local thrift shop. Big frames like this go for about $10-$15 generally. You don’t need one with glass (since you’ll just be removing the glass anyway), so a broken picture frame can sometimes be a bargain. This frame is a little bigger than I traditionally use. Most of the time a frame about 24″ x 24″ will suffice, however, you can go a littler bigger or smaller depending on the army it’s being designed for. Obviously a horde army will need a bigger frame than a GK Paladin army, etc.
Remove the glass, if there is any. If you are going to simply break the glass, BE EXTRA CAREFUL! +++ Safety Alert: Glass can cut you! +++ Obviously shattered glass poses a safety risk on many levels. I would instead recommend removing the backing material from the frame,then removing the glass that way instead. Glass can be recycled, so if you have a large recycling bin just deposit it gently.
This particular frame posed several challenges. The first of which was the matte. I decided to keep the matte as this would create some depth to the board once done, like the soldiers were in a slight defile. 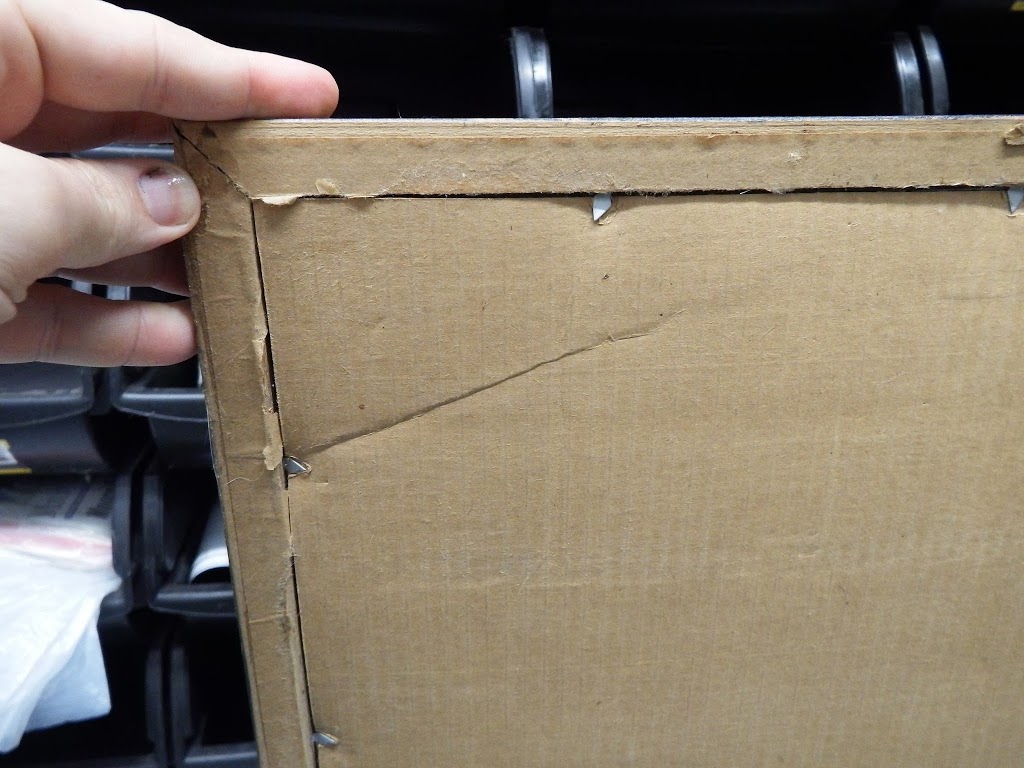 I removed the old backing paper, carefully bent the metal holding spikes up, and removed the old glass. Then I used the glass like a template to measure the size of a replacement piece of foam board. I wedged this in front of the backing cardboard. This helped to reinforce the board, so now there were several layers to the board: cardboard, foamboard, then the matte material. I bent the holding spikes back into place.
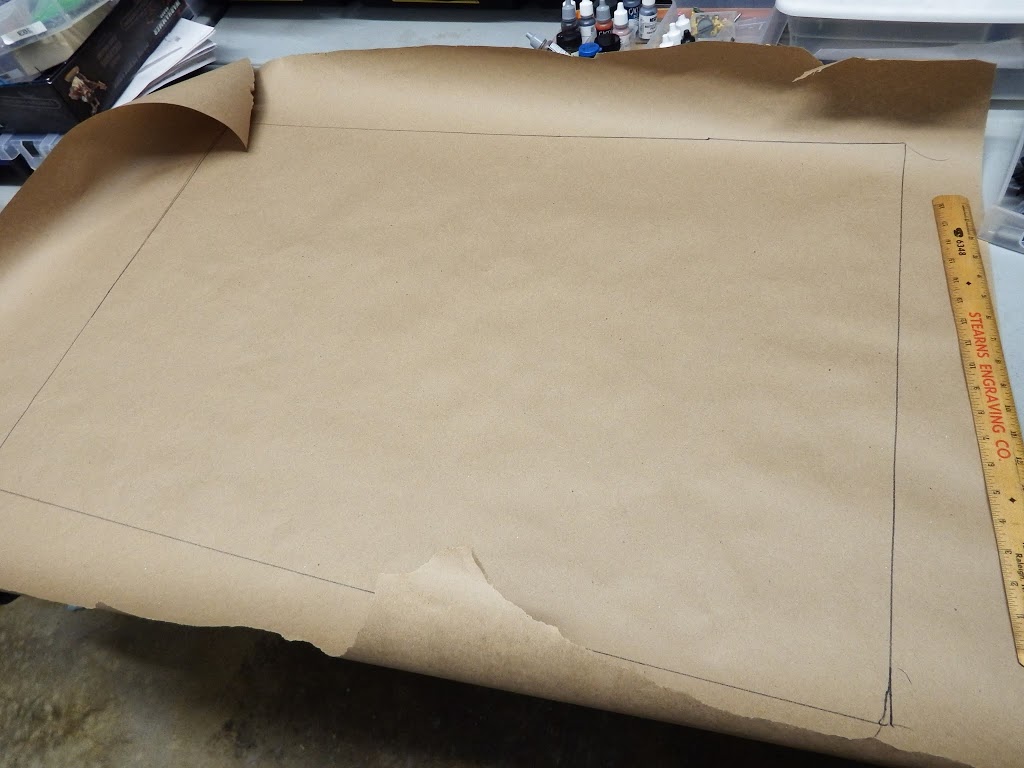
To be extra sure that nothing would collapse, I also grabbed a roll of craft paper (the my wife uses for parties like a tablecloth that kids can draw on) and outlined the size of the frame on the craft paper. Then I cut it out, glued it down to the edges of the frame.

I also stapled it for good measure. This will ensure that the paper doesn’t go anywhere. Be warned these staples could scratch a table so perhaps apply some felt to the staples once done to ensure this doesn’t happen.
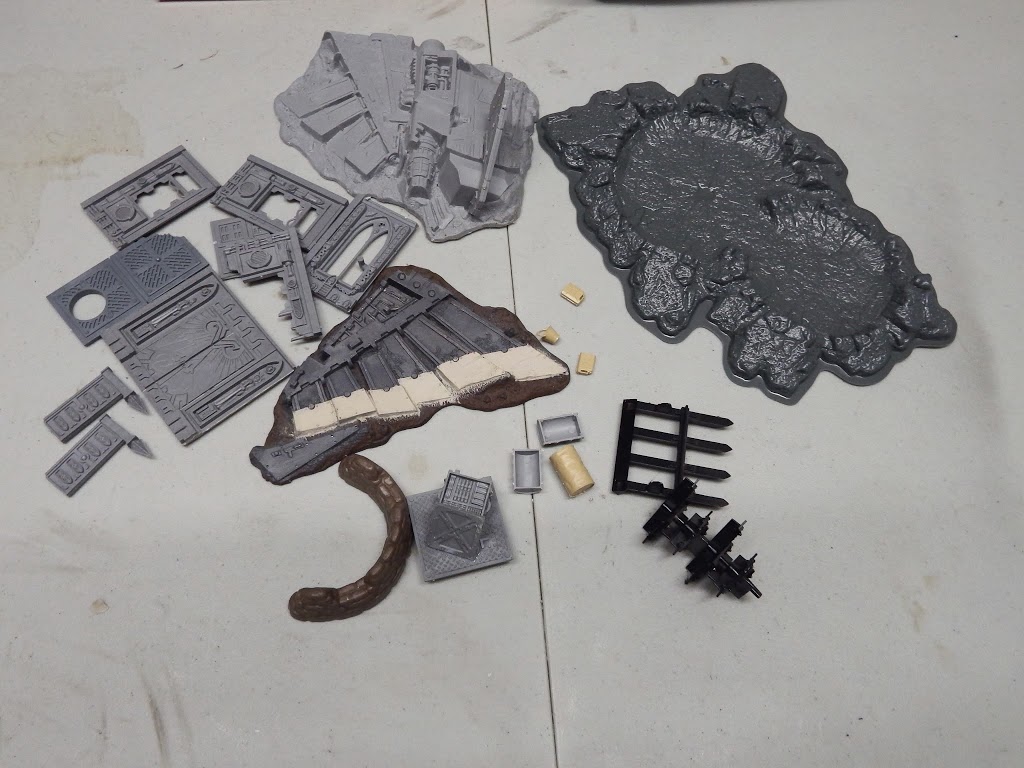
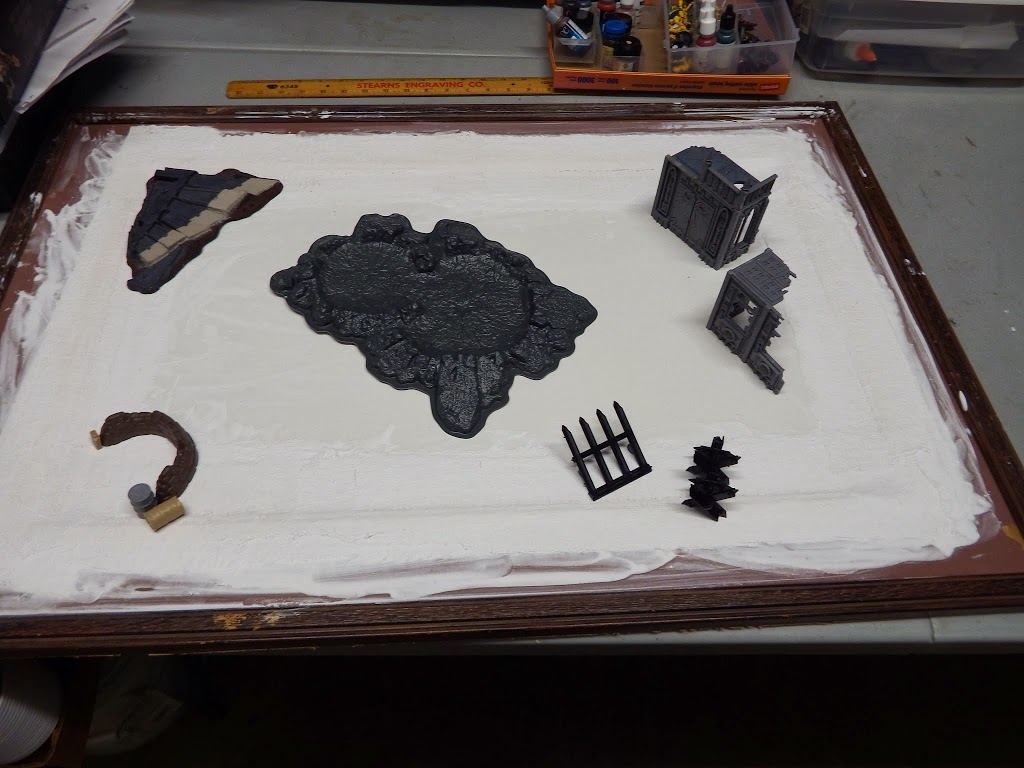
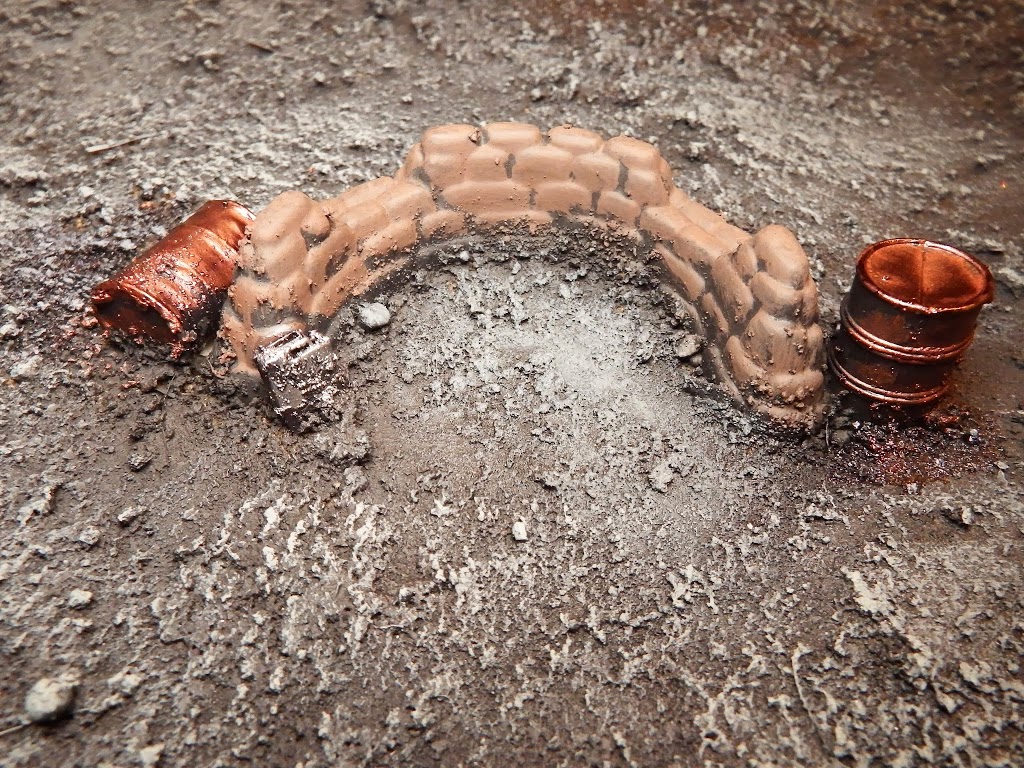
Next, I gathered up a variety of terrain supplies out of my bits vault. I knew I didn’t want anything too flashy or too tall. The goal with a display board is to draw attention to your army, without drawing too much attention to the display board itself. It should accentuate your army and make them look better, sort of the way any geek looks better when standing next to a beautiful person of the opposite gender. Think of it like a narrative base for the entire army.

I lay out some of the bigger pieces to get a general sense of where I might want to put things. This isn’t a firm rule, I just want to have a sense of where things might go, so I can plan accordingly. Obviously this display board, being a demo board, was meant to have several different types of terrain, all of which are fairly flat and low to the ground. If you are designing something more extravagant, like a Necron Tomb World or Heldrake Aerie, then you’ll want to plan accordingly. I personally feel a board with a lot of elaborate catwalks and such can take away from the army, but a few well placed pieces of even very tall terrain can really make the board pop.
Since this board was matted, I’m going to need to smooth over the transition between the higher level of the board with the lower level of the sunken foam board. I’ve used lots of different types of plaster over the years, from Plaster of Paris to simple spackle. The problem with plaster is two fold: One, it’s brittle, and chips easily. Two, it’s heavy and adds a great deal of weight to your terrain or boards. A few months ago I discovered this amazing stuff called plaster cloth, which sort of solves both problems! And it’s cheap!
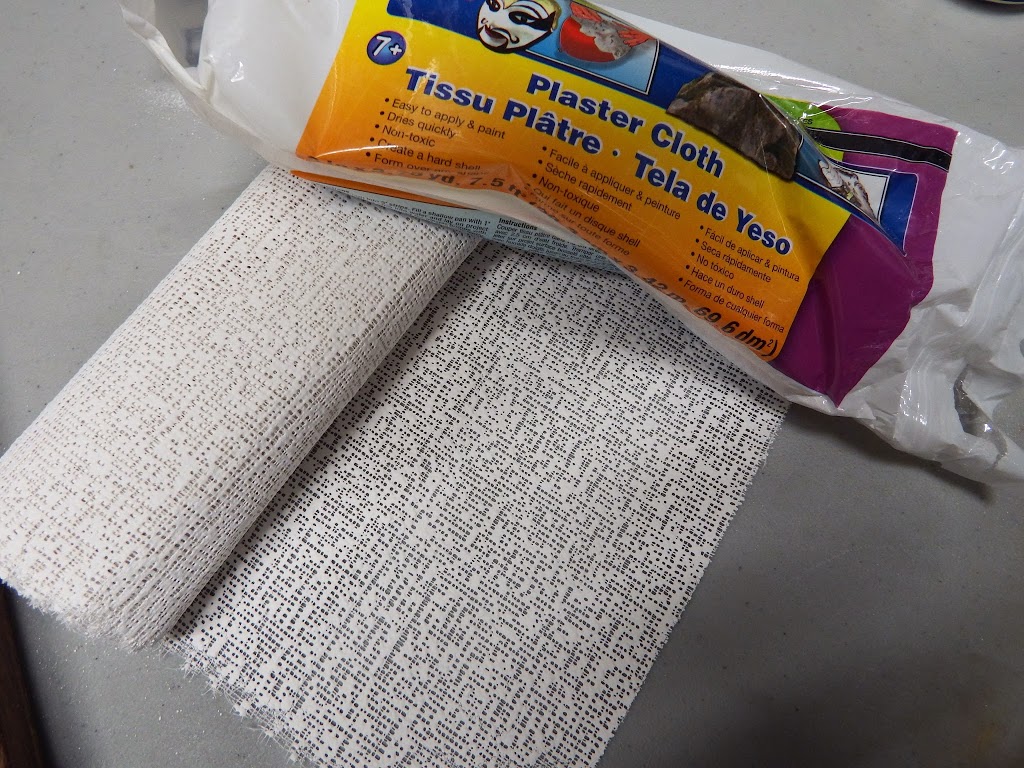
Plaster cloth is a bit like an ace bandage. You cut strips of it and dip them into a basin of water.
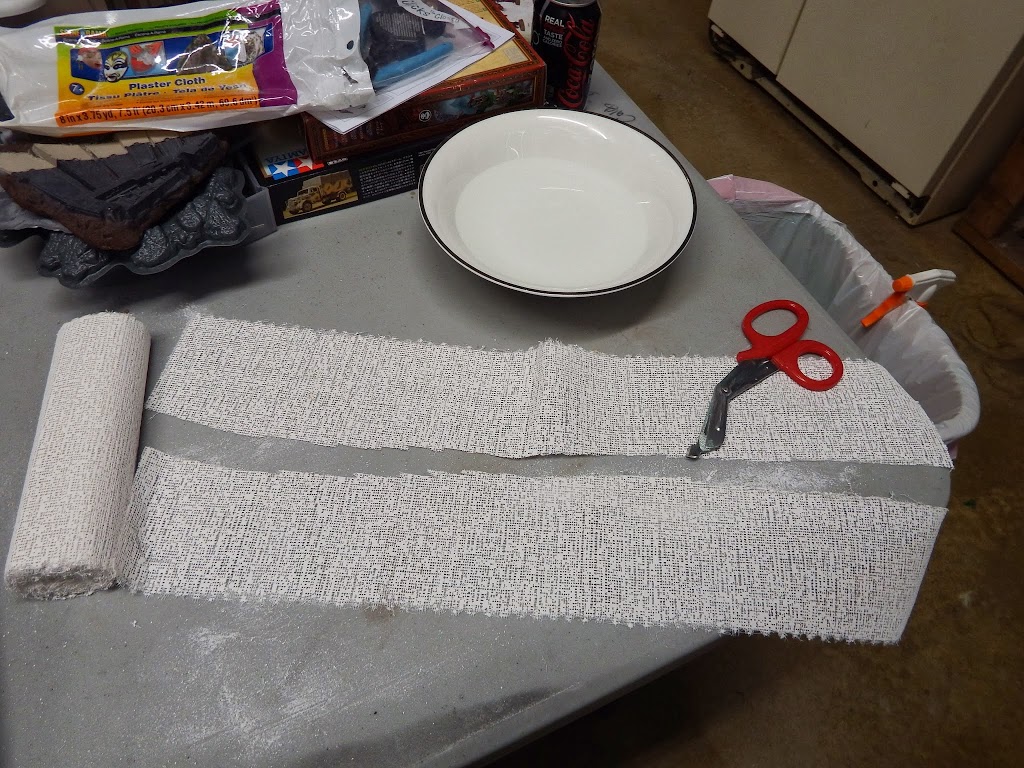
Then you apply them much in the same way you might paper mache. The water activates the plaster and you simply smooth the strips out with your hands. You rub the strips down and it causes the plaster to fill in the holes on the strips, so that in the end you are left with a very thin layer of what looks like plaster, but is in fact much lighter and not at all brittle.
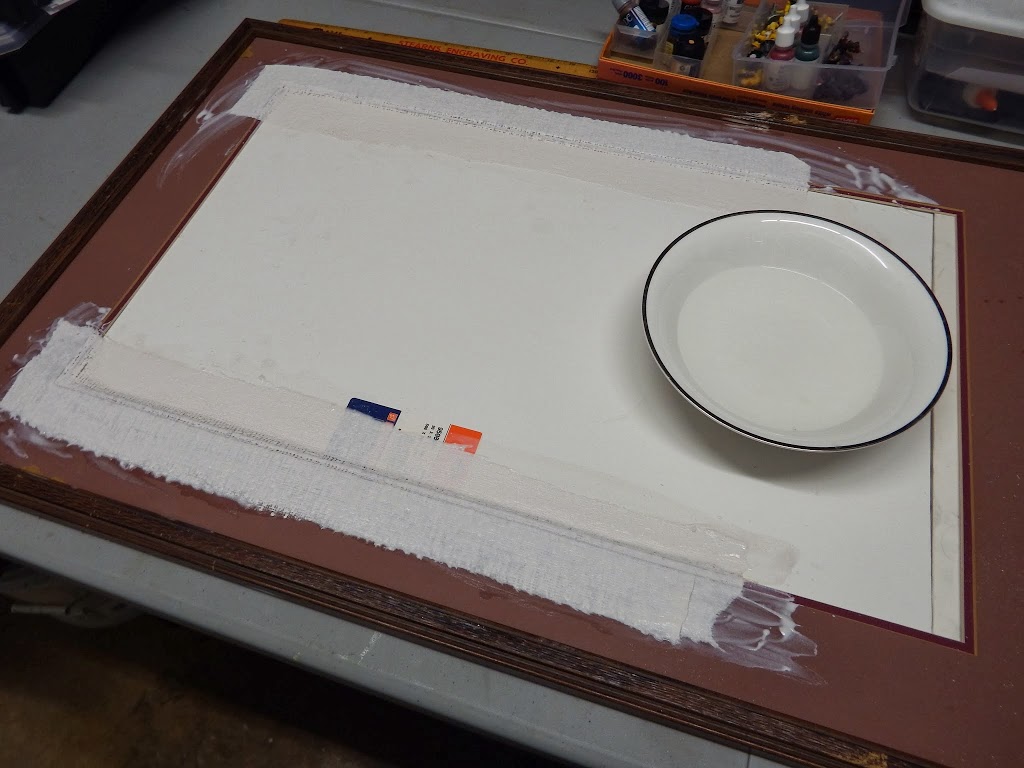
Obviously it gets messy and you’ll need to tive it some time to dry. Also, since the gauze it wet it tends to cling to whatever it is laid over quite tightly. For me, this meant that the transition was still quite pronounced ever after a few layers. I ended up applying about 4-6 layers around the edges of the matter.
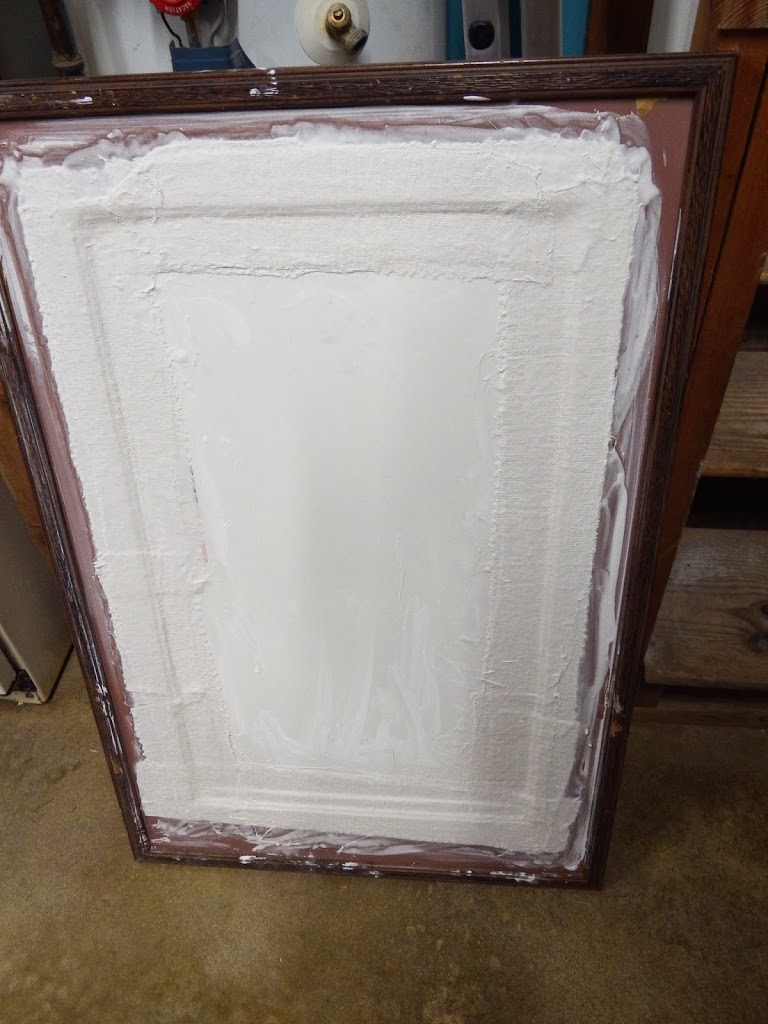
This is around the halfway point. As you can see, the boarder is becoming less pronounced than before.
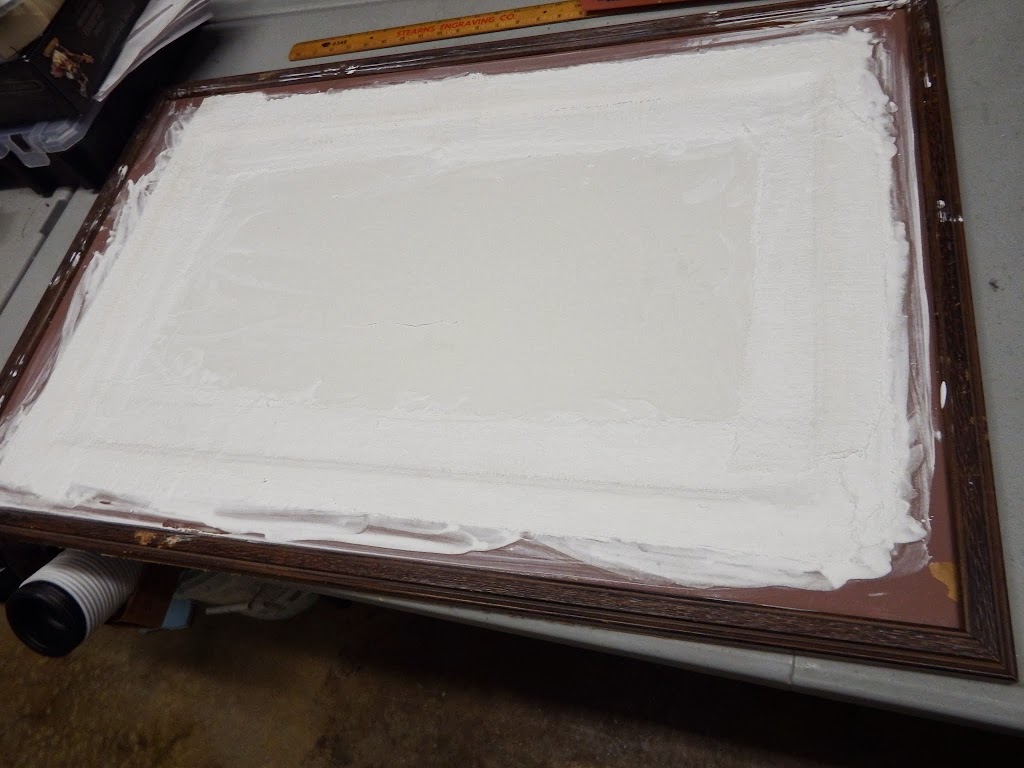
After the final strips are applied, the gradient is greatly reduced and the board appears to be a natural decline in the ground.

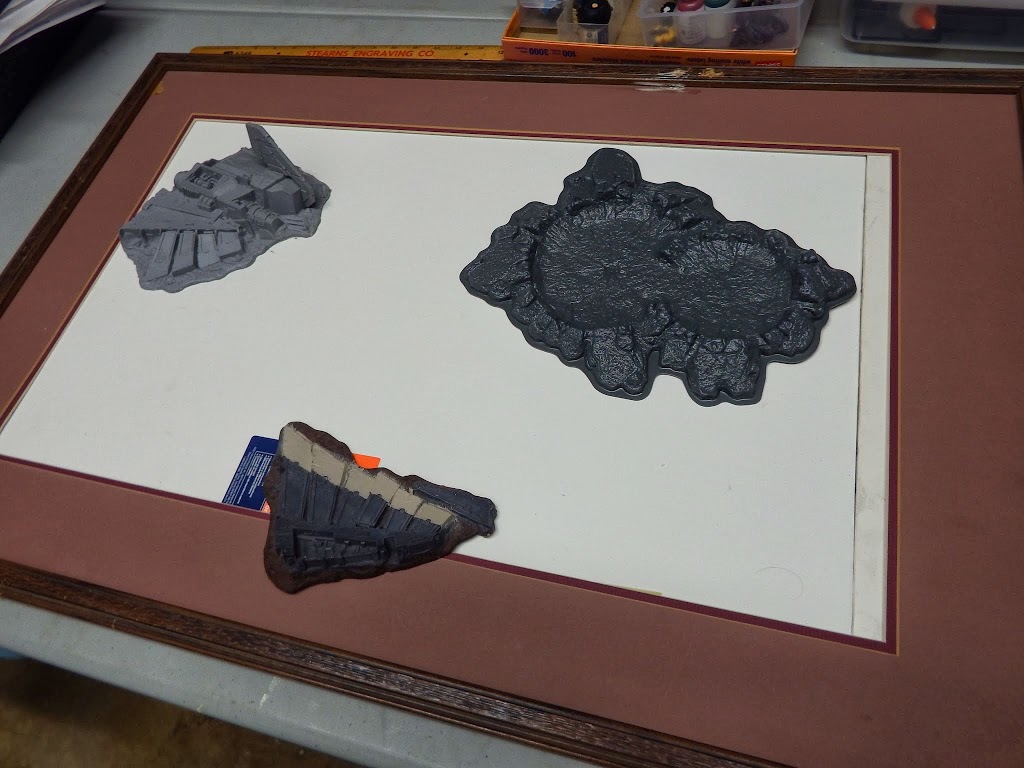
At this point I actually lay out my terrain pieces. I fiddle with them a little bit until I find an arrangement I find balanced and pleasing to the eye.
Okay, if there was a major lesson to be learned building this board, THIS IS WHERE I LEARNED IT! Learn from my mistakes! A lot of companies will try to sell you on scenic cement, which is for all intensive purposes watered down PVA glue. I thought I was being smart by making my own. I grabbed a spare bottle, mixed up a 1/1 ratio of glue to water and used it to coat the board.
 Obviously when applying glue in this way, be sure to use some sort of template or mask to protect areas from overspray. For example, if I don’t want grit/dirty to be glued down in the center of the crater, I should take steps to ensure that the glue doesn’t waft over that area.
That wasn’t my problem. That was something I knew to expect. The problem came later, during painting. Here’s the rub. Scenic cement doesn’t have a lot of binding power. As you dilute the glue, it’s ability to hold things in place lessens. So when it came time to paint the display board, I ran into issues.
I applied my general house mix of dirt/sand/herbs/ballast, etc to the board. Normally for a project like this, I’d use a spray gun supported by a heavy duty compressor to basecoat the board black or brown or the like. However, even at lower operating pressure, the air was blasting the grit mixture right off the board.
 I then tried using a brush to dab paint onto the board and smear it around. This method worked, but took over an hour and required multiple applications. Sand kept coming off the board and would get stained black by the paint brush, clogging the bristles with this half paint/half sand mixture. I would then smear this Azathothian like gel around the board, but it took forever! I don’t recommend this.
Instead, try this: apply generous amounts of PVA (white school) glue to the board in small areas, spread it around with an old paint brush (a big brush, like you’d used to paint something other than miniatures) and then apply your basing medium directly to the board. This will take longer in the application process, but will ensure a firmer grip on your basing medium and save you TONS of time in the painting process. Trust me! 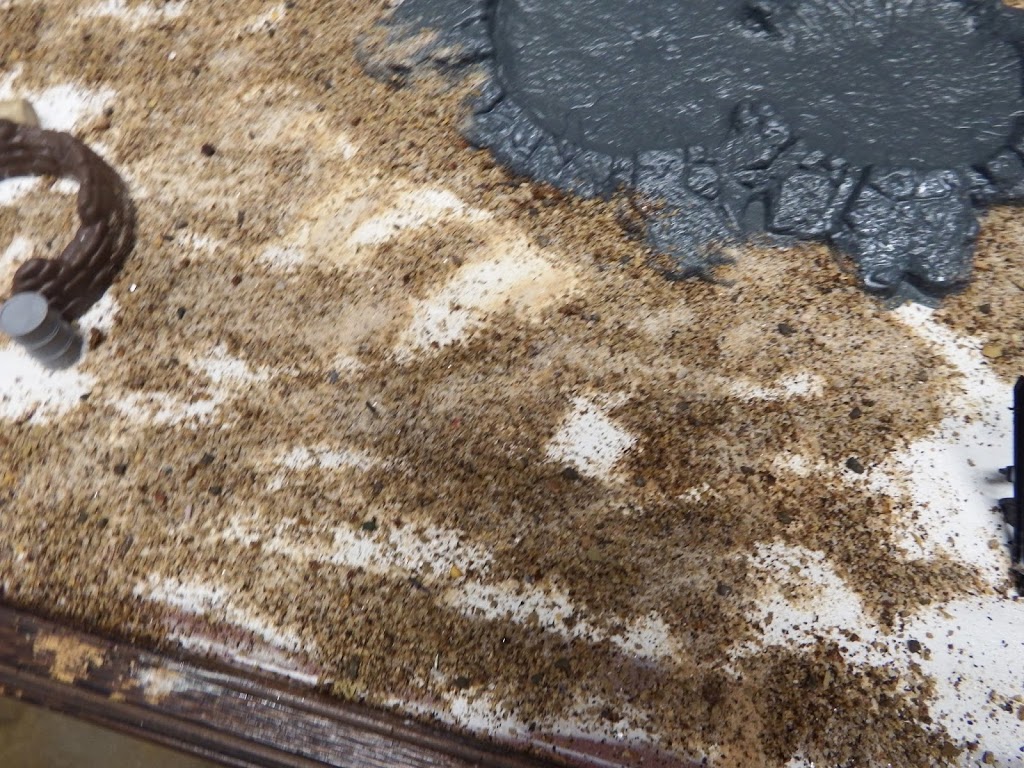
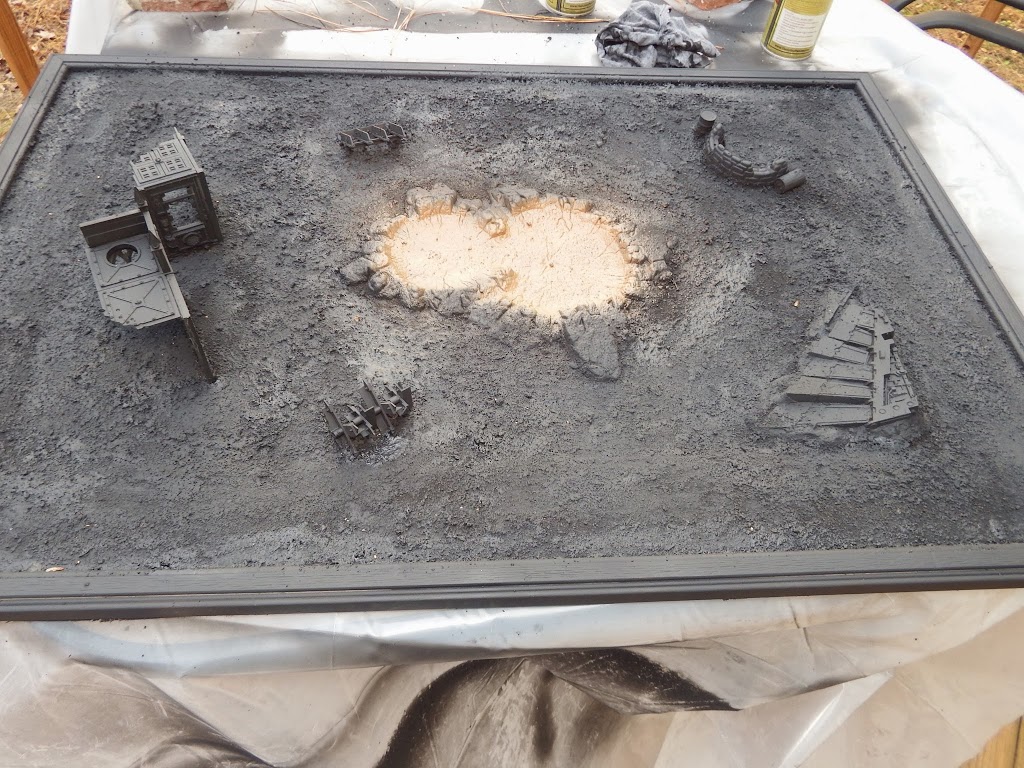
So, after that entire debacle was done, I was finally ready to apply some actual paint. I primed the board black (see above) using a variety of techniques and many, many four letter words. Also at this time I blasted the interior of the crater with some brown paint from a spray paint can. My though process was they built this city on natural earth (and rock and roll), so when the bombs started falling, natural earth would be exposed. It gave me a chance to splash some color onto an otherwise very grey board.
I dry brushed the black with dark grey craft paint from my local Walmart, then applied a slightly light grey paint in the same fashion, create two levels of depth and light/dark contrast.
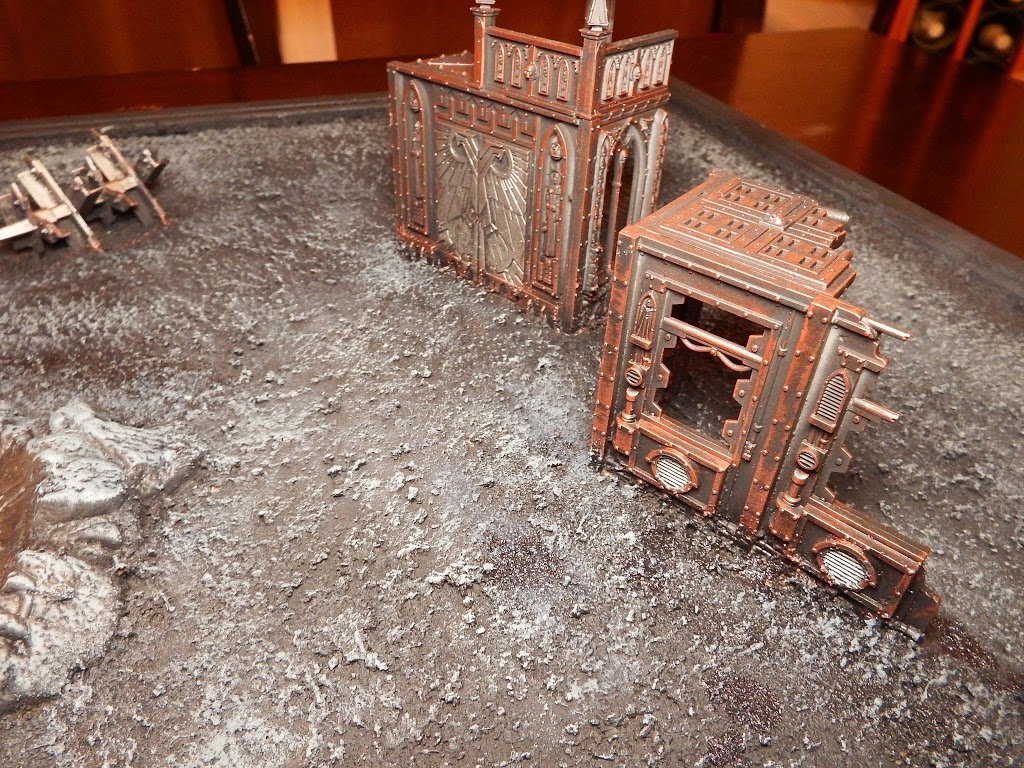
Already having spent a great deal of time during the priming process, I wasn’t interested in doing a great deal of detail work to the board. So I settled on a few simple techniques. For the crashed Aquilla wing, I overbrushed some dark red paint to the wing itself, overbrushed some boltgun metal (or the equivalent) to the exposed engine components, and applied some more grey to the ‘dirty’ areas on the wings. I applied a few simple black washes to pull out a a little detail and BLAM-O, doneski.

For the buildings I went even simple. I drybrushed some coppery metallics of the building, then some boltgun metal over the doors and vents. A simple black wash to pluck out a little detail and WHAM-O, donearoski.
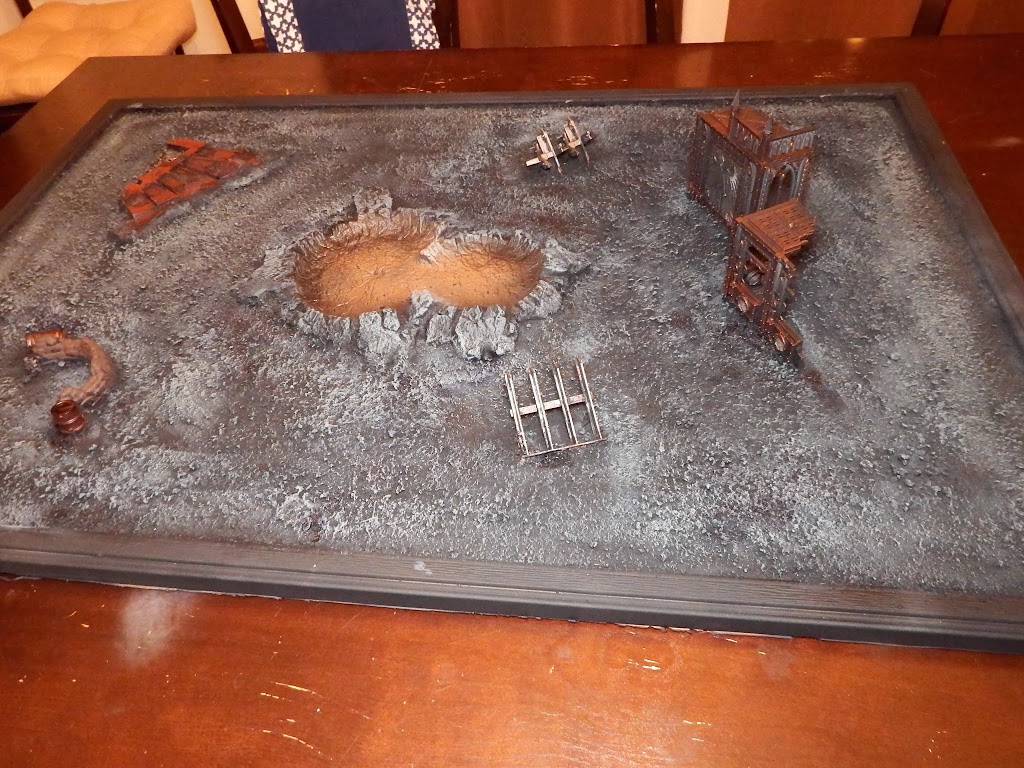
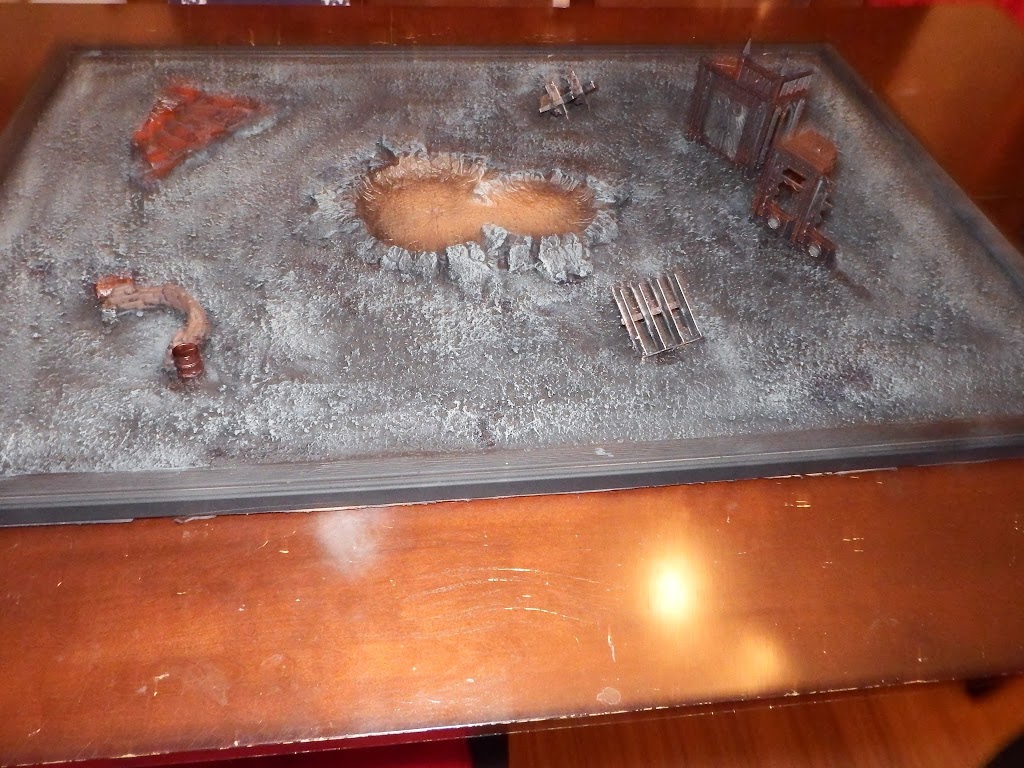
Here’s the finished display board, before bringing it to my FLGS. All in a few days work.
I would be remiss if I didn’t mention Highlen Terrain at this point. A month or two ago, I found out through youtube that Stephen with Highlen Terrain had designed an AMAZING Necron Tomb World gaming board for Project One Gaming. However, something happened (fuzzy on the details), and Project One had to cancel the project, even though it was practically done at this point. Stephen was very good natured about the entire thing and decided to sell off the board as four Necron Display Boards instead.
If after reading this tutorial, you’re still of the mind it’d be better to pay someone to build a display board for you, Stephen is the guy I’d recommend for the job! The Necron boards you see below were only $70 for every 2’x3′ section!  If you haven’t seen the work done by Highlen, I can’t recommend them enough! If interested, you can email Stephen. He offered to rebuild the sections already sold if a buyer wanted to pick up the entire 4’x6′ board for $350 USD including shipping with everything (ALL THE PYLONS!). My mouth dropped when I heard that and if it hadn’t been so close to Christmas I would have most certainly bought it!
Recently Stephen has been working on some crater boards for a new client and let me tell you I can’t wait to see them done!
If you are a Necron player in need of an amazing Necron display board for an amazing price, contact Stephen at Highlen Terrain!
Or, if you’d rather tackle this project on your own then by all means . . .
PUT YOUR MINIS . . err, I mean DEMO BOARD WHERE YOUR MOUTH IS!
If you found this tutorial useful, be sure to check out more of our work on our homepage, or at the very least, like us on facebook! We also have a new podcast called Warcouncil where we share other cool hobby tips! And you can see more tips through our Youtube channel!
Caleb, White Metal Games