X-Wing: Top Gun – Training Time

Now that we’re done with the Basics – let’s put it into practice!
Hello once again X-Wing Aces. I hope have done your home work and studied Part One – The Straight Maneuvers, Part Two – Banks Strike Back and Part Three – Return of the Hard-Turns. If not, I won’t hold it against you but your ships might because today we are going to take flight!
I’ve got a few simple exercises for you to try at home that will (hopefully) give you boost while you’re piloting you ships. These are designed to be flown with a single ship of your choice. I prefer the T-70 X-Wing if you’re getting started because it’s got a pretty solid dial and it’s a great all-around ship. You can opt to use what ever actions (Boost, Barrel-roll, etc) you’d like during these practice exercises – I’ll leave that to you. But the goal here is to learn and not show-off. You’re only going to be hurt yourself if you try to get too fancy and fail.
First up: X-Wing Slalom.
X-Wing Slalom
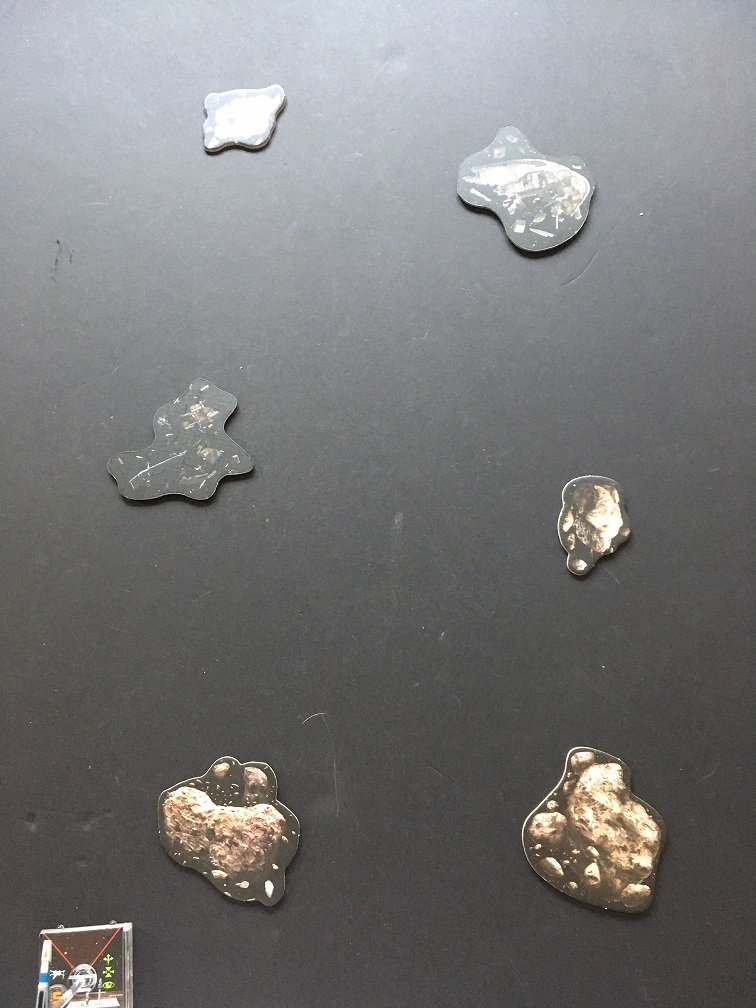
The first thing you’re going to do is setup a simple obstacle course. I’ll leave it up to you to decide how many obstacles and what size – although I do recommend an even number. It’s also up to you to place them how you’d like. In this example I’ve done a simple 6-obstacle setup, in two rows – easy enough.
The goal is simple – you’re trying to weave though the obstacles and get from the end of one set and back down the other:
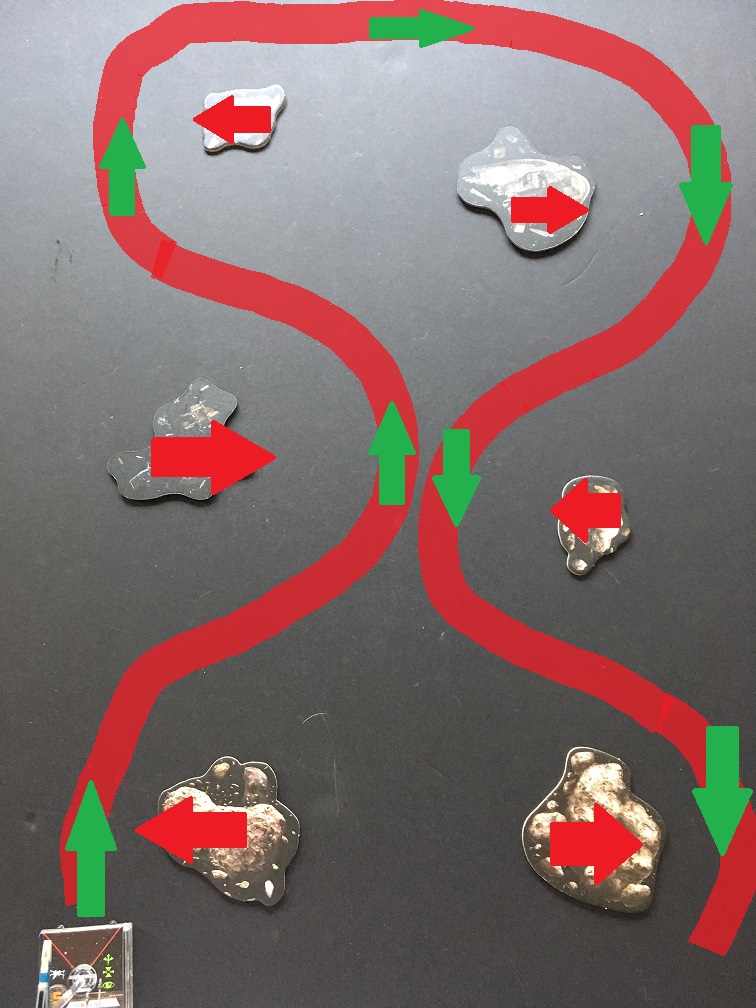 In this example this was the intended path I was shooting for.
Now, as easy as this looks, if you’re not careful you’ll slam into obstacles. The goal here is to make it from one end to the other, in as few moves as possible and if you hit an obstacle you have to reset because you just failed the exercise.
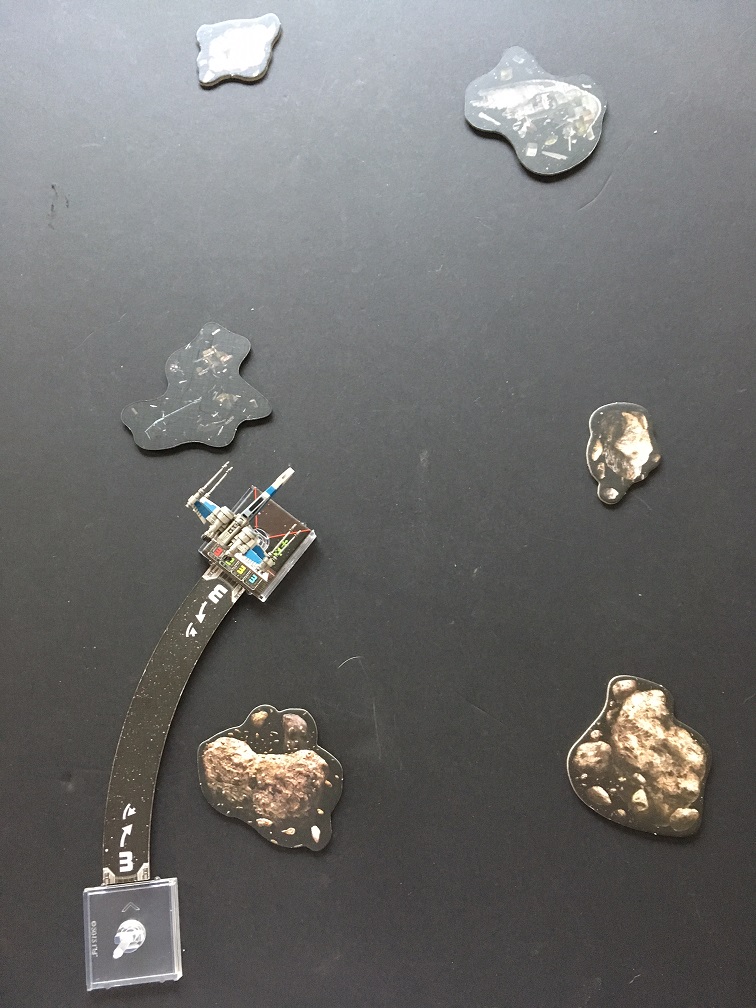
The First move was pretty clear – 3 bank. When you’re doing this, if you have extra bases and templates try and leave yourself a trail. You’ll see why in a moment.
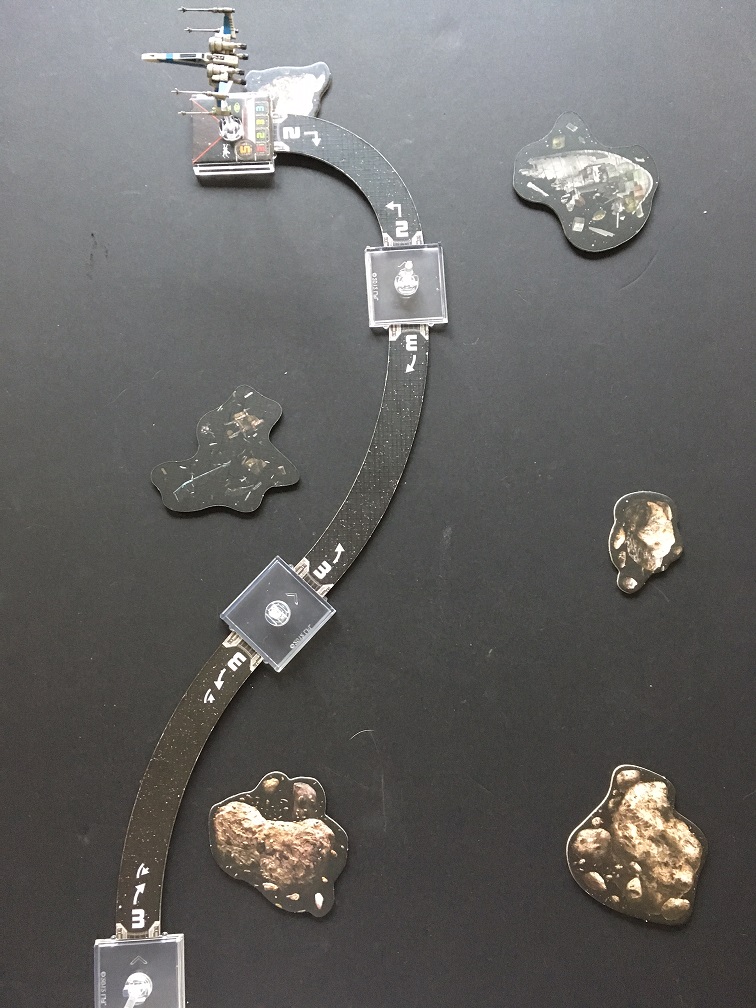
As you can see I followed this up with another 3 bank, but this ended up causing a crash later on – I miss judged the distance and ended up slamming into an asteroid. Now, this is where you’d reset…but because I’m demonstrating this I left a trail and I could trace my way back to see where the screw-up was.
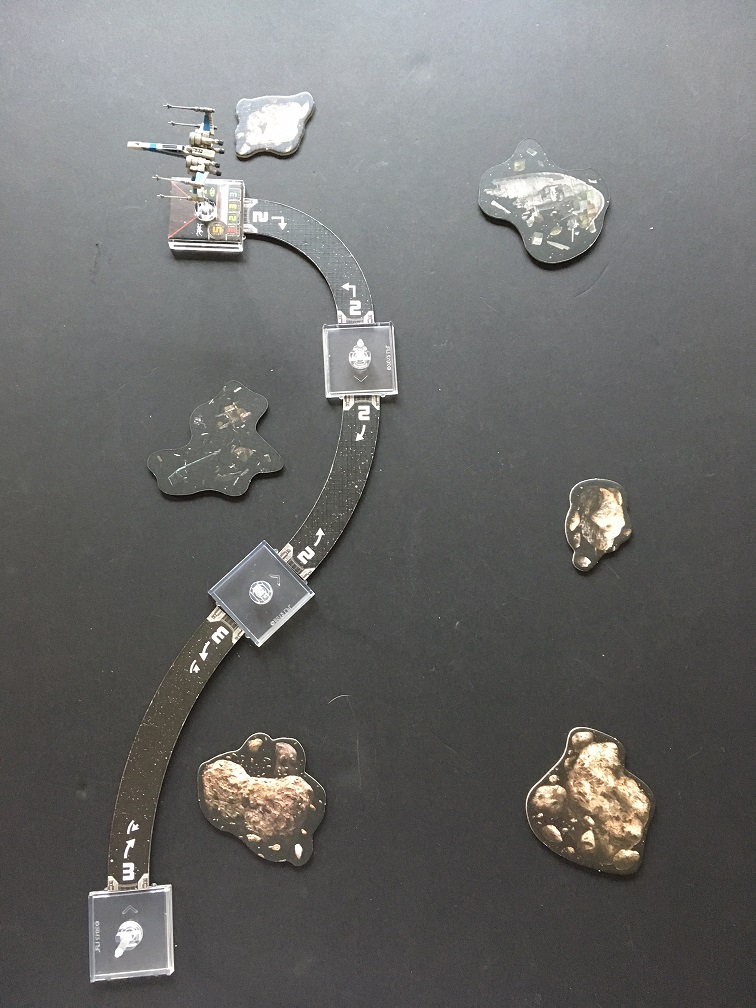
By changing the 3 bank into a 2 bank I was able to clear the top asteroid no problem. This is a perfect example of how visualizing your turns 2-3 moves ahead will help you get better as a pilot. If I had been able to judge the distance between the top asteroid and the debris field better, I would have known to execute the 2 bank and follow that up with the hard 2. What’s the next move? I’ll let you figure that one out!
This is a pretty simple exercise but feel free to change it up as you get better at navigating the obstacles. Shift them around, change up the sizes, offset them in weird positions – maybe even fly a very different course. The move comfortable you get navigating obstacle fields the better you’ll get – and you’ll be able to surprise your opponents, too!
Next-up: Target Practice
Target Practice – Simple Moving Target
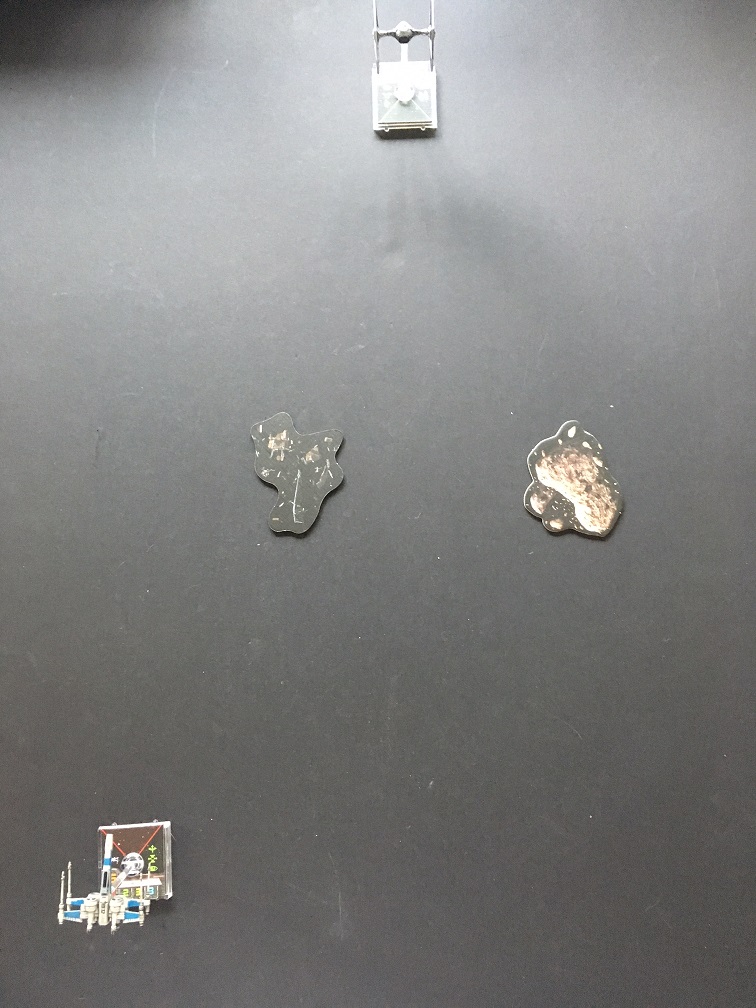
This one does require at least 1 other base. I’m using an extra TIE fighter but you can use whatever you have lying around. The setup is simple, toss some obstacles in the field and setup the two ships on opposite sides. I put the TIE in position to fly right through the middle of the two obstacles.
Now, the Target is the TIE in this example and they have some very strict movement rules.
- They only fly using the straight maneuvers.
- At the end of their movement if they have pasted the middle point, they must execute a k-turn, even if they can’t normally do that (it’s just a practice target).
- Randomize their movement with a D6. A roll of a 1 means a 1 straight, a roll of a 5 is 5 straight, etc. If you roll a 6, re-roll it.
- Roll the dice before you choose your movement. You’re learning to gauge distance after-all.
- If you’re feeling confident, roll the dice after you’ve picked your maneuver.
That’s all the target can do. If you want to up the difficulty, bump up the pilot skill of the target so that it’s flying after you move and shooting first…
Now, the goal is simple, get a firing solution on the target for as many turns in a row as you can. If you ever end a turn where you don’t have a shot and the target does, you lose. If you hit an obstacle, you lose. If you bump the target, you lose. If the target causes a bump, it’s okay – it’s moving randomly after all. Here’s an example of what it would look like:
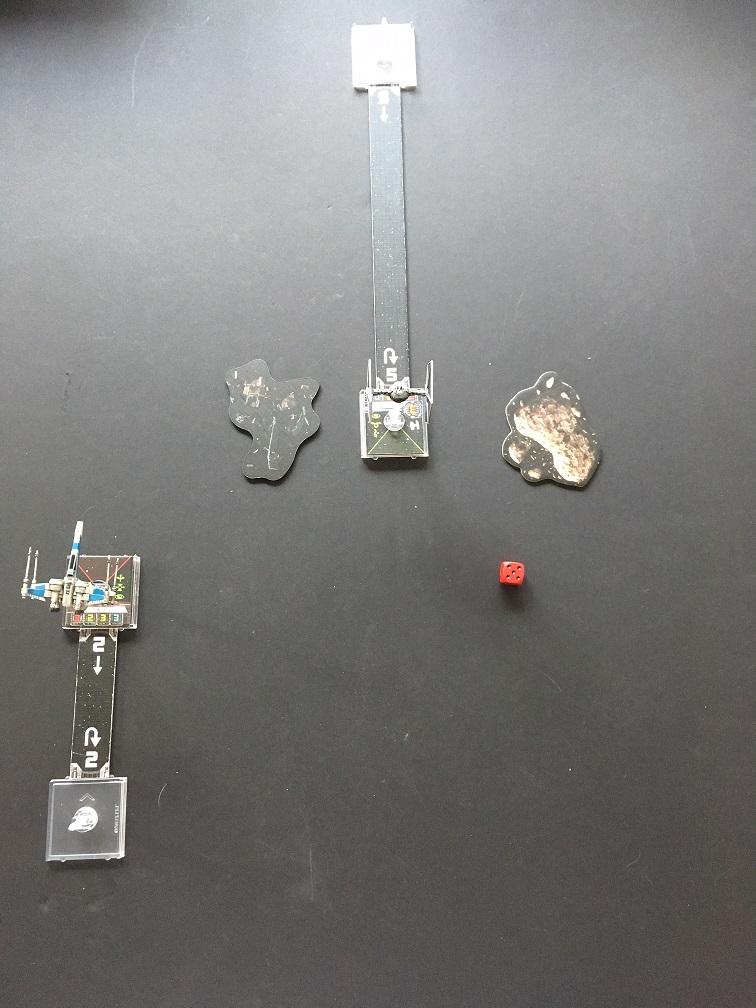 Example 1: I’m flying a T-70 X-Wing and based on the position, I opted to slow-boat with a 2 ahead. I rolled a 5 and so the target went all out. This example ended with neither one of us with a shot and I was going to have to deal with the obstacle next round. A Straight 2 was a bad call all around. Why? because no matter where the TIE ended up, I’d probably be shooting through the obstacle and then have to deal with the obstacle next turn anyhow.
So lets back-up and see if I can’t get a better shot.
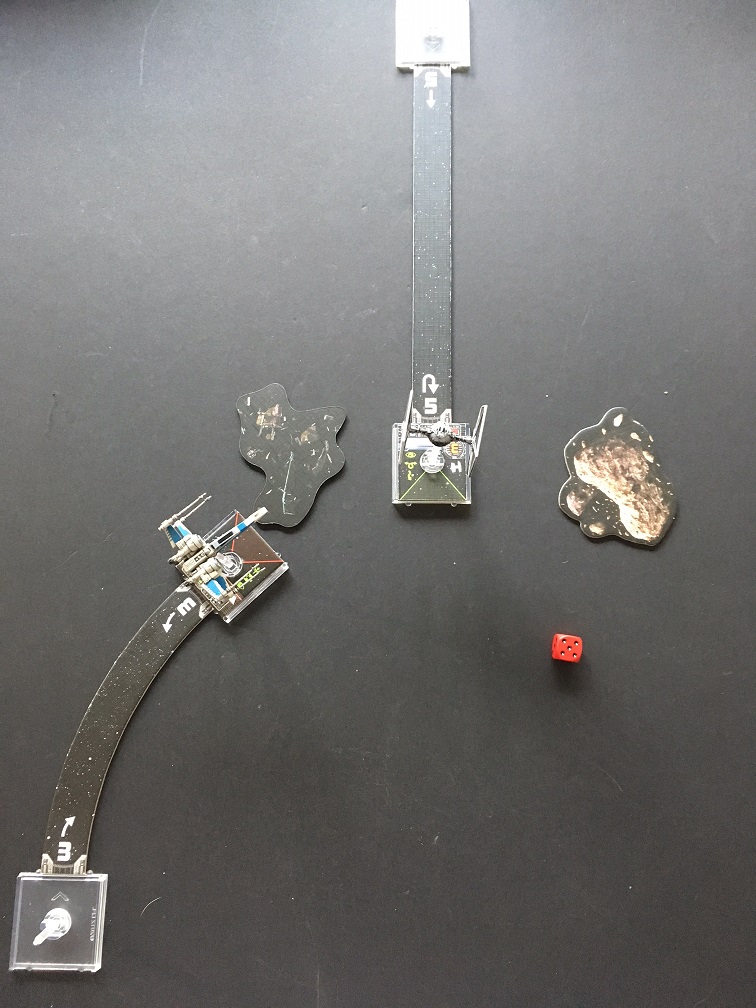
Example 2: Here I went for a Bank 3. Now, I may have cleared the obstacle (just barely) and I do have a shot, but next turn I’ve got to fly through it and that’s no good. On the plus side, the Target doesn’t have a shot in arc…But we can do better.
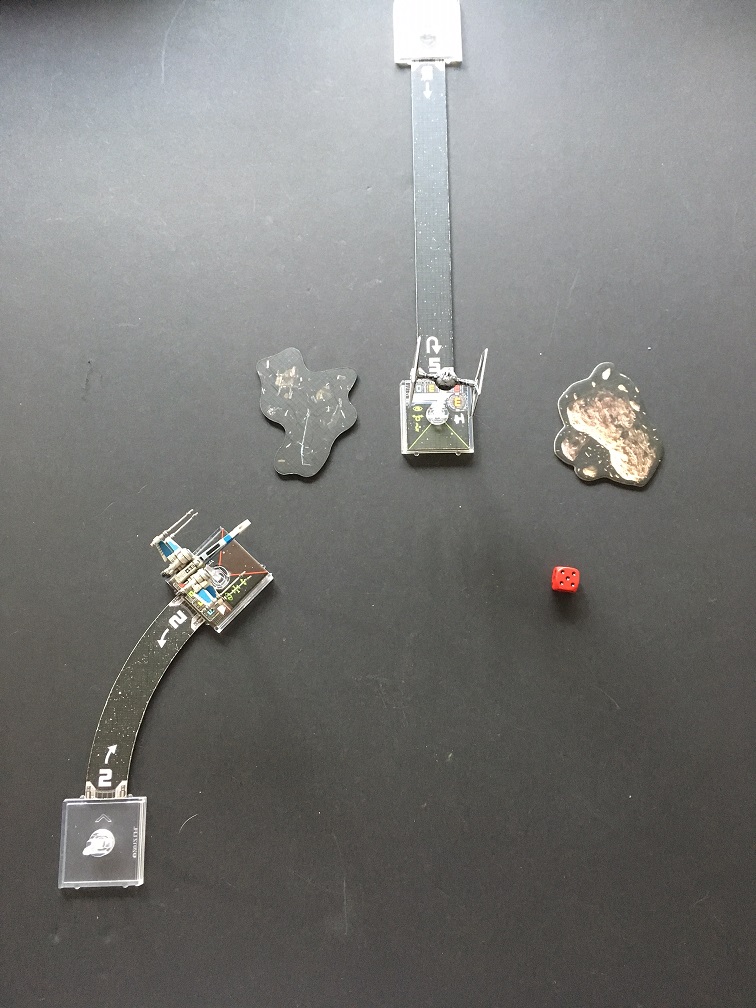
Example 3: The 2 Bank was the right call. I’ve got the Target in arc, I’m not going to go over the obstacle and there is no chance for a bump. What’s my follow-up maneuver? S-loop!
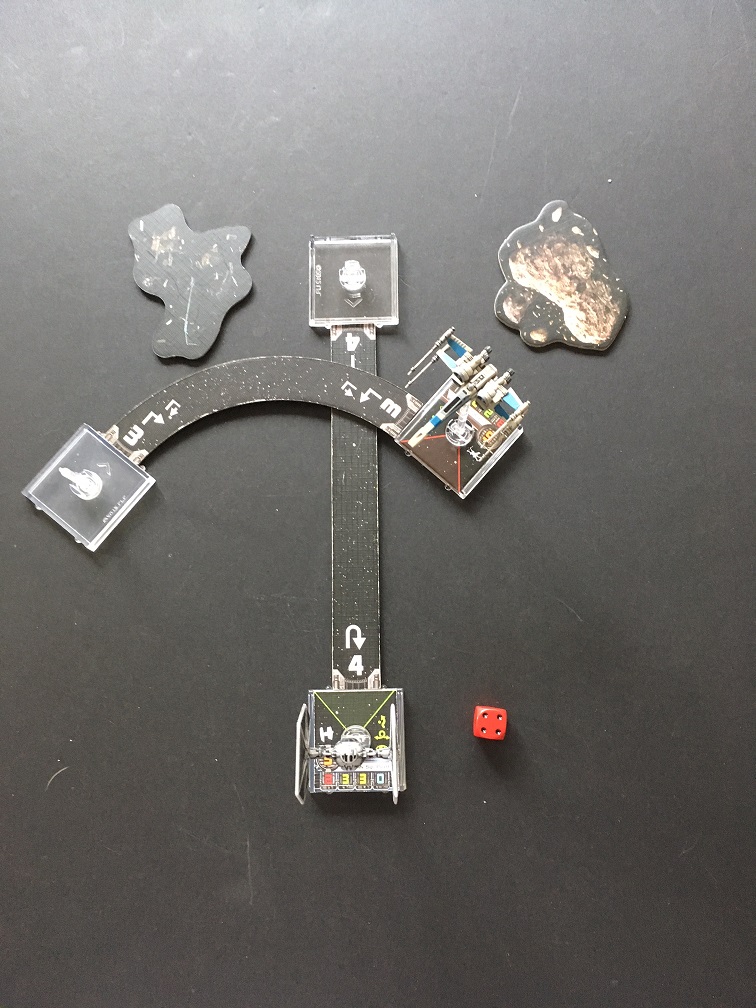
Now, it was a gamble because if the Target had rolled low there was a chance of a bump, but I rolled 4 so it was moving fast. That also meant that it was going to clear the 1/2 way point so it’s doing a K-turn, too. I was able to avoid the obstacles and I continued to have a clear shot.
Now, you can change this exercise up in lots of ways. I already mentioned the dice roll can be before or after you choose. You can even choose to execute actions if you want. I didn’t roll any attack dice (which you certainly could do) in an attempt to blow up the target. You could add more obstacles to make it more challenging as well. You could also work in Turns and Banks in the movement as well. But this was just a basic exercise…So how can you take it to the next level? Glad you asked…
Flying VS AI
Lot of folks have recommended this to us here at BoLS and I just want to say, “Yes, it’s great. We know!” You should definitely go check it out and play it with your friends because it’s extremely well done. However, what I really wanted to point out is that this fan-expansion has an excellent AI deck for piloting the enemy ships. Now these are designed for TIEs so you’d have to be okay with shooting at Imperial ships…but aside from that I can’t think of a better way to practice besides playing against people.
So there you have it folks – take what you’ve learned from the Basics of Flight and put it to use. When you get comfortable flying through asteroids and shooting AI, you’ll be more than ready to take on an opponent at your local gaming store.
Next time – Formation Flying Practice…
Homework: Go download Heroes of the Aturi Cluster and fight some of those AI ships! Maybe play the campaign while you’re at it!


