Leaping to Victory: Harlequins Tactics in 8th


Today we talk Harlequins, my experience in playing them in 8th edition, and some thoughts on units, lists and tactics.
Hello, Embrace Your Inner Geek here from that well known blog (!) Apostates Anonymous. I’m here to tell you a tale about some Harlequins. Well a lot of Harlequins actually, but more importantly about my experience in playing them in 8th edition, and some thoughts on units, lists and tactics.
I came a bit late to 8th edition, having taken a bit of a break from the hobby after this year’s LVO. At the LVO I played Genestealer Cult, but fancied a change for 8th. I’ve always loved the Harlequin models, and fancied the challenge of painting them, so, with the ability now to field a (largely) Harlequins army, decided they would be my new army for 8th.
I’ve now played about a dozen games with my Harlequins, including one tournament, so while I’m no expert, I feel I’m in a position to provide a review that’s more than a simple “this unit does that, and that unit does this”. So, to keep things brief I’ll assume you have the index and have read the basic unit entries. I won’t dwell on the stats and rules, but try and focus on table top tactics and function.
So here goes – first special rules, then Psychic Powers, and then units. There aren’t many, so it’ll be quick!
Special Rule – Rising Crescendo
All Harlequins with this rule (which is all of them bar Vehicles) can advance and charge, and can shoot and charge, even if they Fall Back.
This is Harlies defining rule. It’s part of what makes them so fast and so deadly in assault, especially when combined with Flip Belts (allowing them to move over units and terrain as if it wasn’t there).
Being able to advance and charge is pretty self explanatory. It gives Players a charge range of around 18” on average dice (8” move plus 3d6 i.e.d6 advance and 2d6 charge). The only downside is you can’t shoot pistols if you advance. An issue if you forked out for Fusions Pistols.
The second part of the rule (being able to charge and shoot after falling back) is more subtle, particularly when combined with Flip Belts. What it allows you to do is exploit positioning mistake by your opponents by (very) careful play in the assault phase.
Psychic Powers
Harlies have 3 powers, Twilight Pathways, which allows you to move a unit in the psychic phase, and 2 others I’ve never used (most tournaments in the U.K. require you to choose psychic powers at the list building stage, and I only run one Shadowseer)! With one of them you target a unit and roll off with your opponent. If you win the roll off the unit takes a mortal wound – keep going till your opponent wins the roll off, or the unit dies. The other one targets a unit and that unit is -1 to hit.
The problem with “the other 2” is – one is pretty random (you could lose the first roll off!), and the other limited to one unit – fine if there is one huge shooty unit of death, but, if not…..! So for me, I always choose the guaranteed utility of being able to move a unit twice.
And that power is really strong. A Troupe jumping out a Starweaver (their dedicated Transport, we’ll get to that), and moving twice, gives them a threat range of around 33” on average dice (3” disembark, 8” move, d6 advance, 8” Twilight Pathway’s move, and then 3d6 advance and charge). With Twilight pathways, a Starweaver can get any embarked Fusions Pistols into double dice range of something 34” away, and a unit of Skyweavers (the bikes, again we’ll get to them) can charge something pretty much anywhere on the board (16” move plus 6” automatic advance, another 16” plus 6” automatic advance from Twilight Pathways, and then a 2d6 charge). Pretty damn fast. If only you could cast it on 2 units a turn!!
The biggest problem I’ve found is actually believing you can pull of such long charges. I’m usually far too conservative with the charges I attempt.
It can sometime be a little tricky to pull off, with only a 3” range. It’s best to have the Shadowseer in her Starweaver (and you did bring a Starweaver for all your units, didn’t you?) right beside the unit you want to boost. Get her out, moved her and advance her, then move the unit past her, but stay within 3”. That usually allows the unit you want to boost to get its full movement, before you boost it. Easier with Troupes and Skyweavers (you can hang one model back to stay in range), but harder with Starweavers.
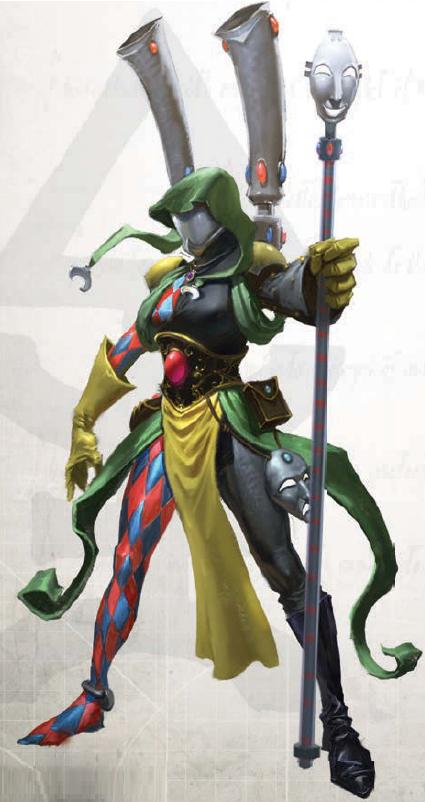
Shadowseer.
The Harlequin Psyker, which when I play her always takes Twilight Pathways. Sure you can deny the odd psychic power, and generate the odd mortal wound via Smite, but they’re bonuses. Her main purpose is to catch your opponent with their pants down, boosting units across the board.
The other ability which seems really good, but in my experience isn’t that great, is Shield from Harm (your opponent must subtract 1 from any to wound roll). It only effects infantry models, so it doesn’t affect Vehicles, nor (sadly) Skyweavers. It only comes into play when your Players are disembarked and running around …… by which time they’re either standing on a heap of enemy corpses, having pulled off that crucial charge, or they’re getting mowed down by so much fire power that -1 to wound doesn’t make much difference.
So IMHO, a “must take” unit, but for a very specific purpose, and I’m not sure you need to take more than 1.
Troupe Master
Basically a Player that hits more reliably (on a 2+), has one more attack (for 5 in total) and 4 more wounds (again, 5 in total). Not much to see here …. except he lets Players re-roll failed wounds in combat, which given their relatively low strength (5 with a Caress, 4 with and Embrace) is critical. Take at least 2 of these!!
Load out for shooting is pretty straight forward – give him a Fusion Pistol (he hits on a 2+ remember), but then you come to one of the most hotly debated topics among Harlie players it seems – Embrace v Caress v Kiss.
The Embrace is S4, -3AP and 1D. For 50% more points the Caress is S5, -2AP and 1D, and for more than twice the cost of an Embrace, the Kiss is S4, -1AP and d3D. The consensus (in so far as there is one) seems to be that the Kiss is too expensive, the Embrace too reliant on the Troupe Master’s re-roll to wound, leaving you with the Caress as the weapon of choice.
To date I’ve run with Embraces. I take 2 Troupe Masters so can usually give all my Players re-rolls to wound. However, I suspect the efficient answer might be to take one Troupe Master, and use the points saved to put Caresses on your Players, leaving you with points left over.
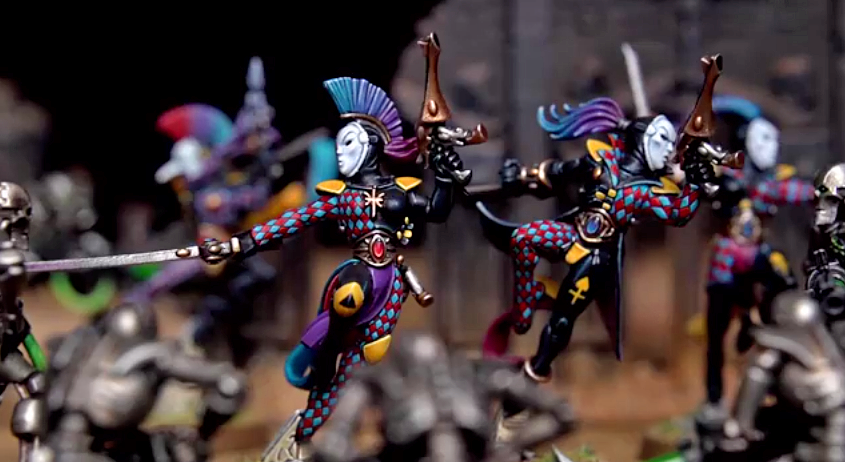
Troupe
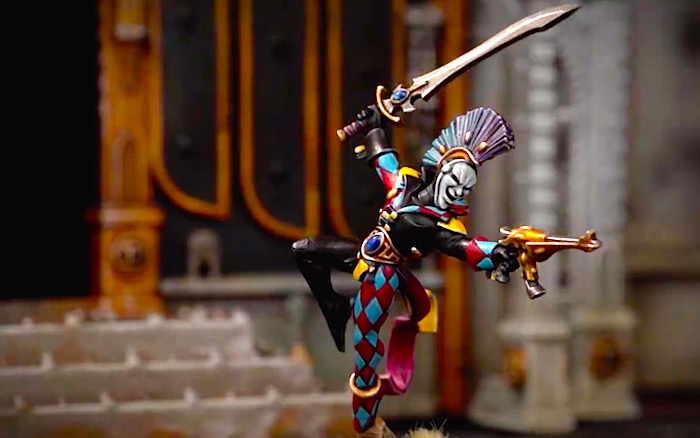
Basic Troupe is 5 players, but can go up to 10 (although you will never want to take more than 6 as that’s all that fits in a Starweaver). A Player hits on 3s, has 1 wound, 4 attacks and a 4++. He/she has a Flip Belt (can move across terrain and models as if they weren’t there) and Rising Crescendo.
The detailed tactical use of Troupes I’ll leave for another post, for now I’ll stick with how to load them out, whether to take Starweavers, and whether to take Fusion Pistols.
Players have the same close combat options as Troupe Masters – an Embrace, a Caress or a Kiss. A Kiss is even less cost effective on a Player (only 1 wound and 4 attacks as opposed to 5 wounds and 5 attacks), leaving you with an Embrace or Caress. I suspect the argument will continue to rage. I run Embraces on my Players, as the most cost effective option, although I can see the argument for Caresses.
I also run one Player in every Troupe with just a standard blade. He’s the one that eats overwatch, or dies when the Starweaver explodes.
And always, always take a Starweaver. To be fair, I’ve never tried it, but I just can’t see running Troupes across the board ending well. Even with a Shadowseer in attendance, they’re still only T3, 1 wound models with a 4++. They just won’t make it.
Finally, Fusion Pistols. What’s not to like – S8, -4AP and d6 damage. Awesome….. except, I’m not convinced that loading Players up with Fusion Pistols is the way to go, for a couple of reason.
First, they are unreliable. Maths isn’t my strong suite, but a 3+ to hit, followed by a 3+ to wound (most things) and then d6 damage is just too many hurdles to cross before you get the “promised” awesome result. In game after game, I’ve found Fusion Pistols don’t live up to their “hype”.
Second, you usually want to use a Player’s ability to advance and charge. If you advance you can’t fire your Fusion Pistol! And if you fire you’re Fusion Pistol, and kill something you risk making the charge harder.
“But, Starweaver drive-buys” I hear you say. Well yes, and that brings me to the third problem …. the desire to execute the “perfect” drive buy, combined with the short range of the Fusion Pistol, tempts you to over commit your Troupes, which usually isn’t the best plan. It’s particularly the case if you use Twilight Pathways to double move a Starweaver full of Fusion Pistols to “snuggle” it up against a “big scary thing” and blow it away. That’s a very expensive suicide unit.
With allies there are, I think, better ways to deal with “big scary things” (Ravagers for example). However, if you plan on running pure Harlies, Fusion pistols are probably necessary (we’ll come to Voidweavers), you just need to be “restrained” in their use and pick your moment.
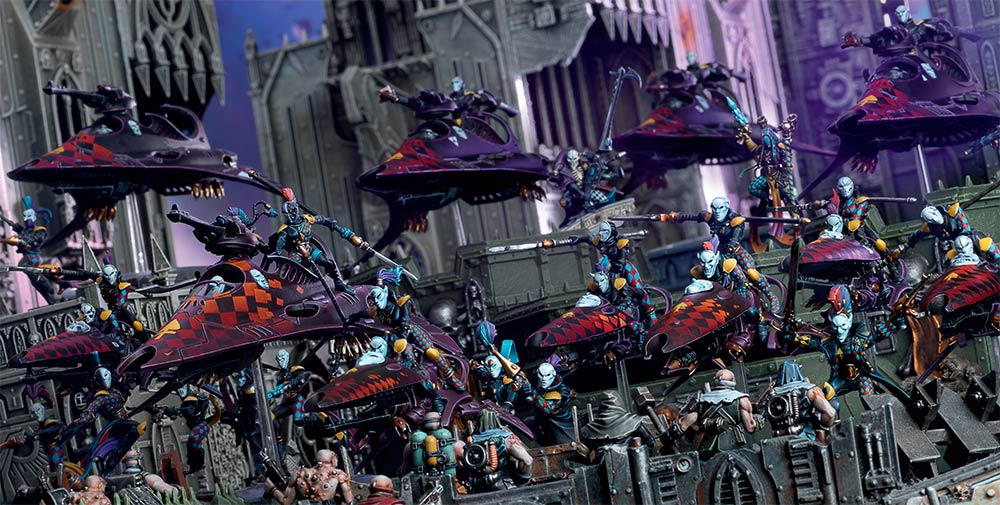
Skyweavers
Two man bikes, T4, hit on 3+, with 3 wounds, 3 attacks, and a 4++, but most importantly, they move 16”, automatically advance 6”, and have Rising Crescendo and Flip Belts (i.e. they can assault after advancing). They come stock with a Shruiken Cannon you can upgrade to a Haywire Cannon (but probably wont), and a Star Bolas, that you can upgrade to a Zephyr Glave (which you probably will). The Star Bolas is interesting, and it’s probably worth having one in the unit that can heave a grenade, but you really want to pay the extra points for the Glave, for S4, -2AP and 2 damage per wound.
They’re OK at shooting and OK in combat (better with a Troupe Master nearby to re-roll wounds) but I think the key stat here is the 16” move and the automatic 6” advance, combined with being able to advance and charge with Rising Crescendo. That’s a 29” charge on average dice, much (much) further with Twilight Pathways, where a 50” charge is possible. With that sort of speed you can do some crazy things.
The obvious one is to pull off a long charge, not so much to kill stuff, but to force them to fall back and limit their shooting for a turn, allowing your Troupes to catch up. However, you can also use them as a “blocker” i.e. move them over the unit you want to charge and have them charge from the back of the unit, while your Troupes charge from the front, locking everything in combat. You then fall back, but can still charge and shoot via Rising Crescendo. It’s also easier with such a long move, to choose exactly where you charge a larger unit, isolating models with specific weapons, or even just stretching out a large unit, limiting their ability to consolidate models into combat.
And they’re surprisingly resilient. Three wounds, T4 at -1 to hit from Mirage Launchers and with a 4++, means it takes some dedicated fire power to take them down.
The problem of course is they’re expensive points wise, but I think you get what you pay for.
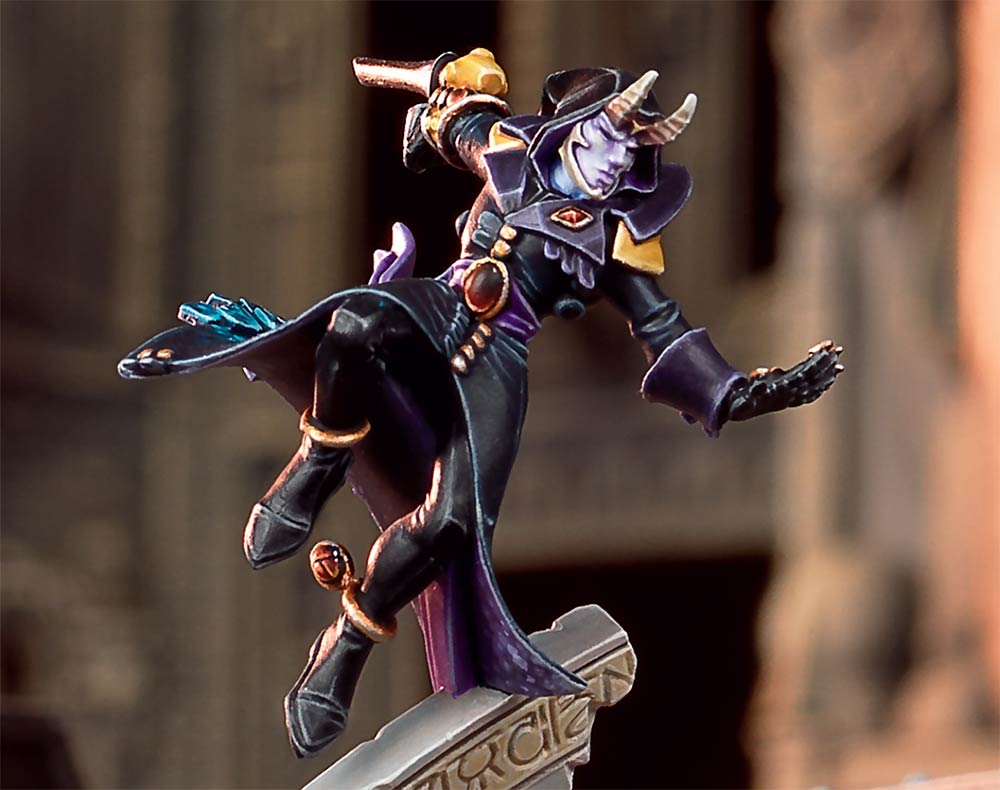
Solitaire
“Sigh” my great unrequited love. I want the Solitaire to be awesome, I really do, but he continues to disappoint. In theory he’s amazing – hitting on 2s, 5 wounds, a 3++, with 8 attacks base, that you can “boost” to 10 once per game if you “blitz”. He’s even faster than your standard Player, moving 12”, which is increased by 2d6 if you blitz. So potential 30+” charges! He’s armed with a Kiss and a Caress so can choose one or other when he attacks.
However, in most of the games I’ve played he’s been underwhelming. The problem is, he’s very situational – when he’s awesome, he’s awesome, but he’s not awesome often enough to make it worthwhile!! For his points I could take another Troupe, or a couple of Skyweavers, or more Dark Elder fire support, which wouldn’t be as awesome, but would be “good” more consistently.
I held out great hope for the Solitaire as a character assassin. In my mind I saw him blitzing over screens and bubble wrap, taking out buffing characters, and crushing my opponents hopes and dreams. In my mind’s eye it looked so cool and clever that, even now, I think I should give it another chance, but the reality is, in all the games I’ve played, I’ve done this once. Usually he runs up to a reasonably soft unit, kills it, and then dies to bolter fire. Or he runs up to a beefier unit and bounces off, before dying to bolter fire.
So, much to my disappointment, I think the Solitaire is a unit to take if you want to “forge a narrative” (do we still do that in 8th!), but is not an optimal choice.
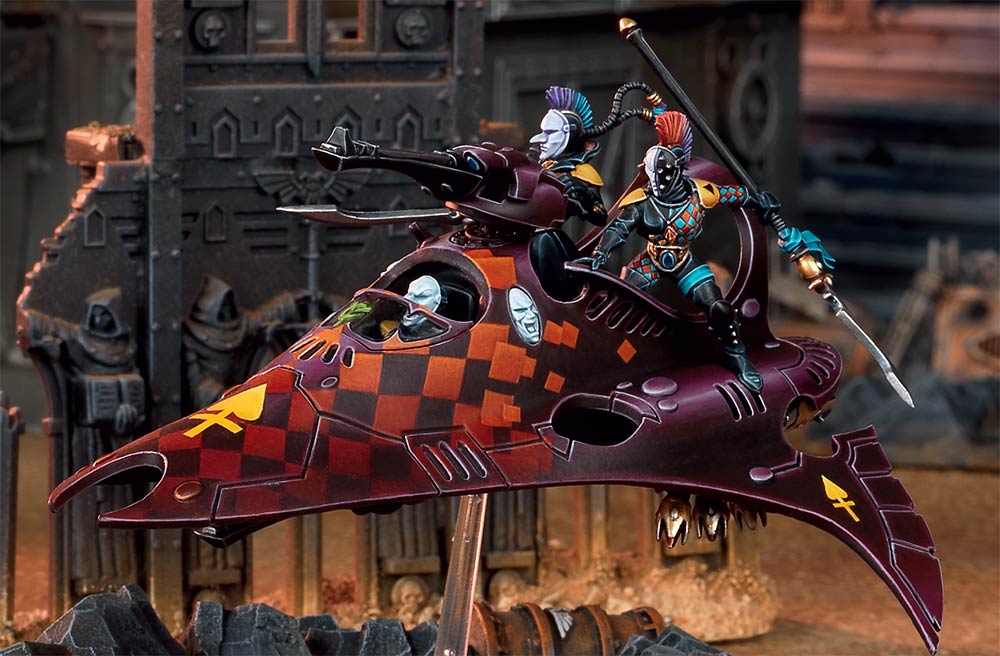
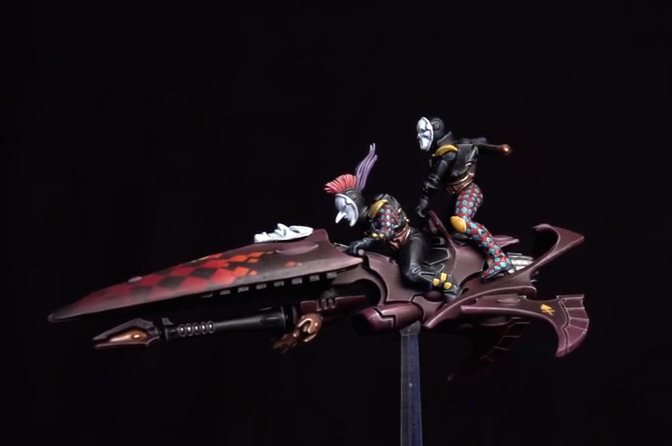
Starweavers
Starweavers are awesome, without them I suspect a Harlequin army simply wouldn’t work. They provide the crucial protection your Players need to get them where they need to be. Although I’ve never tried it, I suspect footslogging Harlies just wouldn’t work. In my view, every Troupe should have a Starweaver.
And that’s because Starweavers are surprisingly resilient. With T5 and 6 wounds they are little more than “paper planes”, but with -1 to hit from the Mirage Launchers and a 4++, they shrug of a surprising amount of fire power. They are also blisteringly fast, moving 16” with an automatic 6” advance. Just the thing for getting your Troupes into position to charge next turn.
They also provide reasonable fire support – six, S6 shots, hitting on 3s, with -3AP on 6s to wound isn’t bad. And they hit on 3s in assault with 3 attacks. Nothing spectacular, but when you charge them in to suck up overwatch, they might just do something!
Voidweavers
I want to like Voidweavers, but they’re a bit lack luster. They come with the same basic chassis as the Starweaver, and most of the same rules (-1 to hit, 4++, 2 Shuriken Cannons, and an automatic 6” advance), but instead of transporting Players, you get a choice of 2 guns, a Prismatic Cannon, or a Haywire Cannon.
The problem is the Guns aren’t great. The Haywire Cannon is d3 shots, S4 and only 1 damage. If you target a vehicle, on a 4+ to wound you do 1 mortal wound on top of any other damage, and on a 6 you do d3 mortal wounds. The Prism Cannon has 3 modes, dispersed which is Heavy d6, S4, -2AP, 1D, focused, which is Heavy d3, S6, -3AP, d3D, or beam which is Heavy 1, S8, -4AP, d6D.
My problem is they’re so random. You might get 3 shots for the Haywire Cannon, and you might roll 3 sixes to wound, but chances are you’re not going to, and you might roll 6 shots with the dispersed Prism cannon, but again, chances are you’re not going to.
And to top it off, all firing modes on both weapons are Heavy, so you’re -1 to hit if you move, and because they only have a 24” range, chances are, you’ll want to move.
But the final nail in the coffin is that Ravagers are just so good, why would you want to take anything else? Different if you want to run a “pure” Harlequin army of course, but even then I think you would be better with more Skyweavers and Fusions Pistols.
~So that’s it. Quick overview of the army’s abilities and the units. Next up some thoughts on lists, tactics and maybe even some battle reports.
And remember, Frontline Gaming sells gaming products at a discount, every day in their webcart!