Hobby: Space Marines – Painting Salamanders with Gentleben

I’m back and I brought a Classic Salamanders with me. Let’s look at how I paint the Sons of Vulkan.
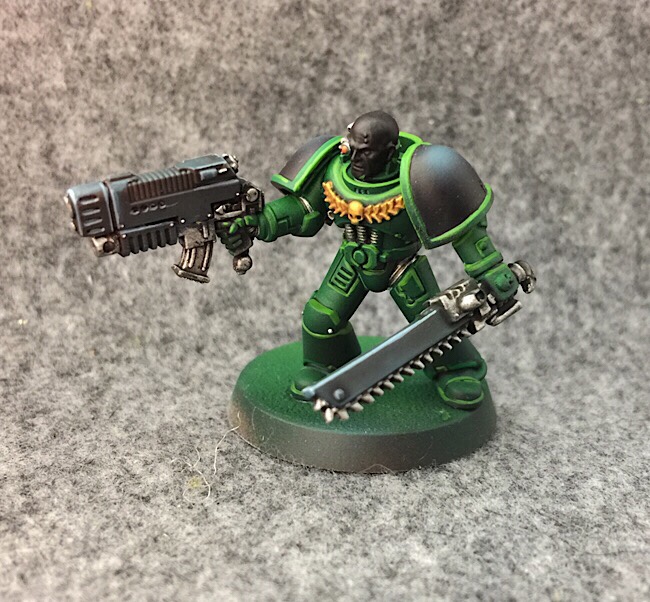
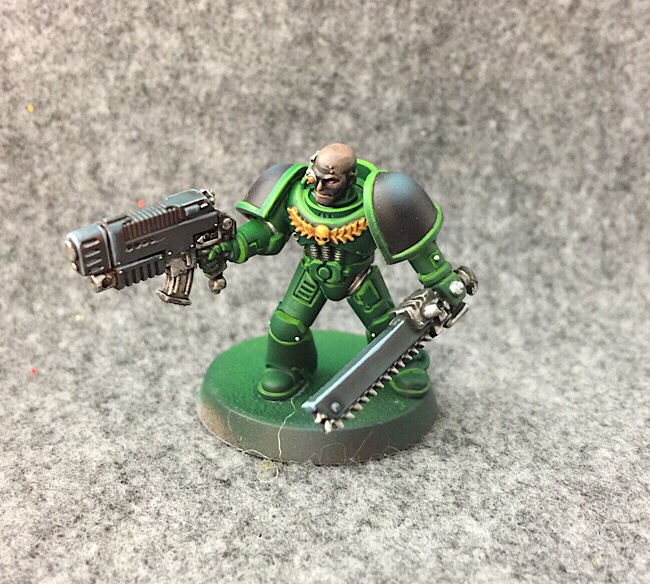
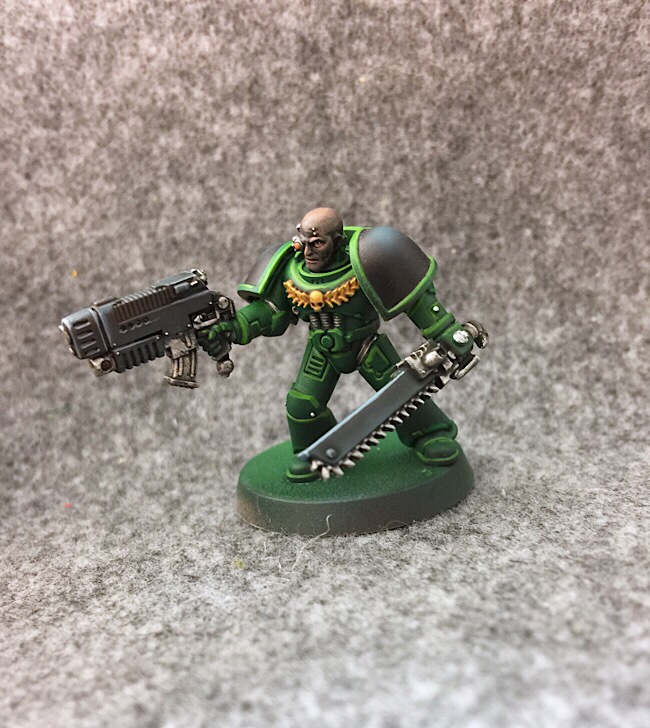
It’s been awhile since Larry posted a showcase of my Salamanders Army, but here’s my more recent Salamanders Astraus. I said I’d be back with a step by step of how I paint them, and here I am.
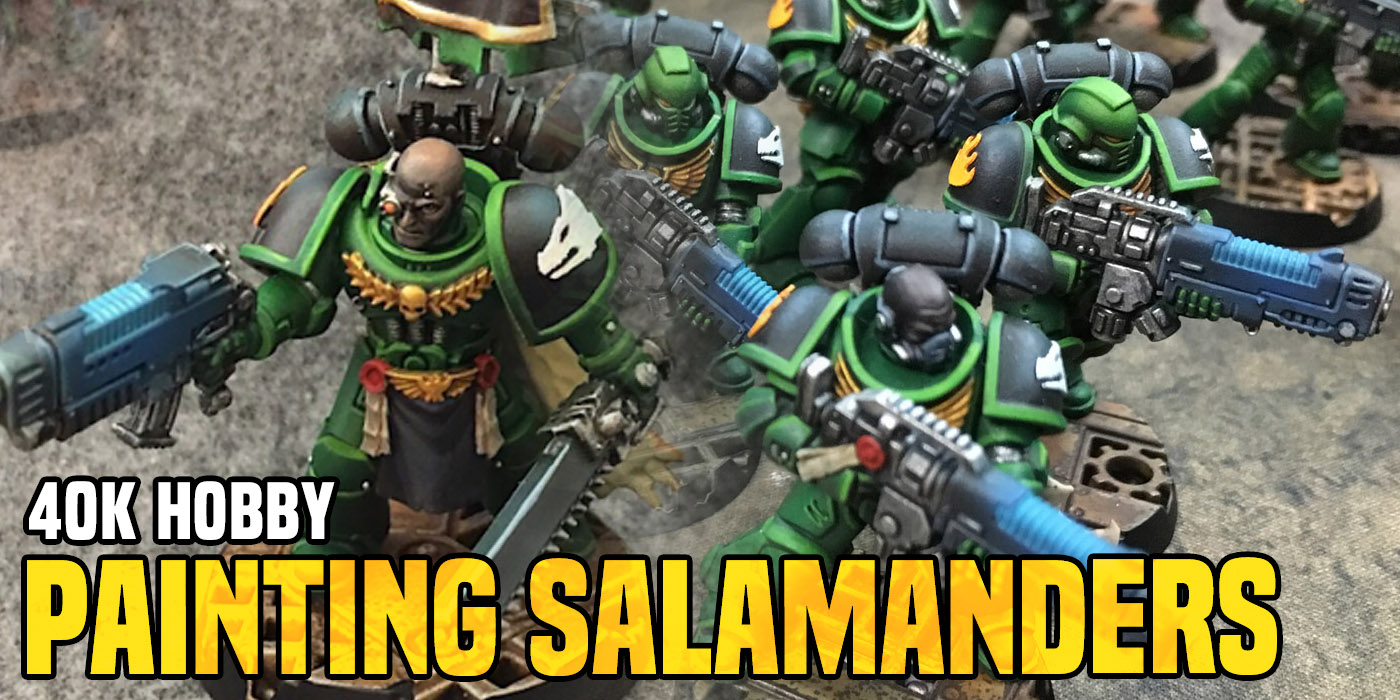
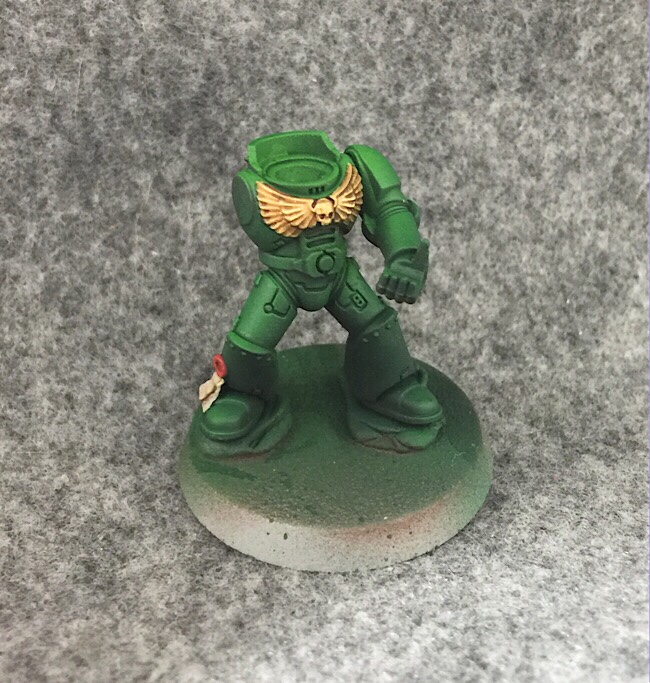
The first step is airbrushing. It’s a pretty basic four color blast so this should be easy enough even for an airbrush beginner – like I was when I began this project.
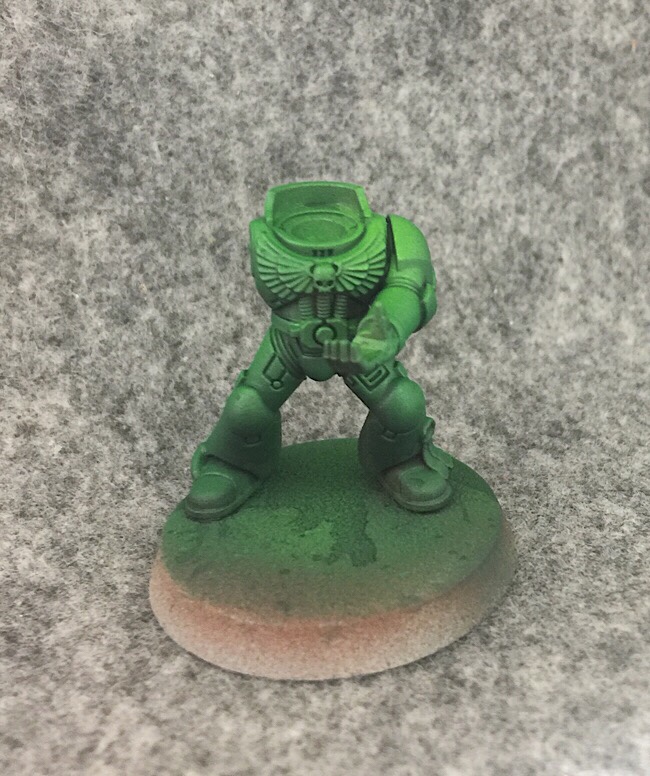
These four colors are airbrushed on before anything else. I start with the Umber, then everything gets a good blast of Caliban Green. This particular marine may have gotten too much green. The whole point is to leave some of that nice warm Umber showing through to create a contrast with the green.
The Warpstone Glow goes on more sparingly from above to start to create a kind of zenithal effect. Then the very top of the model gets one quick blast of the Moot Green. Too much and they’d start to look like Aurora or Sons of Medusa Chapter marines.
I’ve used a lot of different browns as a basecoat since I stopped being able to find the Burnt Umber after I ran out of the first batch. GWs Dryad Bark works alright as a substitute but lacks the deep red that makes such a great contrast for the green.
After the airbrushing is done and dry (of course), I dip the model into clean water, shake it off, and then apply some Biel Tan Green Shade. Dipping the model in water is the best way I’ve come up with to make sure the Biel Tan goes on evenly and not too thick. Without this step you may find lines on the model once its dried from areas that you missed. Additionally many of GWs shades dry white and sometimes even crack in the recesses of a model if applied too thick. The water dipping effect helps minimize this, although it can sometimes still happen.
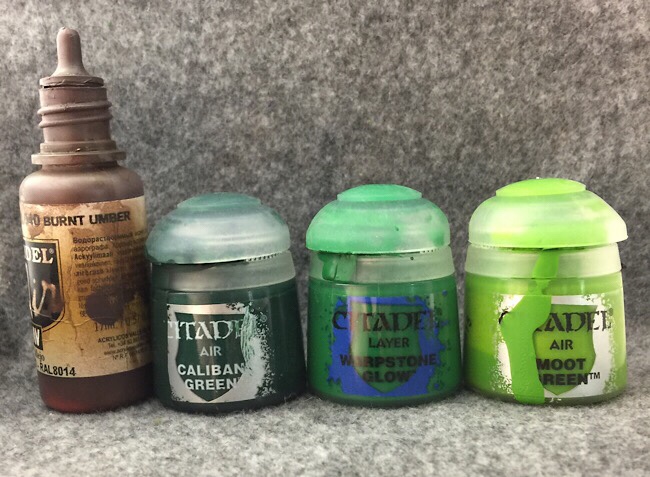
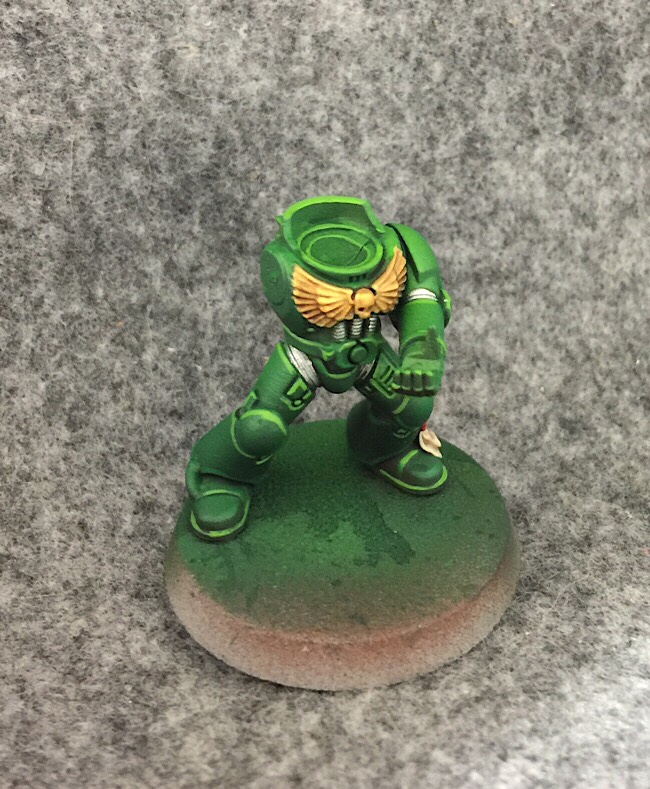
The next step is to paint the gold Aquila with Averland sunset.
I drybrush the yellow with Auric Armor Gold. Then I paint the seal with Screaming Skull and Evil Sunz Scarlet. Then these parts are washed with Agrax Earth.
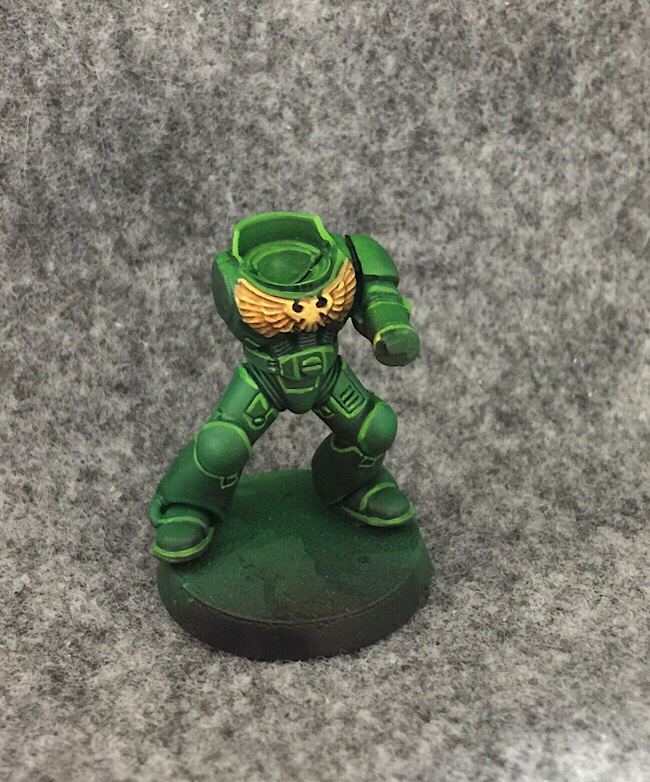
Then the least fun step: line every upward facing edge with Moot Green. The ground facing edges are lined with Warpstone Glow anywhere the surrounding area is dark enough that you can see them.
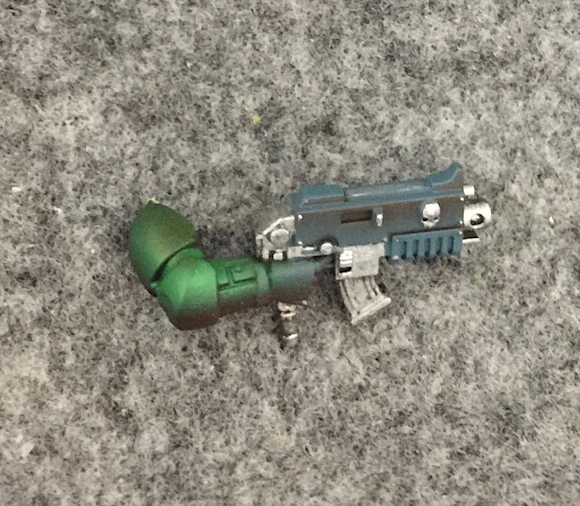
The guns are attached to the arms before airbrushing since holding onto the tiny guns is annoying.
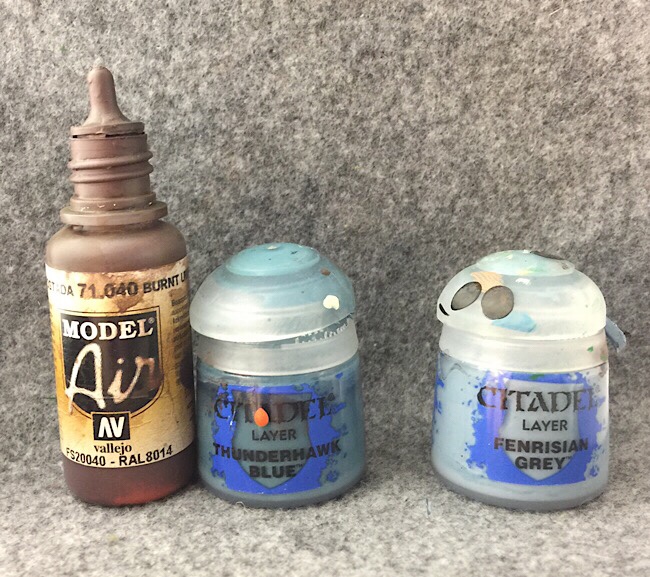
The deep red/brown is back. It gets a line of Thunderhawk airbrushed across the bottom and blasted from above. Fenrisian Grey is never used in the airbrush but will be used in lining later on,
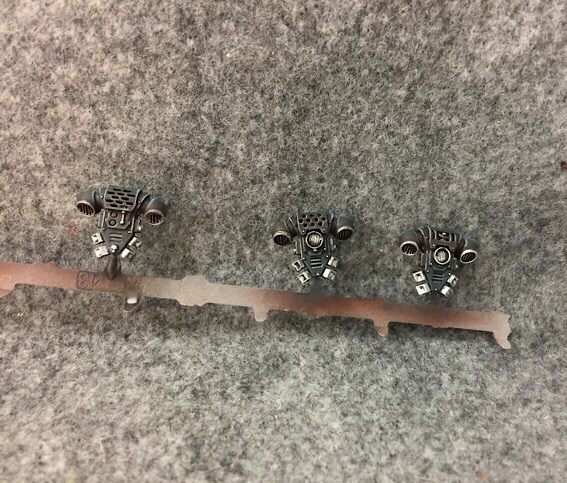
These backpacks are painted with the same method as the guns. Here they are after being lined with ThunderHawk Blue, then the Fenrisian Gray in a few spots.
Before I glue the gun arm on I paint all the joins, tubes, and everything else that looks like it should be metal with Runefang steel.
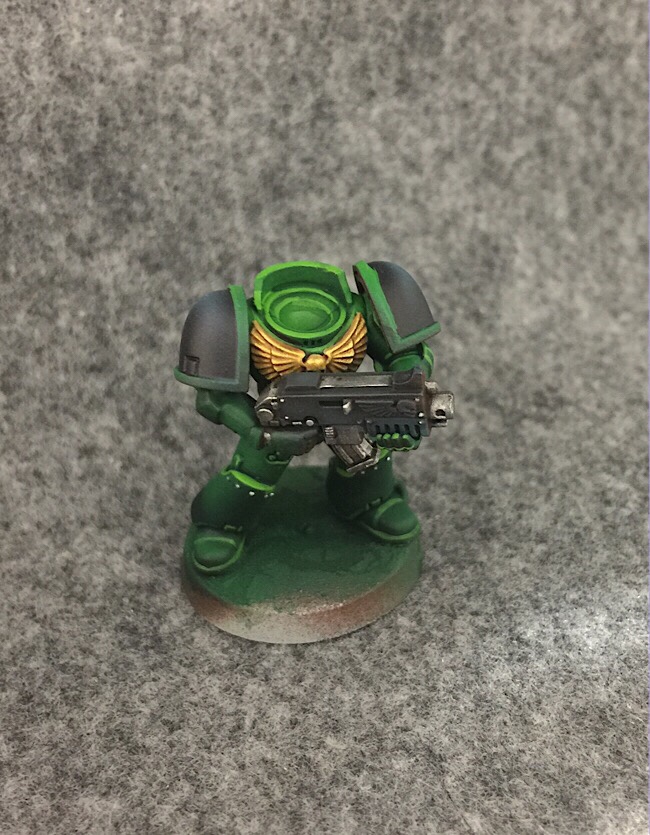
Then the entirety of the gun and all the Runefang Steel partsare washed with slightly thinned down Nuln Oil.
The shoulderpads, painted separately are now attached. They receive the same airbrushing step as the body shown at the beginning.
Then the Shoulderpad itself is painted black toned with some Carroburg Crimson and Xereus Purple mixed in. I always tone my blacks a little to give them some contrast with the surrounding areas.
The last step here is to give the interior of the shoulderpad a gentle little airbrushing of Thunderhawk Blue. Sometimes a little of the Thunderhawk Blue will end up on the green rim of the Shoulderpad, but it seems to disappear when you line those rims with Moot Green as per the rest of the marine.
Here are those new green areas lined in the same way as the rest of the armor. LIke the backpacks, the gun and other weapons are lined with Thunderhawk. Then a line of the Fenrisian Grey is added along any upward facing lines.

The heads are all left attached to sprues and painted there…
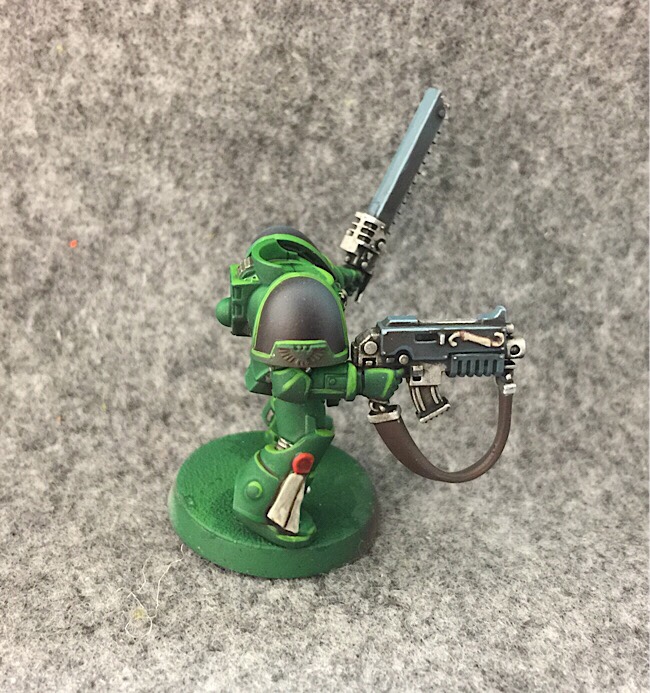
Except this one which I glued on to make it easier to look at. To get that swarthy Salamander skin I start with a basecoat of the warm-toned black I used on the shoulderpads.
This is highlighted only with Cadian Fleshtone. I apply it roughly at first.
Then blend it in a little better.

The banners are painted using a technique I posted to my blog. To finish plasma weapons like this combi, I airbrush the energy cells with maccrage blue, then wash the area with slightly thinned down Temple Guard Blue. This airbrush color is already thin and seems to flow into the cracks nicely creating a good interior glow.
If you enjoyed this article, check out my blog Too Mini. Here you can stay up to date with my Salamanders and all my other projects.
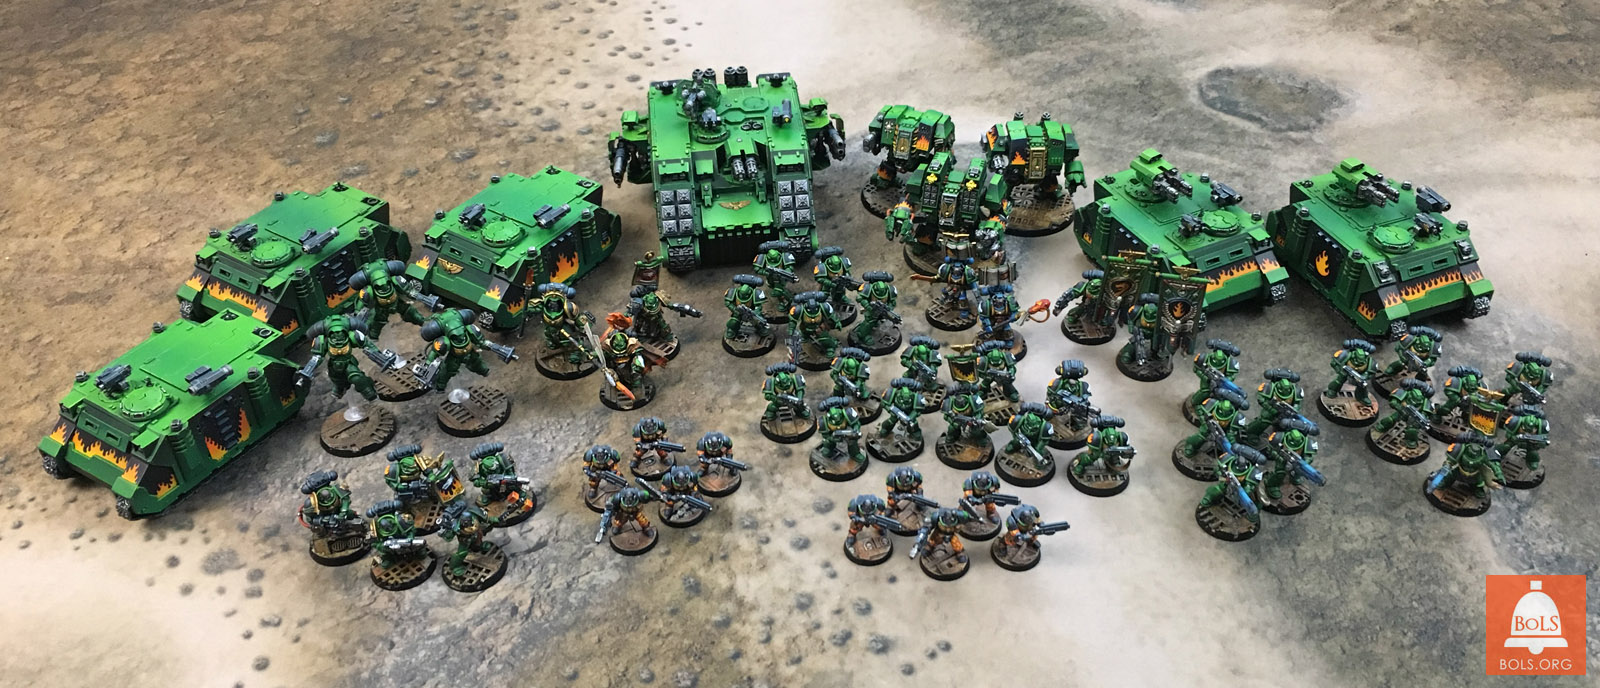 Checkout the full Salamanders army here.
~Thanks for reading! I’ll have another painting article soon!


