Age of Sigmar: Painting The Rabble Rowza From Gloomspite Gitz
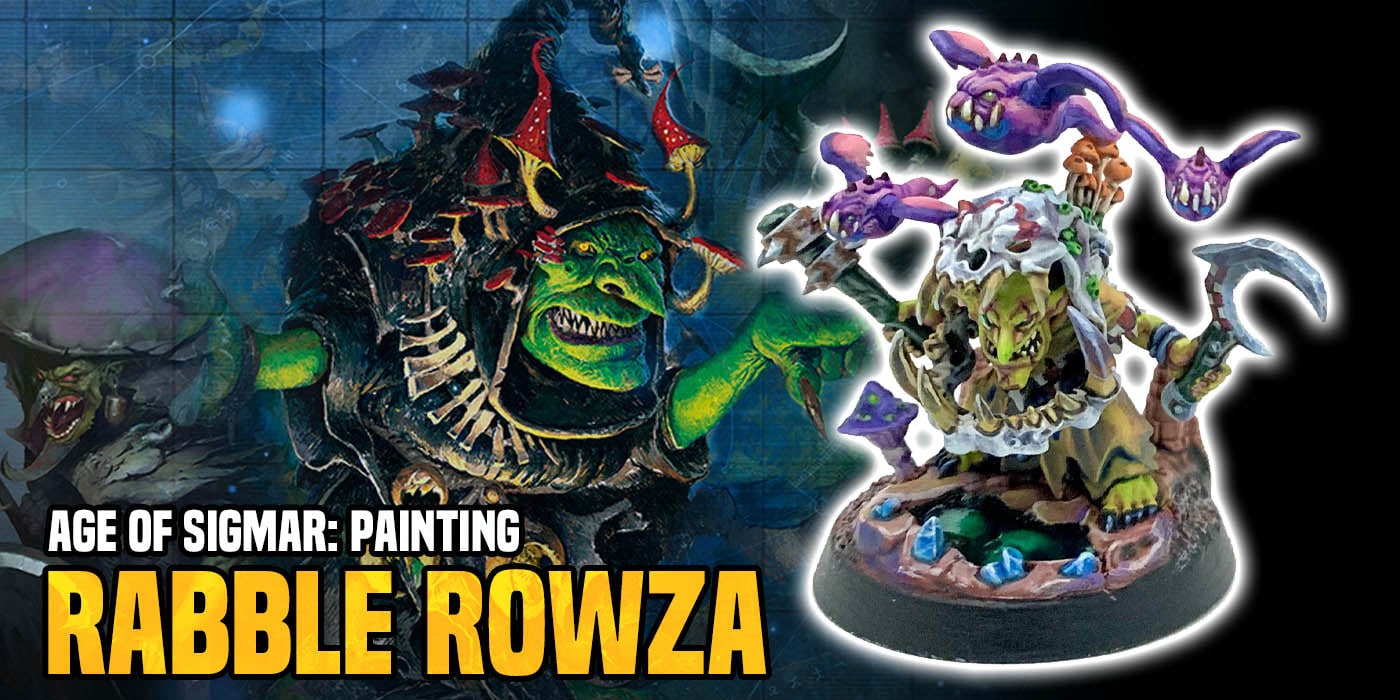
Gentleben is back with a painting tutorial for his awesome Rabble Rowza from the Gloomspite Gitz.
Let’s give this git a proppa coat o’ paint!
Paint Da Git!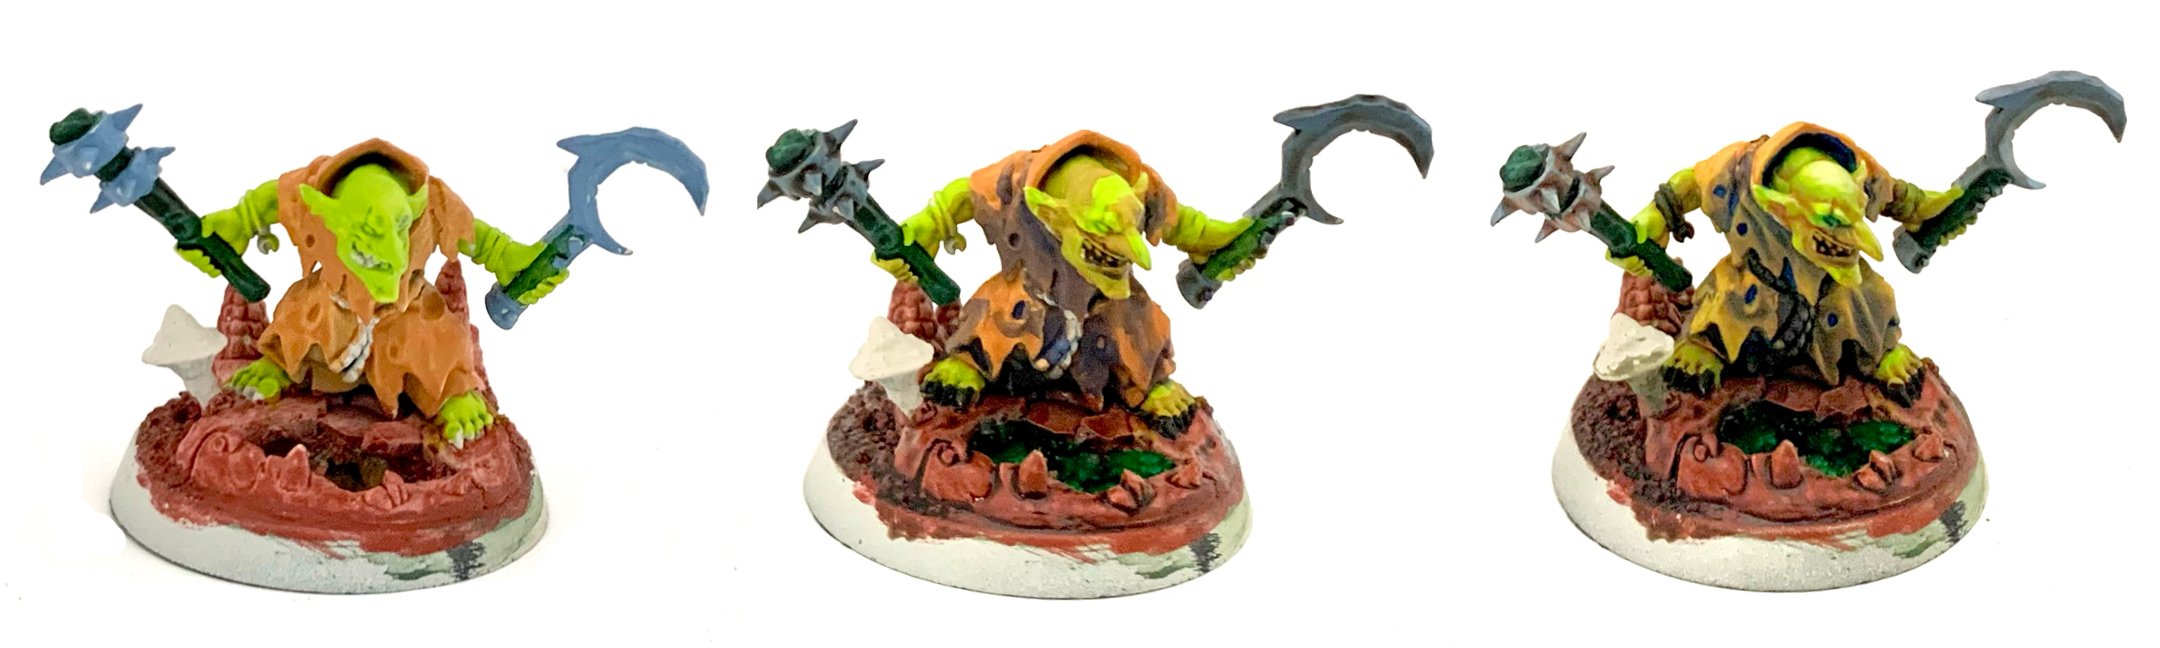
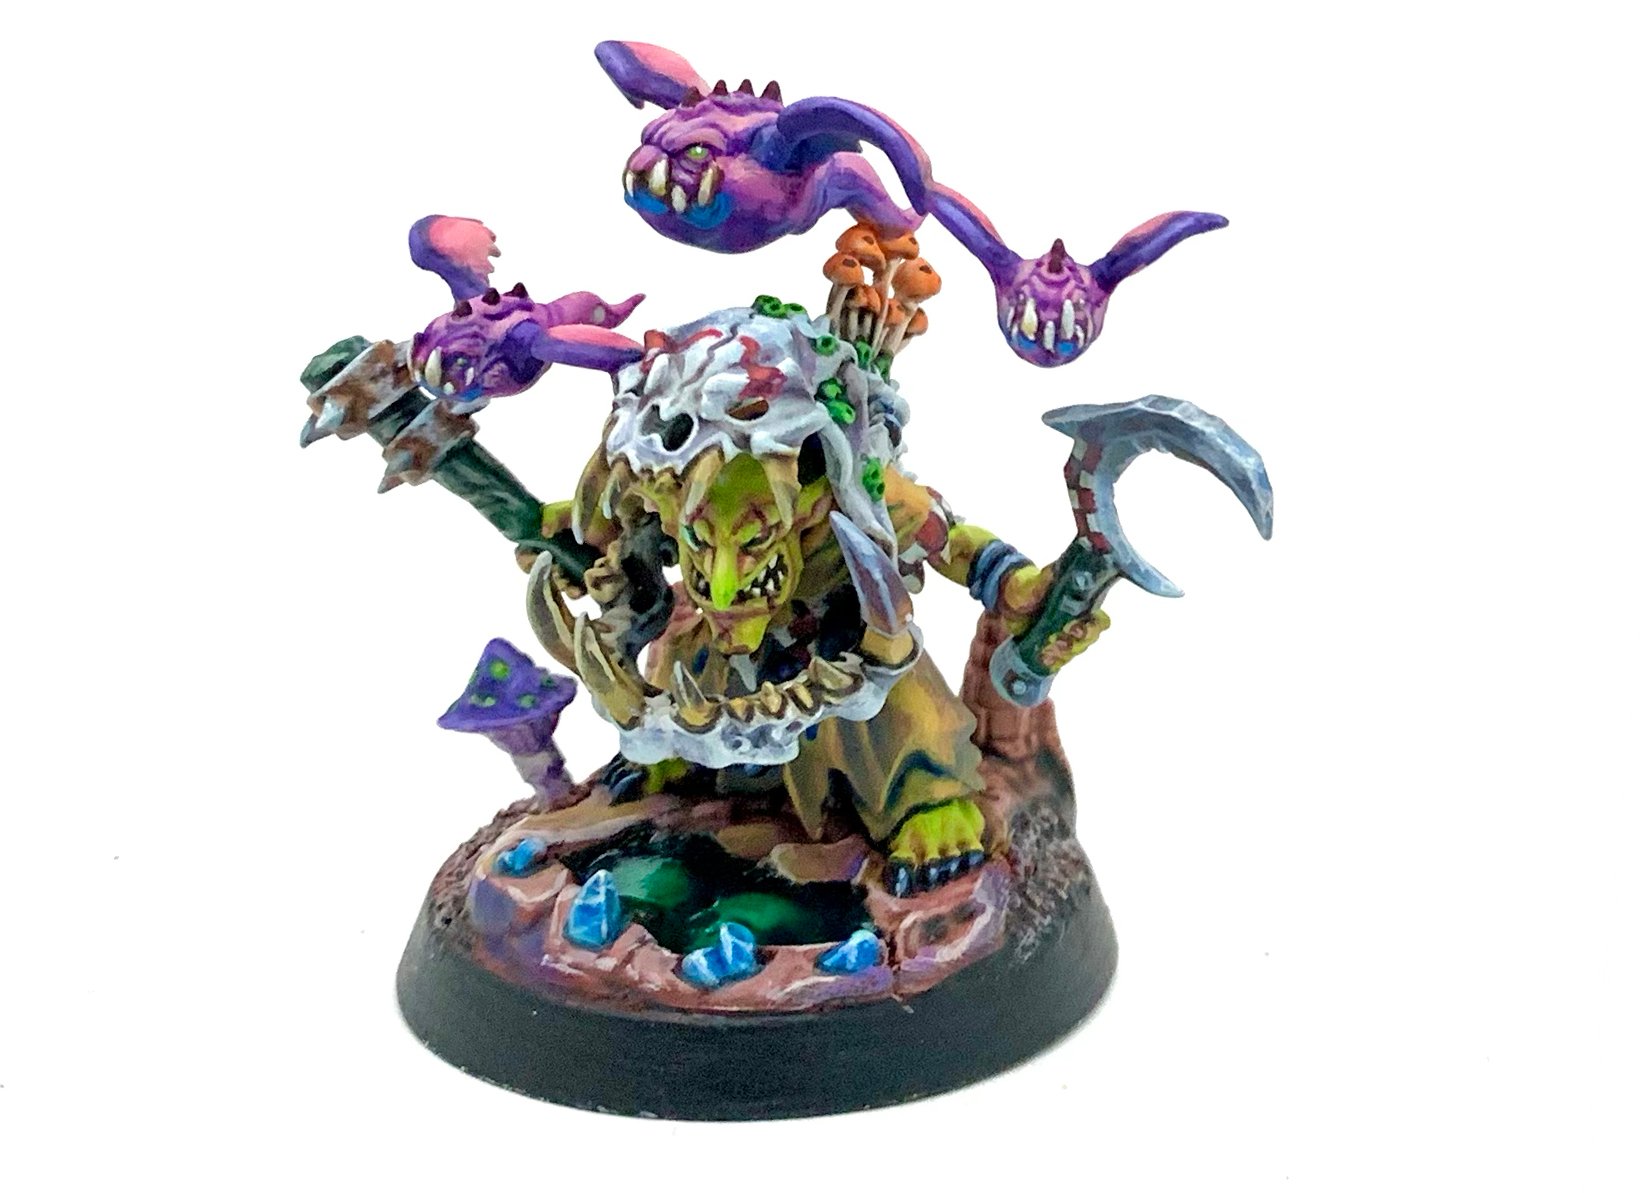
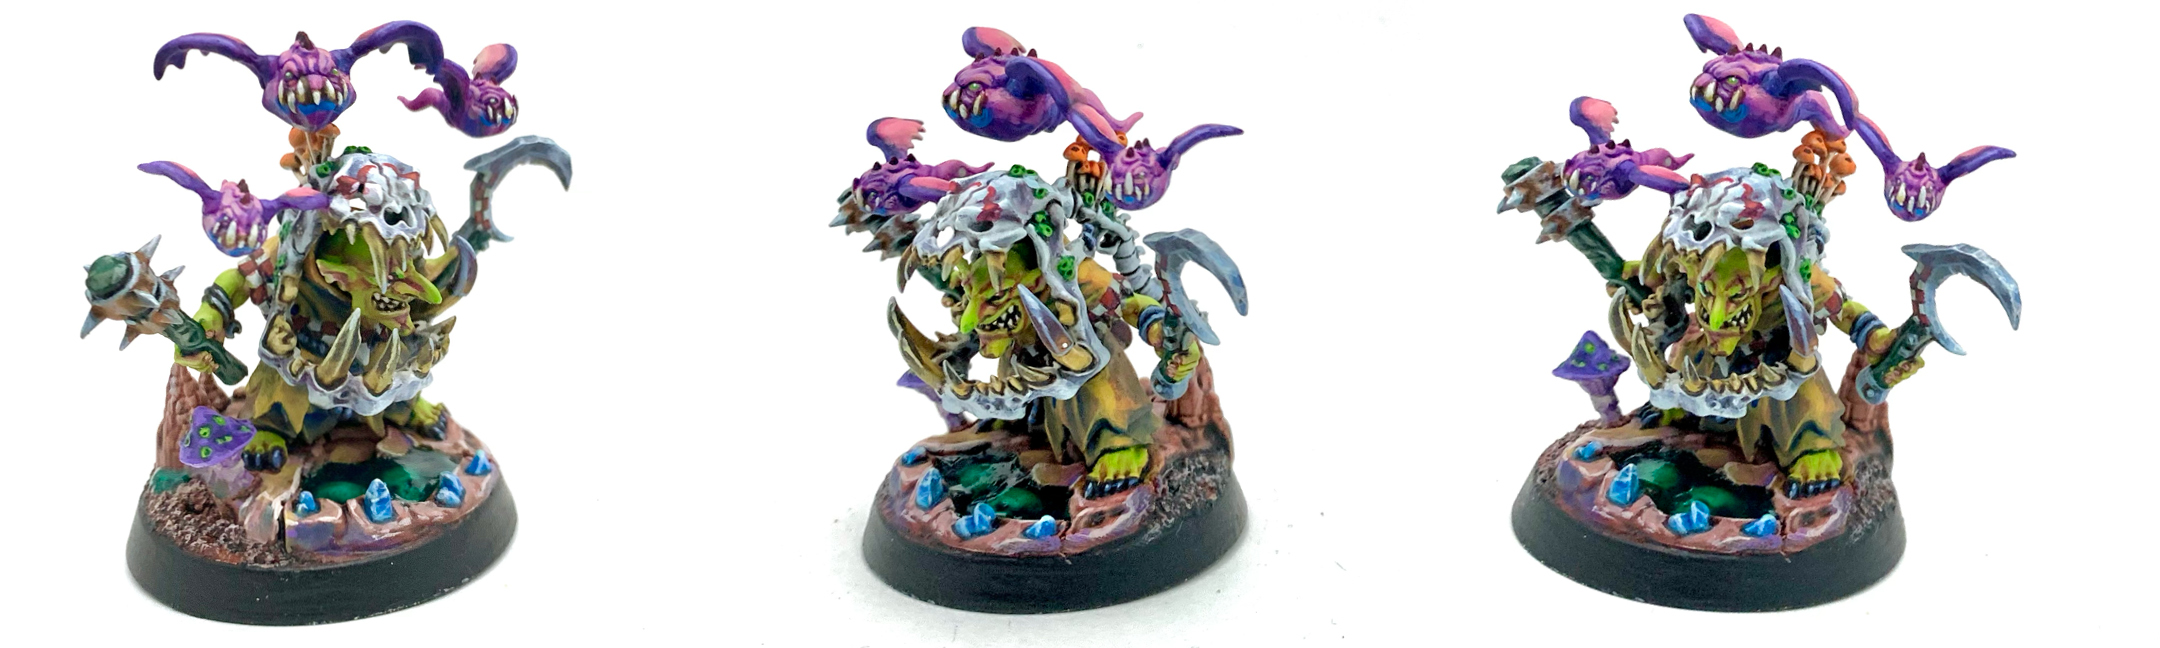
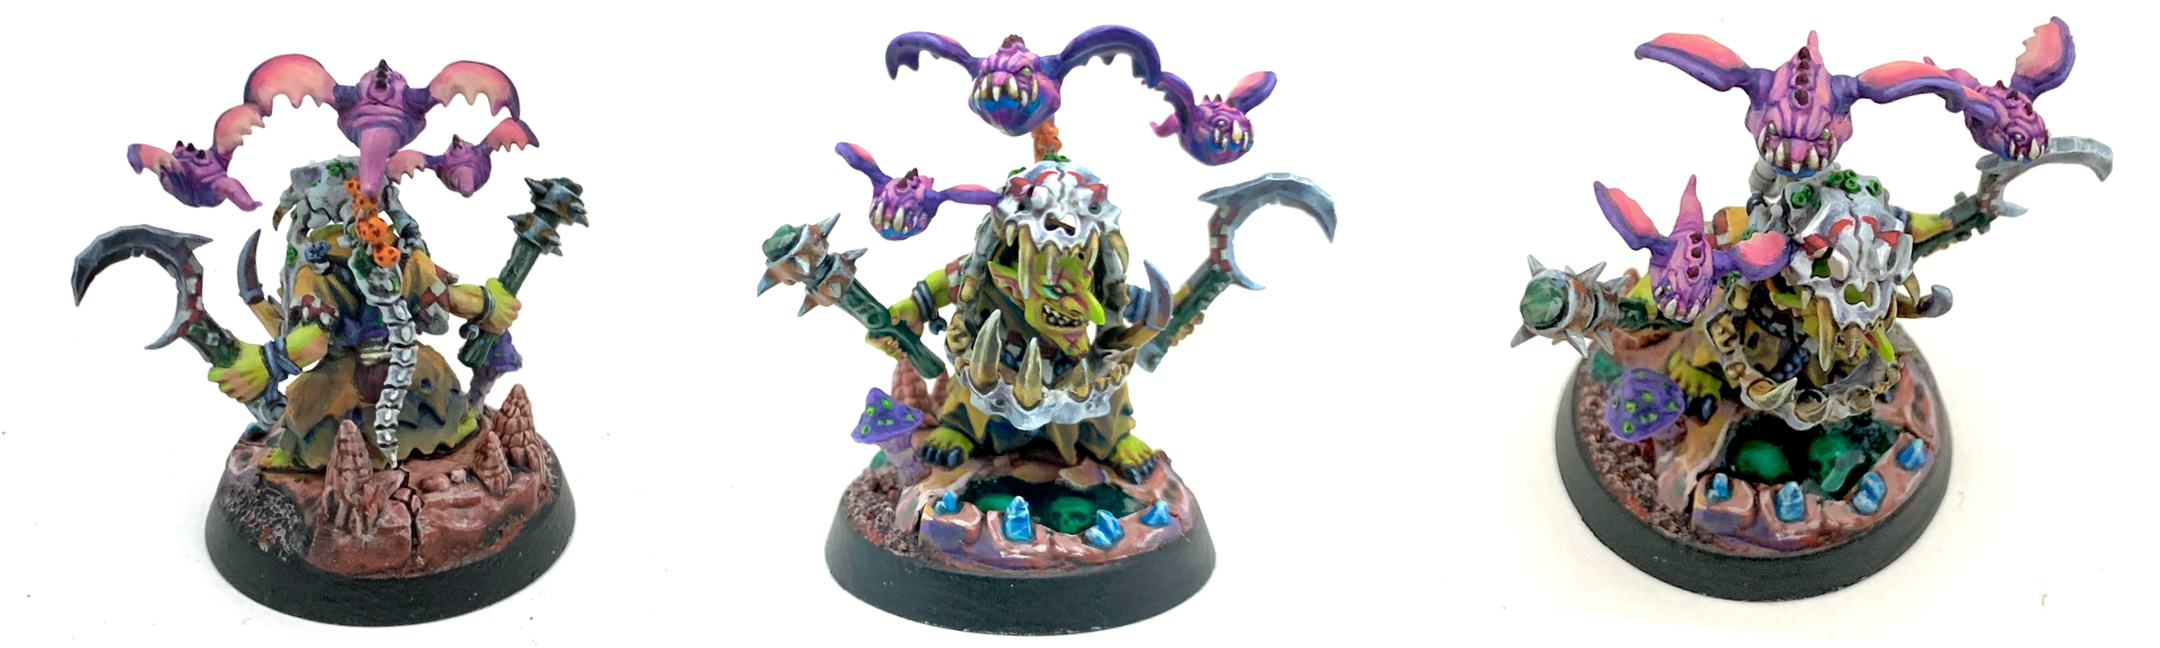
I’ve been painting up the rest of my Gloomspite Gitz with mostly AK acrylics along with some Vallejo and Reaper. I can’t think of any reason this Rabble Rowza shouldn’t get more of the same. For the skin: a basecoat of Frog Green. For his filthy rags: a basecoat of Light Brown (yes it’s really called that – seems impossibly straightforward when you’ve gotten used to names like “Bilepiper Seepage”). The wooden handles get a basecoat of Black Green with Grey Blue for the metal. The dirt/rocks are Vallejo Cavalry Brown.
For step two I begin adding some shading. The skin gets a very thin wash of Wine Red. Using this warm tone as a highlight will keep the skin nice and saturated even though its rather pale. The rags get a thin wash of Oxford Blue. Shading the warm brown with a nice cool tone will keep it looking distinct from the warm skin tone. The weapons get a wash of Nuln Oil. The base and teeth get a wash of Agrax Earth. I also paint the hole I made in the base (more on that later) with Dark Green (not the same as Black Green).
In step three I start evening out the shading and adding some highlights. The reason I like AK Acrylics so much is because I find it really easy to blend by building up layers. It’s also very easy to wet blend with but you don’t necessarily need to get good results. So I start layering up the Frog Green over the darker areas of the skin. Just a little bit of Wine Red goes a long way so I only mix a tiny amount of it with the Frog Green to create the midtones.
Once I’ve built up to pure Frog Green I mix a little Basic Skin Tone in with it to create more of a highlight. The Frog Green has an almost neon feel to it and you only need a little of it as a pure mid tone to keep the skin looking super saturated. I proceed with the rags in a similar fashion, mixing a little Light Brown and Oxford Blue together, and applying it in thin layers until I’ve blended it up to pure Light Brown again. Then Yellow Ochre is used as a highlight for the brown.
The weapons get a little shading with Reaper brand Red Brick and I also stipple some small rust effects around the spikes of the mace with Light Rust. Then the weapons begin to get sharp highlights of Snow Blue. Narrower highlights help create an NMM effect. Additionally the toenails and rope belt are painted black.
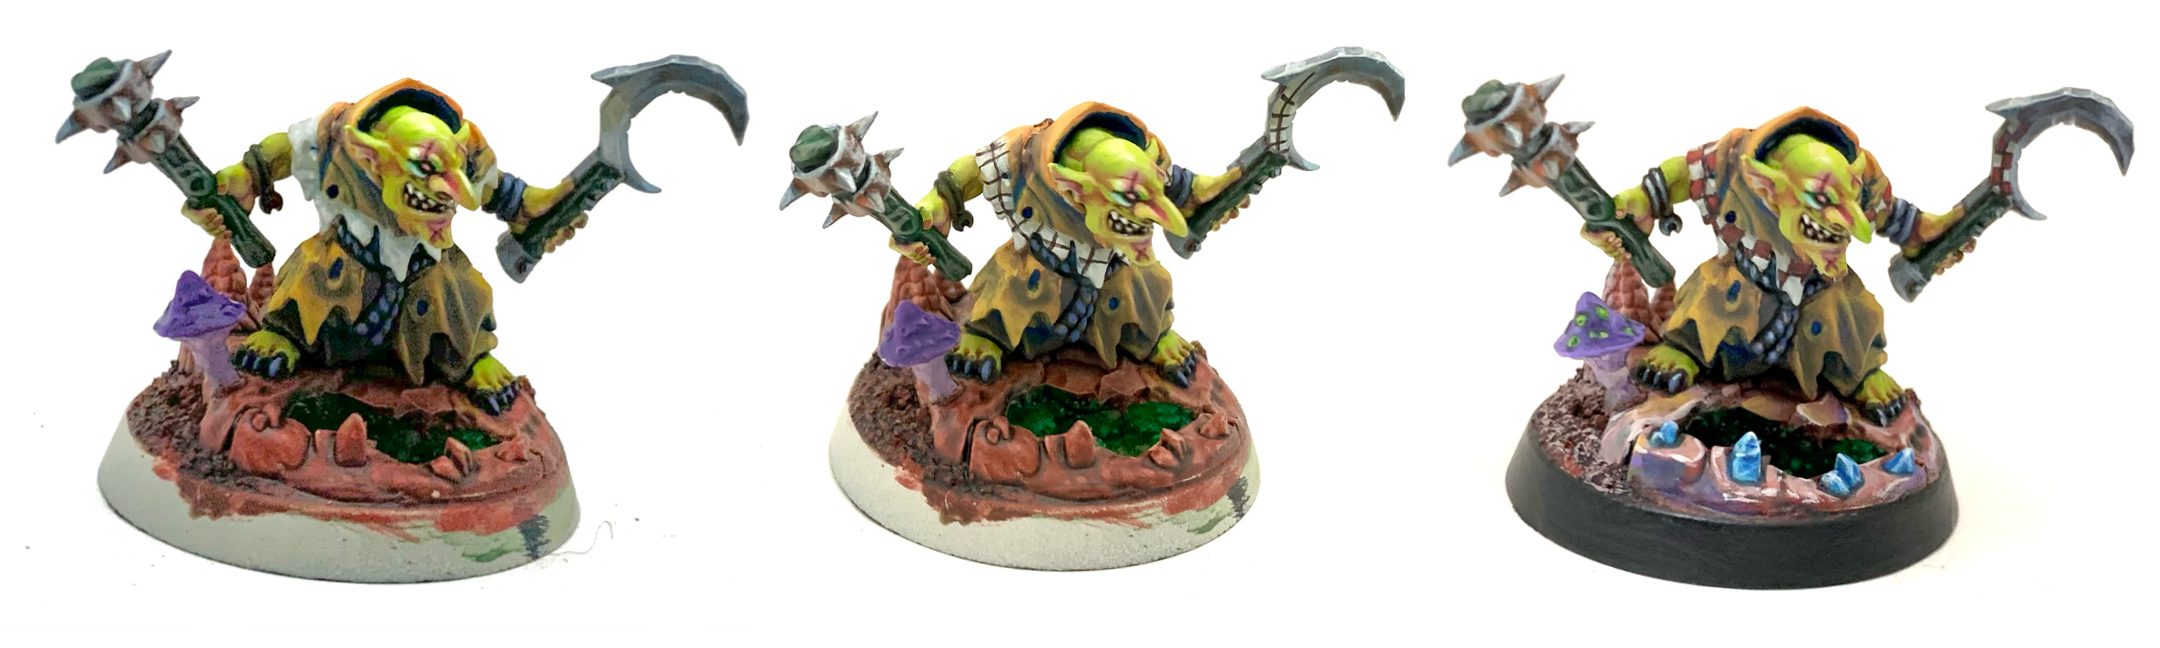
First I add a white strip to his rags that will serve as the basis for the checkers I’m going to do. Next, the weapon hafts get some streaks of Vallejo Green Grey – trying for a wood grain effect here obviously. The black rope and toenails get highlights with a mix of Oxford Blue and Grey Blue. It’s also time for mushrooms! A mushroom anyway. It gets a basecoat of Vallejo Blue Violet for the cap and for the stem: Basic Skintone. The same Basic Skin Tone goes on the Git’s nose, ears and palms to make him seem a little more lifelike. Then I use a tiny bit of pure Wine Red on the nose and in the scars on the chin and above the eyes. I also apply a very thin wash of Light Prussian Blue around the eyes to add some variation to the face, and then I pick out the teeth with Ivory. Meanwhile I keep evening out the blending; smoothing things out and helping to create volume.
Moving forward I continue to smooth everything out all over. I also add the grid for the checkers on the tabard and scythe. Additionally I add some final crisp sharp highlights to the weapons.
Normally I just drybrush bases but as this guy is a bit more of a show piece, I thought I should take a little more time. I spent a while blending the initial Cavalry Brown into some Snow Blue. Then added some Amethyst blue for the shading. For the crystals I blended some Light Prussian Blue into Vallejo Andrea Blue and use some more snow blue for edge highlights to give em a little sparkle. After filling in the checkers with Reaper Red Brick I added some lighter Deep Red to the areas around the shoulders.
Paint Da Skull!
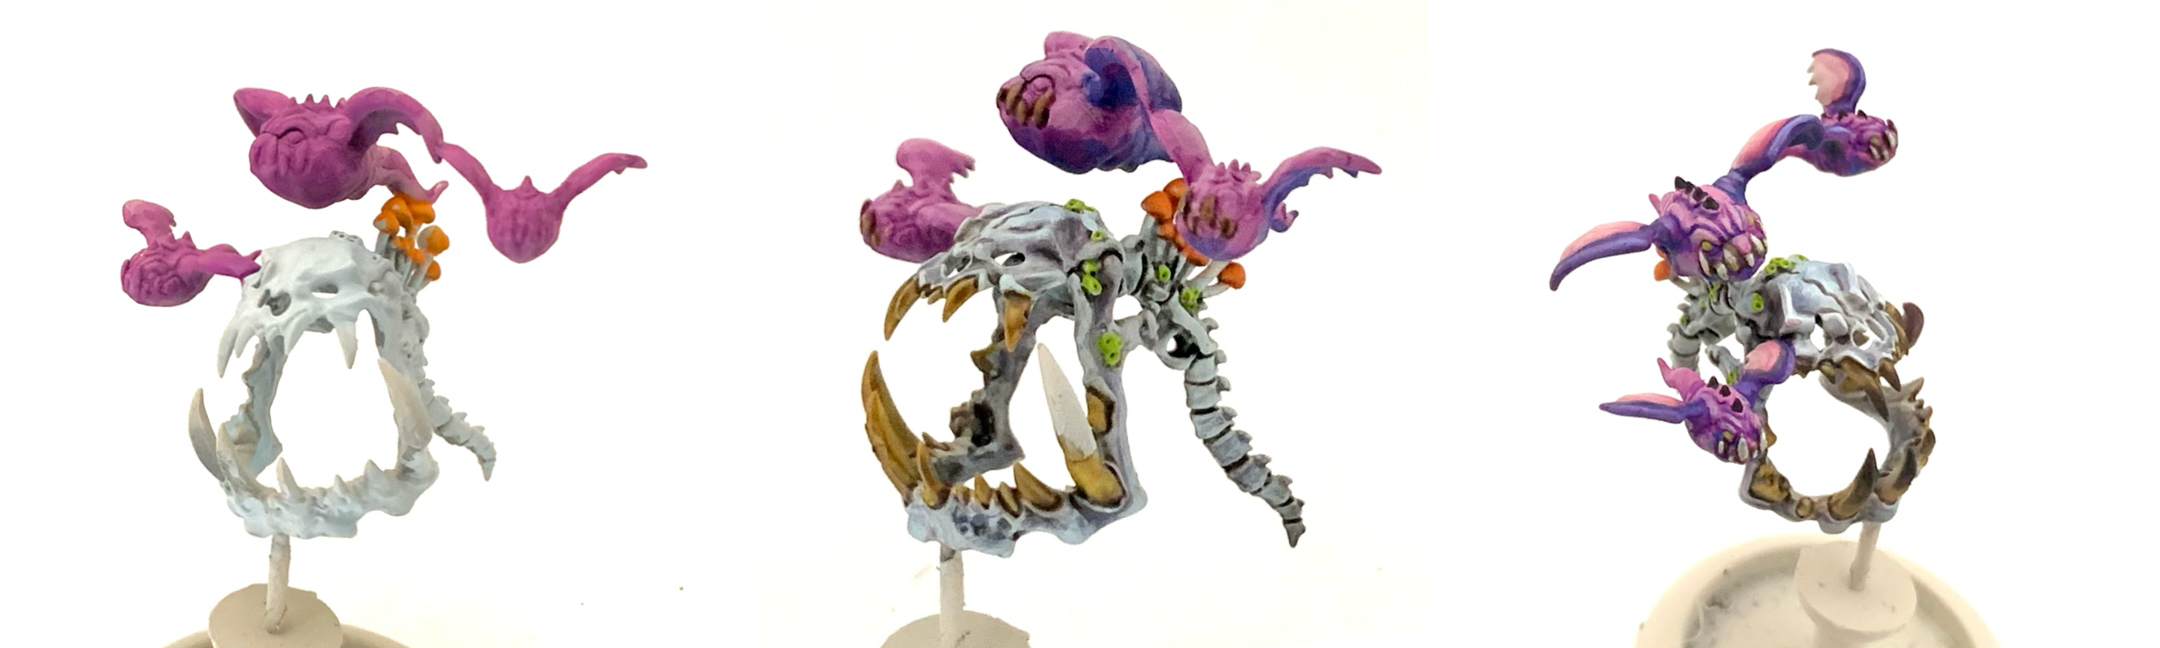
I went with a cooler-than-normal base color for the skull: Snow Blue. There’s enough yellowish tones already on the git himself. The teeth on the other hand got an Ochre basecoat to stand out from the rest of the bone. Next, the squigs get a base of Deep Purple and the mushroom caps get some Light Rust.
The whole skull part – teeth and mushrooms included get a wash of Nuln Oil. You have to be careful with this stuff and use sparingly so the whole piece doesn’t end up black. The squigs get shaded with some Amethyst Purple.
I glaze some thin layers of Snow Blue onto the skull to make the highlights pop some more. The teeth get some streaks of Burnt Umber to make them look more aged and kinda gross. It took me awhile to get the squigs right. They have some very tiny folds of skin but eventually I got them how I wanted with highlights of Basic Skin Tone and more Amethyst Blue highlights. I like to use a contrasting color for the lips of all my squigs and on these I used a cool blue: more Light Prussian Blue highlighted with Andrea Blue. Since this is the same color as the crystal sit helps tie it together a bit.
Basing Da Git!
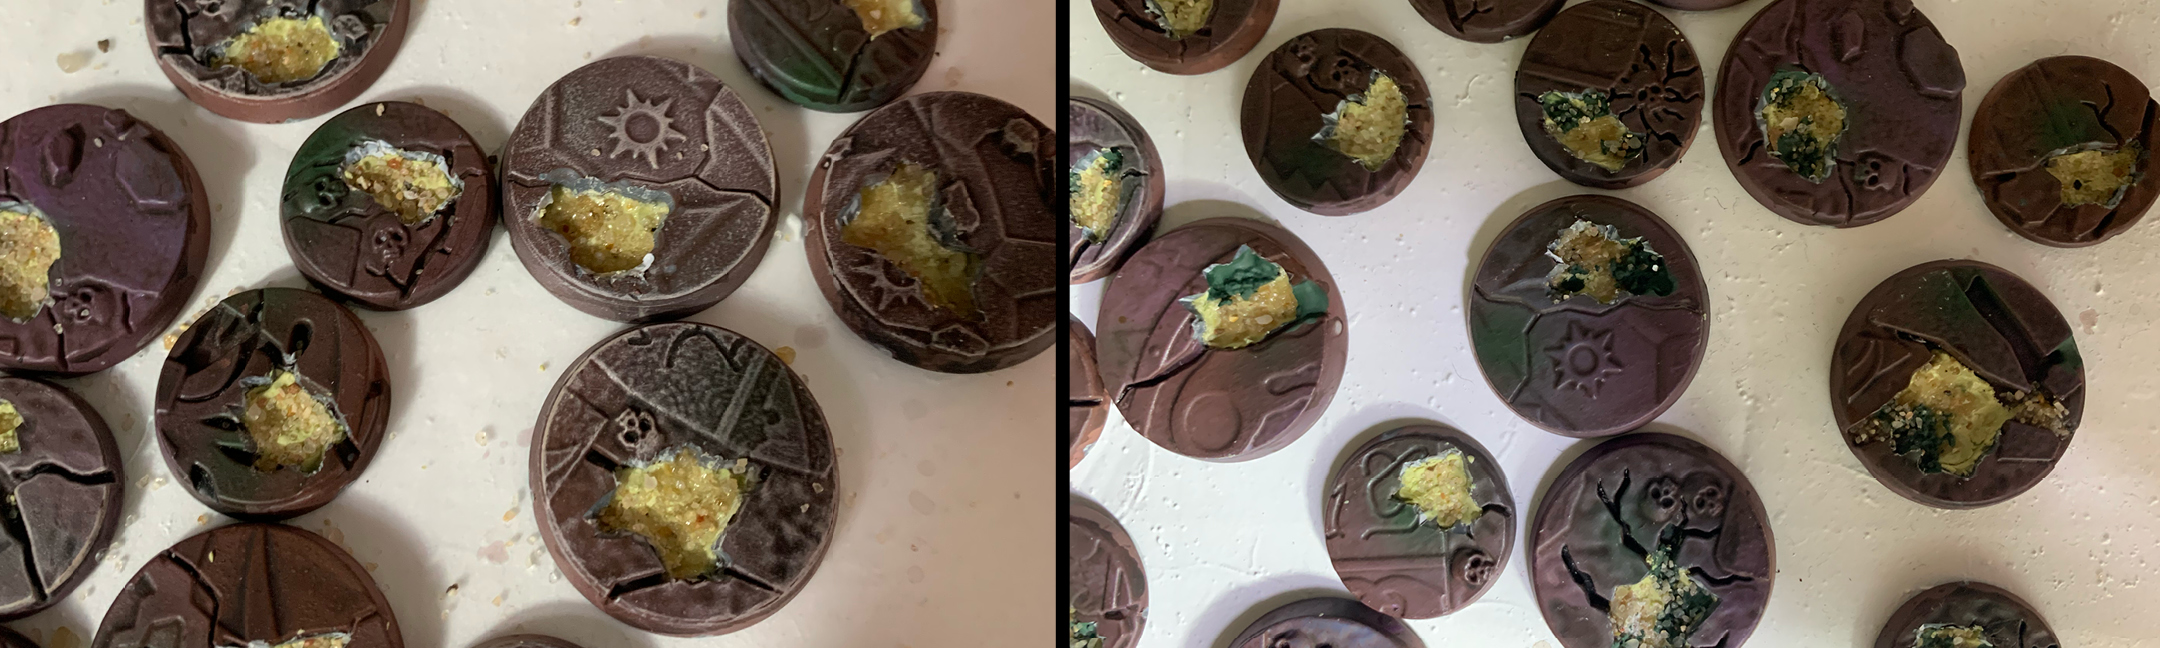
Now let’s talk about that base I mentioned earlier. I’ve been having fun using UV resin to make water effects on my gitz bases. Shown are some of the Shattered Dominion bases but you don’t have to use those of course. I start by drilling a few holes in the bottom with a dremel and a medium sized drill bit. Then I snip out the plastic in between the holes using sprue clippers to create a much bigger hole. Then I squeeze a bit of milliput into the hole and poke it around with the end of a paint brush until it’s made a nice little “cup” I can fill with the UV Resin.
Have the bases sitting on wax paper or something to keep the bottoms flat and make them easy to peel up. When the milliput has cured I squirt a little glue down there and sprinkle a little sand on it to add some texture. There will inevitably be leaks so I try to fill these with Liquid Green Stuff.
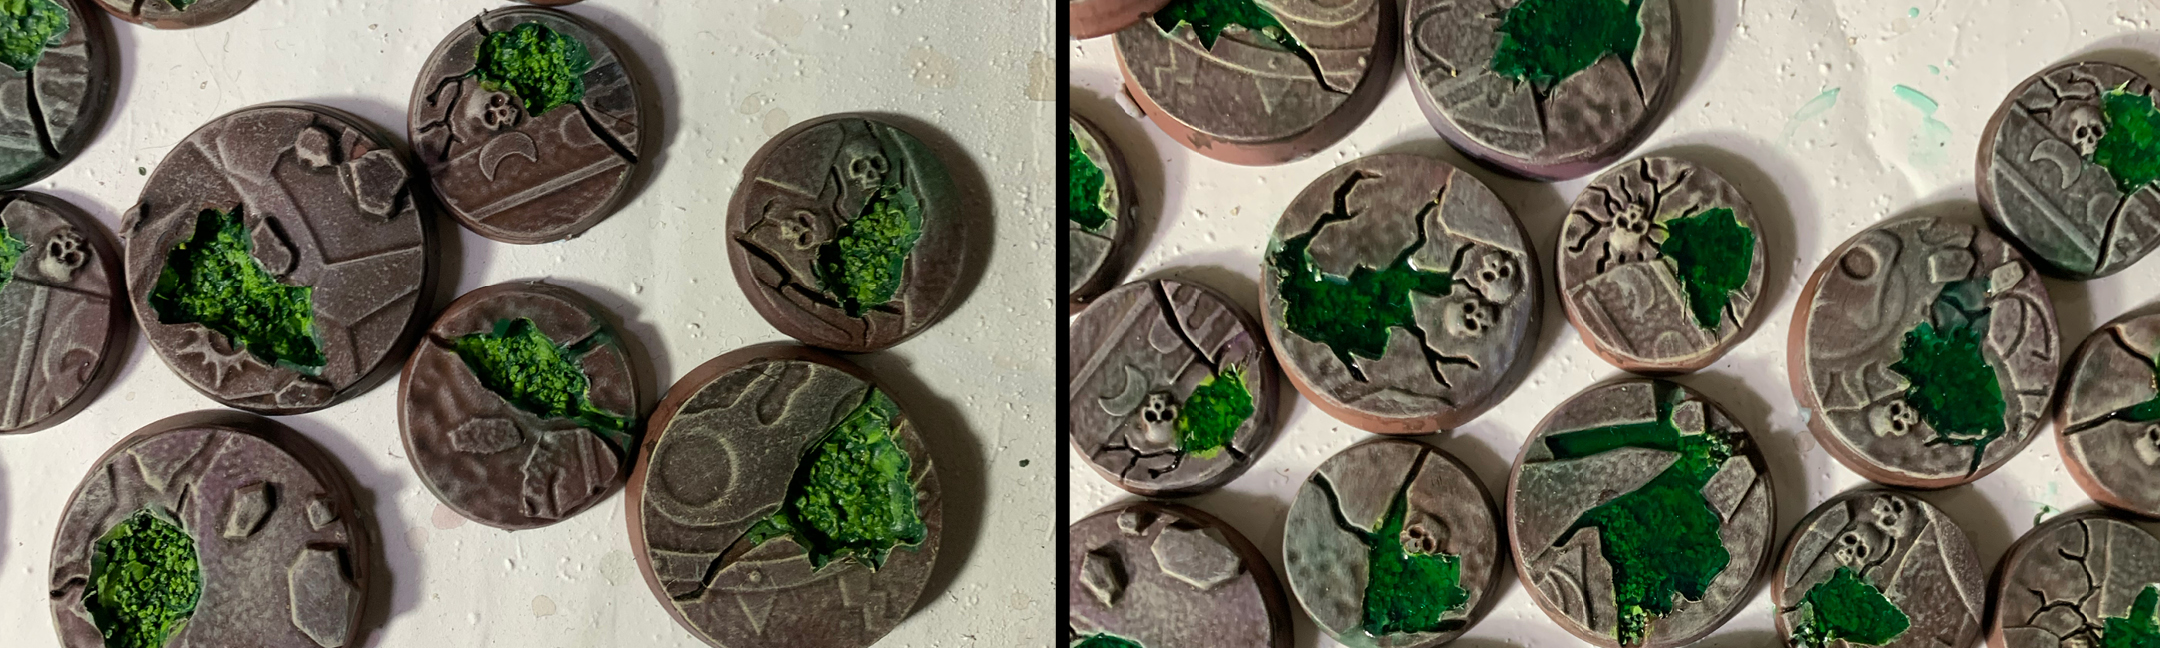
Then everything is painted Frog Green and washed with some Ork Flesh contrast paint. I mix a little green pigment into the UV resin before carefully squirting it into the holes with an eyedropper. Let me warn you – a little of the pigment goes a long way and any at all drastically increases the curing time so only use a very small amount. I often end up having to paint some ‘ardcoat over the top since the surface remains a bit sticky even though its cured solid.
You can buy UV resin kits on Amazon for not too much. I wouldn’t recommend the ones that come with lights though. The light that came with mine had an irritating timer and I had to keep switching it back on. I ended up having to get another with a bendy neck and it’s worked fairly better, though an even stronger one might have been worth the investment.
Gitz Done!
Since he came with a scenic base I was able to make the slime pool on it extra deep. Deep enough to fit a couple skulls in. Unfortunately they’re hard enough to spot that I don’t know if anyone else will ever see them. So, I guess as Bob Ross said, “that’ll just be our little secret.”
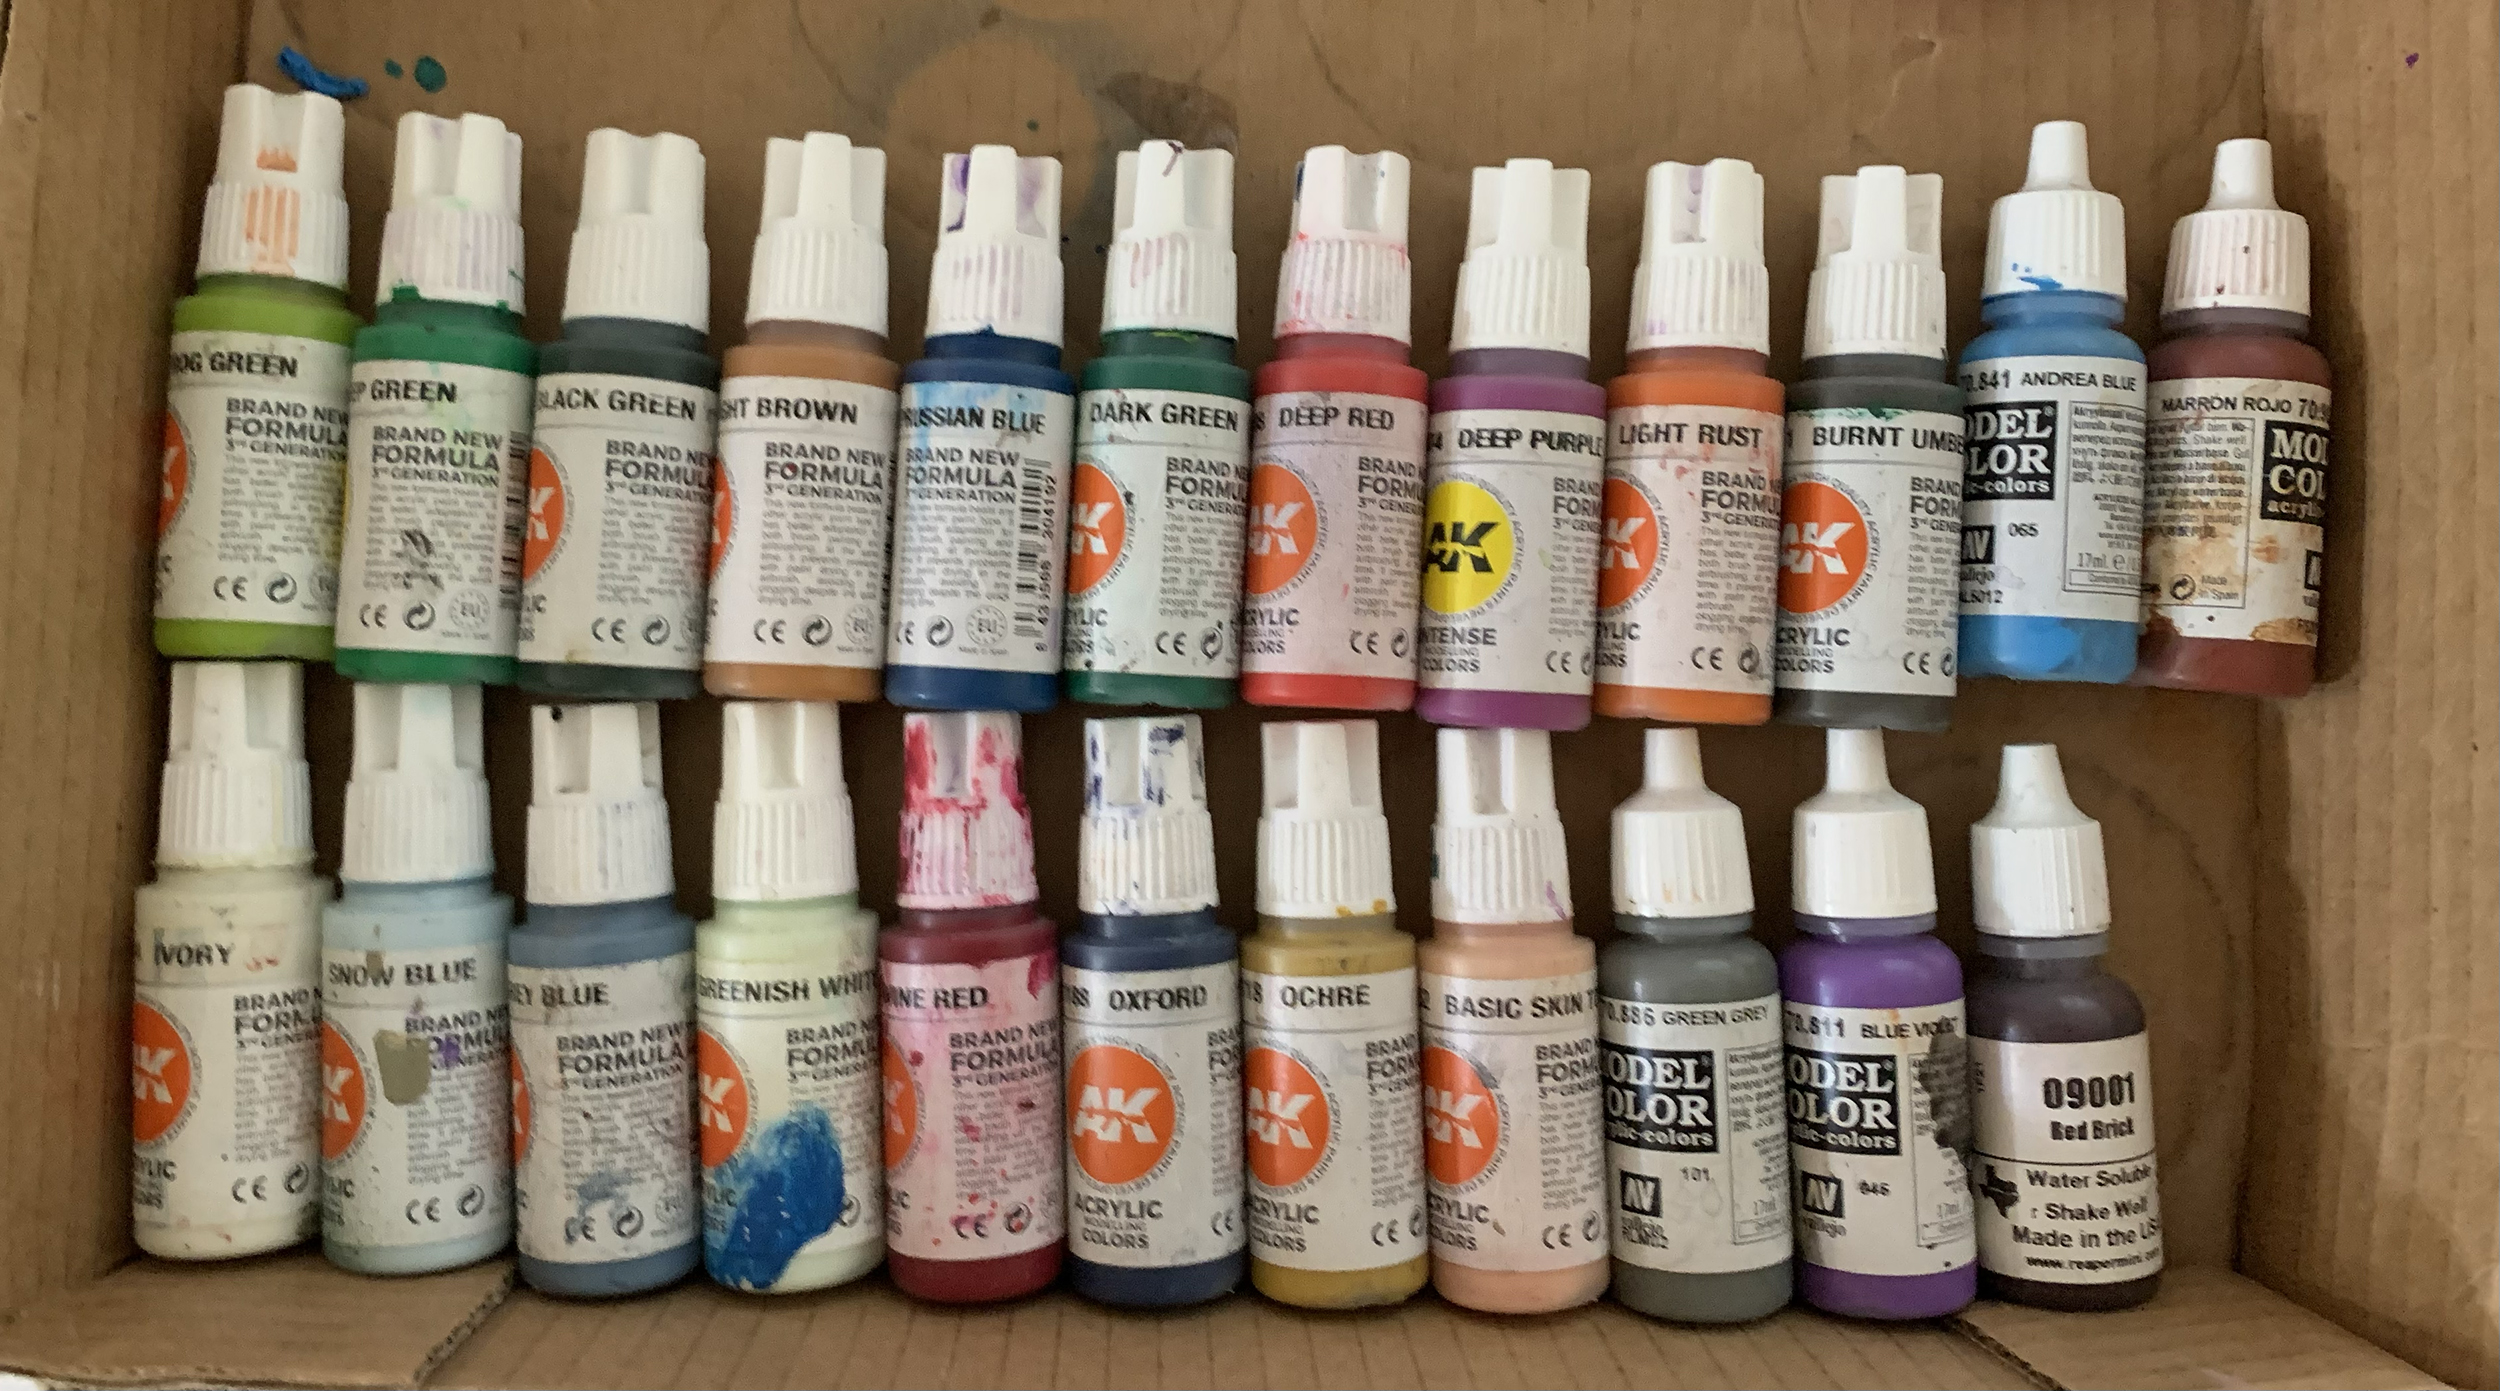
And for those of you who like a paint list here are all the paints I used:
~Hope you enjoyed the article! Have you been using the Rabble Rowza?