Warhammer 40K: Games Workshop Space Marine Painting Tips
Games Workshop has some free painting tips for the new Space Marines and they are pretty legit. This is a great start for beginners.
Over the years GW has put out a TON of Space Marine painting guides and tips. That said, their latest article has a bevy of great starting tips for anyone looking to get their Space Marines Battle Ready (and beyond).
“For those who want to get their miniatures onto the tabletop as quickly as possible, the Warhammer Painting team have also concocted a quick how-to guide using a minimum of paints and simple techniques to get yours Battle Ready in no time.”
Space Marine Painting Tips
The video is a really good primer on how to paint your Space Marines in the style of Ultramarines. However, there’s more techniques and steps they wrote up that are excellent examples of how to do things:
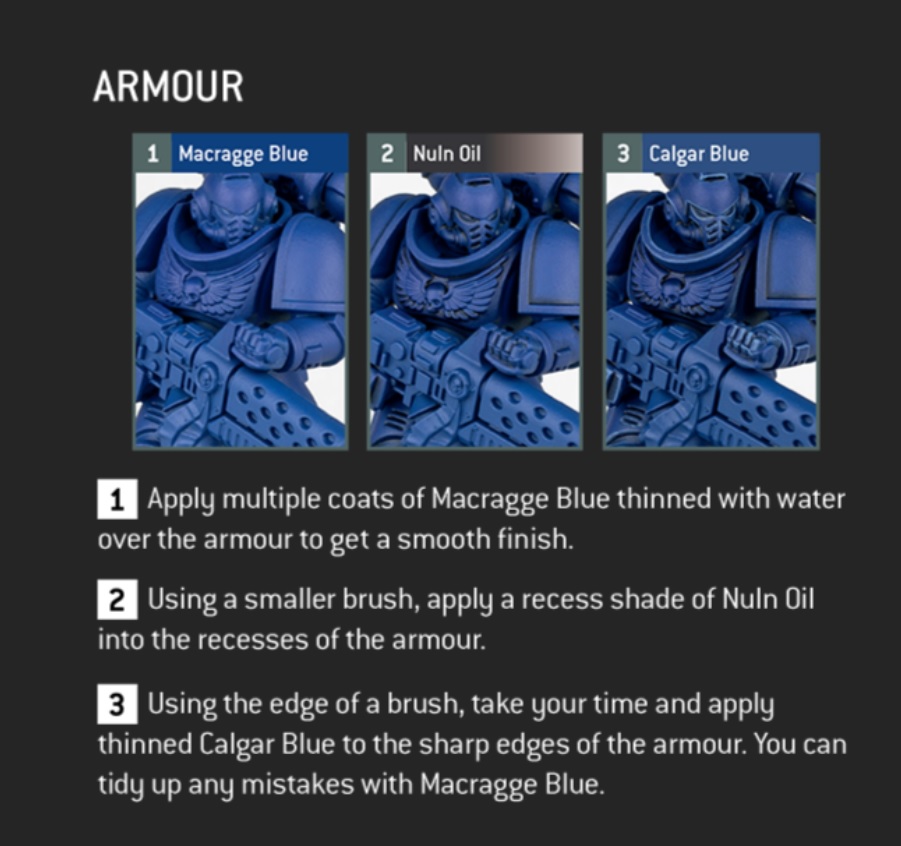
With the vast majority of your Space Marines covered in Power Armor getting that look right is going to be the biggest step. With these three steps you can get some great looking armor that you can then add details to. If you’re not painting blue, then it’s all a matter of choosing the right color palette to work with to get your base color and highlights right. In this case, because they are using Ultramarines, Macragge Blue as a base with Calgar Blue as the highlight works great.
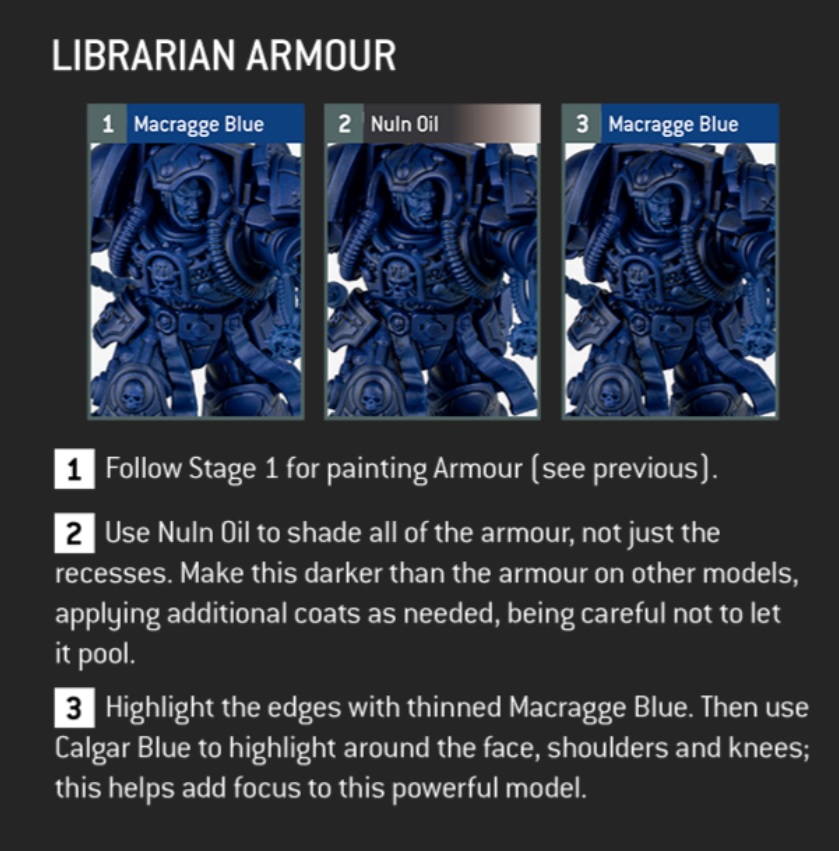
This is an example of how you can use highlights to accentuate the more forward or prominent features. By washing the whole model in Nuln Oil you can then use the base color (Macragge Blue) as a primary “highlight” color again. And then you can use the highlight color (Calgar Blue) to hit the most important parts (around the face, shoulders, and knees).

GW makes painting up the weapons simple and easy with just a few steps. However, it’s really important that during this process you try to keep everything tidy so you don’t paint over your existing highlights on the armor. Personally, I dunno if I’d do this step before or after the highlights — I think that’s a personal preference. It could also depend on the model as well.
In either case, if you follow these steps, you’ll end up with some really clean-looking weapons as these steps will work across all types of bolters. The also work for any Space Marine chapters using Blacks and Silvers on pretty much any weapons — these steps can work on chainswords, too!

It’s really the finally highlights that make the weapons pop. It’s subtle but that Mechanicus Standard Grey highlight and Leadbleacher highlight pay off in the end!
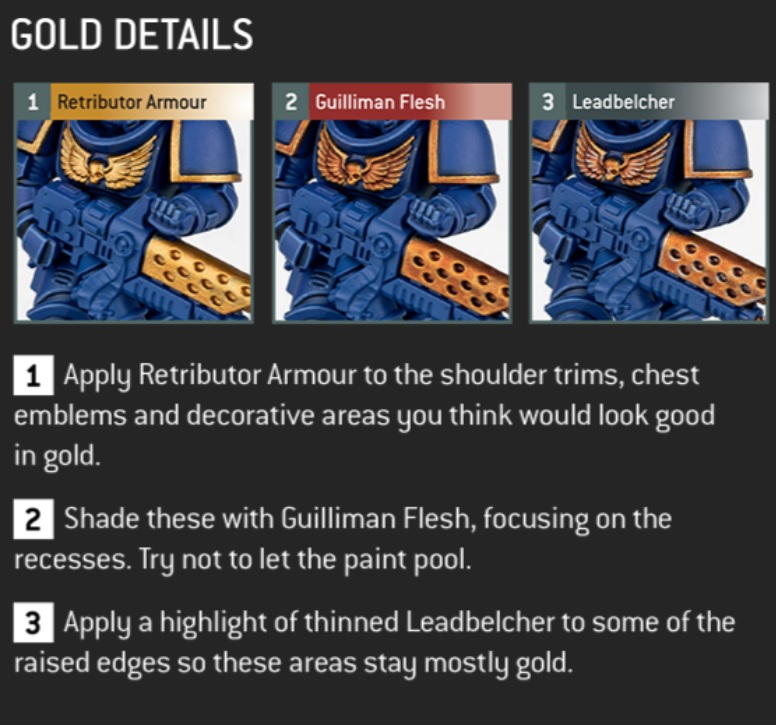
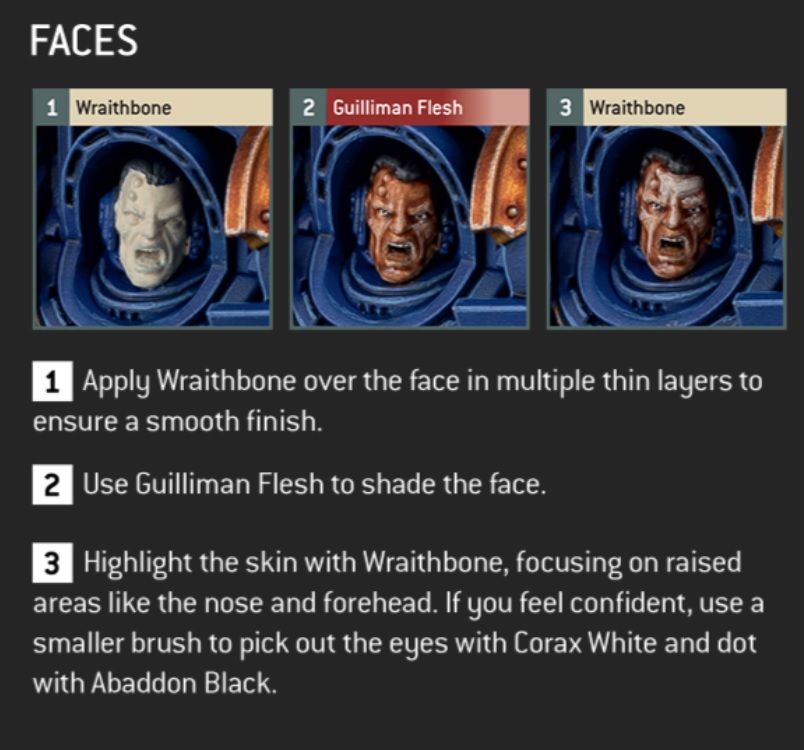
I’ve used variations of this technique over the years to paint gold. I personally prefer to use Seraphim Sepia shade/wash over a bright silver like Runefang Steel. However, the idea is basically the same. By using a wash over the gold you get a richer color that adds some depth to the recesses and helps the details show. Then it’s just a matter of highlighting back up.
I think the video does a much better job explaining this step. It almost feels like there’s a missing step here but the concept is there.
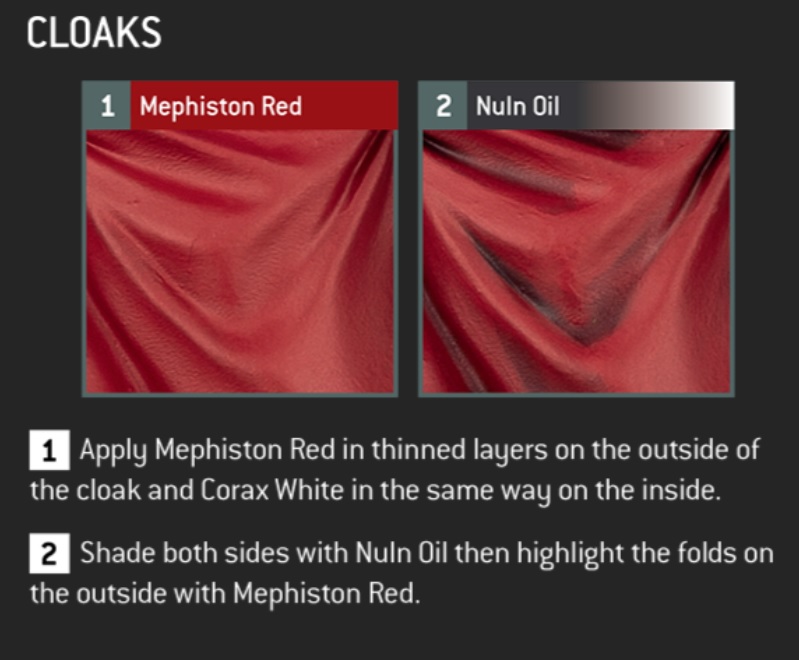
Okay…I’m not 100% behind this color choice here. The result works…but I think you need a different color for the final step. Perhaps the tutorial was using a limited palette or something. I personally wouldn’t use Wraithbone as the final highlight. Just use a Kislev Flesh maybe something paler for the final highlight.
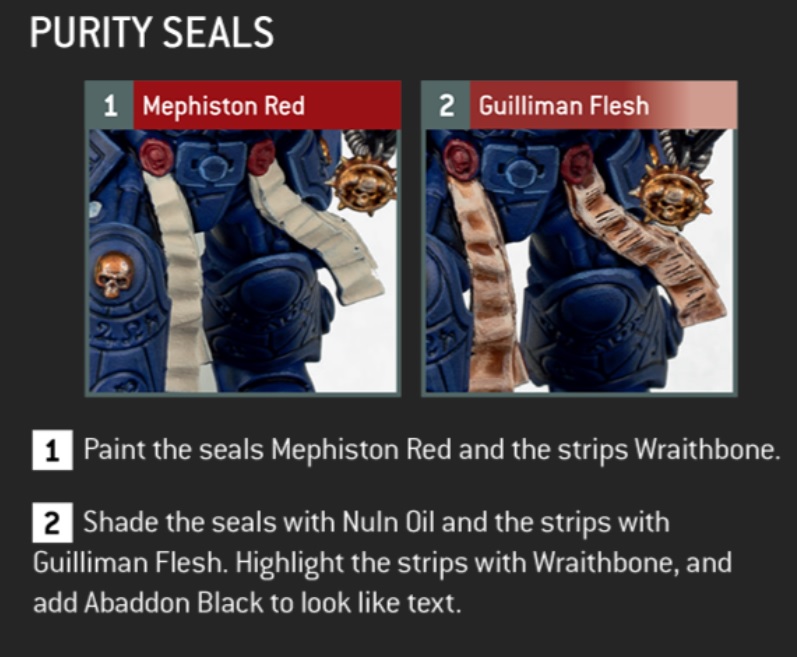
This is another section that I think they glossed over a few steps. There’s a structure here though. Base color, wash/shade/highlight back up — then Abaddon Black for the text.
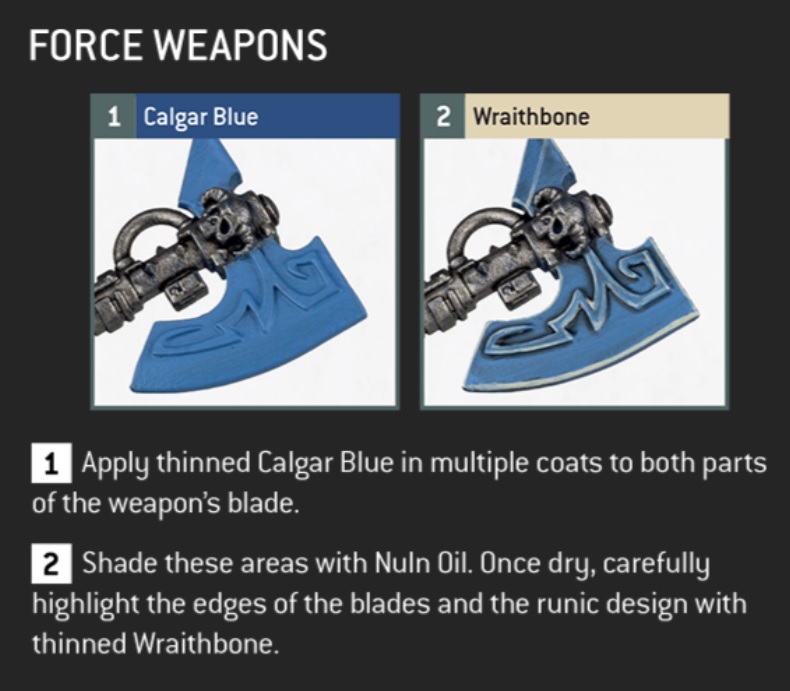
The metal uses the same steps as before. However, I’ve always had trouble painting Force Weapons. This gives them a simple look and that’s totally fine. However, there’s lots of other tutorials out there that uses more complex steps with washes/glazes to really build up the colors. If you’re looking to just get the models Battle Ready follow these GW steps. Otherwise, just search youtube for one of the hundreds of tutorials out there. You can really go absolutely nuts when painting these blades.
Overall, these are pretty simple painting techniques and are easy to follow from GW. I’d start here if you’re new. On the next project I’d encourage to try some new techniques and expand your hobby skills! That’s the cool thing about this part of the hobby: there’s always room to improve!
There’s always the GW Youtube channel to help you with painting tips!


