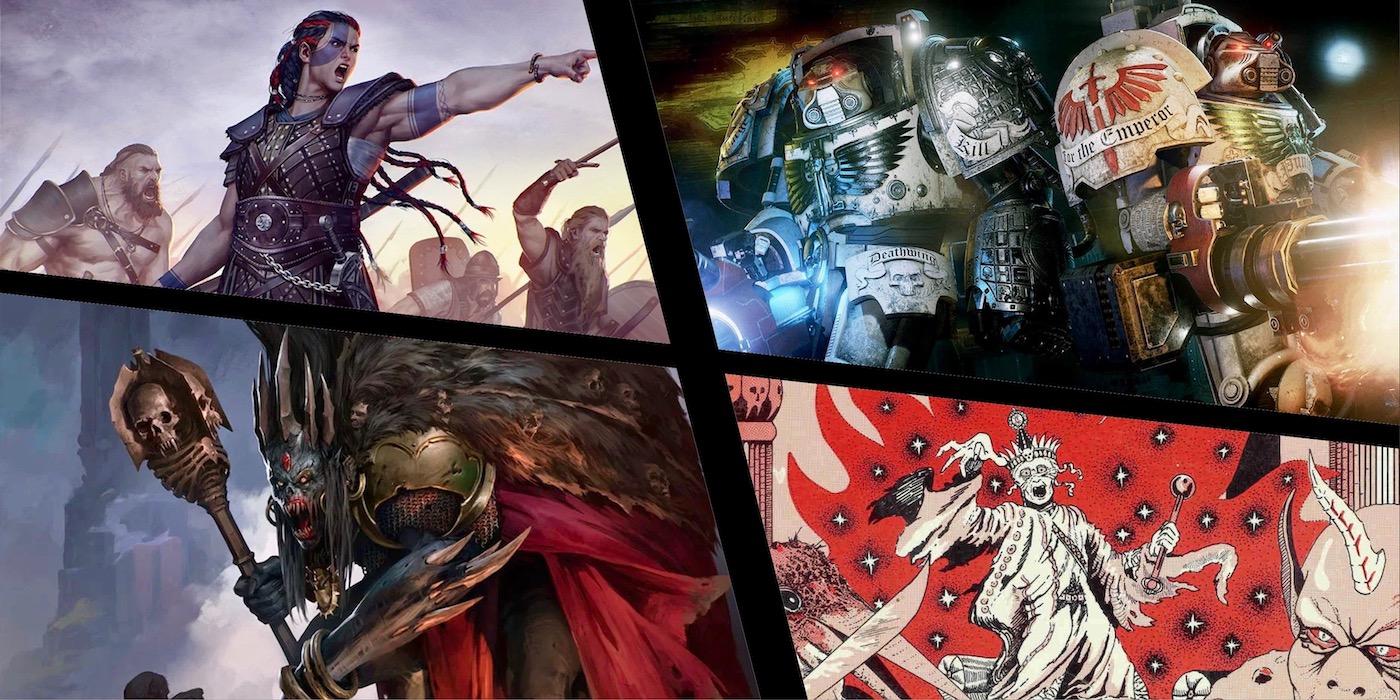
Age of Sigmar: Painting A Maw Grunta
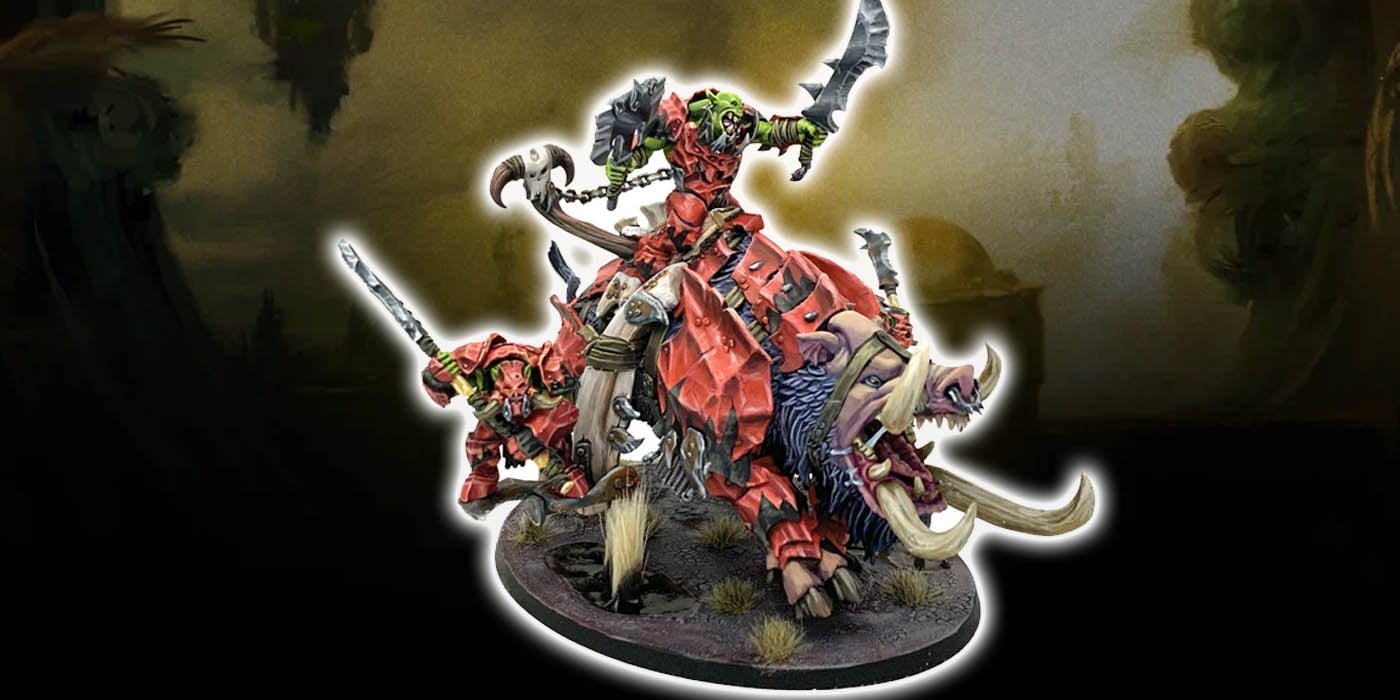
Ben is back with another painting tutorial. This time the Maw Grunta from Age of Sigmar is under his painting brush!

Time to paint up this hog so I can unleash it on the battlefield.
The Rider
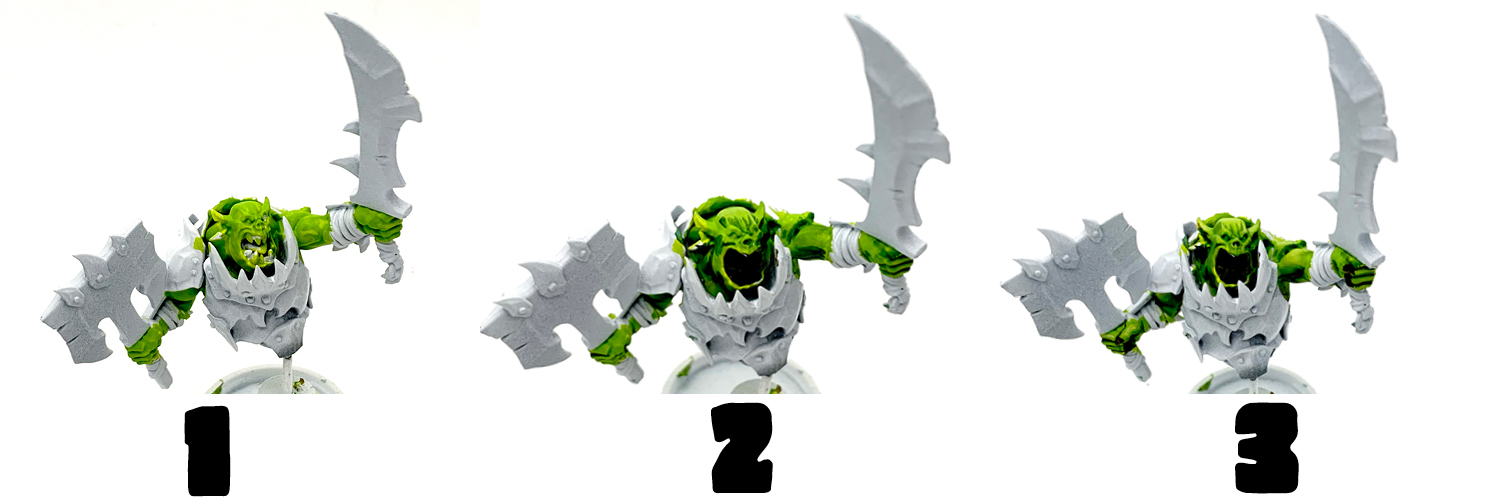
1) I started off with the orruk itself using a base of AK Frog Green. Then I gave it a thin wash of Biel Tan Green to help define it a little more
2) Then I began shading the recesses with some thinned out AK Black Green.
3) Next I started establishing the midtones by blending the first two colors together.
4) Then I added a few highlights to the skin by mixing a little AK Ivory in with the Frog Green base color.
5) I painted the tongue with AK Wine Red and started blocking off more areas with black. I also added a thin glaze of AK Medium Blue around the base of the eyes and below the eyelids.
6) Then I painted the teeth and the various leather straps with AK Mud Brown.
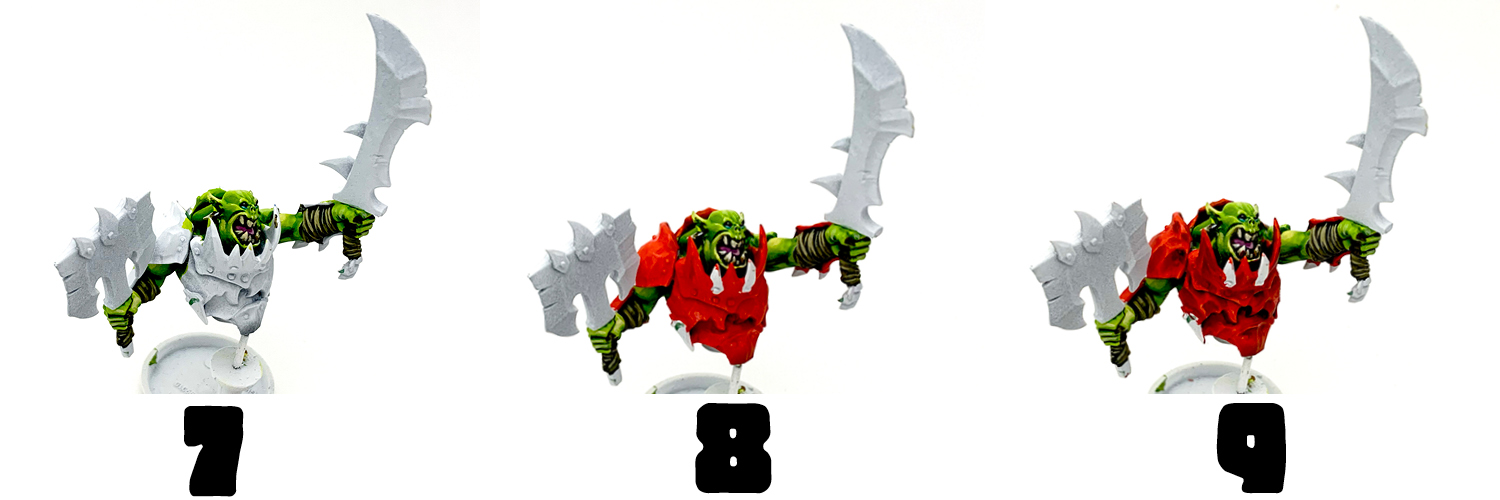
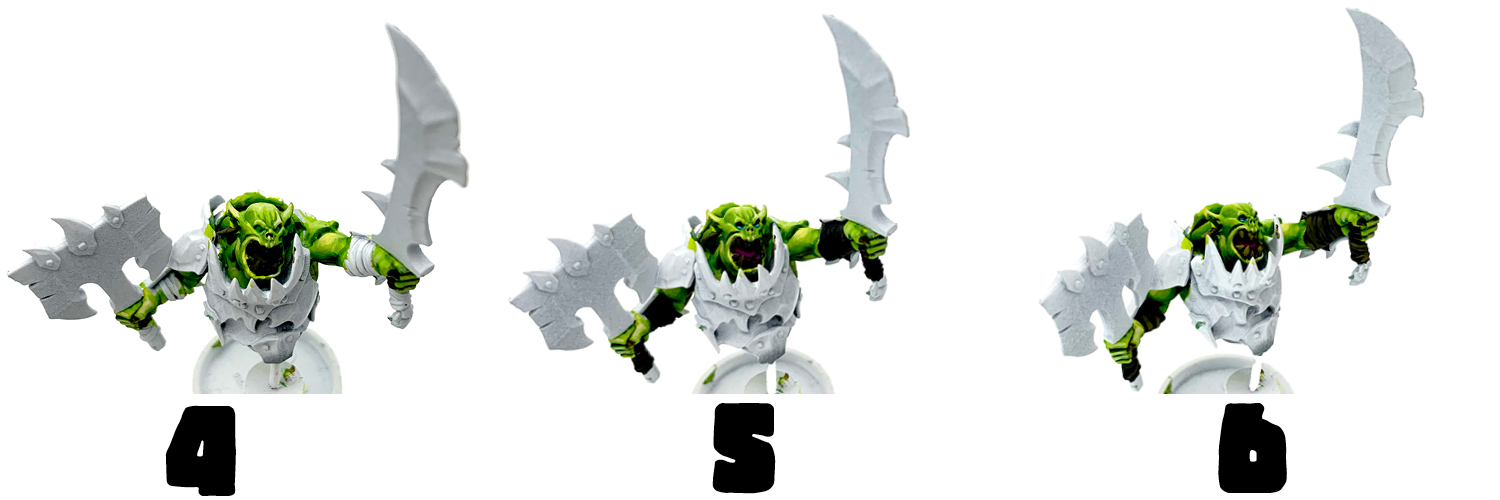
7) The straps and teeth were highlighted with AK Dark Sand and the teeth were given an additional highlight with AK Ivory. The tongue was highlighted with a mix of AK Magenta and AK Salmon
8) Then it was finally time to move on to the armor, which was given a basecoat of AK Deep Red.
9) The red was shaded with AK Wine Red. For the darkest shading a mix of AK Wine Red and AK Dark Sea Blue was used.
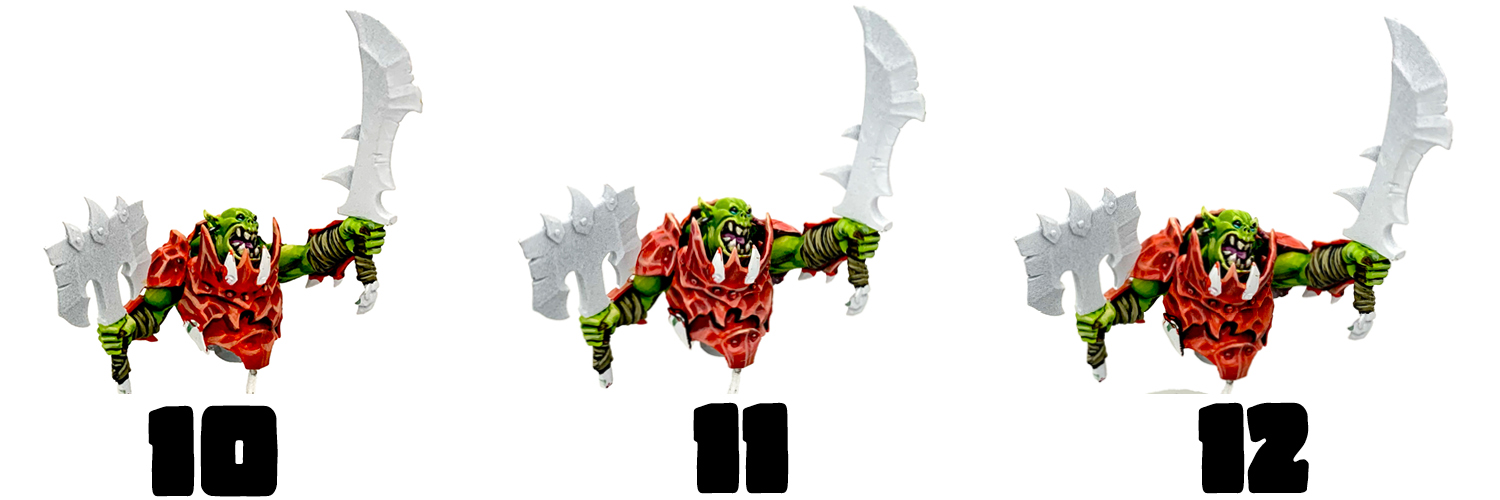
10) Next I began adding highlights with pure AK Salmon.
11) Then I begin to gradually blend the highlights into the surrounding area a little better while also picking out all the rivets and bolts.
12) Then it all gets a very thin wash of Blood Angels Contrast to even out all the red.
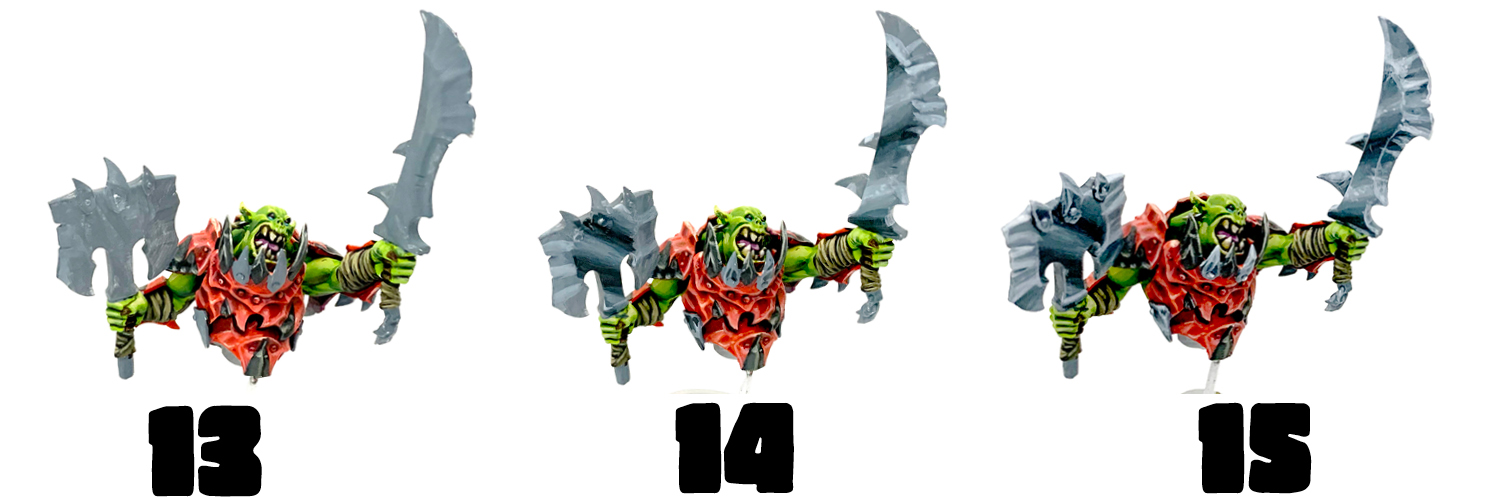
13) A few final bits of highlight were added very sparingly to the red armor using a mix of AK Salmon and AK Light Flesh. Then I picked a few areas of the armor and added some black freehanding in the shape of teeth. This was highlighted with Vallejo Stone Grey, then a mix of Stone Grey and AK Light Flesh for a few especially shiny parts. Finally the raw metal surfaces were given a basecoat mixed from AK Snow Blue with a little bit of AK Dark Sea Blue and AK Black mixed in. If you were wondering, yes I accidentally missed taking a picture between steps 12 and 13 so there was a bit extra to explain.
14) I start adding highlights and shading to the raw metal using the previous colors; Snow Blue for highlights with a mix of Black and Dark Sea Blue for shading.
15) I evened out the blending on the raw metal using more passes with the colors from steps 13 and 14. I could have spent a lot more time on the weapons but I liked how all the raw brush strokes looked on the jagged metal. Additionally, these new Ironjawz are covered in metal “teeth” – all these pointy blades riveted to their weapons and armor. Each of these little chunks needed to be highlighted and shaded on its own so I had to give all of them some attention.So that about wraps it up, just… oh right I also have a whole giant pig to cover.
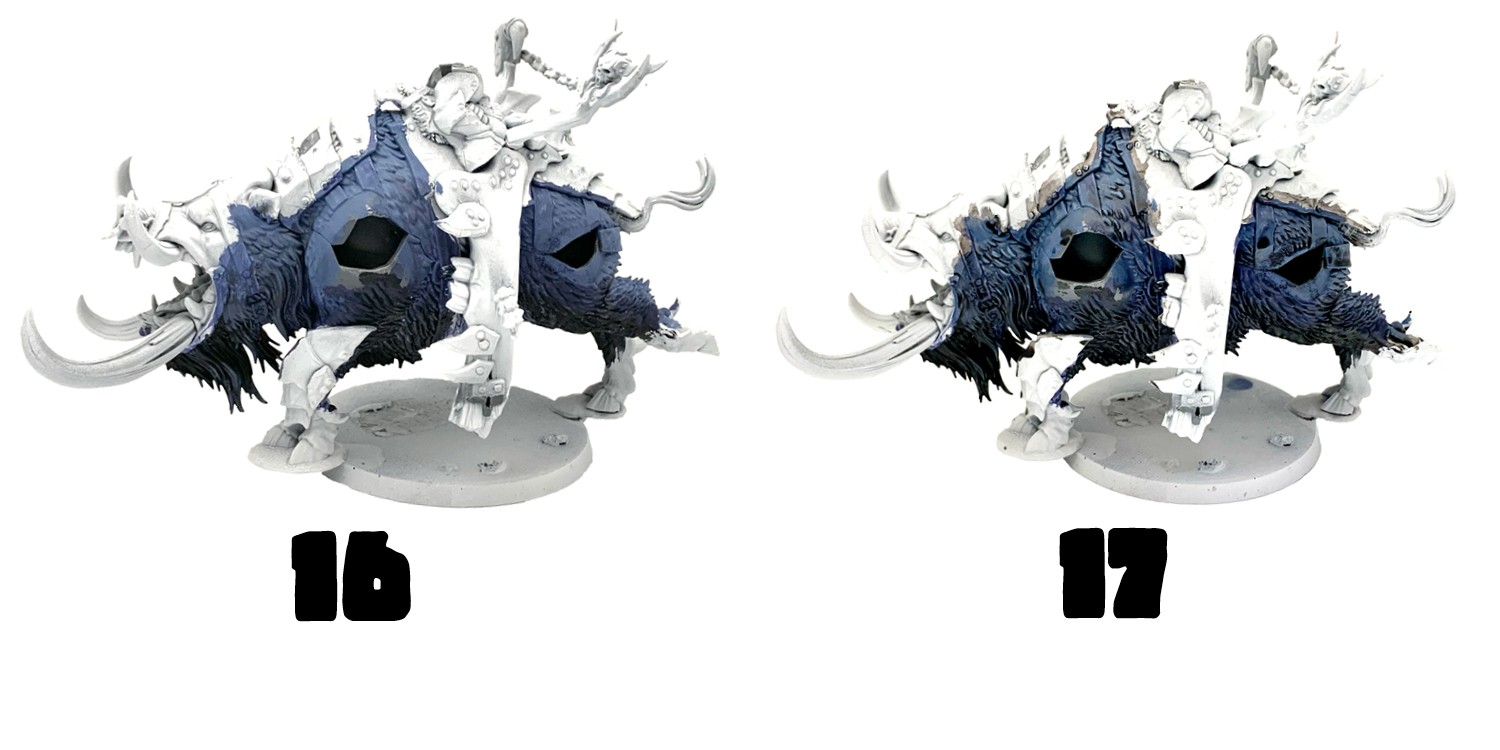
16) I wanted to go with a cool color for the fur since there were so many warm tones in the armor and ork flesh. I started with AK Grey Blue and blended it down to black as it got closer to the base of the model.
17) Then I washed the fur with Nuln Oil.
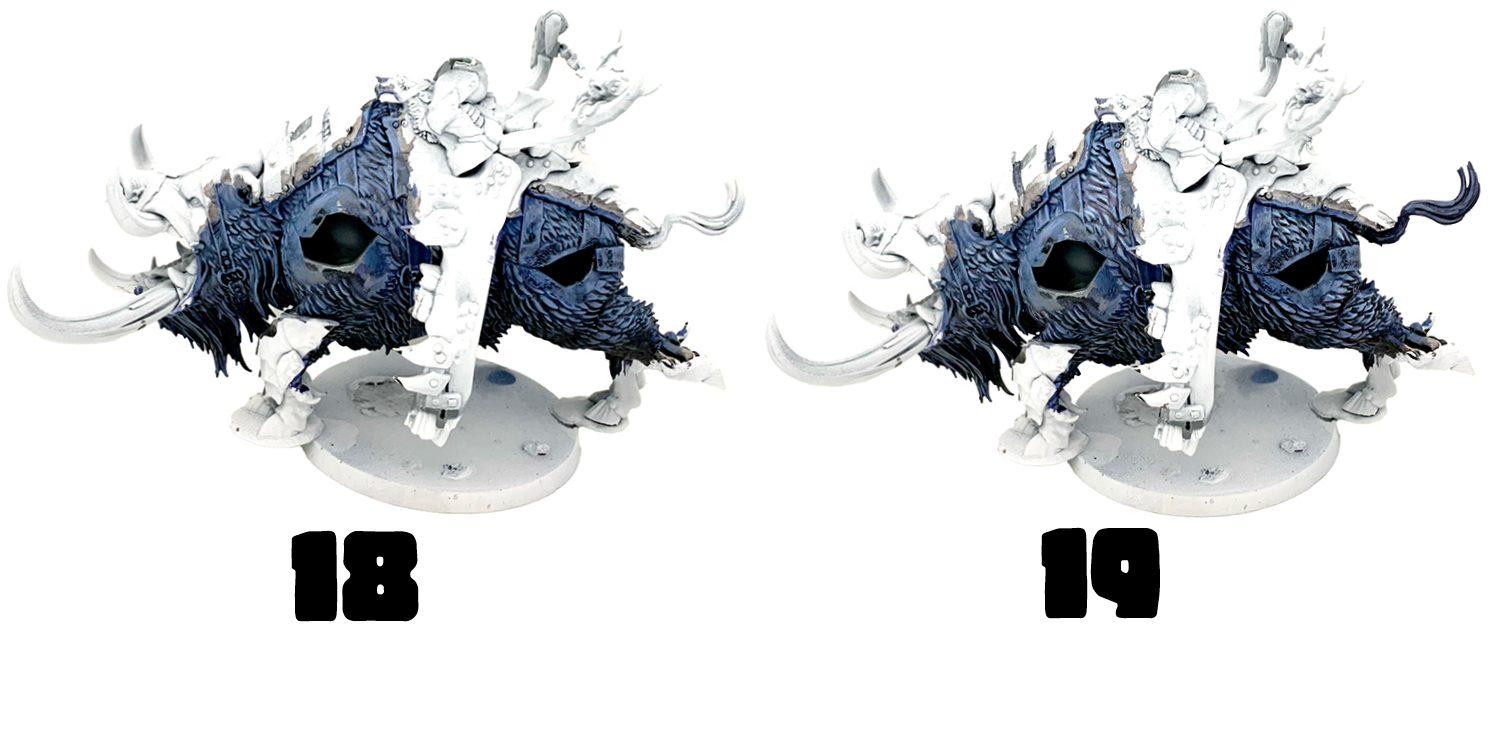
18) Next I drybrushed the fur with AK Grey Blue.
19) Then I drybrushed the upper areas of fur with a mix of Grey Blue and AK Snow Blue. But drybrushing isn’t perfect, so I had to go back and make sure all the lumps of fur really looked separate. Using the Nuln Oil again I added some shading back between any clumps of hair that didn’t look distinct from one another after the drybrushing.
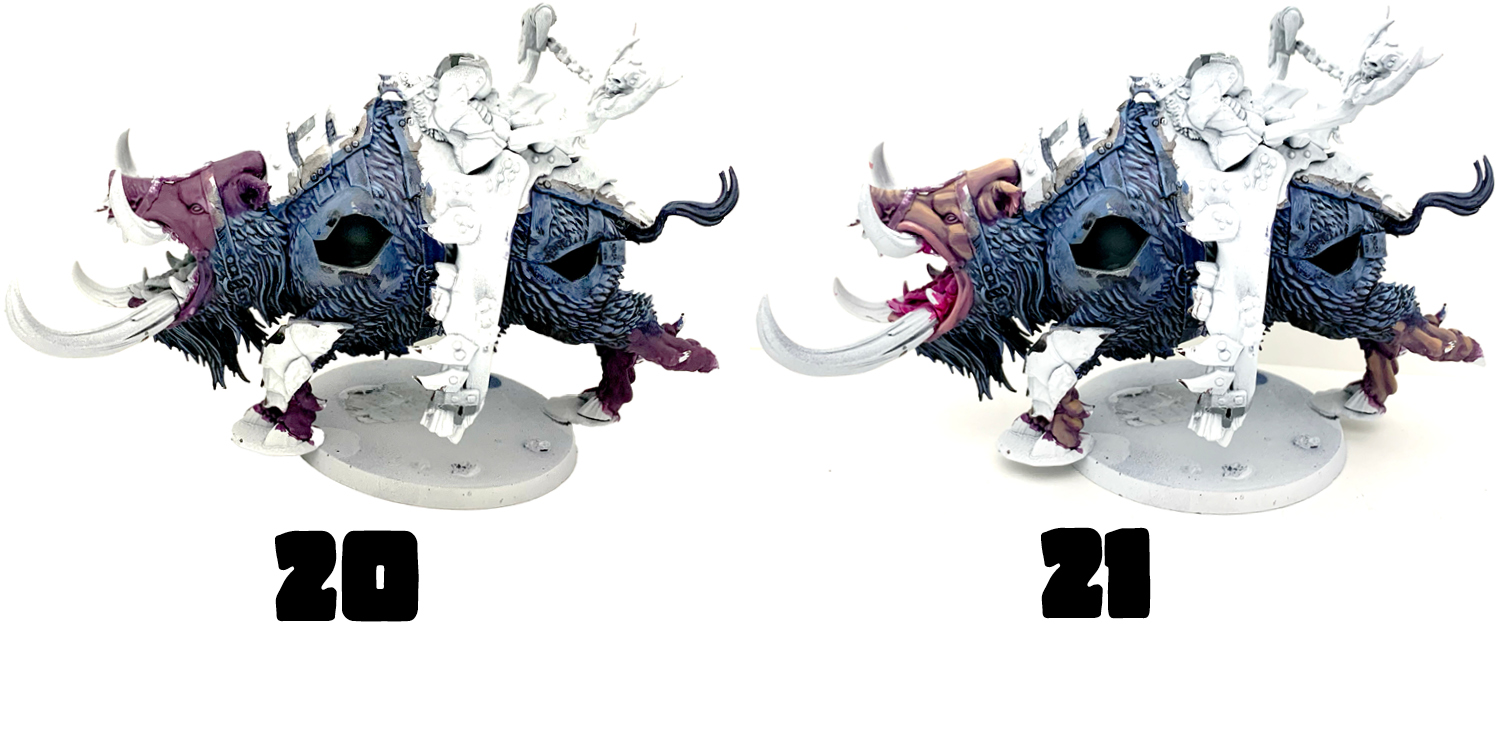
20) It was time to move on to the flesh, so I gave all the areas of exposed pig skin a basecoat of Scale 75 Basic Flesh mixed with Reaper Imperial Purple
21) Increasing amounts of Basic Flesh were blended into the basecoat until some nice highlights had been built up. A mix of Basic Flesh and AK Magenta were used for the lips with pure Magenta being used for the interior of the mouth.
22) The tusks were painted with a basecoat of AK Ochre mixed with a little AK Burnt Umber. A thin glaze of AK Oxford Blue was added around the eyes. Then the eyes themselves were painted with AK Basic Flesh. A dark red dot was added to the far left of the eye to create a pupil that appears to be looking forward. The tongue and the gums were highlighted with more AK Salmon.
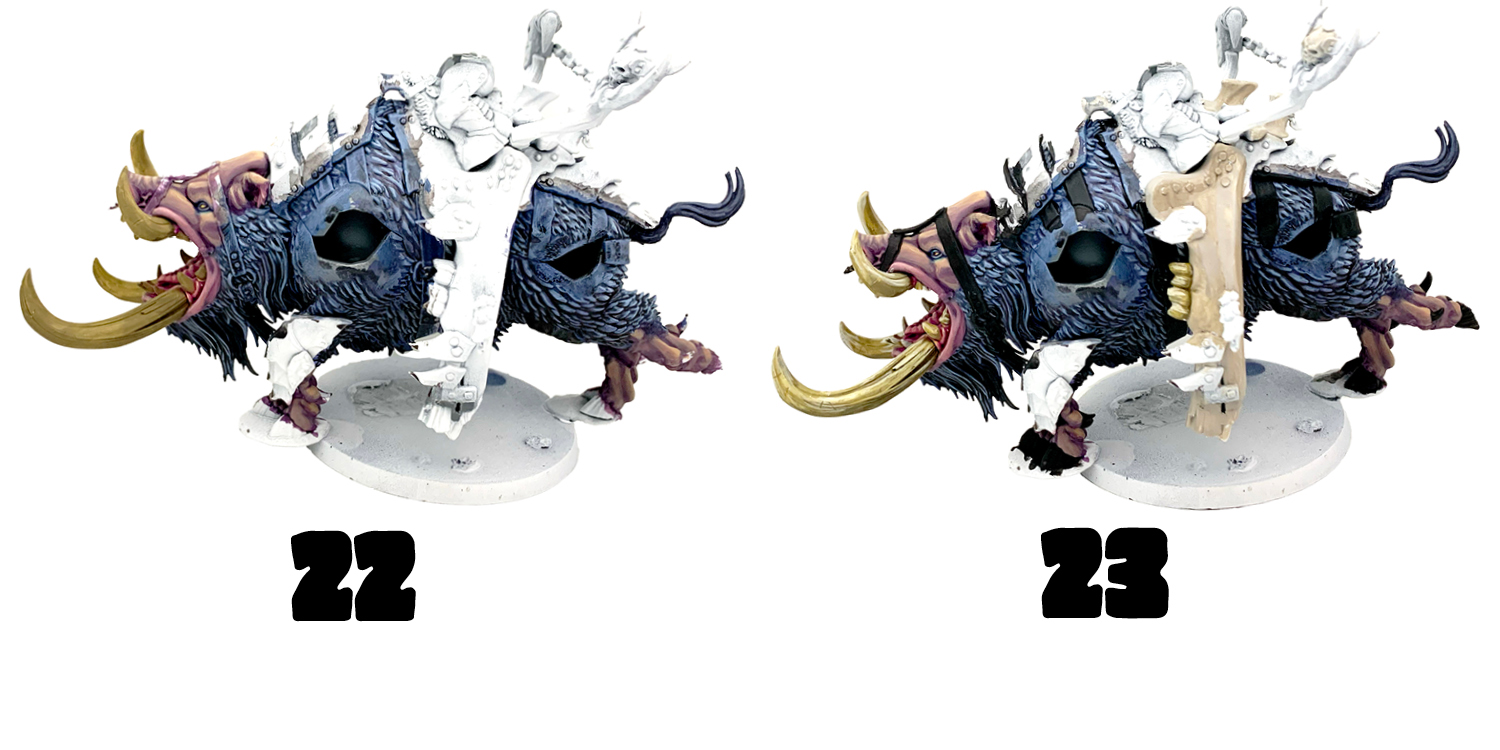
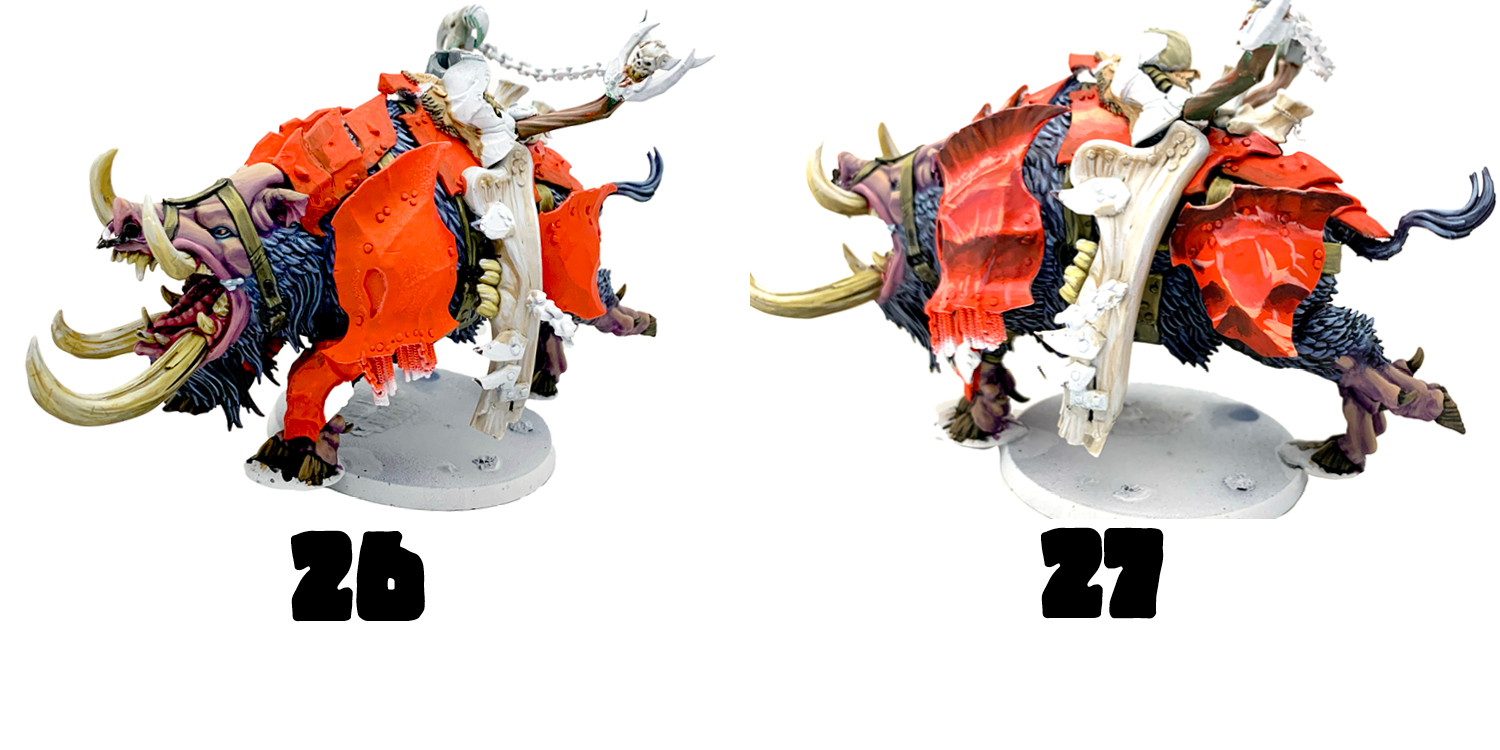
23) Then highlights were built up on the tusks with pure Ochre, followed by AK Dark Sand, then AK Ivory. The massive jawbones on the creatures flank were given a basecoat of Snow Blue with a small amount of Burnt Umber mixed in. The use of the cooler Snow Blue should help this bone look distinct from the more yellow tusks and teeth. And speaking of teeth, the ones on the jawbone were painted with the same colors as the tusks. Additionally All the leather straps were picked out with black.
24) The straps were painted with AK Burnt Umber then given some sparing highlights of AK Middle Camouflage. The bone was given some streaks of pure AK Snow Blue.
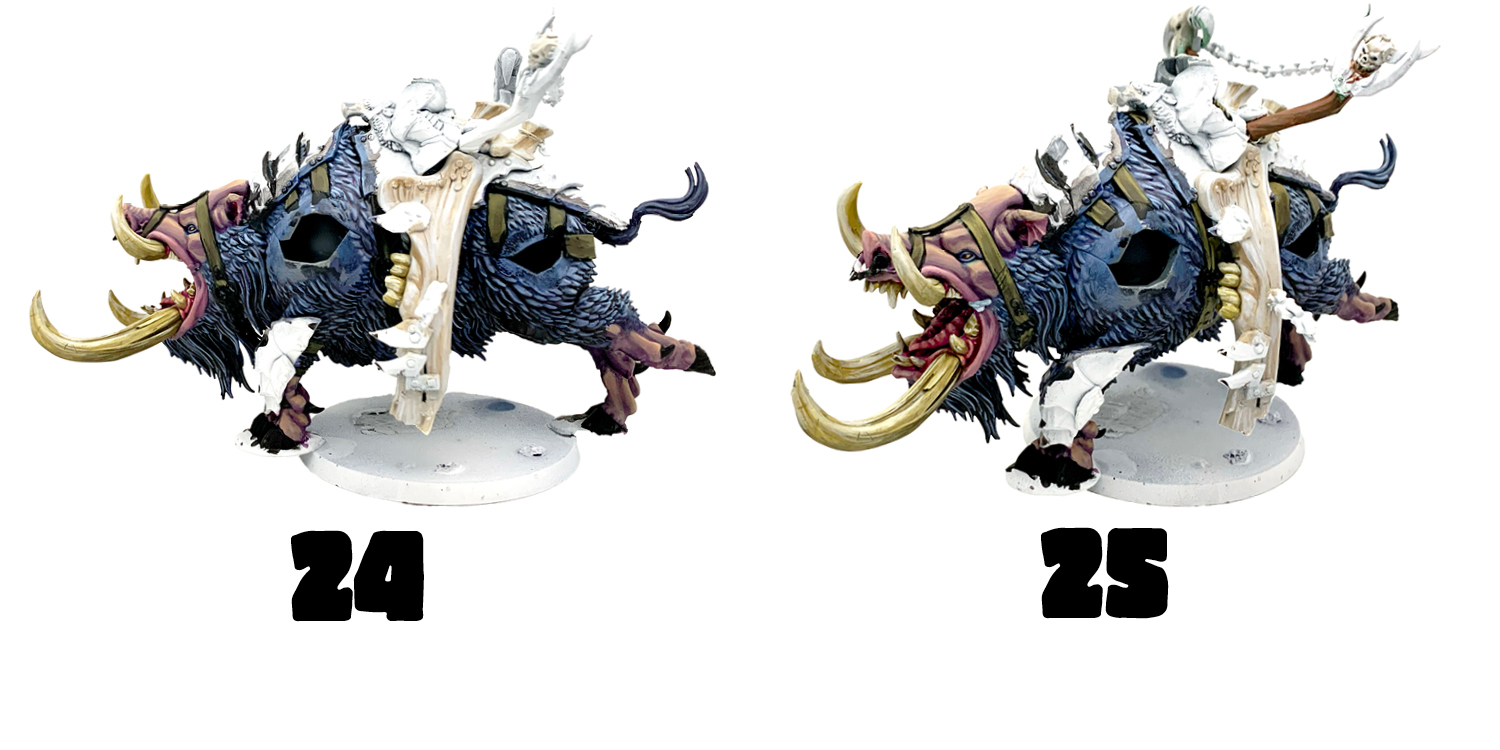
25) The highlights on the straps were built up more by adding some AK Middle Stone. Then the wooden posts on the back were painted with AK Dark Rust. Then some AK Salmon is mixed in with the Dark Rust for some highlights on the wooden texture.
26) AK Basic Flesh has been used here as a highlight for the wood grain. And at this point we’re also on to the same armor and weapon steps from our rider’s red armor, but you can follow along here too. First of course is the Deep Red base coat.
27) Now the rough highlights of salmon have begun, and the Wine Red/ Dark Sea Blue shading.

28) And now the red highlights and shading are being blended into the surrounding red more smoothly with more blending.
29) Here the final few stark highlights of AK Basic Flesh have gone onto the red.
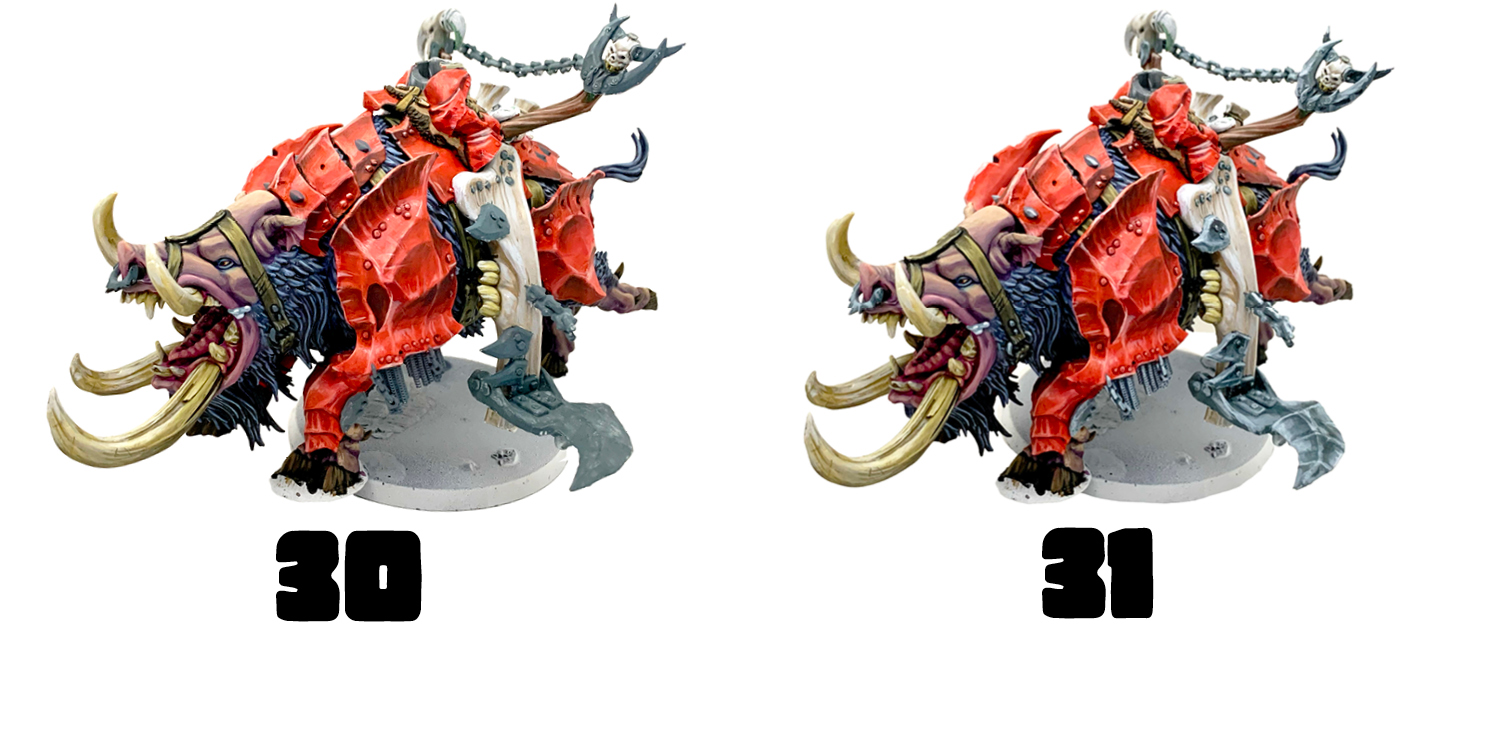
30) Now the Blood Angels Red contrast has been added making that red extra bright. Additionally the Dark Sea Blue/Black/Snow Blue basecoat for the metal has been added.
31) The highlights and shading of the metal begins.
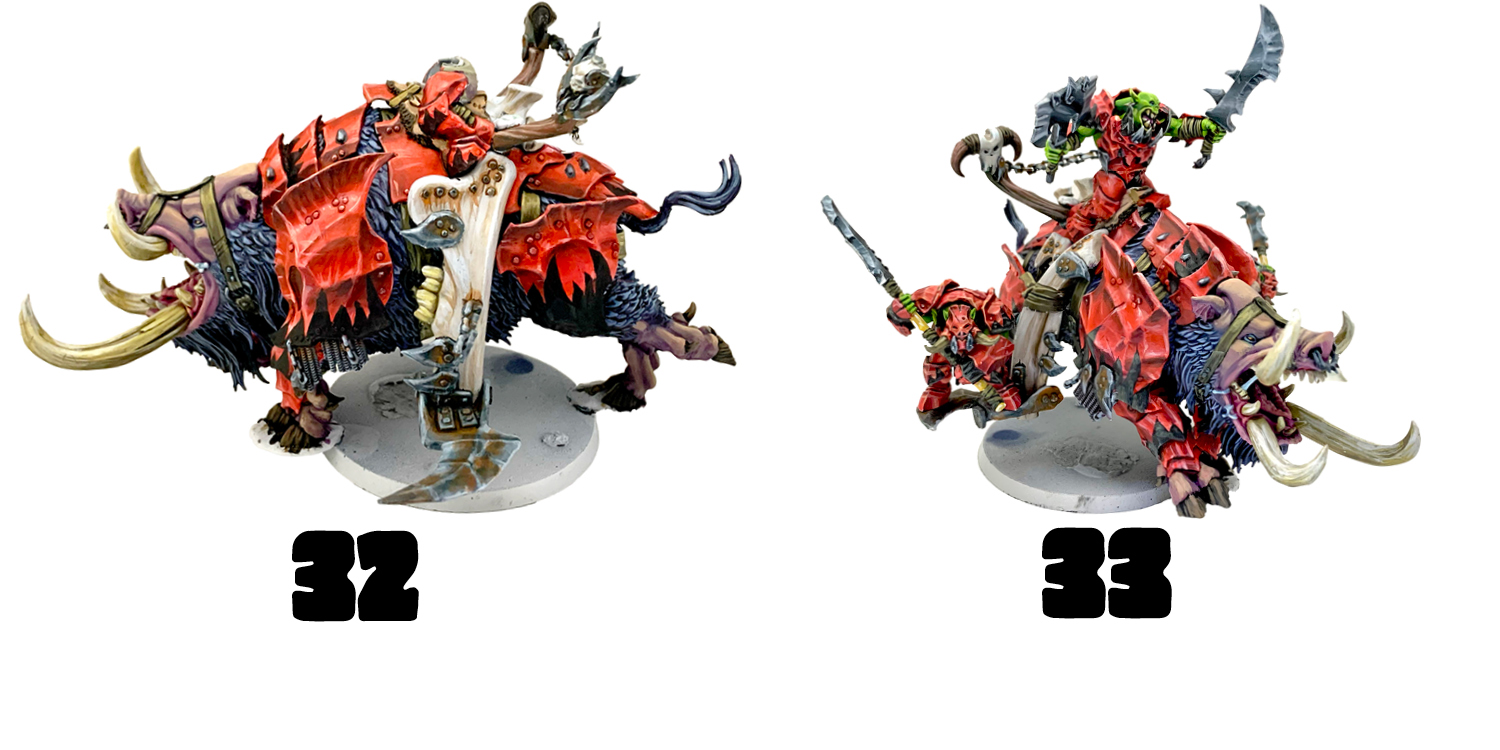
32) A few final AK Off White highlights are added to the metal, followed by some thin splotches of Dark Rust with light stipples of Light Rust. Streaks of Dark Rust are also added trailing down from the rivets on the big bone. I began the black freehand here as well.
33) After the highlights to the black freehand were complete, I glued on the crew. Now it was just down to basing.
I’m trying to keep it a little simpler with this guy so I’m not bothering with a basing kit. Just some GW Technical Agrellan Earth with some grass tufts. I went with a desaturated purple color drybrushed with a tan. And I couldn’t resist adding some pools of gross black water with UV Resin.
~Hope you enjoyed the article! You can follow me on Instagram if you like pics like these. I go by @t00mini. Thanks for looking!