TUTORIAL: Death Guard in 7 Easy Steps


Hi everybody!
I’ve recieved a lot of requests for information on how I painted my Death Guard Army so here is how you do it.
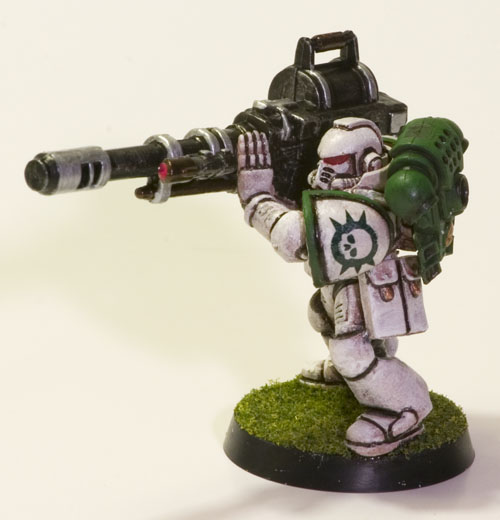
First of all, you cant get a decent result if you don’t have a goal. That goal for me was the image of a “Pre-Heresy Death Guard” from the Index Astartes article in White Dwarf. The overall uniform color is a dirty white with obvious field wear, and medium to dark green trim. The look you are trying to achieve is a slightly “roughed up” feel, so drybrushing will be appropriate, but you should layer on lots of very tight detail work on top of it, to make the final product still have a crisp clean look. The goal is to make the rough white seem “intentionally sloppy” not give the impression that you are a bad painter.
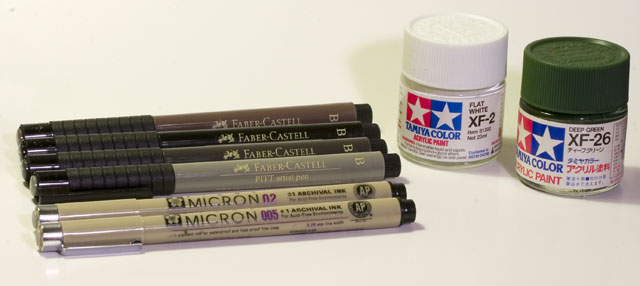
I use standard GW paint, with a small amount of “secret ingredients”. Here they are. I use Tamiya color for my base coats of white and green. This is because Tamiya paint gives decent opacity coverage, and more importantly dries to a very thin finish that does not easily obscure detail. My technique uses several drybrush layers so having very thin coats of paint is important.
Secondly I use technical pens. In partucular, the Micron .005 black liner is used for all the black lining, with limited use of the FaberCastell brush pens to get into tight irregular areas the metal tips of the Micron’s can’t reach. These things are a godsend, are cheap, and should be in every painter’s toolbox.
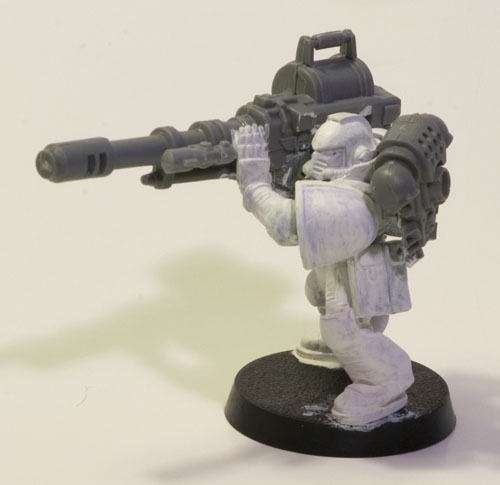
OK, we are off. For this tutorial we are painting a Mk.IV Maximus Devastator marine wielding an autocannon. First things first. Paint on 2 coats of white over the entire marine. Pretty straight-forward. Let this dry before proceeding (at least 1 hour).
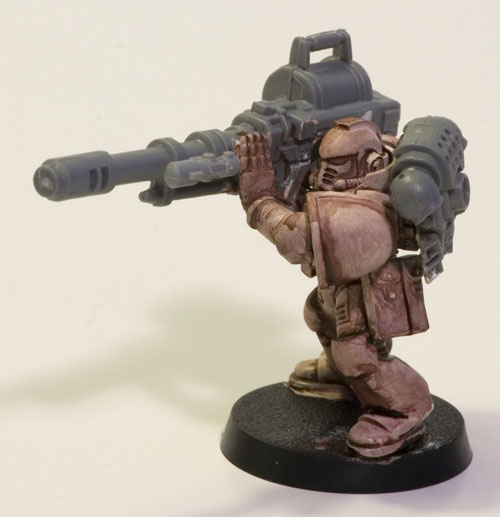
Now, we apply “the sludge”. This is a wash composed of the following proportions:
- Flesh Wash Ink: 6 drops
- Black Ink: 1 drop
- Dark Brown Paint: 1 drop (for “texture” to help the mix stick to the paint surface)
- Water: 12 drops
Mix up an lot of the stuff in an empty paint pot if you plan on making an army. You will need lots. Apply this liberally to the entire white surface ofthe mini. Putting on to much is better than too little. Make sure you get into the crevasses you will not be able to easily reach with a brush later. Let this dry COMPLETELY (overnight).

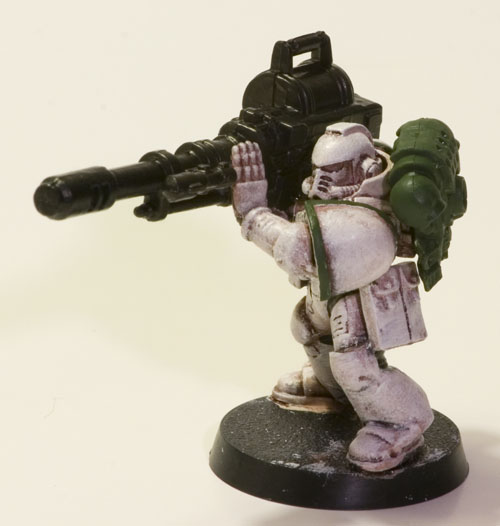
OK, your brown wash is now completely dry. Go ahead and drybrush a light coat of your initial white paint back over the entire mini. Be gentle and dont overdo it. No matter how long you waited, as you drybrush the white on, it will begin to mix with the “dry” brown wash and give you a dirty white 1st coat of drybrushing. It will not be pure white. That is exactly what you are looking for. Let it dry before proceeding (30 minutes+)
As a side note, I know what you are thinking at this point. “Bigred, you jerk, I went through all this trouble and my mini looks like a sloppy disaster.” You are correct, but don’t give up. This is the phase at which your mini will look its worst. It will only get tighter and better looking from here on out. You have already finished the hard part!
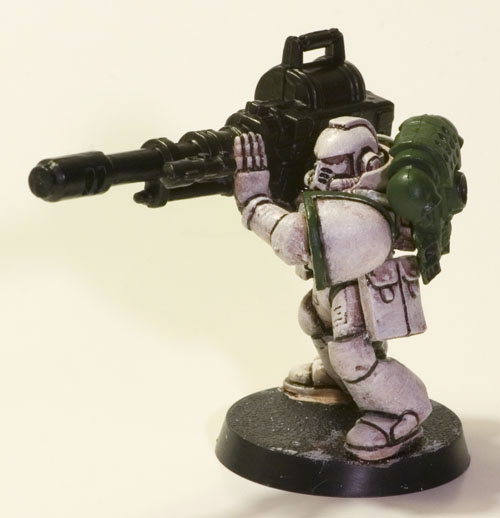
Now go ahead and put on 2 more quick layers of white drybrushing. Each should be gentler than the previous one, and give you a lighter more pure white result. You should now have nice pure white on the topmost areas of your mini.
Once complete, go on and carefully paint in block-color basecoat green on the backpack and raised shouldpad trim. This may need a minor retouching up with a second coat of green in some areas. Black goes on any weapons and the rubber joints on the backsides of the knees, groin joints, and inner elbow and wrist areas.
Here is the Secret Ingredient! Grab that Micron .005 black liner and carefully paint in the cracks defining all the armour plates on the mini. This includes any high relief or inset detail, such as helmet vents and protuberances, panel lines along equipment pouches, the backpack, you name it. If you hit areas that are very recessed or curved and the metal tip of the Micron pen will not reach, use the light or medium grey Faber Castell brush tip precision pens to get in there. Its better to use a series of the lighter grey strokes to build up to the level of darkness you want instead of going too dark and regretting it.
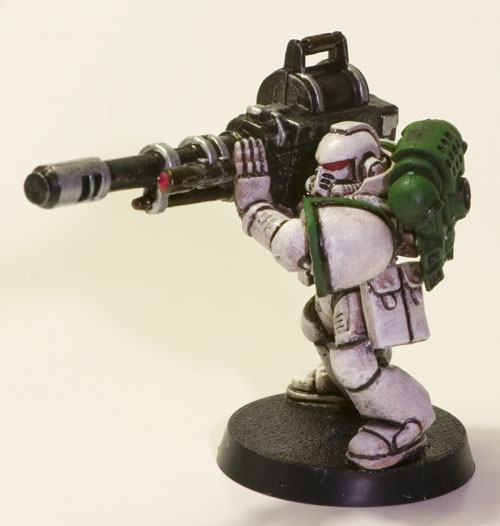
Now is the time to go in and add all the smaller details in other colors to the mini. You should hit the Eyes and Purity Seals now with Blood Red. I detail the black areas with a light Chainmail Drybrush and finish the weapons with limited crisply defined areas of Tinbits, Mithril Silver, and Shining Bronze. Drybrush the green areas with a lighter green as you see fit, and crisply paint on limited areas of the lighter green on “high” areas of the green shoulderpad trim.
Finally, this is the time to go in with white one last time and tidy up any stray spots that still look “too sloppy” from the previous drybrushing layers. You will know them when you see them.
You are pretty much done. Go ahead and cut out your custom Death Guard Decals that you have printed out, and apply them to both shoulderpads (Logo on the left, Roman Numeral or whatever you want on the right). I highly recommend the use of Micro-Sol for this process.
Finally, finish the base per your liking, let your masterpiece dry, and protect it with a Matte Varnish spray. Its off to battle for your finished Legionairre!
I hope you all enjoyed the tutorial, and have a lessoned fear of working on a white army. They are among the rarest color of army seen on the tabletop, but there is really no reason for them to be. Have fun and good luck. Let me know if you have any questions.
