WHFB: Painting Red in Black and White

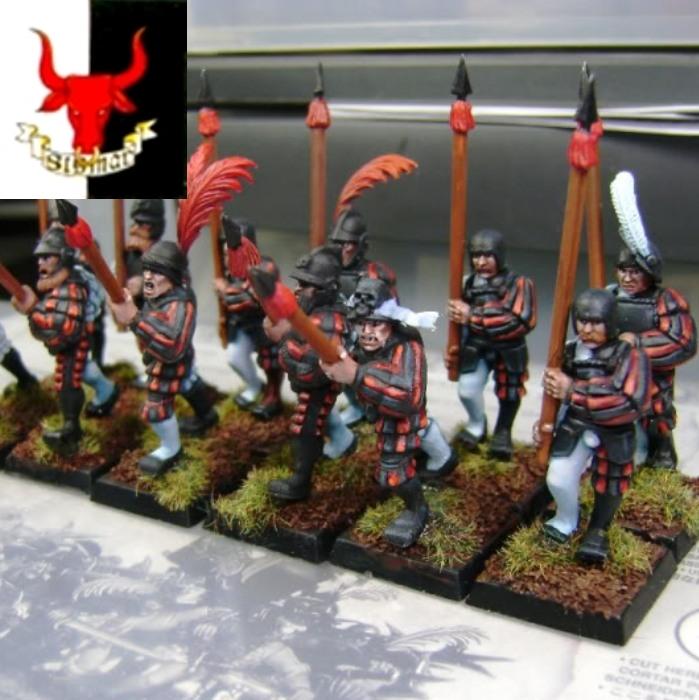
Howdy. Today I would like to discuss how to use Red in black and white, or I should say “On” black and white.
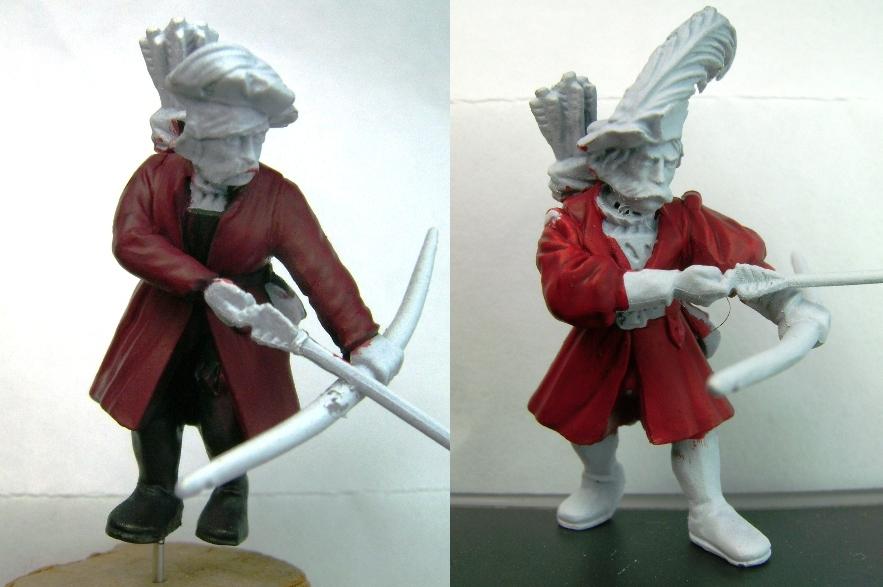
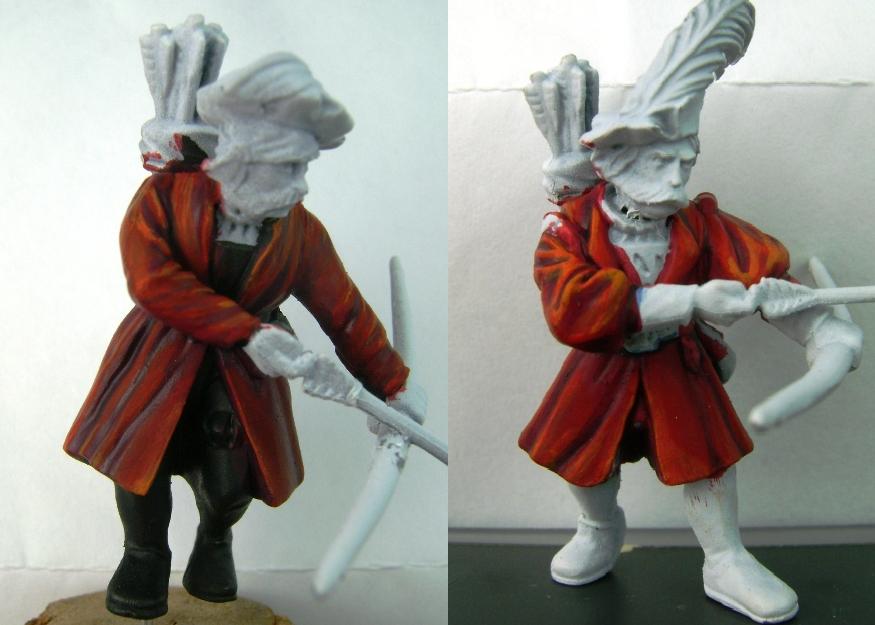
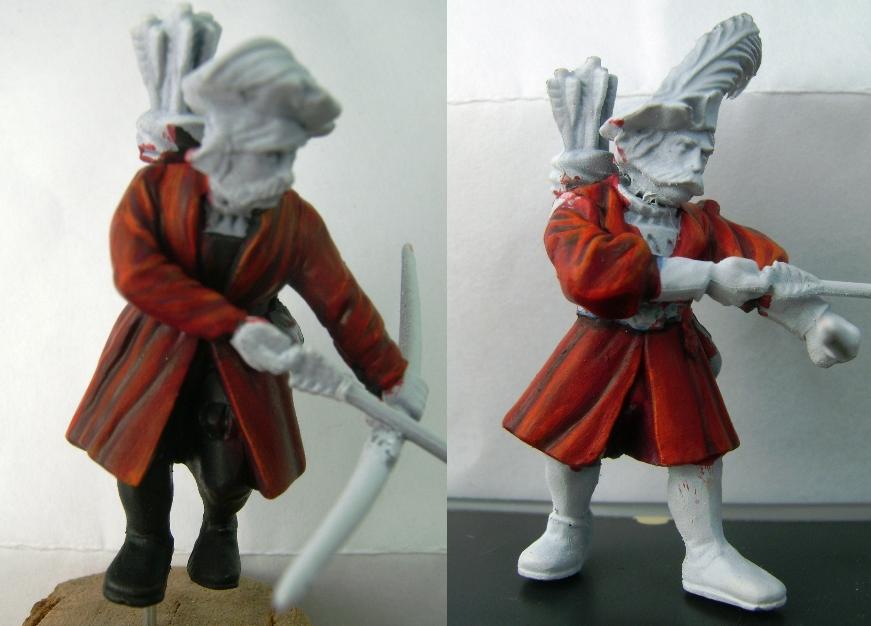
I have worked up 2 models to show the differences between white and black under coat. The undercoat has a significant impact on how the model will ultimately appear. Red is a color that is dramatically affected by the undercoat color. What I mean by this is the red will look brighter or darker based on the primer color or undercoat that it is painted on top of.
Let’s begin by priming 2 models in black and white. When you prime in black, the colors you apply on top of the black will be much darker. Alternatively, when applying paint on top of white primer, the colors will be much brighter. Now while this may seem blatantly obvious, I regularly am asked how to make colors such as red and yellow brighter or darker.
I prefer a black primer for metallic models or a darker models. I use white primer most often because I want a brighter more vivid model. Red is a color that is drastically affected by it’s undercoat and so I feel it is important to explain how the undercoat will impact the end result. On my images, the archer’s coat on the left side was undercoated in black and the archer on the right side was undercoated in white.
One other thing, because we will be applying multiple layers of paint, it is always a good idea to thin your paints. I usually thin my paint 40% water to 60% paint. I use an old Testors brand brush to put several drops of paint onto my palette and then the same brush to put a few drops of water and then mix. I also premix my water. For this I use an old coffee cup and use plain tap water and add 1 drop of dish soap. This breaks up the surface tension of the water and helps with the flow of the paint when it is mixed with water.
Step 1. Apply GW Red Gore to both models. You will need to add several thin layers to get an even coverage all over the model. While it may be tempting to use one thick coat, this really is not the best way. The paint comes out thick looking (like it was painted with toothpaste) and just looks sloppy. Several thin coats will look much cleaner and neater. For my example models, each required 3 coats for even coverage.
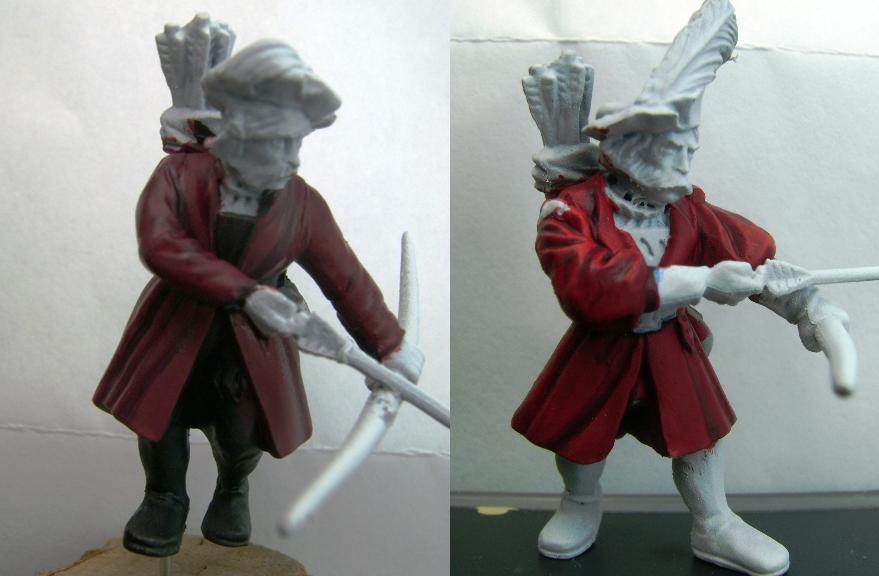
Step 2. I take GW Asurmen Blue wash and paint it in the recesses. Yes, blue. Let me be more specific here. I did not slap the wash all over the model. Carefully apply the wash to the areas of the model that are to be shaded, around the belt, the folds of the clothing and around the weapons and equipment they are carrying. The blue is a cool color compared to the warm red and it is a natural shade that contrasts very well with the red. One application of blue wash is all I used and the difference becomes very apparent once it has dried. If you don’t have GW Asurmen wash, you can use any dark blue color thinned that is significantly thinned(1 part paint to 7 parts water).
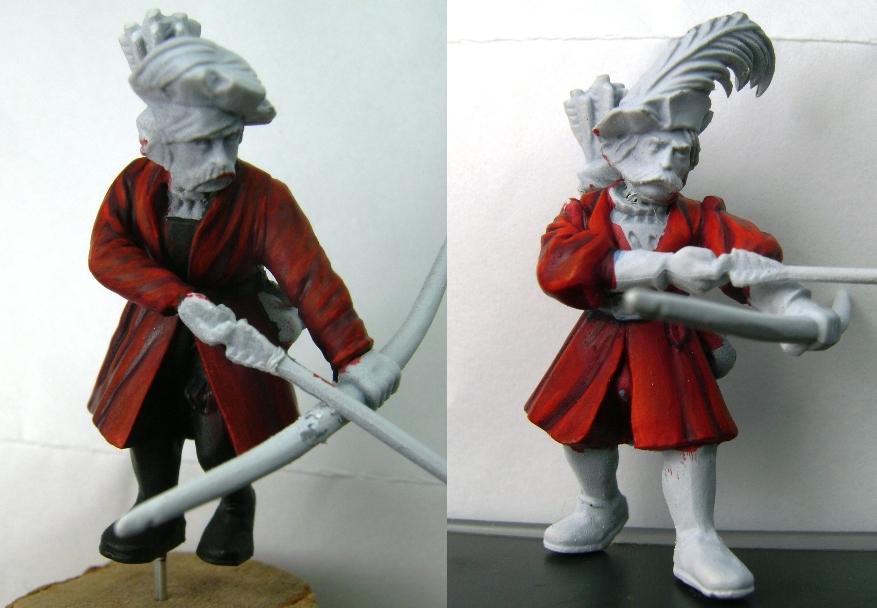
Step 3. Use GW Blood Angels Red and begin to highlight the raised areas of the cloth. I kept a little Red Gore around in case the Blood Angels Red was too stark so I could tone it down by mixing the 2 paints together on the model.
It’s a relatively simple process to wet mix paints, while the paint is still wet on the model, I dip my brush in the darker color and then apply on top of the wet paint on the model and mix it as I see fit. It only takes a tiny little bit of paint to get a good mix, so be careful not to use too much or it will make a big mess.
Step 4. Mix equal amounts of Blood Angels Red and Sunburst Yellow and then apply to the highest areas for the final highlight. A small amount is needed. At this point the highlight may look very stark and not right, but stick with me here.
Step 5. If you still have it, mix GW Red Ink with water in equal amounts and glaze all the red with this. A glaze is a thin paint application that will subtly tint the color it is covering.
If you do not have GW Red Ink, the P3 Red Ink is a very good substitute. Alternatively, a glaze of red gore and blood angel red in equal amounts will work. For a paint glaze, the ratio with water will be much different compared to normal thinning of paint. To make a glaze, you will use 1 part or drop of paint to 9-10 parts or drops of water. The test is applying a drop of paint to a newspaper and you should be able to clearly read or see what is under the painted area. The color of the newspaper should be slightly changed to the glaze color.
The glaze, either with thinned ink, or thinned paint will blend the colors together and remove some of the extreme contrast so the red looks more uniform. You can apply multiple glazes until you achieve the result you are looking for. I used ink, so my glaze was complete with one application. It may take 3 or more with a paint glaze. The key is to be patient and let the glaze dry completely before you apply the glaze again. You can always add more glazing if you prefer, but you can’t take it off.
A final word of warning: DO NOT USE THE CURRENT GW WASHES AS A GLAZE! The current red wash is more of a purple color and will utterly destroy all the effort you just put into your model.
What painting or modeling subjects do you find a challenge to work with. Drop me a line and I’ll be glad to offer my thoughts!
