EPIC: Gods of War – Titans and War Engines

A guest article by Global Epic-Evangelist: GR00V3R
For me, the most compelling artworks describing war in the 41st Millennium are those that show great armies tearing each other apart over a nameless battlefield. Frequently, these works feature massive Titans that tower high above the forces battling on the ground. These gigantic machines unleash raging torrents of destruction with each shot fired and are worshipped as gods of war.
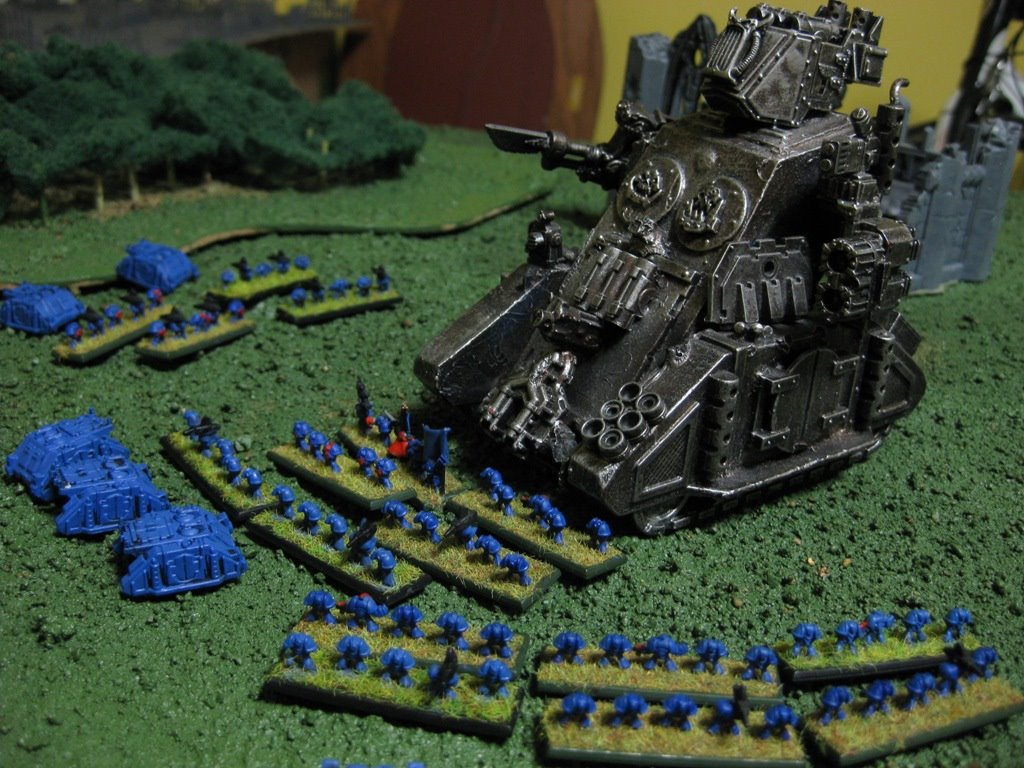
In Epic:Armageddon, Titans rule the field of battle and are rightly feared by the enemy.
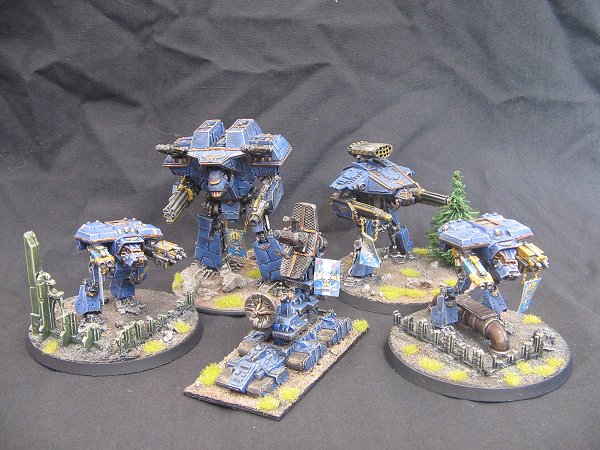
Several Titans of Legio Victorum
The War Engine Class
In addition to Epic:Armageddon’s unit classes of Infantry, Light Vehicles and Armoured Vehicles, the rules also allow for a fourth, much larger class called War Engines. Titans are the largest and most terrifying war engines available in Epic:Armageddon, but smaller units like super-heavy tanks (such as the Baneblade or Shadowsword) and certain flyers (such as the Thunderhawk and Helltalon) are also considered war engines.
War engines operate slightly differently to the other unit classes, and for this reason the rules describing war engines are covered in a separate chapter dedicated to playing with them.
Damage Capacity
Thanks to their large size and considerable armour (be it the reinforced plasteel of a Warlord or the super-toughened skin or carapace of a Tyranid Bio-titan), war engines are more difficult to destroy than are units of the other classes. In the Epic rules, this is catered for by war engines having Damage Capacity (DC). A Warhound titan has a DC of 2, and it therefore takes 2 hits to destroy it. A Warlord has a DC of 8, and so takes 8 hits. A war engine’s DC rating is also used in other areas of the game, such as for determining how many dice it rolls during assaults and how easy it is to break.
Playing With War Engines
War engines follow the normal rules for movement or flying, and they shoot in much the same way–all weapons target a single enemy formation. Where they begin to differ is in their treatment of formations, zones of control and transported troops.
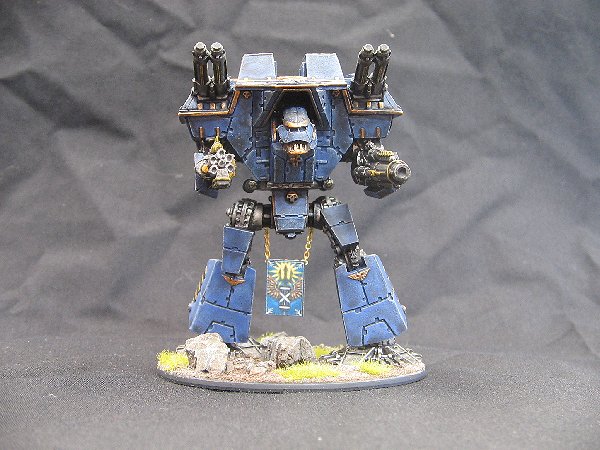
A Warlord Titan strides the field of battle
War engines often operate as individual units (that is, a formation of one). As a formation (even of one unit), all the standard rules governing formations apply. If the formation consists of several war engines, the coherency distance each must maintain is equal to their starting DC multiplied by 5cm. So a Baneblade, which has a starting DC of 3, must remain within 15cm of another unit in its formation. Similarly, war engines’ zones of control is lost only when they have been charged by a number of units equal to their starting DC.
Unlike other classes, troop-carrier war engines can transport troops from another formation, even multiple formations, so long as the entire formation can embark as part of the same movement. This rule allows the Thunderhawks, for example, to transport two formations of Devastators or Assault marines (or one of each) and rapidly deliver their firepower just about anywhere on the battlefield–the ability to perform this kind of attack is what makes Marines a deadly opponent.
When it comes to destroying or breaking a war engine, you’re in for a rude shock: they’re ubertough. Most have reinforced armour, and some have void shields or some equivalent that you need to knock down before you can even begin to damage the war engine itself. In addition, many war engines enjoy the Fearless special rule, which means they are immune to extra damage from taking blast markers while broken or losing an assault.
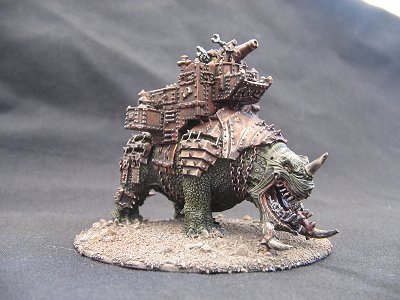
An Ork Gargantuan Squiggoth
Playing against a war engine, though, two things are in your favour: weapons designated as being Titan Killers, and critical hits.
Titan Killers
Some units are armed with Titan Killer weapons. Many of these can destroy a war engine with a single shot. Units hit by a Titan Killer weapon cannot take a cover or armour save–not even if they have reinforced armour–although void shields or power fields still absorb a hit each, and a single holofield save can be taken against the Titan Killer shot (in this case, the Eldar player gets one attempt only to save against the Titan Killer’s hits–it’s save all or save nothing).
Critical Hits
Thanks to critical hits, even the lowliest unit can waylay or even destroy a war engine…if they’re lucky enough. Each time a war engine takes a hit (fails to save and so on), the player who owns it must roll D6. On a 6, the war engine loses that point of DC as normal, but also suffers a critical hit. The effects of a critical hit are described in the war engine’s datasheet, and are specific to the type of war engine. For example, Imperial Titans are prone to explode due to unstable plasma reactors, while Ork Gargants have a tendency to catch fire. Critical hits stack up, too, so it is possible to suffer more than one critical hit effect at once (assuming the first one didn’t cause your war engine to blow up, of course).
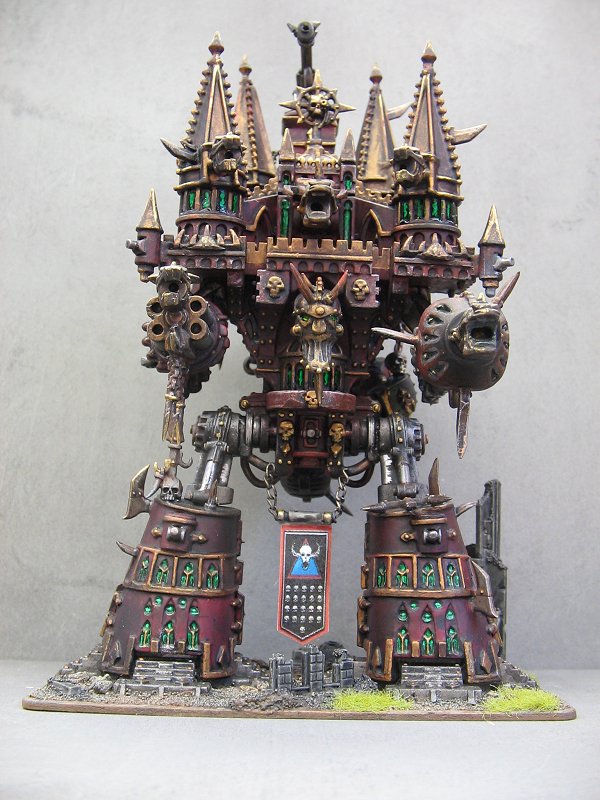
A Chaos Imperator Titan conversion
War Engines and Assaults
Some war engines, like most Titans and particularly Bio-titans, are devastating in an assault. When rolling to hit in an assault, a war engine rolls a number of dice equal to its starting DC. So a Warlord, all on its lonesome, rolls 8 dice in an assault (and it needs just 2 or better in close combat or 3 or better in a firefight–totally hardcore).
Example of a War Engine Assault
To finish up, let’s play out an example of several Ultramarines formations assaulting a Great Gargant to see what war engines can do.
Infantry assaulting a war engine may seem silly at the outset, but this kind of assault is an abstraction of the troops attempting to penetrate (by any means) the war engine to kill its crew or sabotage and destroy it from the inside.
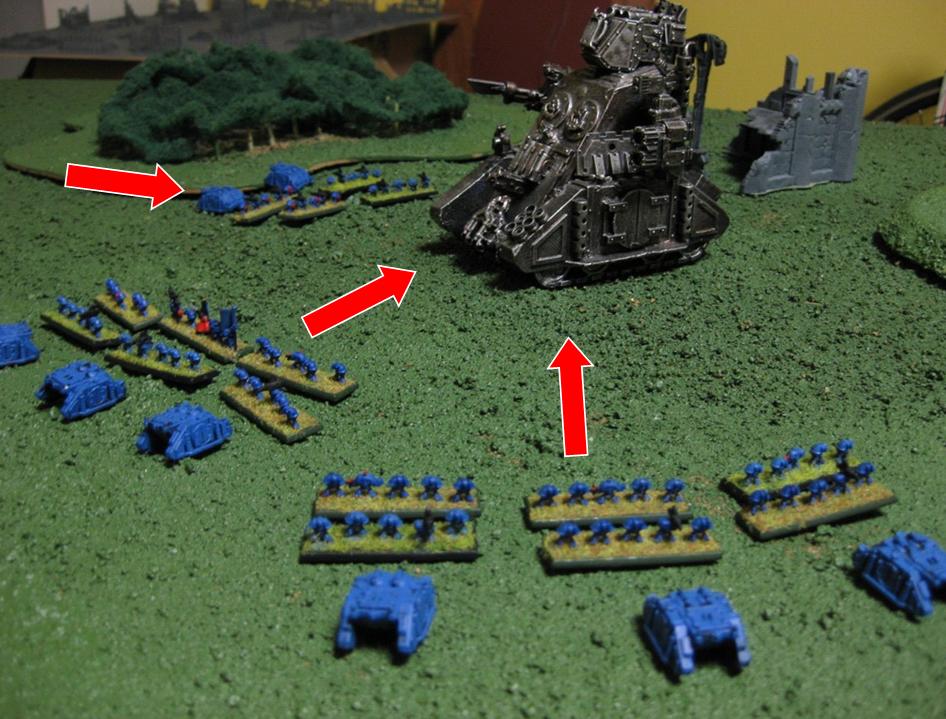
Three Ultramarines formations position themselves around the ugliest Ork Great Gargant you have ever seen.
For this example, in a prior turn, the Ultramarines player has cleverly positioned two Tactical detachments within 5cm of each other so that the first Captain-led Tactical formation could drag the second Chaplain-led Tactical formation along with him when his formation performs an Engage order (this is the Commander special rule, which Captains enjoy). In his prior activation, the marines player also positioned a Devastator detachment within 15cm of the Great Gargant in order for it to provide supporting fire.
The marines launch their combined assault
The marines player has the initiative. He activates the Tactical detachment (six Tactical stands with three Rhinos, led by a Captain) and performs an Engage order.
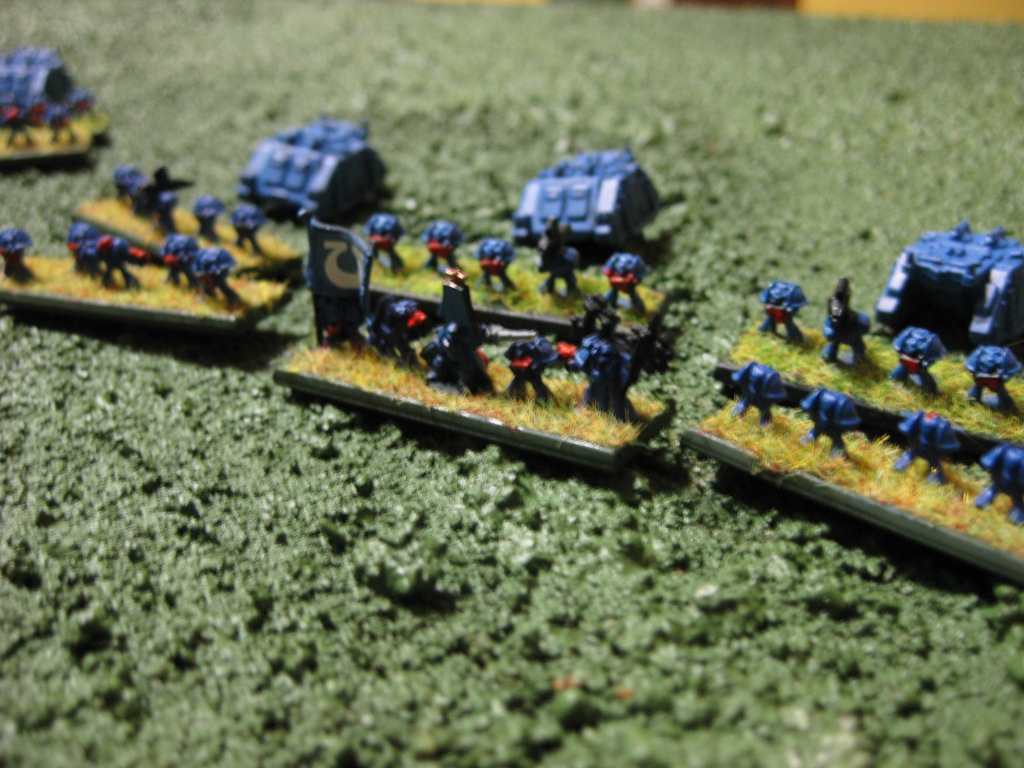
Oh captain, my captain!
With an Initiative rating of 1+, the marines pass their activation test automatically and the player moves his troops up to 15cm toward the Great Gargant. The front three stands, including the Captain character stand, manage to get into base-to-base contact so that the Captain gets an additional macro weapon attack.
As mentioned, the Captain is able to drag the second Tactical detachment along for the Engage action, and the marines player moves that formation now. None of this second formation’s units is able to get into base-to-base contact with the war engine, though, so the Chaplain’s extra macro weapon attack is lost, which is a pity.
Two Tactical formations in a combined assault, with a Devastator formation providing supporting fire from the flank
The marines manage a total of one close combat (bypasses the powerfields) macro weapon hit, one normal close combat hit, and five normal firefight hits. The Ork player removes five of his powerfields for the (four of those left, so not a huge loss), and then attempts to save the close combat hits. He fails the macro weapon save, so the Great Gargant has taken a hit and is now at 11 DC. The marines player makes his critical hit roll, but scores a 5. Close!…but no cigar.
The Ork strikes back
Now it’s the Ork player’s turn. For the Great Gargant, the close combat and firefight values are both 3+, but for war engines the player must allocate before hand which dice will be close combat attacks and which will be firefight attacks. He decides that five will be close combat attacks, so the remaining seven will be firefight attacks.
The Ork player rolls the first five dice needing 3 or better to hit, plus one die for the Lifta-Droppa’s extra macro weapon attack. He scores a total of three normal hits, and the one macro weapon also hits—so that’s one marine who won’t make it home right there unless the marines player decides to attempt an Invulnerable save with his Captain (that needs a 6, so not good odds).
For simplicity, the players decide to resolve the close combat saves now. The marines player opts to take the macro weapon hit on his Captain, and attempts an Invulnerable save. He scores a 2. Doh! Goodbye Captain Wossname. The marines player then rolls for his Tactical marines’ saves and only one is successful, so two more marine stands are destroyed for a total of three marines casualties, which is all of the remaining units in base-to-base contact.
The Ork player now rolls the seven firefight dice and scores four more normal hits. Wounds are allocated from the front of the target formation to the back, so the marines player must allocate the four hits to the closest units—the three remaining Tactical marines stands and one Rhino, all from the first formation.
The marines player rolls three dice for the Tactical marines’ saves and manages to save two of them, so one more marines stand is destroyed. He then rolls for the Rhino, which is also saved by its armour.
Supporting fire
Remember the Devastator detachment the marines player had cleverly manoeuvred into position 15cm from the Great Gargant? Now is their time to shine, and they unleash a barrage of heavy weapons fire upon the Ork war engine. Supporting formations use their firefight value, which for Devastators is 3+, so the marines player now rolls four dice (one for each stand in the formation) needing 3s to hit. He scores three hits. These are taken upon the Gargant’s powerfields, whittling them down further, but doing no actual damage.
Resolving the assault
In the assault resolution, the Ork player wins by one, so the two Tactical marines formations are broken and must withdraw while the Great Gargant takes a single blast marker for losing 1DC. Also, the assault resolution score difference of one translates to one additional blast marker on the already-broken marines. For other armies, this would mean an additional casualty, but for marines with the They Shall Know No Fear special rule, this number is halved (and rounded down if appropriate), so no additional casualties are suffered.
So, at the end of the assault, the Gargant has lost four powerfields and a single DC, while the marines player’s Tactical formations are broken and forced out of position, and a Devastator detachment that is now just begging to be assaulted by the Great Gargant. It could easily have gone the marines’ way and resulted in the Great Gargant being broken, which would have potentially been a game-winning watershed for the marines, but this we can chalk up as a win for the Orks.
Packing Up
As you can see from the above example (which, by the way, pitted 1,000 points of Ultramarines against 850 point worth of Great Gargant), war engines can be deadly.
Remember, though, that Epic is a game about combined-arms manoeuvring: no single unit is a game-winning item all on its own, an the example above could have ended with catastrophe for the Ork player. Not even the dreaded Imperator Titan or Mega Gargant is unstoppable if you employ the right strategy and tactics to counter it. The only sight more memorable than your largest and most expensive Titan laying waste to your enemy’s forces is that of your largest and most expensive Titan turned into a burning slag-heap by a savvy opponent.
Special thanks to Onyx for providing the images of his awesome war engines and terrain. Special thanks also to many of the users on TacComs for their invaluable feedback regarding the example assault.
~Bigred here, GR00V3R strikes again. If you like the epic coverage and want more lets hear it. As GR00V3R moves through the game, I’m sure he would love to hear what things you are interested in so he can start brewing up some articles for you guys.


