HOBBY: Goatboy Loves To Draw

I do all of my artwork digitally as of late. I just don’t have the space to really draw by hand as much anymore. Plus digital inking allows me a lot more freedom to change things up on the fly, when normal inking would make me pull out the white out. I use photoshop to do everything currently and draw on an Intuos 4 from Wacom.
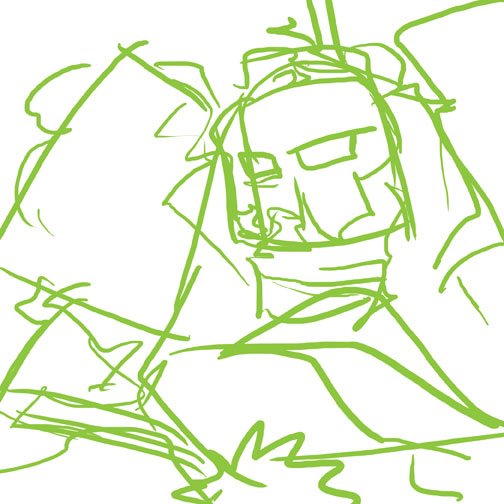
First I start out with a sketch. I usually start with a green sketch that just lets me build out the shape and find where I want the figure to go.
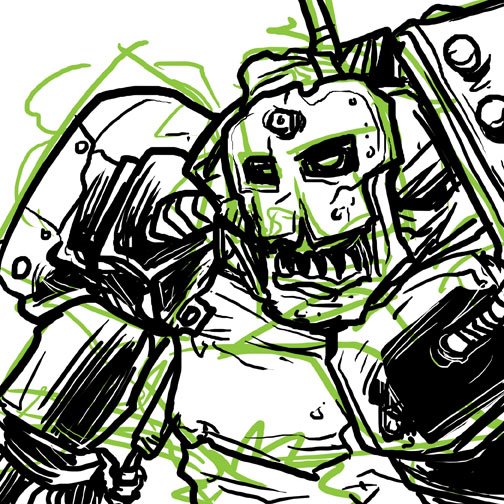
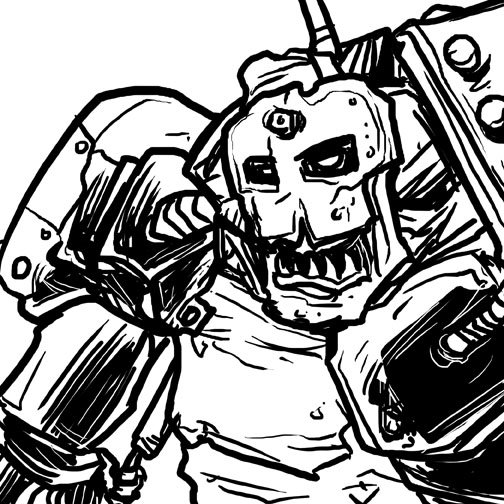
Next I go ahead and ink on top with a black paint chosen. My brush is set to 100% and I use a larger round brush to give me some variation possibilities in the inking. Here it is with the green lines and without it.
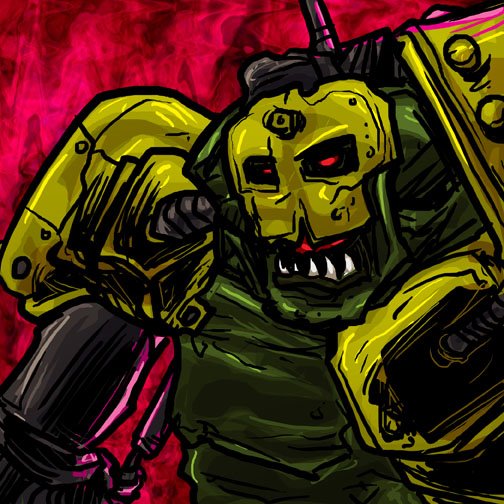
After that I put in the flat colors. I like to flat out my entire sketch first, to ensure I have colors that sorta fit together. This way your image will look more cohesive instead of a color by numbers look. In a lot of ways, this is how I do my physical painting, trying to flat out the entire model first, to ensure I have a nice overall color theme. I also threw in a background that is different from the front image. It helps make the image stand out and not look like it lays flat.
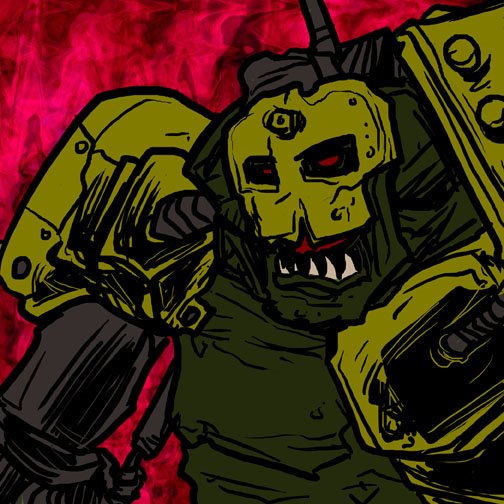
Now I go into the fun part. I like to use the lasso tool in photoshop to create shadow and highlight shapes. From there I select the gradient tool to create shading and highlight effects with the screen and multiple options in photoshop. Screen lights and multiple darkens based on the colors you choose. I then go back and start to find some of the colors chosen and do hard highlights and shadows were needed. You can see here where I start to add a crazy highlight color on the bottom that matches the background. This helps make the figure part of the background, instead of just seeming to be not lit by whatever is behind it. Everything gives off color, due to how it reflects and absorbs light.
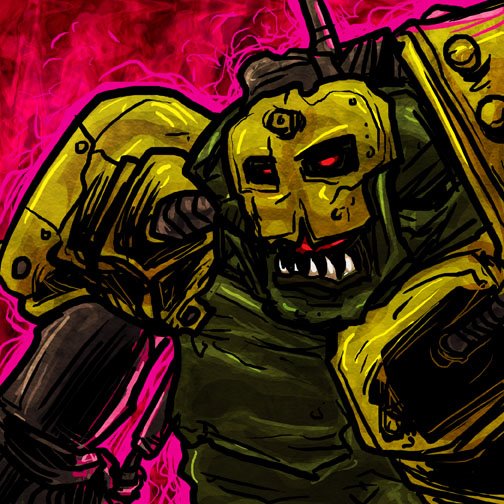
Finally I go into the finishing stages. I like to take textures I have found online or scanned myself to create more effects within the picture. I set the texture on top and mess with the layer settings. Each setting will effect how the top layer effects all the other layers below it. You can darken the image and lighten it, all based on the initial layer you use. I decided to use this paper bag scan I found online and layer it above the model. After that, I go behind all the colors and put a pinkish highlight around the figure to help break it apart a bit and not look so attached to the background.
Hope you enjoyed this little break into my design process and art process. If you have any questions, again shoot me an email.


