EPIC: Black Legion vs Blood Ravens (Pt.1)
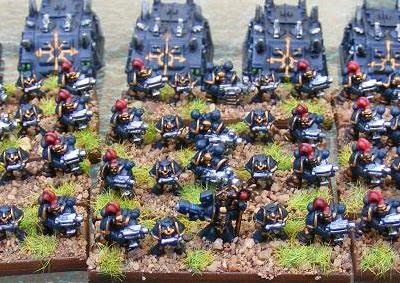
Where Epic:Armageddon really shines is The Big Game. Today, I thought I’d share with you another great battle that highlights how well Epic works at these larger scales.
This post describes a fantastic battle waged between the mighty Blood Ravens (played by Aaron) and the Black Legion (played by Drew). Special thanks to Aaron and Drew for the original write-up upon which this post is based.
Note: Due to its scale, I have had to break the report into two posts, so keep your eyes peeled for the conclusion later in the week.
Forces involved
Space Marines: Blood Ravens Strike Force
Tactical Detachment – TD
+ Librarian
+ 2 x Dreadnaughts (LC)
+ Hunter
Devastator Detachment – DD 1
+ Librarian
+ 2 x Dreadnaughts (LC)
+ Hunter
Whirlwind Detachment – WW 1
+ Hunter
Whirlwind Detachment – WW 2
+ Hunter
Landing Craft – LC 1
Terminator Detachment – TD 1 + Supreme Commander
+ 2 x Dreadnaughts (AC)
Land Raider Detachment – LRD
Landing Craft – LC 2
Terminator Detachment – TD 2
+ Chaplain
+ 2 x Dreadnaughts (AC)
Predator Detachment – PD
4 x Annihilators
+ 2 x Vindicators
Thunderhawk Gunship – TH
Devastator Detachment – DD 2
+ Librarian
Assault Detachment – AD
+ Chaplain
Warhound Detachment – WH 1
1 x Lucius Standard
1 x Lucius Inf Config
Warhound Detachment – WH 2
1 x Lucius Standard
1 x Lucius Inf Config
Reaver Titan – RT
FW Model – Volcano Cannon
– Gatling Blaster
– Missile launcher
Thunderbolt Fighters – TB 1
Thunderbolt Fighters – TB 2
This force was designed around a number of techniques Aaron wanted to employ in the game. Firstly, it has a holding force that would be garrisoned inside his table half to hold the two Chaos objectives. These forces consisted of TD, DD 1, WW 1 and WW 2. Secondly, he allocated some fast-moving, heavy-hitting support for the garrison forces. Their aim was to move quickly from point to point in support of the garrisons, and also provide a means of defending his Blitz objective. These forces consisted of the Titan compliment with WH 1, WH 2 and RT. Thirdly, Aaron needed a hard-striking force with plenty of firepower to take his objectives in the enemy half of the table. To this end, he used the following forces: LC 1, TD 1, LR as Strike Team One. Strike Team Two consisted of LC 2, TD 2 and PD. Strike Team Three consisted of TH, DD 2 and AD. Their aim was to take the two Take And Hold objectives with the LC groups, and then for the TH to take the enemy Blitz, supported by the armour from one of the two proceeding strike teams.
Chaos: Black Legion
Slaanesh Retinue – 8CSM – RET A
4 Havocs
4 Noise Marines
8 Rhino’s
Warlord
Slaanesh Retinue – 8CSM – RET B
4 Havocs
4 Noise Marines
8 Rhino’s
Slaanesh Retinue – 8CSM – RET C
4 Havocs
4 Noise Marines
8 Rhino’s
Armoured Co – 8 LRs – CLR A
Armoured Co – 8 LRs – CLR B
Armoured Co – 8 Predators – CP
Bike Retinue – 8 Bikes – CB 1
Bike Retinue – 8 Bikes – CB 2
Banelord
Slaanesh Chosen – 6 Termies – CH 1
Champion
Icon Bearer
2 Obliterators
Demon pact
Nurgle Chosen – 6 Termies – CH 2
Champion
Icon Bearer
2 Obliterators
Demon pact
Hell-Talon Fighter Bombers
Swiftdeath fighters
Demon pool Greater Daemon x2
Drew has only recently started playing with his (oh so lovely-looking) Black Legion. Having played a monster (40,000pts) game as Aaron’s ally a month back, he has played just one other game with his Black Legion. For Drew, this game was about experimenting with the army and finding what combinations work.
Setup: Marines
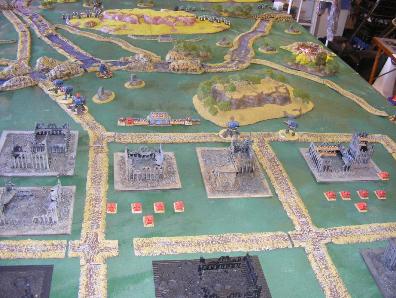
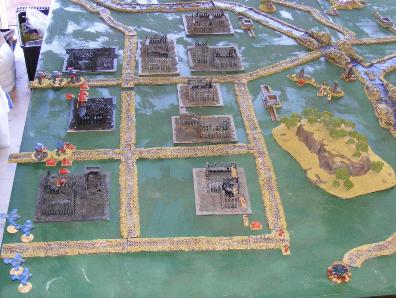
Marines commence the setup, placing Garrison forces within 15cm of the two Chaos objectives. From there, the Whirlwind (WW) detachments are placed creating an interlocking air defence square in the city blocks. Titans take up positions along the roads to make best advantage of the added speed afforded. The remainder of the Marine force is off board and will enter once the majority of the Chaos force has been decisively engaged by the Garrison and Supporting formations. Aaron thinks this will allow him a degree of freedom of manoeuvre once he deploys the strike teams.
Setup: Black Legion
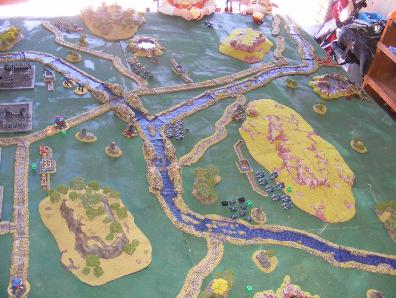
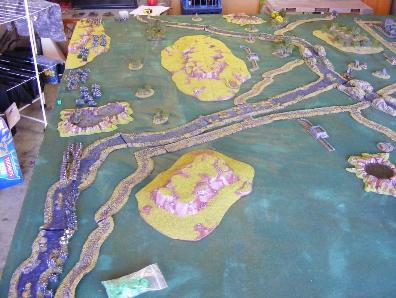
Chaos setup sees the fast-moving Bike detachments setting up on the flanks with (essentially) an armoured and infantry formation set up side-by-side to advance against the Blood Ravens line. The Banelord takes pride of place, centre-field, in order to support either east or west flank advances. Here, Drew is highlighting armour and infantry cooperation, and their “real-time relationship”.
Turn 1: Initiative Black Legion
The game begins. Drew wins the Strategy roll, and so the Black Legion start with the initiative. Aaron having a limited number of units on the battlefield, this is not too much of a problem for him, as he is outnumbered in activations anyway, and happy to see the Chaos army shake out.
It starts with Chaos Land Raider (CLR) 1 doubling forward to secure Marine Objective 2. Aaron utilizes the time available in Turn 1 to reposition Devastator Detachment (DD) 1 back into some cover, in anticipation of repelling Chaos forces in Turn 2 and beyond. CLR 2 doubles forward, east of the central hill, moving towards the ford in the river on the eastern side of the board. This was followed by Aaron’s WW 1 formation advancing forward, closer to DD1 for added security. At this stage, all of the Chaos forces are well outside Aaron’s indirect fire range, so moving the Whirlwinds forward is a sound move.
Chaos replies with the Chaos Bike (CB) 1 formation failing to take their orders (failed activation roll), so they make a single move forward, down the east flank. This can be a challenge for Black Legion commanders facing Loyalist marines–having to roll 2s to take orders over their Loyalist cousins, who make their actions on 1.
Blood Ravens Tactical Detachment (TD) followed next, taking advantage of the close by cover to get better positioning in preparation for Turn 2. CB 2 continues the woes and fails again, making a single move towards the Blood Ravens table edge.
Aaron takes the opportunity now to get some air cover, placing Thunderbolt (TB) 1 onto CAP orders. Drew counters by placing his Swiftdeaths on CAP, just in case.
WW 2 takes the time to move closer to TD, and makes use of some nearby support. Drew’s Chaos Predators (CP) double forward, closing on Marine Objective 1. The Reaver takes advantage of having no one to shoot at it and marches down the road to take up a position covering the river crossing in the centre of the board.
Black Legion Retinue (RET) A marches forward down the western flank and takes up a position in behind the wooded hill, making good use of the cover there. Warhound (WH) 1 marches down the road behind the Reaver, taking up a position in preparation for engaging the Chaos Predators and RET A on the western flank. The Banelord activates and marches towards Marine Objective 2 and takes up a position behind CLR 1.
WH 2 doubles forward and takes up a position to support both the Blood Raven garrison positions. RET B moves to the Chaos Blitz and deploys to secure that location against the likely Marine strikes in subsequent turns.
TB 2 takes note of the mounted Chaos RET A on the west flank decides to conduct a ground attack. They make an unopposed approach, but are pounced upon by the Swiftdeaths on CAP; they take two hits and attempt to “jink” out of the line of fire. The move fails and both aircraft disintegrate in midair, leaving RET A unscathed. The Chaos Hell-Talon (HT) formation takes the opportunity to take up the air coverage and go on CAP, but RET C fails to take orders–and the Chaos Warlord (Supreme Commander re-roll) fails to rouse them from their slumber–so they make a slow move to the south.
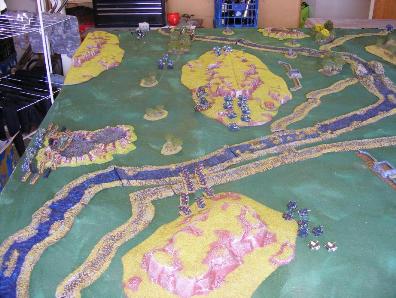
Rally Phase: All aircraft escape the board without incident, and all Chaos formations remove blast markers.
All in all, a fast turn, taking less than an hour to play out. This is common of first turns in Epic; it’s more about manoeuvre than combat.
Turn 2: Initiative – Black Legion
Turn 2 is the business turn of any Epic game. Drew’s dice failed him again and he rolled a stunning 1, thus handing control of the game to the Black Legion.
The turn began with CB 1 taking their orders (for a change, for which Drew was most grateful) and marching down the eastern flank to take position behind a forest. Aaron counter, placing TD on overwatch in preparation for Chaos forces streaming through the gap in the east.
The Swiftdeaths take up a position above the Helltalons on CAP. DD 1 expects the imminent arrival of Chaos forces, and so also goes on overwatch. RET A takes advantage of the open western flank and marches in behind the Marine flank.
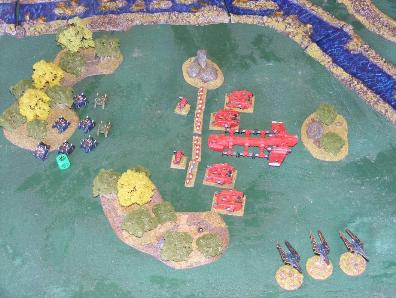
One of the key parts of any good battle plan is making your opponent do something he or she does not want to do. Not wanting to have 30 odd Chaos units running through his flank, Aaron counters with his Landing Craft (LC) 1 strike team. The Landing Craft descends and the Swiftdeaths respond, but fail to alter the Marine plans. The Landing Craft hits the ground and, together with its Land Raiders and Terminators (with Dreadnaughts) payload, unloads upon the mounted Retinue (RET) A. The resulting fire sees seven Rhinos explode, spewing their transported Chaos Marines everywhere. Eight stands fail to save, and the Retinue is broken as a result.
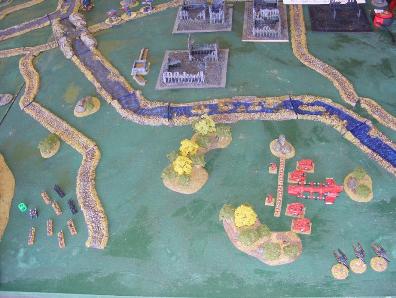
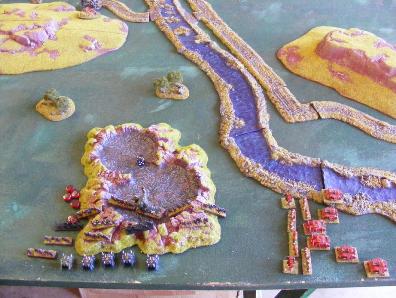
The Chaos Land Raider (CLR) 2 formation advances and takes up a position in the defences overlooking the eastern ford. WW 2 sustains fire on CB 1, killing three stands.
RET C fails to take heed of radio traffic (fails its activation roll); however, the bellowing of the Warlord (Supreme Commander re-roll) inspires them to double forward to the eastern ford to engage the Marine defenders. The Reaver, sensing prey coming into range goes onto overwatch, priming weapons to deal some heavy damage at range.
CB 2 doubles forward and takes up a position in the defences, claiming Marine Objective 1. WH 1, seeing the lightly defended targets, advances and fires on CB 2, killing three. The Chaos Predators advance in support of the Bikes and fires upon the two exposed Warhounds, removing a shield. WH 2 move east down the road, orientating themselves for the on-coming Chaos horde.
CLR 1 doubles forward from Marine Objective 2, but overwatch fire from the Reaver destroys one. The retaliation fire from the Chaos Land Raiders strips three shields from the Reaver.
Aiming to capitalize on the blast markers already on CLR 1, WW 2 sustains fire on the Land Raiders, four hits are achieved, but none penetrate–a single blast marker results. The Banelord doubles forward behind CLR 1 and fires on the Reaver; for all its firepower, however, it manages only to remove a single shield.
Noticing the Swiftdeaths all alone in the air, TB 1 descends from its CAP to intercept. The Helltalons respond, however, and the Thunderbolt pilots are forced for manoeuvre (jink) out of harms way.
RET B on the Blitz objective attempts to go on overwatch, but fails, and so their commander decides to regroup in the current position. The Thunderhawk siezes the CAP-free airspace as a good opportunity to conduct a ground attack, and strafes the enemy Blitz objective–two infantry stands are shredded in the fire.
Seeing the advantage now in the skies above the battlefield, LC 2 ceases the opportunity to strike a mighty blow with its strikeforce payload. Landing west of the enemy Blitz objective, its Predators, and Terminators pour from the Landing Craft and line up to deal death. Three Rhinos explode and another three infantry stands are gunned down.
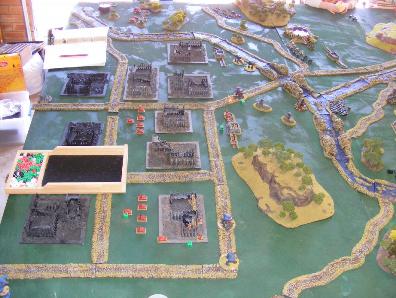
Rally Phase: All aircraft exit the board, no additional fire comes from their movement. Chaos Bike 2 fails to rally along with the Reaver Titan.
This battle report will continue soon with the remaining turns–stay tuned, Epic fans!

