The Dark Gods are many things, but chief among these things they are the are the very essence of Jealousy and Vanity. They demand that their followers not only worship them with unquestioning loyalty, but that they mark all manner of worldly things with their foul marks of their damning allegiance.
Over the past year I’ve been dabbling with the once-human forces of Chaos, in the guise of the Blood Pact, the elite soldiery of the Archenemy that plagues the Sabbat Worlds being liberated by the Imperium in Dan Abnett’s fantastic series of Gaunt’s Ghosts novels. Throughout these novels, Mr. Abnett describes dozens of foul constructs used by the Blood Pact and as I started to bring my vision of the Pact to life (in miniature form), I really became interested in some bold, graphic ways to show how these debased individuals would display their allegiance to the Gods of the Warp. As I painted more and more Chaos Stars on my tanks and trucks, more and more people started asking me how I painted these symbols. What follows is a fairly straightforward tutorial on how I get the look that really pops on my vehicles.
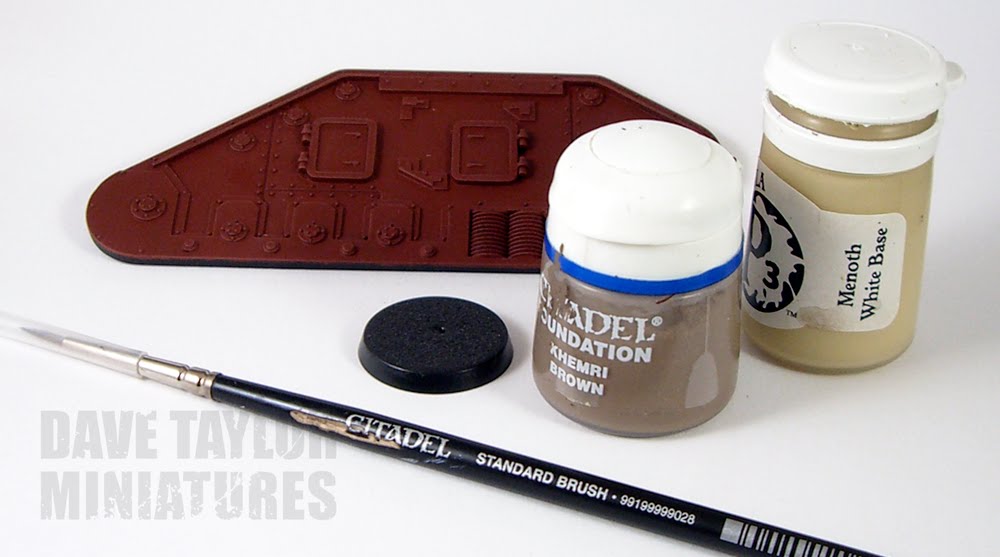
For this tutorial the only things I used were a tank side (painted with Dark Flesh, the base color of my vehicles), a GW Standard Brush, a 25mm round base, a base color (Khemri Brown), and a highlight color (P3 Menoth White Base).
Let’s jump straight into it!
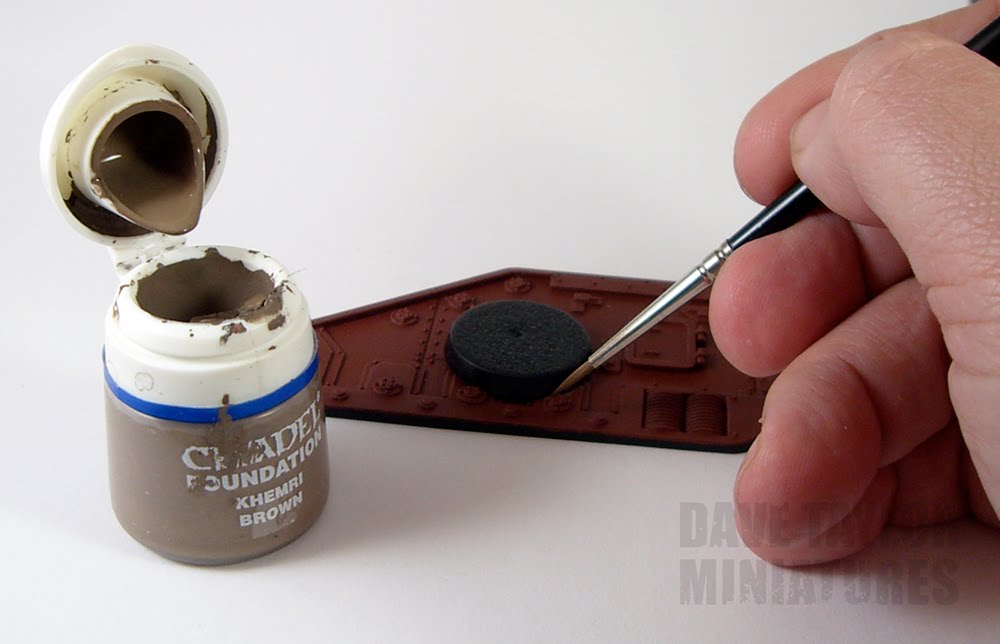
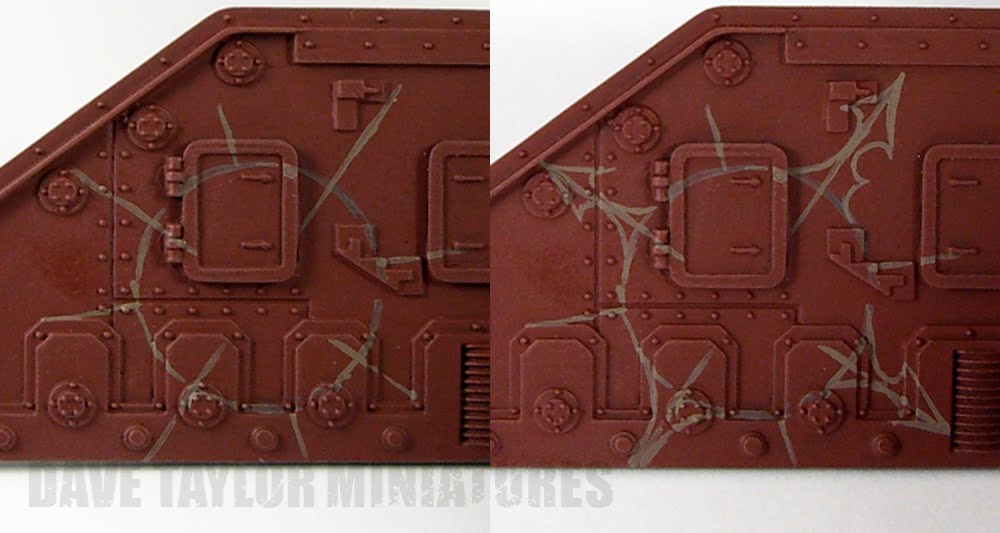
I placed the 25mm base on the tank side, where I wanted the star to be. Then I carefully “traced” a circle around it with my base color.
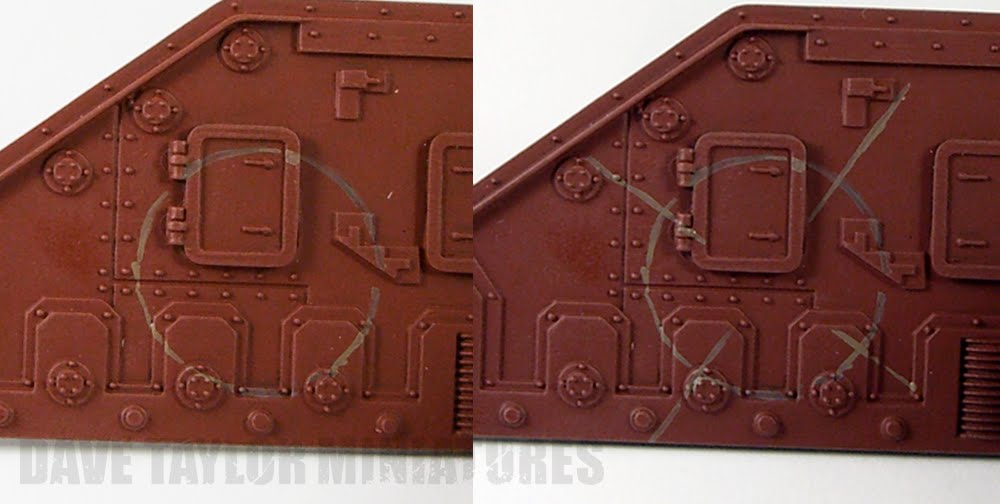
As you can see, the circle is a little patchy and rugged as it goes of the varying textures of the tank side. The next step is to paint in lines for the four main “compass points” of the Chaos Star. I always try to angle it slightly for a less uniform look.
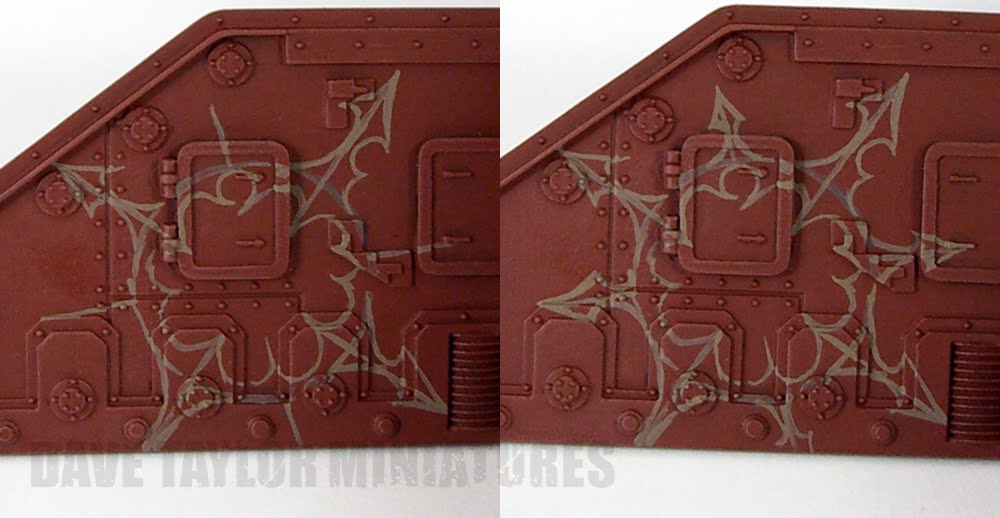
The next step is to paint in the guides for the smaller (or lesser) “compass points”. You’ll notice that these are shorter and also do not cross the line of the circle (this will be explained in a later stage). Then I started to paint in the barbed arrowheads and curving lines to join the points to the circle. NOTE: I’ve done a lot of painting and have a steady hand. If you aren’t too confident I recommend you try all of this on a sheet of paper first. Practice it several times to build your confidence.
In the next stage I started creating the wild-looking maw in the center of the Chaos Star. Using the guides painted inside the circle I painted small, scalloped edges that were not always consistent. Some of the scallops touch the inside edge of the circle (the reason I didn’t continue the lesser guides inside the circle). This was followed by painting the arrowheads on the lesser points around the outside and connecting everything together.
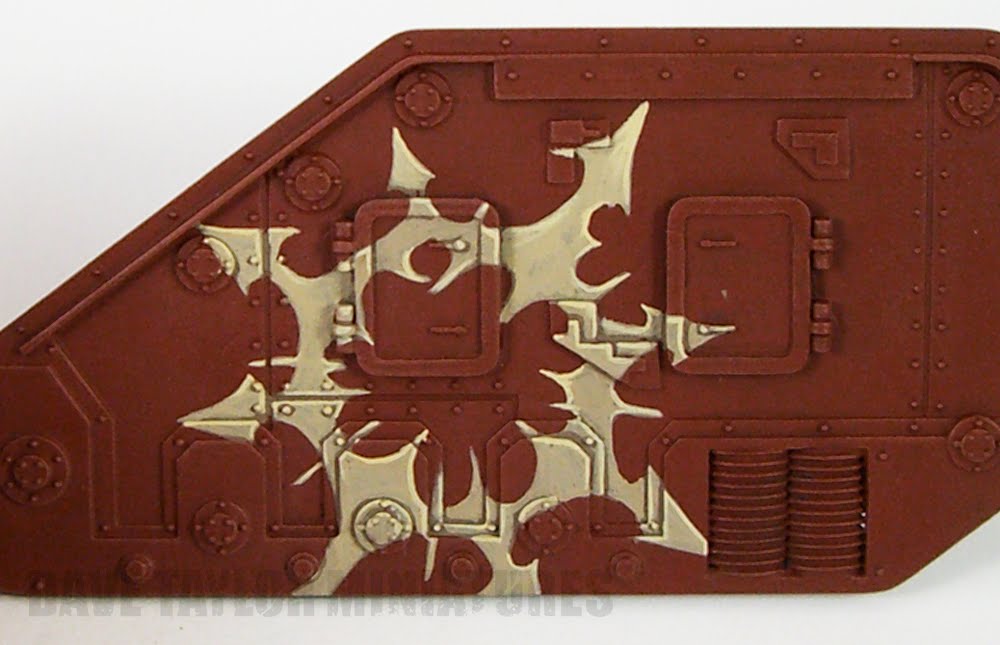
The next stage involved simply “coloring in” the shapes I had created. to this I added a few thin lines between the eight points of the Chaos Star. This little detail was inspired by the etched brass symbols available from Forgeworld. Then it was on to the highlighting. A 50/50 mix of my base and highlight colors was used here, I left the base color showing in all the recesses and shadows.
The final stage was painting a few thin edge highlights with a 20/80 mix of my base color and highlight color. The Chaos Star that has taken 10-15 minutes to paint on the side of your vehicles can display your eternal allegiance. Not bad really.
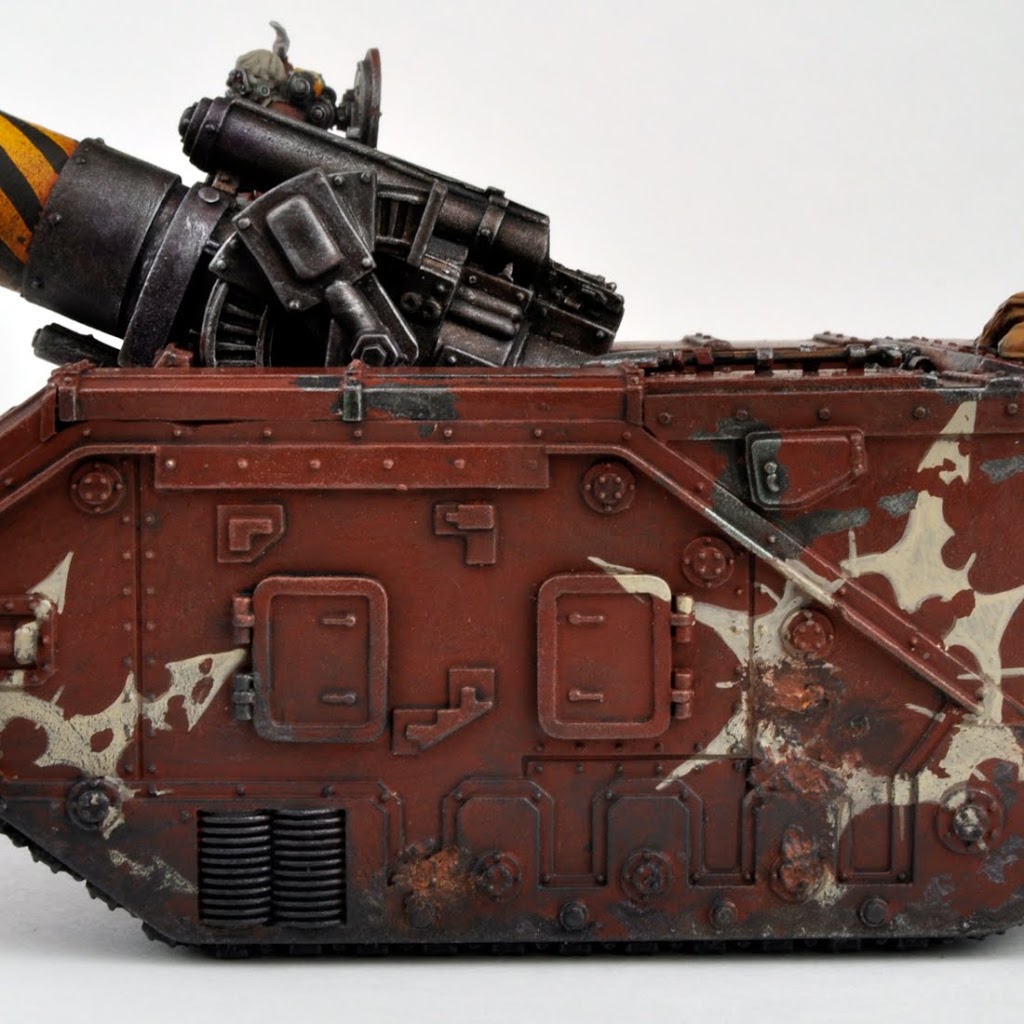
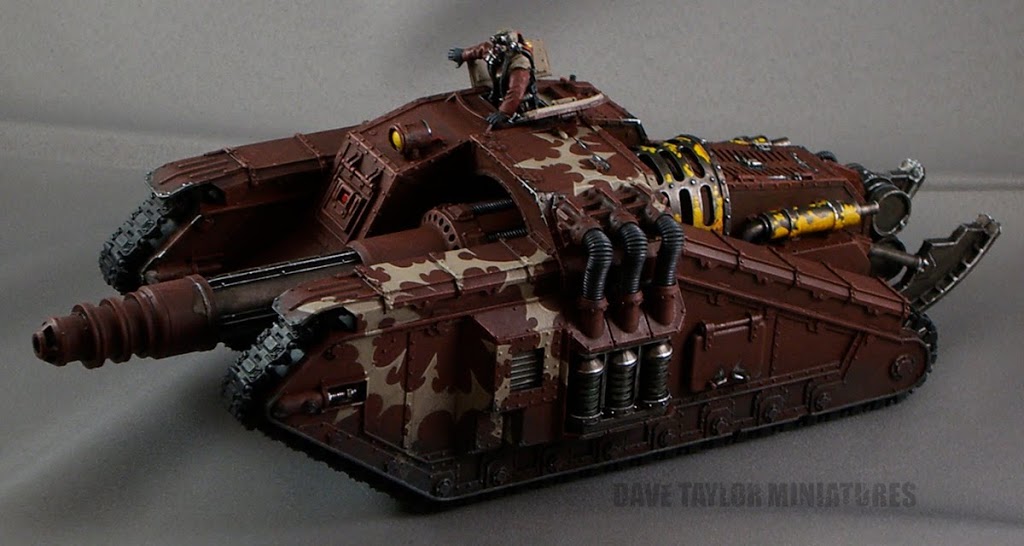
The Chaos Stars you paint on your vehicles really start to look the part when you start to build up the weathering. The Valdor above is a great example (or the Usurper at the top of the page). There are dozens of ways to weather your tanks, perhaps I’ll go into some of those at a later date.
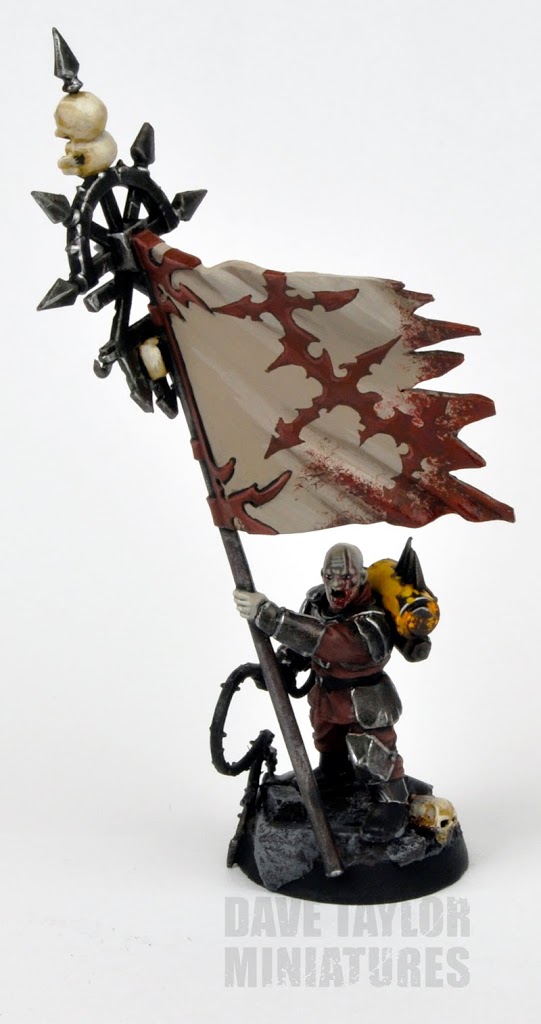
Also, the Chaos Stars can be any size you like, with points of varying length and intricate detail. They don’t have to be light-on-dark (like the example) but can be dark-on-light (like the Standard Bearer above). Either way, if you’re looking for some “pop” make sure there’s a high contrast in the colors. Sometimes the star can also look great in a darker (or lighter) tone of the same color. It’s a much more subtle look, but can really add depth to you models.
Have fun demonstrating your allegiance!
Dave Taylor has been painting toy soldiers for almost 20 years, many of those spent working in various guises for Games Workshop. His work can be seen in many old back issues of White Dwarf, as well as on his own blog: davetaylorminiatures.blogspot.com.
~Bigred here. Guys we are very excited to have Dave Taylor showing off some of his work on BoLS. By all means, please give him a hand, feel free to ask questions, and go check out his blog for even more amazing conversions and paintjobs.
Dad, Gamer, Publisher, Pilot, Texan. All games all the time since junior-high.
I started BoLS Interactive in 2006. I’m a lifelong tabletop & RPG gaming enthusiast, and internet publisher working to entertain and inform my readers every day.
I've been playing RPGs and Tabletop Games since the 1970s. I'm been playing and covering Warhammer and Warhammer 40K for over 35 years.