Hobby: Painting Fennblades

 As some of you will probably recall, earlier this year we posted a review of one of Privateer’s first forays into the field of plastics, the Trollkin Fennblades. And as excited as I was to get my hands on them, other projects ensured I’ve just now gotten around to posting about painting them. Hopefully this article will be useful, not just for the budding trollblood player, but also to anyone with questions on painting leather, cloth or non-human skin.
I’ve been collecting Trollbloods since the release of Hordes Primal, and they are currently still my only Hordes faction. I’ve seen some fantastic alternate color schemes for trolls in the Privateer Press Painting forums over the years, but for me blue just always seemed the right way to go, and so I ended up with an army quite similar to the studio scheme. I have five stages of Trollblood skin I use, starting with Shadow Gray, and ending with Space Wolf Gray. I keep some pots mixed for faster painting and to help keep my colors matching in future projects.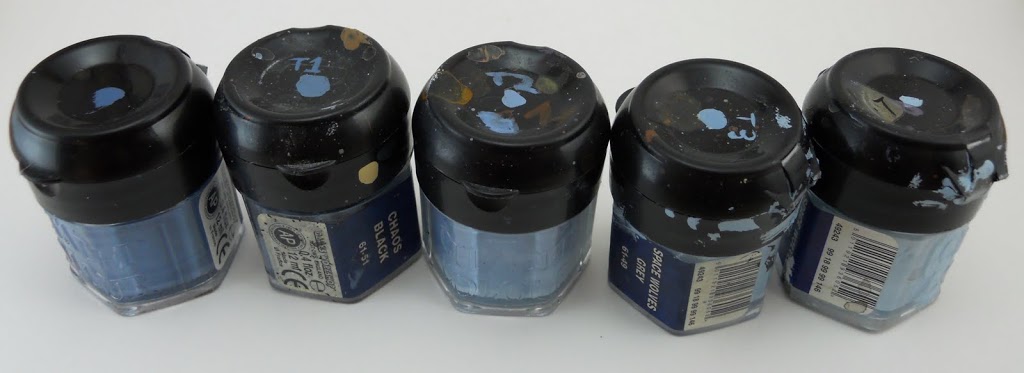 After painting the metals, I get started on the skin. As you can see I keep the arms separate from the rest of the mini while I’m painting. I only do this when I feel confident that attaching them would cover a significant amount of the detail I want to paint. In this case its the tartan I’m concerned about. 3 of the 10 Fennblades actually got their arms attached at the beginning.
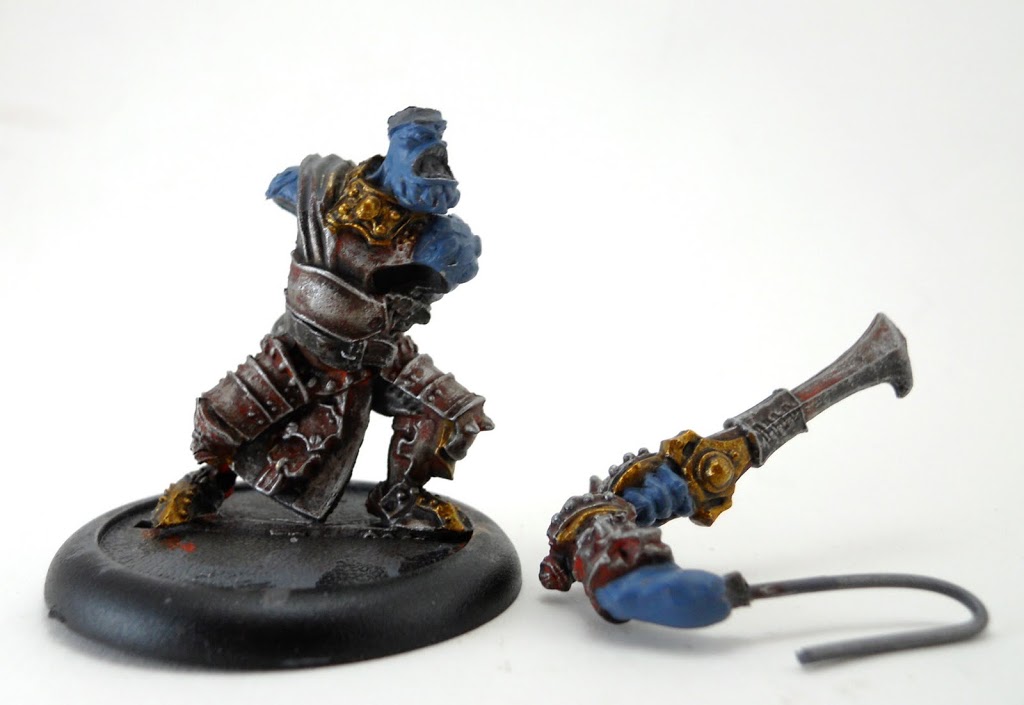 The next step is to give the skin a wash of a thinned down Dark Flesh. This earthy red will give the skin a warmth and vitality it would lack if it were painted with just blue. Next I drybrush the skin with Shadow Gray to help give the red a more even blend with the blue of the skin. Before I paint any highlights I paint the eyes. They’re easy to screw up, so if I wait until I finish the highlights, and make a mistake, I’ll have to repaint their eyelids too. When the eyes are done I start to build up my highlights, using progressive layers until I reach the Space Wolves Gray. As the layers build up, I often find myself going back with previous colors, to make sure everything stays nice and smooth. In fact, even when the whole paintjob was otherwise finished, I still ended up going back and touching up a few rough patches. I also paint the lips and palms with a mix of Shadow Gray, Liche Purple, and just a little bit of Elf Flesh. This warmer color, which represents thinner areas of skin where the blood would be closer to the surface, is highlighted up by adding more elf flesh and some white.
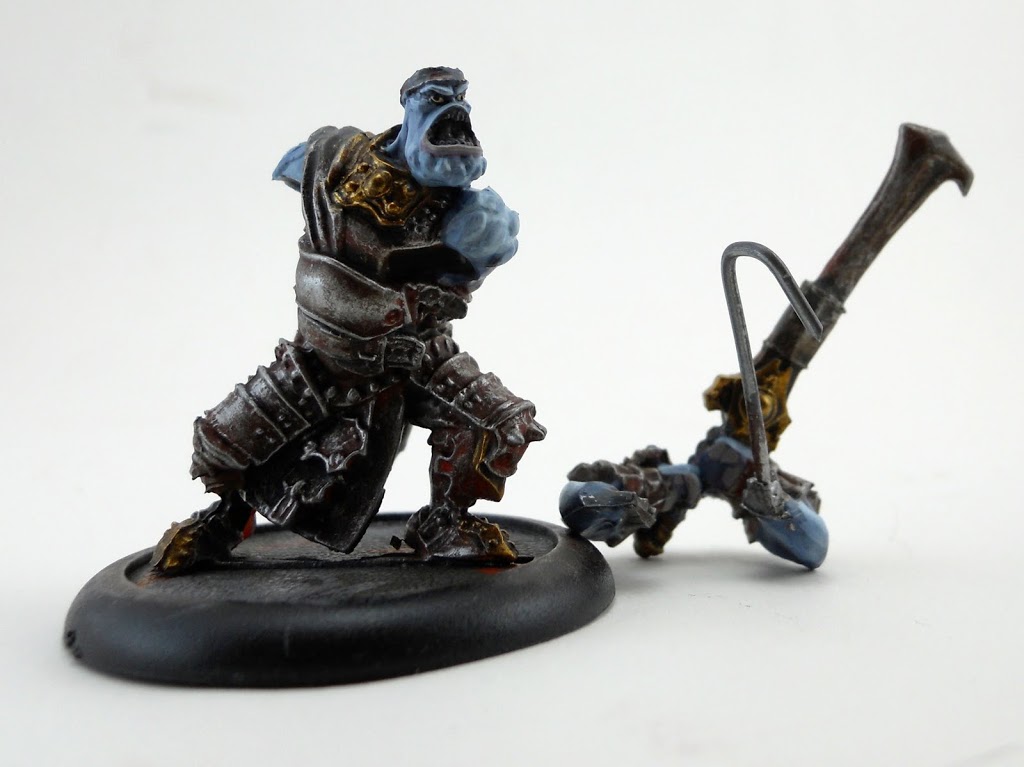 Up next is the leather. I plan on having two distinct types of leathers; a softer looking one for the pants, and a stiffer looking one for belts and straps. I paint all these areas with Scorched Brown to begin. Then the area I plan on being the “softer” leather gets a thinned down Liche Purple wash. The stiffer one gets a thinned down Scaly Green wash. The colors will serve to contrast the final highlights in a way that I think really makes the model pop. I’ll leave it to anyone who intends to replicate my process to decide whether these extra color washes are worth the effort. Many people tell me they can’t even see these colors in my final pieces, but when I skip this step I honestly believe I can tell, and that the mini looks less vibrant.
 The final highlight for the soft leather is Snakebite Leather, with a step in between of Snakebite mixed 50/50 with Scorched Brown. I also start on the inner belt (the piece of cloth bulging out from under the belt) at this time and give it its starting basecoat of Snakebite leather. Except… I forgot to do that until after this pic was taken.
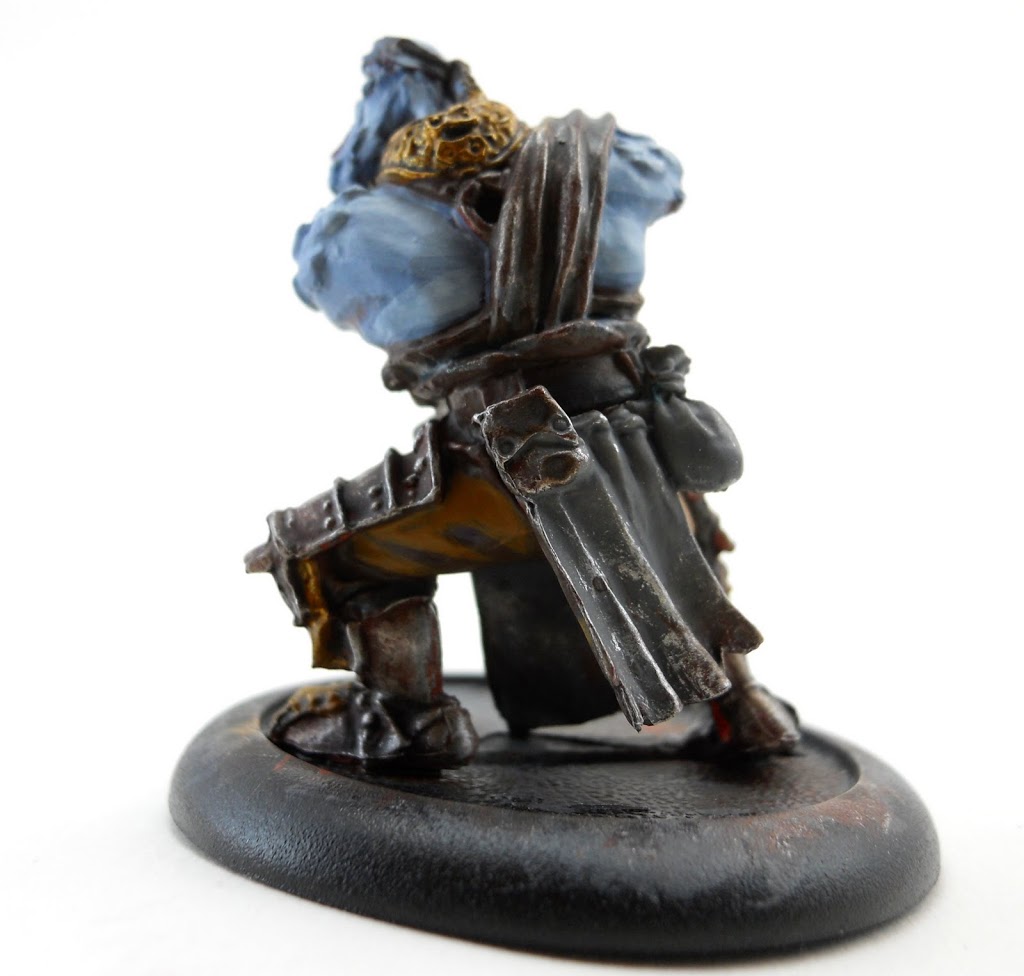 For the thicker leather I begin with Dark Flesh followed by Vermin Brown, and touch up a few key areas with a mix of Vermin and Vomit Brown. The scales(?) begin with a basecoat of dark flesh so I start on them at the same time. They are also highlighted with Vermin Brown, but receive a final highlight that has had a little Blazing Orange mixed in to give it some color. I paint his pouches and the Tartan Codex Gray. All the leather, the tartan, and the pouches are given a very thin coat of Devlan Mud. For the leather, which is now finished, it kind of acts like instant blend, and unifies the colors a bit. Just keep it thin enough to keep the highlights prominent. You’ll also notice I’ve added gravel to his base at this point. Since basing involves a lot of drying down time, I often start the process well before I’ve finished painting the model to keep things moving. The bits of wire you see stuck in the base are stalks for what will later become mushrooms.
 The inner belt, which is not a part of the tartan but a piece of protective cloth, gets a Desert Yellow highlight followed by a bit of Kommando Khaki. The tartan is also meant to be kind of a tan color, and it gets a layer of Kommando Khaki over its basecoat of codex gray. I proceed with the highlight layers adding Bleached Bone, and then a mix of Bleached Bone and Skull White. M5 for anyone who read this article.
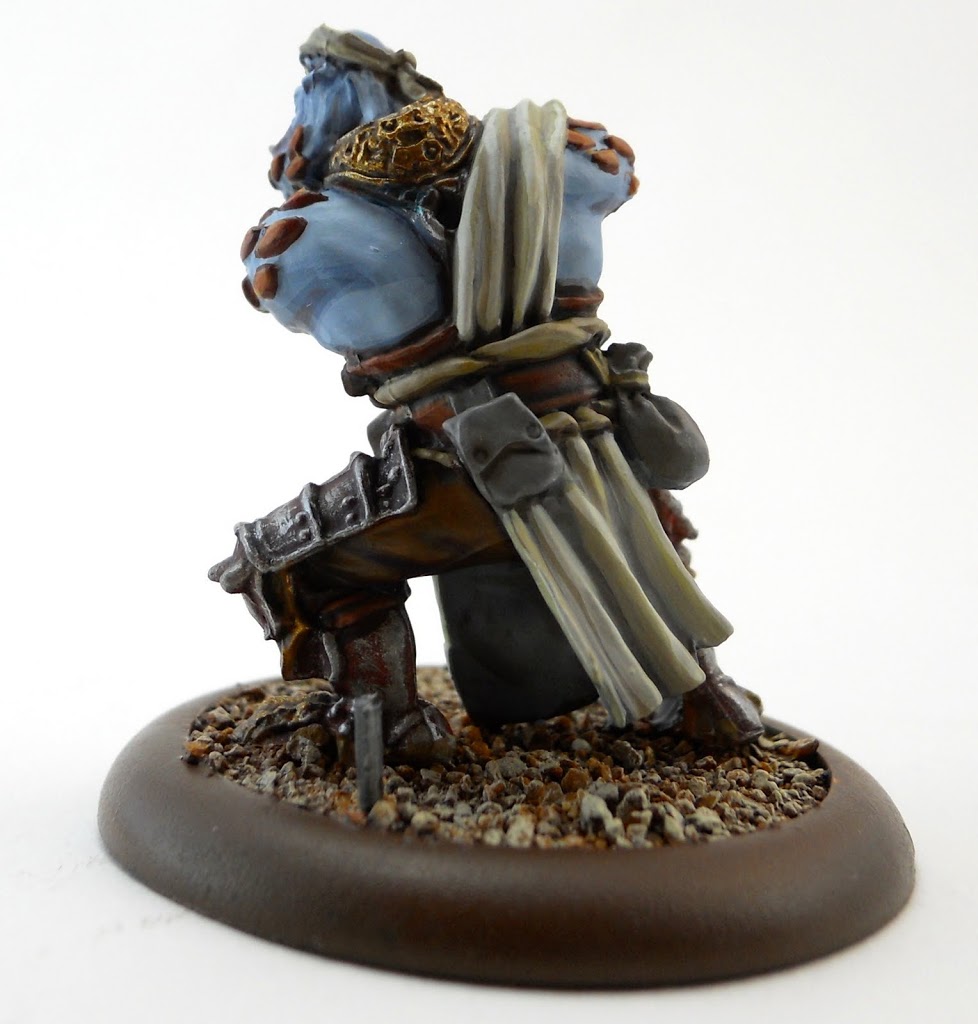 Next comes the patterning. Lots of people ask me how to do this, but the truth is, you do it exactly like it looks. Manually and painstakingly. First pick a color that contrasts sharply with the tartan’s base color. Very gently apply bands of perpendicular stripes. I base the width of these bands off of the width of the tartan at its narrowest point. Essentially I want to make sure it looks natural to have just one band going down the middle. Apply the line slowly and gently taking extra care on the ridges of the cloth. Going over a bump will cause your brush to bend more, expelling extra paint which will make your line bulge terribly
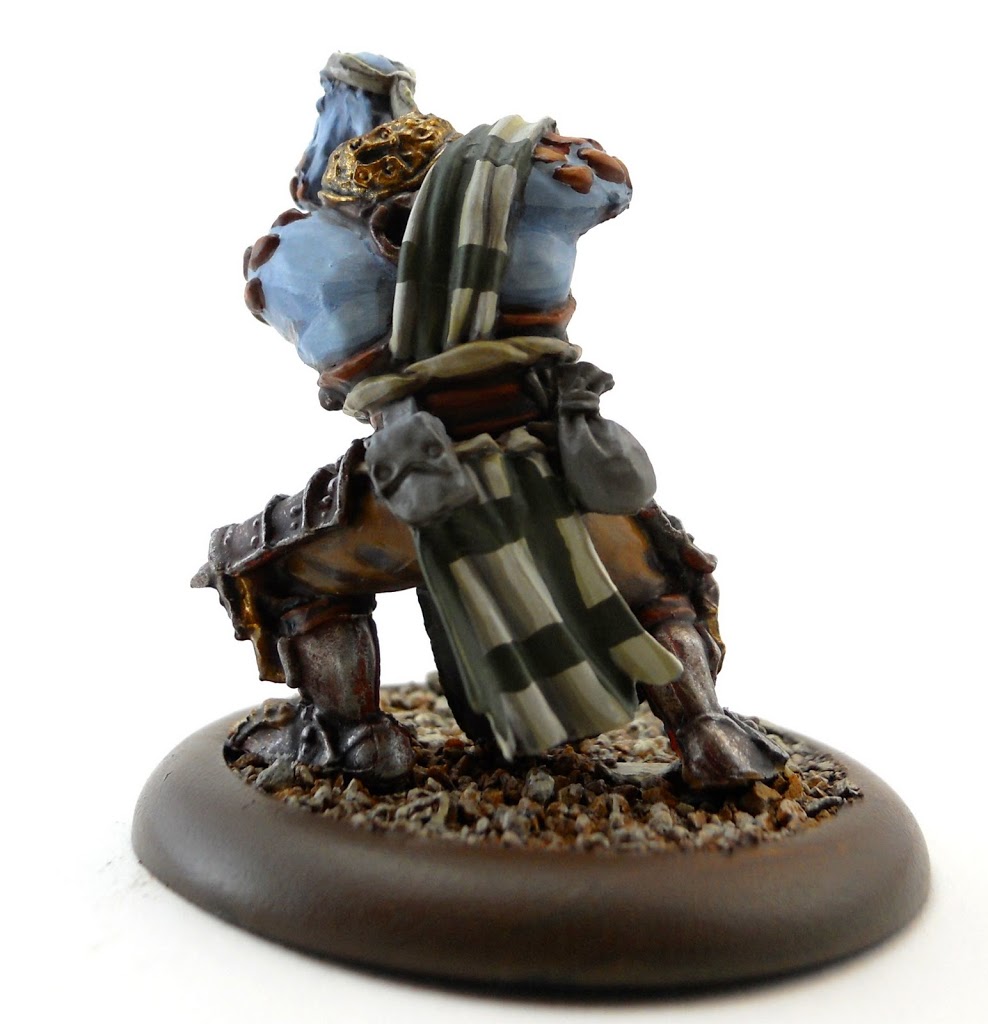 At the intersection of the bands I paint a square of another distinct color. In this case a dark blue that is unfortunately a bit difficult to make out in this photo.
 Then thinner intersecting lines of a 4th color. Bestial Brown for these guys.
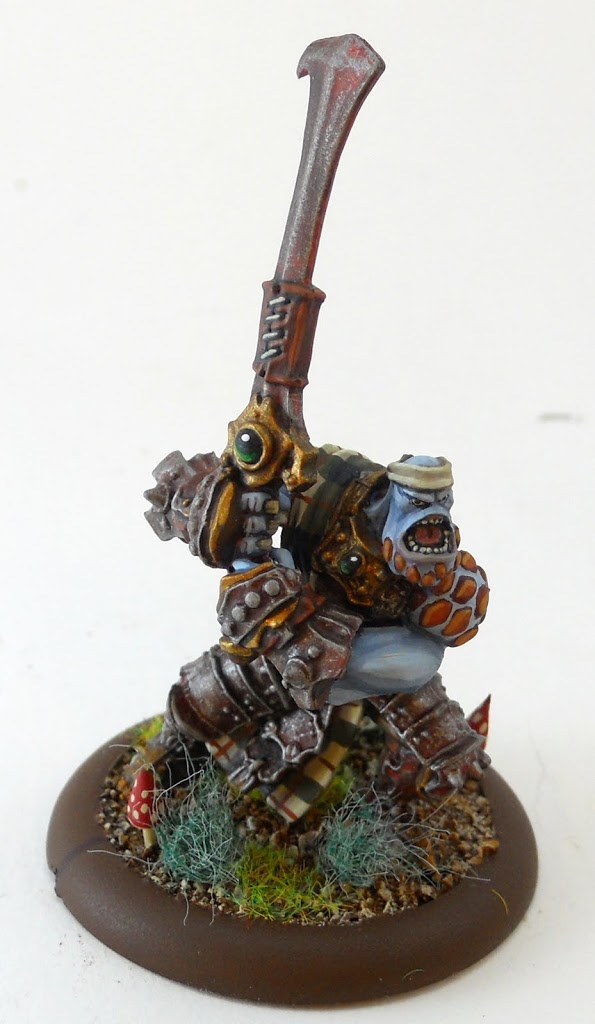
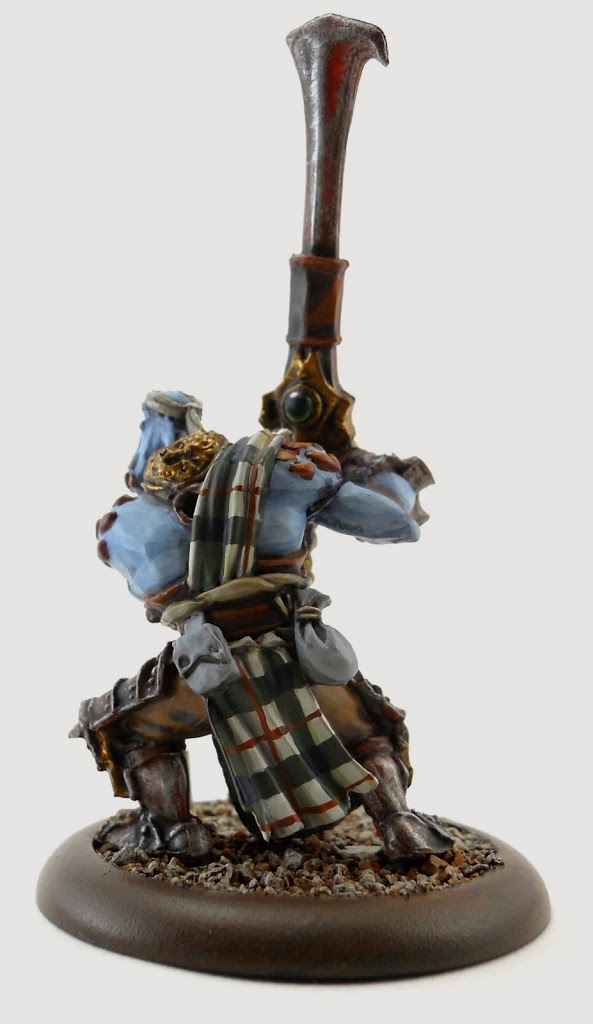 Then its time for the Devlan Mud again. Brush a thin layer into the cracks only to darken out the lines you’ve just added. And having finished the tartan I’ve glued on the arm, which has left a gap that will have to be filled in with green stuff and painted. You’ll also see that the sword hilt has gotten a little green gem. So all that’s left are the final basing details. All my trolls get little mushrooms for their bases made out of oven hardening clay and pinning wire. Something about reading all those White Dwarf magazines from the early nineties has left me with the indelible impression that fancy models have to get mushrooms for their bases. Fortunately the compulsion only seems to apply to my trolls and Cryx. After those are done I add little bits of shrubbery made from chunks of green Scotch-Brite pads. Add a little grass and he’s good to go.And of course… all his friends.
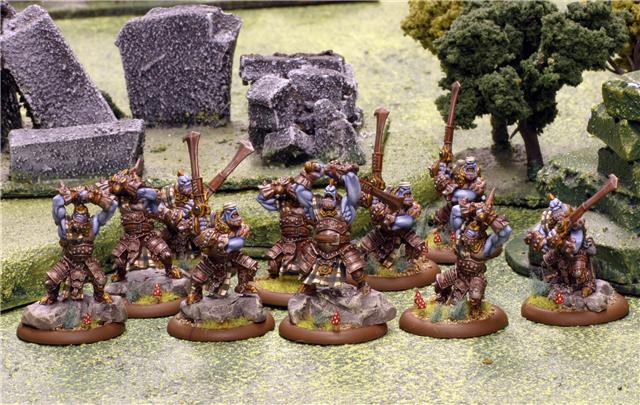 ~So as always, hope you found that helpful. If these guys make you think you might want to start a Trollblood force, keep your eyes peeled. Hopefully Hordes faction articles will be right around the corner.


