So, you’ve just picked up that shiny new box of miniatures, and you’re ready to start painting them, but you aren’t really sure what this whole “painting miniatures” thing is all about in the first place. You may have some questions that are holding you back – “What paints do I use? What do I have to do to prep my miniatures? What kind of brushes do I need?” – and so on. No need to fret, my fellow hobbyist, that’s what this guide is for. I’ll start by saying that all miniature painters had to get their start sometime, and with your first foray into miniature painting, you must maintain a disciplined mind and disciplined hand, because not all of us are the modern-age DaVinci or Michelangelo. My first miniatures were some 1/72 American War of Independence plastics, and they received a heavy coating of bright metallic paints of every color imaginable. I was only five years old at the time, and I had no idea what I was doing; but I was hooked on the hobby, and I have been practicing and perfecting my techniques ever since. So, keep an upbeat attitude and tackle every new miniature with the mantra of “How can I paint this miniature better than my last one,” and you should be set.
Now, your first painted miniatures may not win you many awards, and that is a hard piece of information to swallow at first. However, they will be uniquely your miniatures, and they will be painted, which (sadly, but hey, I’m here to change all of that!) is a rarity these days. Producing high-quality painted miniatures is an art form that requires hours upon hours of practice, and you may eventually reach that Zen state where you can paint award-winning miniatures in your sleep. Until that time, all I can tell you is that you will not advance as a painter without first practicing and experimenting with the paint. But you will need to set up a work area before jumping straight in.
So, without further ado, I present to you the first part of my quick guide for breaking into the world that is miniature painting.
Materials: What Do I Need For My Work Area?
Every painter needs a clean, tidy work area that is well-lit and comfortable to spend time in. Think of it as getting your car ready for a long road trip. You wouldn’t want to spend hours on end driving with the wheel too close to you, or the A/C blasting your face, or the windows down with freezing rain outside. Likewise, you won’t want to spend time painting your miniatures if you are not comfortable during the process. There are several approaches to setting up a paint station, but there will be a few necessities you will need to maximize in order to paint efficiently and comfortably.
Lighting
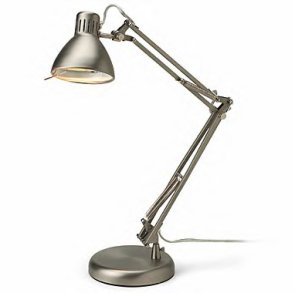
Unless you are in a really well-lit room, you will need some extra source of lighting to help you see what you are painting. There are several products out on the market right now that are aimed at helping miniature painters paint with a good light source. I’d recommend finding articles that have reviews of these products before running out and buying them, because they may not be the best fit for every painter. Plus, you should always do some research before committing to a product in the first place, right? Right? I get by well enough with two adjustable desk lamps, fitted with true light light bulbs. These lamps have a wide range of flexibility in terms of where I can shine my light, and the bulbs provide a natural light source that will not distort my paints’ colors when I look at them under the light.
Regardless of which lamp you choose, remember to check and make sure the bulb you are using is providing a true, natural light, as this will give you the best results while painting.
Work Surface
Advertisement
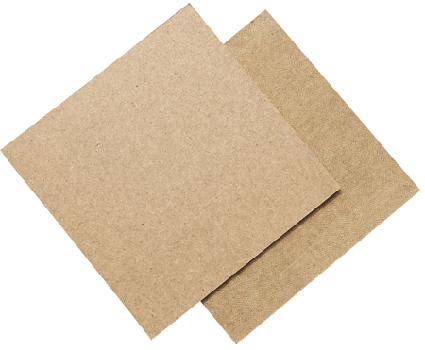
Let’s face it, everyone is bound to spill their paints at least once in this lifetime, so we need a surface which we can spill stuff on and not mind the mess. Art supply and hobby stores sell cutting mats, which are excellent for painting because they will double as your assembly station when you need to build miniatures. Hardboard tiles are also an excellent surface to work on, and are my preference when it comes to painting. Be sure you use the finished side, and not the back side since it is not waterproof and will quickly warp your hardboard tile. Some painters also use porcelain or plexiglass, both of which will provide a smooth surface that can double as a paint mixing area. If none of these materials are readily available to you, then get cheap with it. Find some newspaper or an old magazine, and set it down on your table, just to prevent any paint spills from marring your table’s surface.
Whatever surface you choose to work with, it’s main purpose is to prevent any unnecessary damage to your table top.
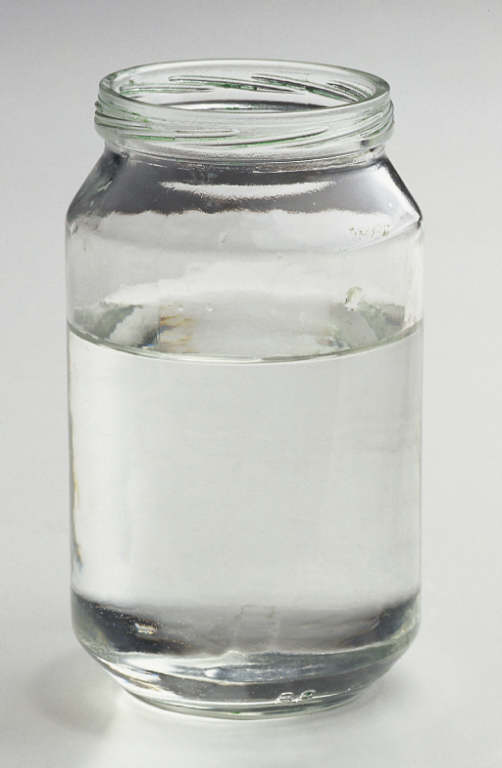
Water Container
You will be constantly cleaning and rinsing your brushes, so having a cup, glass, tin can, or jar filled with water at your paint station will be a must. Actually, most painters will tell you to have two or more water containers specifically. Why, you ask? When painting with non-metallic acrylic paints, if you rinse your brush in dirtied water, it will come out rather clean, and you need not worry about cross-contamination. If you paint with metallic paints, however, when you rinse your brush, the small metallic chips that are used in the paint may not always come out of your brush. If you then turn around and paint a non-metallic part of a miniature, there may be some cross-contamination of paints that will produce an undesired effect.
So, if you are overly-worried about cross-contamination, then set aside one water container for metallic paints, and another for non-metallic paints, and rinse your brushes accordingly. I also recommend having a smaller container filled with clean water, so you always have something to thin your paints with that won’t discolor them. Rinse out your containers once or twice a session and refill them with clean water. This will help maintain your paints’ true color in the long run.
To recap: metallic rinse container, non-metallic rinse container, clean water container, and thorough container and water maintenance.
That’s all for this part of the guide. In Part 2, we will go over brushes, paints, and everything else needed to start slapping (not literally!) some paint onto our miniatures.
~ Let me know how this guide has helped you by leaving a comment below. Thanks for looking, and happy painting!