WarMachine Hobby: Painting the Wrassler

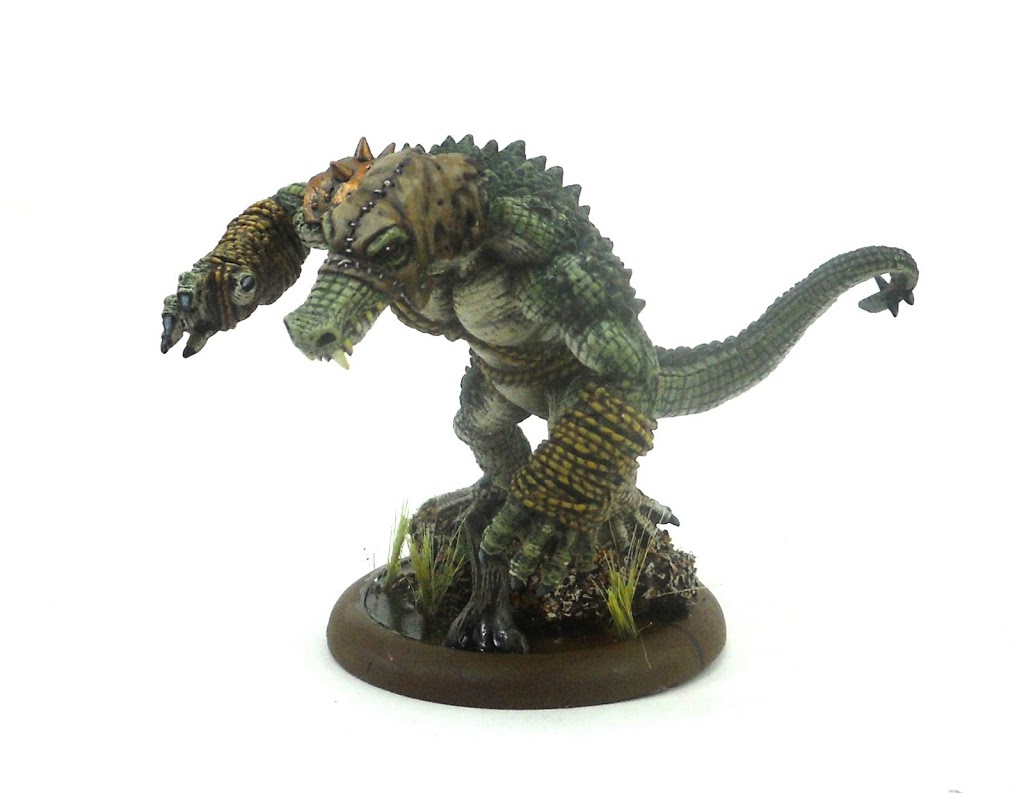 Today lets look at painting techniques for big scaly creatures. The new Wrassler model from Privateer is the perfect subject.
When painting anything covered with scales the basic idea is to alternate between washes and drybrushing. Its actually not too difficult to get some pretty good results once you’ve got the hang of the techniques.
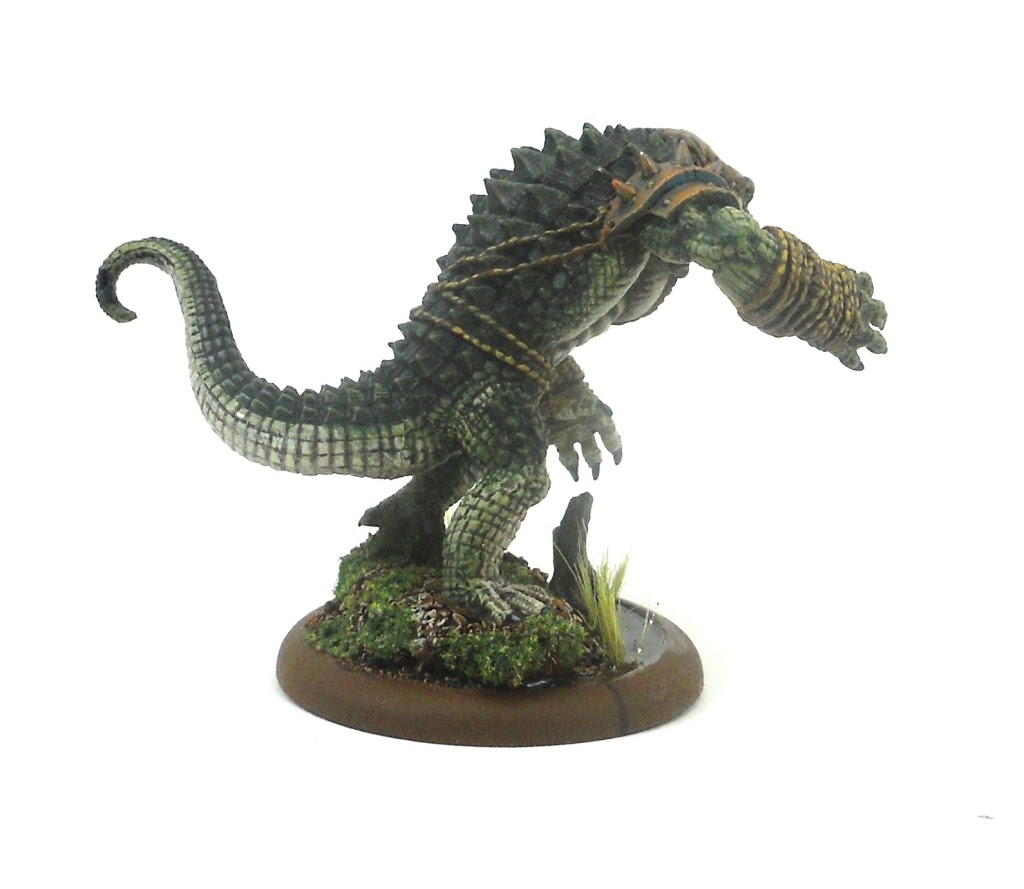
After the piece is primed most of it is painted with Catachan Green. Then it gets a wash of watered down Dark Angels Green mixed with some Devlan Mud and some Badab Black. Then the first round of drybrushing begins.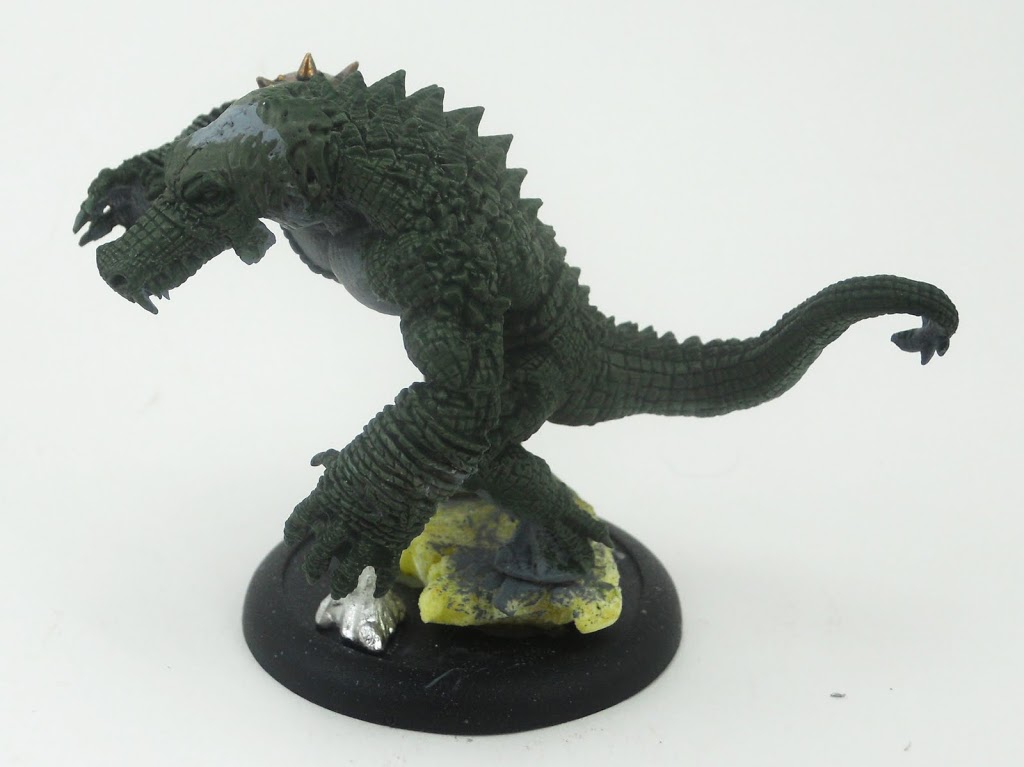
The first layer is a mix of mostly Catachan Green with a bit of Fortress Gray and Camo Green. The gray was added to keep the color a bit more dull and natural in keeping with the look I was going for. It was drybrushed on very heavily with an old large brush.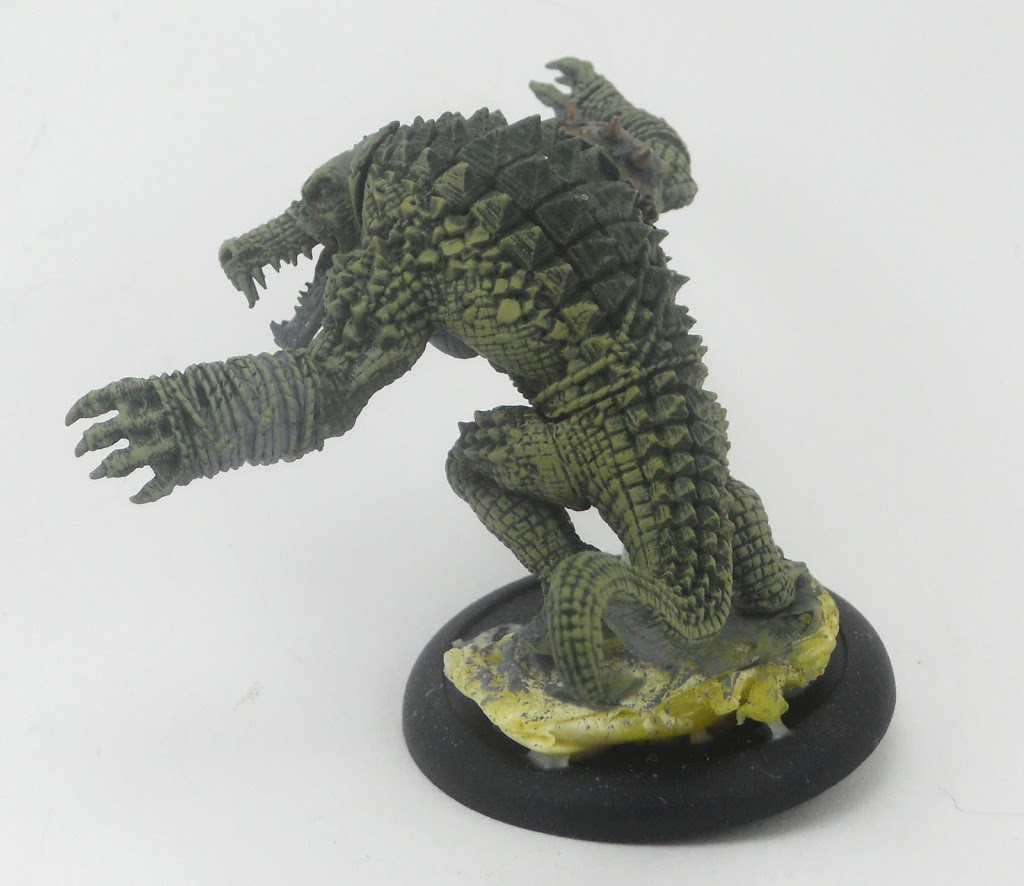
The next step was to go back in with my wash and apply it more precisely just in the area around the recesses of his musculature. This is done a couple of times focusing more precisely on the deeper parts with each pass. This will add more depth and definition. When the wash has dried I add some rotting flesh to the previous highlight mixture from above and do some more drybrushing. This time I use a smaller brush (one of my old number 2’s thats gotten too old for detail work) and I apply it very carefully just to the raised areas. Finally I wash the more defined scale areas with Badab Black and Devlan Mud.
The process is very similar for the creature’s pale belly, only different colors are used. I begin with Kommando Khaki which is washed with Devlan Mud. I drybrush it with a mix of Khaki and Bleached bone, then lightly with pure bleached bone.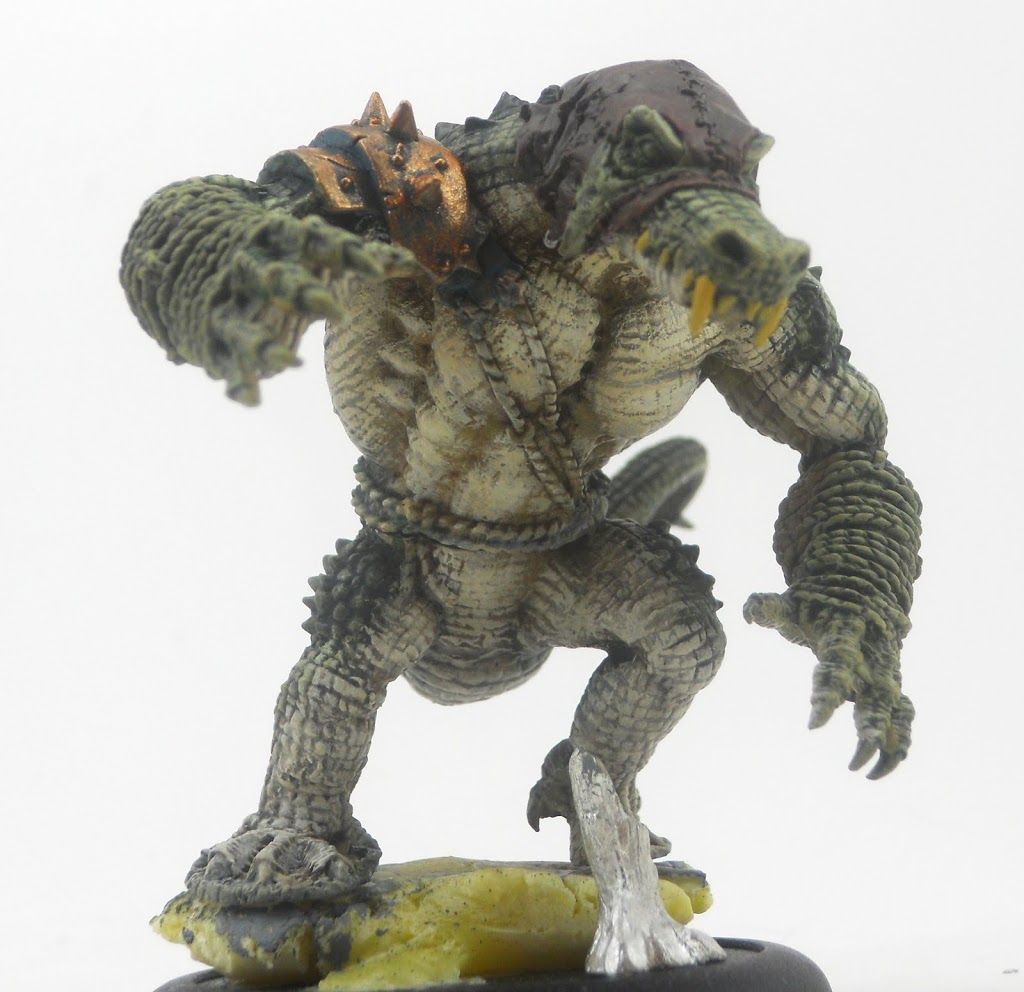
Then just like before I wash the recesses again, and add more focused lighter drybrush highlights to the raised areas. I also get started on the ropes and hood. I paint the ropes with snakebite leather before giving them a Devlan Mud wash. The hood is painted Scorched Brown then washed with Devlan Mud that’s had a bit of Liche Purple added. For the lovely little face on the hood, Dwarf flesh is used before it gets the same wash. The teeth are painted desert yellow. The shoulder pad is Hawk Turquoise, drybrushed with Dwarf Bronze, then washed with a mix of Badab Black, water, and a bit of Asurmen Blue.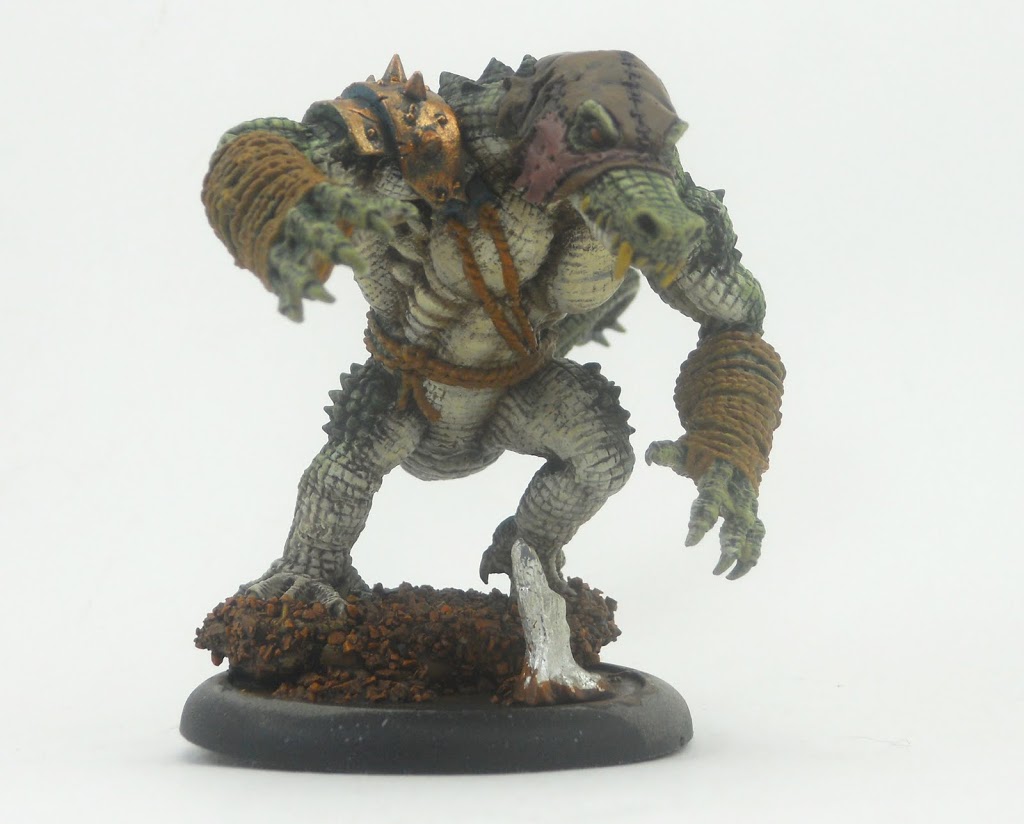
The final details as always, are the fiddliest. The ropes get highlighted manually with Desert Yellow. It would be easier to drybrush them, but doing it manually makes them pop more. The hood is highlighted up to snakebite leather using stages of Scorched Brown mixed with Snakebite. It is also given a final sparing highlight of Desert Yellow. The claws and tail spikes are painted Chaos Black and given a highlight of Shadow Gray, then Shadow mixed with Space Wolves Gray. Badab Black is then washed over them to even them out a little more. Bleached bone is used to highlight the teeth and for the stitches on the hood. The eyes are done using the typical gemstone technique of painting highlights along the bottom edge of the eye area rather than the top. The colors are Scorched Brown, Vermin Brown, and Blazing Orange. A Black slit is painted down the center of the eye before a spot of skull white is applied to represent light reflecting off the surface. 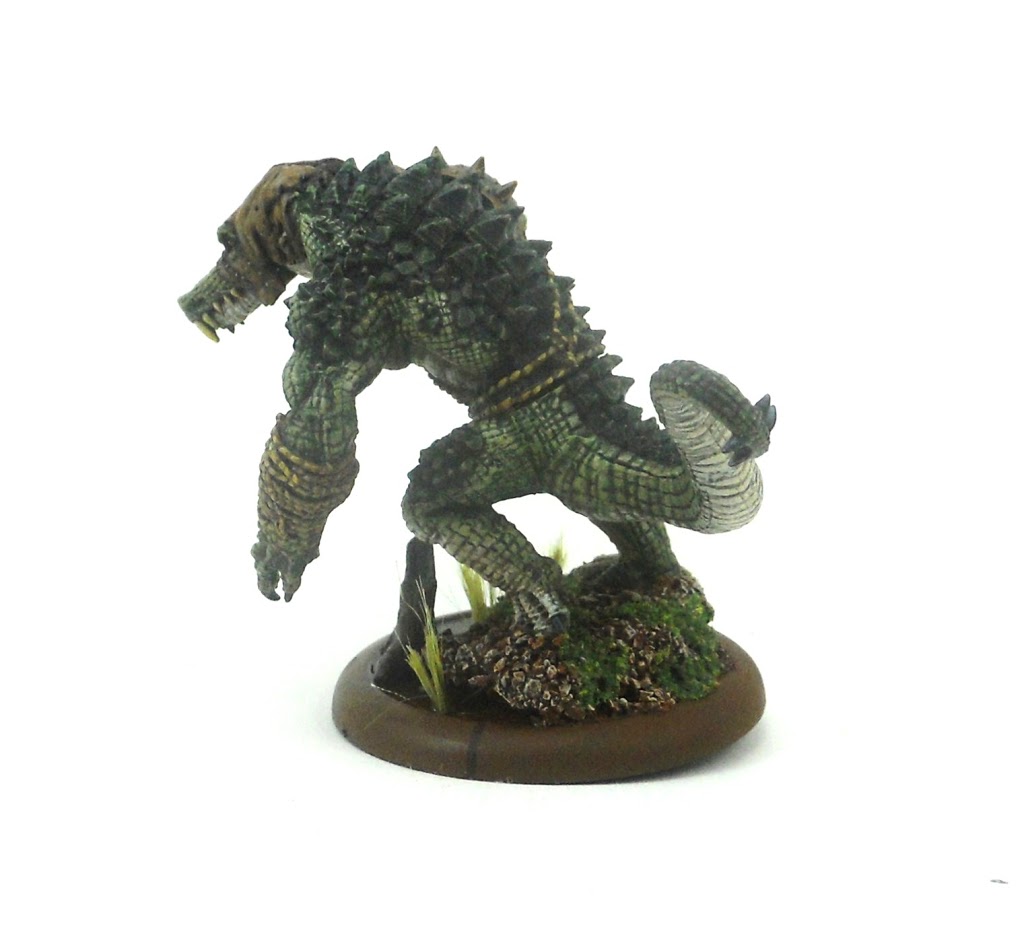
~ So there are some pointers for all you Blindwater Congregation players out there. I used these same techniques to paint pretty much all the scaly things in my army. But obviously you can use them on whatever scaled creature you’re working on. That might be it for my gators for now. Since I’ve finally gotten my hands on Dr. Arkadius I think I may need to stitch together a couple more War Hogs. Check back to have a look at the pics.


