Warmachine: Painting Skorne Fast

It came to my attention that I have never done a tutorial on how I paint my Skorne. It’s time to correct this…
Because of the colors I chose, the basics of this scheme could also apply just as easily to a Protectorate of Menoth army.
The goal with this force (as with most of my armies) is to have something “good enough”. That means a good tabletop quality that can also be painted up fairly quickly with a minimum of effort. Six plus layers of blending on every part of a model is great, but there are too many unpainted models in my closet and not enough time in the day for me to paint everything I own to that level. I’m happy to sacrifice some quality for speed. These Skorne take advantage of every shortcut I could find. One of the key concepts to remember for this is that small mistakes are ok. If you smudge a little paint in a tiny spot that can’t be seen from more than one foot away, don’t worry about it. We’re going for a good table quality scheme here. On to the show!
Step 1
I start off with a white primer and a follow-up dusting of an ivory/bone spray paint.
 |
| A light primer does a lot of the work for you |
This set up does most of the work for me for my ivory/white armor scheme. A second benefit is the metallic paint covers easier over the light colored primer, meaning fewer coats to get solid coverage, and less time spent painting. The one big downside is that any areas I miss, say the armpits, will show up as giant white spots, instead of as dark shadowed areas like you’d get with a black primer.
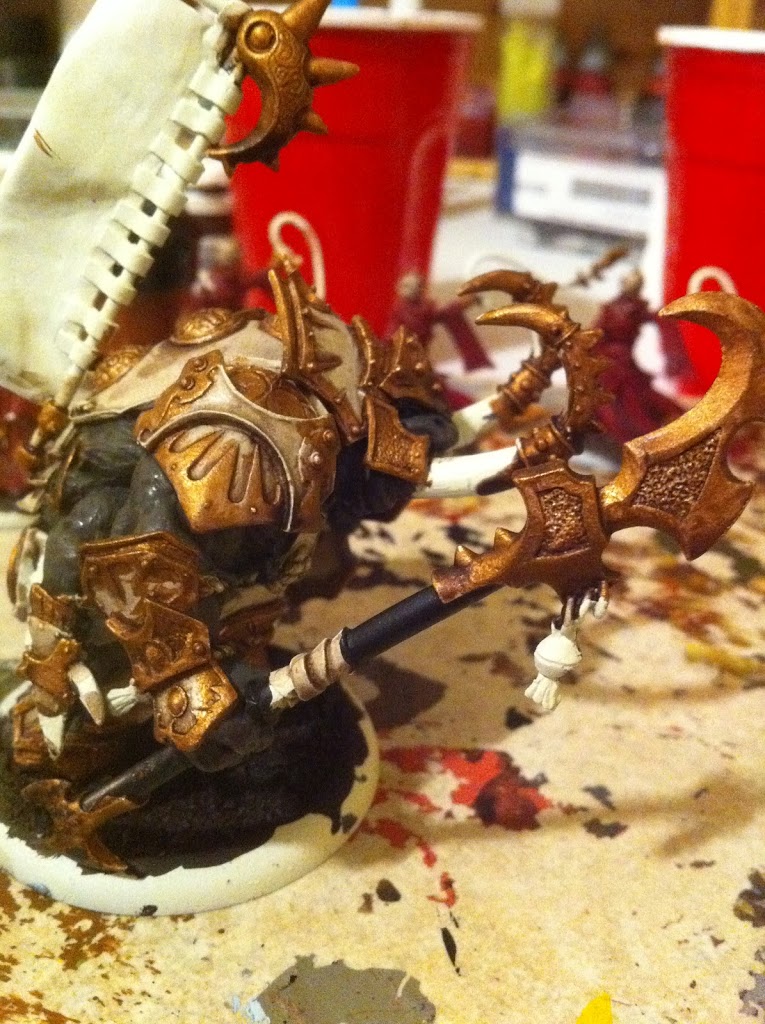
Step 2
The metallic areas are painted P3 Molten Bronze. I made mistakes here, and accidentally spilled over onto the armor plating in some areas, but remember, that’s ok. Later stages will cover up the most glaring spots. Try to be accurate, but the point here is speed.
 |
| The model after the metallic areas are painted |
Step 3
The skin is painted a dark grey, P3 Greatcoat Grey in this case, and then drybrushed with GW Codex Grey followed by GW Fortress Grey.
Step 4
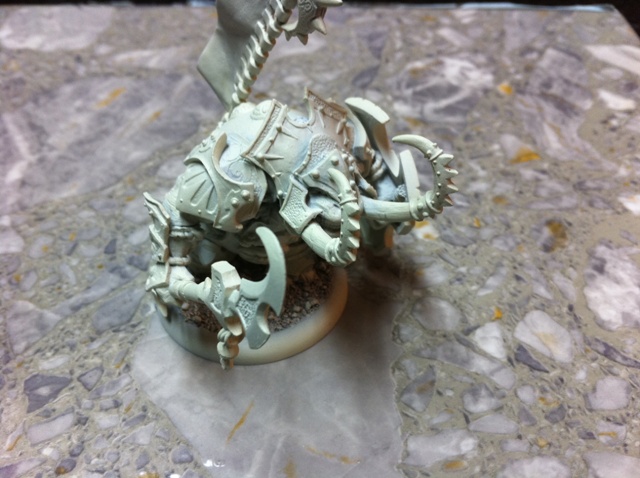
Washing the entire model with GW Devlan Mud completes the first stage. The wash does a lot of things. It smooths out the skin tone, shades the bone armor plates, and shades the bronze. From here on out, it’s detail. The wash takes awhile to dry, so I suggest you leave it overnight.
 |
| A wash does most of your shading work for you |
In the picture above you’ll notice that the skin isn’t painted. That’s because on this particular model I was in such a rush to take photos and move on to the next stage that I started washing it before I painted the skin. Whoops! It meant extra time on this one while I went back, painted the skin, and then applied the wash to that area too. Just one of those little lessons that trying to be fast without paying attention can cost you more time overall.
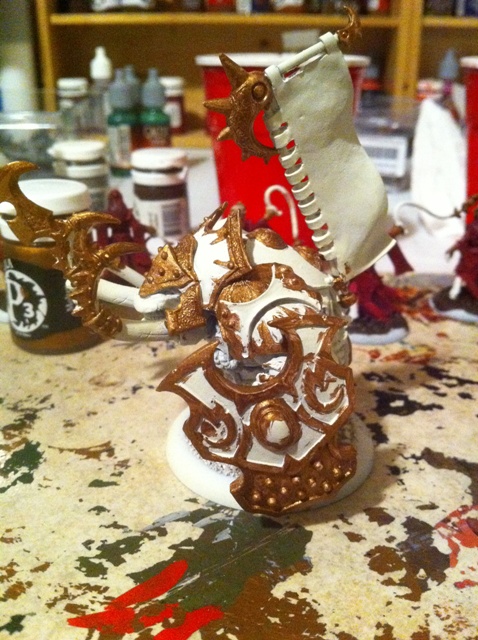
You can really see the difference the wash makes when comparing the before and after photos. I feel it really brings out the bronze.
|
| Before the wash |
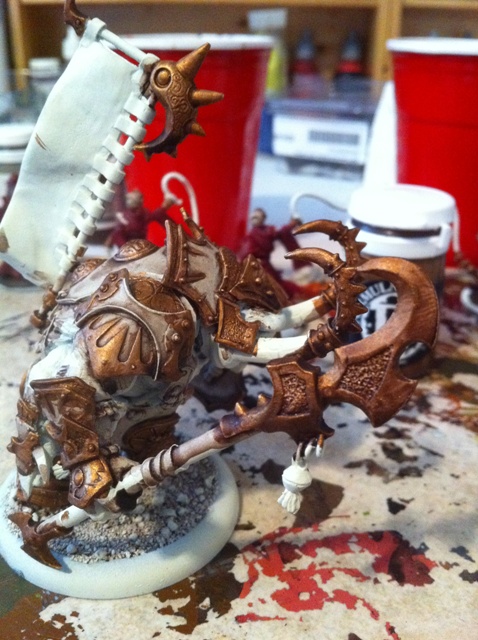
 |
| Add “liquid skill” and Voila! |
So we’re back on track. The armor and the skin is now painted and shaded.
Step 5
Now we get into the detail stages. Most of the time you spend on the model will be here. The armor is first. I went back and painted it in 3 stages: P3 Hammerfall Khaki, P3 Menoth White Base, and P3 Menoth White Highlight. In each case, I tried to make extra sure I left some of the darker shading down in the crevices. During this stage I also painted the teeth, horns, and finger and toe nails. First with GW Graveyard Earth, and then with P3 Hammerfall Khaki, with a tiny bit of P3 Menoth White Base on the edges.
Some of you may be wondering why I took the time to paint it all three colors, and didn’t just go straight for the top Menoth White Highlight color. The answer is that acrylic paints are partly translucent. Your eye will actually pick up on some of those mid tones. The little bit of extra time spent on them makes the final product look much better.
Step 6
Some of the bronze areas are re-touched with P3 Molten Bronze, to give a bit of a highlight. Once you’ve got the armor plating done, I went in and painted the rope, straps, and middle of the shield black. The rope and straps are highlighted with P3 Ironhull Grey. The orb in the center of the shield is painted with two coats of gloss varnish to quickly and easily simulate a black pearl.
Step 7
The cloth/pants are painted GW Scab Red, followed by GW Red Gore, GW Blood Red, and finally P3 Khador Red Base. The tongue is painted red at the same time.
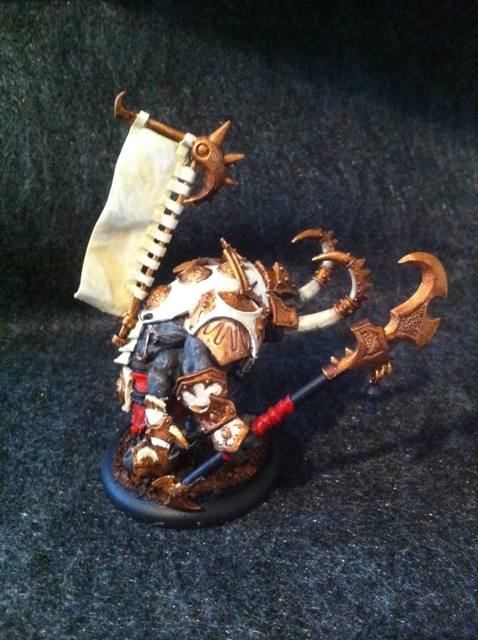
And that’s it! The sand is painted, the rim of the base is painted black, and the model is tabletop ready. In case you’re wondering, I went with a “red” sand look for the base, reminiscent of the Bloodstone Marches.
Basing
P3 Umbral Umber, followed by drybrushes of GW Dark Flesh, a 50/50 mix of Dark Flesh and P3 Bloodstone (I have a ready-made pot of this). And a final light drybrush of P3 Bloodstone.
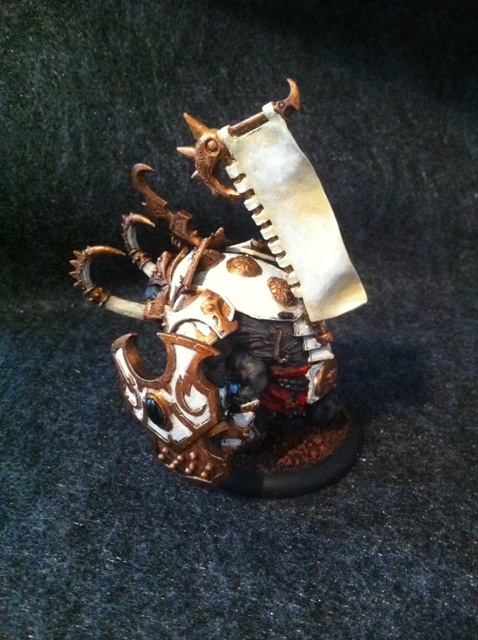
This scheme would also work well if you were painted a red Martian sand base for another game we all know. The banner is still incomplete; I’ll go back and add a freehand design later, but this guy is ready to rumble.
|
| Table-ready |
You may have realized that I limited most of my highlights to a 3-step system. The basecoat, a mid-tone, and the final highlight. This is intentional. It gives a decent result for the least amount of work. To improve the quality of the model, simply increase the number of mid-tone layers. Instead of jumping straight from dark red to medium red, go from a dark red to a 50/50 dark/medium, and then to medium. You’ll end up with a smoother gradient and a better looking model.


