HOBBY: Studded Power Armor

Studded shoulders can help mark a particular model as a veteran, or even give your forces a bit of the “Pre-Heresy” touch, ever important for those looking to get their HH army going on a budget. But who wants to pay upwards of $3 for one pauldron from a bits site? Making your own is pretty easy if you’ve got a bit of time, and for the price of one bit, you can outfit almost an entire chapter of marines. Let’s get to it after the jump!
First, the tools:

1) a file.
2) a straight needle.
3) a pin vise, as well as a 1/32″ bit.
4) your super glue of choice, though I don’t recommend gel, or brush-on varieties for this undertaking.
5) a standard Space Marine Shoulderpad.
6) Glass Micro Beads, 1mm.
The micro beads are the trick to the whole project. I found mine on Etsy for about $3, including shipping, for the bag shown above. Obviously, there’s really no chance of me using the entire bag in my lifetime.
A link to point you in the right direction for micro beads.
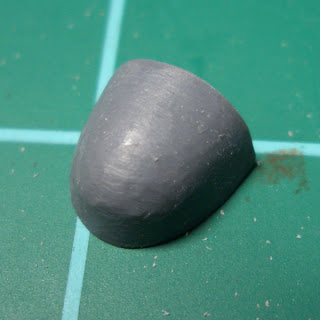
Step 1: File the trim from the shoulderpad. Depending on how coarse your file is, you may want to go back and sand lightly with a finer grain, to smooth the pad out.
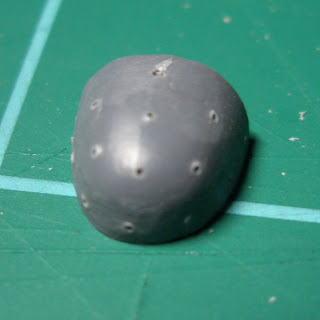
Step 2: Using the straight needle, poke guide holes in the pad. You might already have a few studded pads in the army you want to match, or you can create your own design.
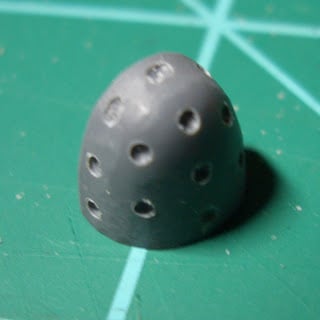
Step 3: Use your pin vise to drill into your guide holes. Not clean through, but just 1/3rd to half-way in, as if you were making an impact crater from a bolter. If you find a hole doesn’t line up with the others, redrill where it looks right; you can come back at the end and clean it up with a bit of greenstuff around the bead. (liquid greenstuff works great for this!)
Step 4: Lay some micro beads on your worktable. At this point, you should also probably wash your hands, since I have no way of knowing when the last time you did that was. Lick your finger and lightly touch a glass bead. Squeeze your super glue until there is glue on the tip, touch the microbead lightly to the glue, and place it in one of the holes. Once you get used to the method, you can do more than one bead at a time, instead of going one by one.
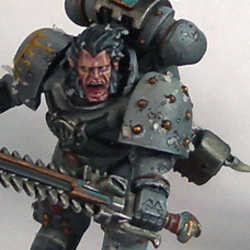
After that, you’re done! For the finished shot below, I repeated step 1 on another shoulderpad to create a pair of Corvus pattern pauldrons for this suit of mk VI armor.
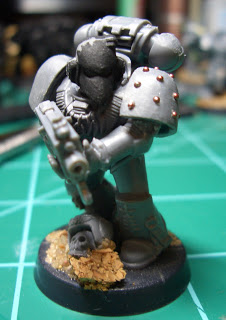
This is simply one application for the studs; you can use them to stud other areas of armor, creating mk V armor, or even help create a custom suit, like I’ve done with the Rune Priest below.

I’m always happy to share things I’ve picked up over the years in the hobby; let me know what kind of articles interest you, or maybe something specific you’d like to see. Who knows, it might end up as my next article!
For more of my previous hobby articles, or to get a peek at my works in progress or past completions, head over to my blog, Drowned in Plastic.


