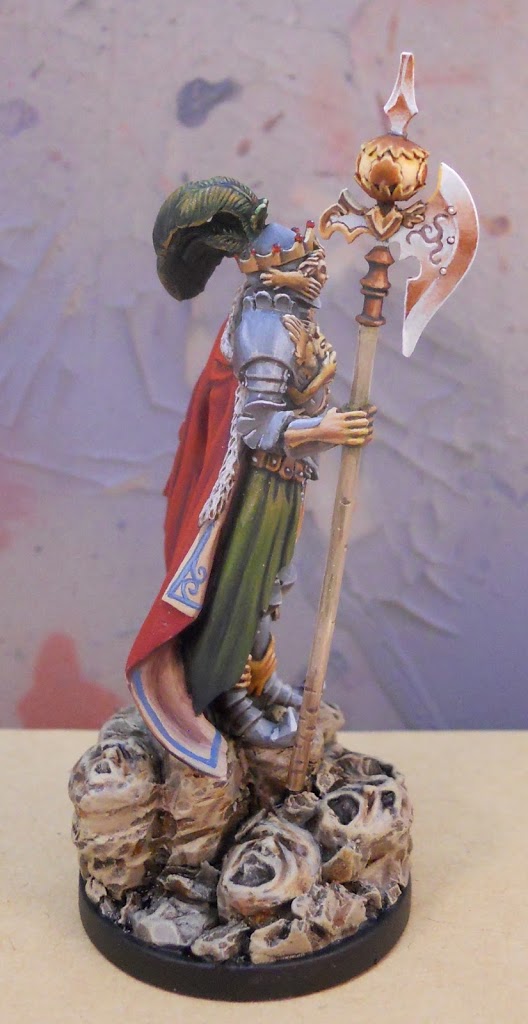
Kingdom Death: Painting the Kingsmen


It’s hard not to have Kingdom Death on the brain right now. It took less than two weeks for their Kickstarter to reach the half a million dollar mark. So I decided it was finally time for me to paint something from my ever-growing collection of their products.
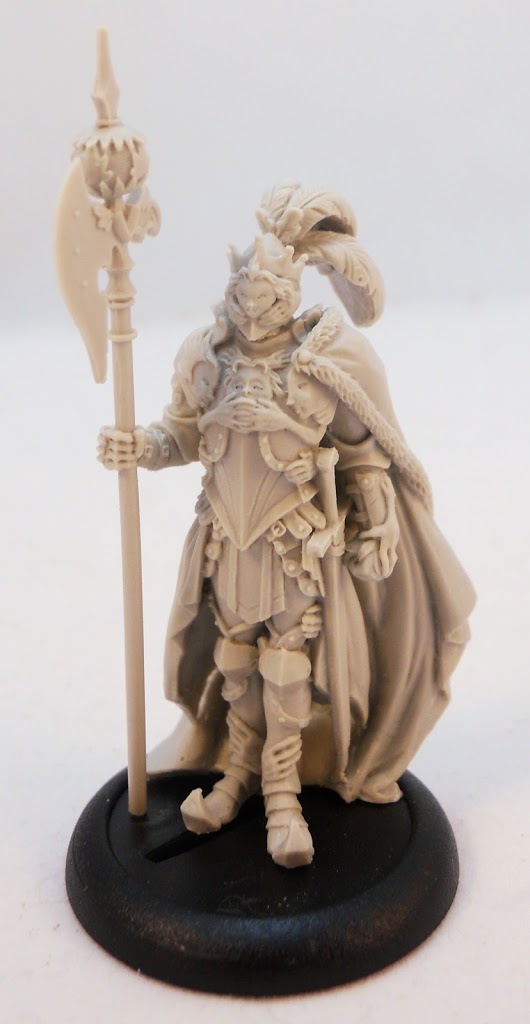
Choosing a mini to paint was a task in and of itself. In the end I went with the Kings Men because he was the one that really drew me to the line. My fascination with the company had been growing for awhile, but when I saw this guy I finally reached for my wallet. Of course by the time he was released, Kingdom Death had already reached the point where most of the things they made sold out in hours. He was gone before I knew he existed.
While that missed opportunity lead me to vow never to miss out on another Kingdom Death limited release, it was nonetheless almost a year before I had a chance to finally score my own Kings Men. Finding a healthy stock of them re-released in the Cool Mini or not booth at Gen Con was one of the highlights of my trip.
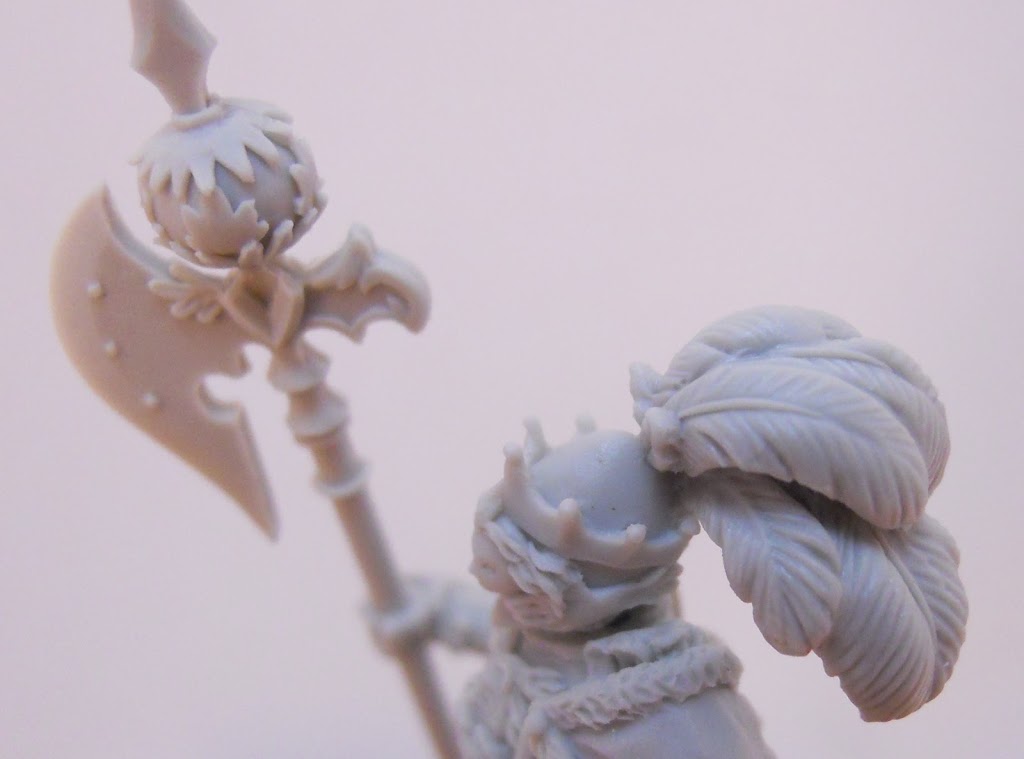
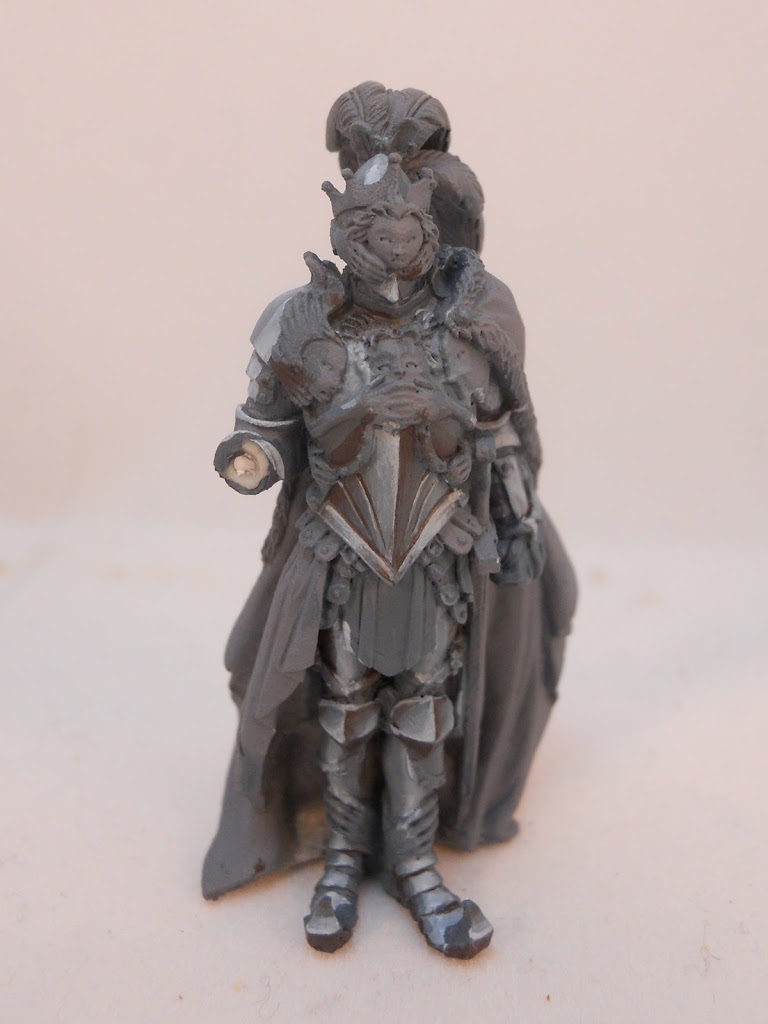
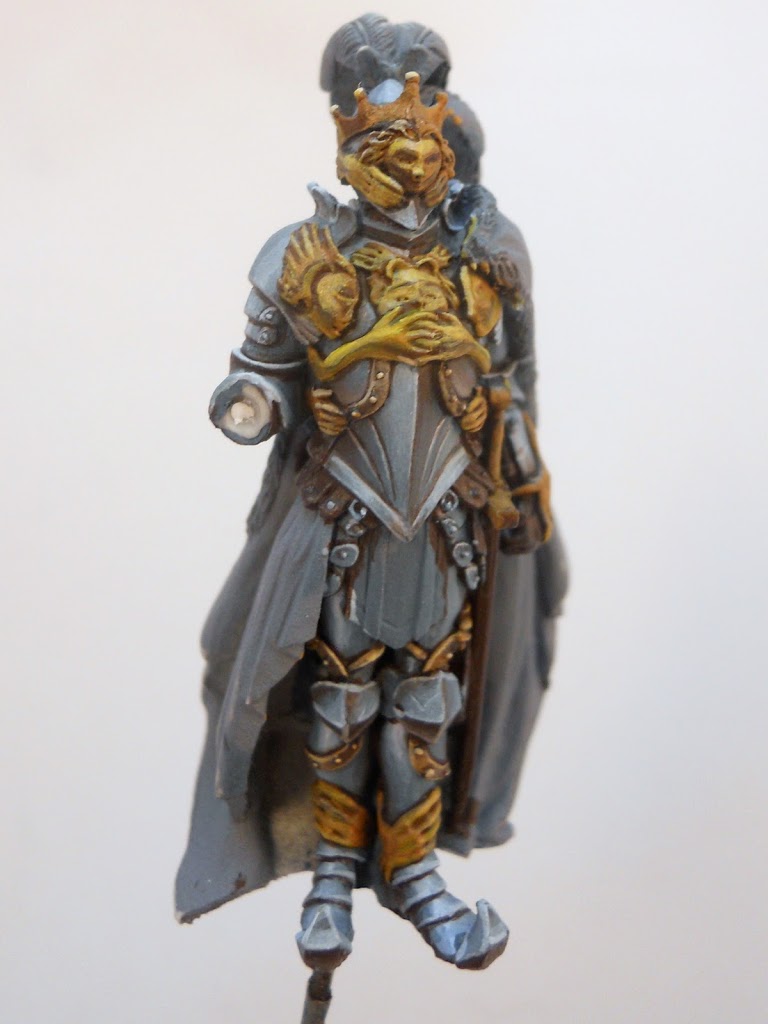
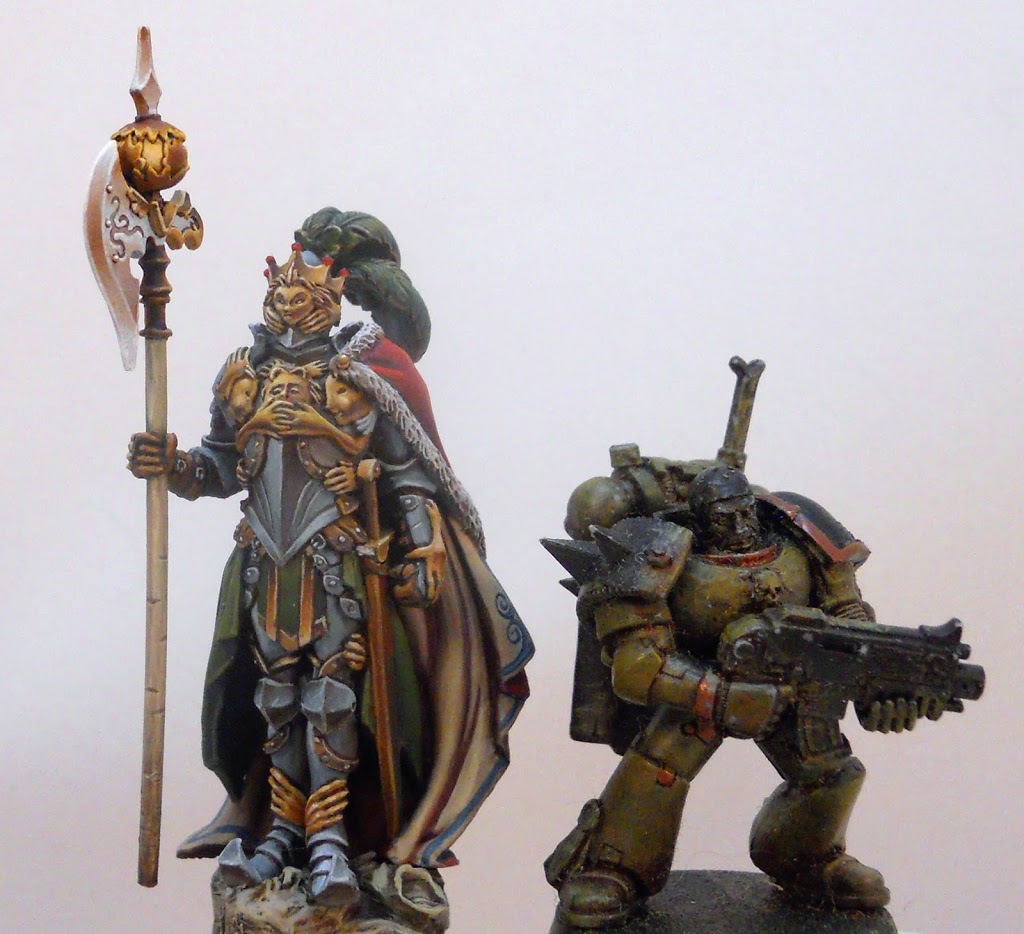
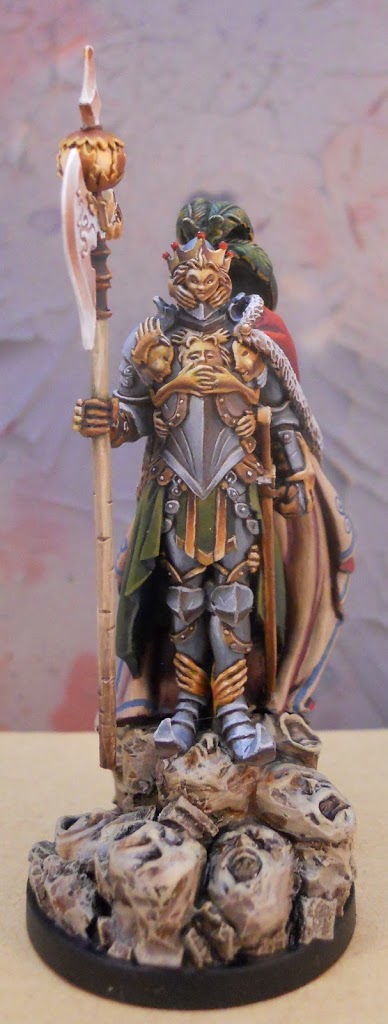
Even though this is a painting article and not an unboxing, I still have to show off two particularly notable areas of this mini before I get to the good stuff. Stop for a moment if you will and consider the fact that the Kings Men is only a three part model: head, torso, and halberd arm. That means that all those individual little spokes on this fellow’s crown are all cast as part of the same single piece. And while I didn’t even notice it at the time, the lantern on the halberd’s head is perhaps even more intriguing. All those little petals splay out from that sphere beneath them in complete disregard for everything I thought I knew about molds and under-cutting. With that out of the way, let’s get to the painting.
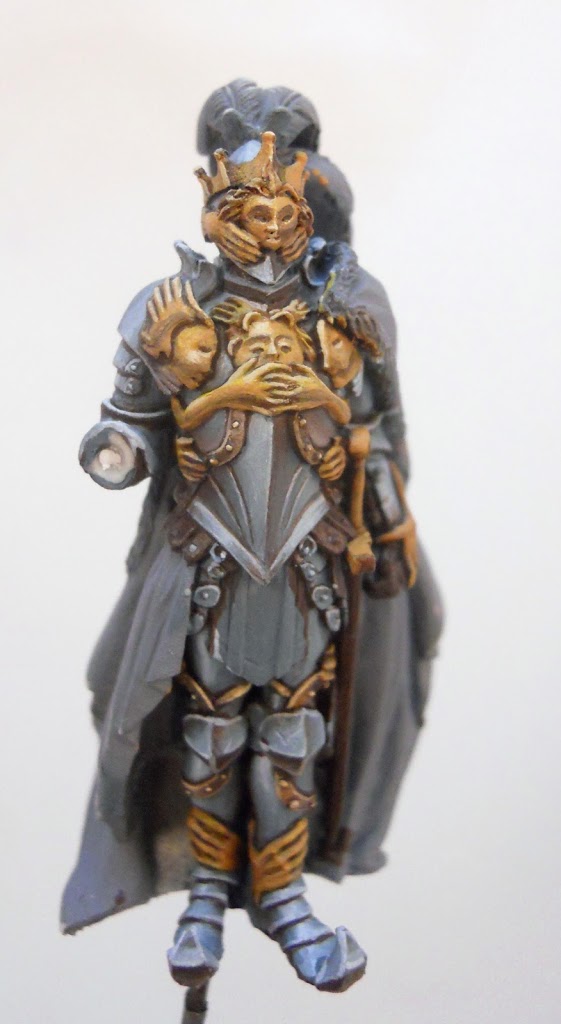
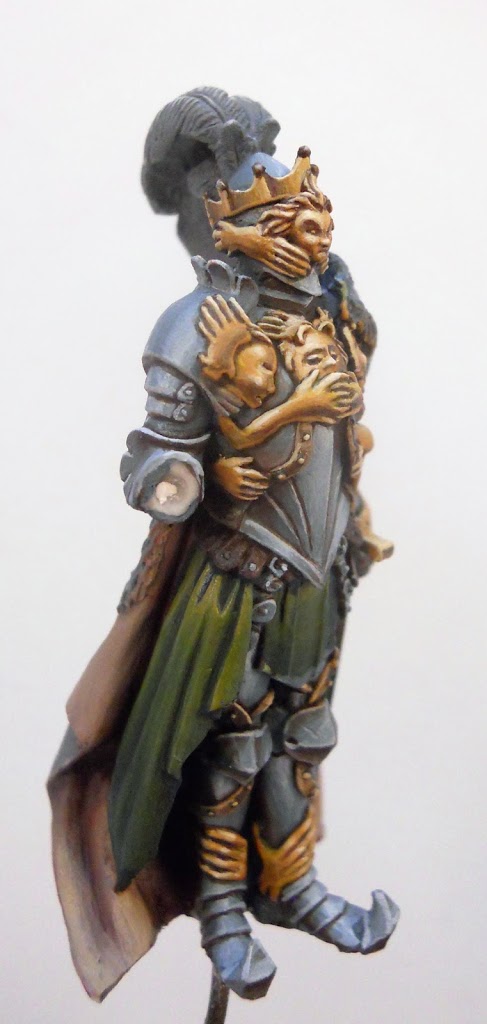
After giving our subject a healthy spraying with Model Master’s Gray Primer, I decide to start on the metallics first. As you no doubt noticed in the picture in the header, I’ve decided to go with non-metallic metals for this guy. I’m always looking to get some more practice with my NMM technique. I start by trying to divide up all the various sections of the armor into three crudely defined areas: highlight, midtone, and shade. My highlight color is P3’s Frostbite and my shade color is Umbral Umber. For the midtone I have something I’ve mixed just for the occasion; a combination of the two aforementioned colors along with a healthy amount of P3’s Exile Blue. We’re probably talking about a 3:3:2 ratio of Umbral Umber, Exile Blue, and Frostbite respectively.
Figuring out what areas get what tone is just as important to painting good NMM as your ability to blend smoothly. If you want a little more advice on this part of the NMM process check out this article I wrote a few months back.
Once you have your areas mapped out it’s time to start blending them together. I still use a combination of wet blending and layering of very thin glazes of colors to create smoothly blended transitions. As a rule, lighter colors will probably look better when wet blended where darker colors can simply be layered for good results.
And here we are with some more blending. I decided the halberd was in my way at this point so I broke it off for the time being.
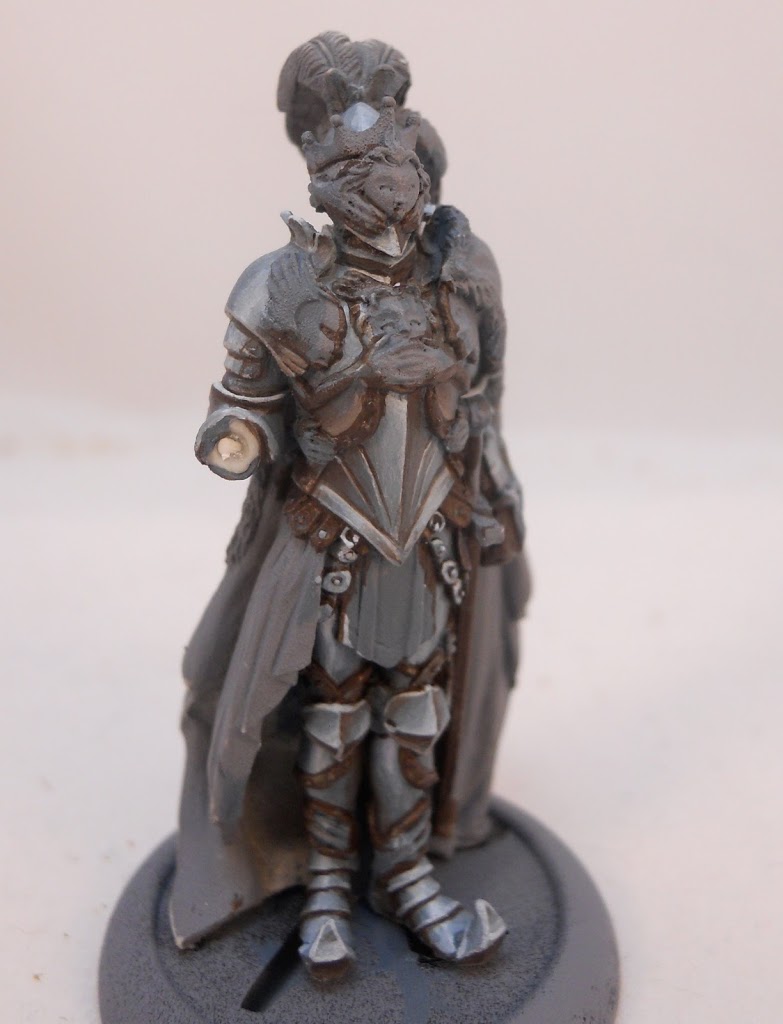
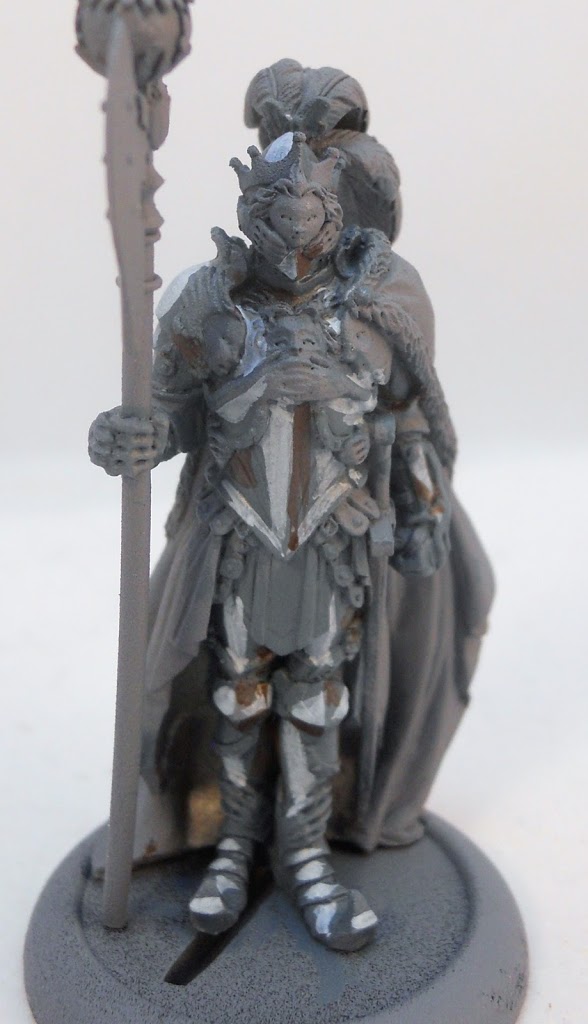
And at this point I’m comfortable moving on to the next step. The truth is, a project is never really finished until it’s finished. So even though I’ve decided to move on from the steel areas on this guy, I’m sure I’ll be returning to them to make more changes. In preparation for the next step, I paint a few areas of the armor with Umbral Umber.
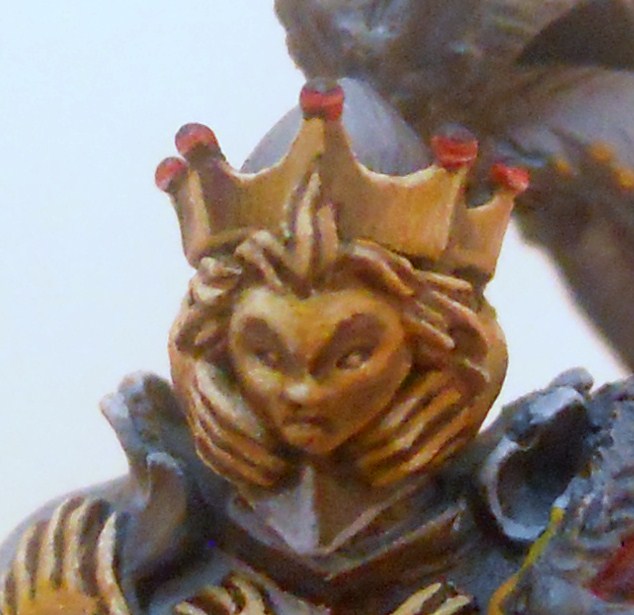
I want to do a few regions in a sort of brass tone. Since I’m planning on having a lot of gold I want to define a few structural areas of the armor with this specific color to mark them as separate from all the ornamentation that will be following very shortly. These brass areas are painted with a very limited color palette that consists only of Menoth White Highlight and Umbral Umber with Coal black being used for shading in a few places. While I’m not sure I really nailed the appearance of Brass, I’ve definitely set up a region that is neither gold nor steel.
My brass areas receive a wash of GW’s Agrax Earth to even them out. I also begin on the gold areas by painting them up with some Rucksack tan. These areas also get a wash of the Agrax Earth. You can just ignore those little bits of flock that I didn’t notice had gotten stuck to his chest when I took this picture.
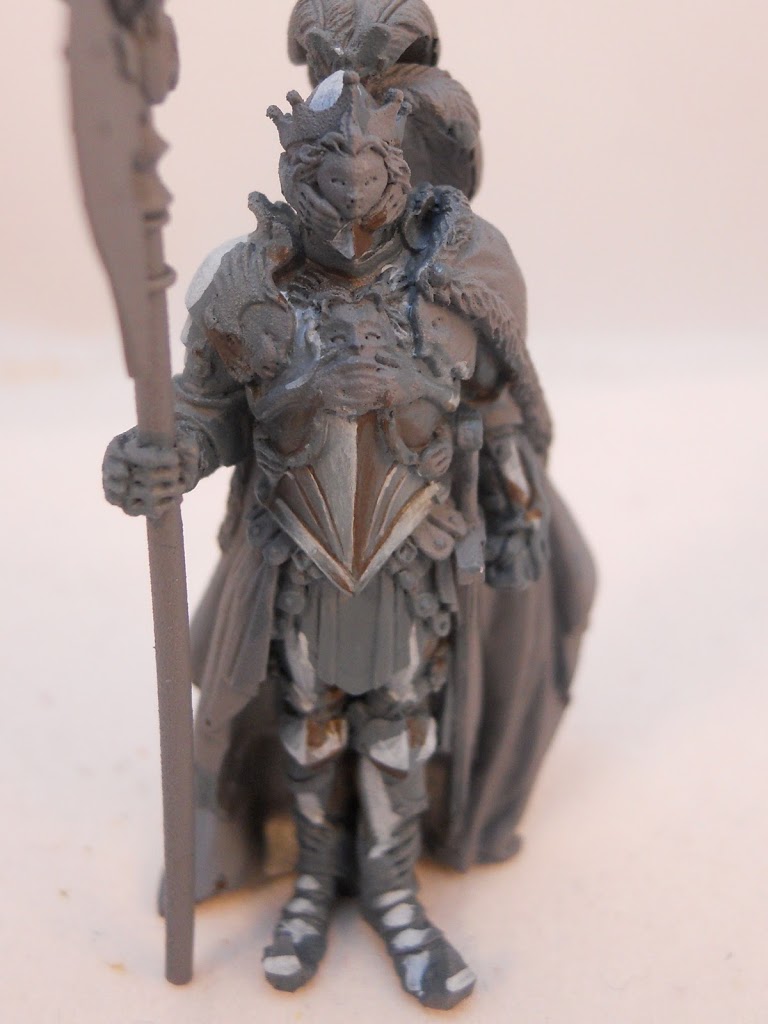
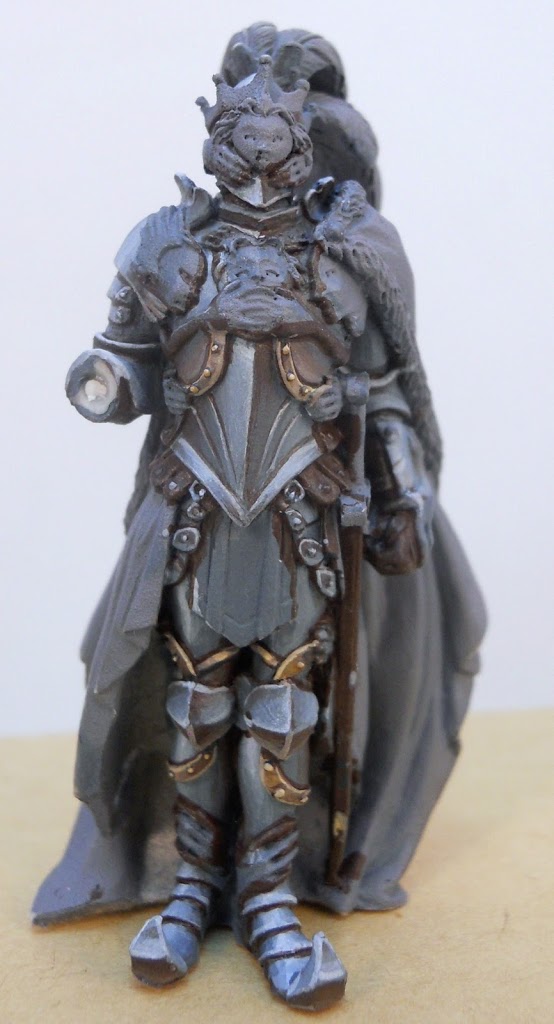
I deal with the gold areas in the same way as the steel ones; by defining regions of light and shade first, then blending them together. The color palette for the golds was a bit more complicated. Rucksack tan was used as a midtone with Umbral Umber as a shade and Menoth White Highlight as a general highlight. Gold has always been considerably more difficult for me to get right than steel. If you make it too orange it looks off… too yellow and it looks off… too much contrast and it looks off… not enough and it looks off. In the course of trying to get it right, I ended up using 8 different colors. There were the three listed above of course and also Beaten Purple which was added to some of the darker areas. Blood Tracker Brown was used to help blend my midtone into my shade. Cygnus Yellow was occasionally added to the highlights for color, as was Morrow White to make them even brighter when necesary. Finally more Agrax Earth was used here and there to add a little shade in places.
And here he is with some more blending.
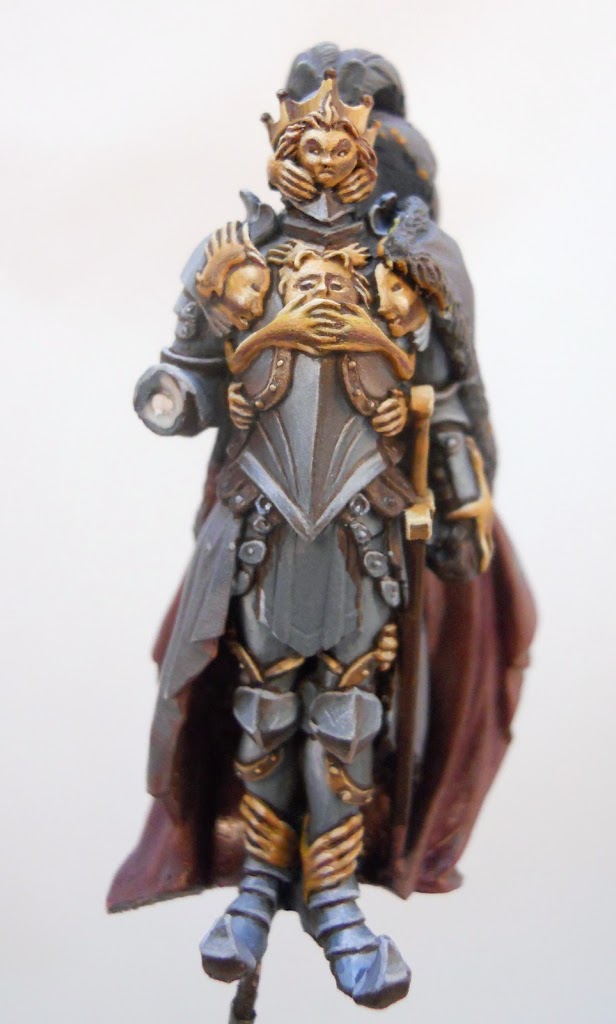
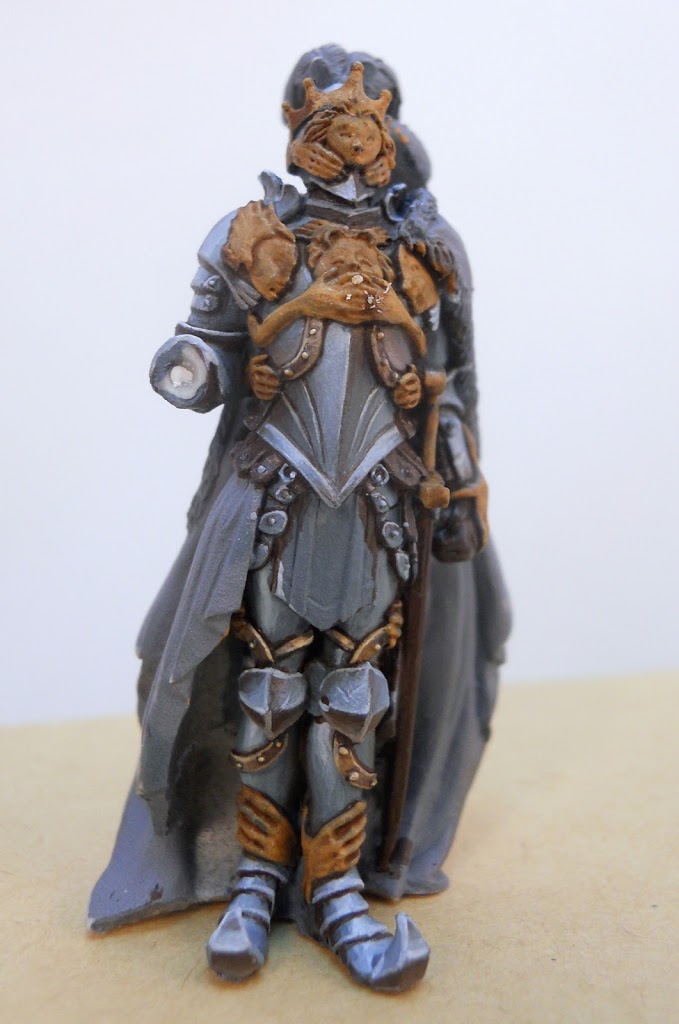
This was the point when I decided to move on to the next step. I wanted a warm tan color for the interior of his cape, so I started with a desaturated purple color mixed from Beaten Purple, Hammerfall Khaki, and Bootstrap Leather.
The cape interior was highlighted up by mixing Hammerfall Khaki into the base color, then adding final highlights of the Khaki with some Menoth White Highlight mixed in. Unfortunately I didn’t realize how out of focus the cape was when I took this picture.
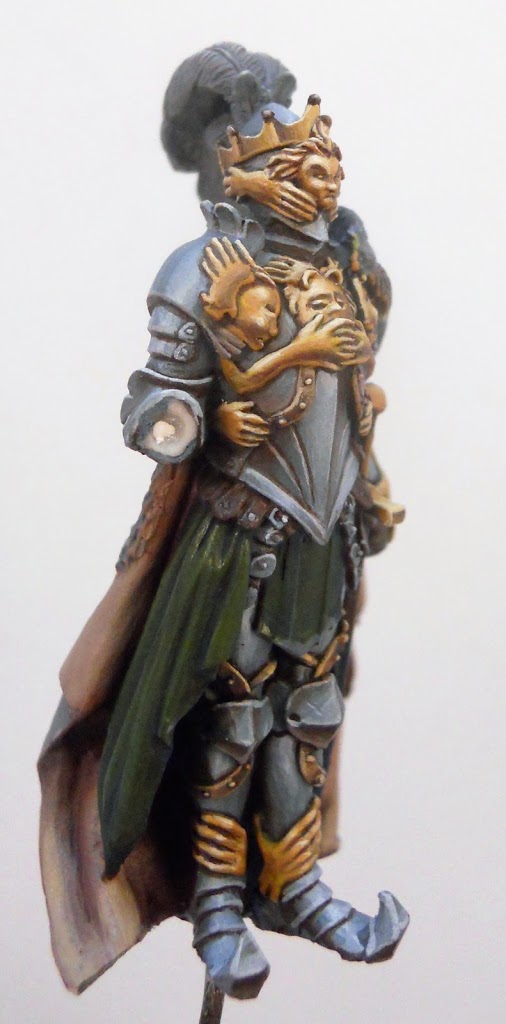
Up next is the skirt. I thought a green would be nice for it, so I gave it a base of Ordic Olive and washed it with Agrax Earth to give it some easy definition.
I added some Exile Blue to the darker areas of the skirt to add some variety. To highlight the green I actually ended up using Rucksack Tan. For those unfamiliar with the color, it has an orange tone to it, and I was very pleased with the vibrant feel it gave me.
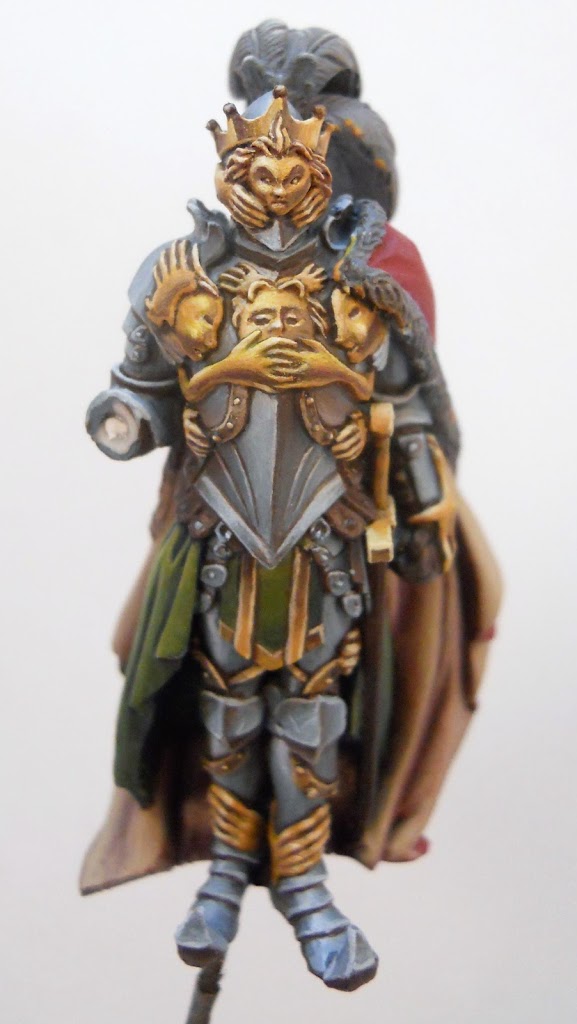
With the green out of the way I was finally able to paint the strips on the loin cloth. I decided to go back and make them gold. I also started on the cloak which I basecoated with Sanguine Base. As a Kings Men I thought this guy should really have a suitably regal red cloak.
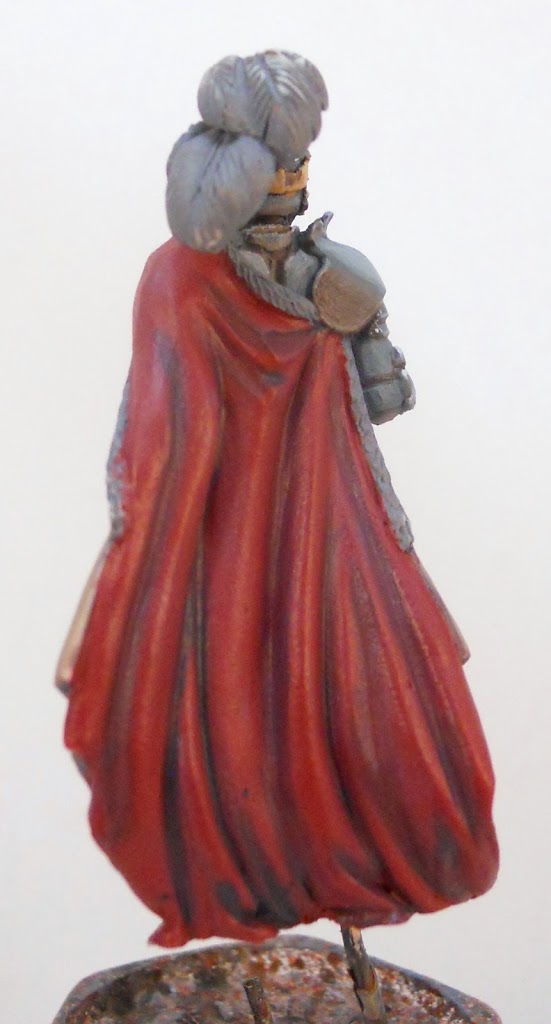
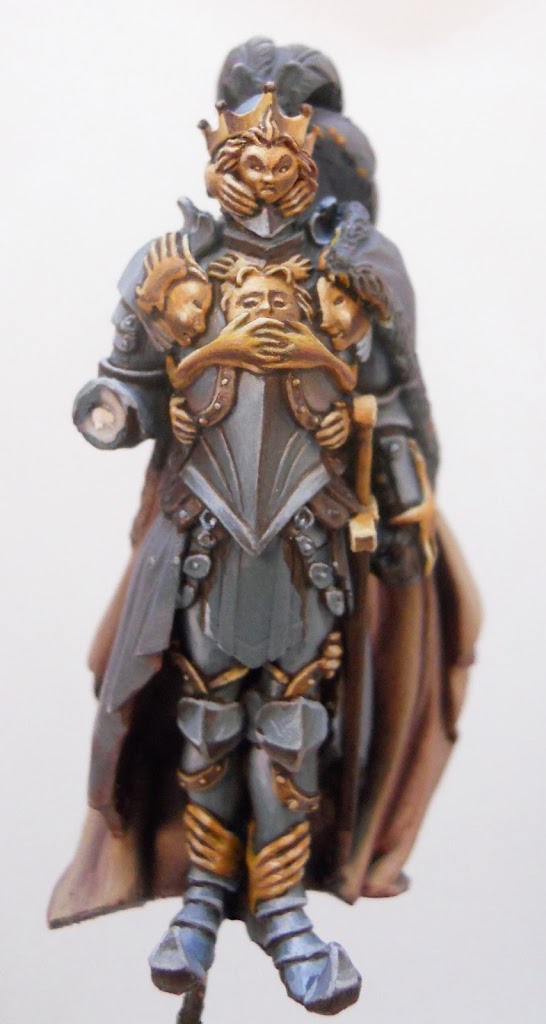
I shaded the recesses of the colak with some thinned down Coal Black. This particular color is more of a dark turquoise than an actual black.
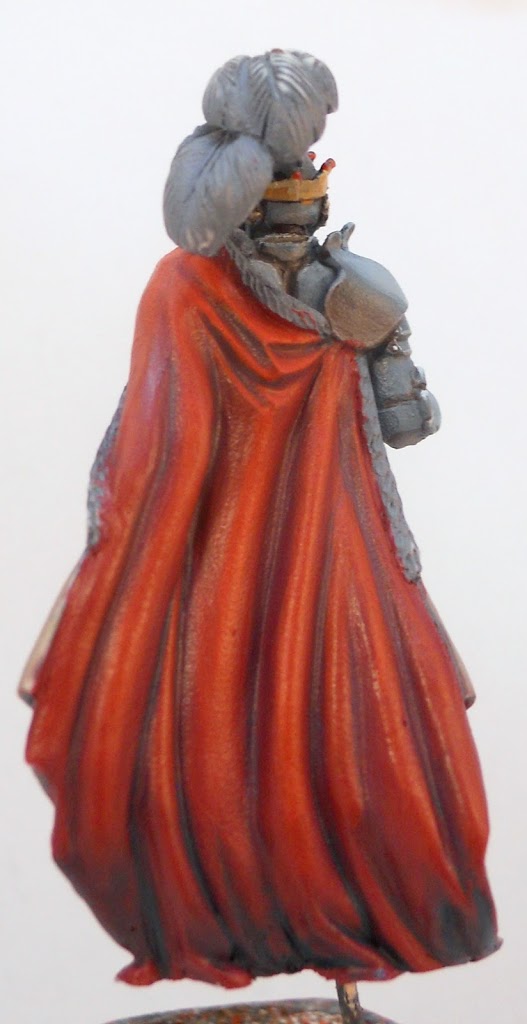
Next I increase the amount of Coal Black shade at the base of the cloak, then start highlighting the rest of it by blending in increasing amounts of Khador Red Base.
I decide to do the tips of the crown as red gems to match the cloak. They are done with the same colors, but the base gets a little Rynn Flesh added to lighten it even more.
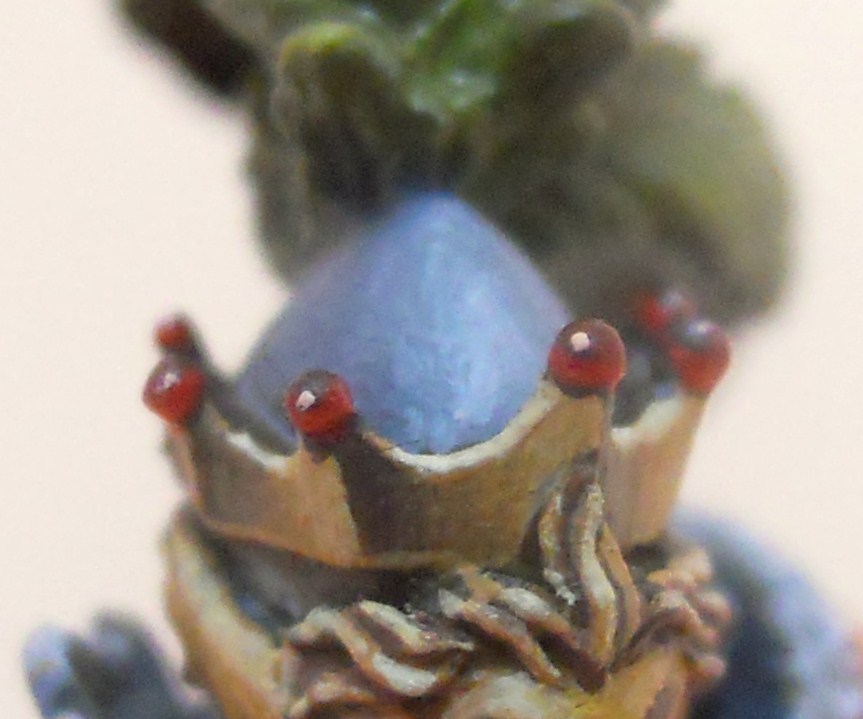
Then I wash all of them with P3 red ink and give them a little point of highlight of pure Rynn Flesh.
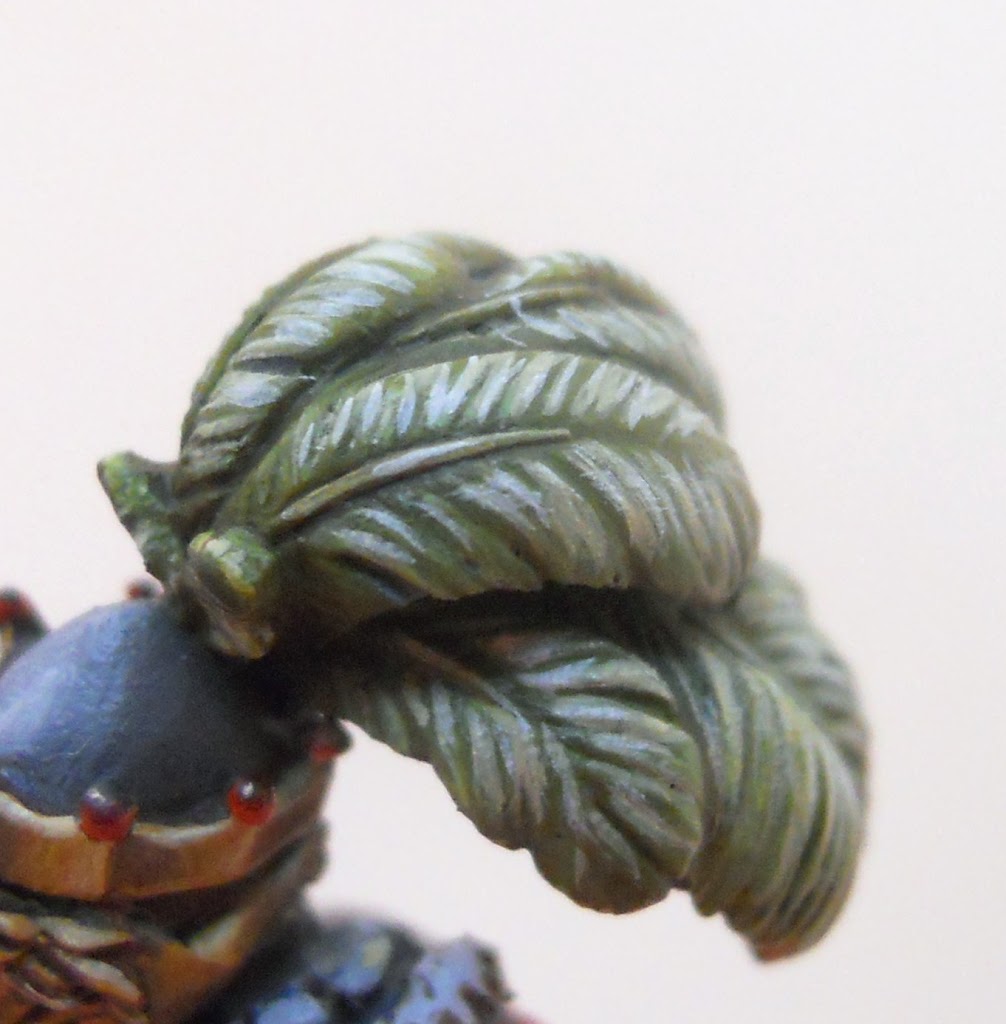
For the plume on the helmet I decide to go with a green to kind of match the skirt. I start with a basecoat of Rucksack Tan and Ordic Olive mixed together. Then I add some manual highlights with Menoth White Highlight and even some pure Morrow White.
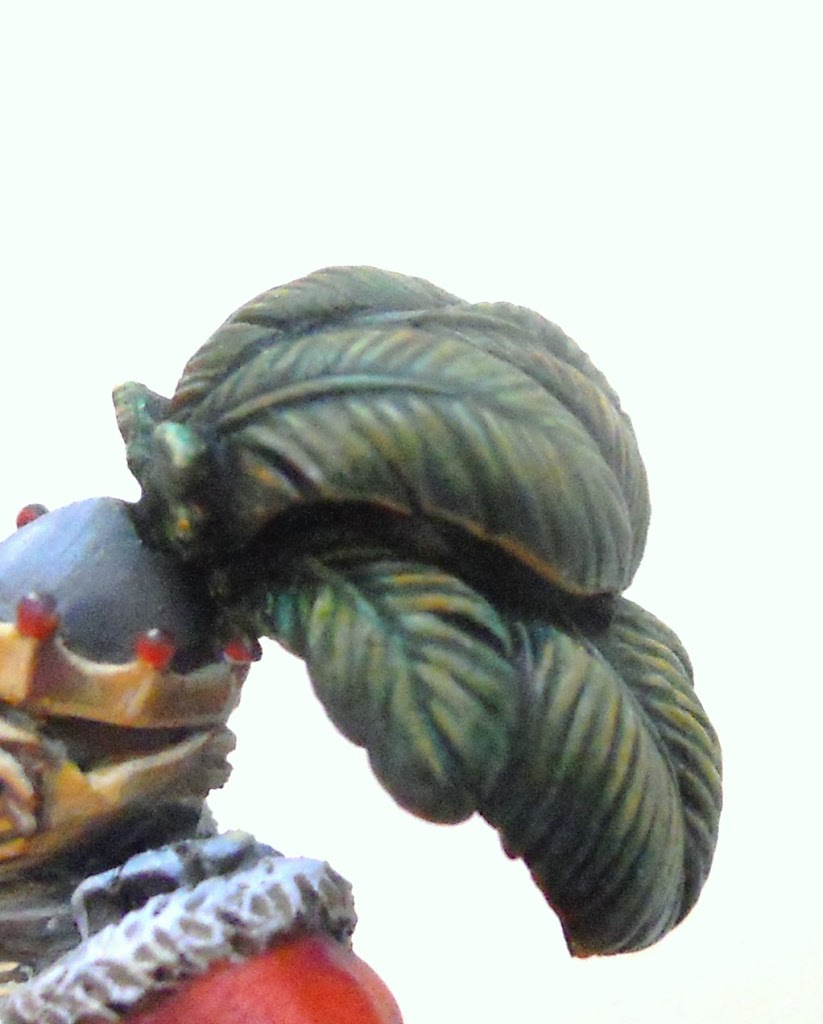
I added some Ember Orange to some of the highlights to try to capture that iridescent tropical bird kind of appearance. Then I washed everything with some P3 Green Ink with just a bit of Agrax Earth mixed in to desaturate it a bit.
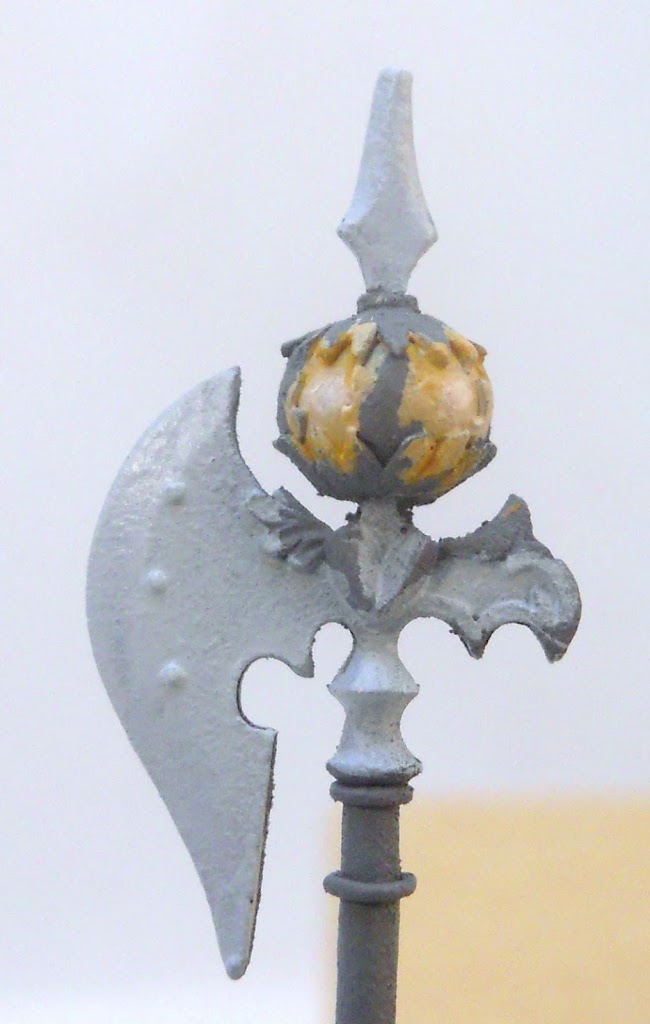
On to the halberd now. For the glow effect in the lantern I started by laying down a base of Morrow White and Menoth White Highlight. I began to darken it as it reached the edges by mixing in some Rucksack Tan, and Cygnus Yellow. I also paint the blade of the halberd with Frostbite. I want it to look separate and distinct from the armor so I’m going to use different colors on it.
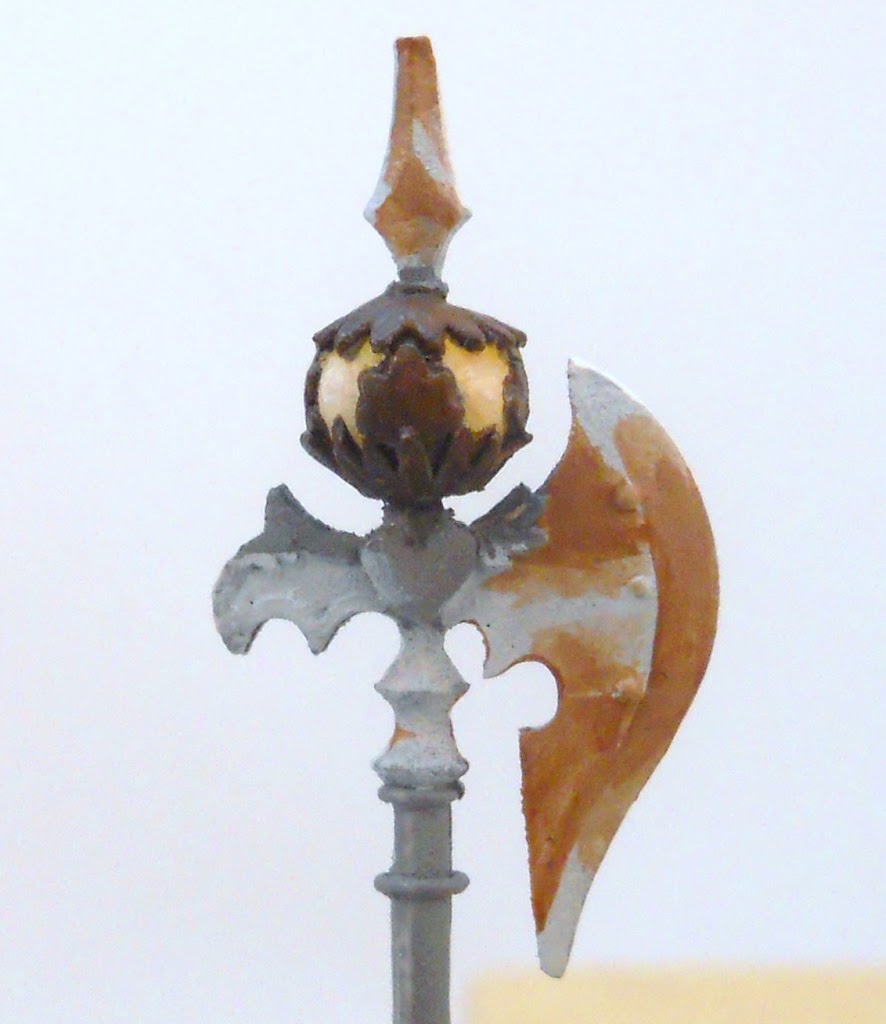
I base the metallic areas of the lantern with Umbral Umber and move along to the blade. I lay down the first coat of Bootstrap Leather which will be the shade color.
I finish off the lantern by blending out towards the edges with Blood Tracker Brown which gets a bit of Menoth White mixed in as it gets closer to the edges. Then every edge gets a thin line of Menoth White mixed with a bit of Cygnus Yellow to represent a reflection of the light coming from within. I also begin to blend the brown and Frostbite on the blade together.
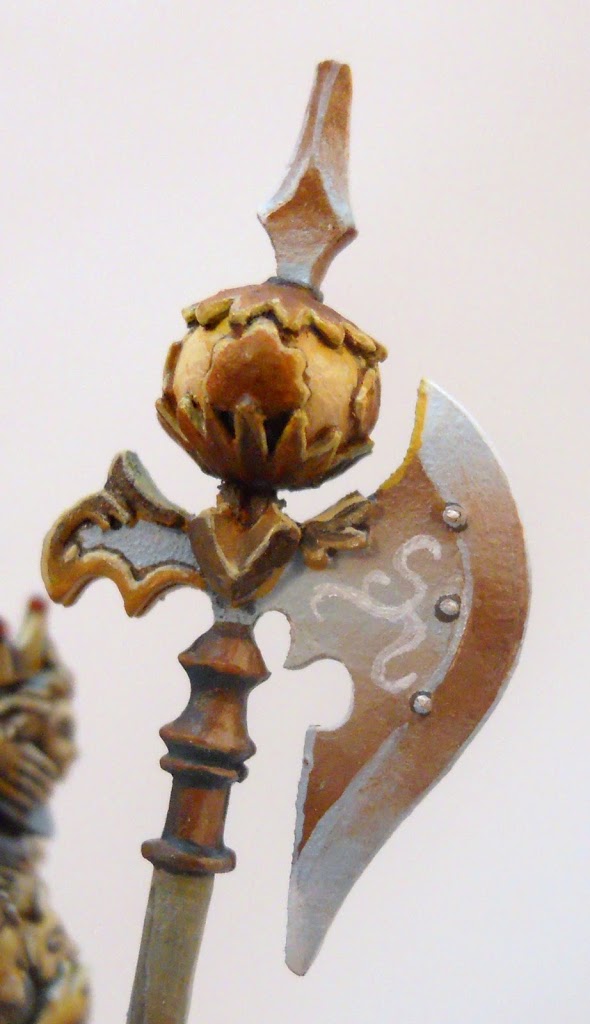
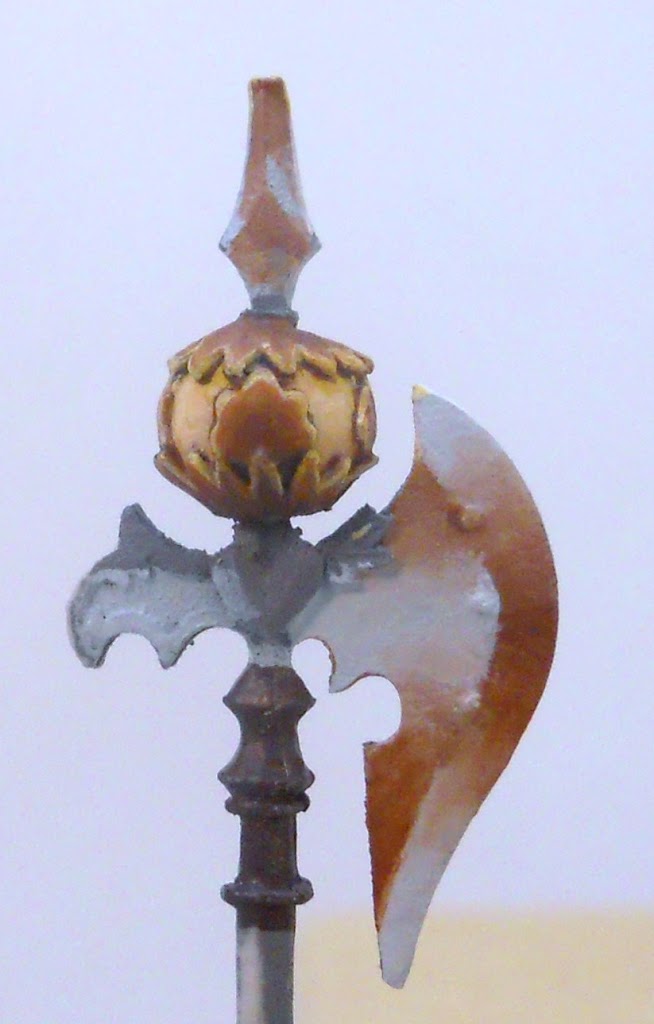
The blade is nearly completed, but I decide to add some freehand to really make it interesting. I start by making a swirly little design with pure Morrow White.
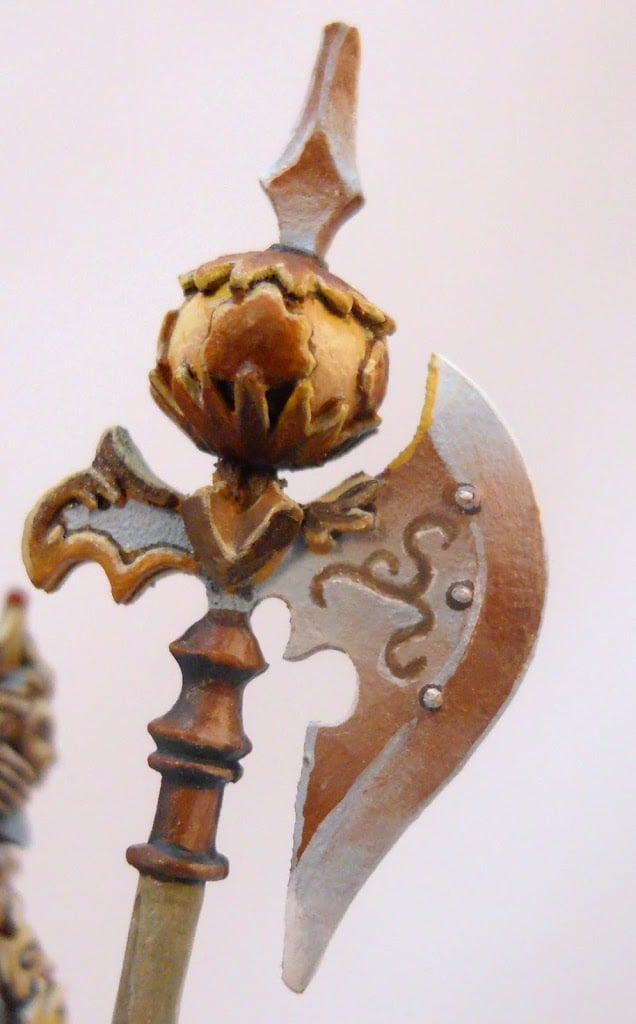
This first white step becomes a highlight ridge as I paint a darker mix of Frostbite and Umbral Umber over it to create the appearance of a recessed area.
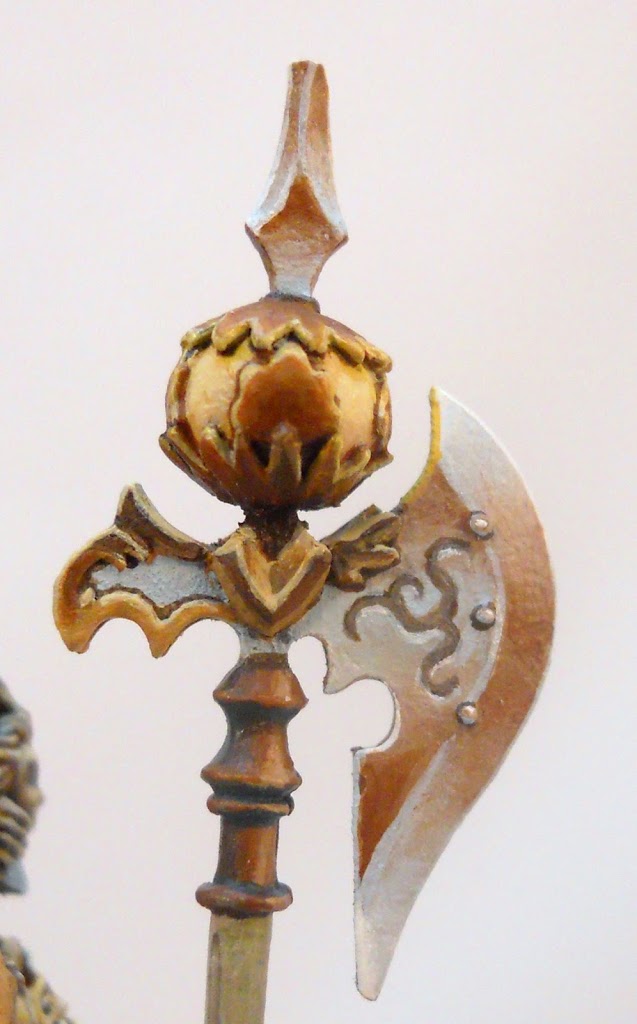
I add a few darker shadows and define it a bit more making sure the points of the pattern stay nice and crisp.
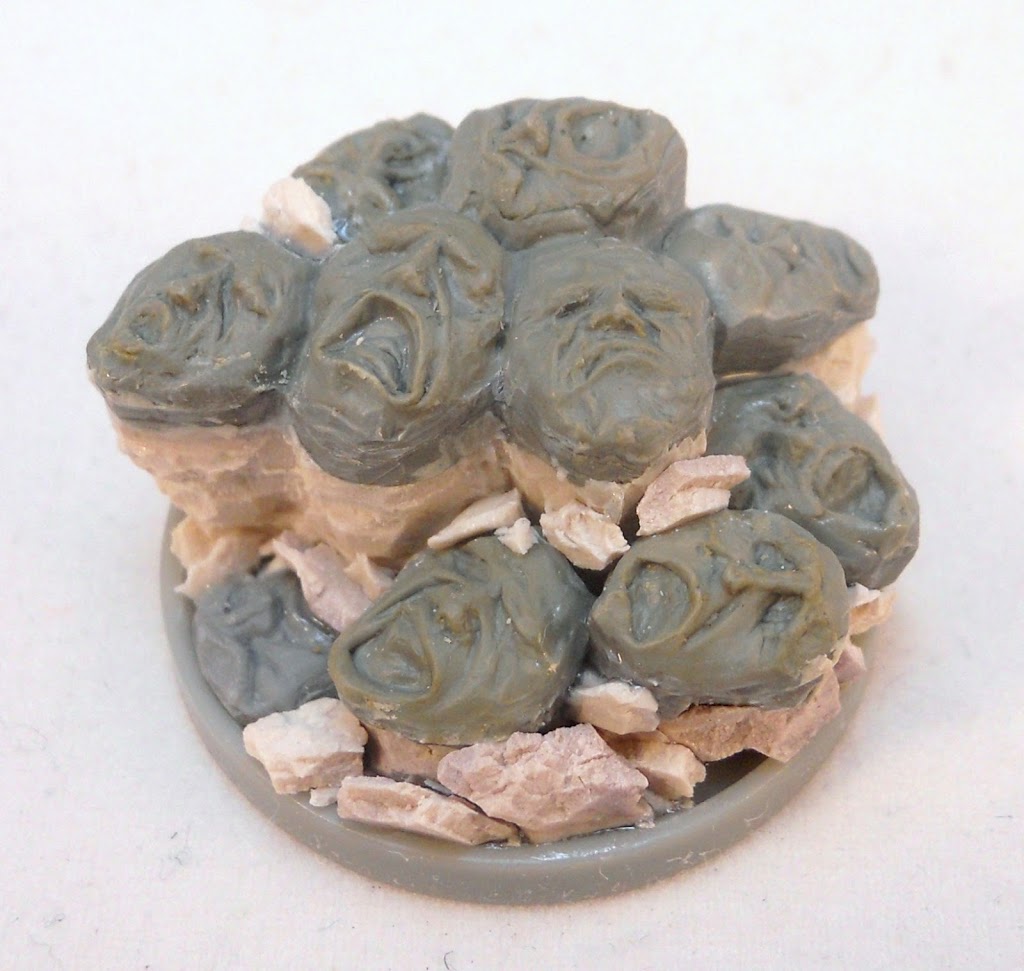
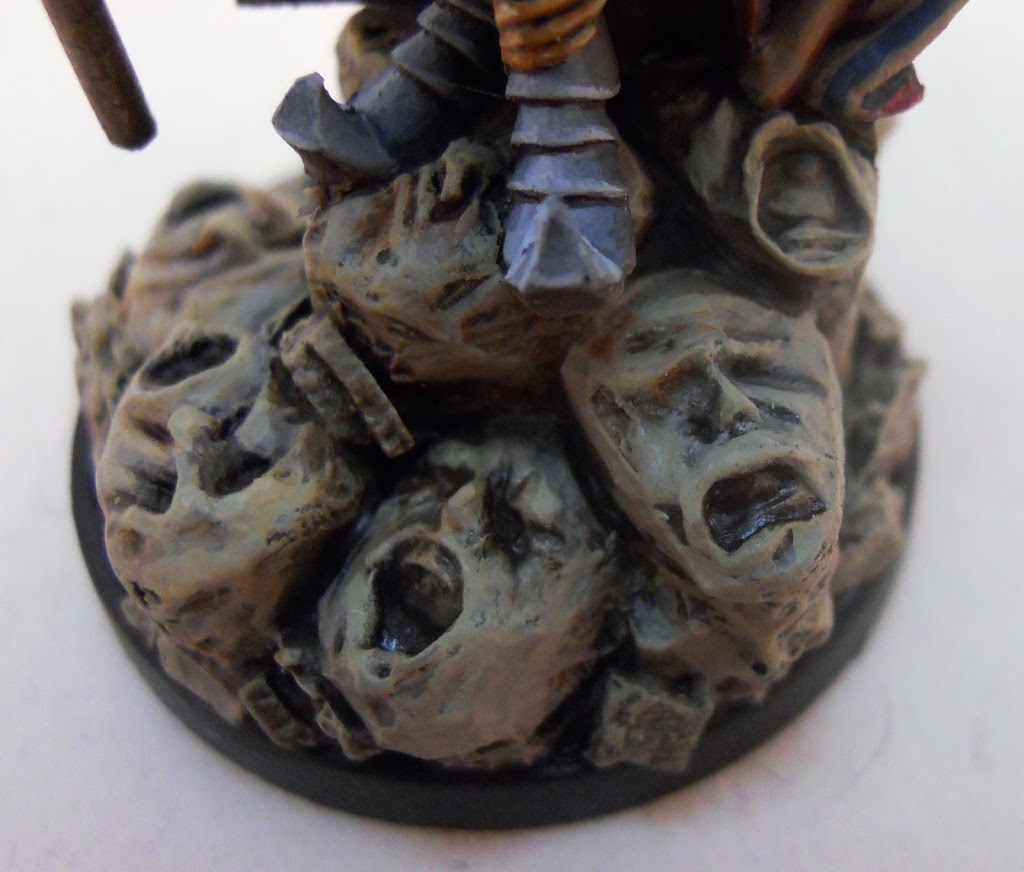
I want this guy to have a cool base and that definitely means including some of those faces that feature so predominantly in the game. I was visualizing multiple tiers with the faces erupting out of the ground on columns of stone. While there will be some very cool face base inserts in “Monster” when it is released, for the time being the Lion Knight is the only place to get anything like them. Fortunately I did grab a Lion Knight for myself when he was first released. But even if I didn’t have the slightest reservations over hacking up a base from an out of print (for now anyway) $60 mini, the thing is made out of some very thick and very hard resin. I don’t know if I have the skills to take it apart correctly without breaking it. And since that would leave me with no base for my Kings Men or my Lion Knight I decide the easiest solution is to press mold some of the faces and make some new ones out of gray stuff. Everything else is made out of Sculpy which I carved into shape with a hobby knife after cooking a lump of it in the oven. The stuff is pretty soft and if you get aggressive enough with it you can sort of chip bits of it off and leave a kind of rough stony texture behind.
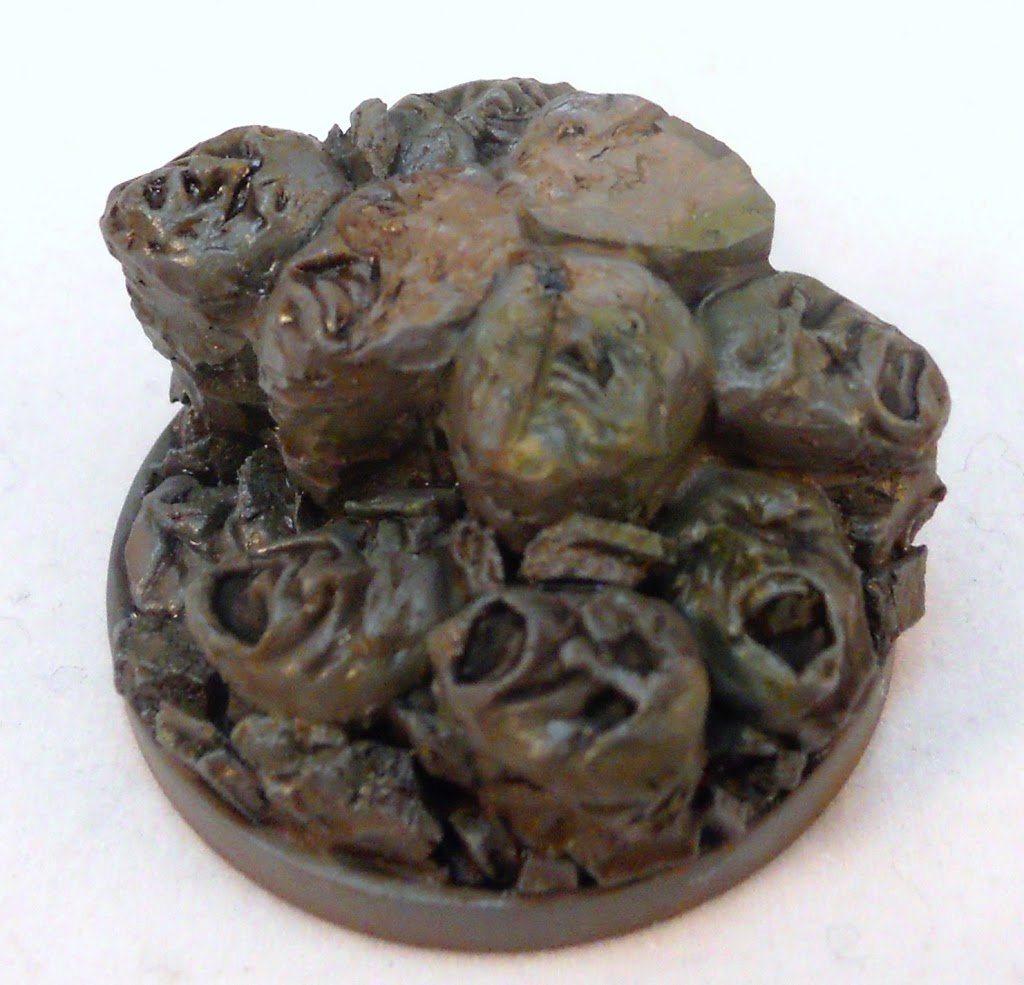
I sprayed the base with the same gray as the mini,before painting it with Bootstrap Leather, then washing it with Agrax Earth with some Ordic Olive and Bloodstone here and there for color. I also had to shave some faces off to ensure the Kings Men would sit flush on the base.

~ Is everyone else looking forward to Kingdom Death “Monster” as much as I am?


