Hobby: Making the Most of Decals
5 Minute Read
Apr 19 2013

Advertisement

Too often we as miniature hobbyists forgo the substantial benefits of waterslide transfers and other decals. We find them too obvious, fake-looking, and sometimes just hard to use. What, then, is the secret to getting your decals to look the way you expect them to?
Well, so long as the decals aren’t too thick, a sure sign of low quality, I think you will find the techniques in this article to be of great help. Luckily for those of us in the Flames of War hobby, decals sold by Battlefront are almost always high-quality, though some can be a bit harder to use than others, probably due to different vendors printing them, etc. They are, however, consistently thin, and easy to blend into the model with just a bit of work.
For starters, don’t expect miracles. If you want to put a symbol on a highly irregular surface, you are probably better off just painting it by hand. If the surface has a few subtle curves or irregularities, a decal solvent will usually be sufficient to make the decal adhere evenly. More on that in a bit.
First thing you want to do is identify all of the surfaces to which you will be applying decals. Paint these surfaces with a thin coat of brush-on gloss varnish. This will give the decal a smooth application surface and will minimize air intrusion.
 |
| Painting on gloss varnish where a decal is to be applied. |
Cut the decals you wish to use from the decal sheet and dip them in water, taking care not to leave them in or to drop them into it. Alternatively, you can lay them on a paper towel and use your brush to wet them. Either way, some take longer to release from the transfer paper than others. Once the decal is loose, use a brush with plenty of water and use it to maneuver the decal into place on the model. This takes some practice at first with the fiddly nature of small miniatures. If the positioning of the decal is not to your liking, use some water to loosen up the decal and try again. You will probably end up ruining a few decals now and then, especially with decals that tend to curl. Consider it a small price to pay.
 |
| Try not to let decals dry crooked. |
Once you have your decal where you want it, it will be time to apply some decal solvent to make the decal adhere better to the surface of the model. It is usually a good idea to let the decal dry thoroughly before applying the solvent, as it can loosen an unset decal. I use Microscale Micro Sol, but there are other brands out there. The solvent subtly melts the decal, so that it looks much more like it is painted onto the model than merely applied. WARNING: Thick, low-quality decals may be rendered into mush by decal solvents.
 |
| Because it works. |
The next step is to paint the decal and any areas that were gloss varnished with brush-on matt varnish. I don’t recommend relying on a spray finish to do the job. Just brush on the varnish, then use any spray varnish when the time comes to seal the entire model.
The last step is to add weathering and to make the decal blend into your model a bit better. For weathering, I like to take a bit of sponge or model blister packing foam, normally abundant in a miniature gamer’s home, and use it to stipple paint onto the decal. I like to make the weathering a bit more apparent on the bottom of a decal, to represent its closer proximity to the ground and thus its greater exposure to the elements. Just be sure to start out with very little paint on the sponge until you get the hang of it.


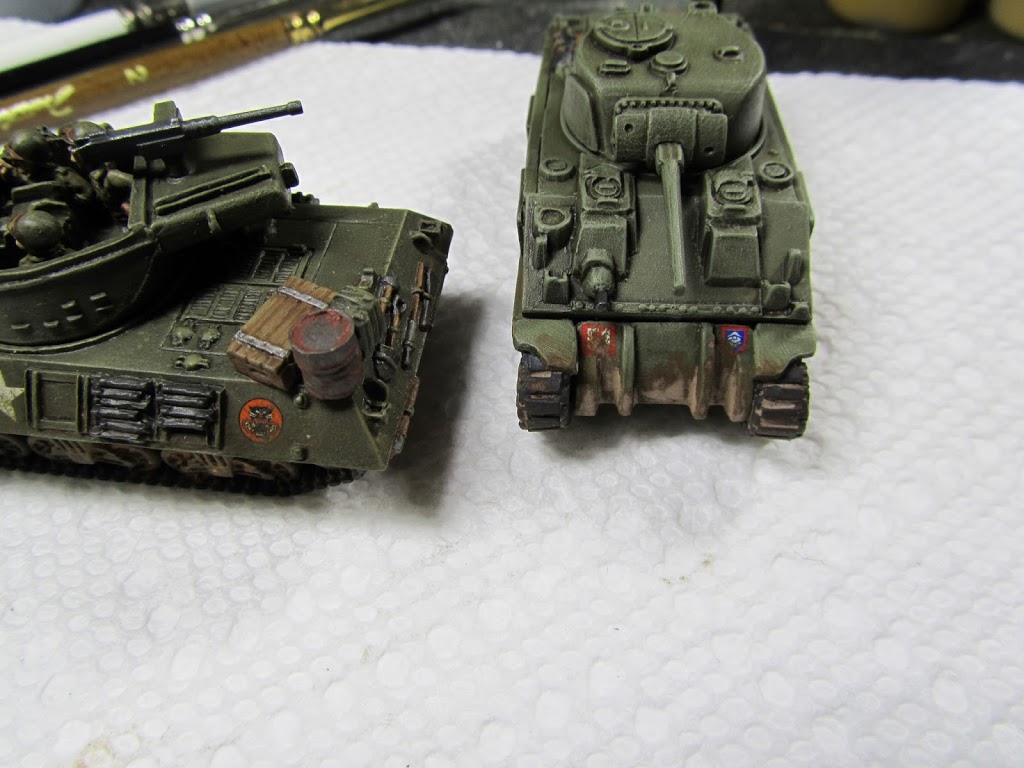 |
| Weathering decals can truly make them look like a natural part of the miniature. |
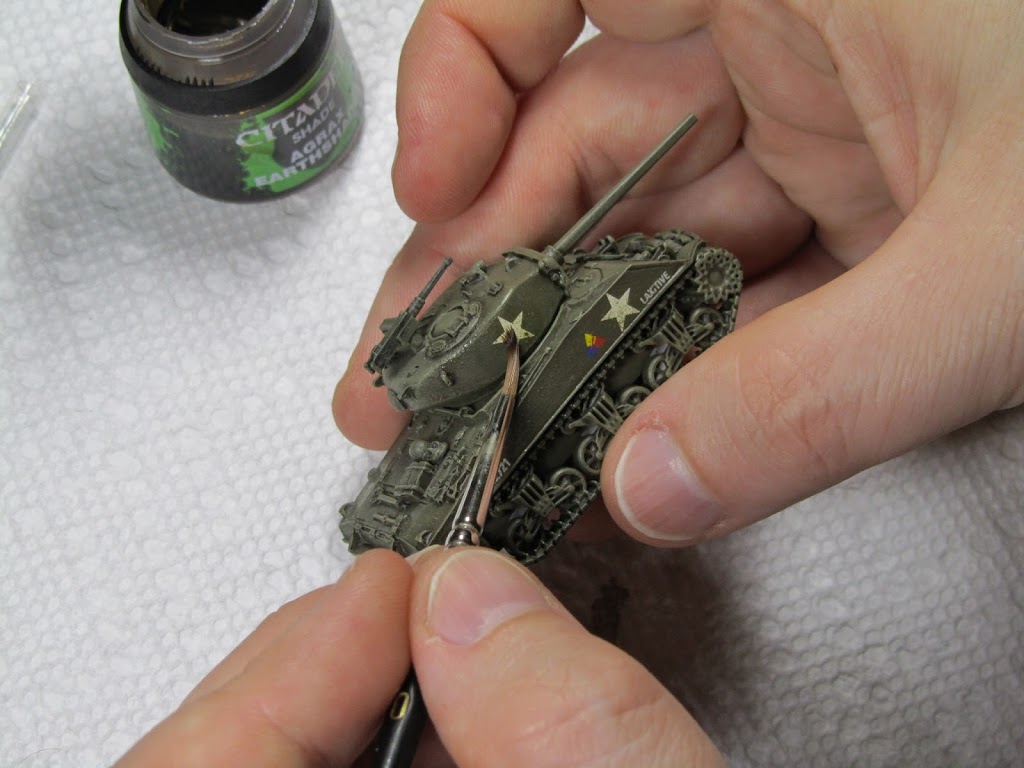
In order to blend your decal in a bit better and to make it believable, apply a very thin wash, preferably one you have already used on the same surface you have applied the decal to. I typically find myself using Citadel Agrax Earthshade mixed with water.
You may decide to leave out some of these steps, such as weathering, to suit the look you want for your miniature. You may not get what you are looking for the first few times, but keep trying and you will be an expert in no time. And don’t forget that these techniques work for any miniature to which you may want to add decals.
 |
| Whether you are after something somewhat conservative…. |
 |
| ….or doing something a bit more ambitious. |
And that’s all! Know any tricks that make decals work better for you? Feel free to leave a comment and let us know about it.
Author: Mike Travis
Advertisement


