BoLS logo Tabletop, RPGs & Pop Culture
Advertisement

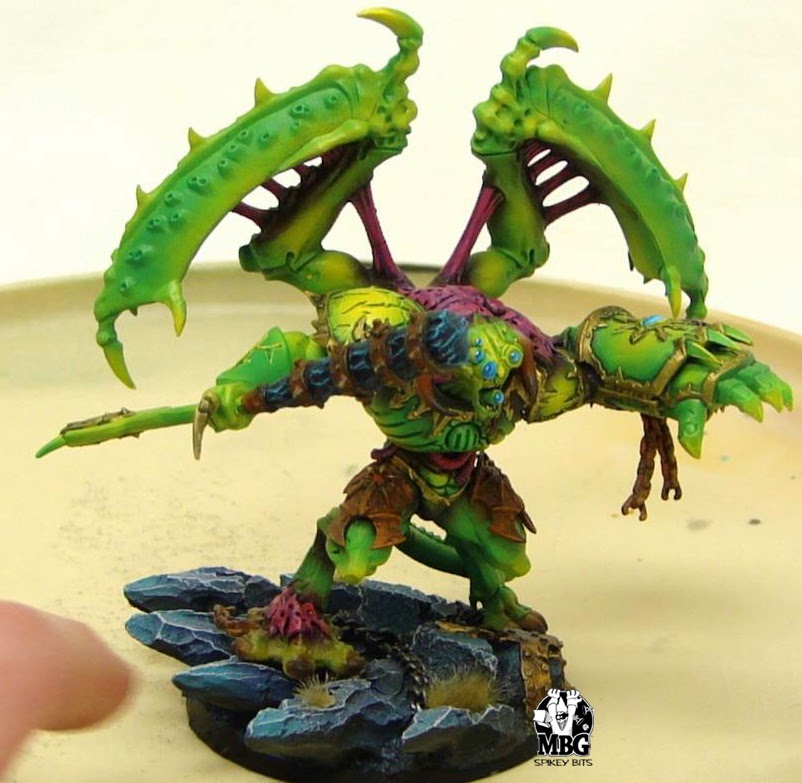
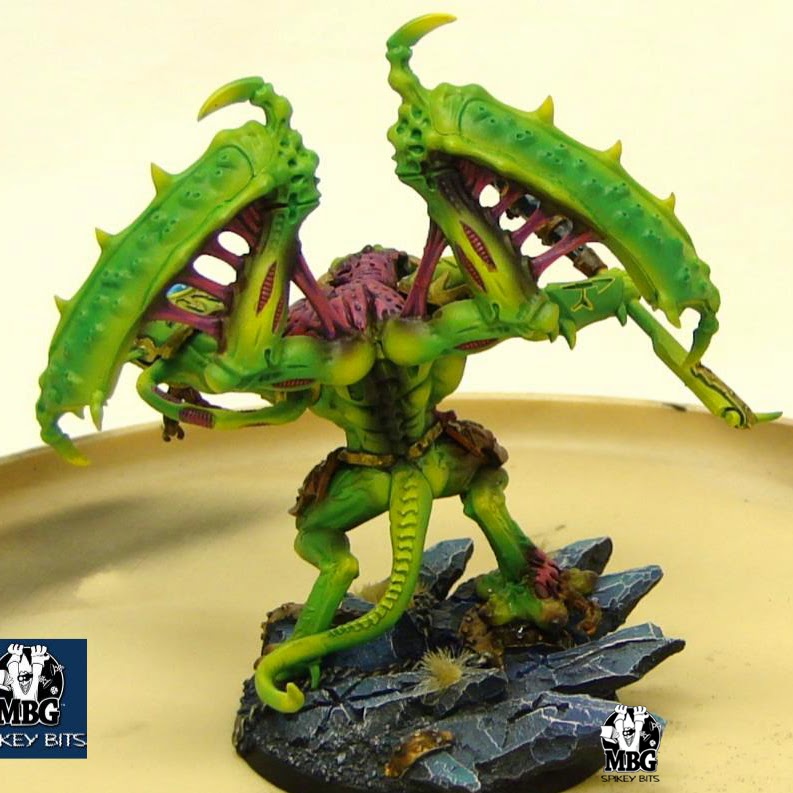
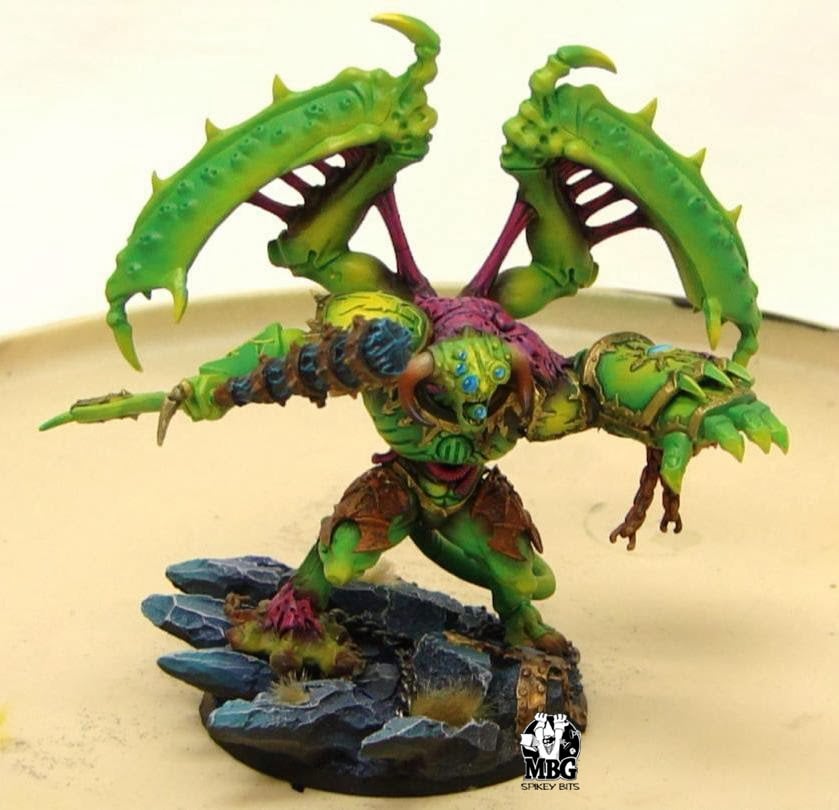
40K Conversion: Nurgle Mantis Pattern Daemon Prince

3 Minute Read
Jan 23 2014

I’ll be honest the idea for this little guy just happened to come from just dumb luck.

Not that I’m upset, heck that’s how we got nice things like Penicillin and Nura Sweet! However while those discovers went on to change our world, I’m just playing with toy soldiers and trying to inspire others with all this.

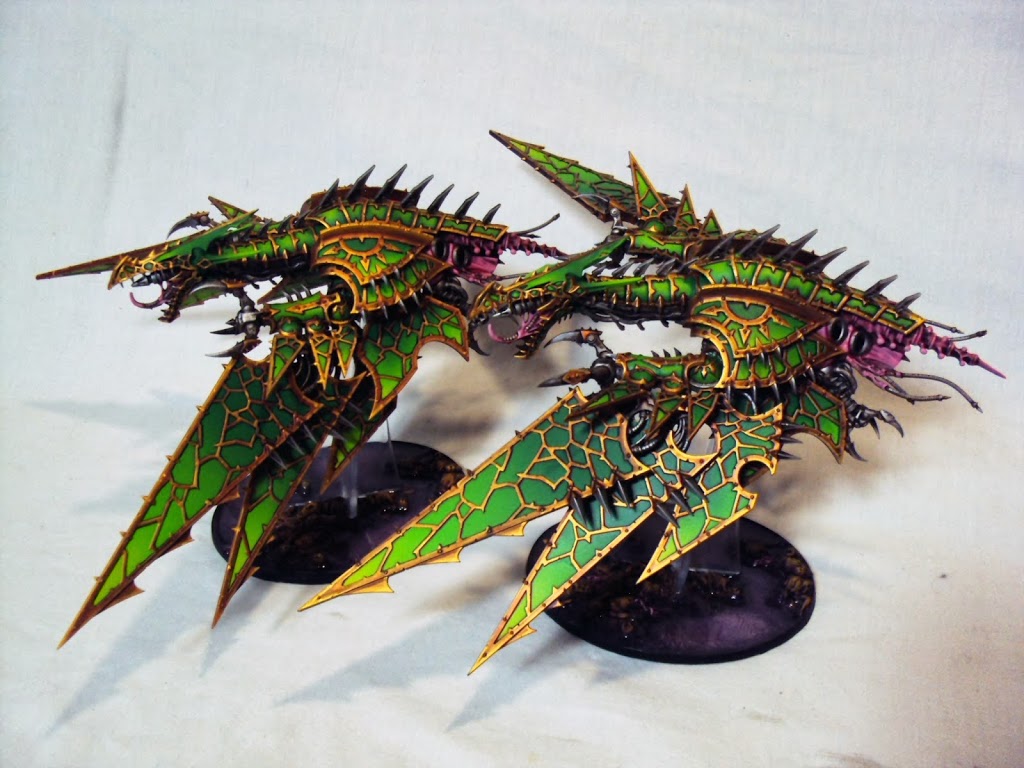
Way back in the spring, I happened to be working on a Daemon prince model, and put it away one night in a lid from a random GW kit. When I pulled out the box the next day, I noticed the model was resting over a pair of Tervigon arms that were in the box already. The rest, was history. I had to make this conversion!

So I added a few more parts, and some green stuff to tie it all together then hit the spray booth with it.  The color scheme is from Kenny Boucher’s Nurgle army, and I think it turned out quite well IMHO.

Parts List 

Green Stuff
Plastic Daemon Prince Model
Orge Kingdoms “Black” Mace
Apocalypse Command Sprue “Melta Head”
Helbrute arm, and right foot.
Tervigon Hive Arm set
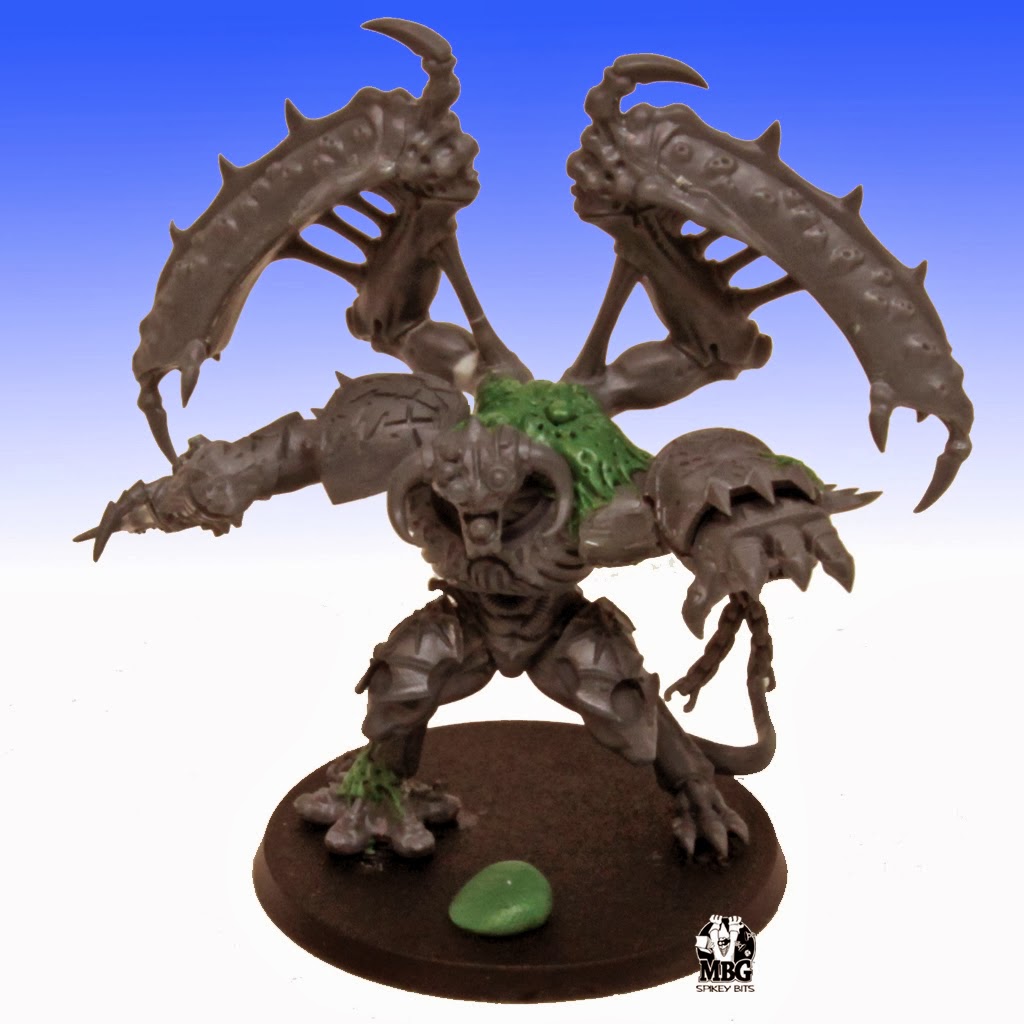
 

Advertisement

The Conversion


You can pretty much see what I did with this model in the picture above.  I added the helbrute arm and foot, as well as the new “wings” and then puttied around them.  I gave him a little extra putty work on his back from Papa Nurgle too just to fill some space I couldn’t seem to cover with anything substantial.
After that I just went to work painting him.
The Paintjob

To start out I painted the whole model using an airbrush first. Then I went back in with a brush and hit up all the details like trim, eyes, claws etc.


The recipe I used was a new one that I got from Next Level Painting‘s Kenny Boucher (you may have seen this on his awesome looking Heldrakes from earlier in the year).
So to paint the skin I used p3 Iosan Green for a basecoart. Then I blended Necorite Green over that, and did highlights with Citadel Flash Gitz yellow.   All of this was done over a neutral Gray base (Army Painter Uniform Grey Primer).
Then I went back and highlighted every edge with more of the same highlight paint where applicable. It’s a very time consuming process, but produces great work!
While the colors may have changed a bit, I used basically the same process from my “How to Paint Plaguebearers” videos from earlier in the year to apply the paint to the model.


Advertisement


That’s pretty much it. It seems quicker than it really was, the brush work took up most of the time. Honestly if I hadn’t saved time airbrushing the basecoat, I would have never been able to spend so much time detailing him in the end.
So what do you think of using both a Brush and an Airbrush to paint your models? -MBG

Avatar
Author: Robert B
Advertisement
  • 40K - WFB RUMOR: "Independent" Minis Coming

    Warhammer 40K