Dropzone Commander: The Commanders, Part I
4 Minute Read
Oct 23 2014

Advertisement
The brain in the body that is a Dropzone force! Today we begin a discussion of those valuable Commanders, their role in the army, and the tactics they best employ.
We have worked our way through the factions now, and it seems that the next best place to go is to the Commanders. These are the leaders of your force, and are purchased alongside the army. Depending on the scale of the particular game and the points you’re willing to invest, you will get a leader with a Command Value between 2 and 6. There are various thought processes and strategies to consider when determining your Command Value, and we will discuss what goes into that process here.
First, it is imperative to know that you lose all these benefits as soon as your Commander is slain. This brings a very unique value to this unit, as you will continually weigh the risks and benefits of exposing them to enemy fire. With that caveat on the table, let’s get started!
The Roll for Initiative
Dropzone Commander relies on an alternating activation system that sends the action from one player to the other and back again over the course of a single turn. Who begins this process is determined every turn by a roll-off for Initiative. The Command Value of your Commander is added to this roll, meaning that if you have invested in a larger Command Value, you have a greater chance of getting the first activation each turn.
This can be crucial, especially later in the game, when victory can often come down to a single activation. One player may be positioned to destroy an Objective-laden dropship with AA fire, but it won’t do them much good if that dropship gets to activate first and flies off the table!
The Command Cards
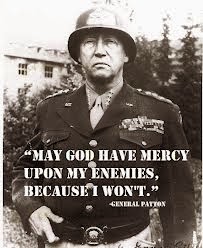
This should totally be a Command Card…
Each faction has a set of faction-specific cards that are designed to influence their particular style of war. Some of these cards can bring back destroyed dropships, while others cancel the abilities of a previously played card. They can heal your units, bring damage to Buildings, and generally make life less enjoyable for your opponent’s plastic soldiers.
Each turn you draw a hand of Command Cards from your faction-specific deck, and the number of cards you hold will be equal to your highest level Commander currently on the field. This provides another incentive to bring a big Command Value to the table, as more drawing power means more options with the cards you’re dealt. Imagine playing Texas Hold ‘Em where you are dealt six cards, and your opponent is only dealt two. While the power discrepancy is not exactly the same, it gives you an idea of how much influence a big Commander can have on the game.
Command Radius
The next thing to consider when choosing a Commander is his Command Radius. This will vary from 9” to 24”, increasing along with the Command Value. This is the Sphere of Influence for your Commander, and many of his cards will be limited to this area of play. For example, a Field Repairs card will allow you to restore one Hull Point that has previously been knocked out of a friendly unit. However, the unit you are repairing must be within the Sphere of Influence of your Commander. Needless to say, it takes a special amount of consideration when picking a leader for your forces.
The Role of Scouts
While Scout units are separate entities, their battlefield role means that they are inextricably linked to the Commander.
Scout units are used to relay command communications to the frontline. In game terms, this means that they can be used as a source for the Command Radius when using cards with Sphere of Influence. Since these units generally operate in flanking or forward operations, it means that they will usually be extending your Commander’s influence over a dramatic area of the table. Taking these units also means that you can protect the Commander by keeping him in a more secure position.
Scout units, however, are generally very fragile. While they operate in harm’s way most of the time, it is important to be shrewd with their deployment. They come in limited numbers, and are generally expensive!
Lead by Example!
That covers the basics of Commanders in Dropzone Commander. Over our next few articles we will discuss each of the faction leaders, along with a short look at what they bring to the table. Stay tuned!
What other roles do you have for your Commanders? Let us know in the comments below!
For a healthy dose of gaming insanity, visit us at Enter the Maelstrom.
Author: Randall Madden
Advertisement


