FFG: Star Wars Armada Shows off the Starfighters
5 Minute Read
Dec 11 2014
Advertisement
We finally get a good look at the fighter squadrons and ace pilots for the upcoming Star Wars Armada
FFG takes us through moving and attacking with fighter squadrons, and gives us a tease of Luke Skywalker and Howlrunner’s special squadron rules!
The Squadron Phase
In the Squadron Phase, you and your opponent take turns activating any squadrons that were not already activated by a Squadron command during the Ship Phase. Each squadron that activates during this phase may either move or attack, but cannot do both.
The player who has initiative goes first. He chooses one of his unactivated squadrons and activates it:
- If he chooses to move his squadron, he utilizes the range ruler, placing it on the table so that its distance side is faceup, with the distance “1” end of the ruler touching any part of the base of his squadron. Then, he picks up the squadron and places it at any point along the ruler, so long as its base does not extend beyond the maximum speed indicated on its squadron card.
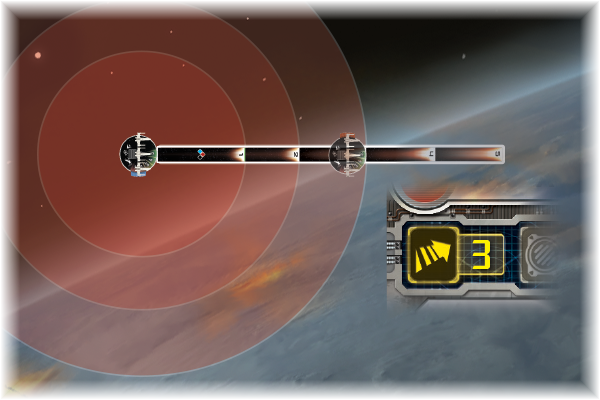
An X-wing squadron has a speed of three, meaning it can move up to distance “3” in any direction from its original starting point.
- If he chooses to attack with his squadron, he can target any enemy ship at distance “1.” Any squadron that attacks can use all the dice indicated on its squadron card, but they ignore all
 results.
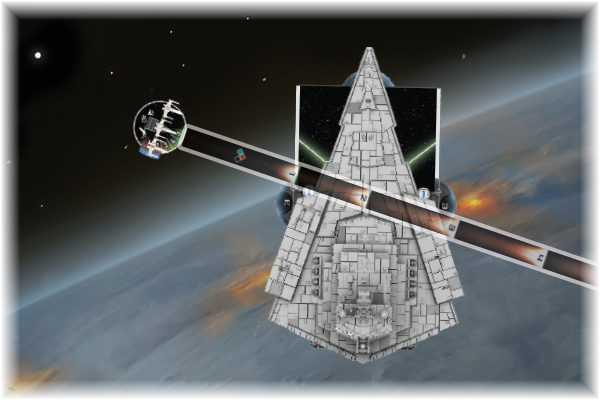
The X-wing squadron begins its activation within distance “1” of a Victory-class Star Destroyer, meaning the Rebel player can activate it to attack.
After the active player finishes activating his squadron, he must activate a second unactivated squadron, if able. Then his opponent activates two of his own squadrons in the same way. This process continues until all squadrons are activated.
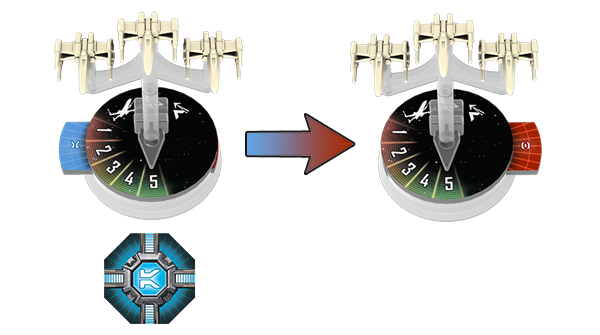
Each squadron’s base features an activation slider that you can use to track whether or not it has been activated. The activation slider displays one of two colors, orange or blue. If the color on the activation slider matches that on the initiative token, the squadron has not yet been activated.
Deploying Your Fighter Wings
While you are not required to field any squadrons in your fleet, the squadrons that you bring to battle can easily prove the difference between victory and defeat.
It’s hard for capital ships to hit them because most capital ships’ anti-squadron armaments number only one or two dice. Meanwhile, your squadrons each get their own attacks, and your opponent’s ships only get a limited number of defense tokens each round; swarms of starfighters can quickly wear down even the largest of ships.
Accordingly, most admirals acknowledge the threat that squadrons pose by ensuring that each of their ships has its own escorting fighter wing. They may use screens of squadrons to protect their ships, or they may deploy their squadrons more aggressively to pin down enemy squadron groups.
In Armada, whenever two squadrons are at distance “1” of each other, those squadrons are engaged and must abide by the rules for engagement:
- Engaged squadrons cannot move.
- Whenever an engaged squadron attacks, it must attack a squadron instead of attacking a ship.
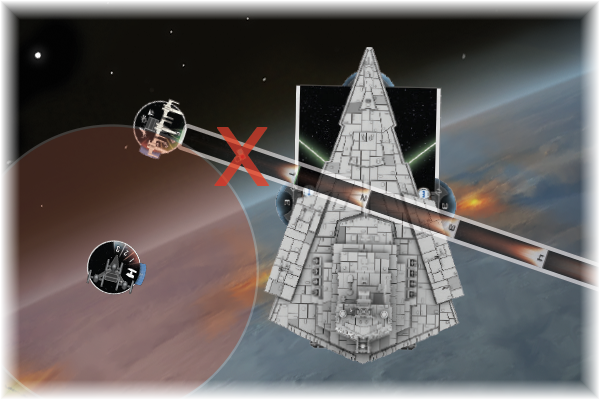
While it is engaged by the TIE squadron, the X-wing squadron cannot fire on the Victory-class Star Destroyer, leaving its captain free to ignore the pesky X-wings in favor of larger and more important targets.
Whether you’re hoping to negate your opponent’s superior numbers or you’re looking for ways to swarm your opponent’s ships with as many squadrons as possible, you want to consider how engagement can play into strategy.
Ace Pilots and Their Wingmates
As you think about the best ways to use your squadrons, it’s important to remember that not all fighter squadrons are the same, and you’ll want to select the right squadrons for your strategy.
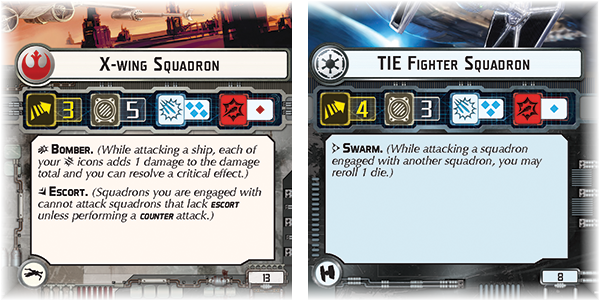
X-wing squadrons, for example, feature the Bomber keyword, which means that while they’re attacking a ship, they do not ignore all their  results. Instead, their
  results are added to the damage total and allow you to resolve a critical effect as though you had scored a
  result with a capital ship’s attack.
On the other hand, TIE fighter squadrons feature the Swarm keyword. While a TIE squadron is attacking an enemy squadron engaged with another one of your squadrons, it can reroll one die.
In addition to the differences between the different types of starfighters (which we’ll explore more when we take a closer look at the Rebel and Imperial Fighter Squadrons Expansion Packs), there are differences between your standard squadrons and those led by your aces.
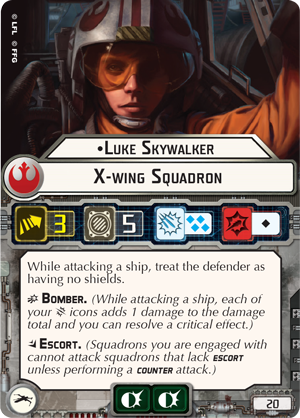
An ace X-wing pilot like Luke Skywalker doesn’t necessarily gain any extra speed, hull points, or anti-squadron armament. However, he gains a number of defense tokens, which may, in the long run, prove far more valuable than a couple of hull points. Luke Skywalker, specifically, gains two brace tokens, which each allow him to halve the damage of an attack directed at his squadron. Additionally, ace pilots each have unique abilities, and in Luke’s case, his ability allows him to treat any ship he attacks as though it has no shields, meaning his damage goes straight to its hull. This is even more important when you consider that Luke attacks your opponent’s ships with a black die, which represents a meaningful step up in damage potential from the standard X-wing’s red die.
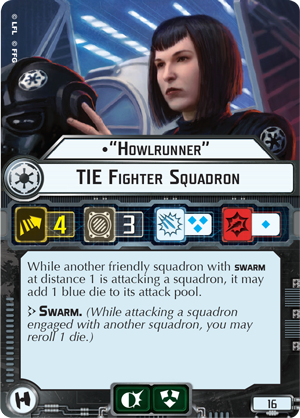
While your squadrons’ defense tokens work the same as they do for capital ships, they may also permit additional effects. Some ace pilots, like Howlrunner can use the powerful scatter defense token to negate all damage that they would otherwise take from a single attack.
Here is our GENCON Star Wars Armada demo to give you a refresher:
“Never tell me the odds” – Han Solo
Author: Larry Vela
Advertisement


