Dropzone Tactics: Shaltari Tribes – Infantry
Last week we showcased a large battle report between the UCM and the Shaltari Tribes. Today let’s jump right in with Shaltari infantry!
Last week we showcased a large battle report between the UCM and the Shaltari Tribes. The goal of that report was to give you newer players an idea of how the Shaltari function on the tabletop, and how their units mesh with one another. Eventually, the idea is to explore each and every faction and some of their deeper tabletop uses. With all that in mind, let’s jump right in and begin our discussion on the Shaltari infantry!
In Dropzone Commander, infantry are the most essential units for an army to be successful. An occasional scenario will come along that allows the player to focus more on destruction, but at its essence most missions simply cannot be won without infantry on the table.
However, the infantry are not necessarily exceptional in an offensive capacity. They will suit the purpose of defending a position and gathering objectives, but they don’t do much else besides. Since they must be taken for success, it is important that we analyze their capacities to the fullest, so that we are getting the best mileage for our investment.
Braves
Braves are the bread and butter of Shaltari infantry, and as such they must be discussed first. Many of the principles discussed in this section will apply to both Braves and Firstborns, but since Braves are the required unit in any Shaltari Tribes force we will begin with them.
Braves are by far the most expensive basic infantry when considered on a per-unit basis. Immortals, the second most expensive, clock in at roughly seven points per soldier, but the Braves are nearly eleven points each. While they come with the survivability necessary to mitigate this increased cost, they must also be protected to keep the investment ticking as long as possible.
So what do we get for this increased points cost? We get infantry that can only ever sustain 1 DP per hit, along with some seriously buffed resilience to Falling Masonry. These two pieces of resilience are essential due to their limited numbers.
When coupled with the Totem Warspire, this can make their removal incredibly difficult for enemy forces. A good amount of damage points will be saved, especially when Demolisher weapons are considered. This gives our elite infantry time to get into the tight spots and survive to get out once more.
A good battle plan will also leverage gates that maneuver Fine Mass, as the limited numbers of Shaltari infantry must be able to get anywhere quickly. Plans must be made two turns in advance, to ensure the fulcrums will be ready to transfer the infantry. You absolutely cannot have them pinned in one place for long. For a good example, see the battle report from last week. My Braves spent turn one checking the baseline buildings, and by turn two they were using advance gates to engage the enemy in CQB at the center of the table!
Braves also bring one of the best infantry weapons in the game, in the form of the Gauss Rifle. With infinite range against targets with no countermeasures, this weapon is amazing against buildings when there is nothing else to target. This also means that it serves as a devastating piece of offensive equipment against those cheap Resistance junkers. With 18” against Active Countermeasures, it still has a real potential to reach out and touch someone.
Their Discus Launchers are nothing to sniff at, either. Enemy infantry are taking their lives into their own hands by manning walls within 18” of a building occupied by Braves. Scourge Infantry can quickly be melted down if they decide to try their luck with Energy 11 shots, and if the threat of such action can dissuade them from fire, then it was worth it in the end.
With all of this in mind, it is important to position Braves early to extract objectives or score Intel points. Once this has been done, they can quickly reposition to either move on more objectives or to cause damage to enemy skirmishers. The massed firepower of a couple of squads can defend an area against all but the heaviest assaults, and they are not easy to defeat in CQB. The big thing to keep in mind is where they need to be in the next few turns. This is a rule with the Shaltari in general, but it is doubly true with the infantry.
Another thing to keep in mind is that our infantry are much easier to keep in the fight than the infantry of other factions. Whereas UCM Legionnaires must embark on their Raven-A to get an objective off the table, we can simply teleport through a gate. This frees the gate to leave the table with the objective, and the infantry can still rematerialize through another gate in the same turn. This makes us much faster at consolidating gains, and also gives us a reprieve from waiting for our guys to show back up from reserve.
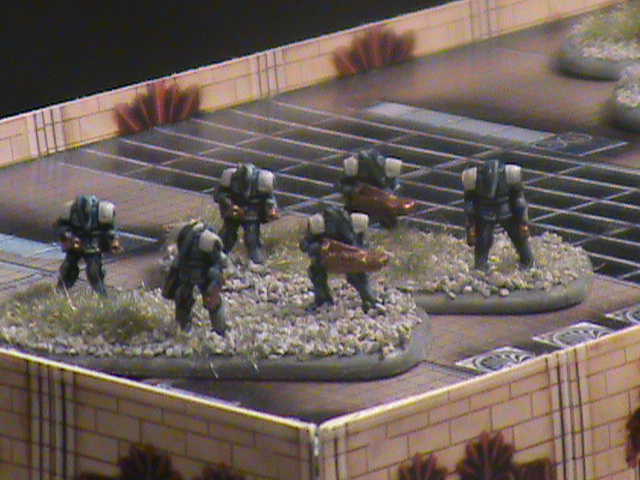
Firstborns

These guys are concentrated nastiness on a stick. Take all of the advantages of Braves in the resiliency department, and then strap on a microwave gun and a lightsaber!
When I’ve fielded Destroyers in my Scourge army, I’ve always worried that they were about to be shot down. I stressed over positioning, knowing that my opponent would be watching to see what they were doing before they pounced. With the Scourge’s limited AA quantity and range, I also knew that there was little I could do to force the issue.
None of these factors matter as much with the Shaltari. Firstborns can confidently wait as multiple areas are approached with Spirit Light Gates and Haven Terragates, until there is a significant saturation. No matter where the enemy jumps, there will be a gate waiting to unload the CQB specialists on target.
Of course, you must have adequate AA to protect these gates, and that is where Yaris and Kukris come in. Yaris in particular are useful, as they can use the Spirit Gates on the first turn to position themselves at the middle of the table. At that point, the opponent has no choice but to either abandon the area or go ahead and commit, making the placement of your Firstborns that much easier. If he does decide to wait it out, you can simply use the Yaris to dismantle his light dropships.
Conclusion
Shaltari infantry are difficult to use, but when played properly they can mean serious trouble for the opponent. Patience and timing are key, and they can be used to fulfill a wide variety of roles that other infantry may not be capable of completing. Use the Shaltari’s superior technology, and your foes will learn better than to underestimate the diminutive little aliens.
What are your thoughts on the Shaltari foot soldiers? Anything I left out? Leave your thoughts in the comments below!
For a healthy dose of gaming insanity, visit us at Enter the Maelstrom.