Star Wars Armada: Rebel Wave II Overview

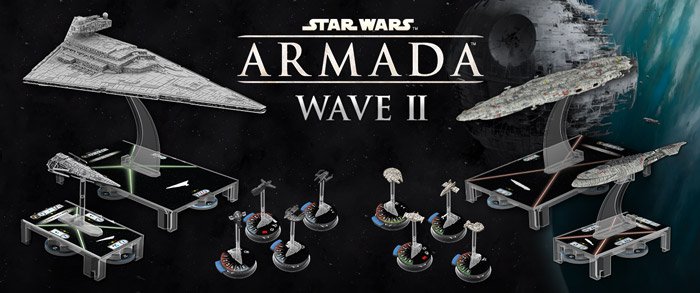
The Rebels aren’t going down without a fight in Wave II for Star Wars Armada. Here comes the BOOM!
I guess it’s not really a BOOM in space but “here comes the FLASH” doesn’t really have the same ring to it. HEY, BoLS Readers and Armada Admirals, AdamHarry here with our follow-up to the Imperial Wave II Overview article – this time we have the Rebel ships under the microscope (or rather camera lens) so lets get this party started! First up: Home One
Home One Expansion Pack
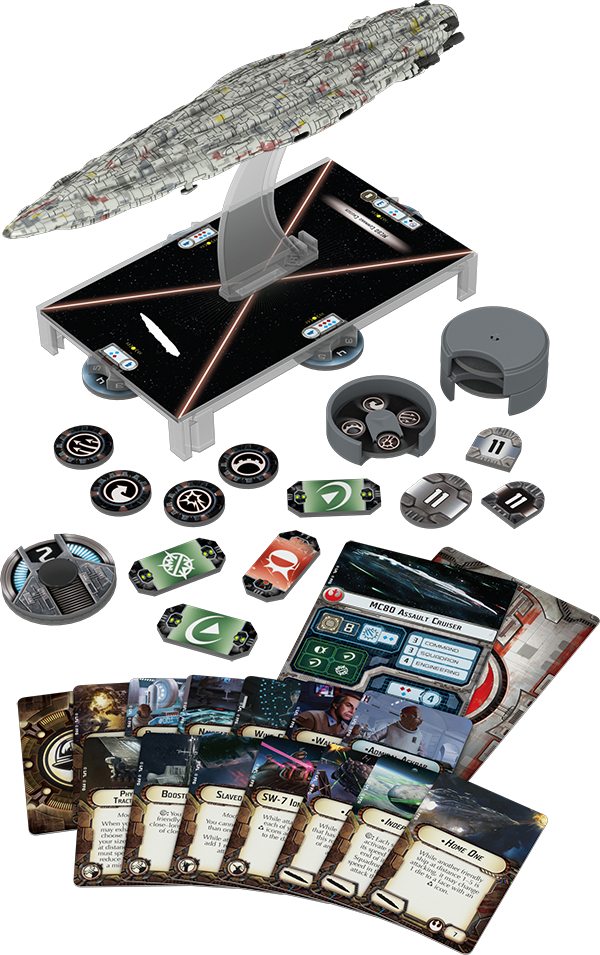
The Rebels needed this ship BAD. It’s not going to even out the playing field in a pure offensive way but it does bring in some much needed firepower and support tricks. It’s not a direct counter to the Imperial Class Star Destroyer although it’s probably the best ship to compare it with. The MC80 is a very different ship.
Looking at the Cards we see right off the bat that this ship wants to engage in the broadside game. It doesn’t want to fly straight at it’s target. At first glance you’ll be tempted to get in the middle of two ships and unload both your Port and Starboard arcs into two different targets.Theoretically this will generate more potential damage. But that’s not really the best idea unless you can finish both targets. Otherwise you end up over extended and in the middle of TWO ships that are going to fire right back.
It’s certainly a gamble to try and match firepower for firepower. I think this ship excels at sticking to the outside and firing in at targets. You then use it’s 4 engineering to repair your hull or shields and keep up the defense while you allow your fighters or smaller frigates to do the heavy damage up close. That’s not to say this ship doesn’t have some dirty tricks.
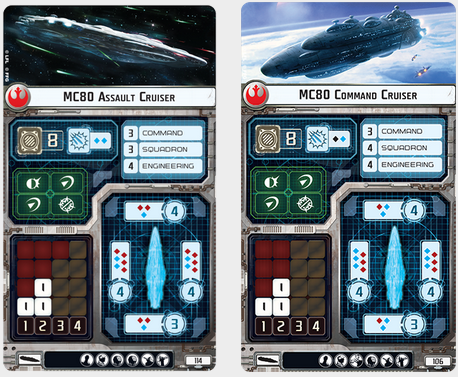
With these two cards the MC80 Assault Cruiser is pumping out 7 red dice – that’s nothing to sneeze at! If you combine that with the Home One card and the Leading Shots card you you can get into the the “Scary” damage output territory.
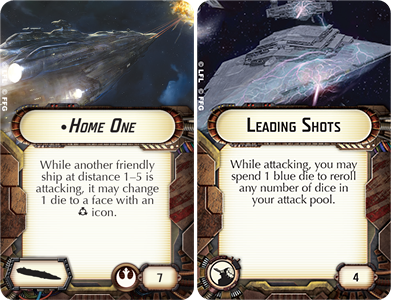
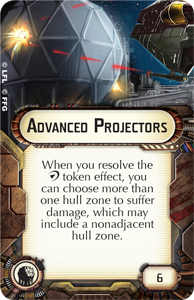
7 red dice + 2 blue dice with the ability to drop a blue die to re-roll your misses on the red and then guarantee an accuracy to stop anything like a brace – ouch. And don’t forget the Red dice have double hit potential! But that’s just pure damage and as I mentioned above this ship isn’t strictly designed for pure offense. Those 4 shields really entice me to bring in the Advanced projectors:
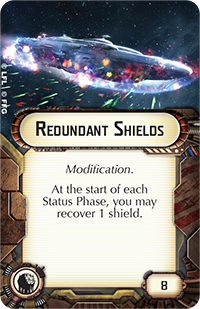
Now as you’re flying sideways, you can take advantage of your off-side shields by dumping damage on them too! Now that side hull of 4 is looking pretty beefy. If you combine that with Redundant Shields you’re in for the long haul.
We’ve got some more tricks to increase the longevity of the MC80 – but I still want to talk about another ship the rebels are getting: The MC30c Frigate.
MC30c Frigate Expansion Pack
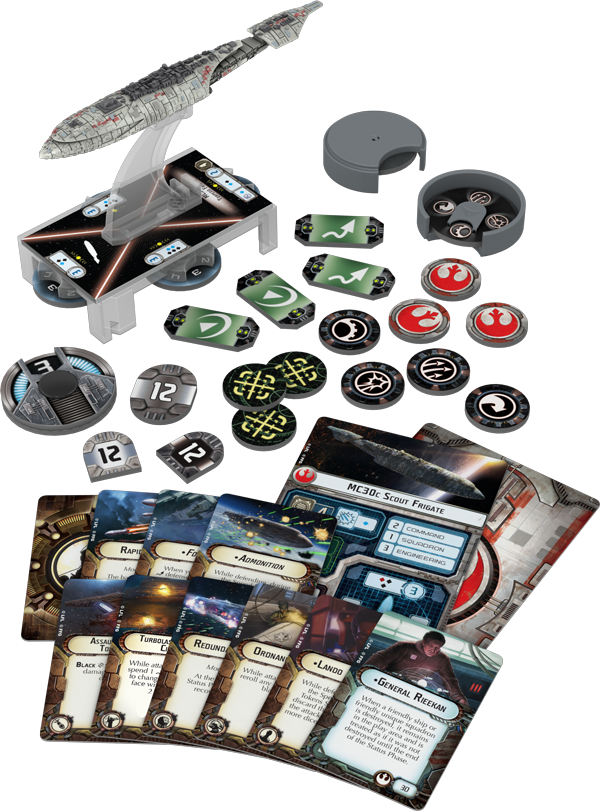
This card is a slippery one! There are really two ways to play this ship: up close and personal or long range/shoot-and-scoot.
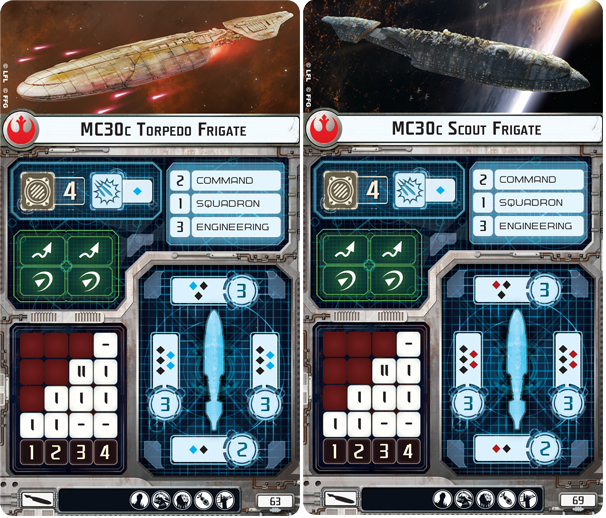
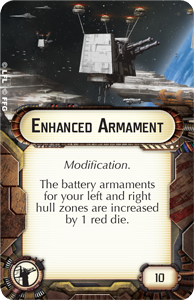
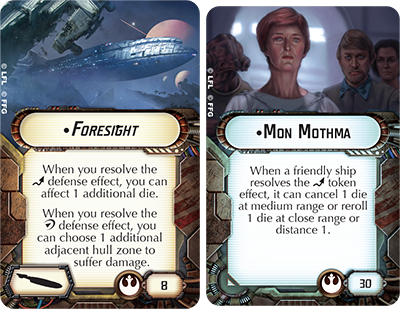
Lets talk about the shoot-and-scoot option first. The Scout Frigate swaps out the blue dice for red which puts it in a strange spot. The Black dice only work at short ranges. This is kind of an awkward pairing to me. It’s not that red dice are useless, you can still do things like combine them with Enhanced Armaments (from above) but that doesn’t seem to really scream amazing to me. But it you want it to stay alive it’s one way to go. So lets keep that idea going. If we paired that with Redundant Shields, the Foresight Title and Mon Mothma and suddenly that scout ship is really tricky to hit! And if you only do 1 or 2 points, the ship is pretty much ignoring that damage.
The Turbo Laser Reroute is also pretty solid too. Now you’re throwing out those two red dice but they are actually causing lots of annoying damage.

The other option is the up close and personal version. I like this one because it’s a brawler! Maybe a glass cannon…but the damage output will make those big Star Destroyers think twice about letting this ship close. This one takes advantage of the fact that it’s very easy for little ship to get two facings to target the same hull zone on big ships:
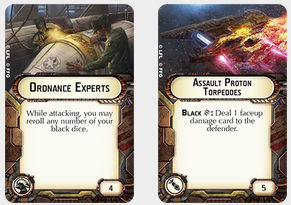
The Torpedo Frigate is super mean up close! If you combine Ordance Experts and Assault Proton Torpedoes together you’re amping up that close range damage. And don’t discount this things speed to close that gap and unload that payload!
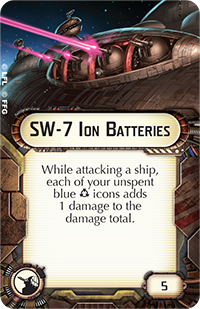
There are a few other tricks you can do with this ship. I really like pairing the new SW-7 Ion Batteries in there as well. If you’re dumping those extra accuracy on nothing a point or two more can really help drop a critical shield or take that last hull away.
Overall, these two ships add quite a bit to the Rebel Fleet as well as to the game overall. I’m loving these Wave II ships and Armada is picking up some steam! Keep at it Admirals!
Next time: Rogues and Villainy: The Expansion
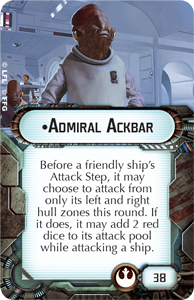
Whew – avoided “It’s a TRAP” joke in an Ackbar article!


