FFG: Runewars – March To War

FFG is back with more info on how movement will work for Runewars – The Rank and File Tabletop Miniature game!
Do you miss the clang of blocks of infantry smashing into each other? Do you prefer the tactical planning it takes to pull off a cavalry charge? Well Fantasy Flight Games’ new game Runewars might be the one for you!
Previously we explored how the dial works with for your units in Runewars. This time we’re going to take a look at the movement orders and how those work in the game.
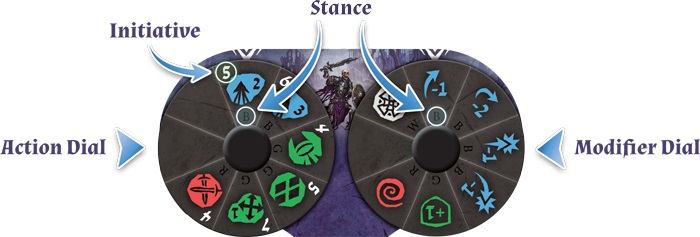
Each unit will have a unique Action Dial and that dial will determine which movement options you can take and those can be modified by your stance:
Let’s Get Moving
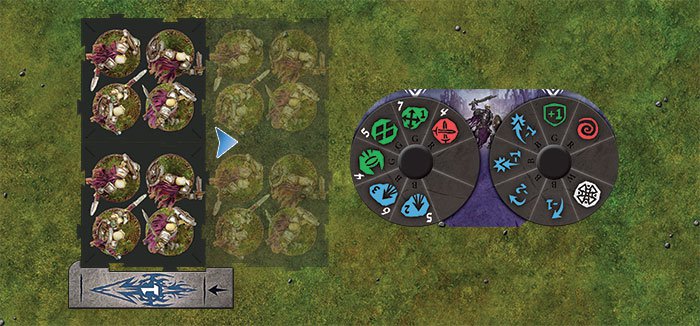
Marching is the most common way for you to move your blocks models along the battlefield. In the example below the player has selected the March Order with a speed of 3. The Modifier Dial is set to “skill” and for this example that just means no modifier has been assigned to the movement order:
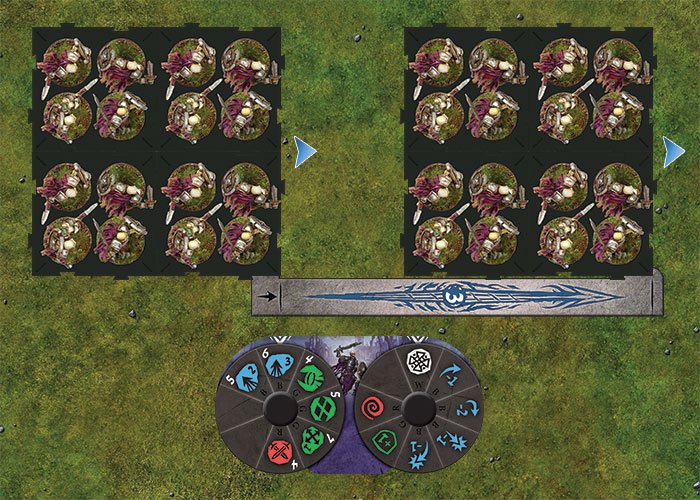
Movement is simple and intuitive. You simply align corresponding movement template to one of the front corners of the unit and slide the unit along the movement template until it hits the end. All march orders use the corresponding straight templates unless the modifiers alter the movement:
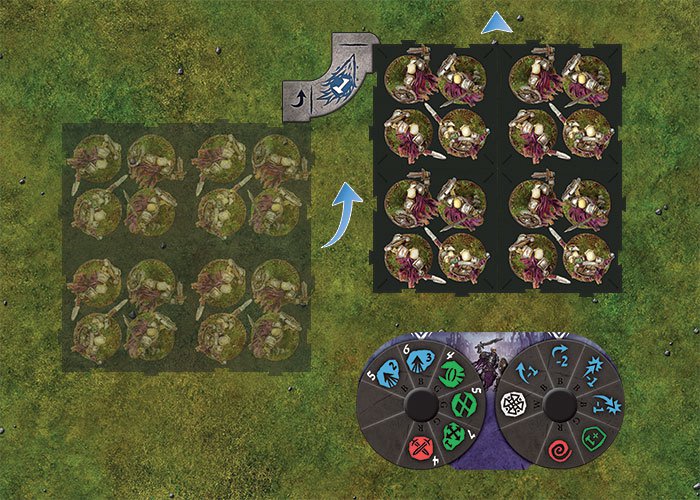
In this example, the unit has been given the March 3 order – the same as above. However, the template has been set to the Turn Modifier with a -2. You apply the -2 to the March 3 to get a 1, and because it’s now the turn order, you use the 1 turn template. The templates still applied in the same manner – choose a front corner and move the unit along that path until it stops.
Let’s Get Dangerous
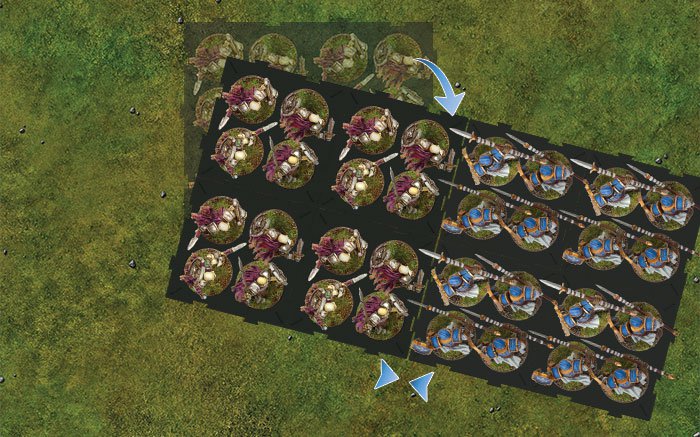
The standard operating procedure for movement is that you don’t want to make contact with the enemy with your March Action. That can work out poorly for you. However, you do need to make contact with the enemy so that you can then hit them in close combat! So you’d think there would be an order for that – and there IS! Say hello to the Charge Modifier:
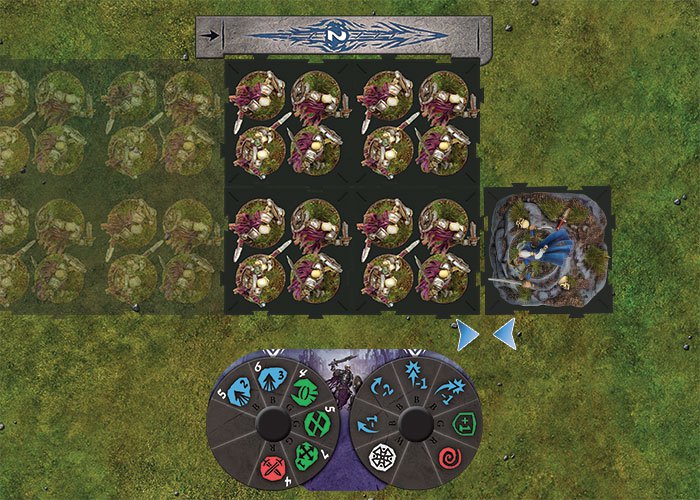
In this situation, the March 3 Order was given again. However, the Modifier was set to “Charge -1” – so the -1 modifier is applied and the unit moves using the 2 straight template. However, when they make contact with the enemy unit, instead of panicking because of unplanned contact, they get to make an immediate attack! You typically have to select the combat option on the command tool to actually make an attack. The Charge Modifier is the only way to execute a move and attack in the same activation.
There is a drawback – if you come up short the unit will have to take a panic token. So you can’t just choose the Charge Modifier the entire time hoping you make contact eventually.
What happens if you make contact with an enemy unit that is at a different angle? That’s covered too:
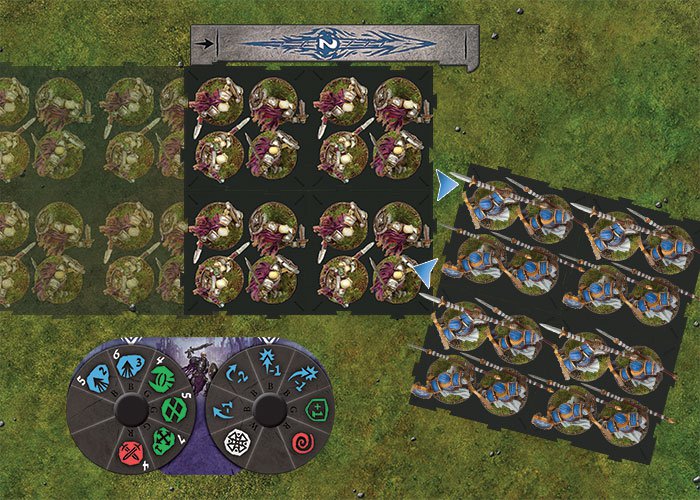
The moving unit has made contact with a successful charge action.
Simply turn and square up the charging unit with the target unit, locking them both into combat.
Tactical Withdraw
Sometimes you’ve got to take a step back to avoid a dangerous combat. There are other ways to move around the battlefield besides Marching and that’s where Shifting comes in. Shift is basically identical to Marching, except you can place the movement template off of any corner and not just the front.
While Shift is typically much slower, it also has the benefit of allowing you to move while engaged. That means you can retreat from an unfavorable combat. You will get one of those pesky panic tokens, but that could be better than staying in a losing combat!
The final movement option is the reform action. This action is basically the option you choose if you want to rotate your unit:
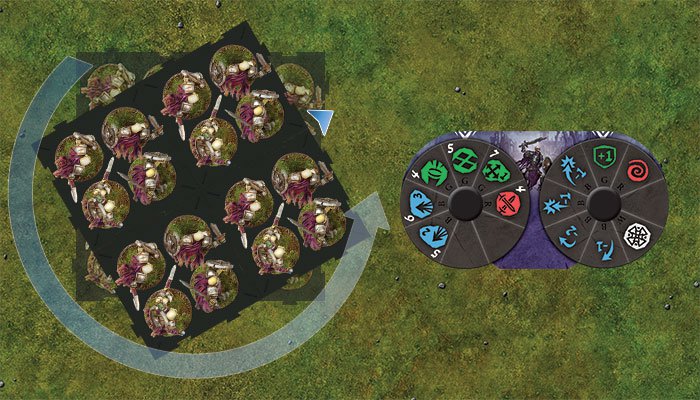
By rotating your unit around the center point you can better align yourself to charge for next turn. You can also choose this option in the middle of combat – this could be critical in denying the enemy units bonuses from flanking your unit.
March, Shift and Reform are the 3 basic tools to moving your army around the battlefield. When you combine them with the Modification Dial you can end up with a devestating charge, some shifty shenanigans or some critical reforms. Play it smart and you’ll be out maneuvering your opponents in no time!
If you’d like to learn more about Runewars check out the full article from FFG right HERE.
Runewars Miniatures Game
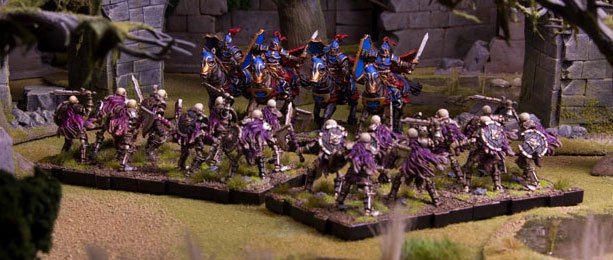
For years, the armies of Waiqar the Undying have stayed within their borders, launching only minor raids across the border. But now, a nameless threat stirs within the Mistlands, and legions of undead cross into the realm of Terrinoth under Waiqar’s command! The Daqan Lords have sounded the call to war, and their finest generals lead armies of warriors and golems to take up defensive positions in the border territory of Roth’s Vale. The first battles of the next great war are about to begin.
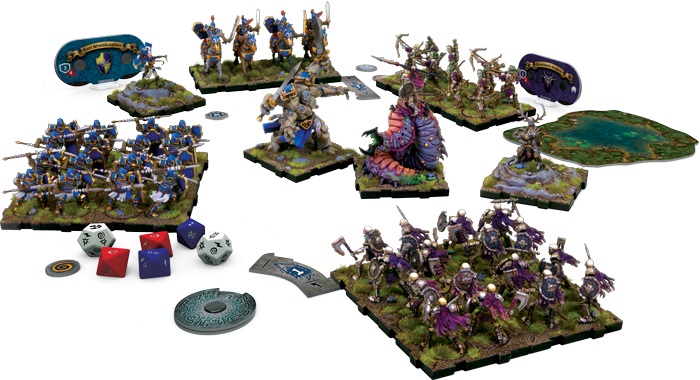
RuneWars: The Miniatures Game is a two-player miniatures game of battles between the great powers of Terrinoth. In each game, you and your opponent will gather armies of miniatures and lead them into battle—blocks of infantry will maneuver for position, cavalry wings will wheel and slam into a weakened flank, and monstrous rune golems or carrion lancers will smash through formations of lesser warriors. Innovative command tools, two distinct factions, and countless ways to customize your experience combine to offer an unparalleled miniatures gaming experience in RuneWars. Finally, with forty-eight beautifully sculpted, unpainted figures, you’ll be able to paint and customize your armies to bring an entirely unique touch to your games and enter the hobby of miniatures painting!
I would like to Charge now…


