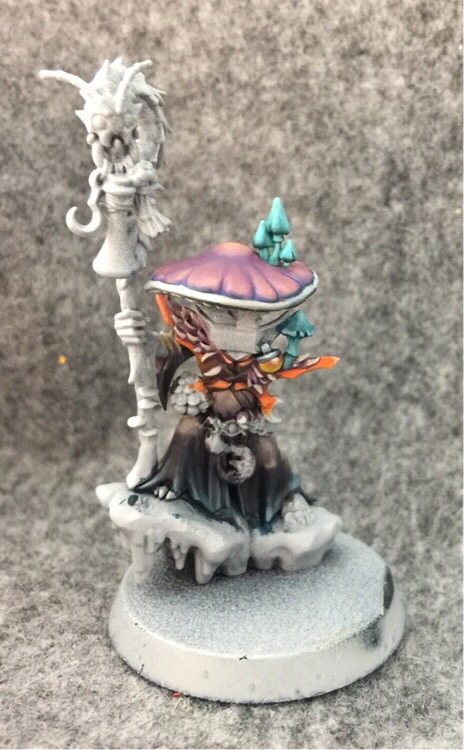
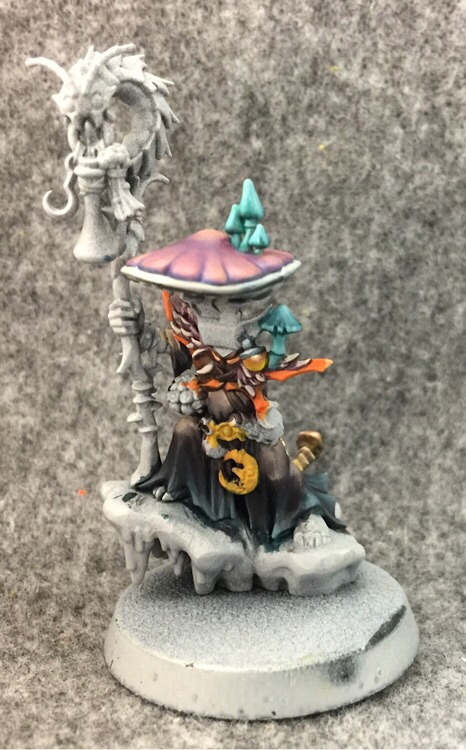
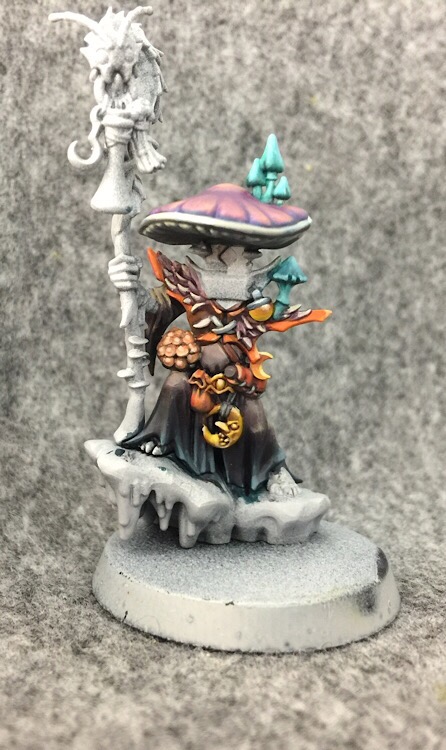
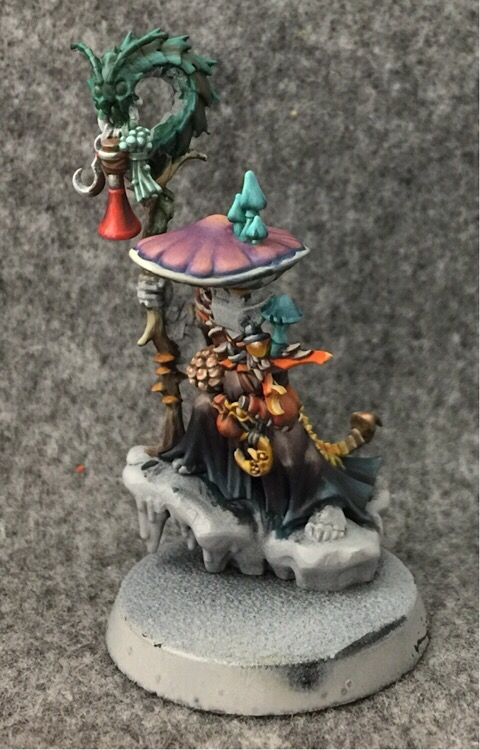
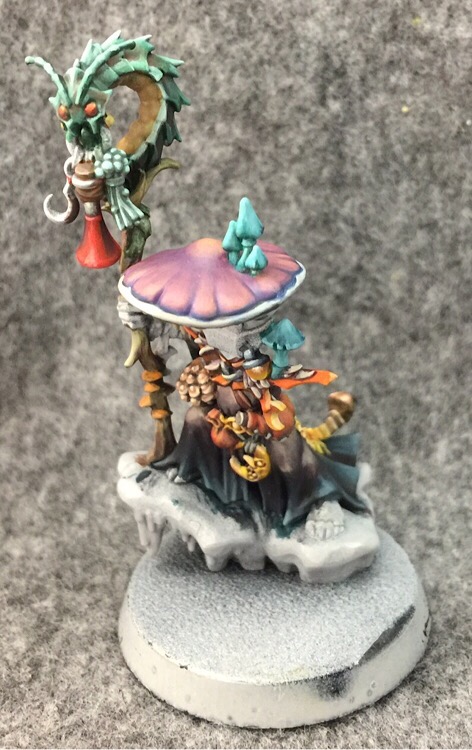
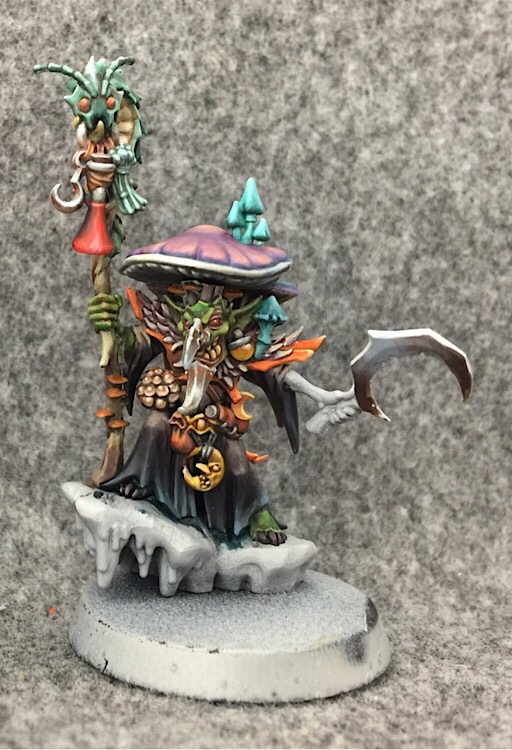
Showcase Tutorial: Age of Sigmar – Painting Stinkmullet Part 2

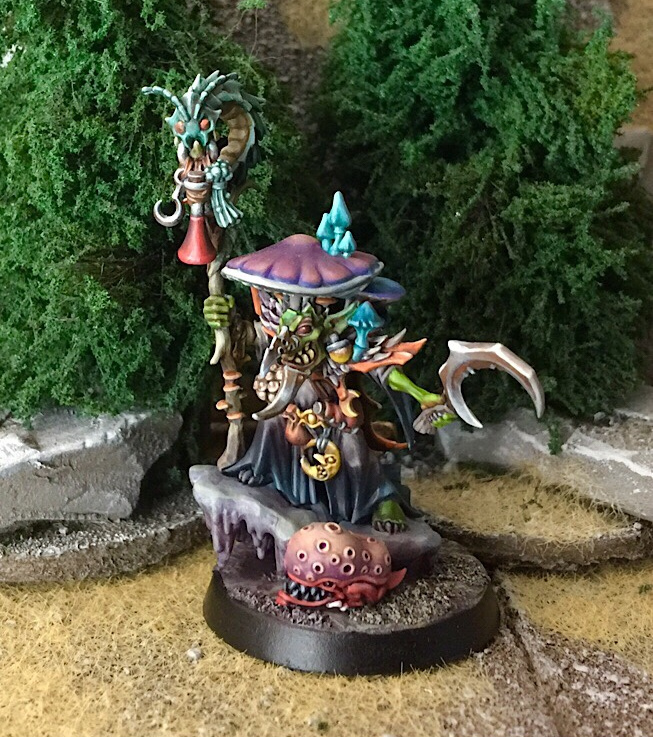
Gather round hobbyists. The Stinkmulleting continues…
It’s hard to notice but what we’re focusing on now is the earring potion.

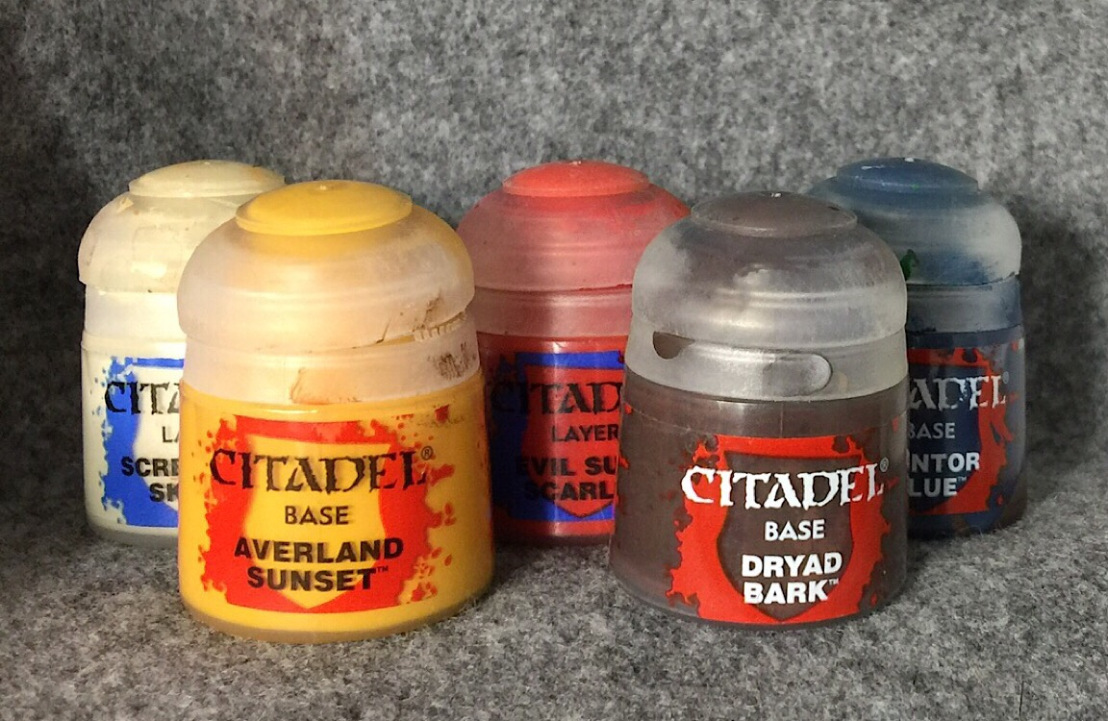
I had to start with a base of the averland sunset because yelow can be so translucent. Once it’s dry I start with a Skull/Scar mix at the base of the bottle and blend it up with Flash Git into Skrag Brown at the very top. To get the illusion effect of a gem or glass bottle like this you reverse the usual highlight order putting the darkest colors at the top instead of at the bottom.

After the yellow has a nice even gradient I give it a strong central highlight with a mix of Skull and Scar blended into the surrounding Skrag Brown. This represents light reflected off the “glass.”
Then on to the lid (I guess it’s the lid?) with a kind of silver NMM appearance.
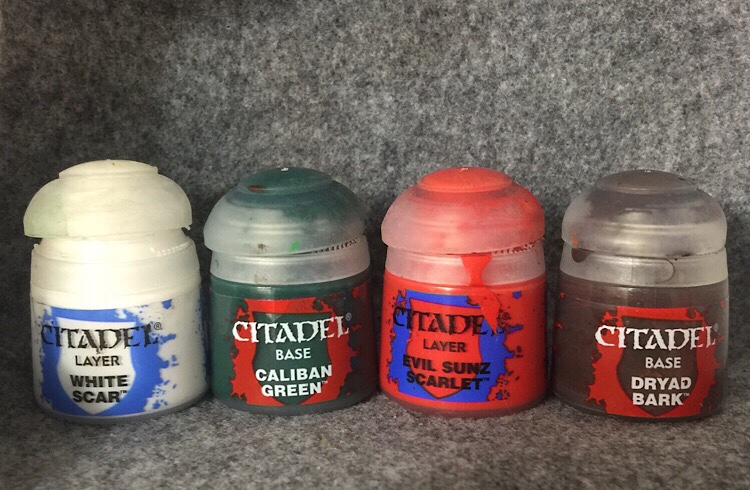
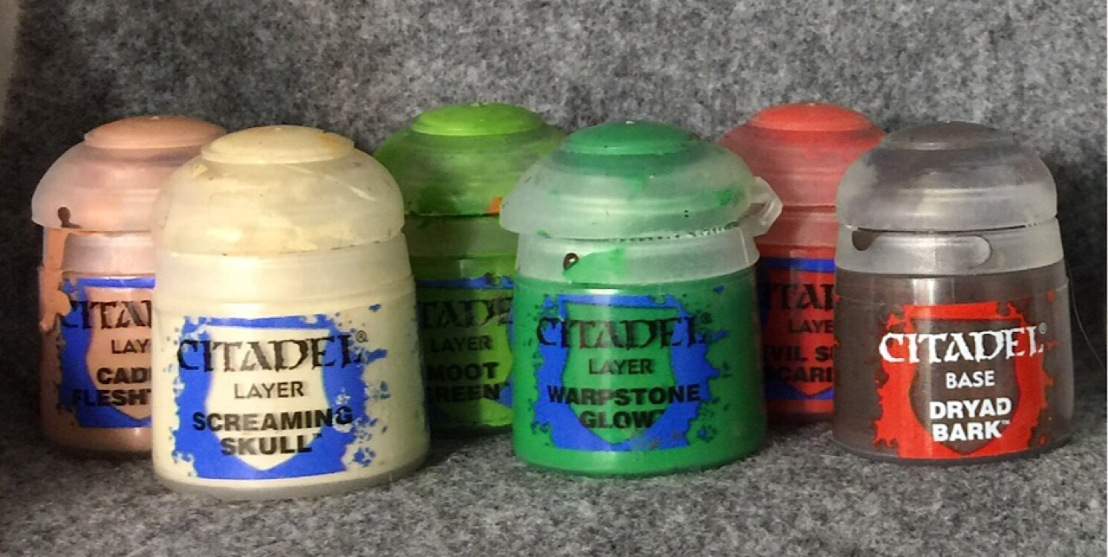
Here are the colors I used for the silver. The basecoat in the above pic is a mix of the blue and bark.
I build up the highlight along the rim with the Fenrisian Grey before giving it a thin line of white to represent a metallic “reflection”.
Last up we have this bug. It uses the exact same palette as the potion earring, and also started off with a base of Averland Sunset.
I took a picture of the bare plastic to help give me a guide of where to put the highlights and shadows.
In some areas I did use Dryad Bark when I wanted things a little darker. I never did finish the thing’s face since most of this critter is hidden by Stinkmullet’s shawl.
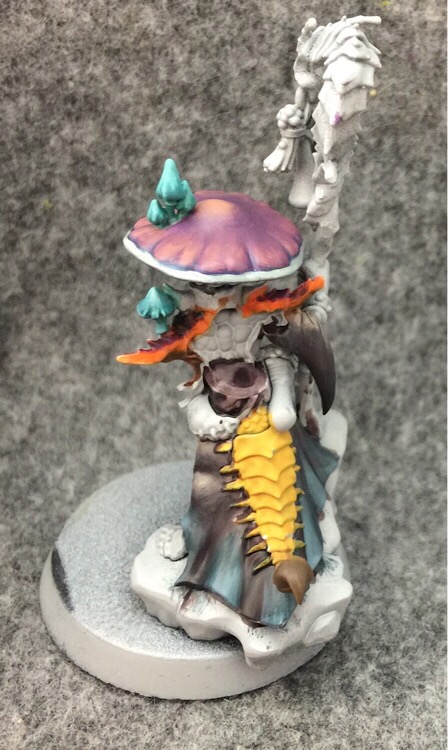
Since we’ve got that yellow out let’s do his belt buckle and moon trinket.
Yellow always needs to be built up in layers or it doesn’t look right.
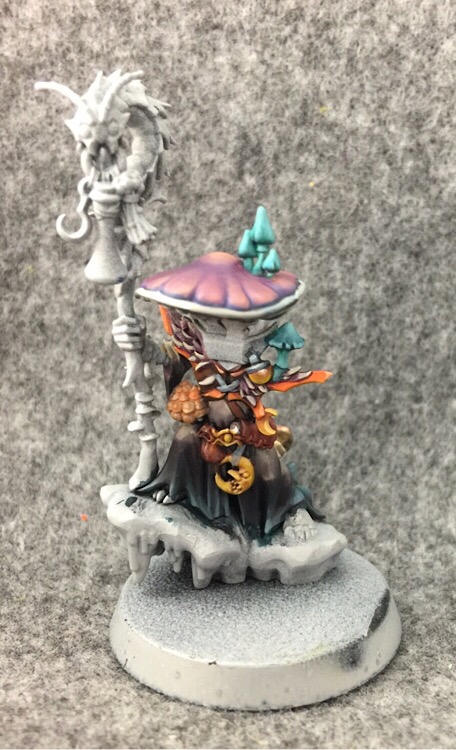
As I’m proceeding I also begin on the satchell of mushrooms at his belt. These are done simply with the Screaming Skull and Skrag Brown I already had out for the yellow areas. I also started on the leather bits on his pouch, canteen, and belt.
I used a lot of colors on the brown leather, adding this red and yellow to the highlights and some blue to the shading. It may seem like overkill but I really think all the extra color you can add helps. This is a a fungus infested goblin after all so there’s no reason to feel like anything has to look natural or realistic.
Here I’m just continuing to build up all those highlights on everything.

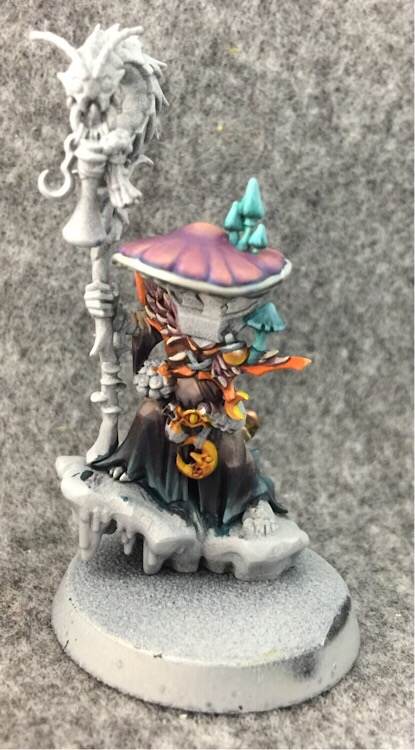
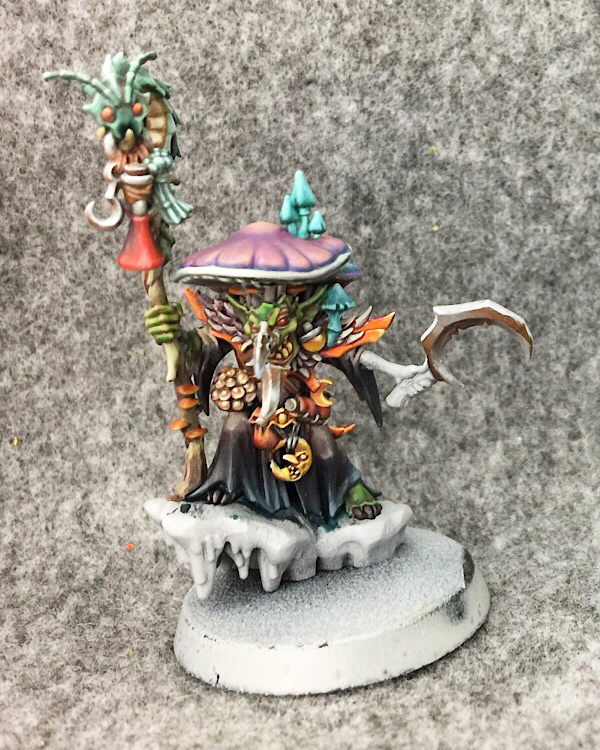
Next it’s on to the staff and potion.
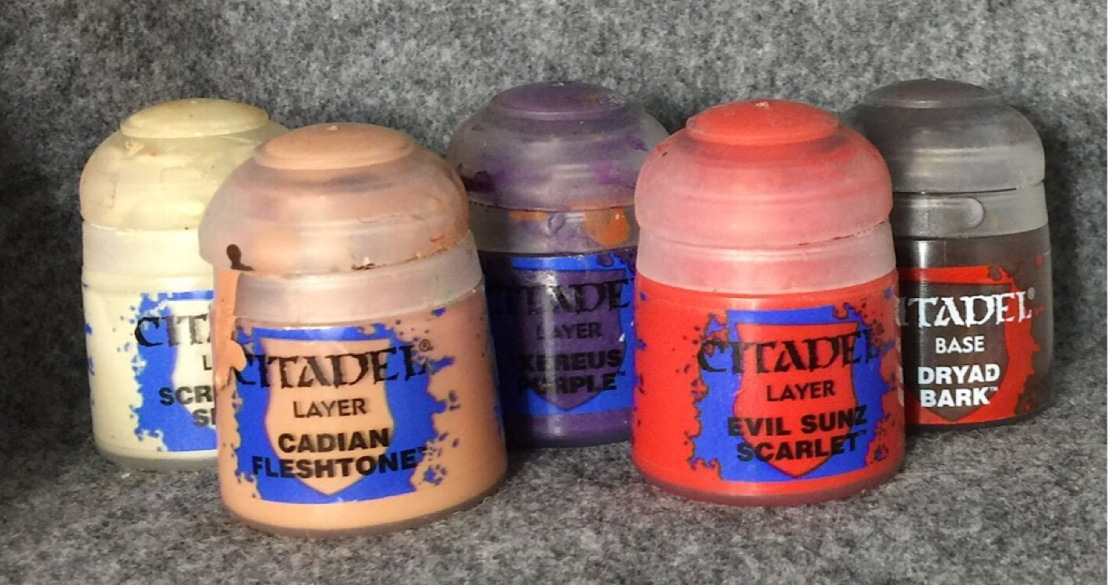
For the flask a mix of the purple and brown are blended up into the red. This is then highlighted with a thin narrow band of fleshtone with a little screaming skull blended in down the middle.
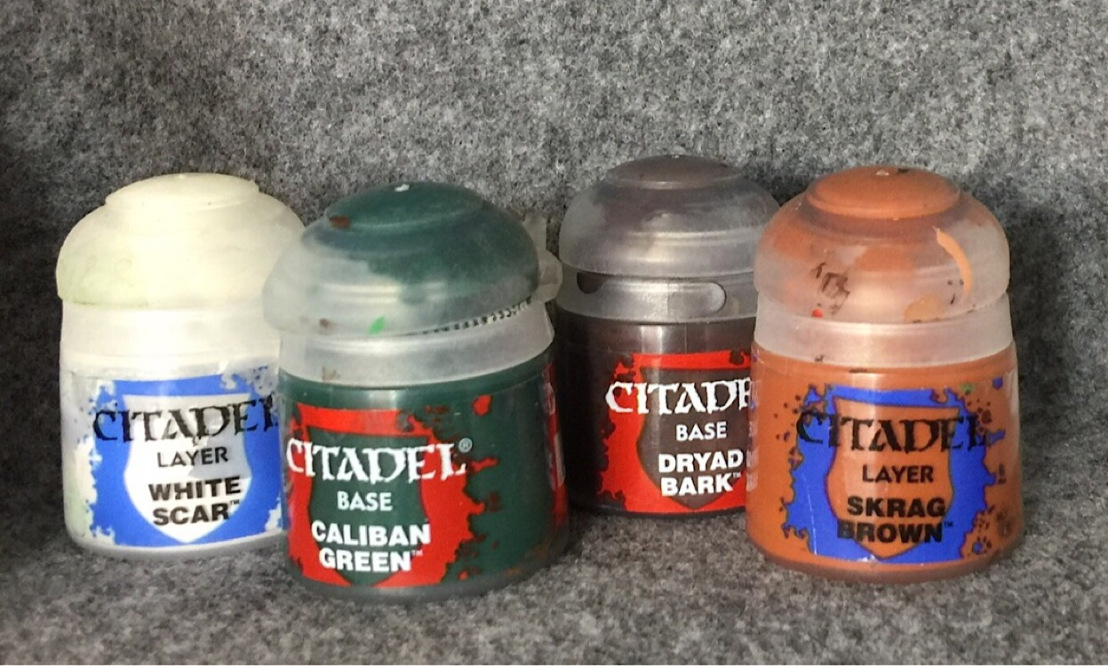
For the staff a mix of the green and bark are used as a basecoat, and highlighted up with a mix of the Skrag Brown and White.
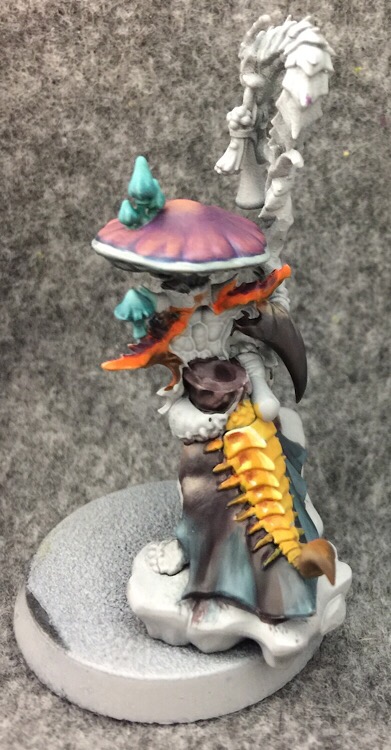
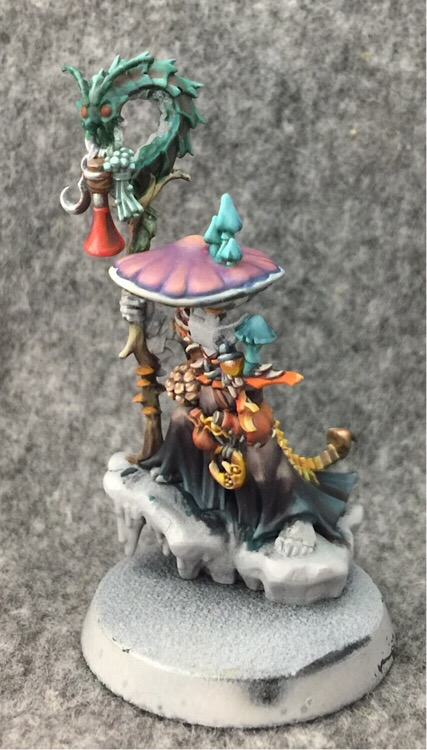
Here’s everything a little further along.
Next I moved on to the wormipede on the staff.
The base is Caliban Green. I used a mix of the Dryad Bark and Scarlet in the shadows to try to create a nice color harmony with the green. Unfortunately I just couldn’t really get this guy to pop like I would have liked. It’s too bad since he’s one of my favorite parts of the model. I think part of the problem is I broke one of my own rules and highlighted him with just pure white. Maybe if I‘d mixed in some yellow…
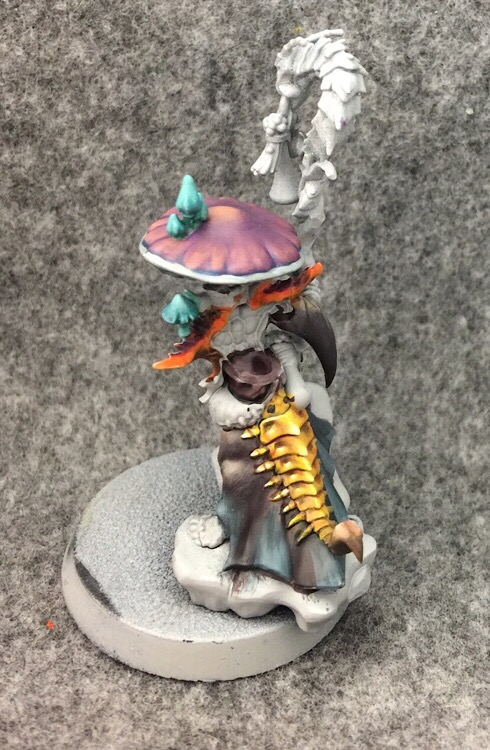
Anyway here he is further along. I tried to concentrate the highlights in certain areas to create the appearance of a reflection on an iridescent bug.
Here I’m continuing to smooth everything out. I wish I’d left him a bit more like this, where there’s a good amount of contrast. He’s closer to having that iridescent look in this image than how he eventually ended up.
Here I’ve brought up the highlights more and I don’t think it’s as effective.
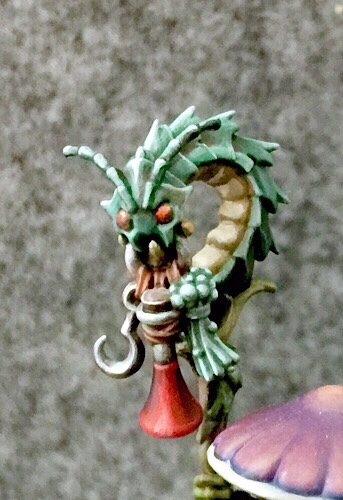
Here’s one final close-up. I probably could have spent some more time on it. It can take quite a few passes to really get the highlights working right for an irridescent appearance. But this was just supposed to be a fun weekend project so I’m satisfied to keep it like this.

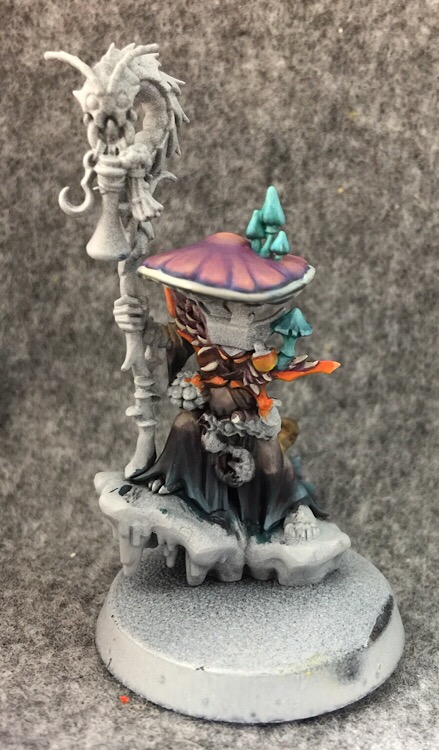
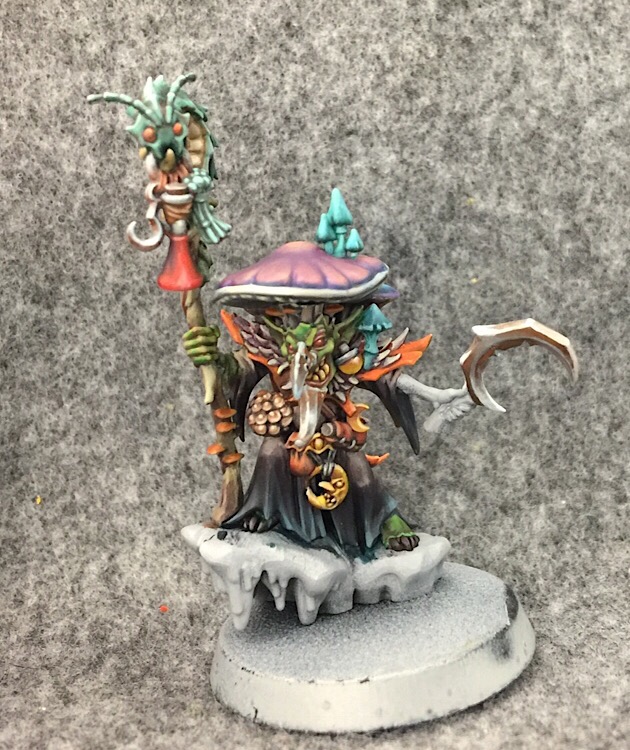
It’s finally time to get to Stinkmullet’s face. Unfortunately I didn’t realize these face pics I was taking were a little out of focus until I’d snapped a couple, but you can still see what’s going on well enough.
Here are all the colors going into the face. As with the staff worm, I used a mix of red and brown in the shadows to really make the green pop.
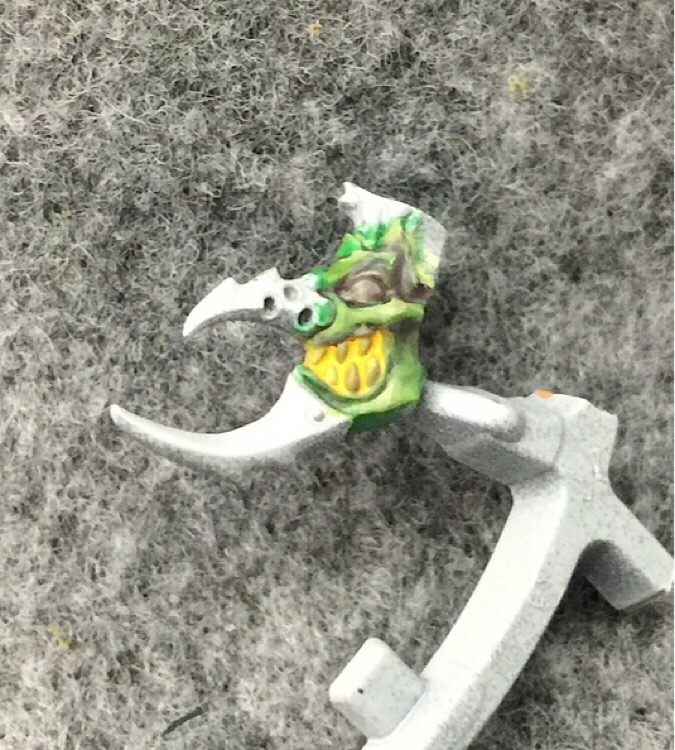
Here I’m adding some highlights with the Screaming Skull and Moot. I also began the teeth with a basecoat of the Averland Sunset I’ve been using so much.
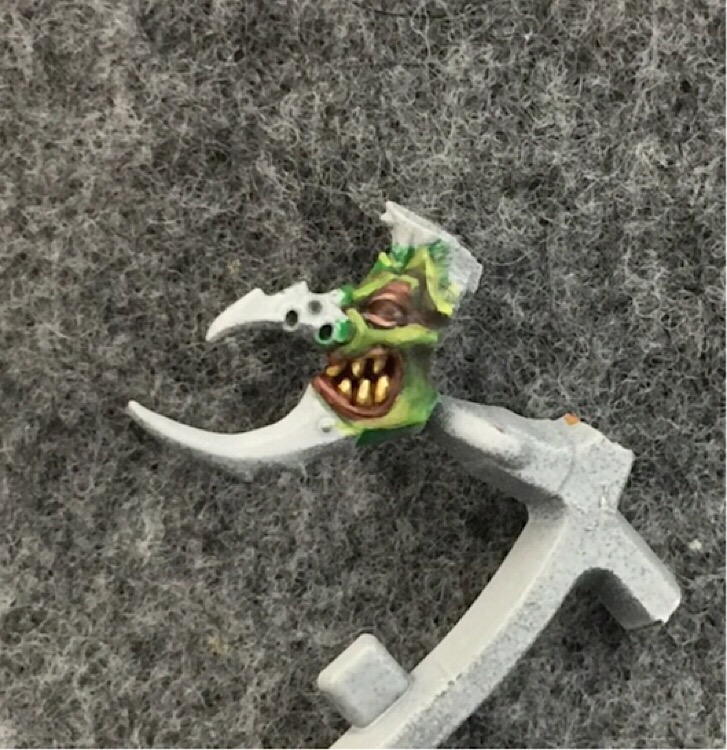
I washed the teeth with Agrax Earth before highlighting them with Screaming Skull. Then I began to use the Red and Cadian Fleshtone to highlight the lips and eyes.
More Highlights and then it’s on to the steel nose and chin.
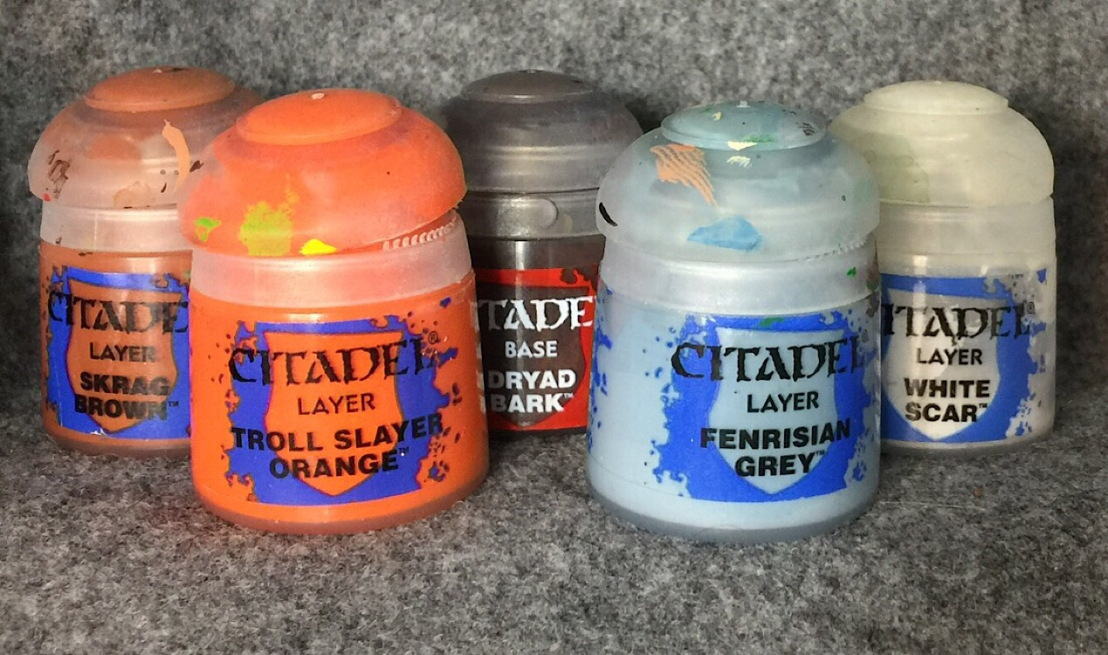
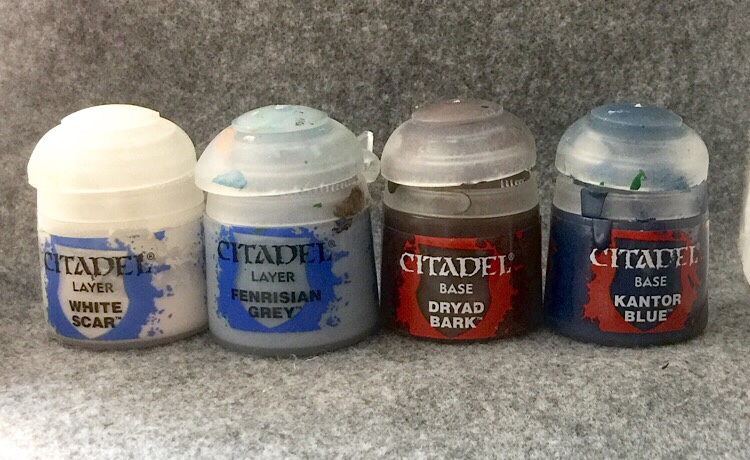
Rusty NMM can be tricky. The Dryad Bark is the base, mixed with Skrag Brown in some places. the Fenrisian Gray and White Scar are used to highlight.
Watered down orange is stippled sparingly on the shadowed area, and near any bolts or studs.

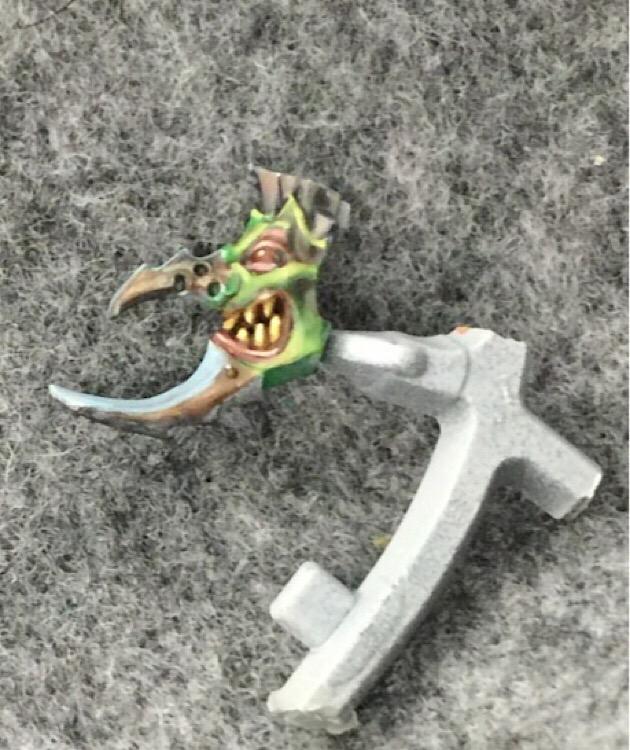
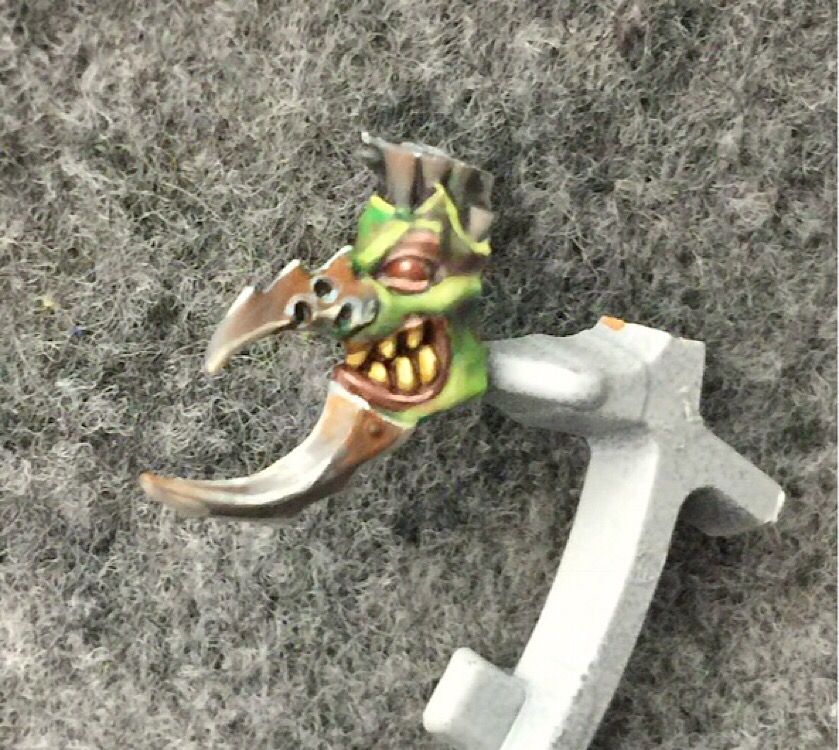
Not much difference here between the last pic. Just finalized some of the highlights. I got this one to focus a little better propping it up on my clippers.
After gluing the face and shawl on, I had to try to fill the gaps with super glue. It was hard to reach in there and get it in the right spot where his face meets his ears. I decided to emphasize the gap in the shawl, rather than fill it, since it just looks like a tear.
Then I began on the sickle with the same NMM palette used on the nose. Here I’ve just begun with a simple gradient. A central stroke of Fenrisian Grey is blended outward into Dryad Bark.
Now I’ve stippled some Skrag Brown and Trollslayer into the Dryad Bark for rust.
Here I’ve finished off the last of the highlights.
Then I go ahead and paint the arm with the same colors as the face. I try to keep the palms and knuckles a bit pink since I think it really livens up the green and keeps it from looking too much like plastic.
If you like articles like this check out my own blog toomini!
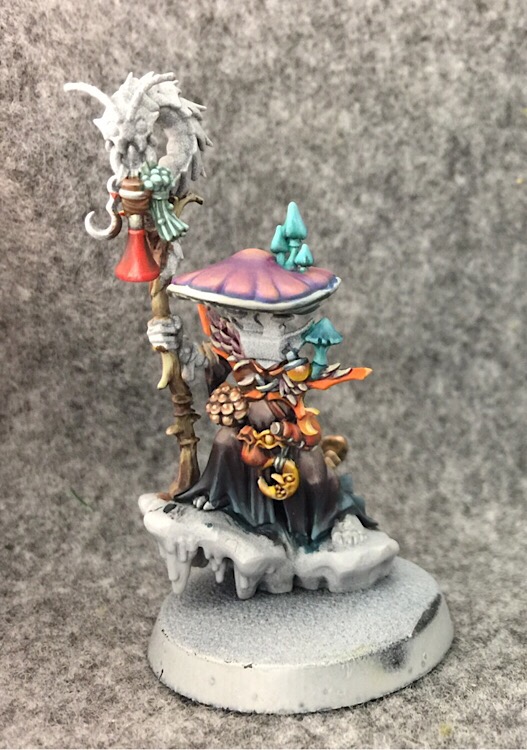
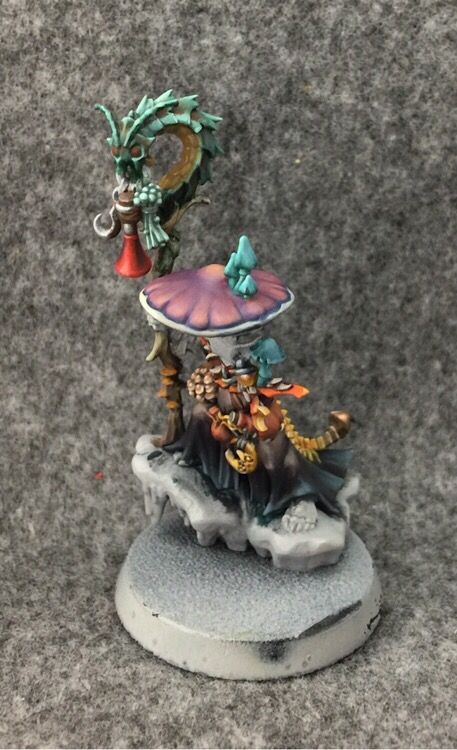
~Stinkmullet may be finished, but this project isn’t. I have a few more WiPs to add, then pics from other angles.