Marvel Crisis Protocol: Painting Daredevil Comic Style


We’re going step by step and painting up the ‘Man Without Fear’ in comic book style!
I’ve been a fan of comic-style painting for miniatures for a while now, but just recently decided to try it out for myself. Comic book style attempts to emulate the look of a hand-drawn comic, but on a 3D miniature(which leads to some interesting challenges). There is no one right way to do this, but one consistency nearly all comic style painting has is the heavy use of black ink – both for shadows and to help give the appearance of being drawn by hand.
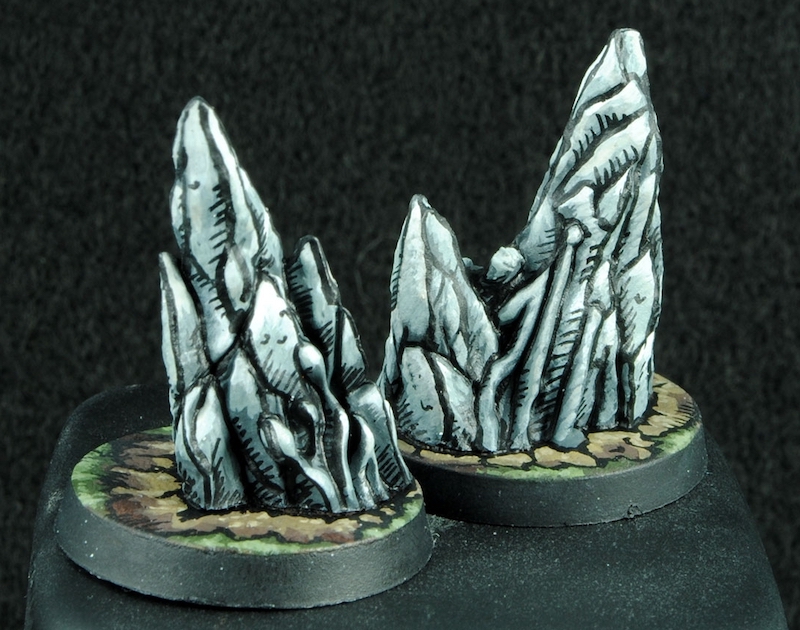
Geomancer Spires painted by Epic Duck Studios
For anyone looking up this style, you would have surely come across the Epic Duck Studios Youtube channel, where Mike has a ton of great content for learning to paint in comic style. Many of the tips I’ll be sharing come directly from what I learned watching Mike’s videos, so definitely check out the channel if you want to learn more. I’m definitely no expert on comic style yet, but I’m excited to spread the knowledge I have about this very cool technique. Without further ado, here is the step by step process of how I painted Daredevil up!
Starting Point
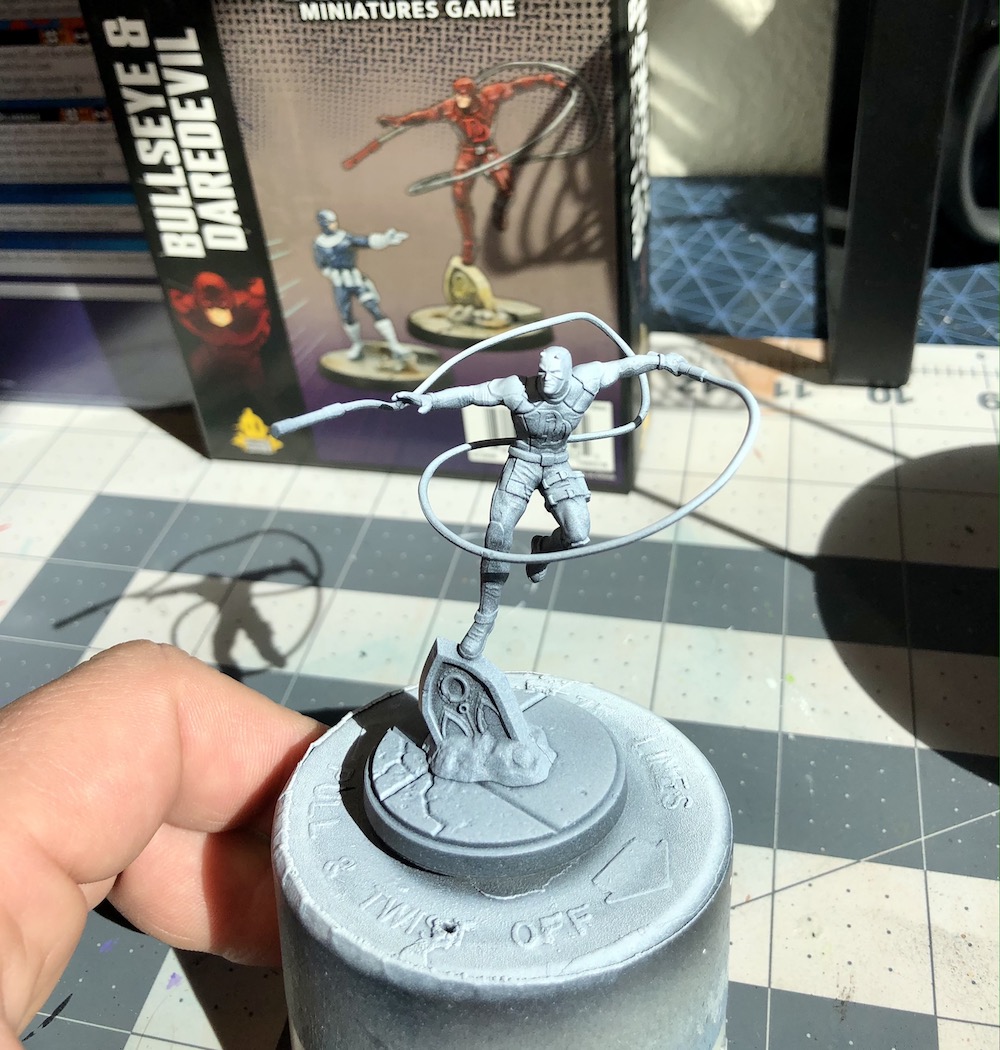
I’ve already assembled and given my model a zenithal prime. This is just a fancy term for priming the model black, then coming back with white primer at a high angle to mimic light from above. The zenithal prime isn’t a necessary step, so feel free to skip it and instead just prime the model white. The reason I suggest white over black primer is that we want our model to be bright before we apply the black ink. Priming white helps keep the brightness up on the model overall.
Painting the Model
These first few steps are going to be basically painting the model normally with a few rules. Rule 1, stick with brighter colors. Maybe even a shade brighter than you might normally paint a model. Rule 2 is no shading! Stick with your base colors and highlight colors only. This is because we’ll be adding a lot of shading and dark lines with black ink later which will drop the color palette darker right at the end.
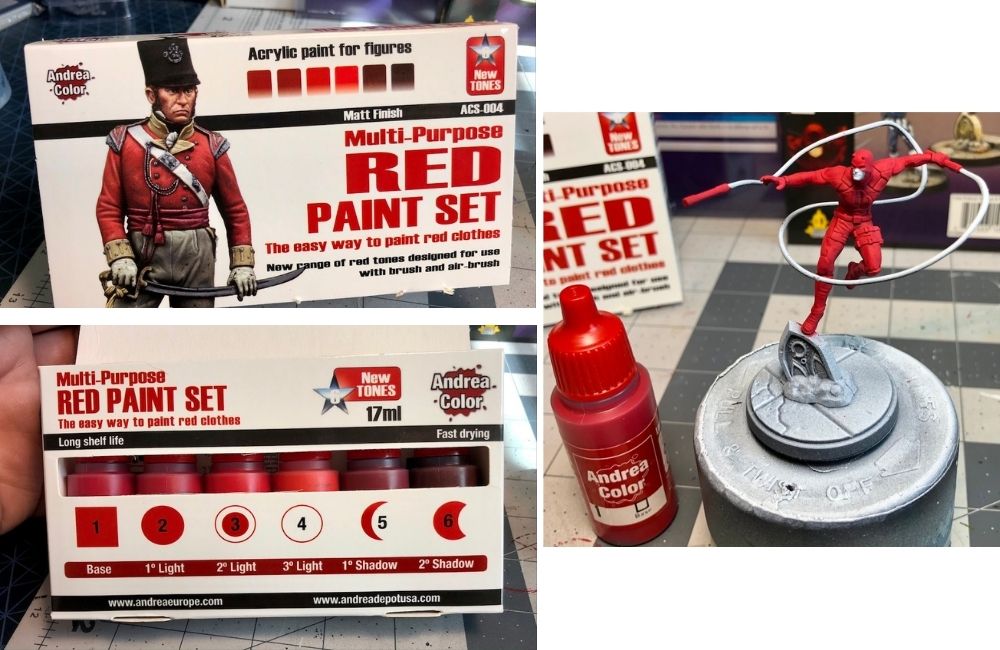
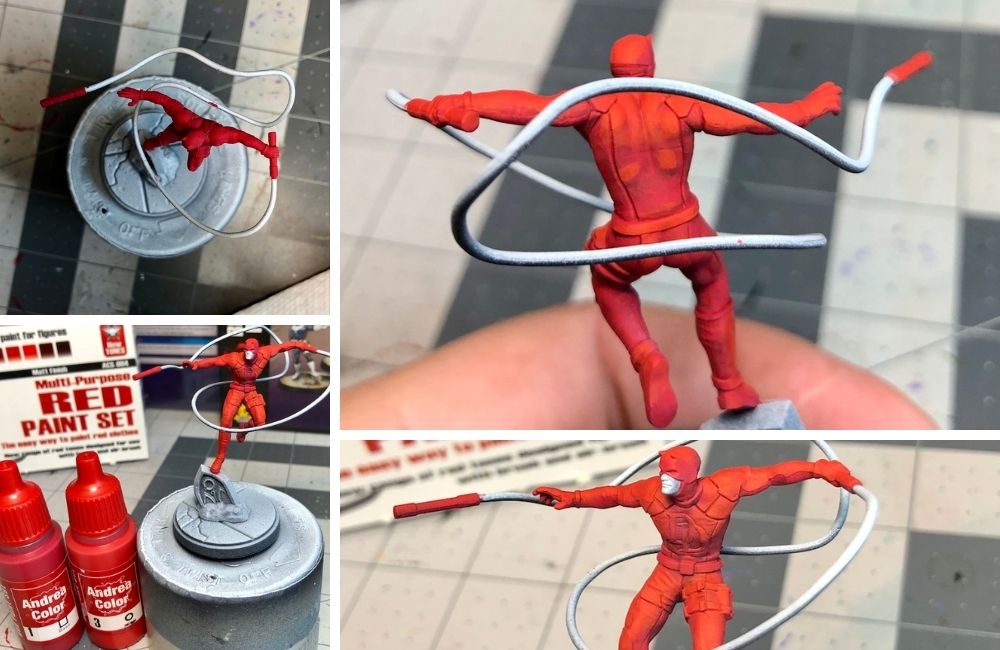
For my reds, I’m using a few colors from this awesome set by Andrea paints. However, throughout this entire guide don’t worry so much about the exact paint – but rather the intention behind color. The important part is I’m choosing a base color, first highlight, and second(brightest) highlight. In this case the Andrea Base, 2nd Light, and 3rd Light colors in the below picture.
Daredevil (R) with just the base color applied.
After the base comes the first red highlight. One trick I especially like for highlights is looking at the model from directly above. Any surface of the model you can see from directly above should get this first highlight.
Base and first highlight applied.
Next, our brightest red highlight get applies. This color should only be applied on top of our first highlight and in this case, I’m covering about 25% of the first highlight with the second highlight color. This is mainly being applied in the center of panels/sections or areas that would naturally catch the most light(tops of straps, eyebrows, buckles, etc…).

Red is complete!
As Daredevil is mostly red, the rest of the model paints up pretty quick. Here are the steps I used to get this model ready for some black ink.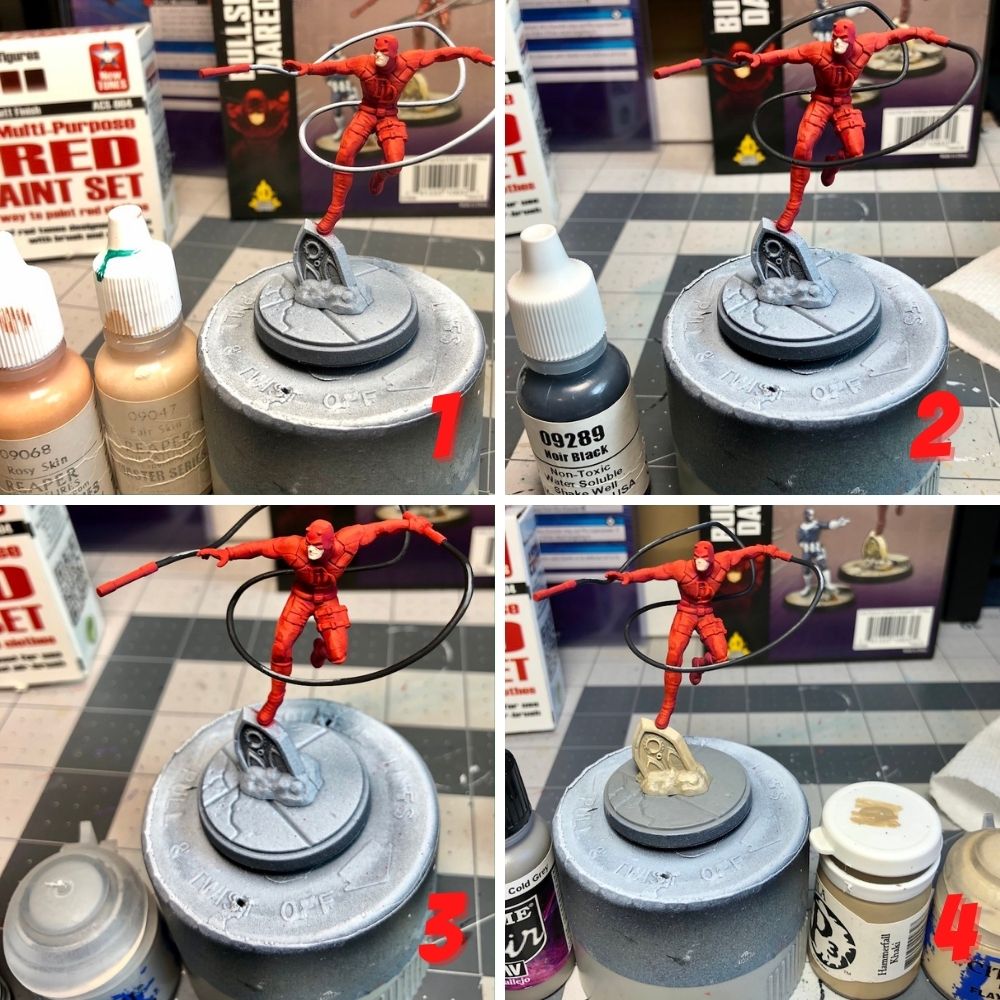
- Painted the face with Reaper Rosy Skin and a Reaper Fair Skin highlight.
- The whip gets a base coat of Reaper Black Noir. This very dark grey color is a little lighter than the black ink, which lets us add a nice subtle black ink shadow to the underside of the whip later.
- Highlight the whip with a few lines light grey(in this case GW Administratum Grey) along the tops of curves where they would be likely to catch the light.
- Used Vallejo Cold Grey for the concrete. Hammerfall Khaki for the base color of the rubble, then a highlight of GW Flayed One Flesh. Don’t stress about the highlights here, we’re going for an overall simple look to the base. In this case, I choose the section right by Daredevil’s foot to be highlighted as well the some of the arch tips and tops of the rocks.
The Comic Style, Finally!
We’re ready for some ink. For this step, you’ll want some artists waterproof black ink and a triple zero brush size(or something similarly small). I’ve used both Liquitex Carbon Black and Higgins Black Magic and like them both. For this model, I’ll be using Higgins Black Magic. I’ve got three brushes in my arsenal the right size for this job. My favorite so far, and the one I’m using for this model, is the Army Painter Insane Detail brush.

I like to approach the model in sections; right leg, right arm, chest, left arm, etc.. and in each section, I do the following with the black ink.
- Outline each ‘thing’ in that section. Boot, pouch, arm, panel, etc.
- Block out the deep shadowed sections with ink
- Add additional accent lines or marks as needed to create the comic look
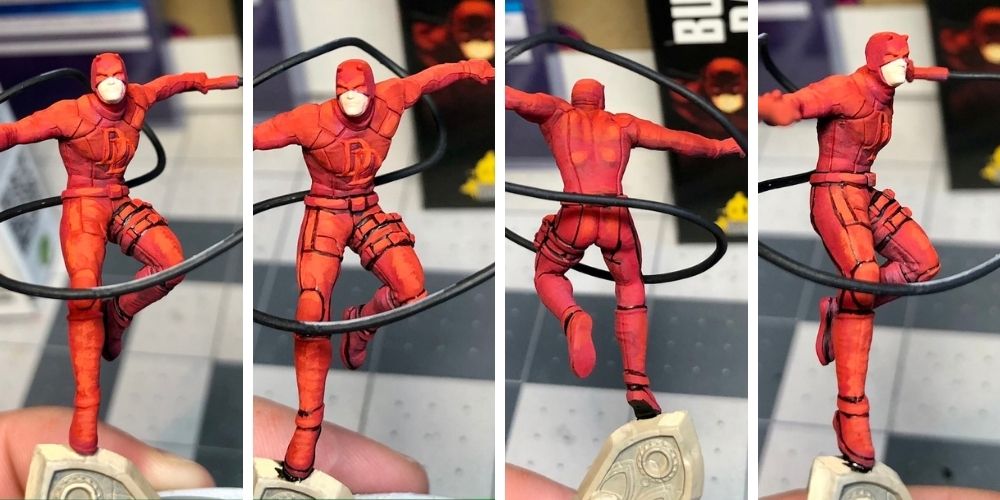
Take your time outlining the sections of your model. This step is by far the hardest part of comic style and will take some patience. Don’t stress about mistakes at this point, often they can be turned into accent lines later – or may get blocked out completely by an ink shadow in the next step. Here is the outline step for Daredevil’s legs.
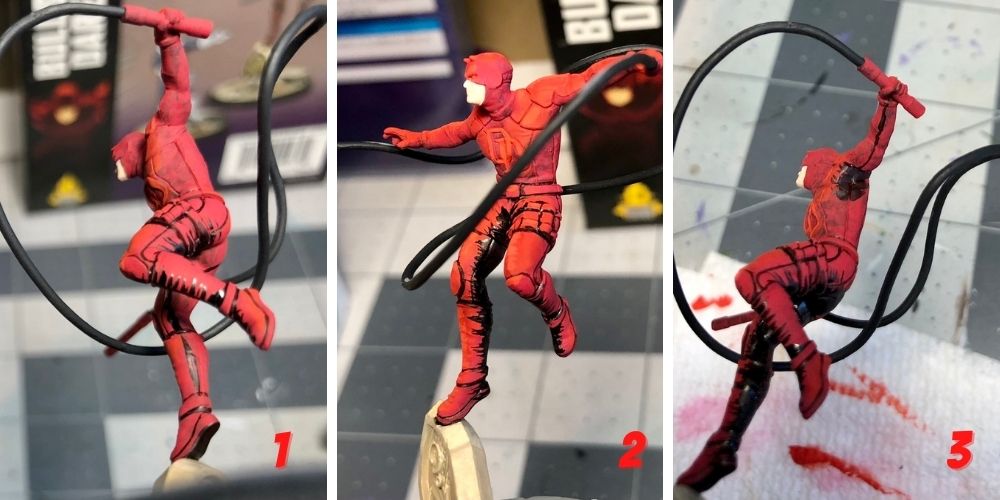
Next, I’ll block out the deep shadows of the legs. Often I’ll draw a thin line(image 1 below) to help guide my shadows when blocking in with ink. I keep a consistent back and forth brush stroke so that all my lines are going roughly the same direction. In picture 3 below you can see the nearly-completed leg on the right.
Tip: Sometimes it’s easier to block in an area you know will be completely in shadow so you don’t waste time outlining it. The inner sections of thighs or armpit areas are often just blacked out with ink shadow.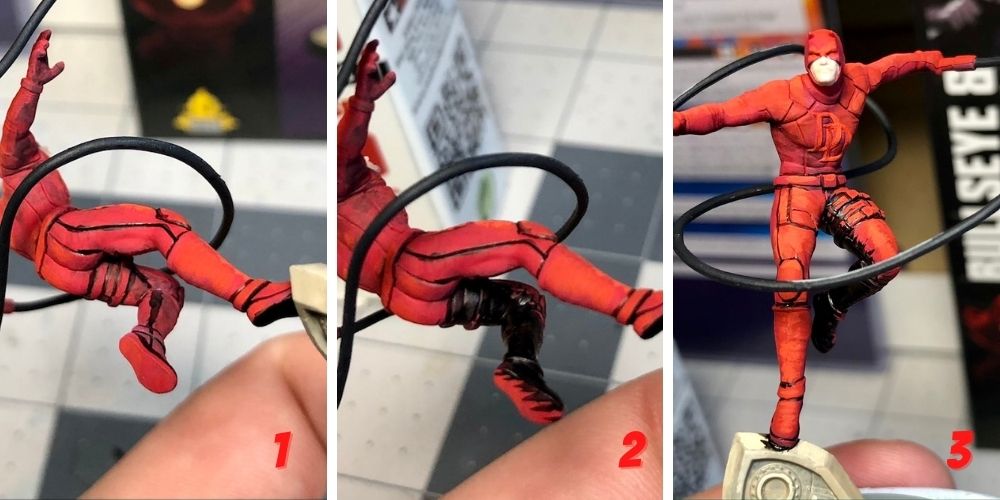
I’ll keep this basic process going for each section of the model. Below you can see I again start with a small line on his inner right leg to guide me as I add the shadow. In image 3 below you can see me start to blackout the left arm and armpit.
More in-progress shots – image 1 below shows the nearly complete left arm shadow. For Daredevils face I put an outline around his mouth opening and 2 small black dots under his horns.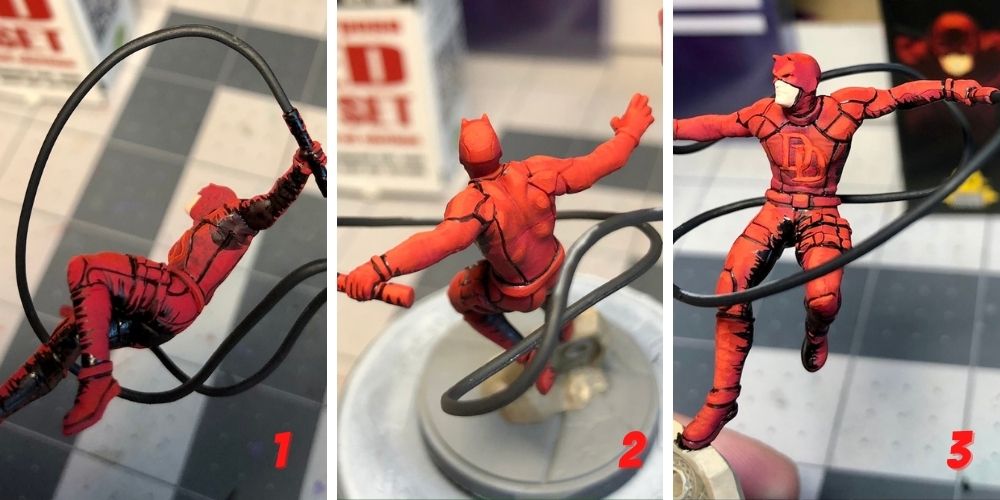
Finishing up the right arm and chest details…
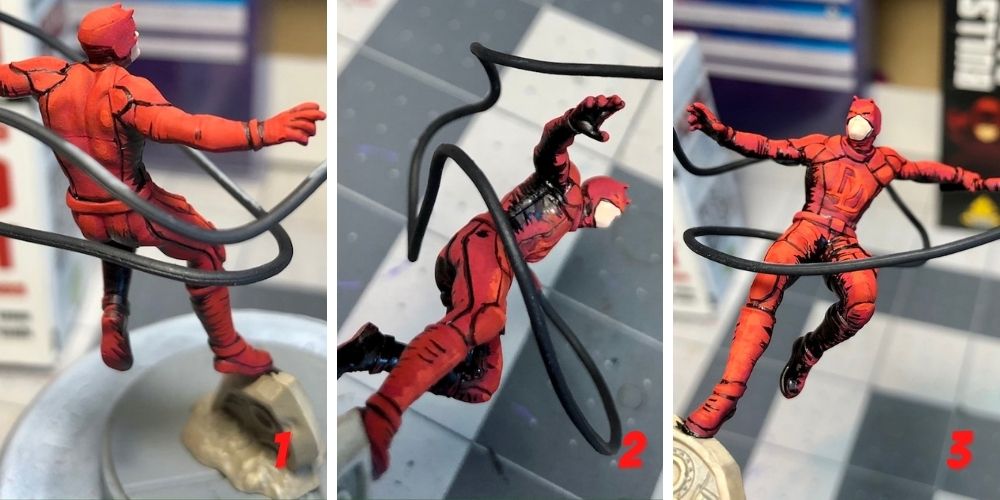
As I complete a section I will often add some small accent lines as well. Showing the shape of a muscle, or elbow joint with a small line two.
Comic Style Base
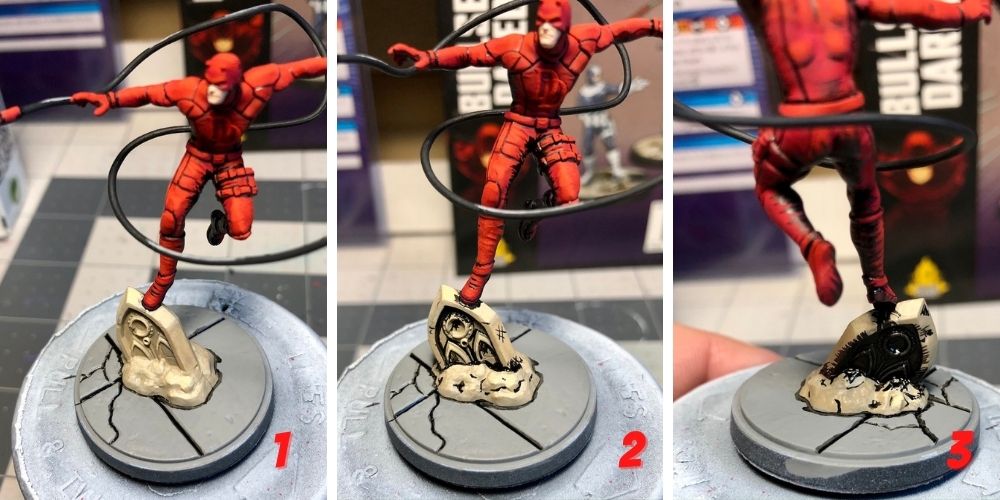
Daredevil isn’t quite done, but at this point, I want to get the base squared away. Just like the rest of the model, the first step(image 1) is to outline the basic parts of the base. This means outlining where the boot and arch meet, where the rubble and concrete meet, and also the cracks in the concrete itself. In image 2 you can see some shadows have been blocked in and accent lines like the hash mark on the side of the arch have been added. These aren’t super precise, just trying to pick some areas that might have some shadow and fill them in. As you can see in the 3rd image, the recessed part of the arch has been completely blacked out. I could have probably done even more lines here where the arch meets the rubble.
Finishing Touches
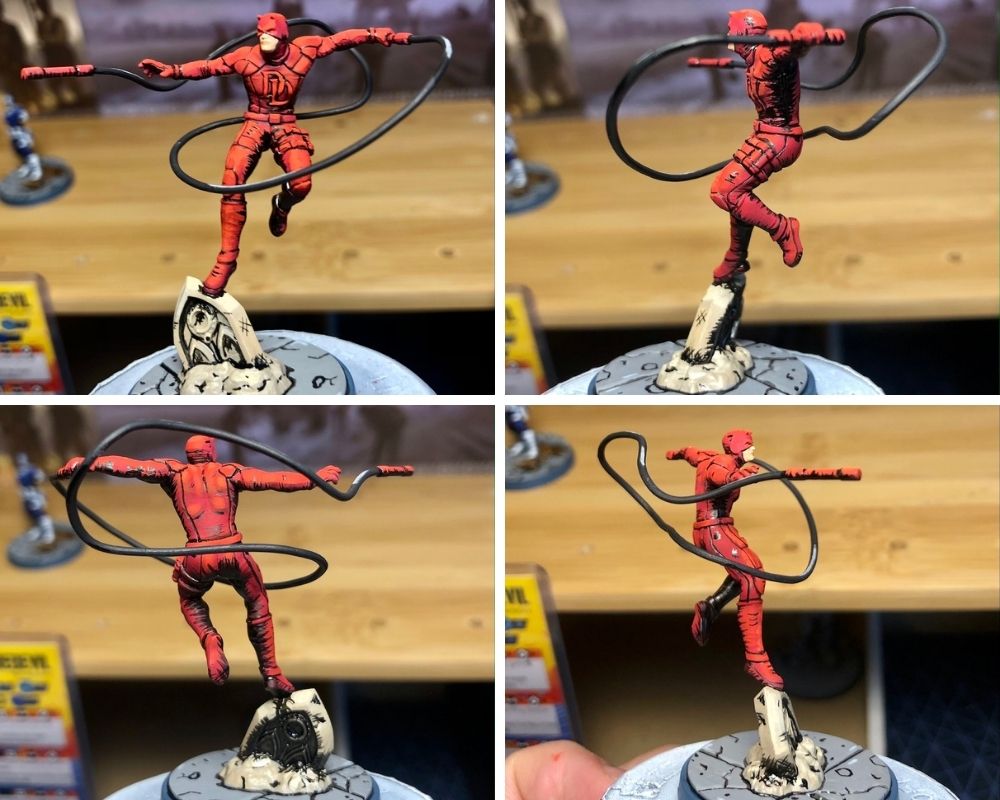
We’re just about done, but there is one thing I’ve been debating about this whole time….do I outline the Daredevil logo on his chest? A part of me wanted to leave it as is. I’ve already painted the logo with my brightest highlight, so it does stand out. However, in the end, I decided to outline the logo and it was definitely the right decision. The interlocked Ds stand out a lot more now.

For all of my Crisis Protocol models I outline the base rim with P3 Gravedigger Denim, then a ring of black ink. At this point, I realize I’m not happy with the mouth area just yet, so I decided to finish it off with a small amount of Reikland Fleshshade to add a bit more shadow to the mouth and nose. Lastly, I add some additional detail to the base in ink, some random markings and circles, just to give a sense of texture. This is another one of Epic Duck Studios’ recommendations, just to add something to the base without distracting from the model itself.
>One Last Important Step
At this point, we’ve got a complete model, but as you might have noticed in the pictures above…the ink is very reflective and glossy. You’ll want to seal your model using a dull coat varnish. This will not only protect your paint job, but it will also get rid of the glossy shine from the ink. I highly recommend Testors Dull Coat, I’ve been using it for years and have never had an issue with it. Remember to use the dull/clear coat though, there is a glossy version of Testors and they are basically identical cans. Don’t buy the wrong one!
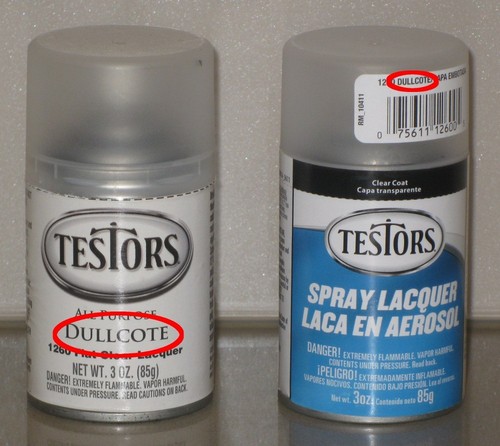
Note the ‘Dullcote’ circled in red.
Wrap Up
With our model freshly dull coated model, we are now complete and ready for the table!
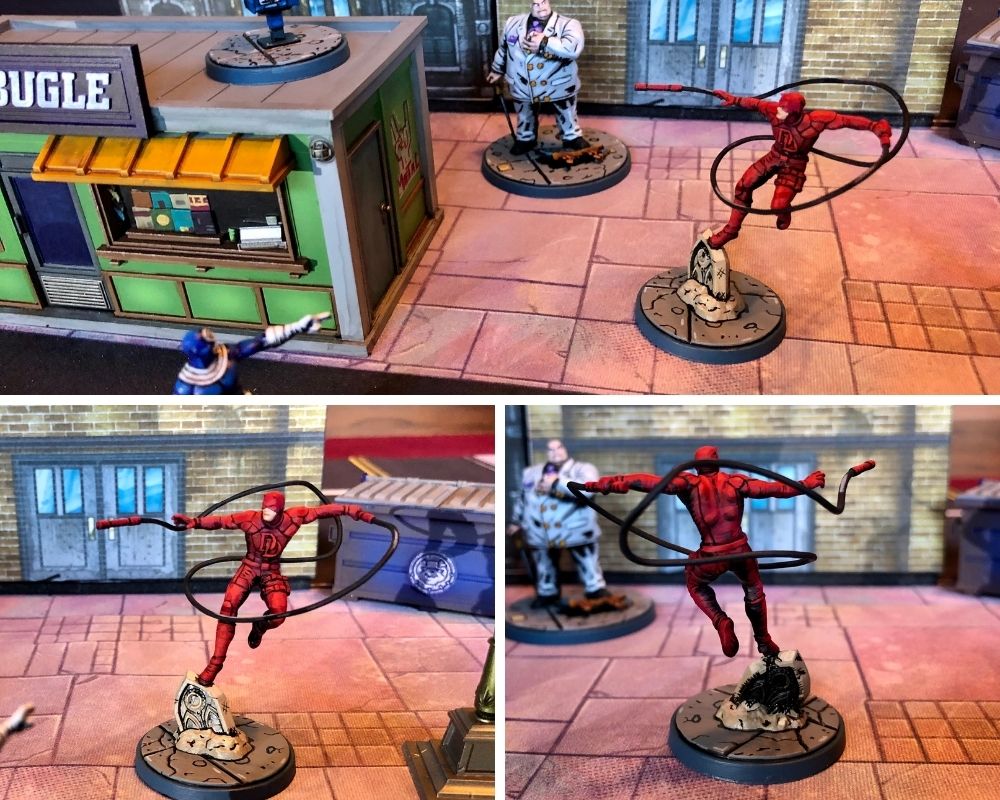
Thanks for sticking around to the end of this article! I sincerely hope you enjoyed it and it’s inspired you to give comic style a try yourself.