Moonstone: Painting the Goblin City Troupe Starter

Even if you haven’t tried Moonstone, this article is full of helpful tips painting tips for every kind of model.
If you’ve never heard of Moonstone it’s a very cool small-scale skirmish game. Combat is handled with two decks of cards rather than dice. Melee combat uses its own deck with a rock/paper/scissors kind of mechanic. All other attacks and abilities use the other deck and involve a bluffing mechanic. I’ve enjoyed the games I’ve played so far and if you want to learn more youtube has plenty of videos.
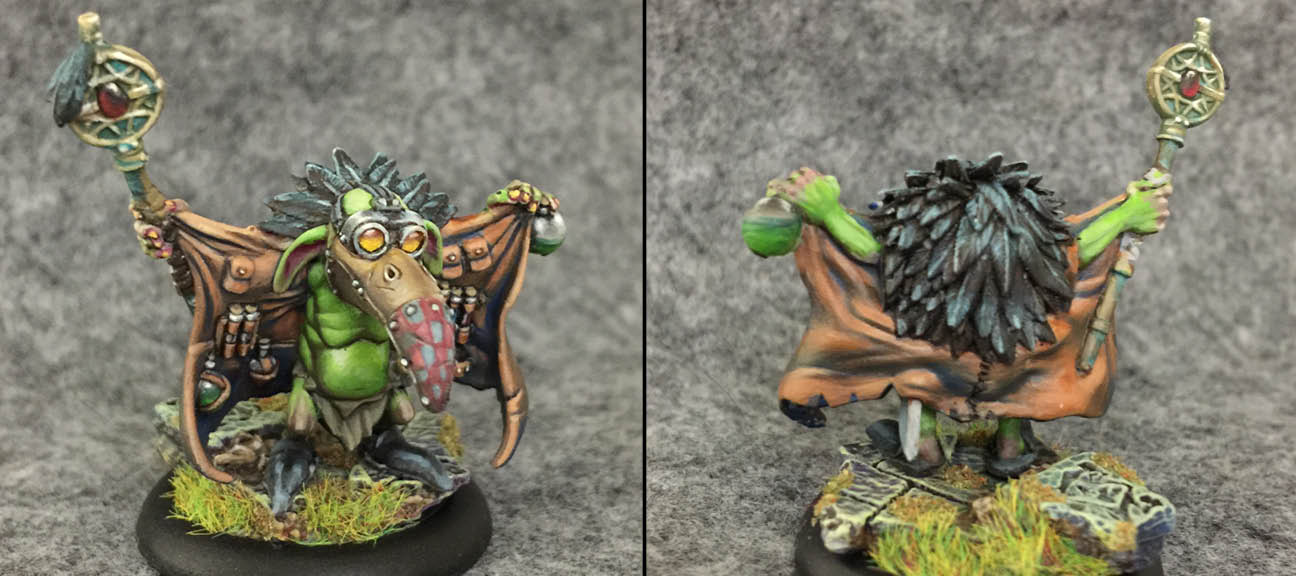
We’ll be starting off with Beaky Bobby here. He’s one of four gobbos from the Moonstone 2-Player starter.
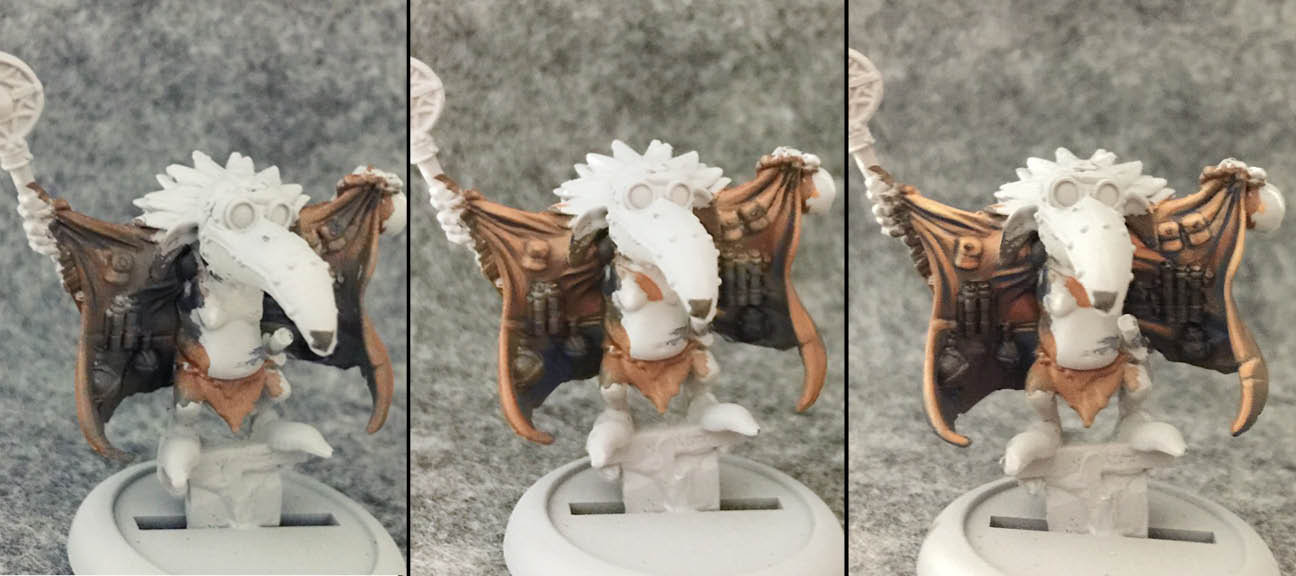
I’m starting off with Bobby’s cloak. It is based with Skrag Brown and shaded with Kantor Blue and Rhinox hide.
Next, I begin using the Skrag Brown to highlight all those folds.
Kislev Flesh, and then a little Flayed One Flesh, are used to really bring out those highlights.
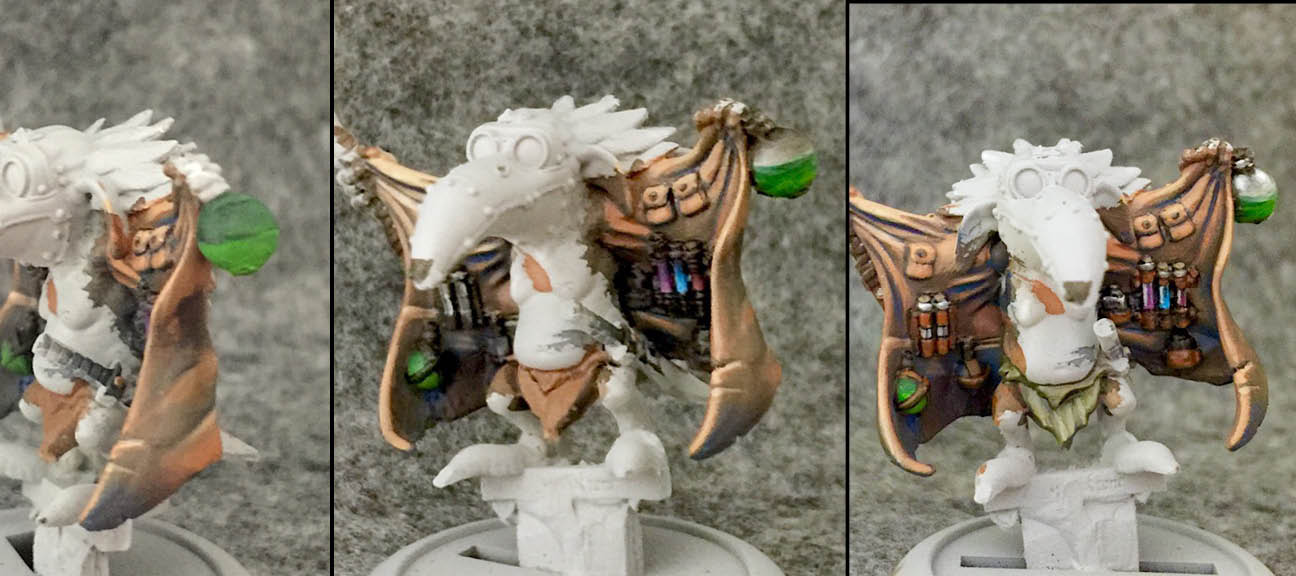
Next, I proceeded to the potions. Zooming in on the largest bottle you can see I’ve started with a darker green (Caliban Green) on top and a lighter green (Moot Green)on the bottom.
The greens are blended into each other and a white ring is painted around the middle of the whole bottle. This white is then blended up into almost a pure black at the top of the round bottle creating a nice gradual gradient of white to gray to black. Some thin strokes of Moot Green are used in the green “liquid” in the bottle so it appears as if something is swirling around.
Then a sharp highlight of white is added around the upper corners of the bottle to represent a reflection of light. A simple spot will work well but I find the effect is even more convincing if you can manage to fade it into the surrounding area. This can be a little difficult to pull off since you’re painting it over an area that already has a gradient going on. I usually apply an extremely thin layer of water over the area to help blend the “reflection” into the surrounding “glass.”
The other potions in the cloak are all painted in a similar way. The test tube-shaped vials get a thin reflective line rather than a spot to enhance their cylindrical shape.
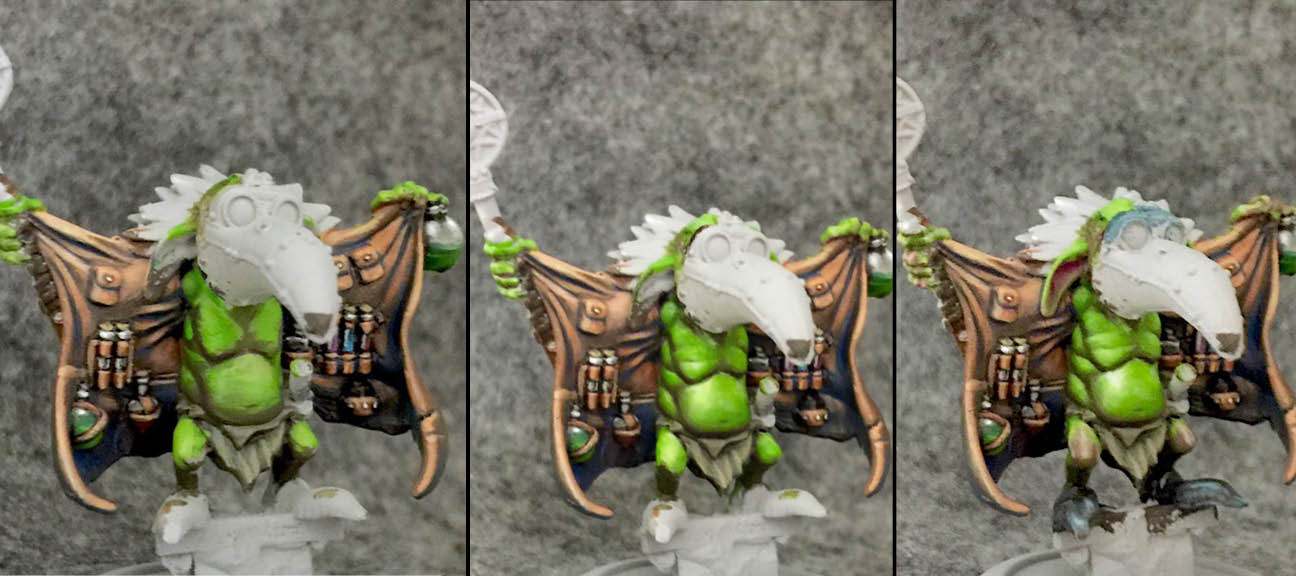
Next, it’s time for that beautiful goblin skin. I start with a base coat of Moot Green and add some shading with Rhinox Hide and a few highlights with Flayed One Flesh while the green is still wet. I smooth it out with a few subsequent layers, adding some Menoth White Highlight (formula P3) to make it really pop. Finally, I add some Screamer Pink (which is actually a deep red rather than a pink) to the ears and knees. The “pink” is highlighted with Kislev Flesh and Menoth White Highlight which are also blended into the surrounding green.
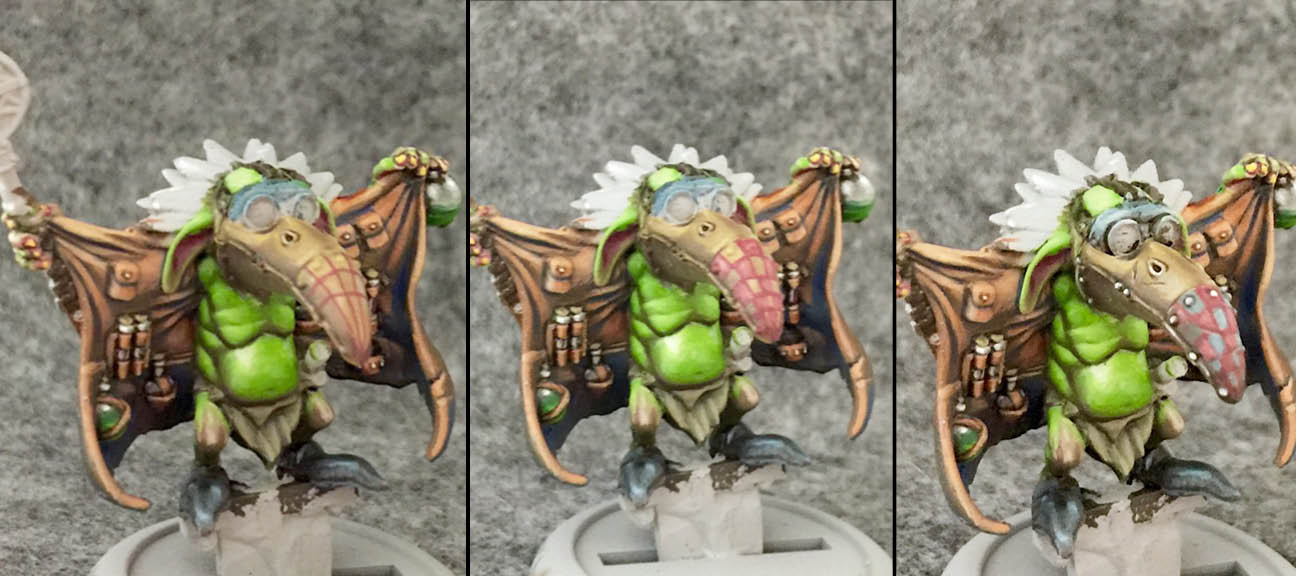
Now I’m doing the checkerboard pattern on the eponymous beak. I start with a grid of lines in Screamer Pink. Then I fill in the alternating squares with a mix of Screamer Pink and Kislev Flesh. The remaining square is filled with a mix of Thunderhawk Blue and Fenrisian Gray.

Finally, I move onto the mask. I do a gemstone effect on the goggles with a base coat of Averland Sunset with Skrag Brown at the top and accents of Flash Gitz yellow on the bottom of each lens. I use Celestra Gray highlighted with Menoth White Highlight and shaded with a mix of black and Rhinox Hide for the metal frames for the goggles.
After too much thought I decided to go with some crow feathers for the feathered cloak. I considered vibrant colors; oranges and purple or reds and blues – but crow feathers are dark enough to not draw attention away from the face and have the added bonus of seeming a little sinister. Also, they match Beaky’s art.
I tone the black with a little Fuegan Orange shade and Screamer Pink before adding some highlights with P3 Coal Black. I find giving the black a warm tone helps the blues really pop. P3 Frostbite is used to further lighten the feathers. Avoid the temptation of picking out each feather barb with the Frostbite. Restrict it to where the feathers bend or curve and they’ll look more natural. The picture of his back below shows this off pretty well.
I went with a tarnished brass look for the staff. I start with P3 Cryx Bane Base and highlight it with a mix of Averland Sunset and P3 Sulfuric Yellow. Menoth White Highlight (of course!) is used to brighten it up further and add a few sparkling bright spots.
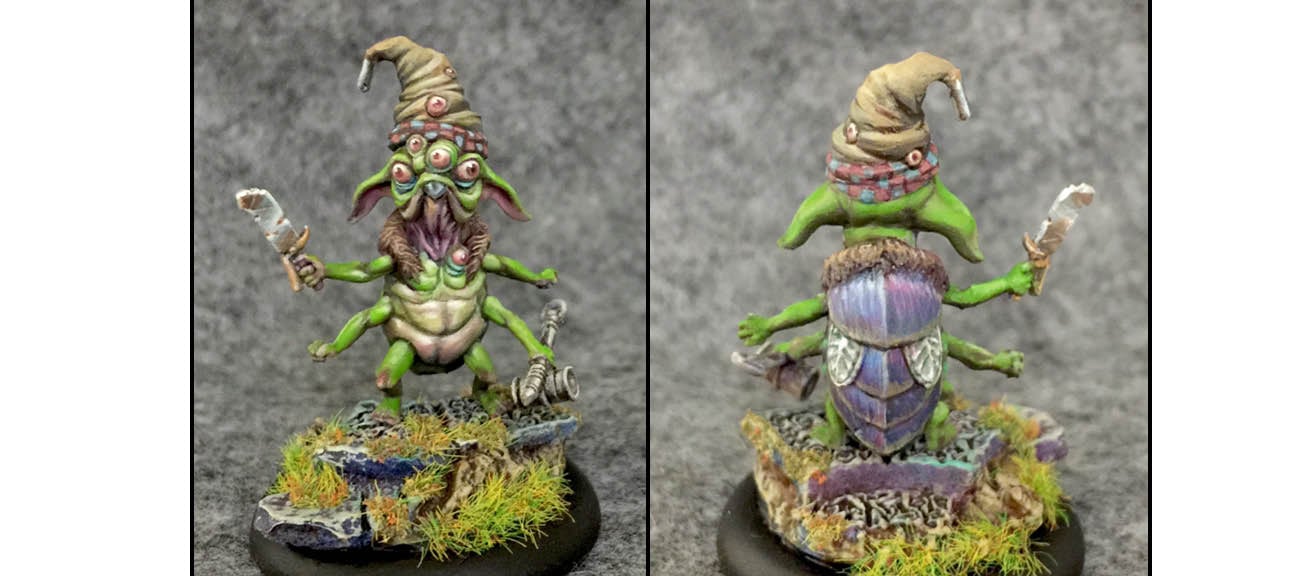
Next, it’s wee Grub. He’s only available in the two-player starter which you should split with a friend anyway because it’s a great deal.
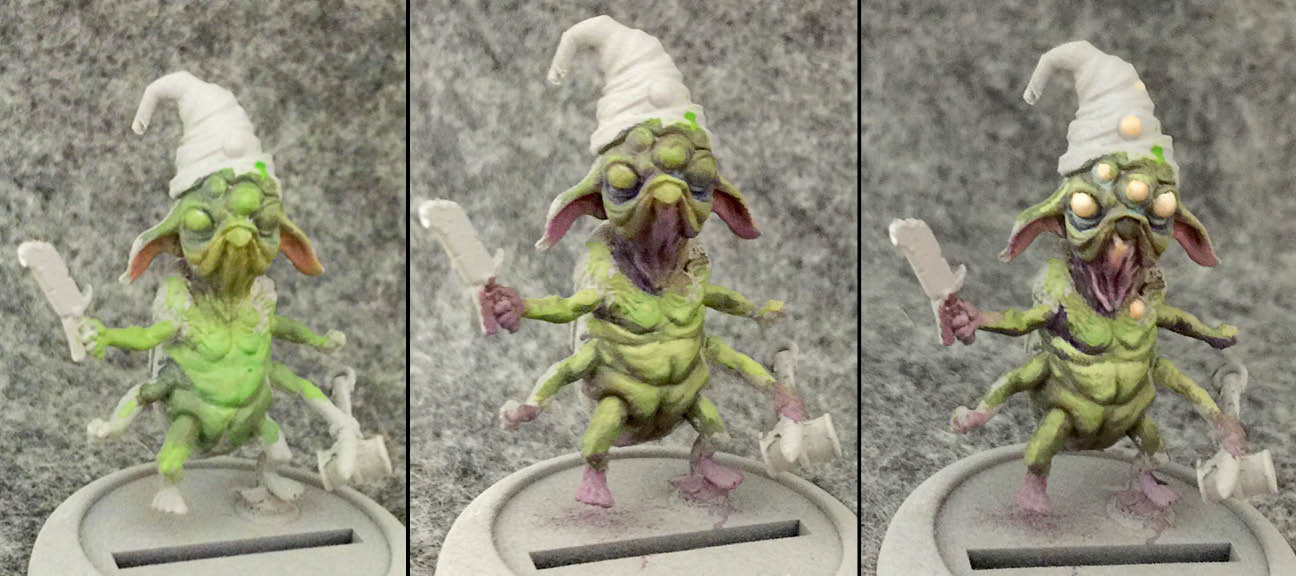
The base skin tone is a nice vivid Moot Green. This is shaded mostly with Rhinox Hide and in some places Genestealer Purple. The face has a lot more color with a little Kantor Blue around the eyes. Cadian Fleshtone is mixed with the Moot Green on the neck to give it a bit more warmth. Pure Cadian Fleshtone on the ears really makes them pop.
Moving on I add more of the same colors. More purple is introduced to the hands, feet, and neck to make them stand out more. I’ve also begun adding some highlights of Menoth White Highlight (formula P3) blending it into the Moot Green.
Next, I get the shadows even darker while bringing out the pink in the neck with some Kislev and Cadian Fleshtone. The eyes are formula P3 Moldy Ocher highlighted with Menoth White Highlight.
I add the corneas with some Screamer Pink (which is actually a dark red) and continue adding definition here and there smoothing out the shading. I decided to accentuate the belly, making it paler by adding some Kislev Flesh highlighted with Ionrach Flesh.
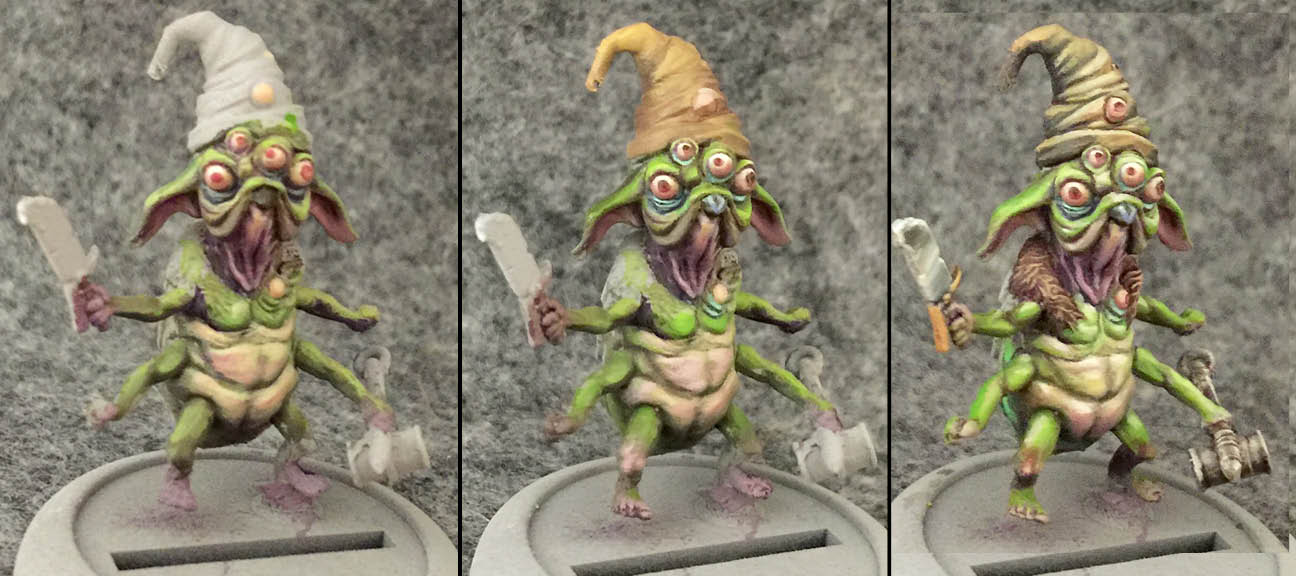
The fingers, toes, and knees get some attention with Kislev Flesh shaded with some Genestealer Purple and Screamer Pink. I also add some arcane blue around the eyes. In the pupils, I blend a little black into the red around the top. When you have a model with eyes this large, you can paint the corneas like gemstones – darker at the top, lighter at the bottom. The hat gets a basecoat of Baneblade Brown.
In the last frame, all the skin gets some final Menoth White Highlight highlights to really bring out the detail. The hat is highlighted with some P3 Sulfuric Yellow and Pallid Wych Flesh. It’s shaded with a mix of Kantor Blue and Rhinox Hide.
His fur collar is Rhinox Hide with some Sulfuric Yellow dry brushed onto it. His little beak started with a basecoat of black with some stark highlights of Celesta Gray and Menoth White Highlight applied in a little cone shape to try to make it looks shiny.
I did some NMM effects for the knife and bug spray can. I’ve done a lot of NMM articles so if you want to learn more about that this is a good one with a lot of theory.
His eyes get pupils with a little spot of black before I add a little off-center highlight to each eye. I also did a checker pattern on his hat, to tie him in with the rest of these goblins. Check The Beaky Bobby painting article for more on doing a checkerboard pattern.
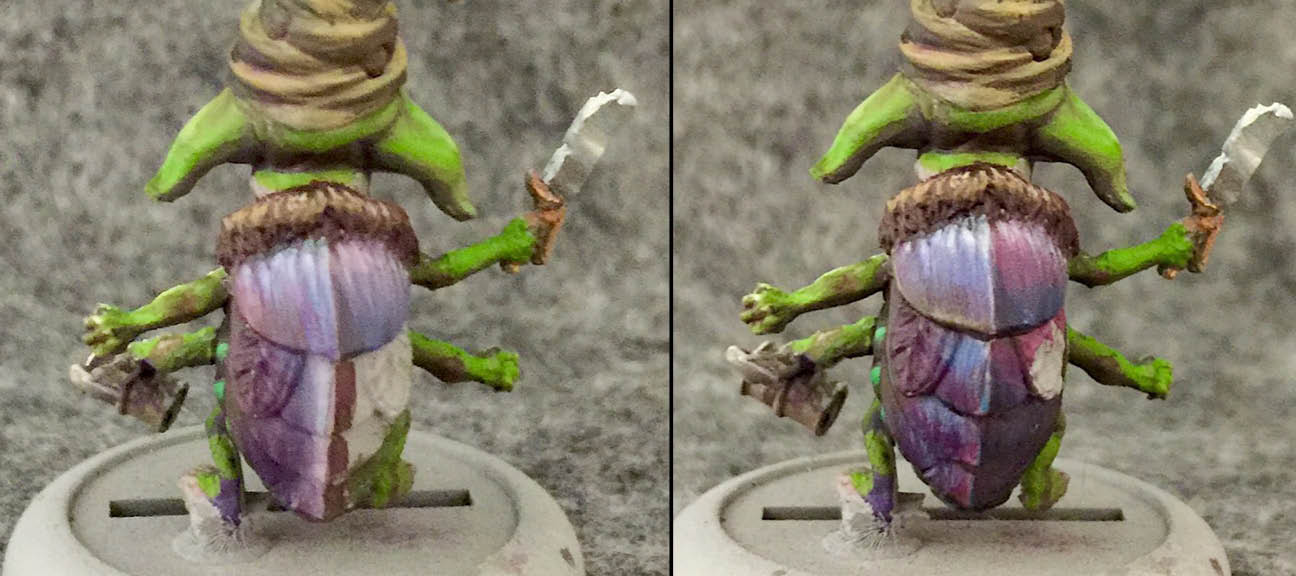
Then there is his little bug back. I wanted to go for an iridescent beetle look here. I tried this by using cool colors for the highlight and warm colors for the shading. To try to take it another step I reverse this on the other half – warm highlights and cool shading.
I think I was on the verge of something cool here but I didn’t quite pull it off. Still looks fairly nice but it could have used darker shading and more saturated colors.
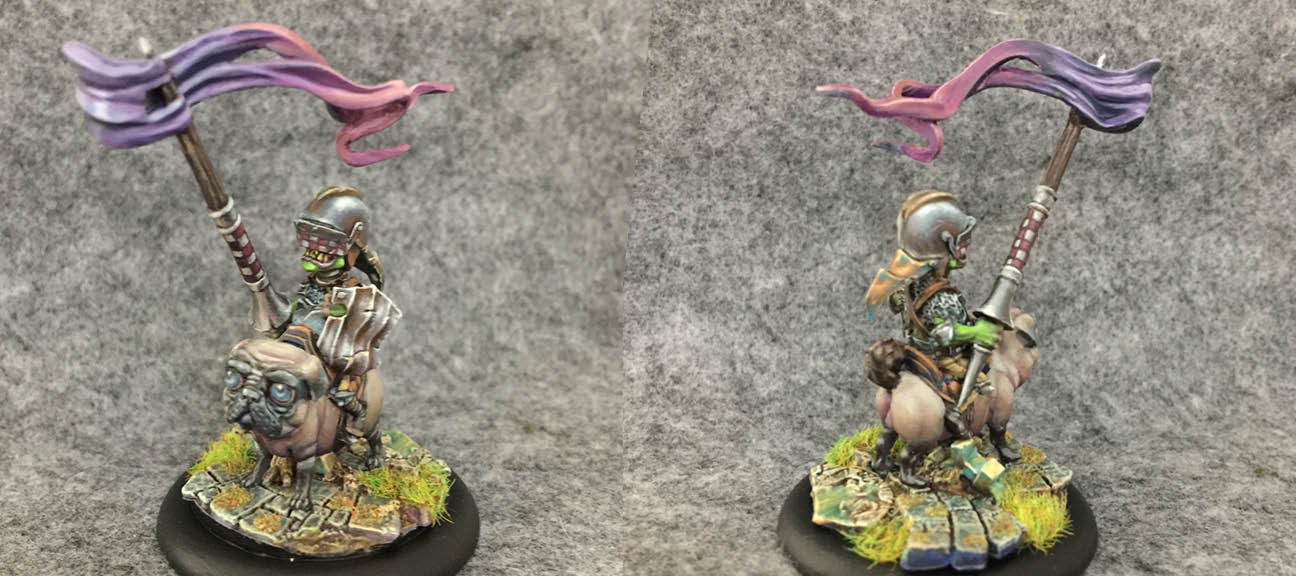
Next is Doug the Flatulent, an ordinary gob and his merciless bloodthirsty steed.
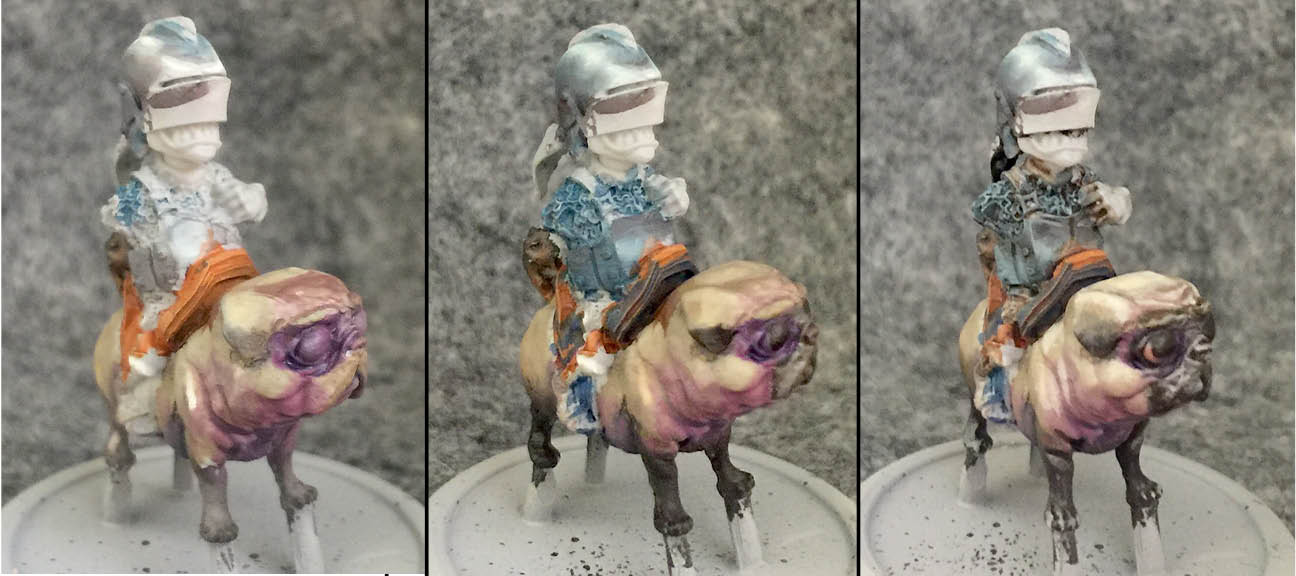
The pug gets a basecoat of Baneblade Brown, with a little Genestealer Purple and Rhinox Hide for shading and some Screaming Skull highlights. I also begin adding black to the legs and ears. The saddle is Skrag Brown. I start on Doug’s armor with some THunderhawk Blue, adding a little shading with a mix of black and Rhinox Hide.
I move forward by adding more layers of the same colors, eventually bringing in some P3 Menoth White Highlight in the last step to really make those highlights pop.
A bunch more layers later and they’re that much closer to finished.
Back to the pug, the eyes start off with a basecoat of Kislev Flesh. Then a circle of Rhinox Hide is painted in the center of each eye. I do a gem effect for the retina with Ultramarines Blue, blended up into a pure black with Fenrisian grey accents along the bottom. For the pupil, I add a dot of Fenrisian Gray with a dot of Abaddon Black directly above it leaving just a thin circular line of the light gray.
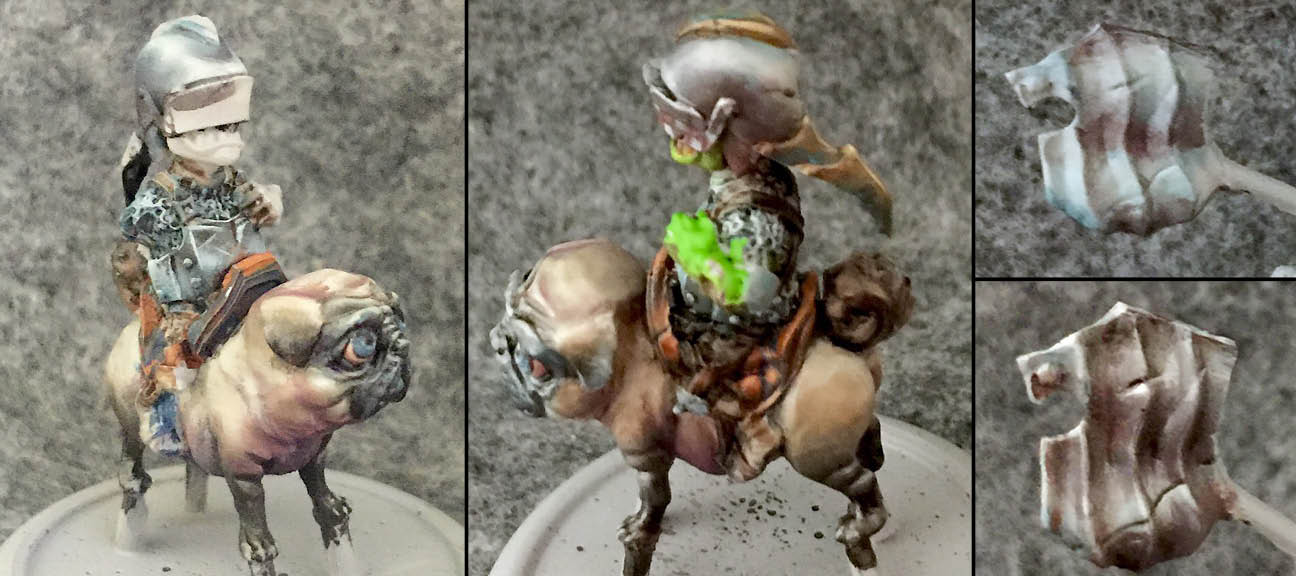
The shield turned out to be one of the most fun parts and went a lot faster than I expected. The curved surface seemed like it would make it hard to pin down where to apply the right highlights to get that NMM effect but it turned out to be fairly easy.
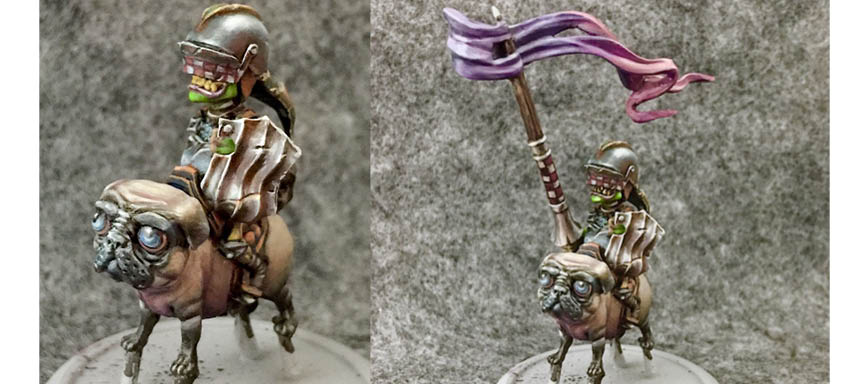
There are just a few things left to do. I freehand the checkers using the same technique I did in this Beaky Bobby article. I add a little rust to the armor with some thin glazes of Khorne Red mixed with Troll Slayer orange applied sparingly around the recesses and shaded areas.
There’s only a little goblin skin, and for that, I use the same technique as I did with Grub. The wood grain on the lance is Rhinox Hide with some streaks of Baneblade Brown and then a little Screaming Skull. The pennant is Xereus Purple blended into Screamer Pink. The Purple is highlighted with P3 Frostbite and the Screamer Pink is highlighted with Kislev Flesh.
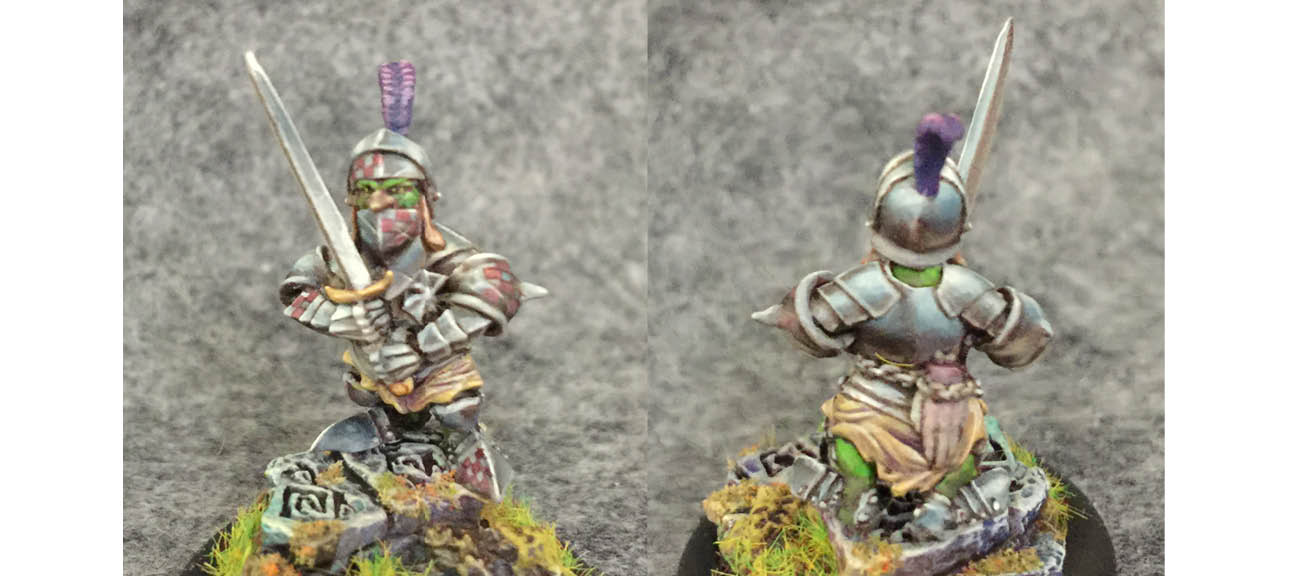
Last of the pack is this Vicious Midget.
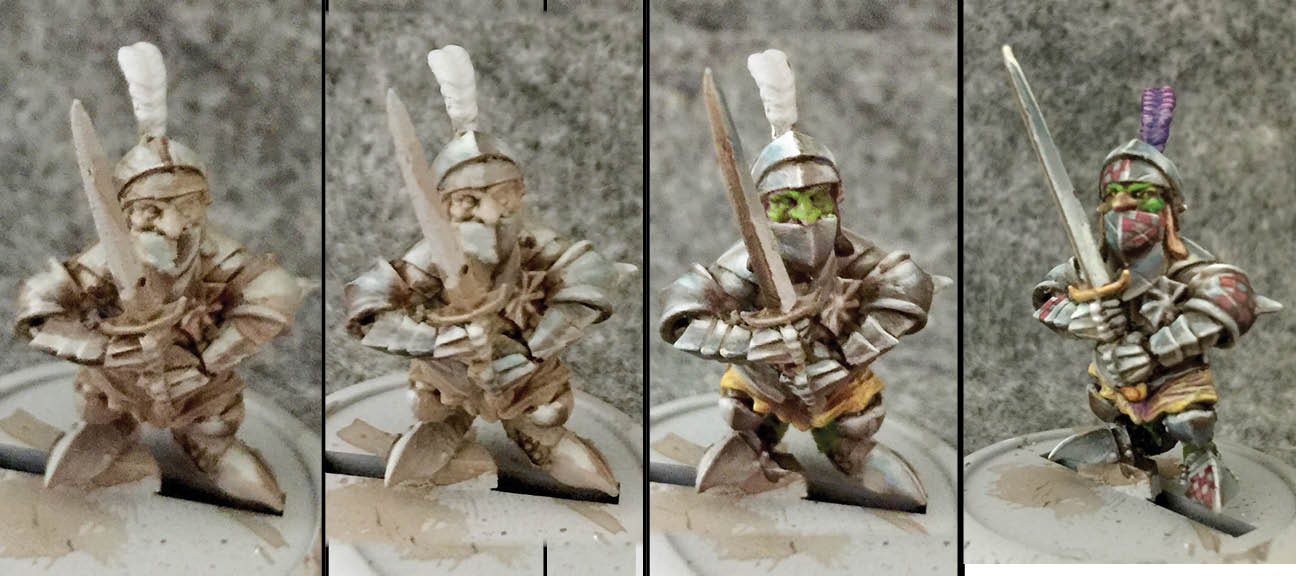
He’s mostly just that big suit of armor. I use the same color scheme I’ve been using for NMM steel lately: Rhinox Hide with highlights of Thunderhawk Blue, then Fenrisian Gray, then pure white blended into the Fenrisisan for the brightest final highlights. As always the trickiest part is figuring out where to put the highlights on uneven surfaces like his greaves. Be sure to click that earlier link for a little more NMM theory.
Then he gets the checker pattern like the other goblins in his clan. Of course, since he’s so small, his checkers had to be extra tiny.
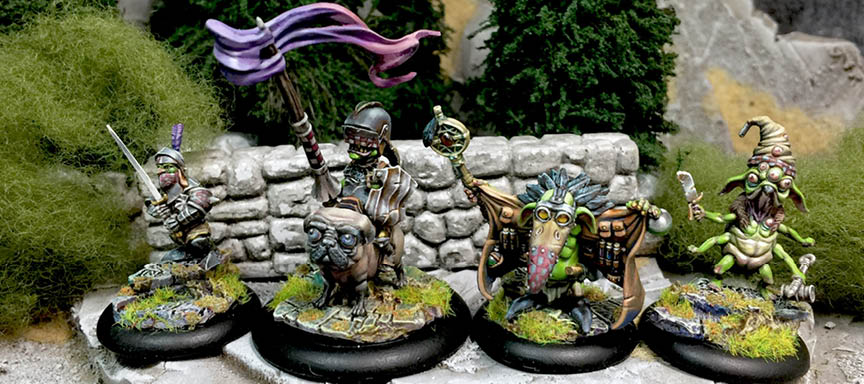
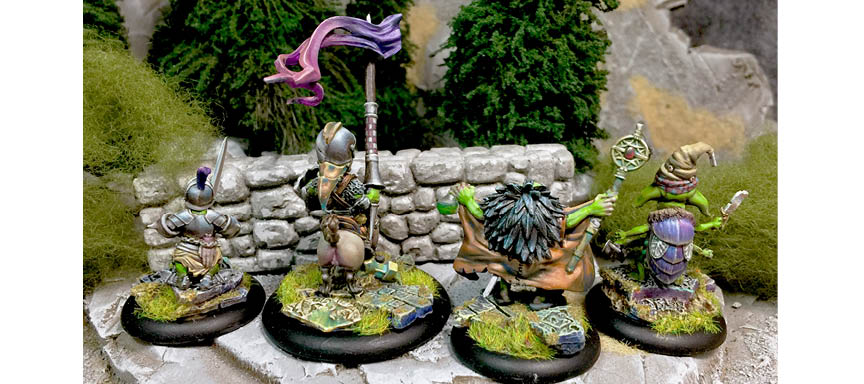
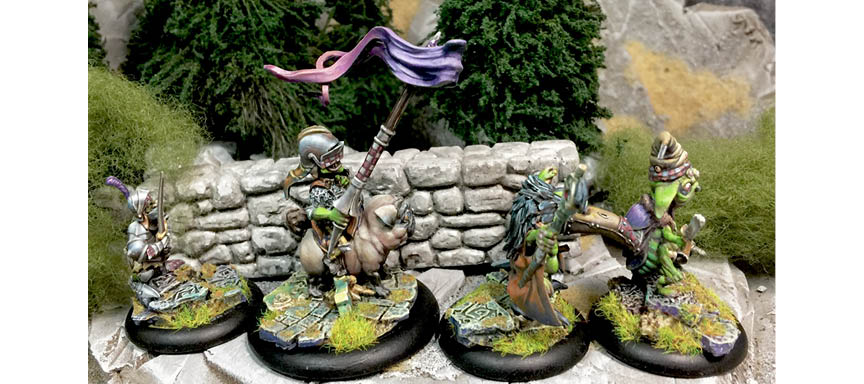
And here’s the whole clan!
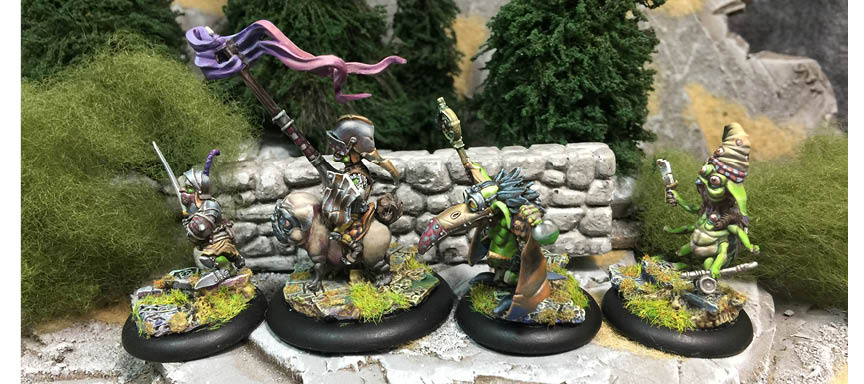
With lots of angles!
~Hope you enjoyed the article! Who else has been playing Moonstone?


