Age of Sigmar: Painting A Lumineth Realm Lords Vanari Blade Lord
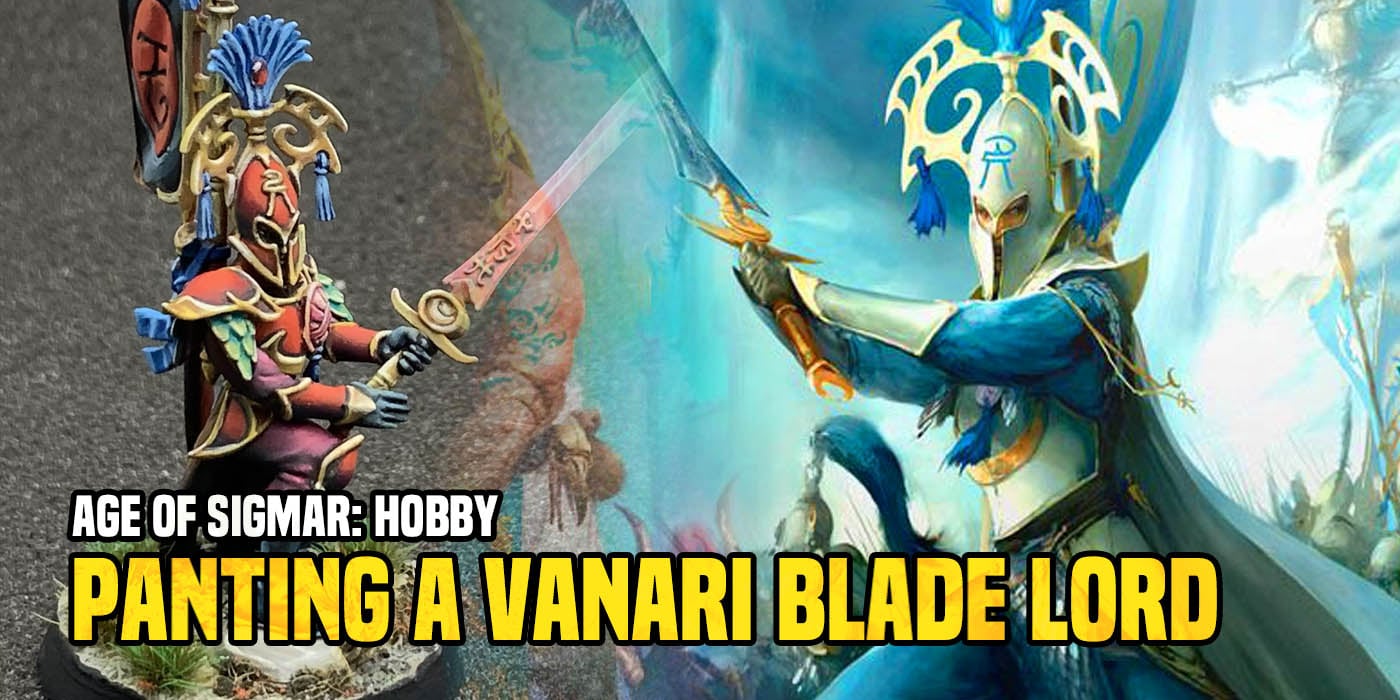
Ben is back with a very different take on the Lumineth Realm Lords. This Vanari Blade Lord’s scheme will draw blood!
I’ve started painting a Lumineth army with a very different color scheme in mind. Now that I’m close to finishing up my Gloomspite Gitz army I’ve got an eye on what my next force will be. I decided I want to go with something that’s as far from Gitz as I can go. I think the sleek and graceful Lumineth fit that bill. I like all the callbacks the army has to the Old World High Elves, and I also love the newer weirder stuff like the Alarith, and the Hurakan “Kangaroos.” What I didn’t like was the thought of painting a white on white color scheme. After some thought I settled on a more sinister red scheme. I thought it would look cool and it’s also been awhile since I painted an army with a lot of red. Red can probably go great on a lot of other armies like Stormcast, Slaves to Darkness, or really any army with a lot of armor.
Ben’s Vanari Blade Lord
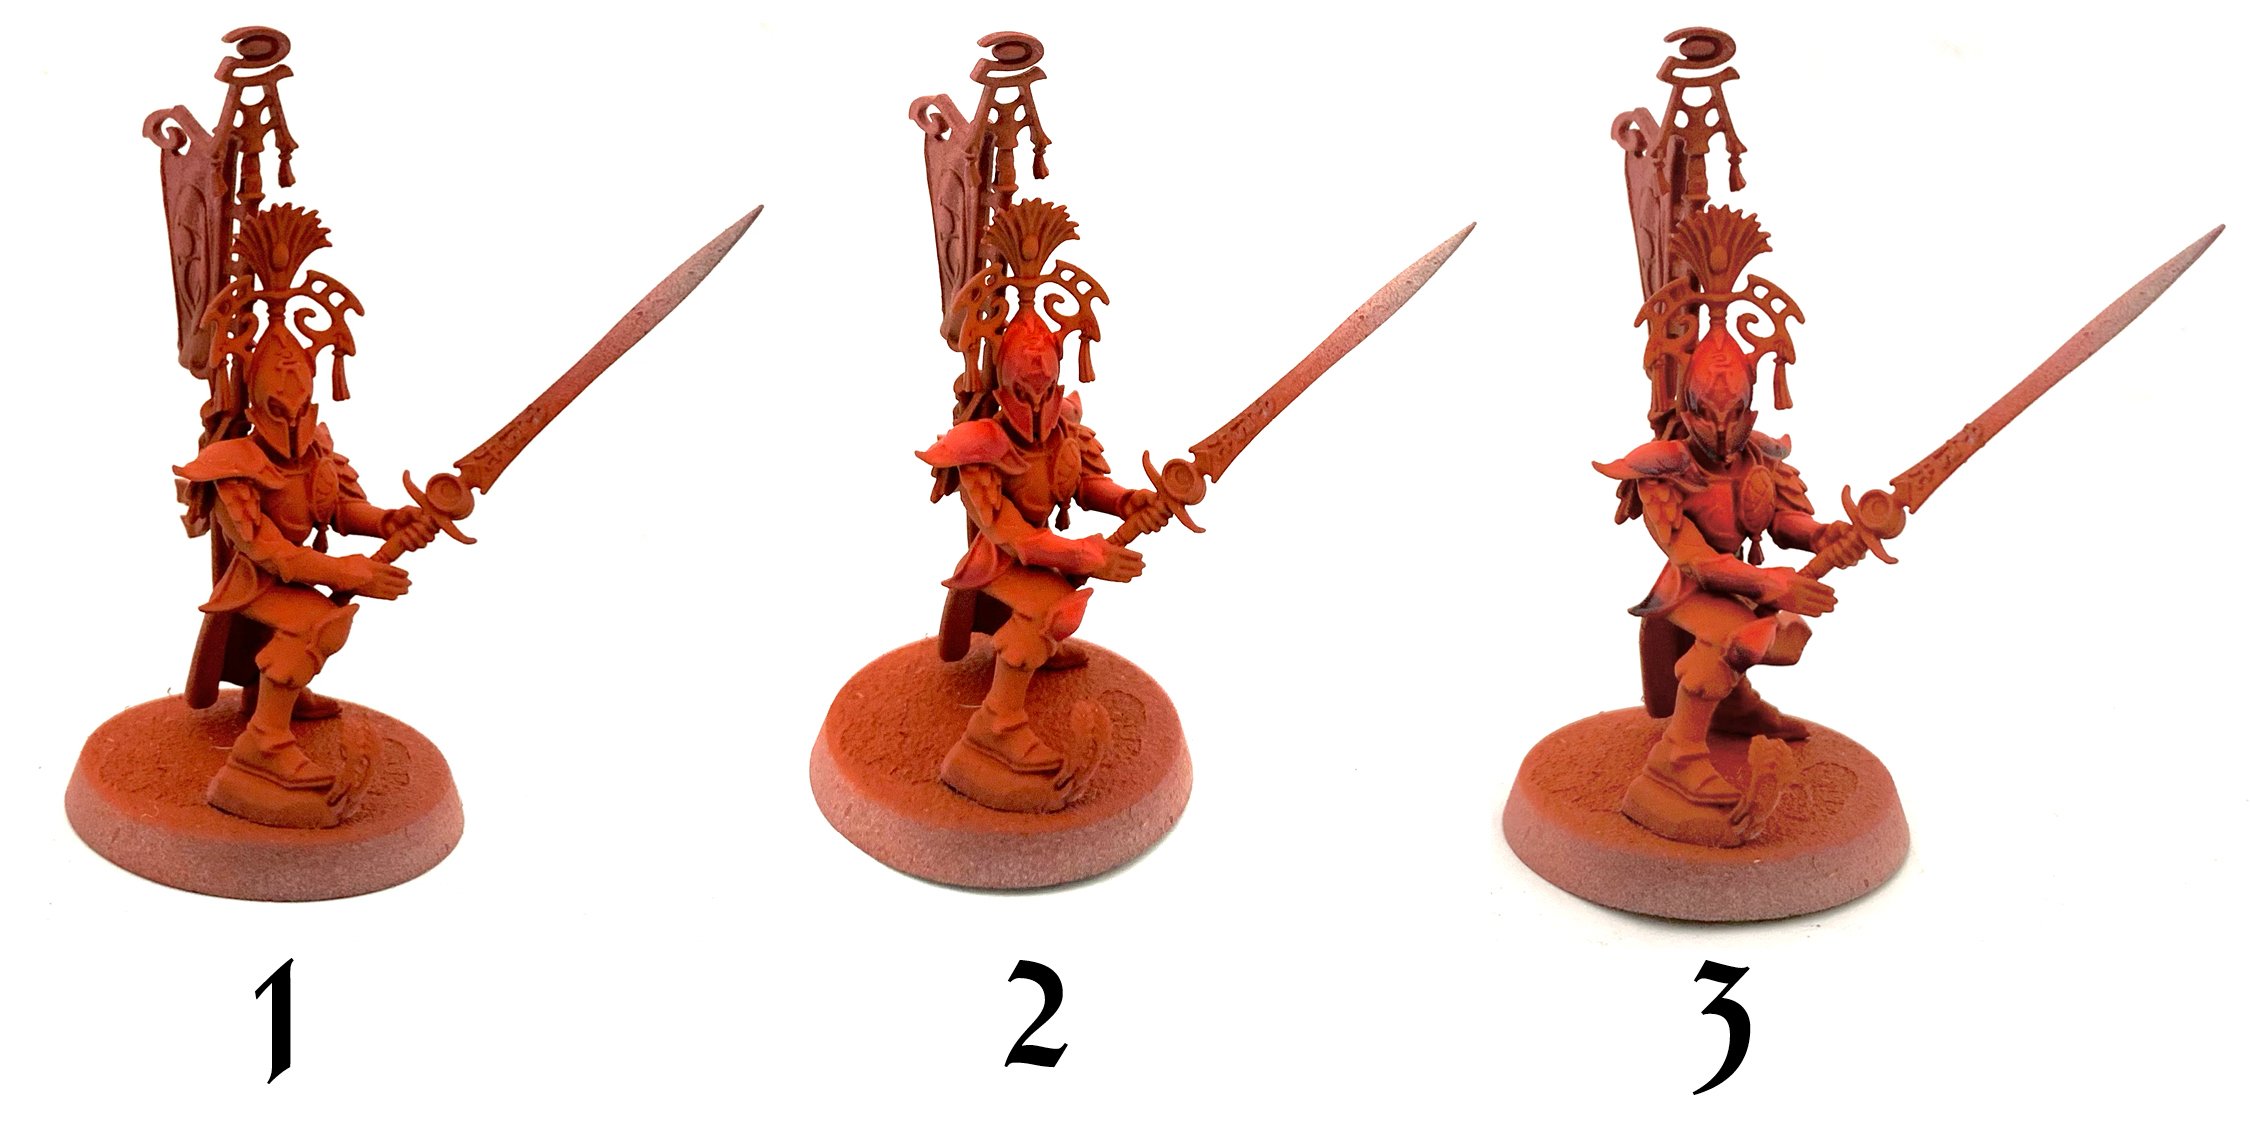
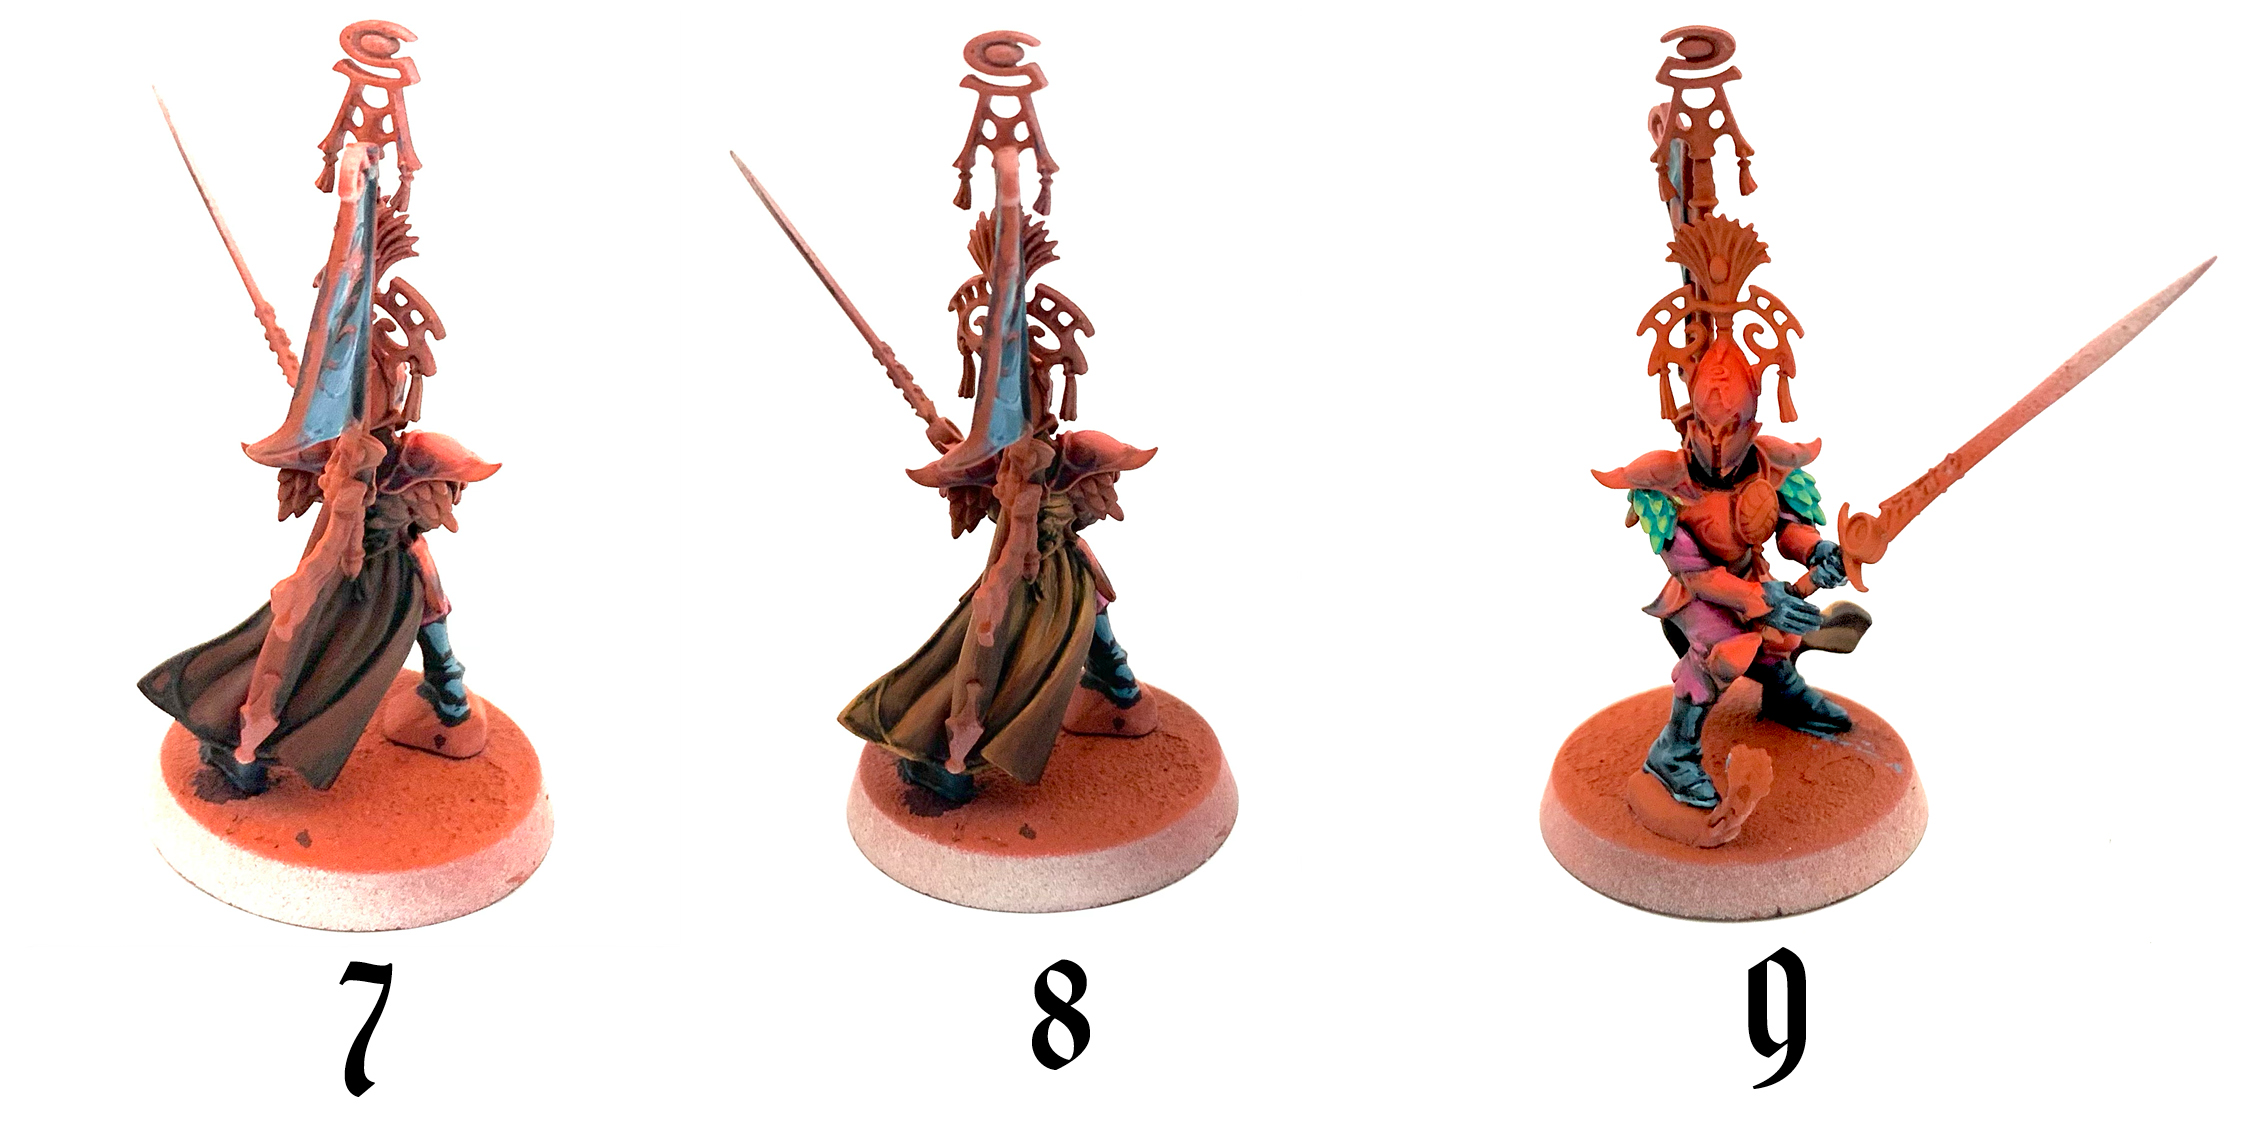
1 – Since red is the most-difficult-to-paint color on this model I started by airbrushing the whole bladelord with Reaper Red Brick. Then I gave it a quick blast from above with AK Matte Red to create a kind of Zenithal effect.
2 – With the base coat done I begin making the red more vivid with a coat of AK Deep Red shaded with AK Wine Red.
3 – Then I add some more shading with a mix of Wine Red and Dark Sea Blue.
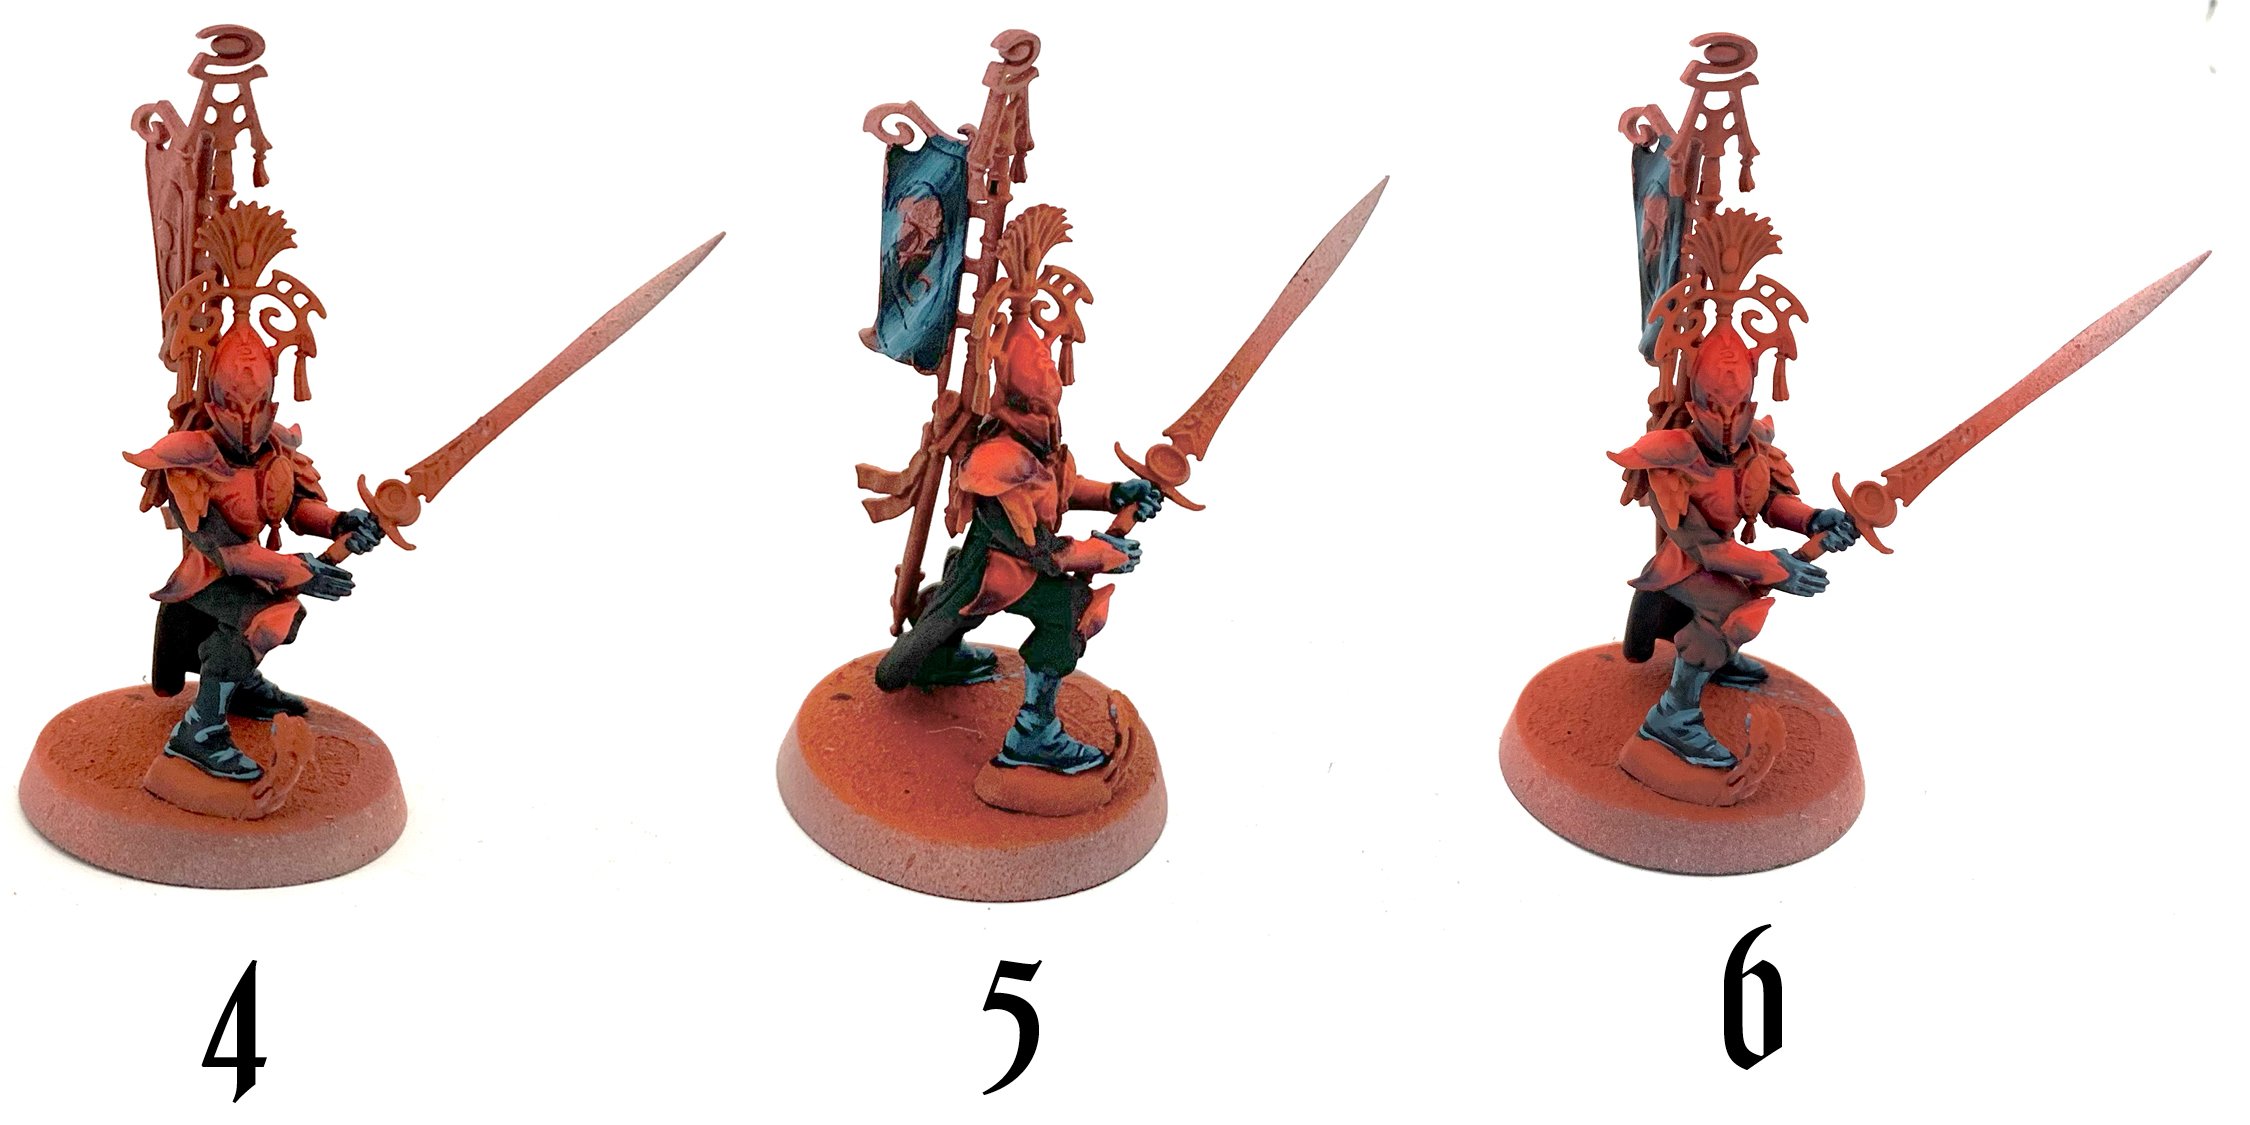
4 – Now to start painting over the red. I use some AK Black to cover the boots, pants, gloves, and cape. Since I want a nice cool black leather for the gloves and boots, I begin highlighting these areas with Dark Sea Blue. Then I do some lines of AK Snow Blue to start picking out the highlights
5 – I blend the stark Snow Blue highlights into the darker blue areas by mixing it with some of the Dark Sea Blue and glazing on the mix. I also decided the back banner should have some black to tie it in with the rest of the model so I repeated the same steps there.
6 – Finally I added more glazes of pure Dark Sea Blue, and then black to even out the blending.
7 – For the cape I went for a dark orange. I painted Vallejo Cavalry Brown over the black basecoat for a start.
8 – Then I blended the Cavalry Brown up to AK Light Rust (a pretty standard looking orange despite the name.)
9 – For the scale armor I began with a base AK Emerald, then gently brushed some AK Radiant Flesh over it while it was still wet. I also painted the pants and sleeves, blending AK Wine Red into the black. Then a bit of Radiant Flesh is blended in with the red as a stronger highlight
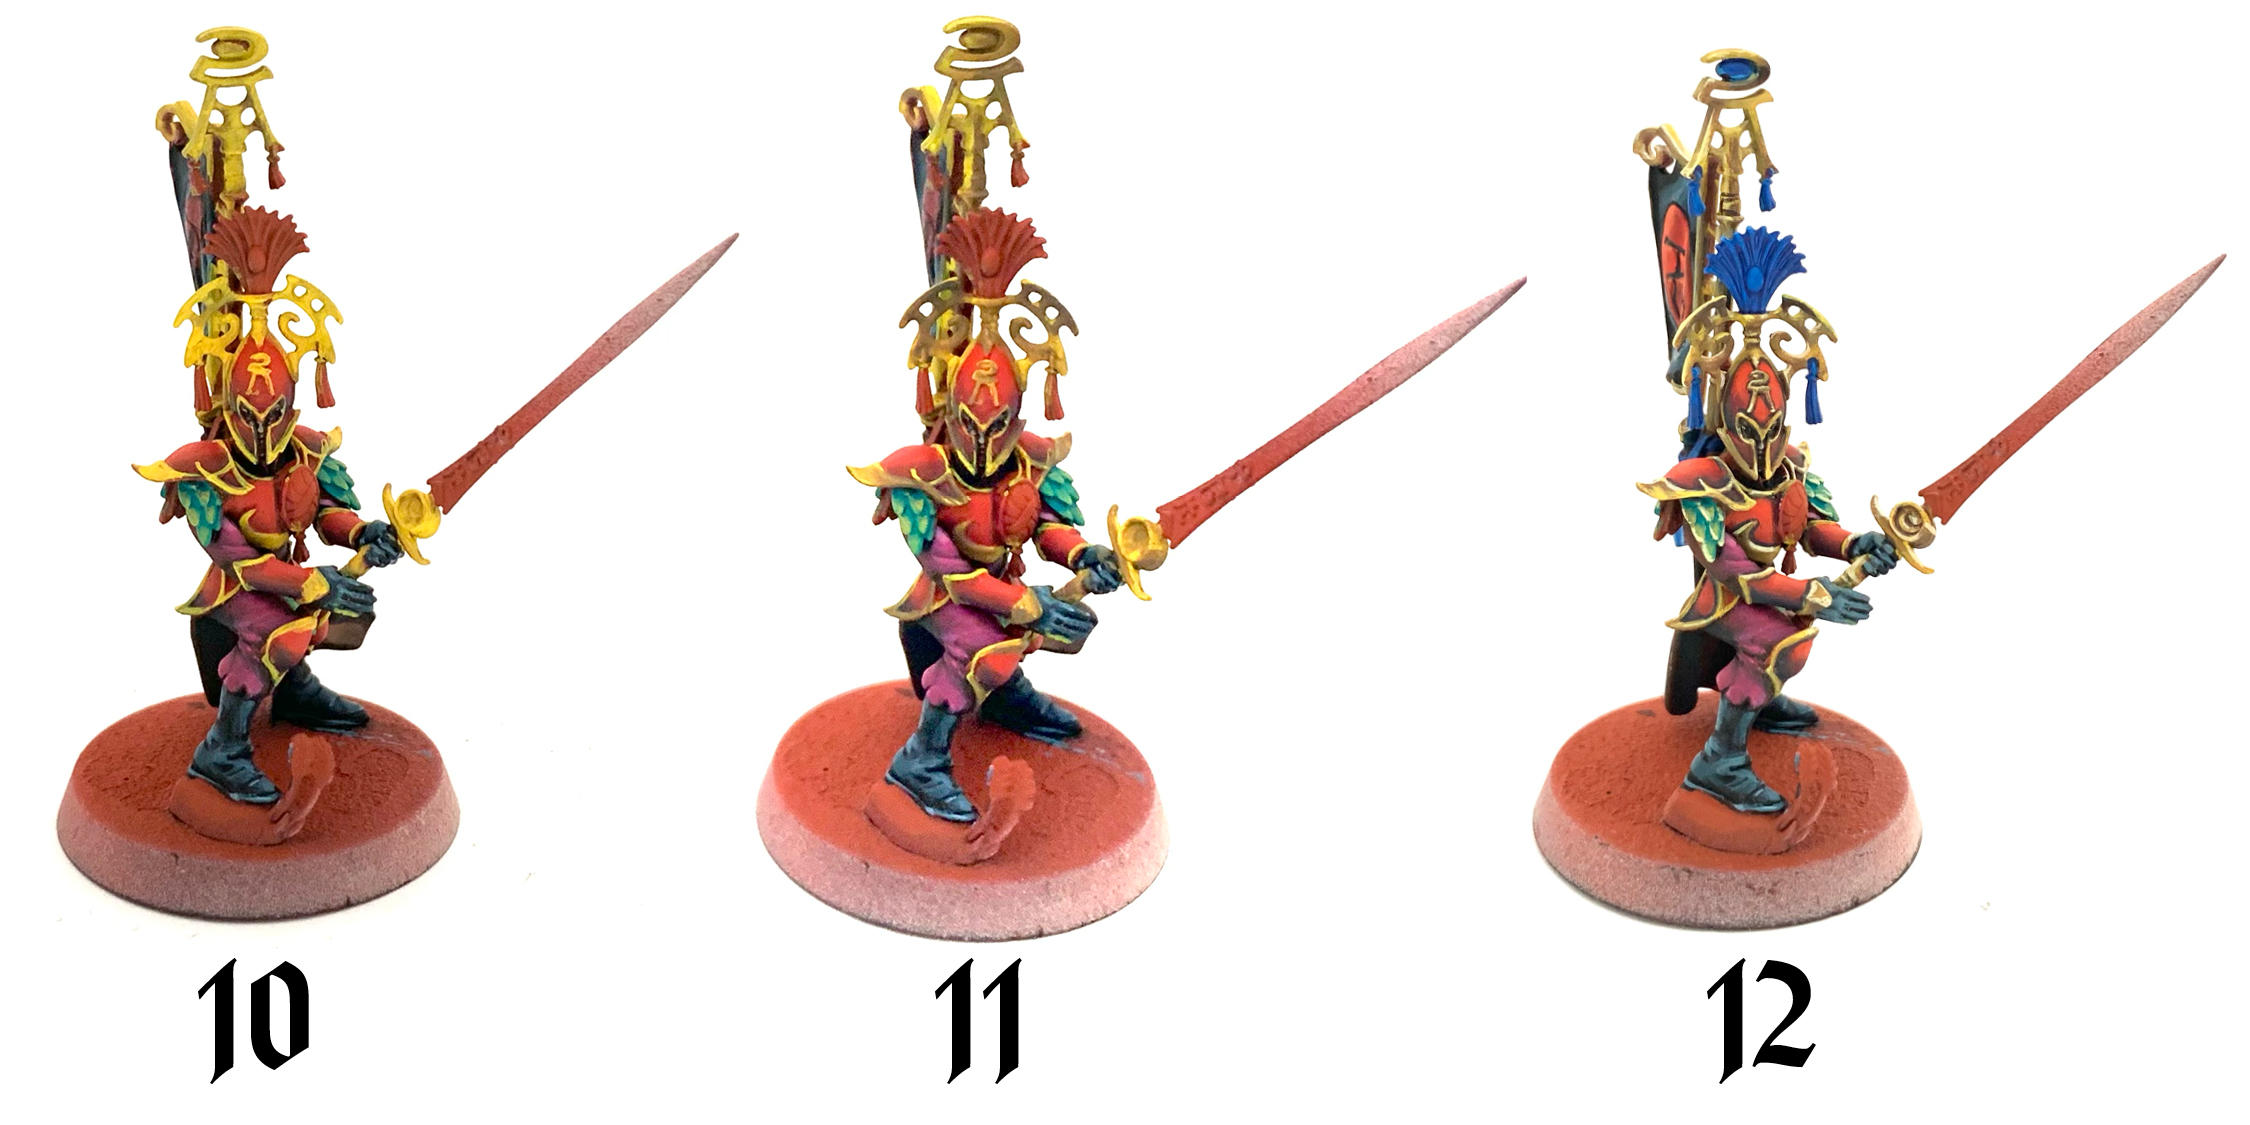
10 – Next I began the most challenging step of the model: the NMM gold. It starts out relatively simply with a layer of AK Dirty Yellow.
11 – The tricky part begins when I start shading the gold with a mix of Dirty Yellow, Vallejo Cavalry Brown, and AK Burnt Umber. Everything matters when trying to get a good gold illusion. The color shouldn’t be too orange or it looks less natural. It also needs to be dark enough, without looking too dark or, again, it will look unnatural.
12 – Once I have the shading how I like it I start adding in highlights. First I add some lines of Dirty Yellow back in along the top edges. Then I add a few thinner smaller highlights with AK Ivory at some of the highest points to create the appearance of a sharp reflection. Even now that I’ve finished the model, I’m not quite satisfied with how it looks and I continued to try to even out the highlights and shading of the gold as I continued the other steps of the project. Then I painted the tassles, ribbons and the banner crystal with Dark Prussian Blue.
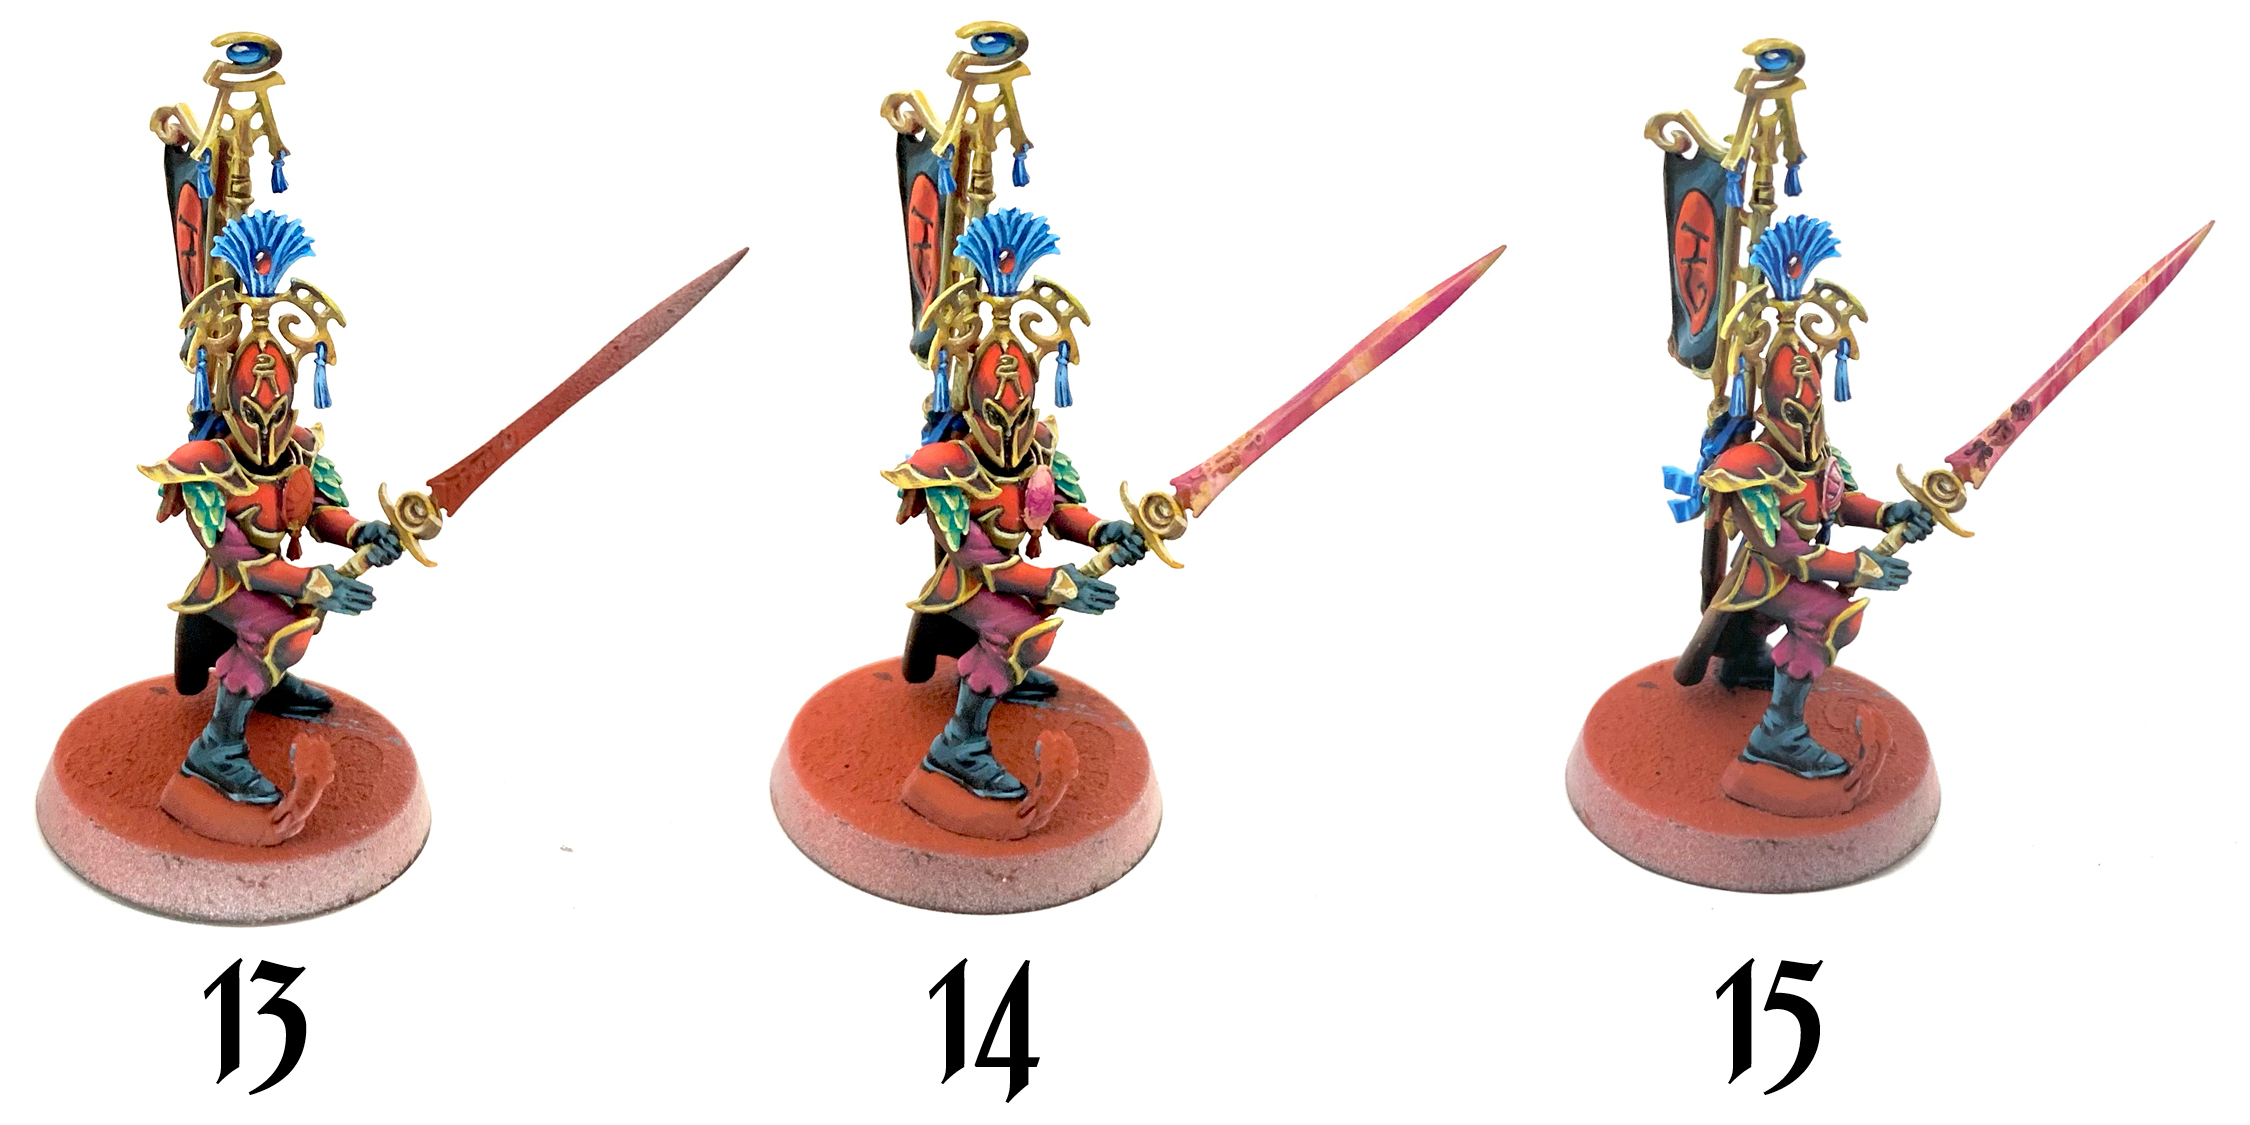
13 – The Dark Prussian Blue areas were highlighted with AK Deep Sky Blue and a little Snow Blue. I painted the gem with te same colors as the armor.
14 – For the gem on the chest, and for the weapon, I started with some Sunny Skin Tone and then wet blended in some AK Magenta.
15 – After a little more blending to make these two areas look even cleaner, I added some streaks of those colors on the sword to enhance the Sun Metal Weapons look. Then I added thin edge highlights of Basic Skin Tone to both.

16 – The final painting step was to highlight the runes on the sword. I considered making them glowing but in the end it just didn’t seem like the correct choice.
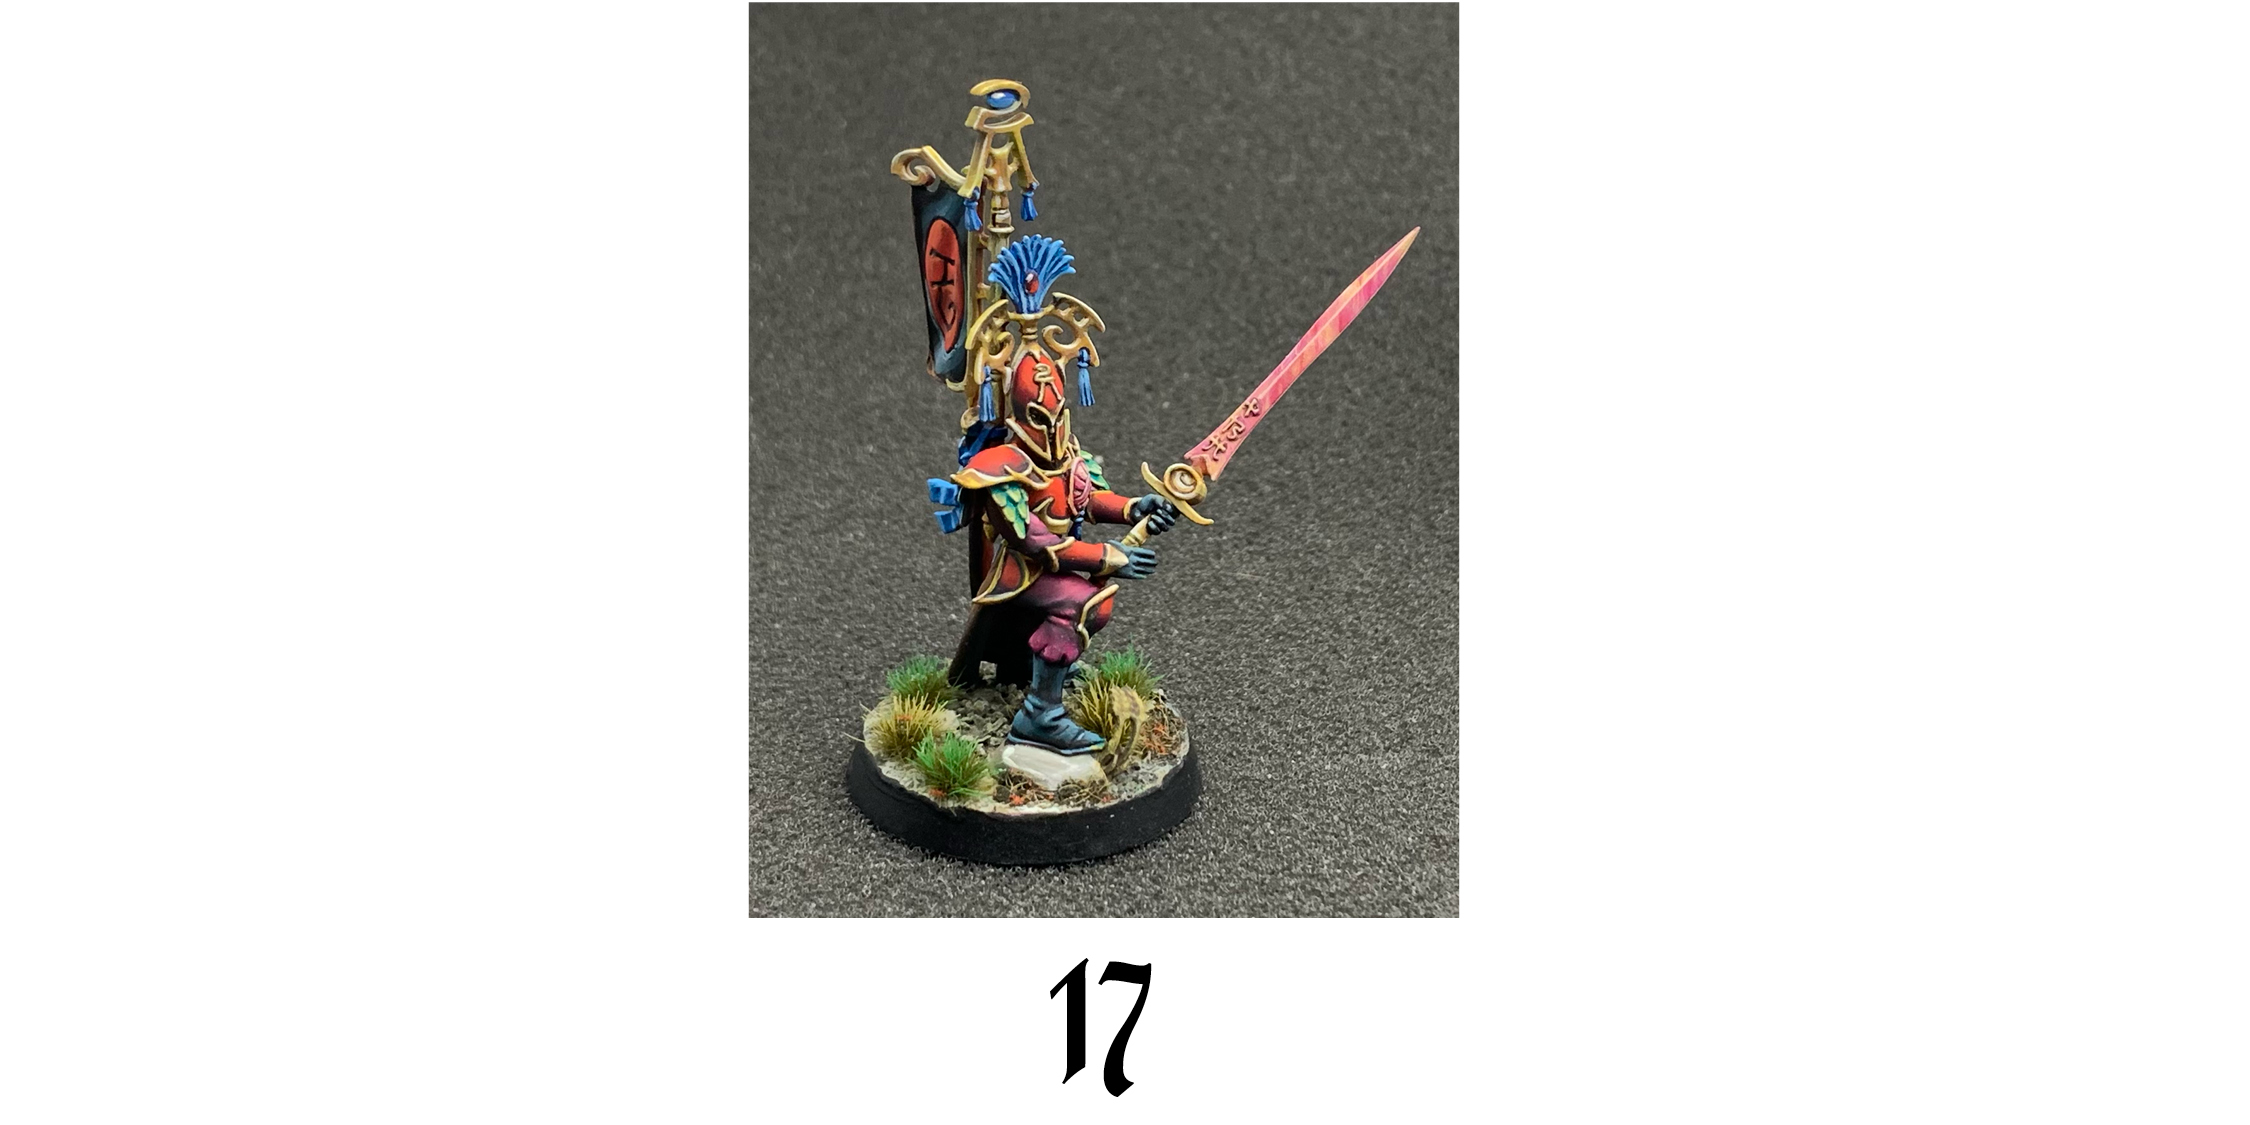
For basing I started by spreading some thick acrylic medium across the base then sprinkling on some coarse sand. This was painted with AK Umber and drybrushed with Vallejo Green Grey. Then I added some Green tufts and some GF9 Marsh Blend.
~Hope you enjoyed the article! Do you think red is a good choice?