Hobby Spotlight: Painting Mechanicum, 40k Mechanicus or House Raven
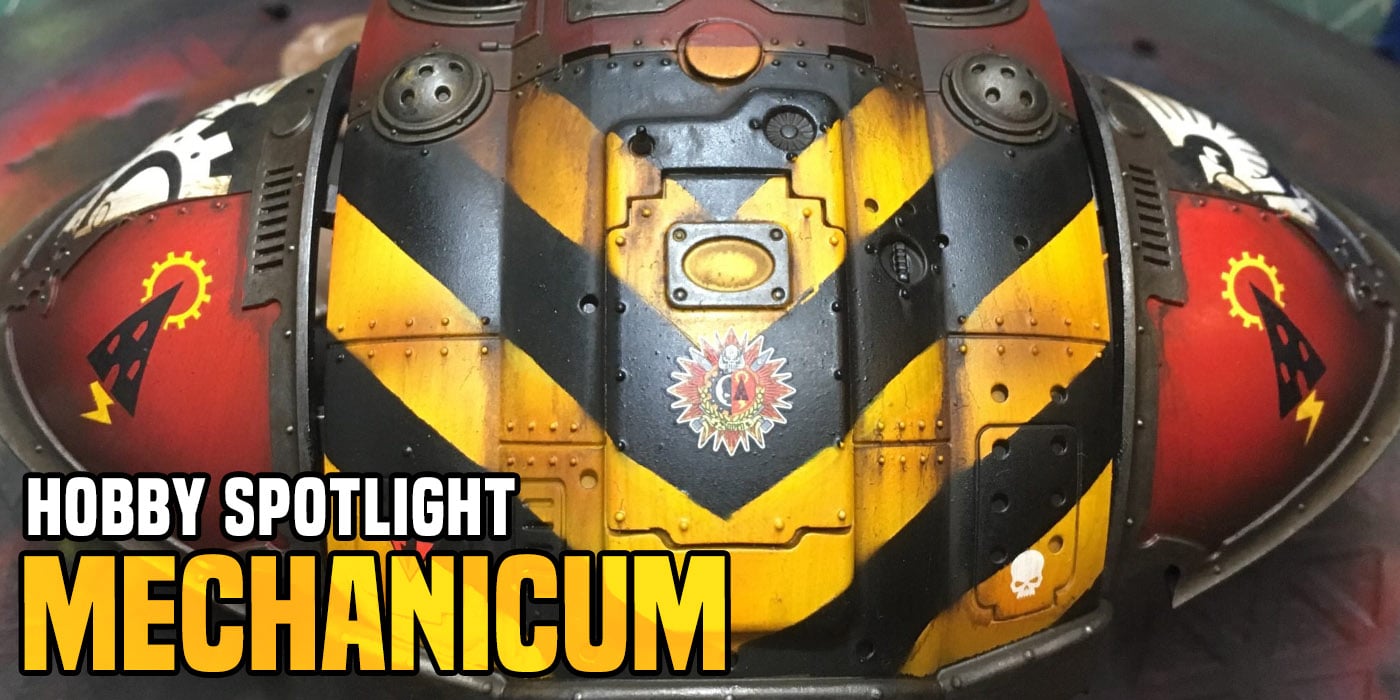
Here’s my step-by-step process to get your Mechanicum, Mechanicus, House Raven, and anything red, black, and full of hazard stripes painted up – FAST!
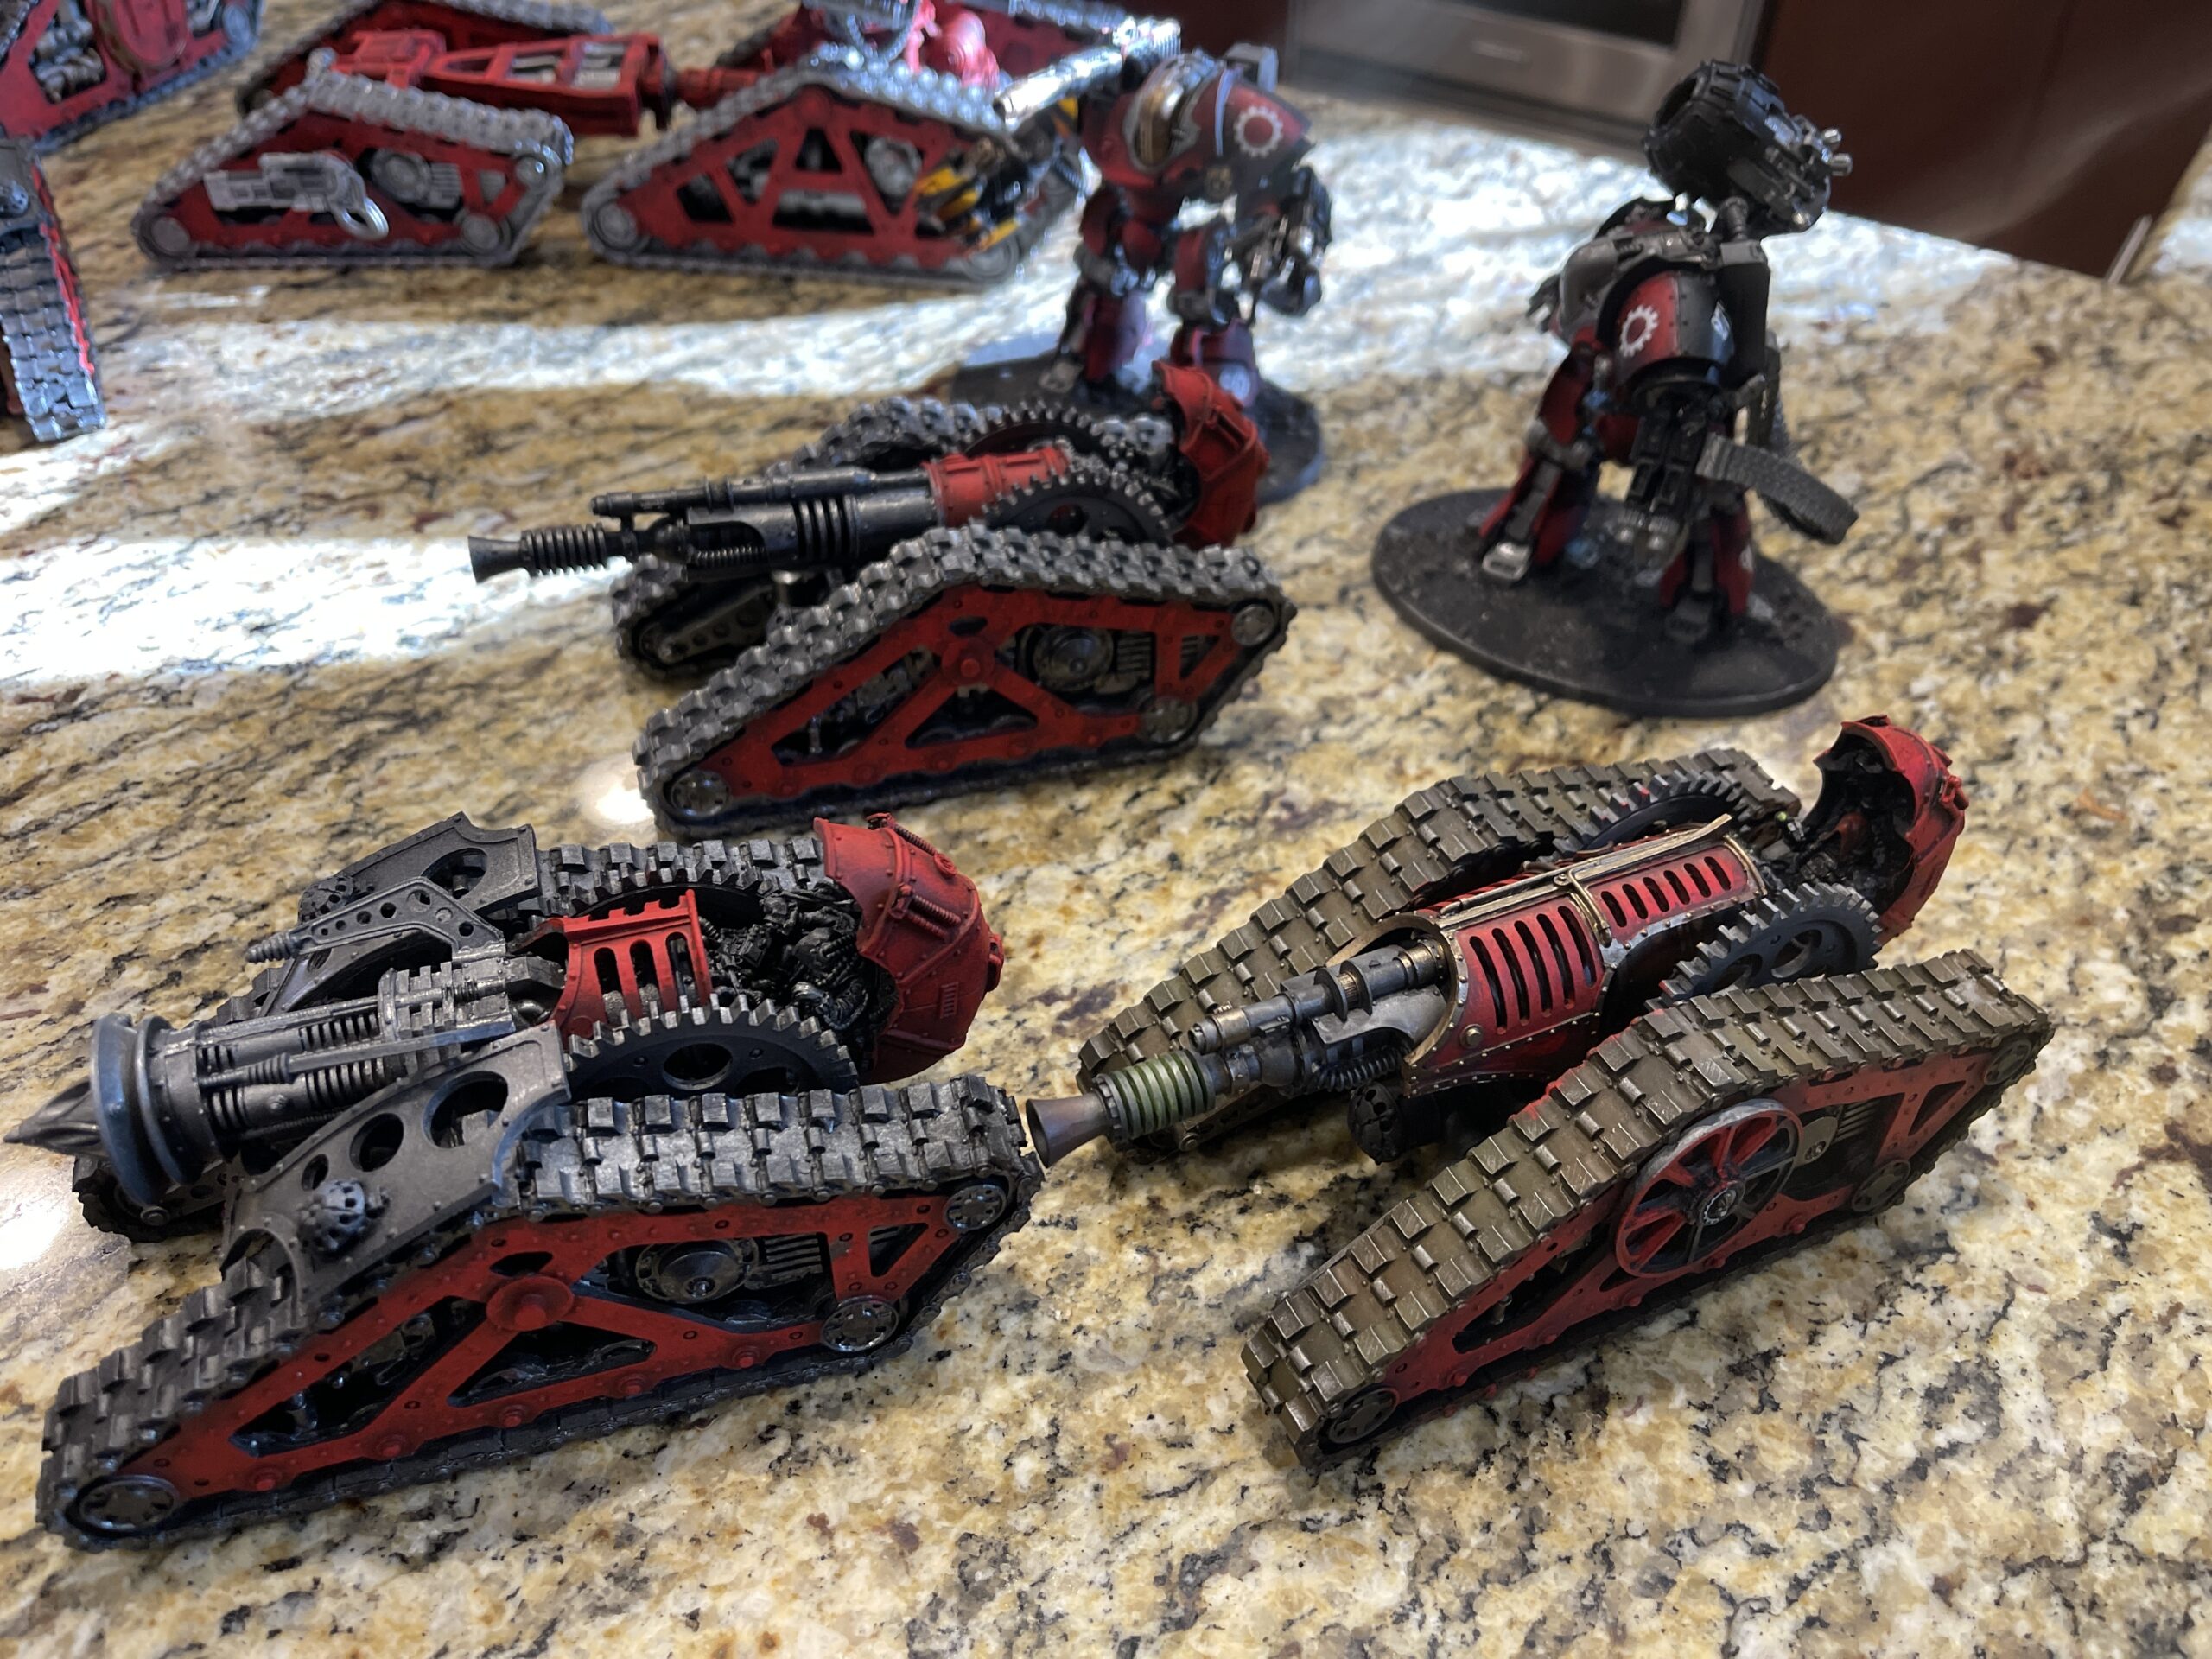
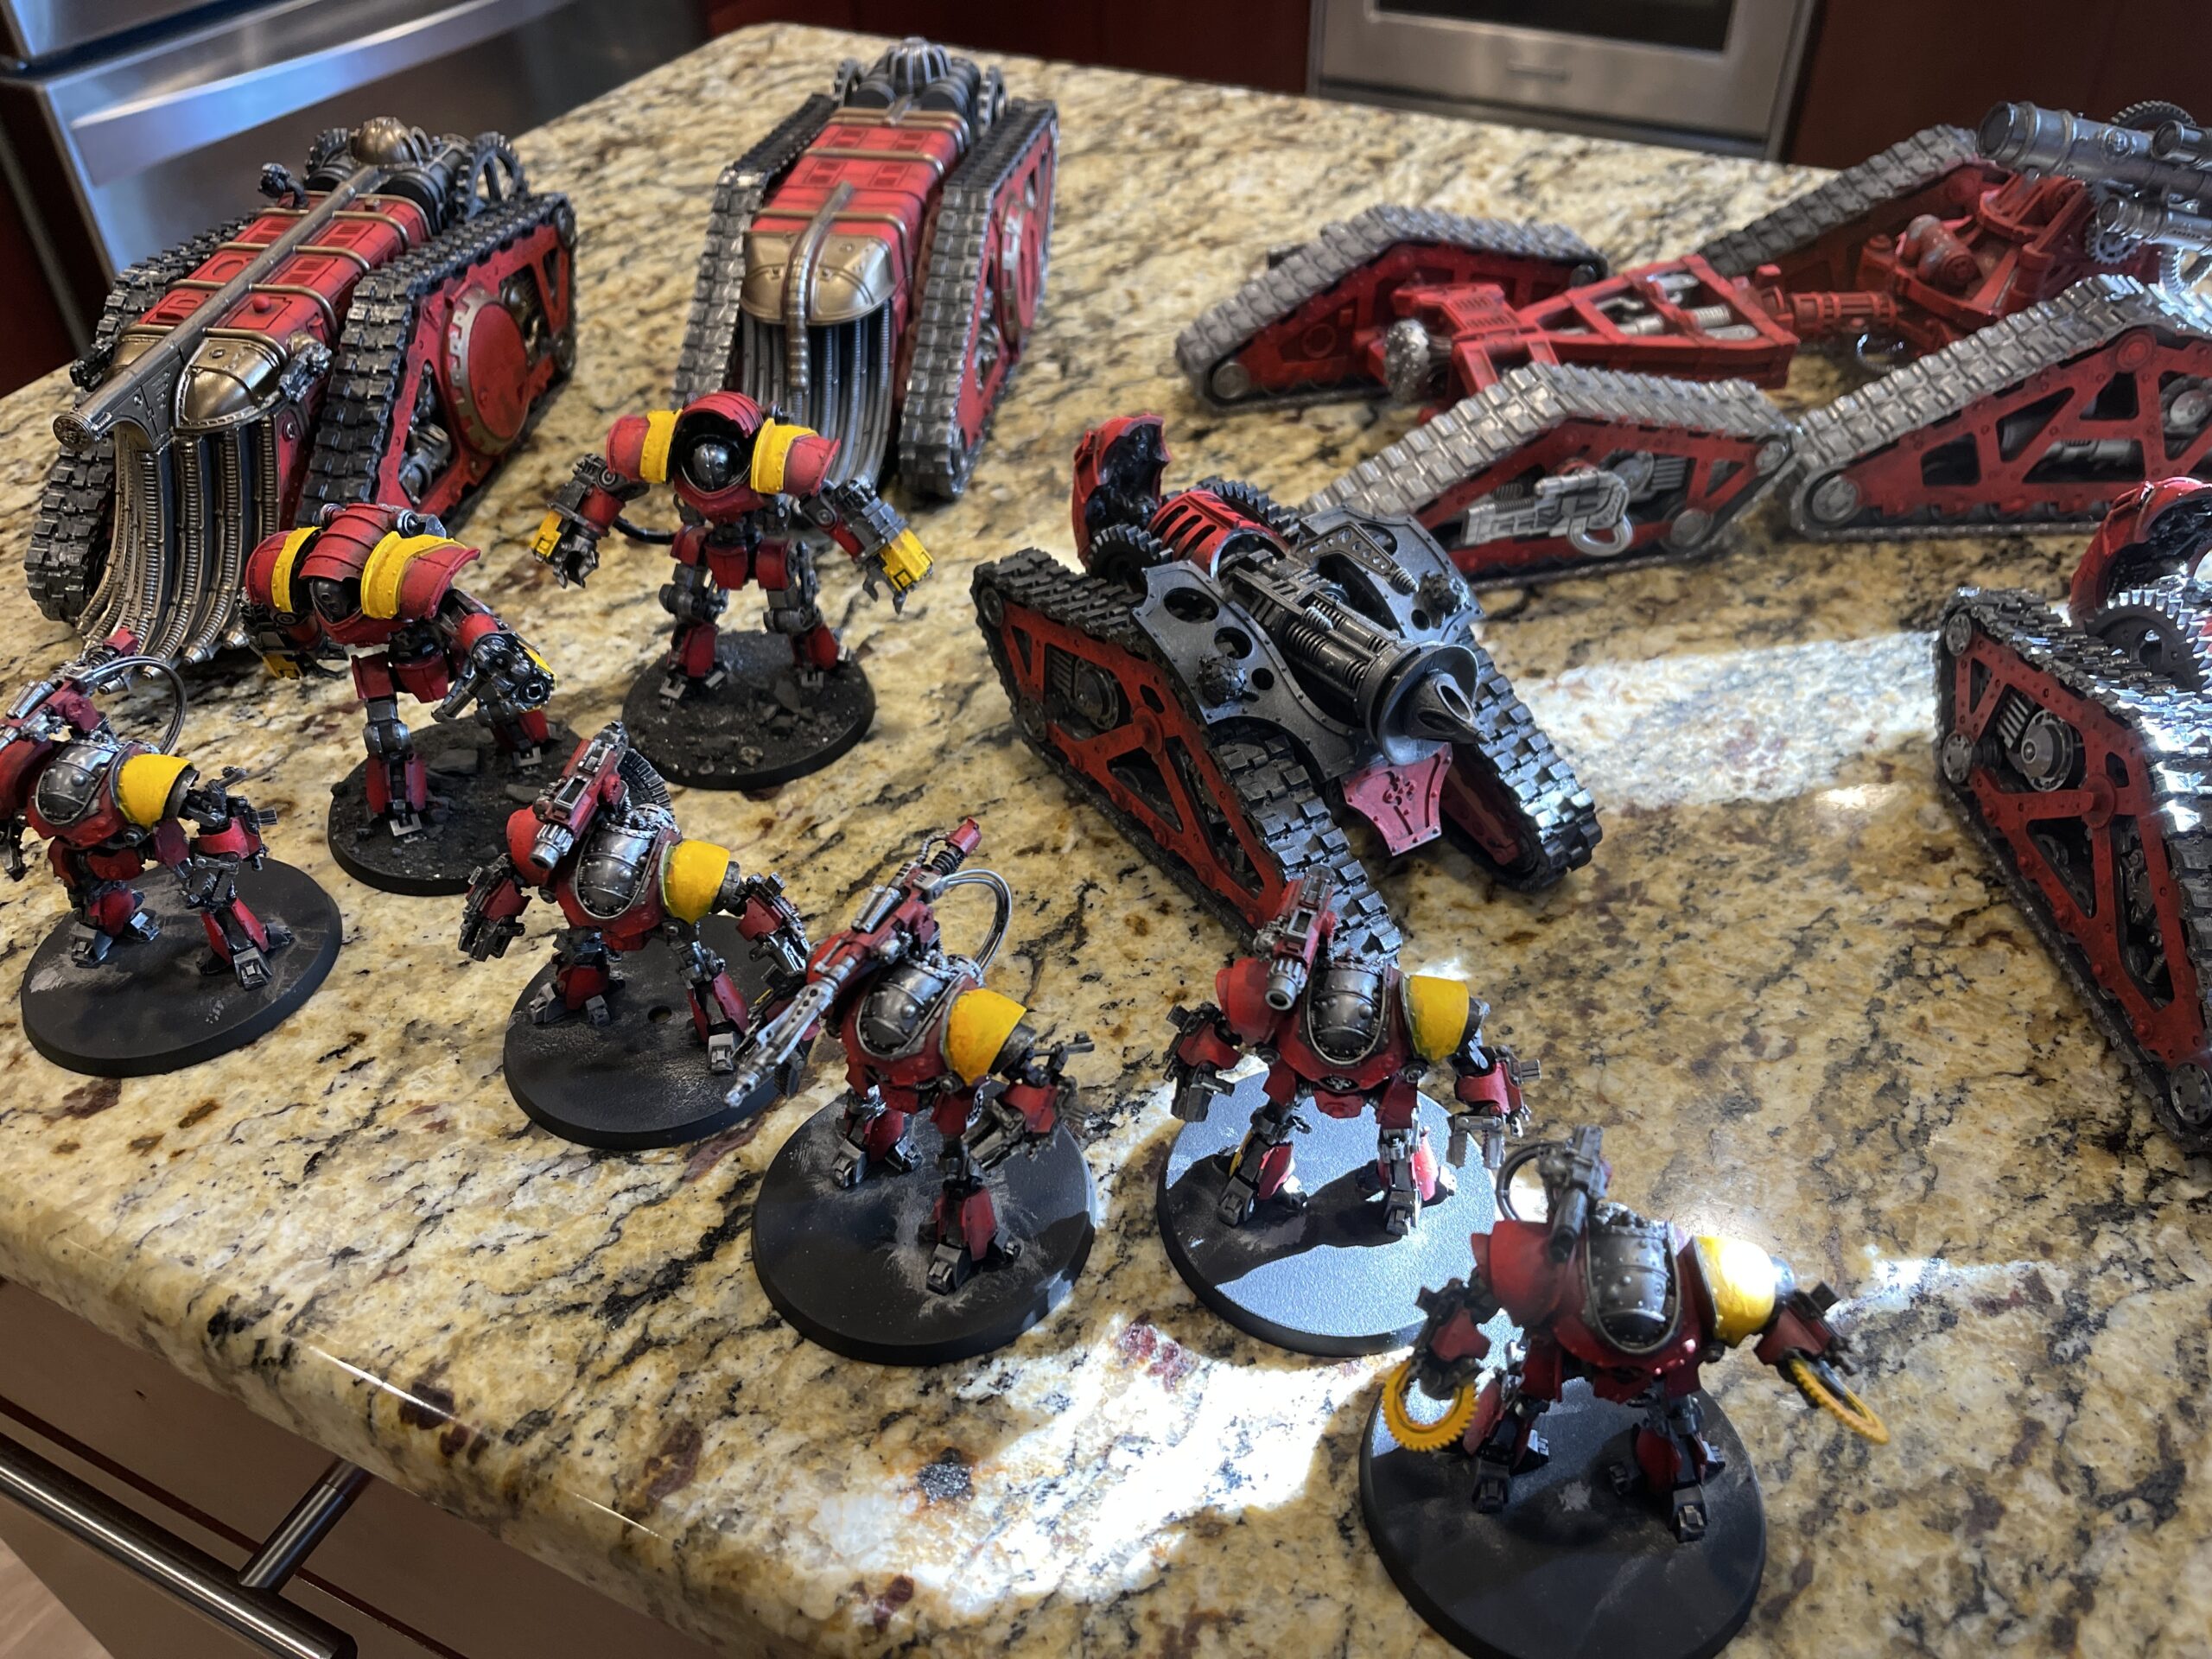
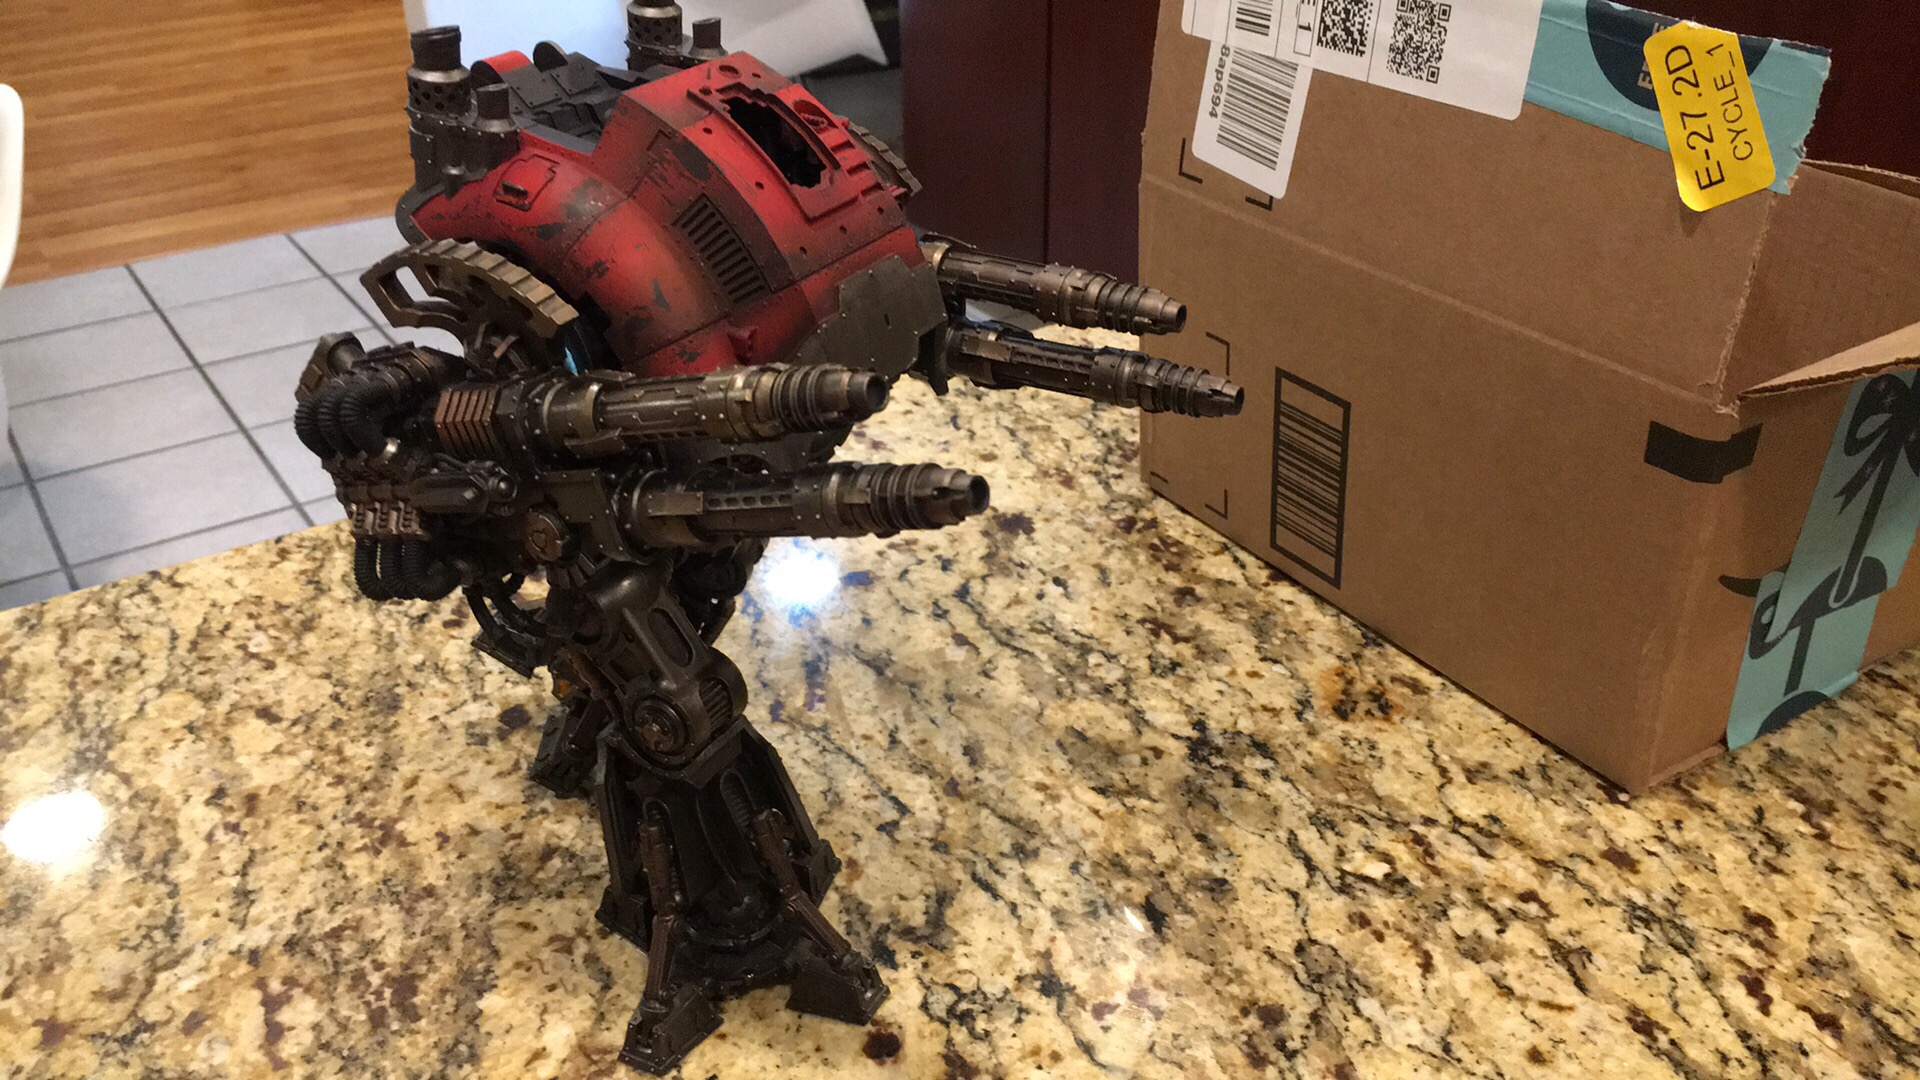
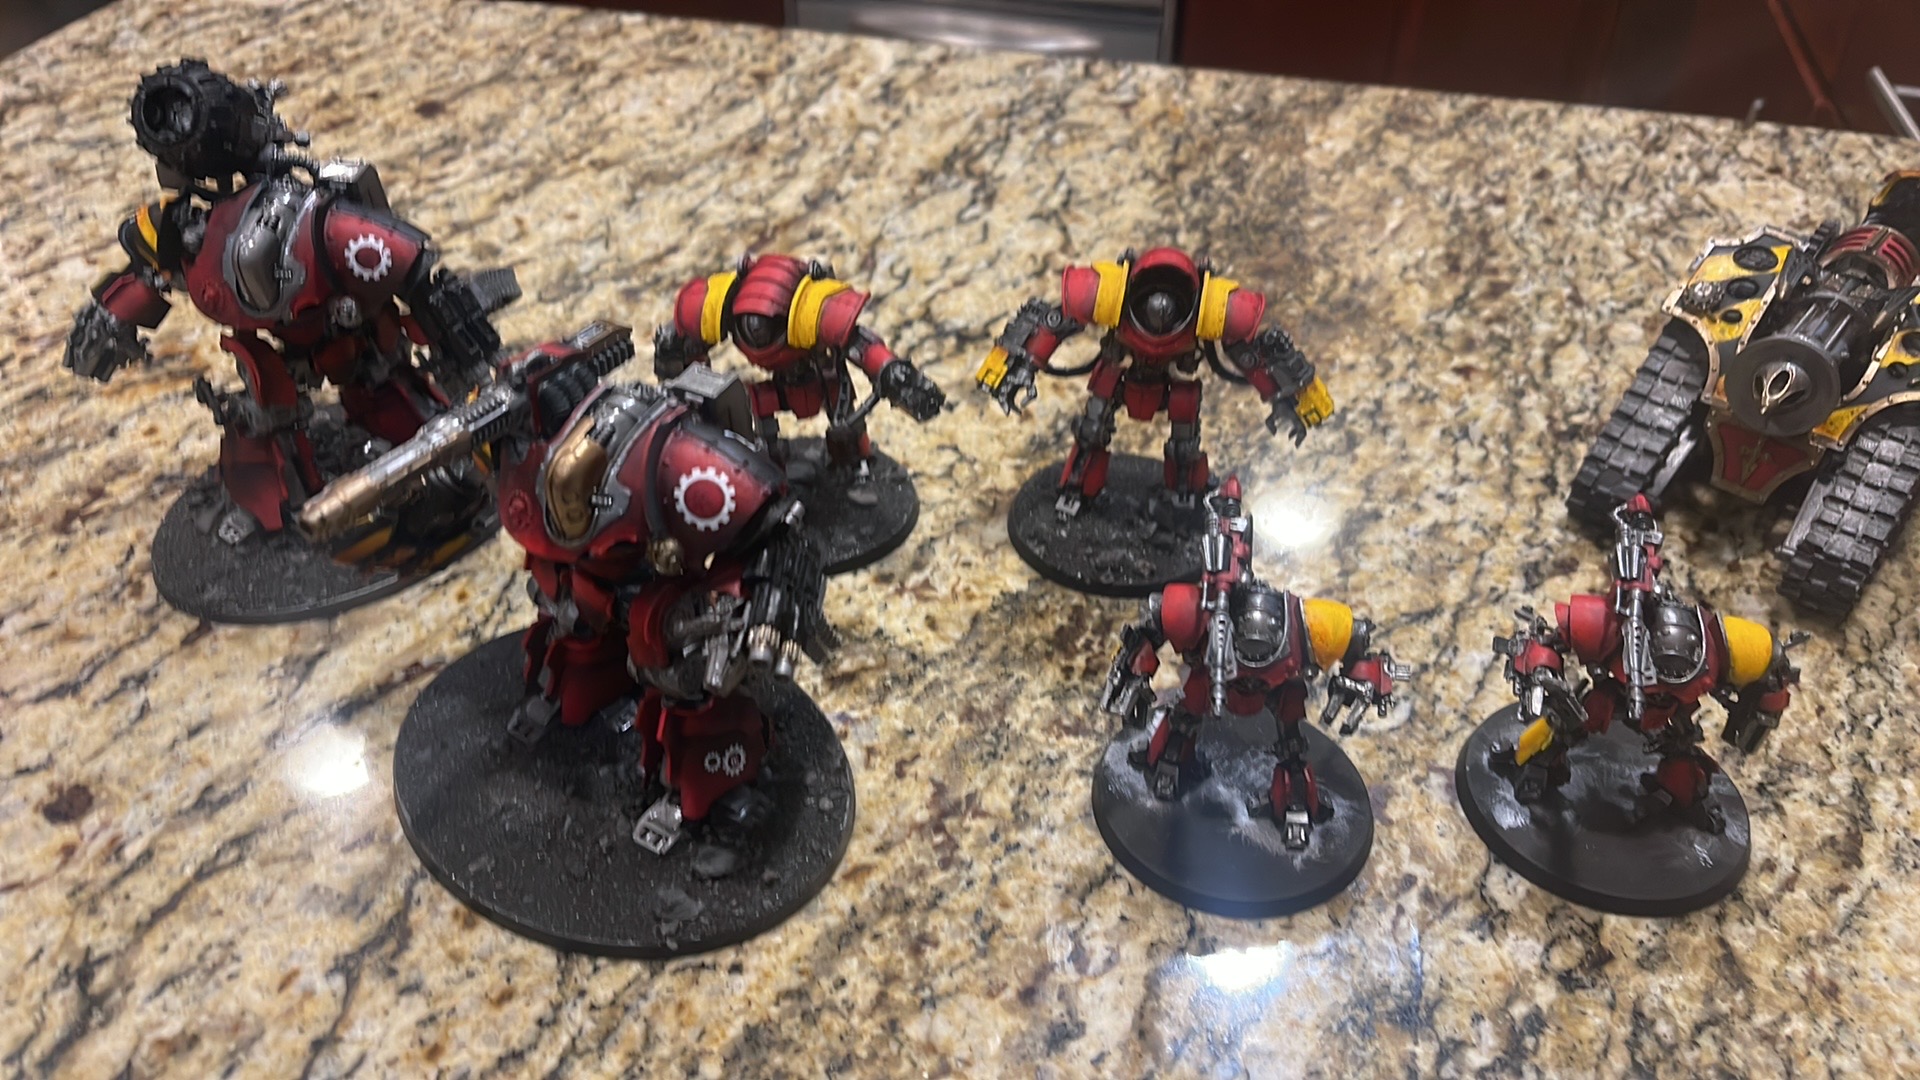
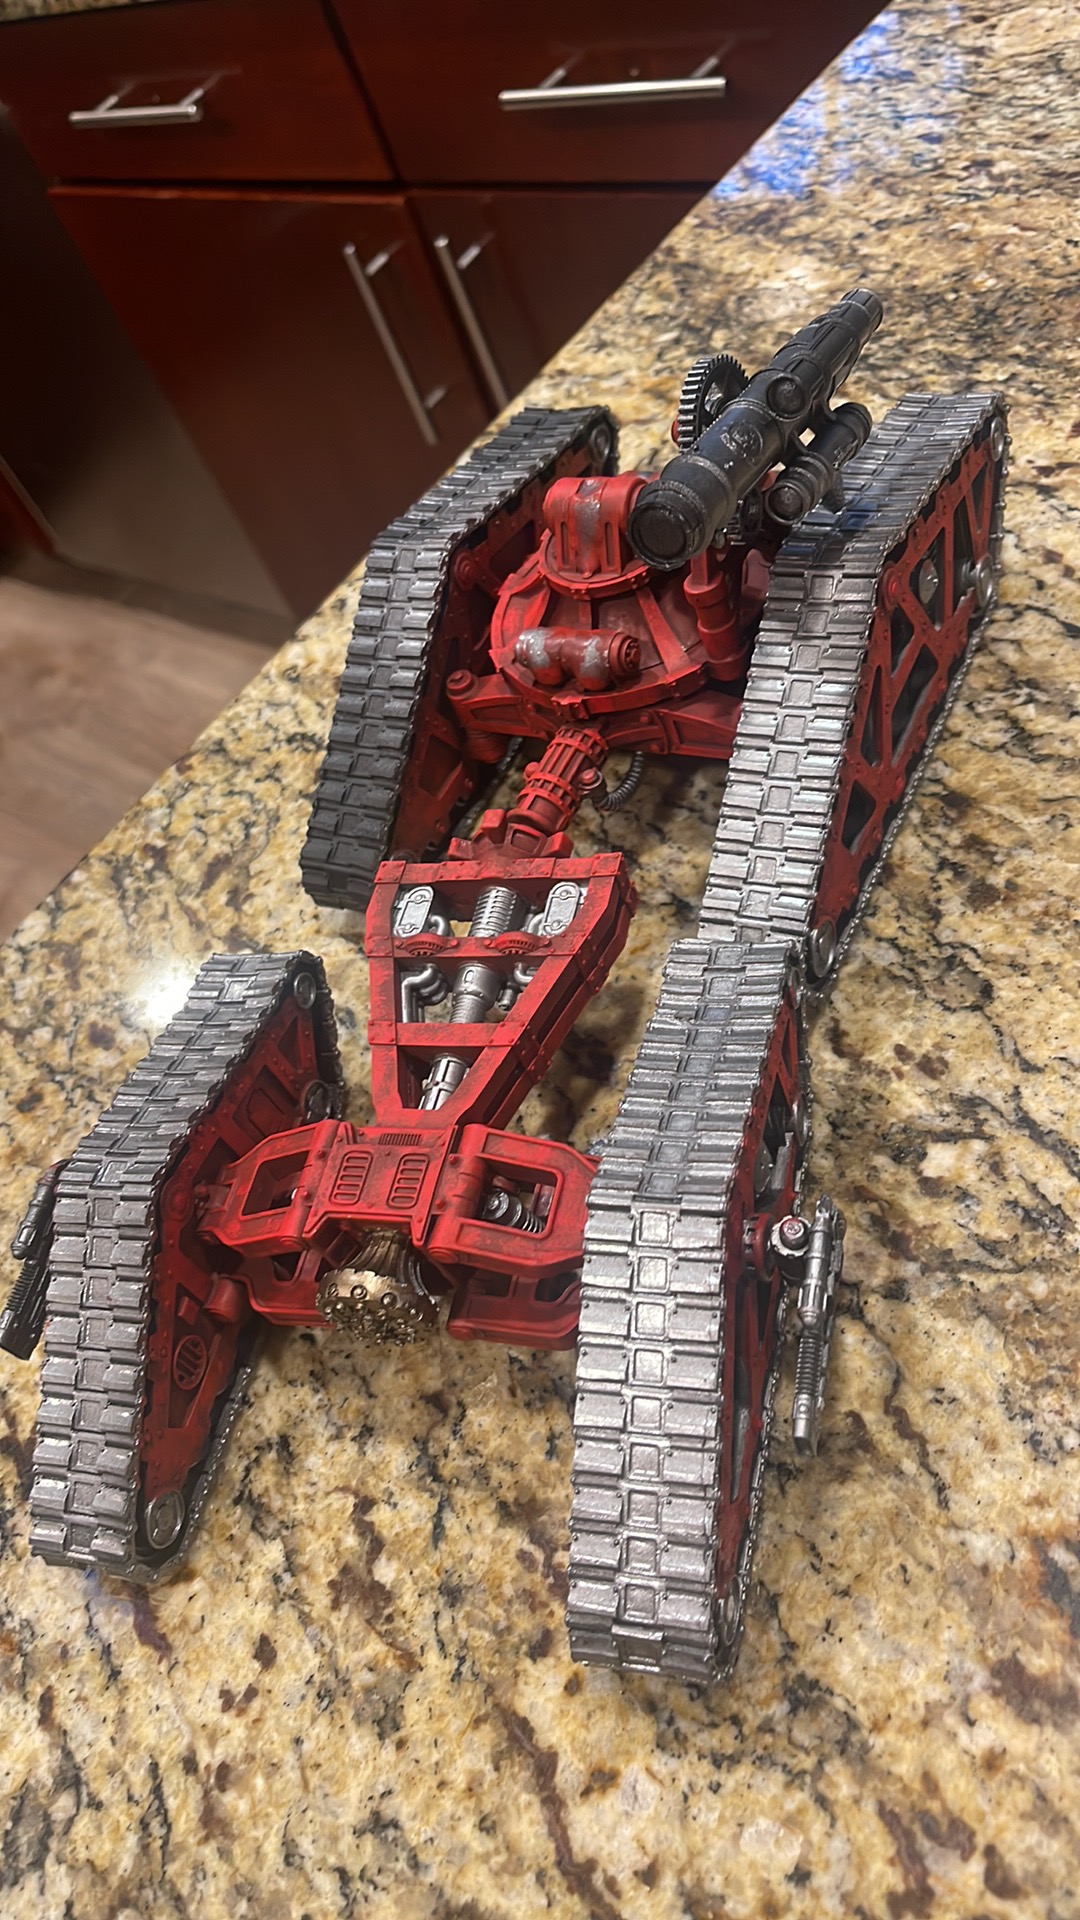
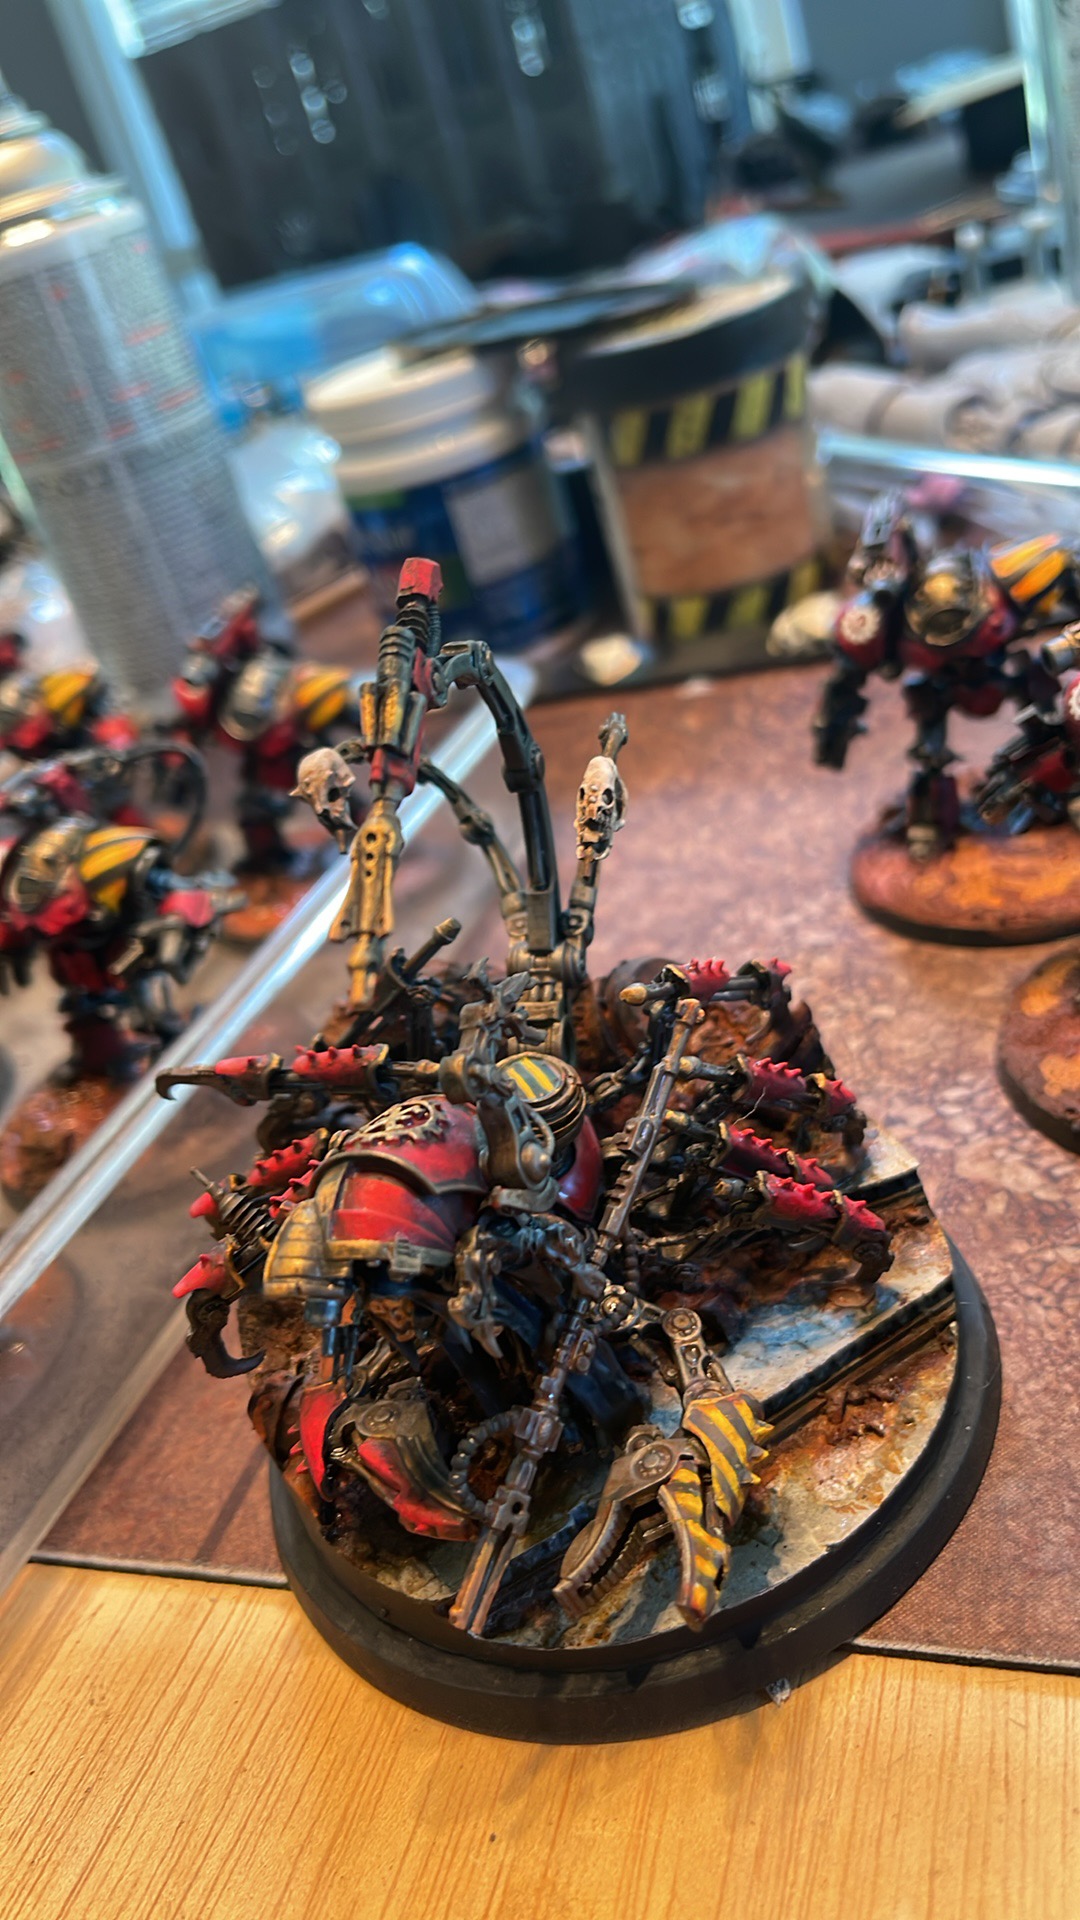
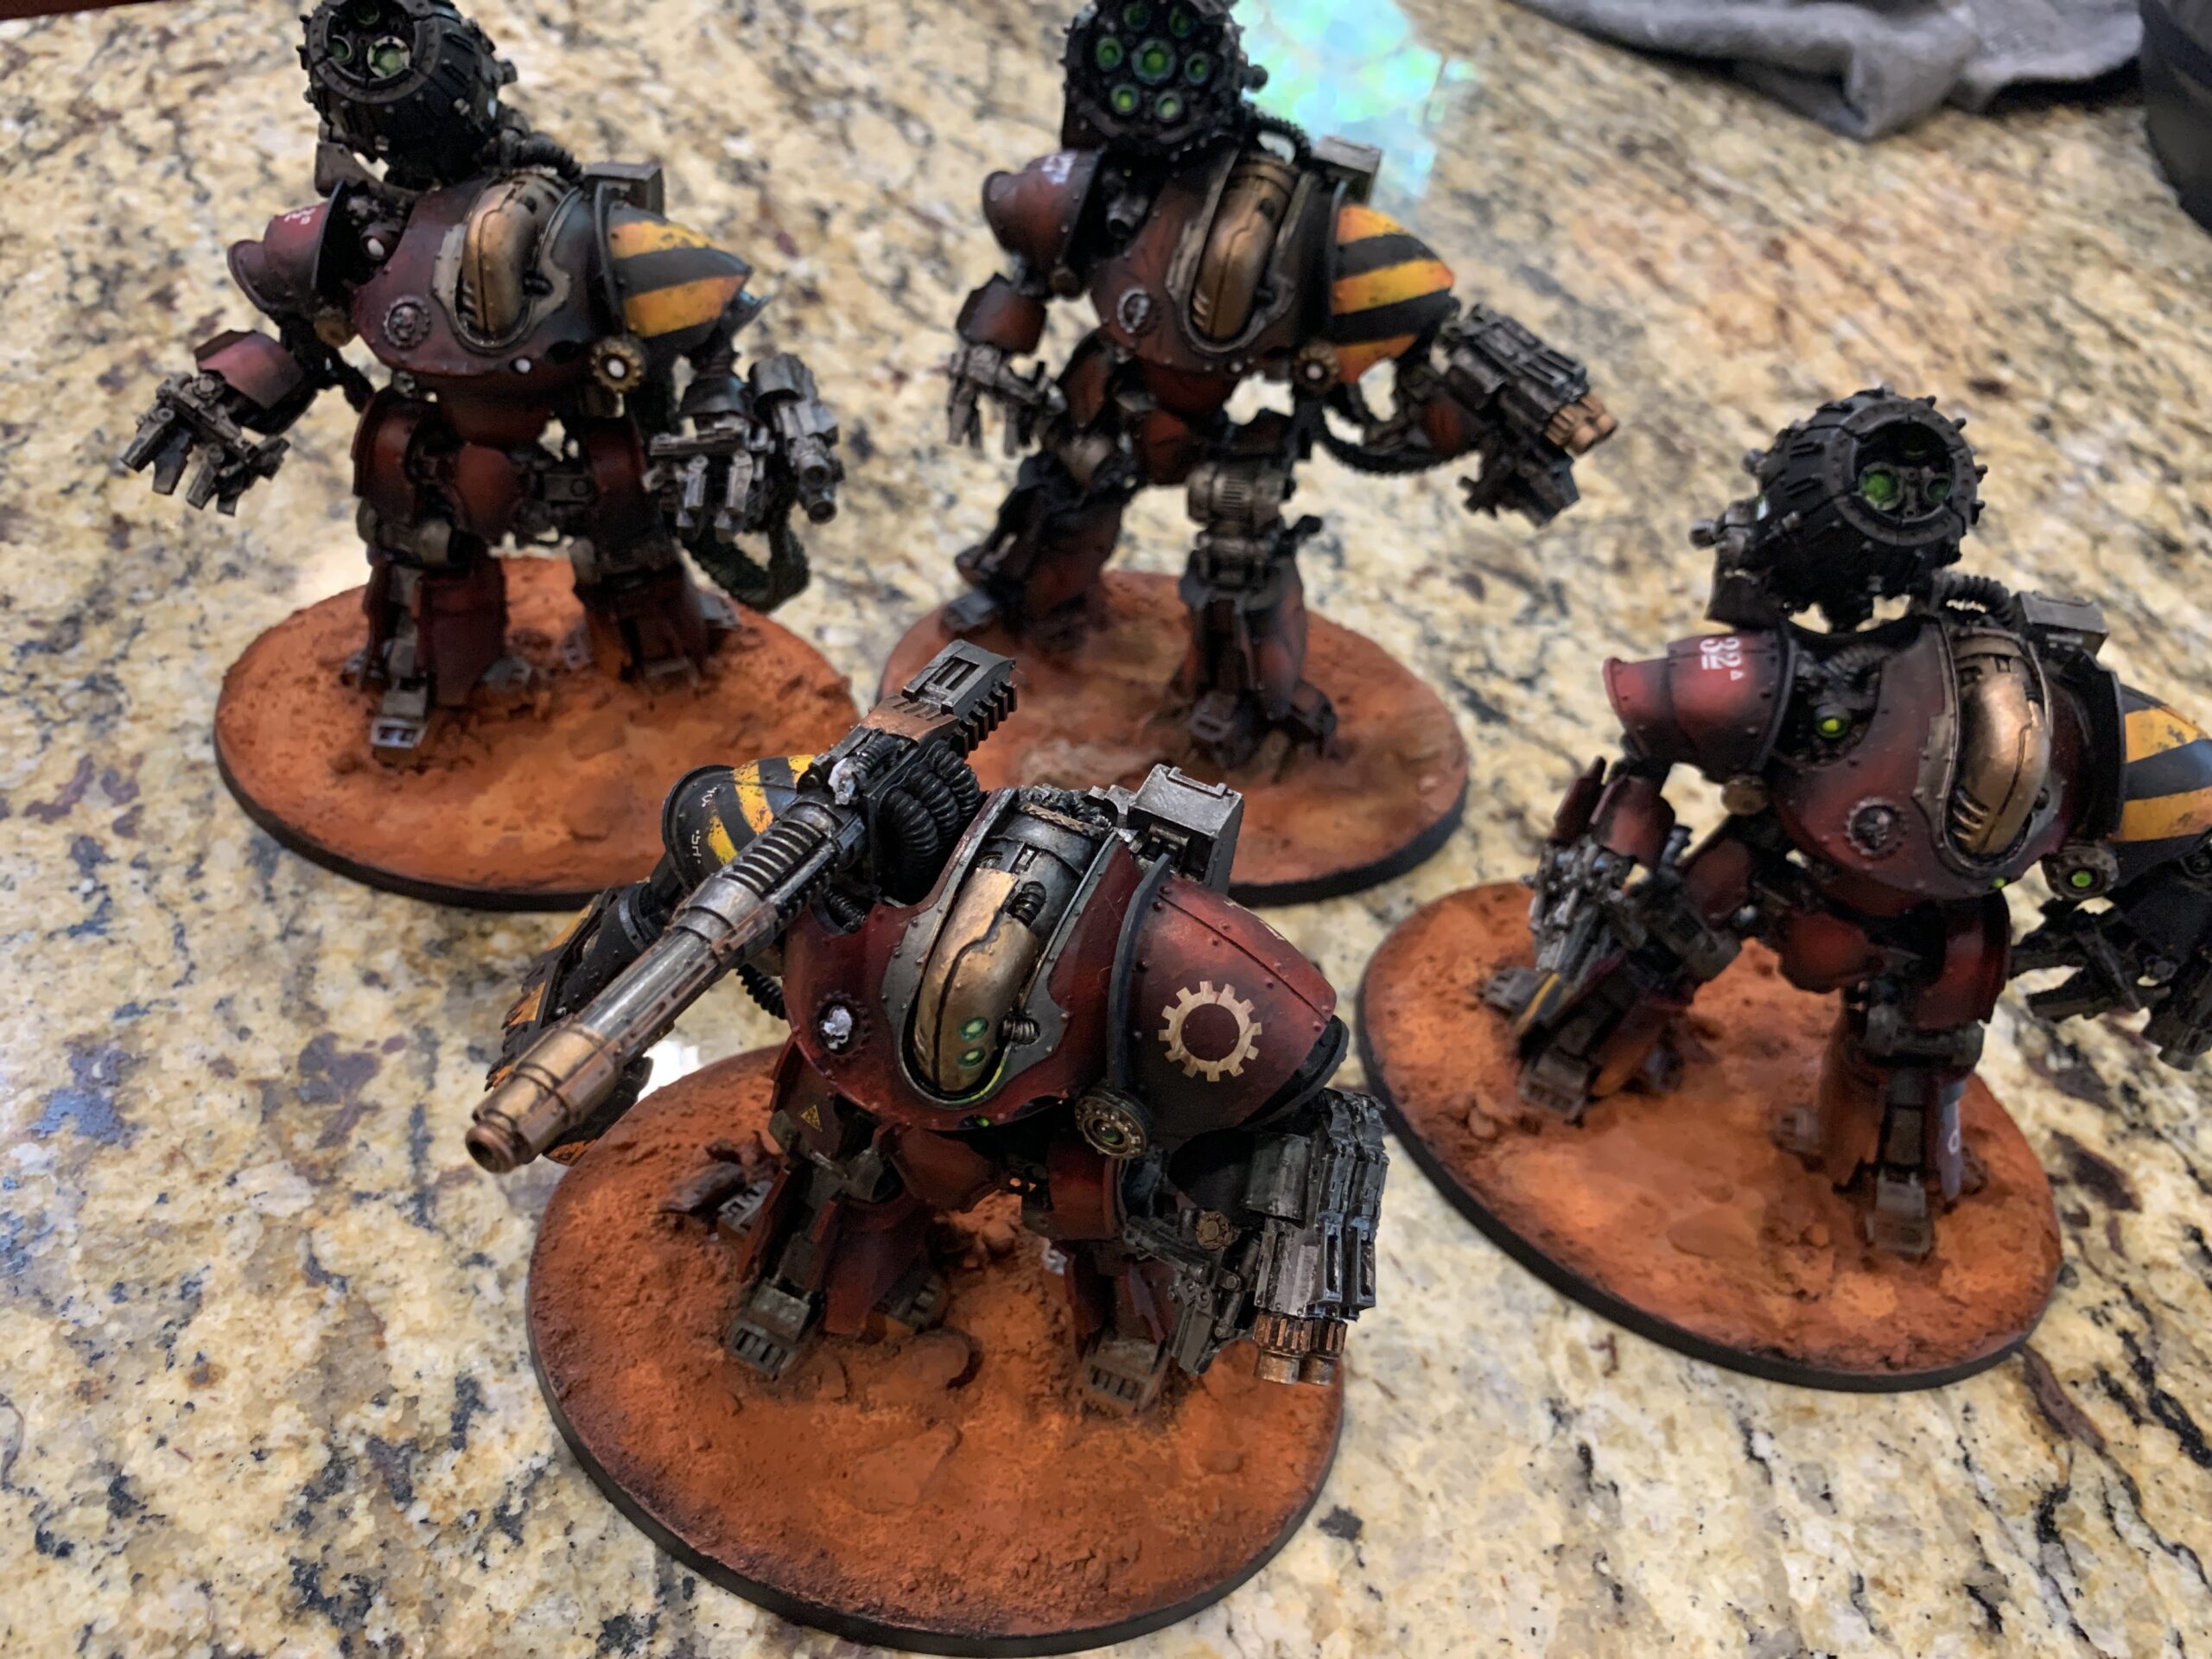
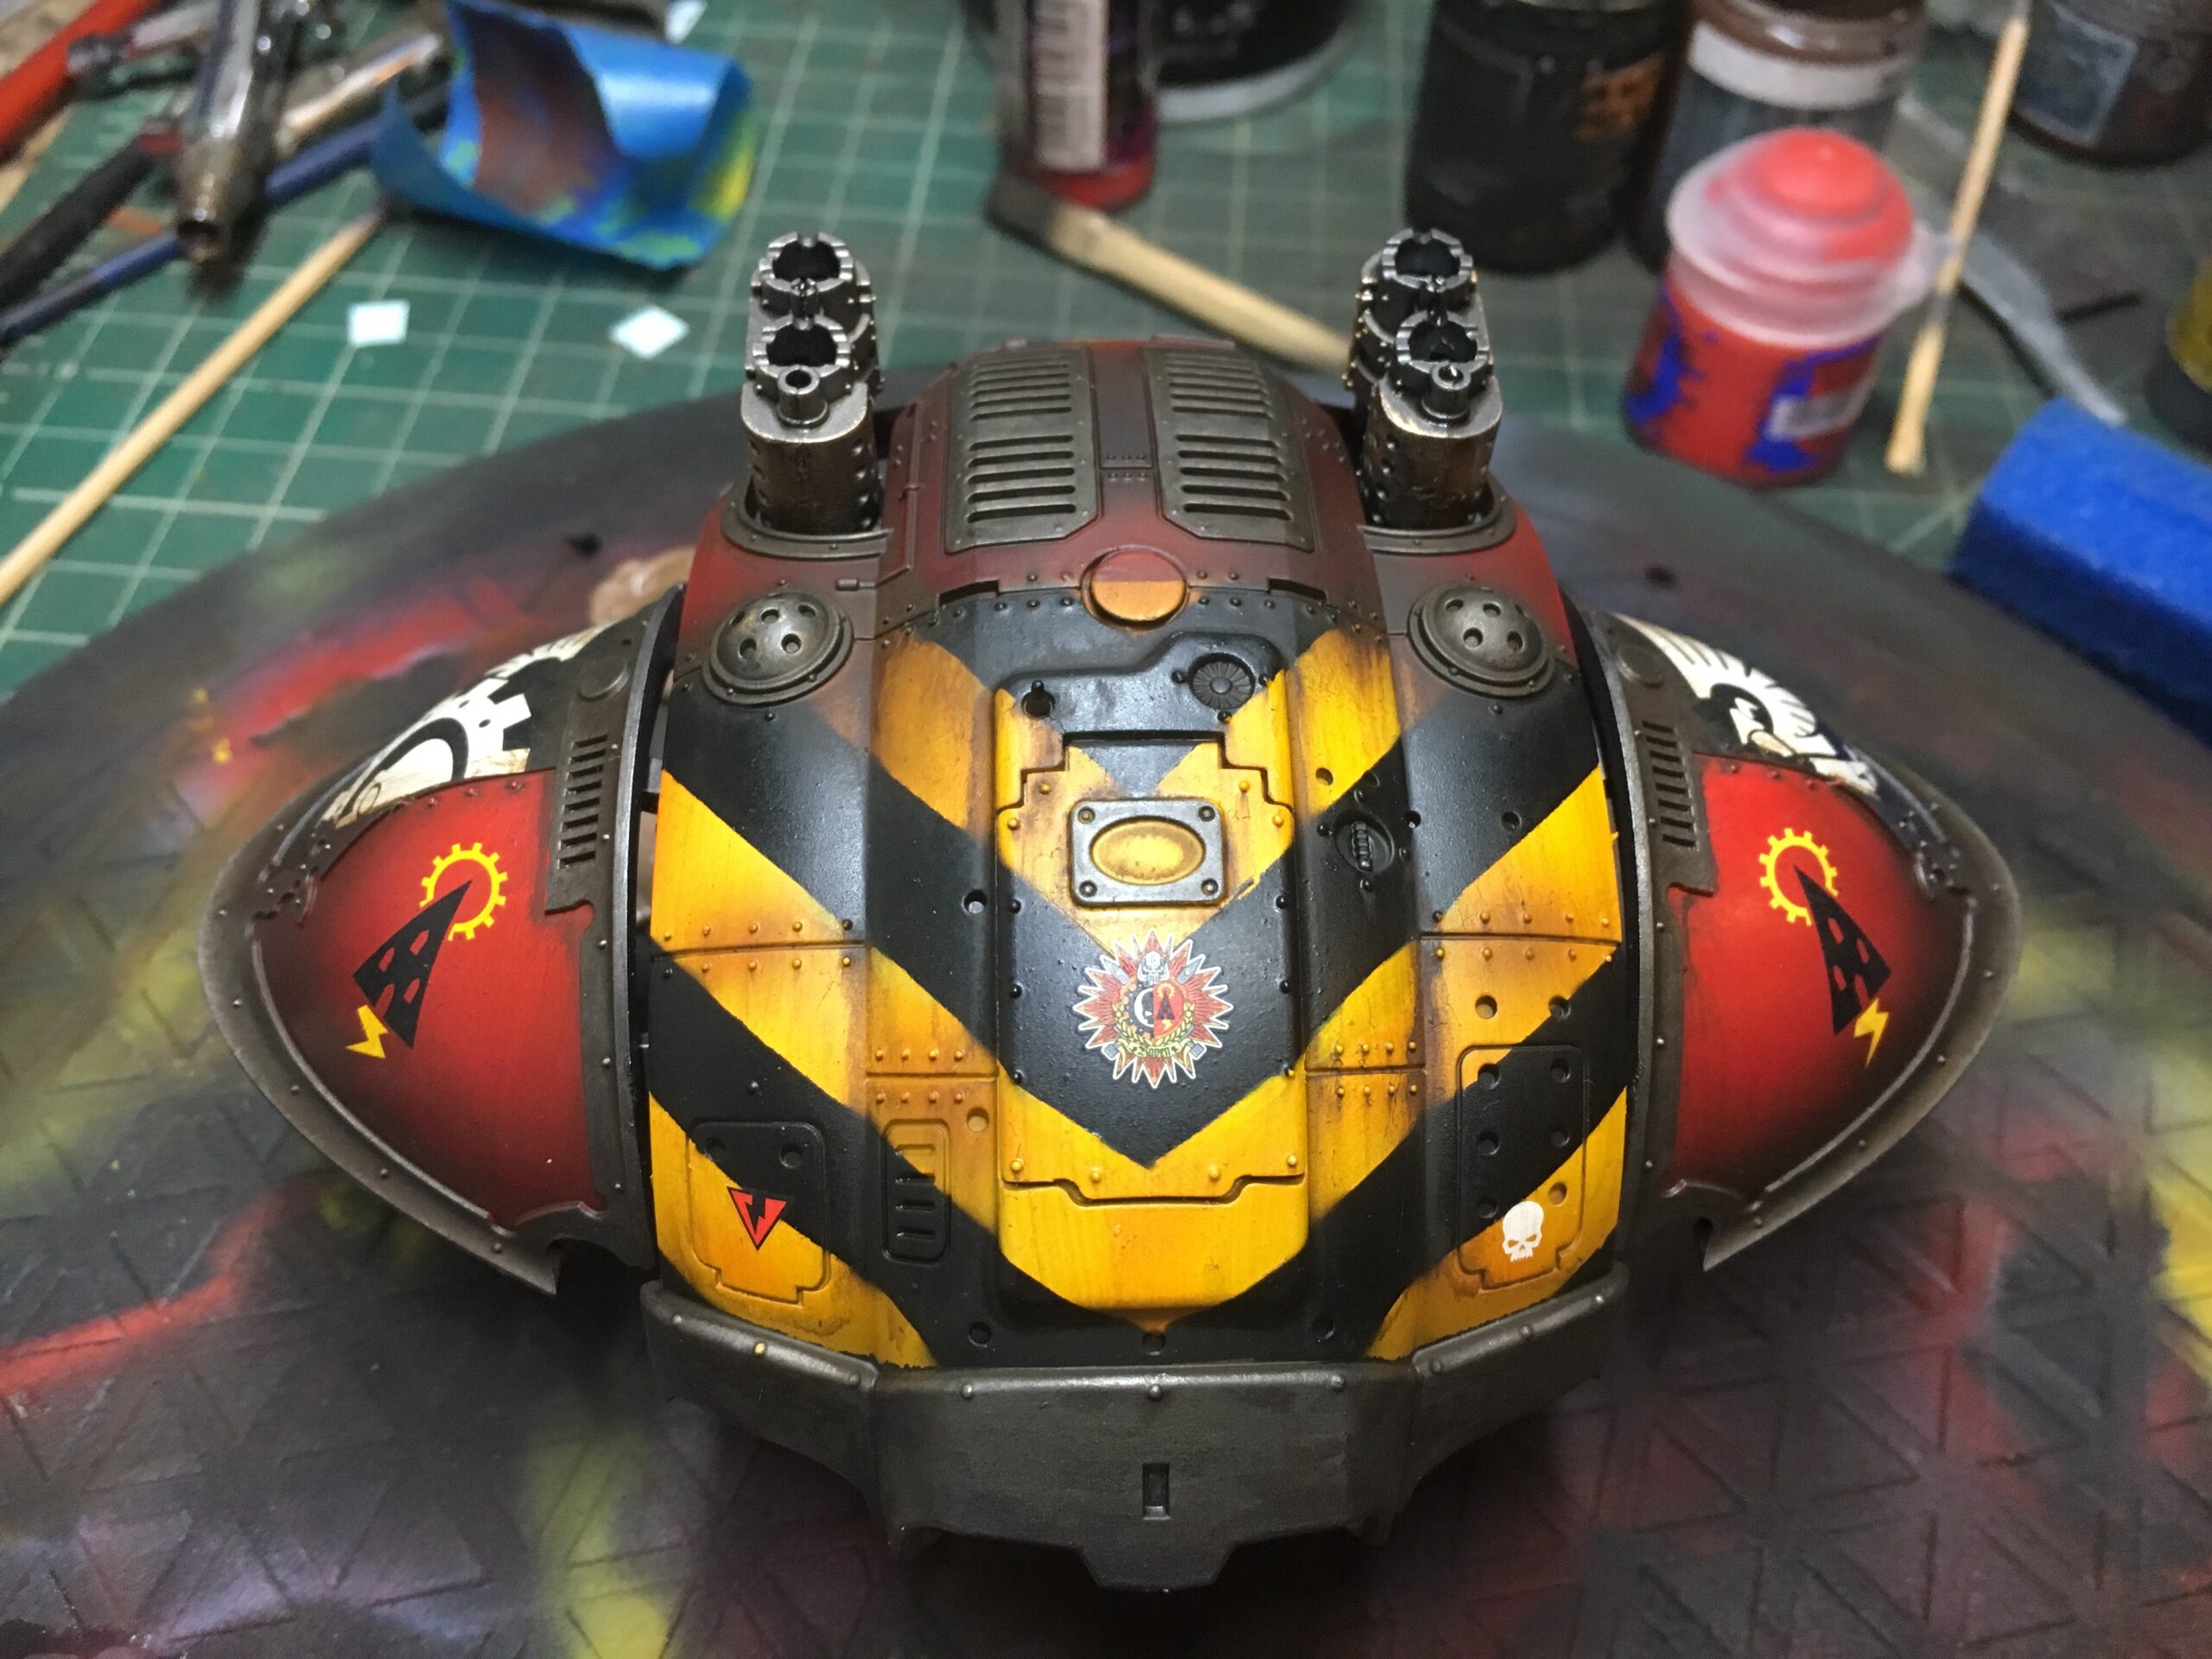
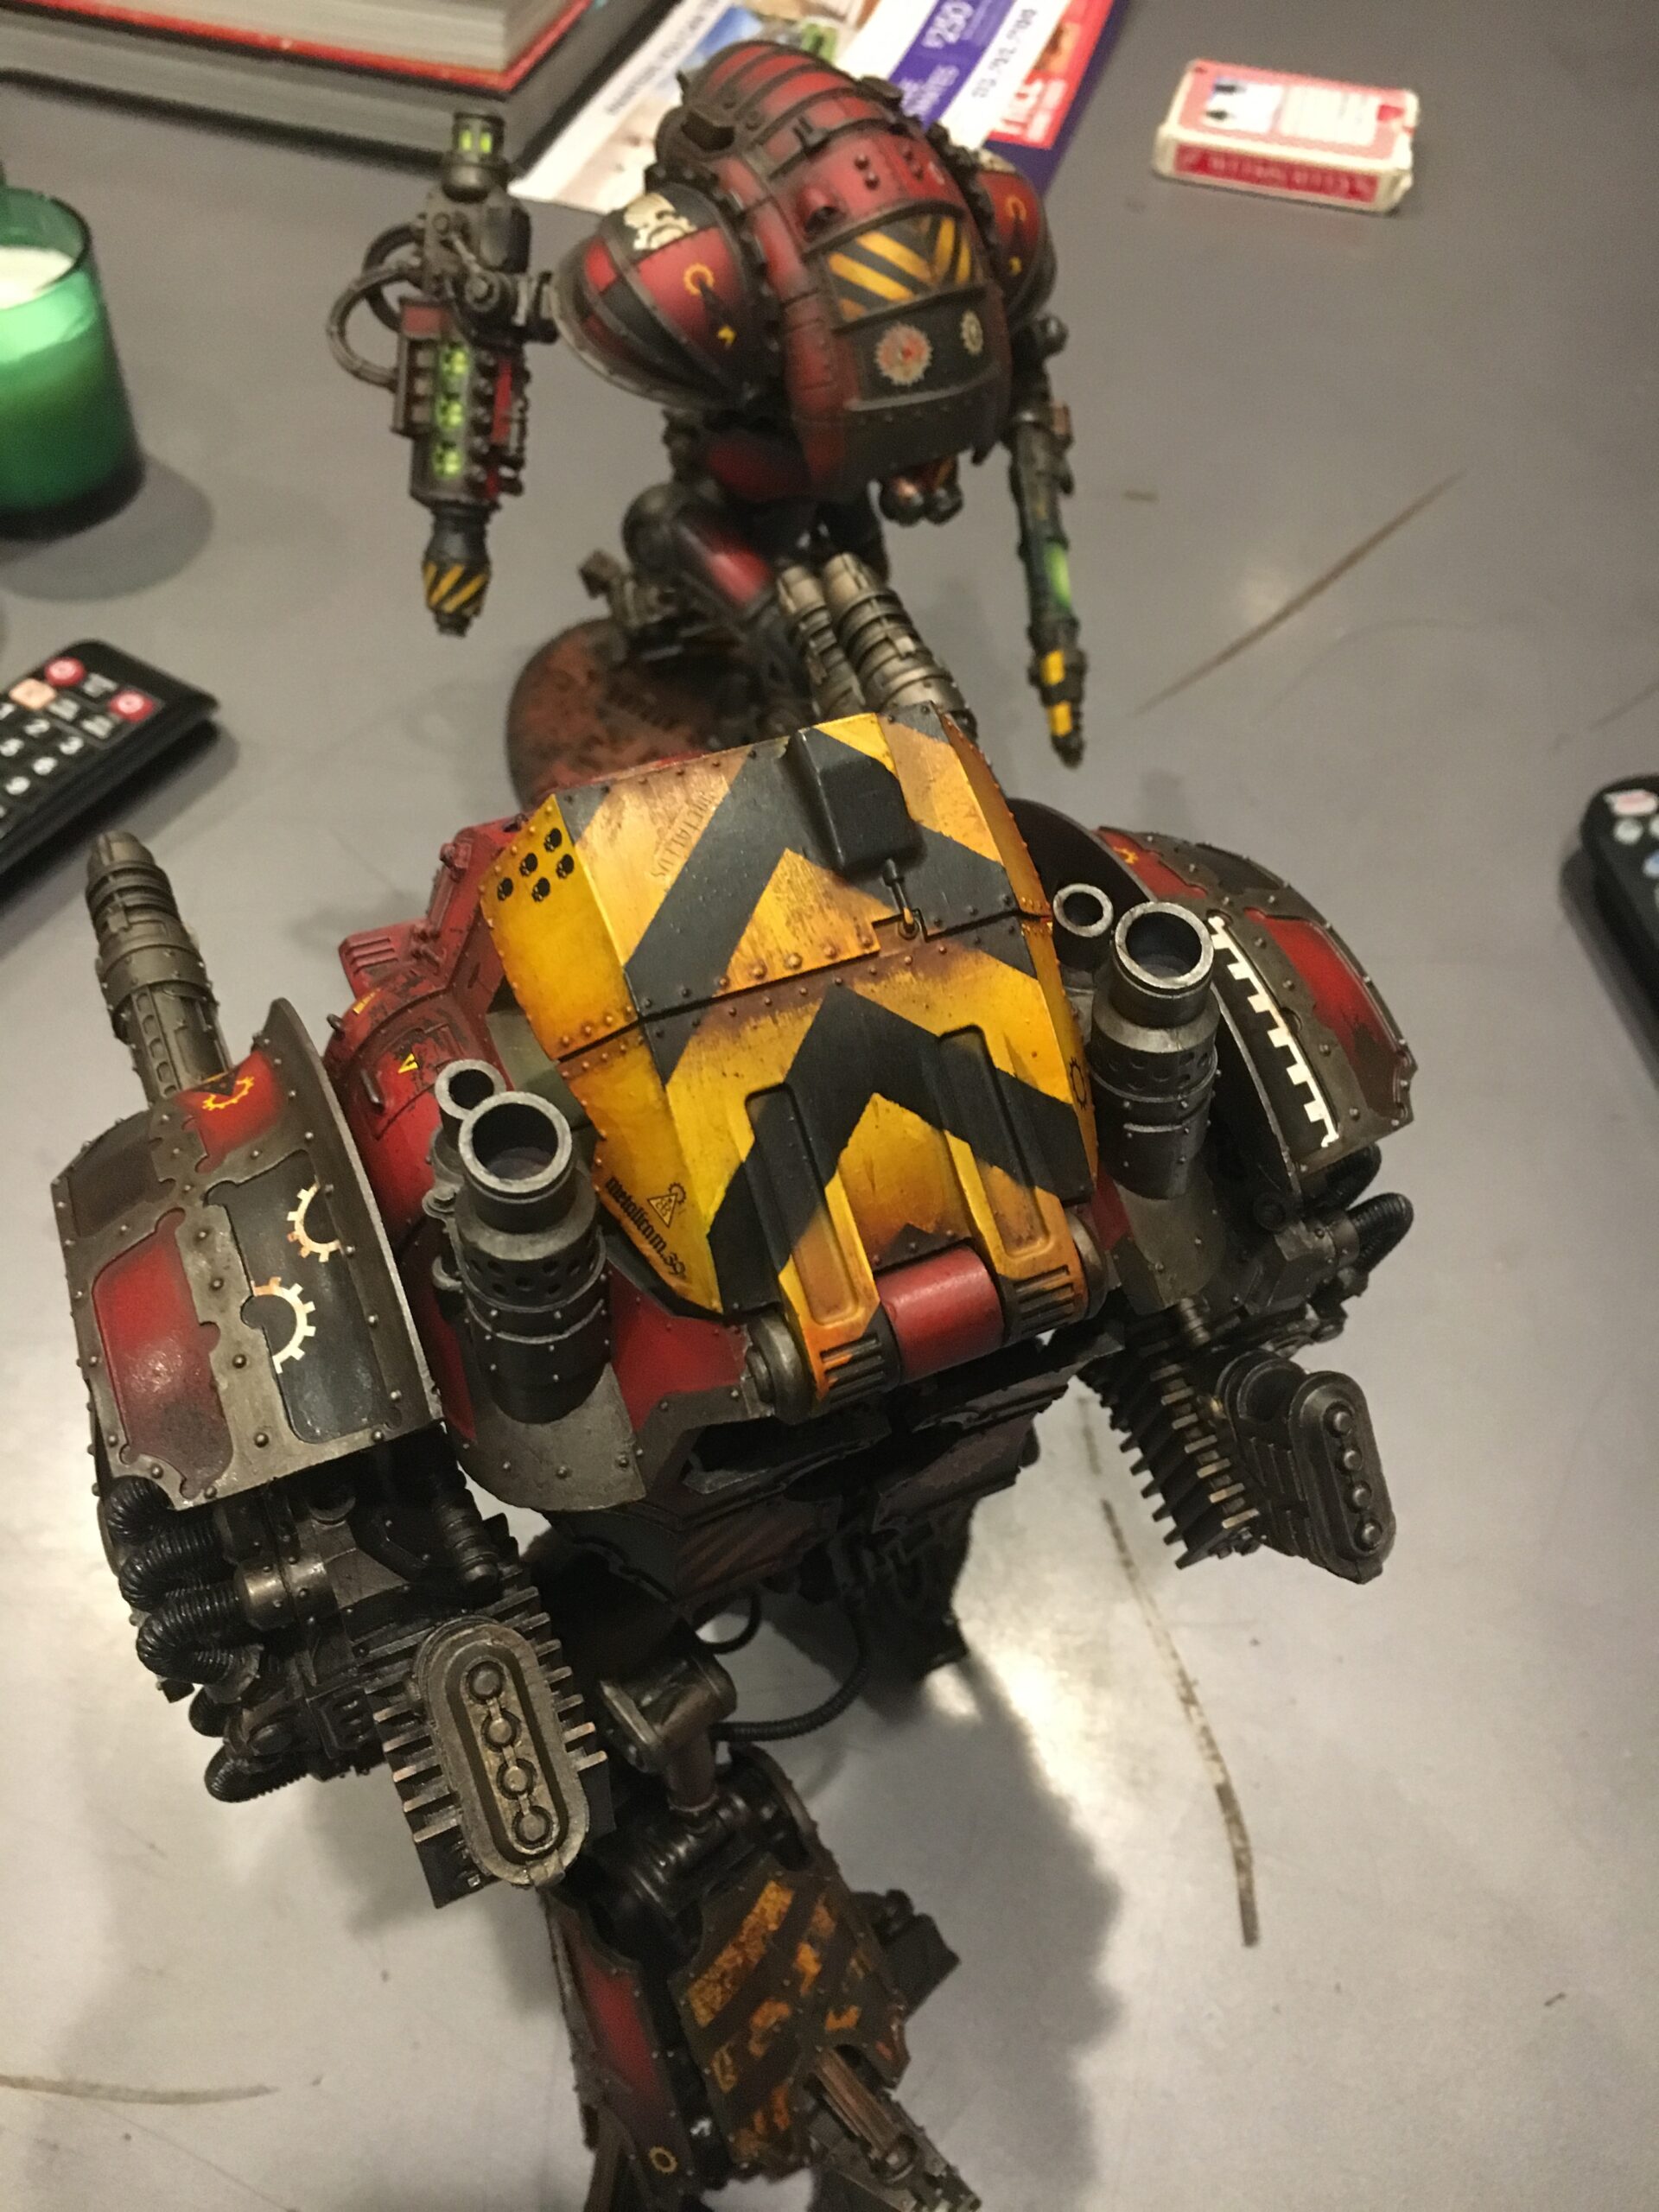
As days have grown colder and nights longer I’m spending much less time outside and more time indoors. I’ve been steadily chugging away on a large Mechanicum / Knight army that I have some plans for in the future. The below recipe is a quick and easy way to paint up any red force but I particularly love it on Mechanicum. Enjoy my Grimdark take on red, hazard stripes, and oily metal.
A Quick Note on Hobby Tools:
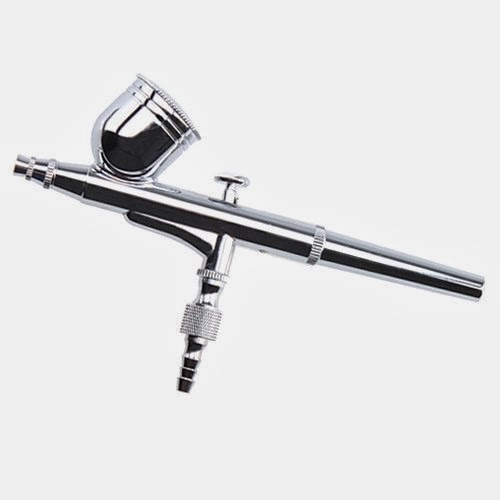
My primary paint tool is an airbrush. This is how I quickly lay down base layers, shading, and even some weathering quickly. It’s really good for larger models because you’re going to avoid so many of the headaches that come along with large flat panels, like brush strokes, uneven paint, time, etc. That being said, in the end, you’re still going to need a brush for all that detail work, so find a good balance. My airbrush setup is as follows:
- Iwata Eclipse HPCS -.50mm
- 1 Gallon California Airtools Quite Compressor w/ regulator and water trap
- 6ft hose
- Another water trap right before the airbrush (because I live in a humid area)
- Sponges
- Brushes size 1, 2 and 4. Because I’m hard on brushes I generally won’t use incredibly expensive ones. I tend to buy the crappy throw aways that come in packs of 20 for 8.99 at any art store. I do keep 2 or 3 really solid Kalinksi hair brushes for fine detail work.
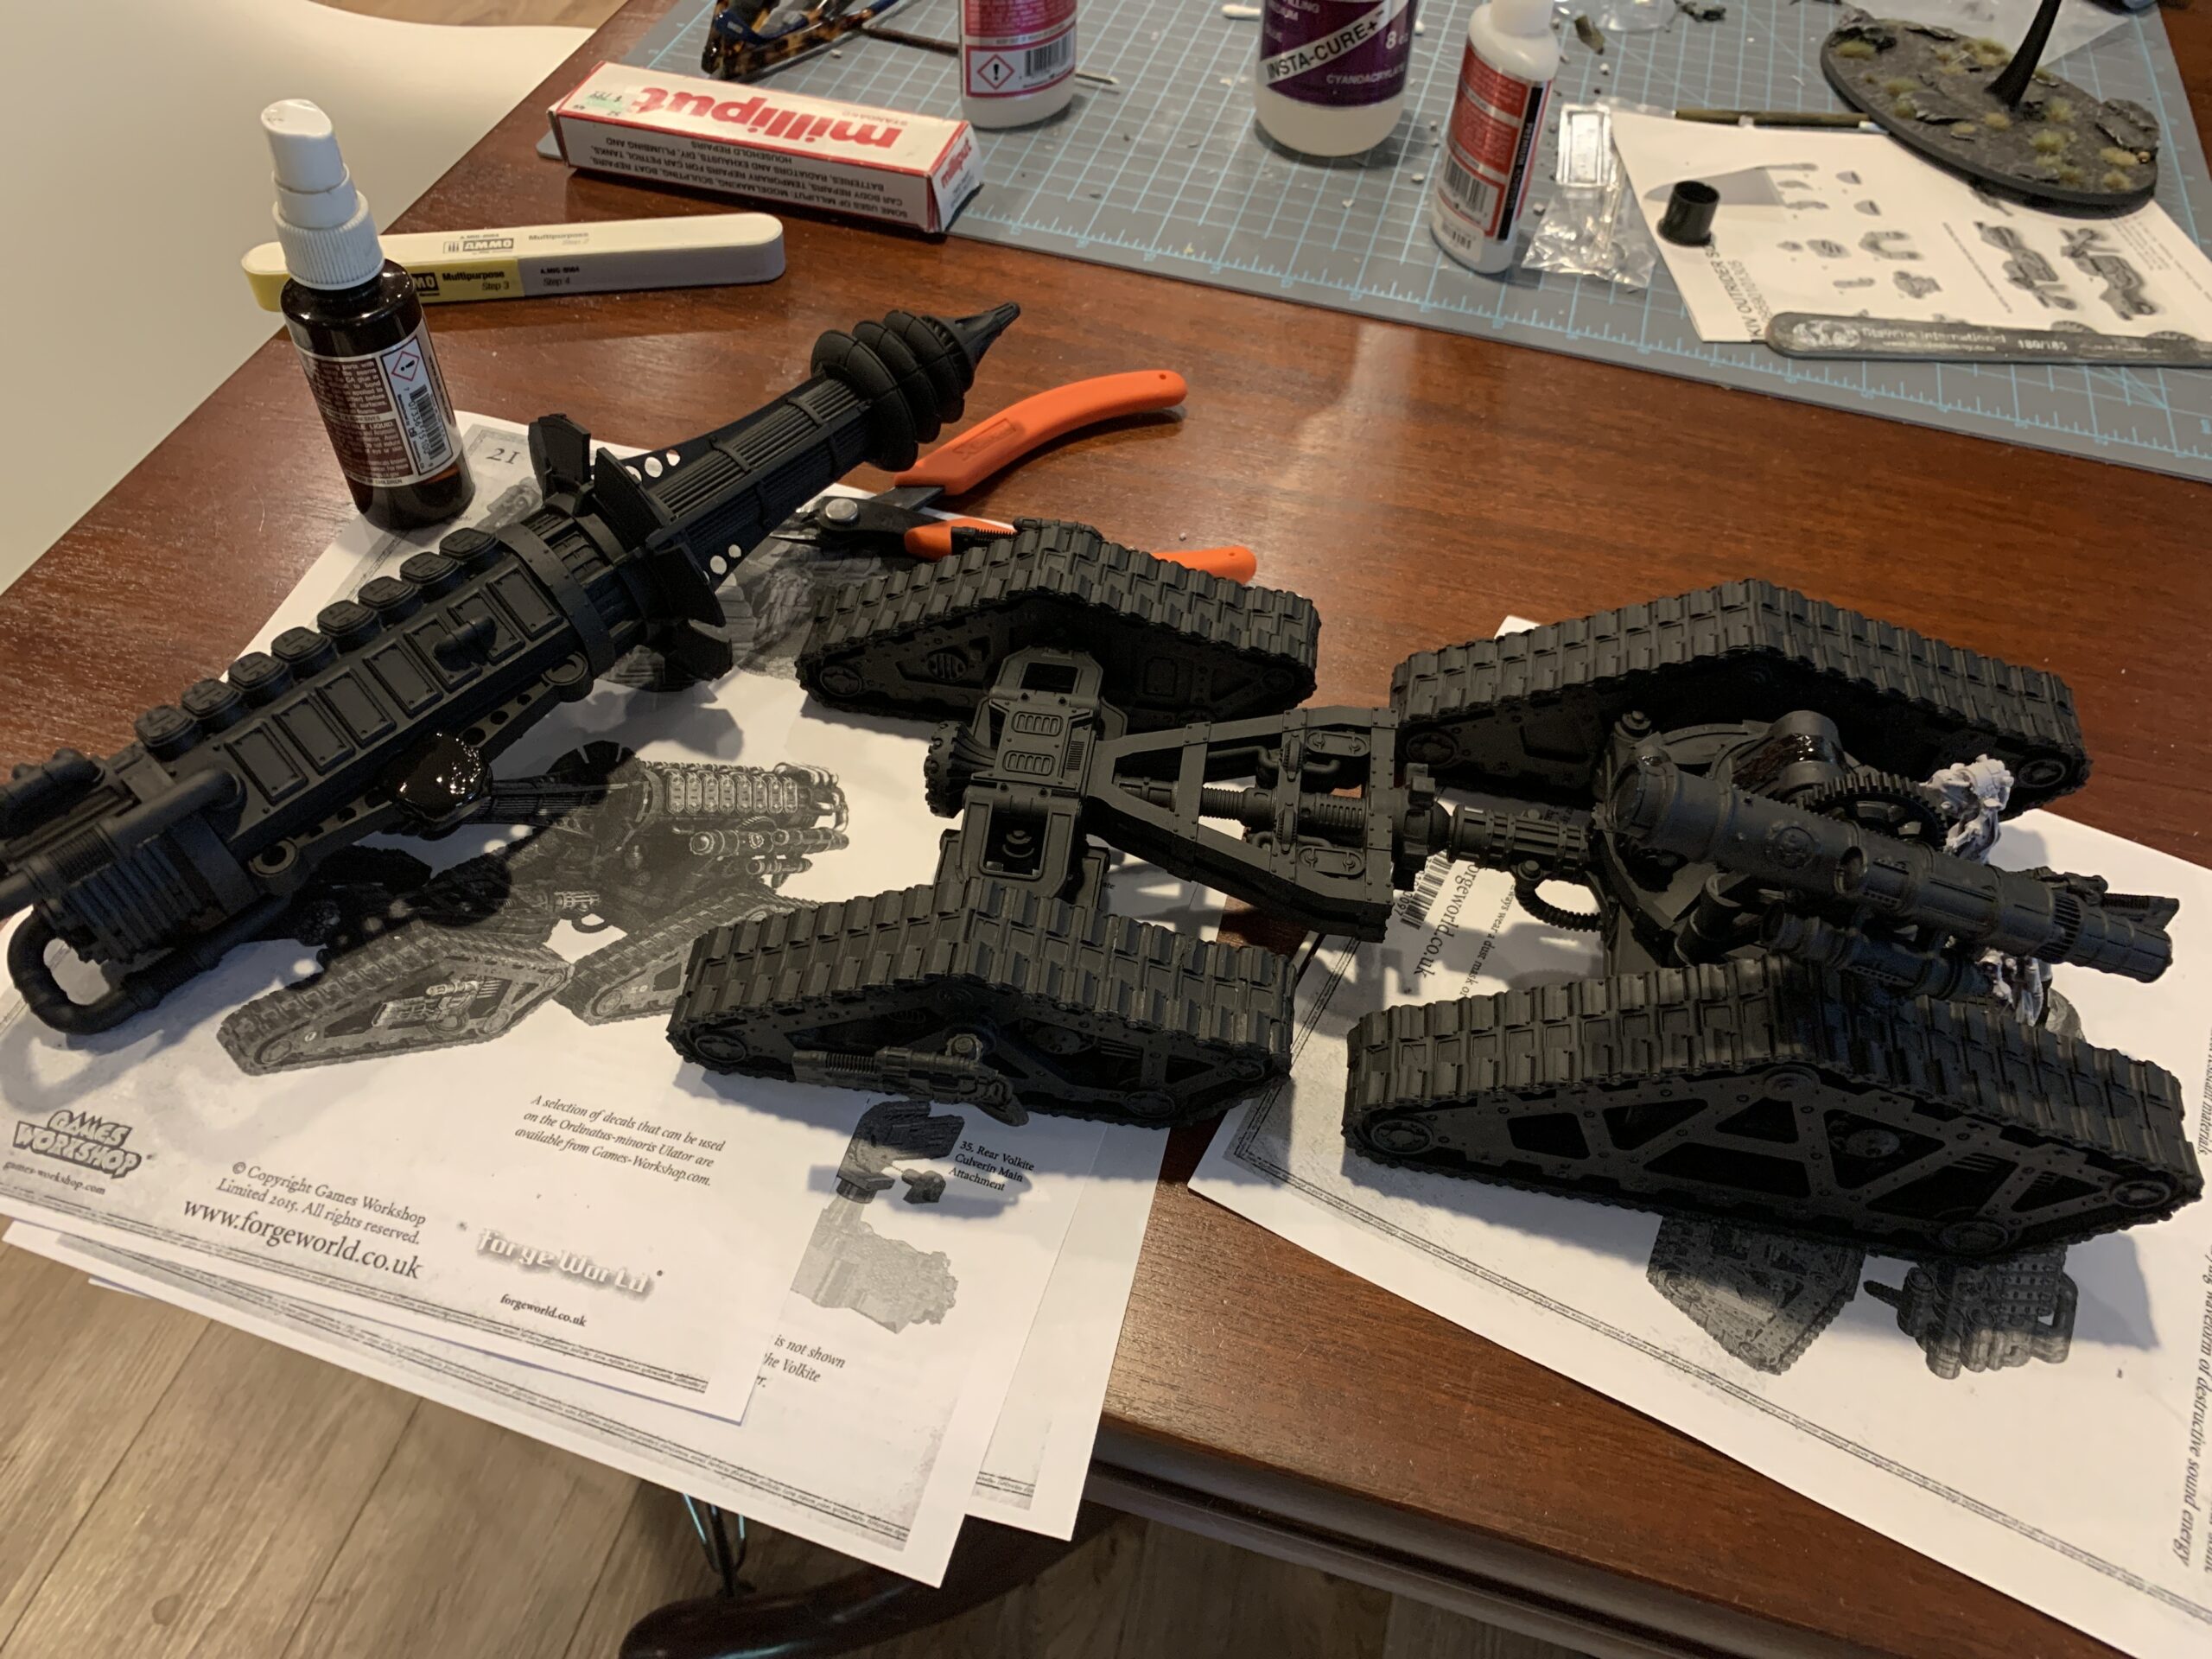
Sub-Assemblies
Knights and larger models, in general, lend themselves well to sub-assemblies. It allows you to spray paint or airbrush the larger panels while avoiding overspray onto the ligature and support structures of the knight/titan. For anything smaller than a Knight, I generally assemble everything and just do touch-ups along the way.
Let’s Paint!
Mechanicum Metal
Your standard weathered metal, I use the recipe frequently for corroded and grimy metal.
- I start with a drybrush of a copper or tin randomly over the model to help give a little variety to the gunmetal that will be drybrushed later
- Dry brush boltgun over the model. Don’t worry about being sloppy or getting paint on the panels that you’ve glued on. We’ll take care of that later.
- Paint various bobbles around the armor with copper or tinbits
- Here is another big secret. They make metallic ink pens Aiye Chrome Marker. These are amazing for quickly picking out small widgets and details in copper and gold colors as well as doing the metallic trim on the armor panels of knights, titans or other larger armor. I’ve used them to good effect on nearly my entire collection.
- Today I use a dark brown oil wash made from burnt umber, lamp black, sepia and mineral spirits
- Paint wiring red, yellow or blue, if you’re fancy hazard stripes are cool and standout.
- Paint hoses and exterior wiring with black contrast or your favorite black. If you’re using a traditional black paint, give the ribbed hoses a quick dry brush with grey or metal to highlight the ridges.

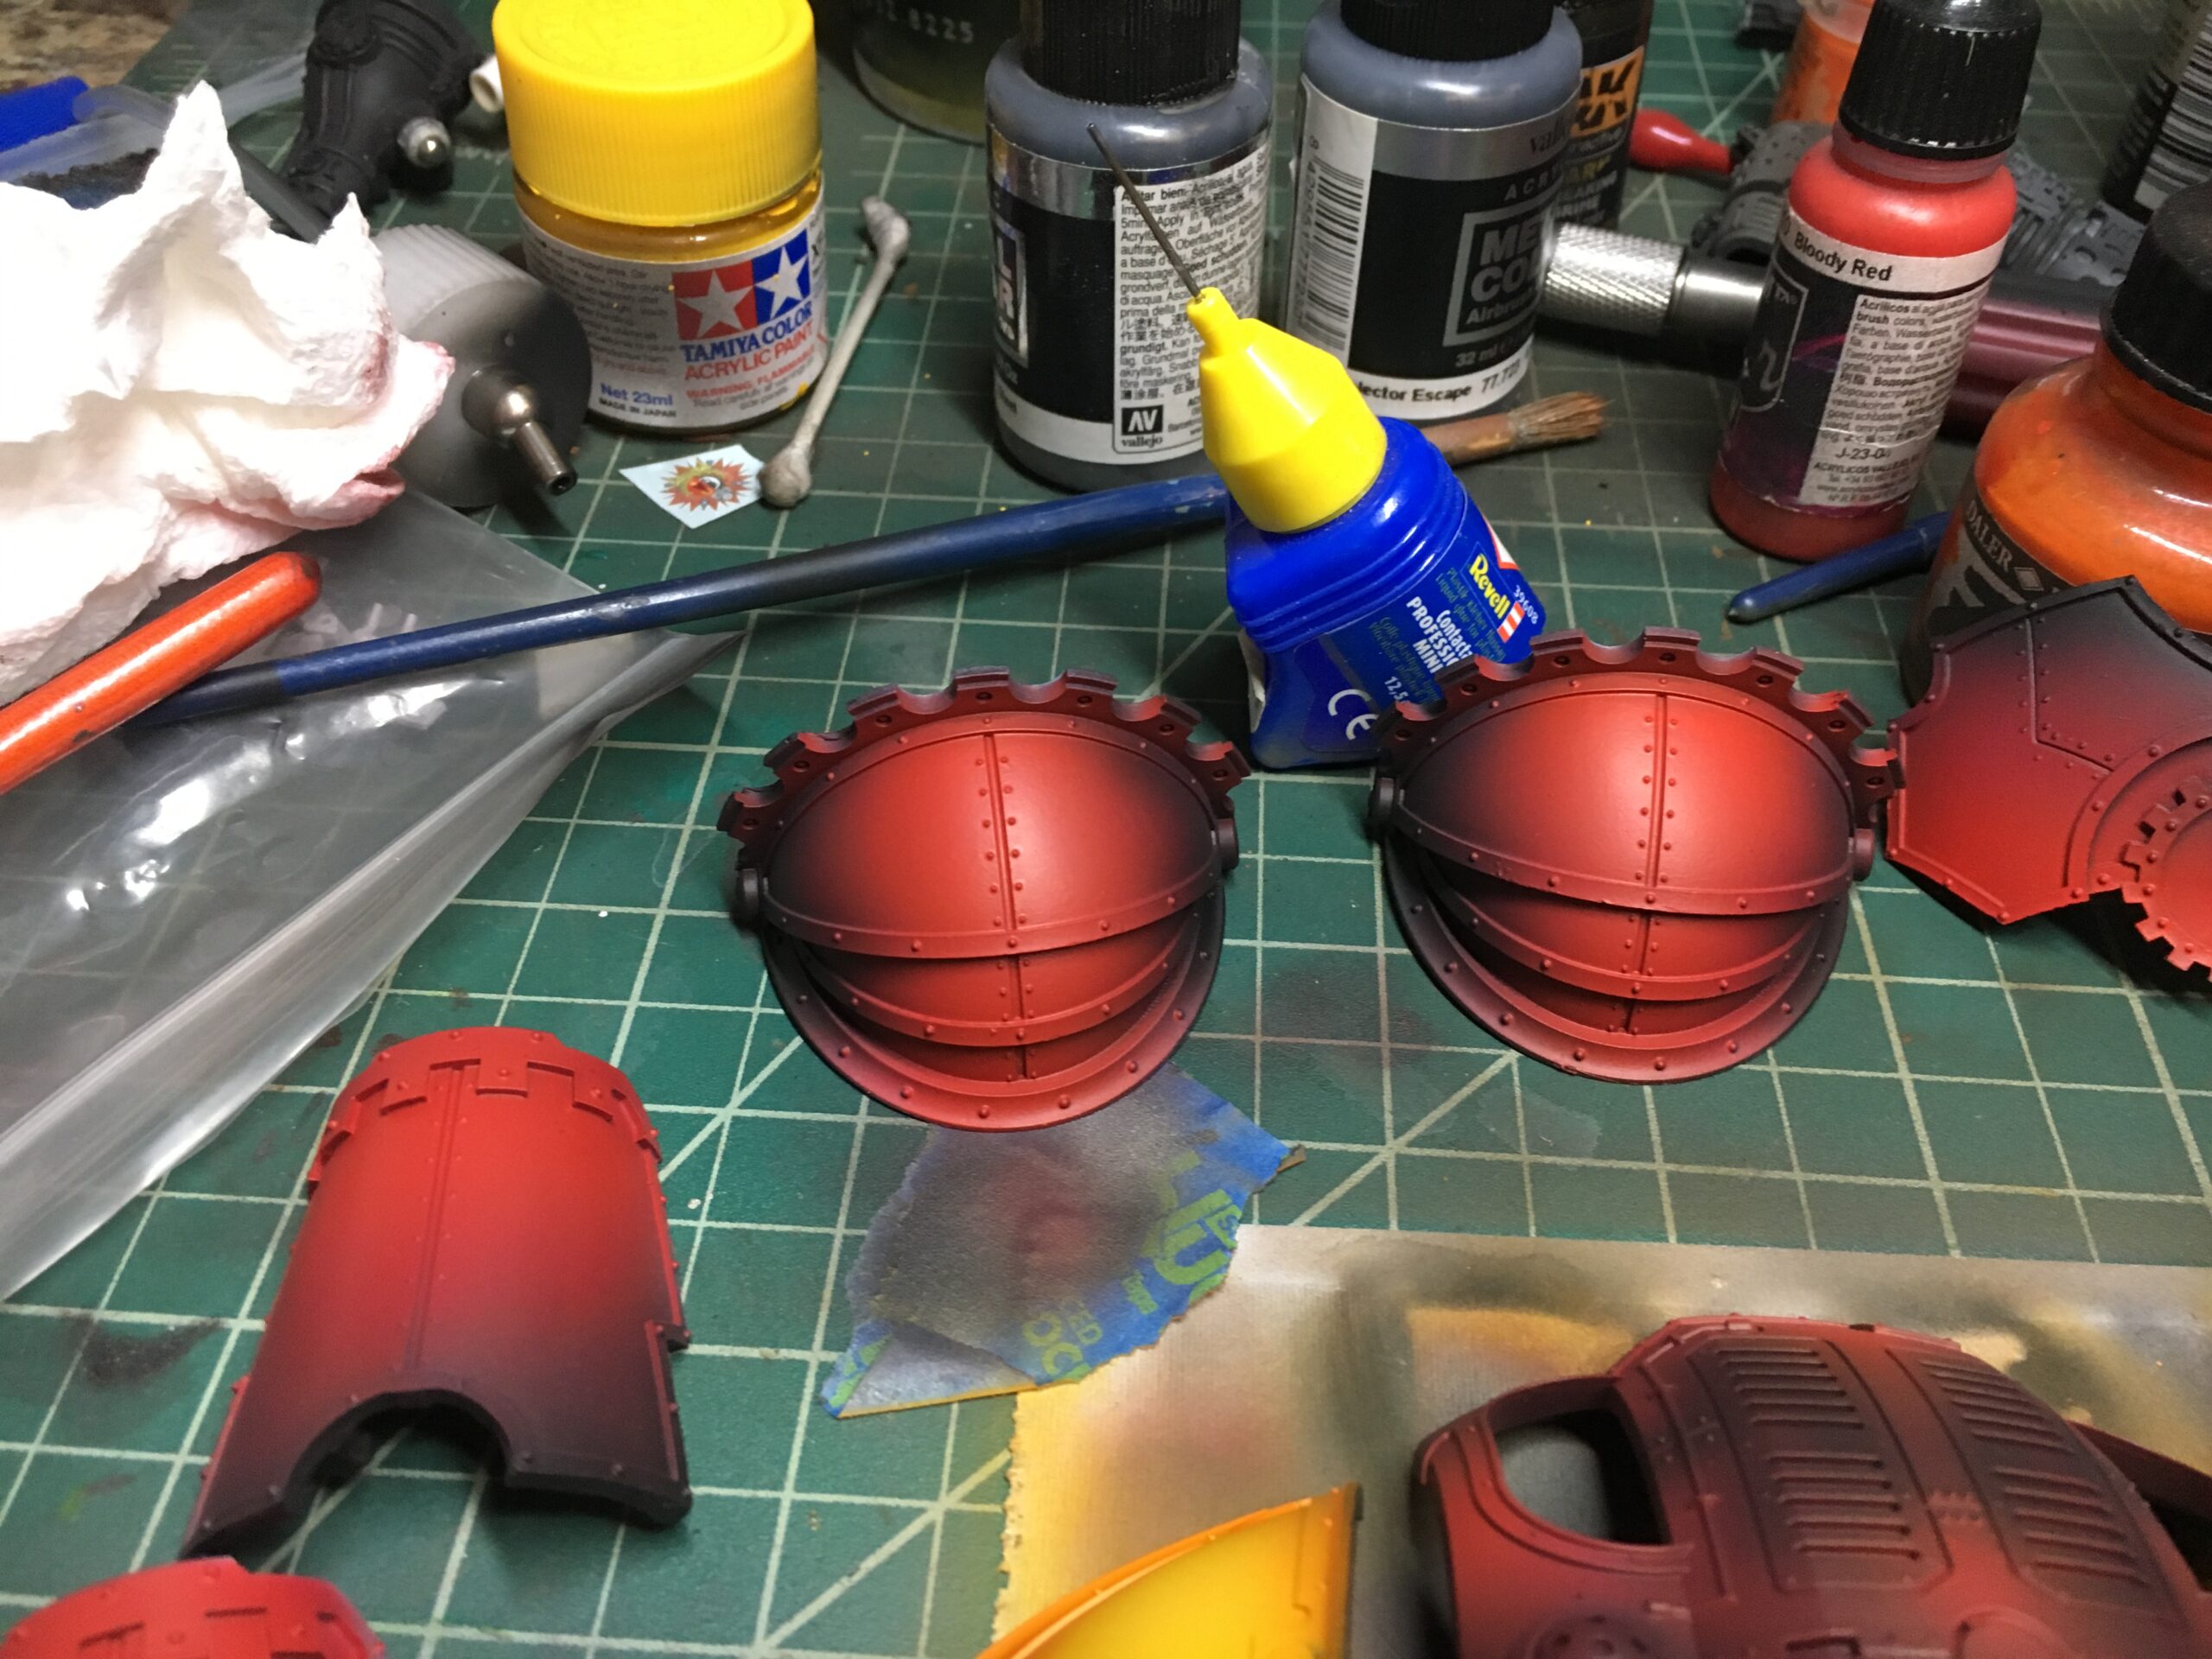
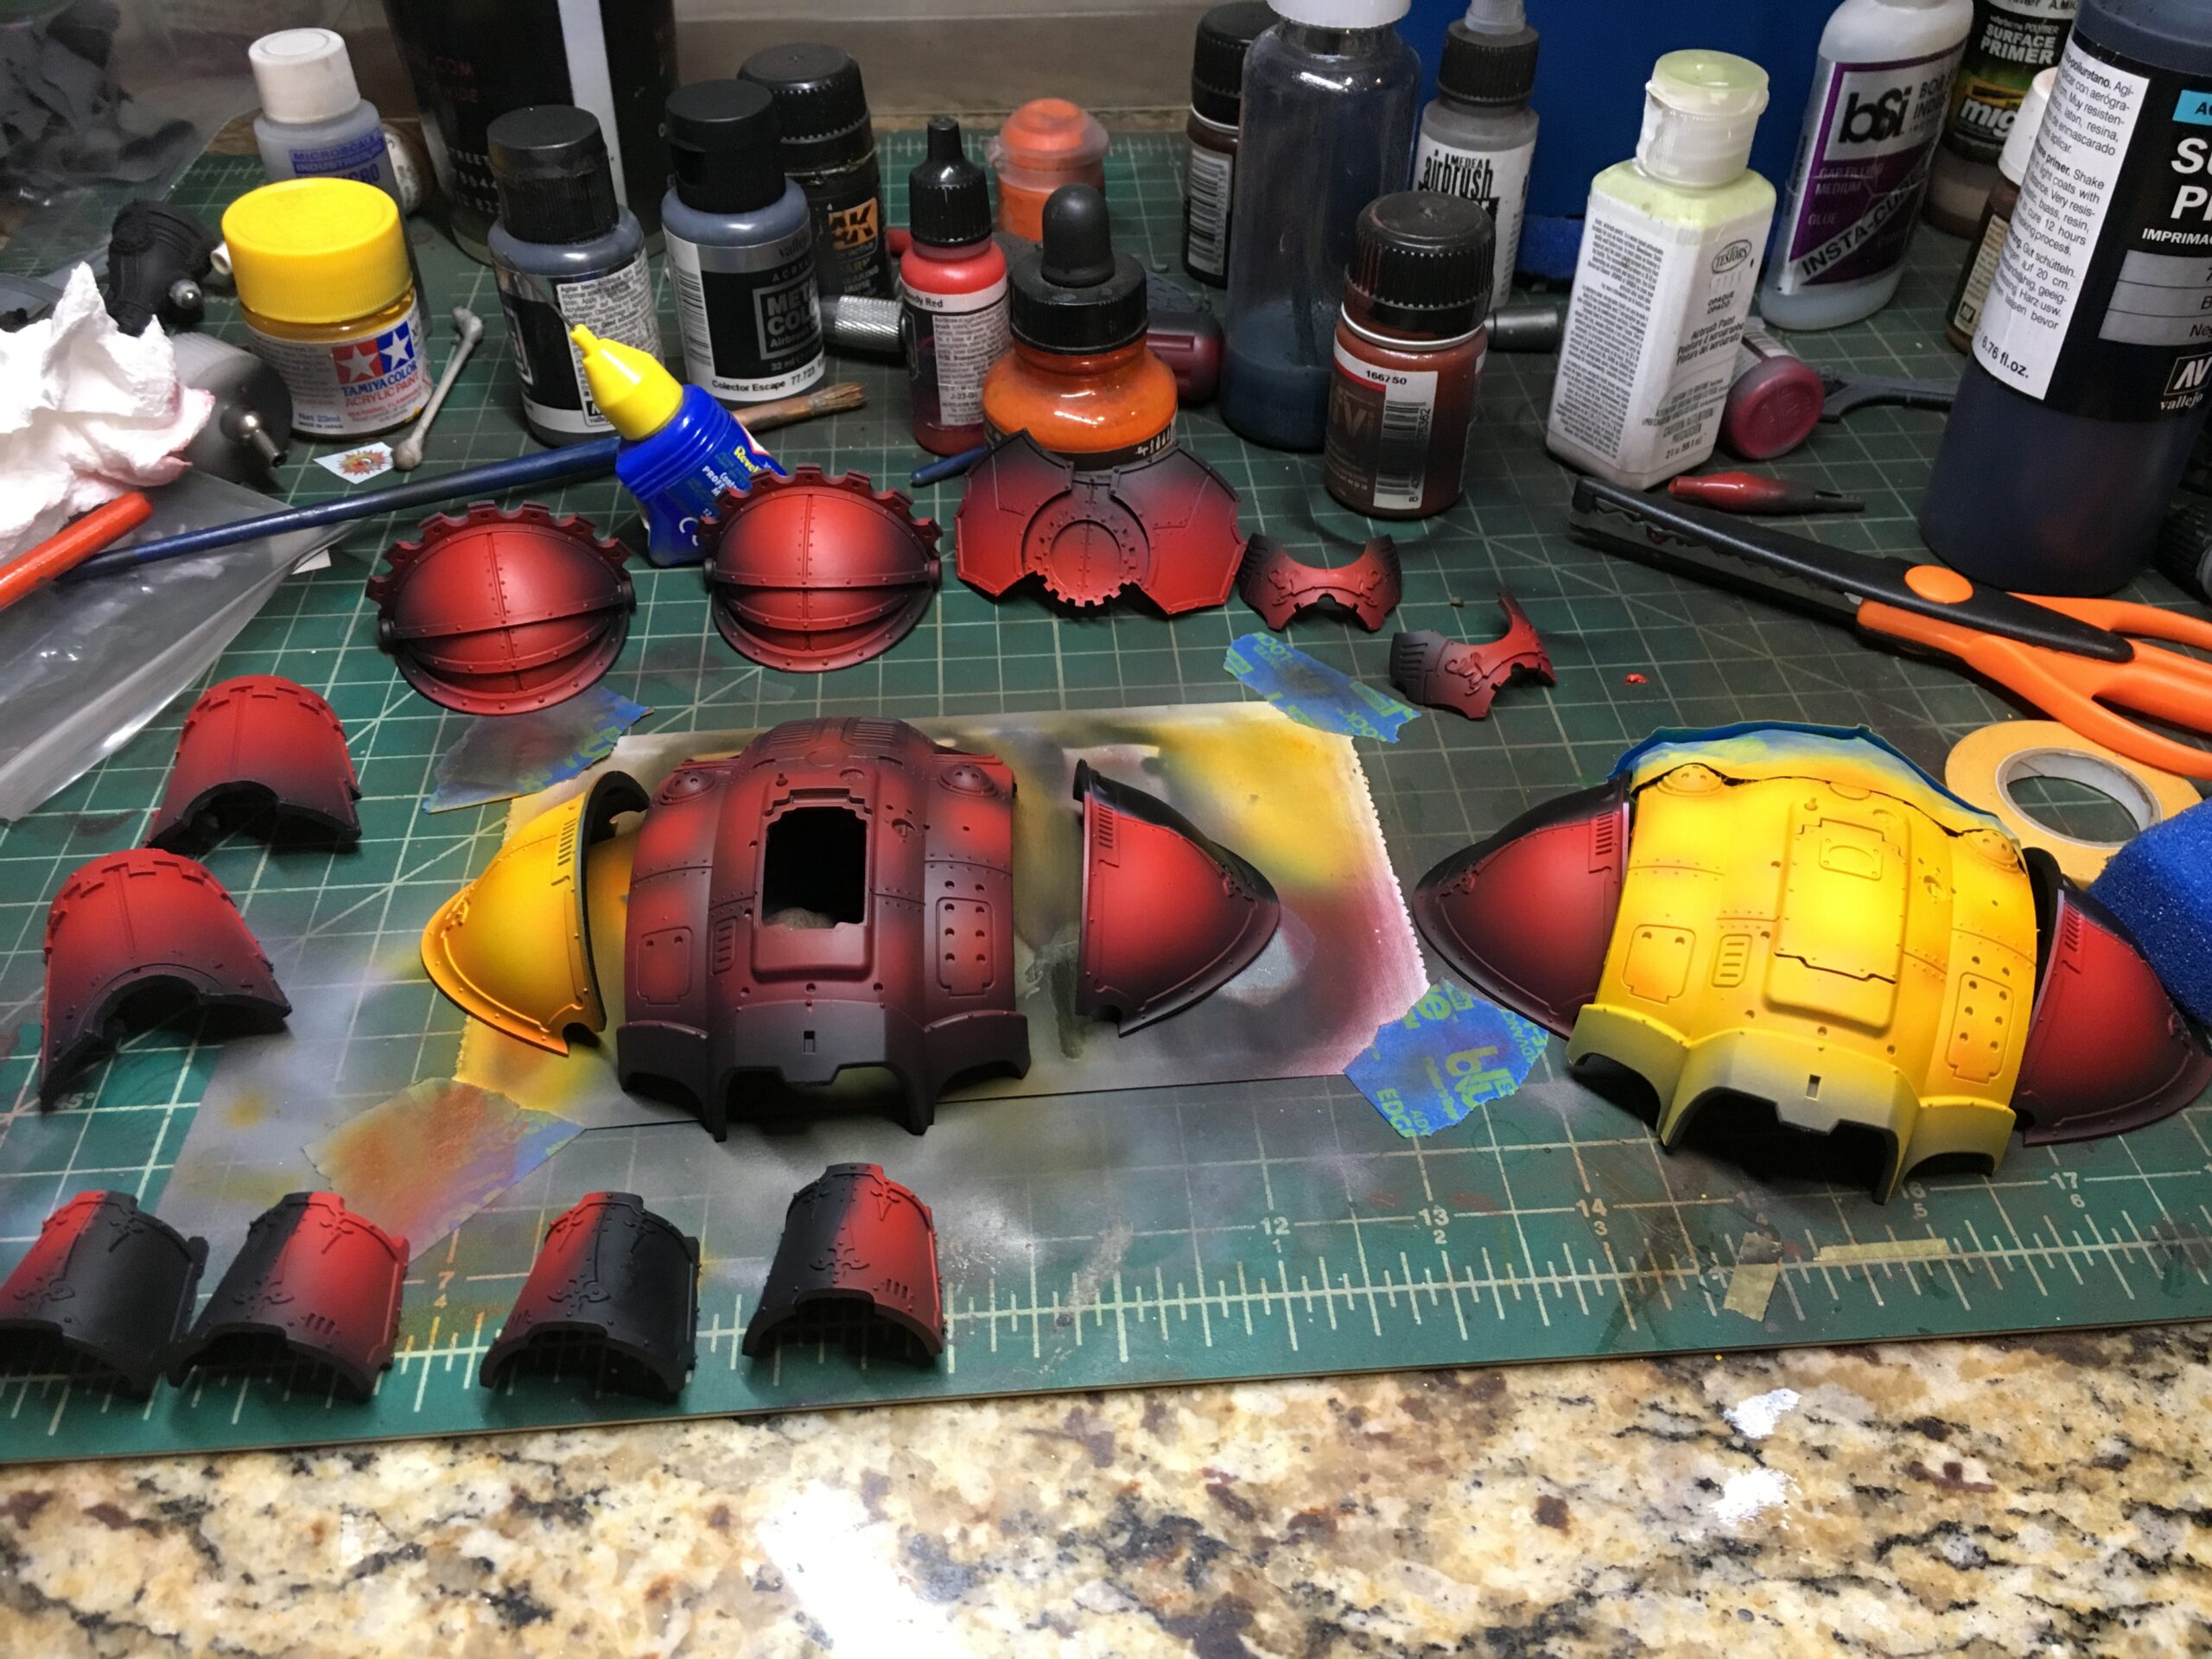
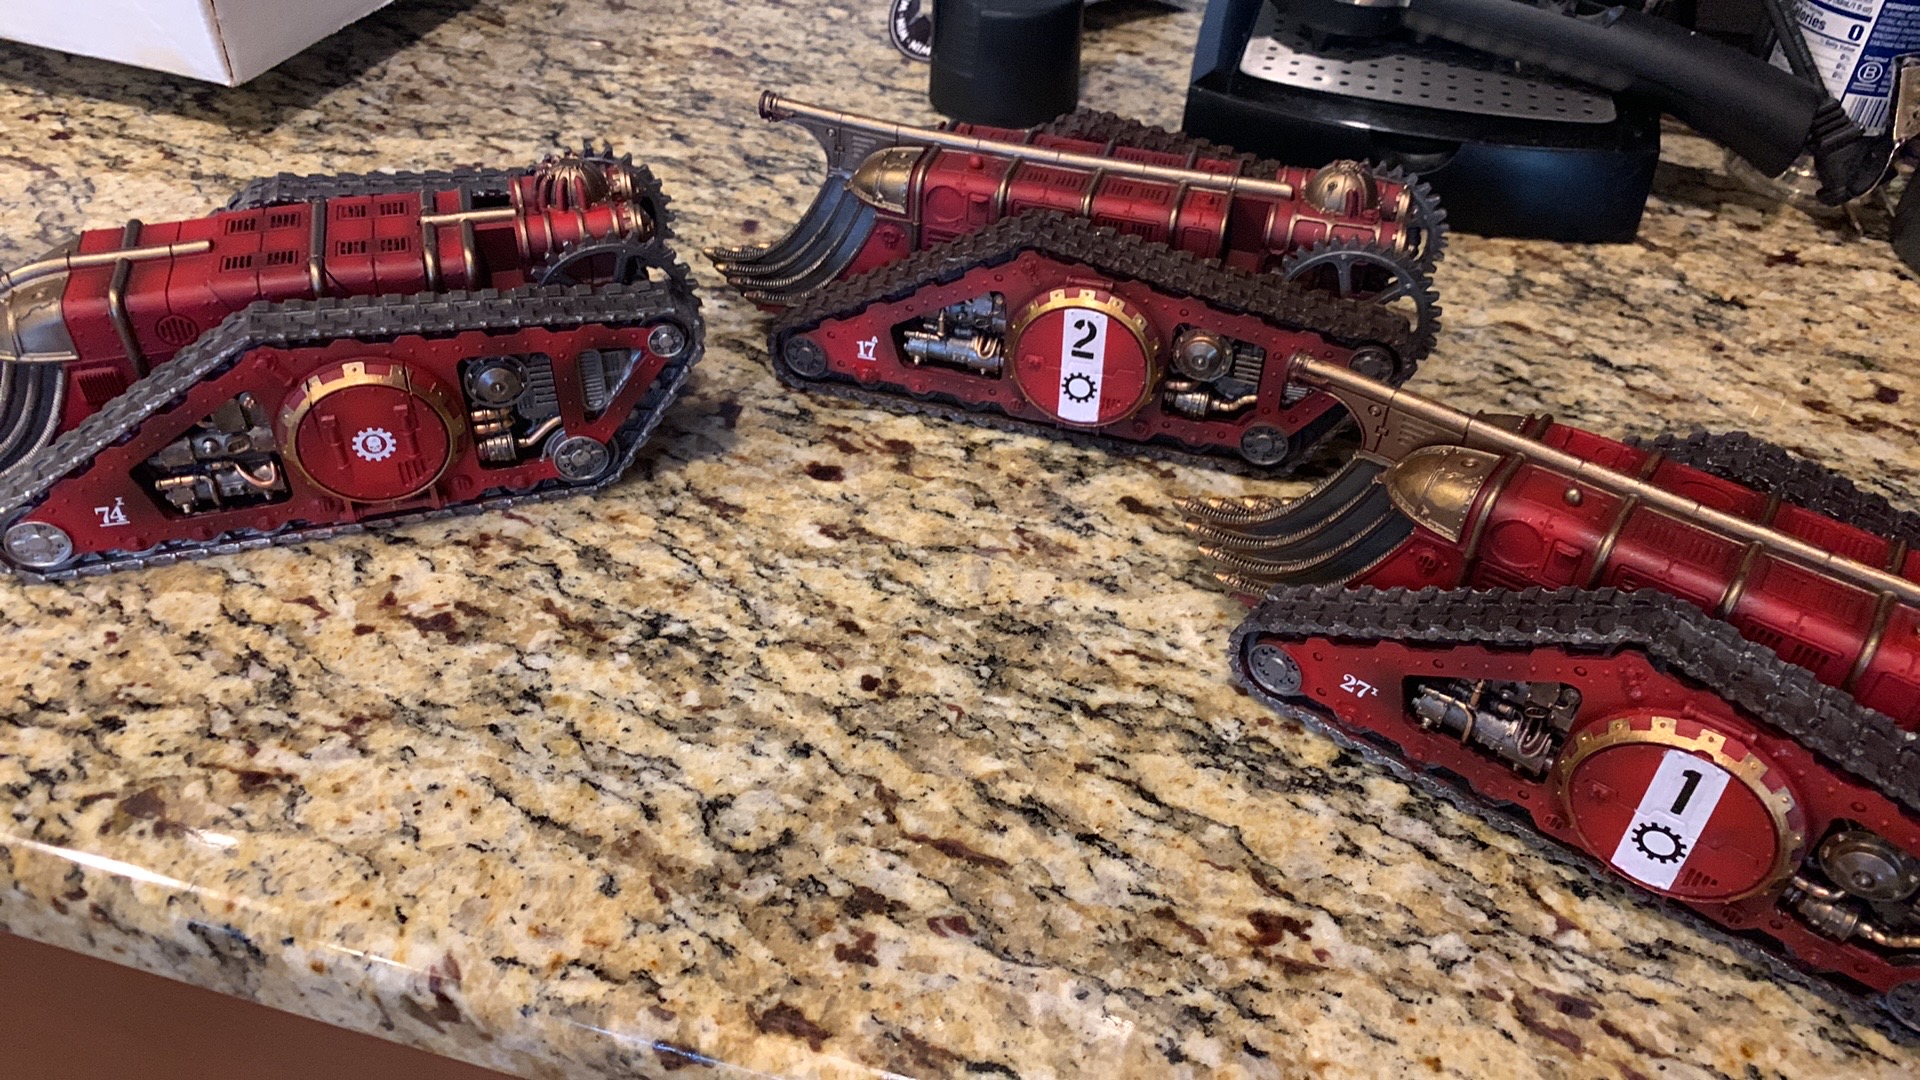
Mechanicum Red
I opted to mute the bright red tones that are depicted in the box art and the codex that and go with a more crimson scheme that is going to be darker and beat up. On the armor plates start w/ black primer.
- Start by applying Khorne Red to all the armor and areas you want to be red, i generally use a large brush or airbrush depending on the size of the model
- Apply highlights with ProAcryl Bold Pyrrole Red or Vallejo Blood Red using a stippling brush or sponge. Don’t worry about getting any of this on the silver, you can go back and correct this with some touch ups
- This step is optional but create some shadows and variety on the red by airbrushing Coelia Greenshade or another greenish or blue contrast or shade on the lower sections of the panel, in crevices.
- Let your paint cure.

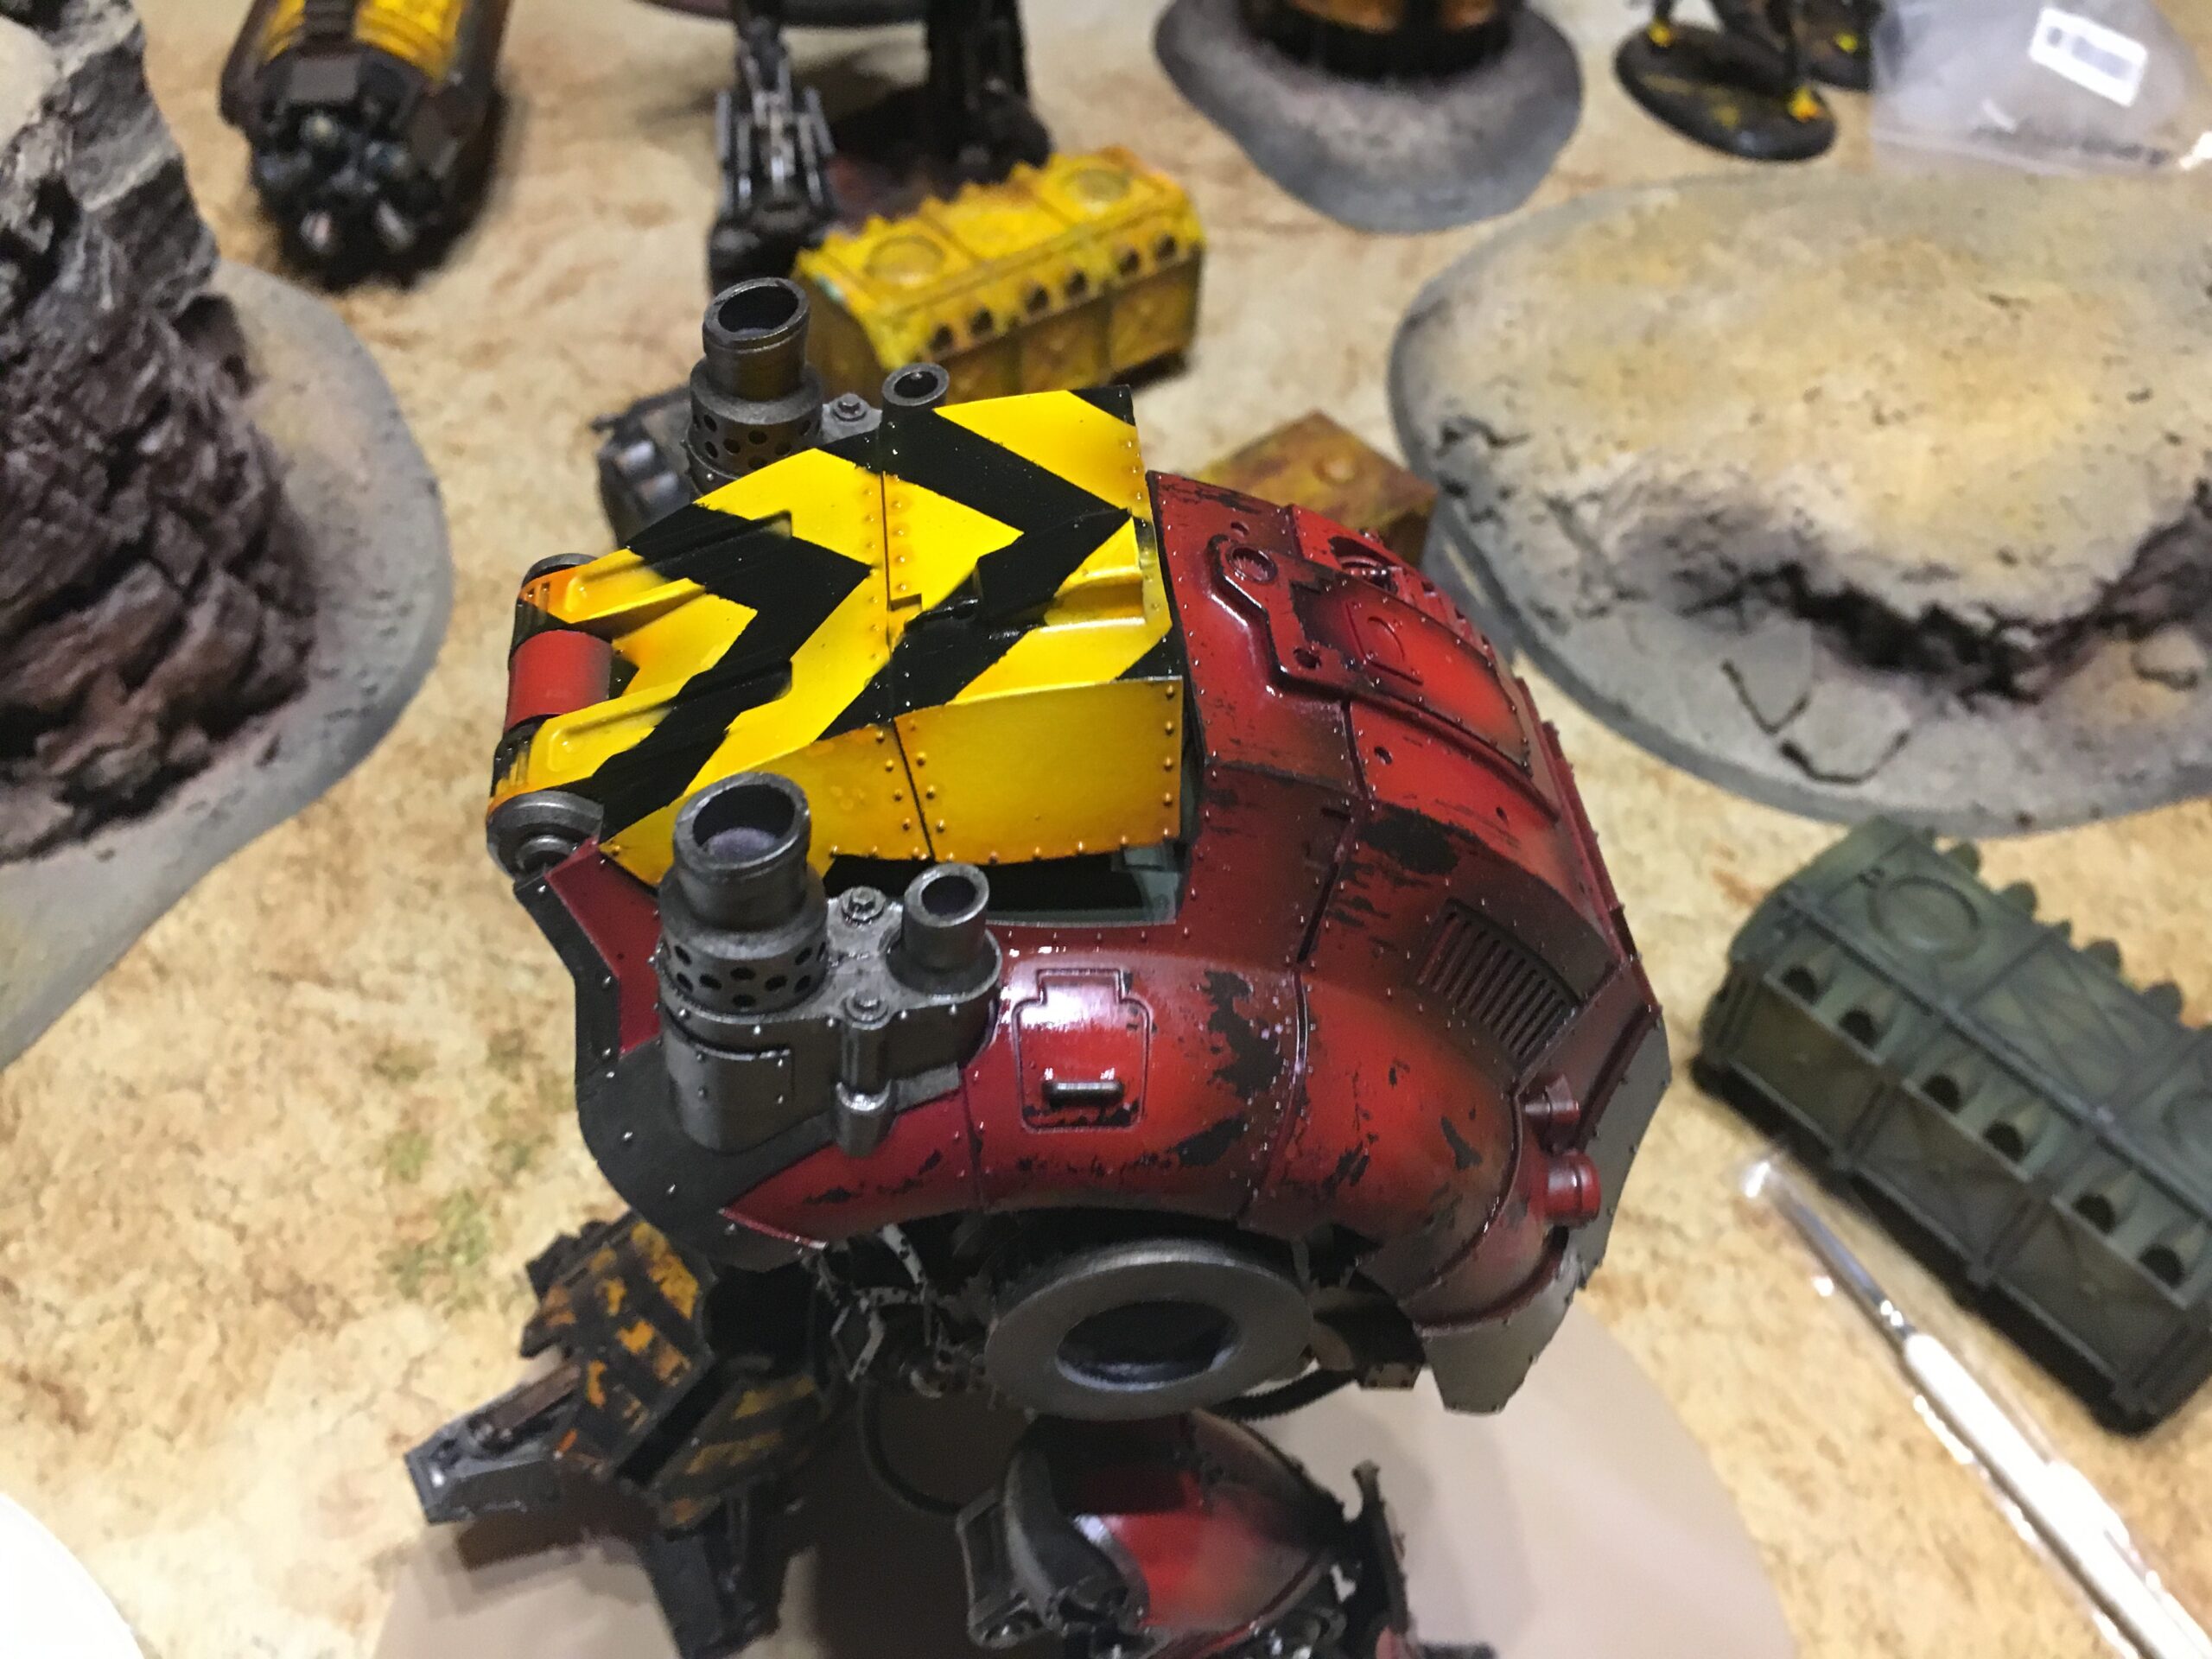
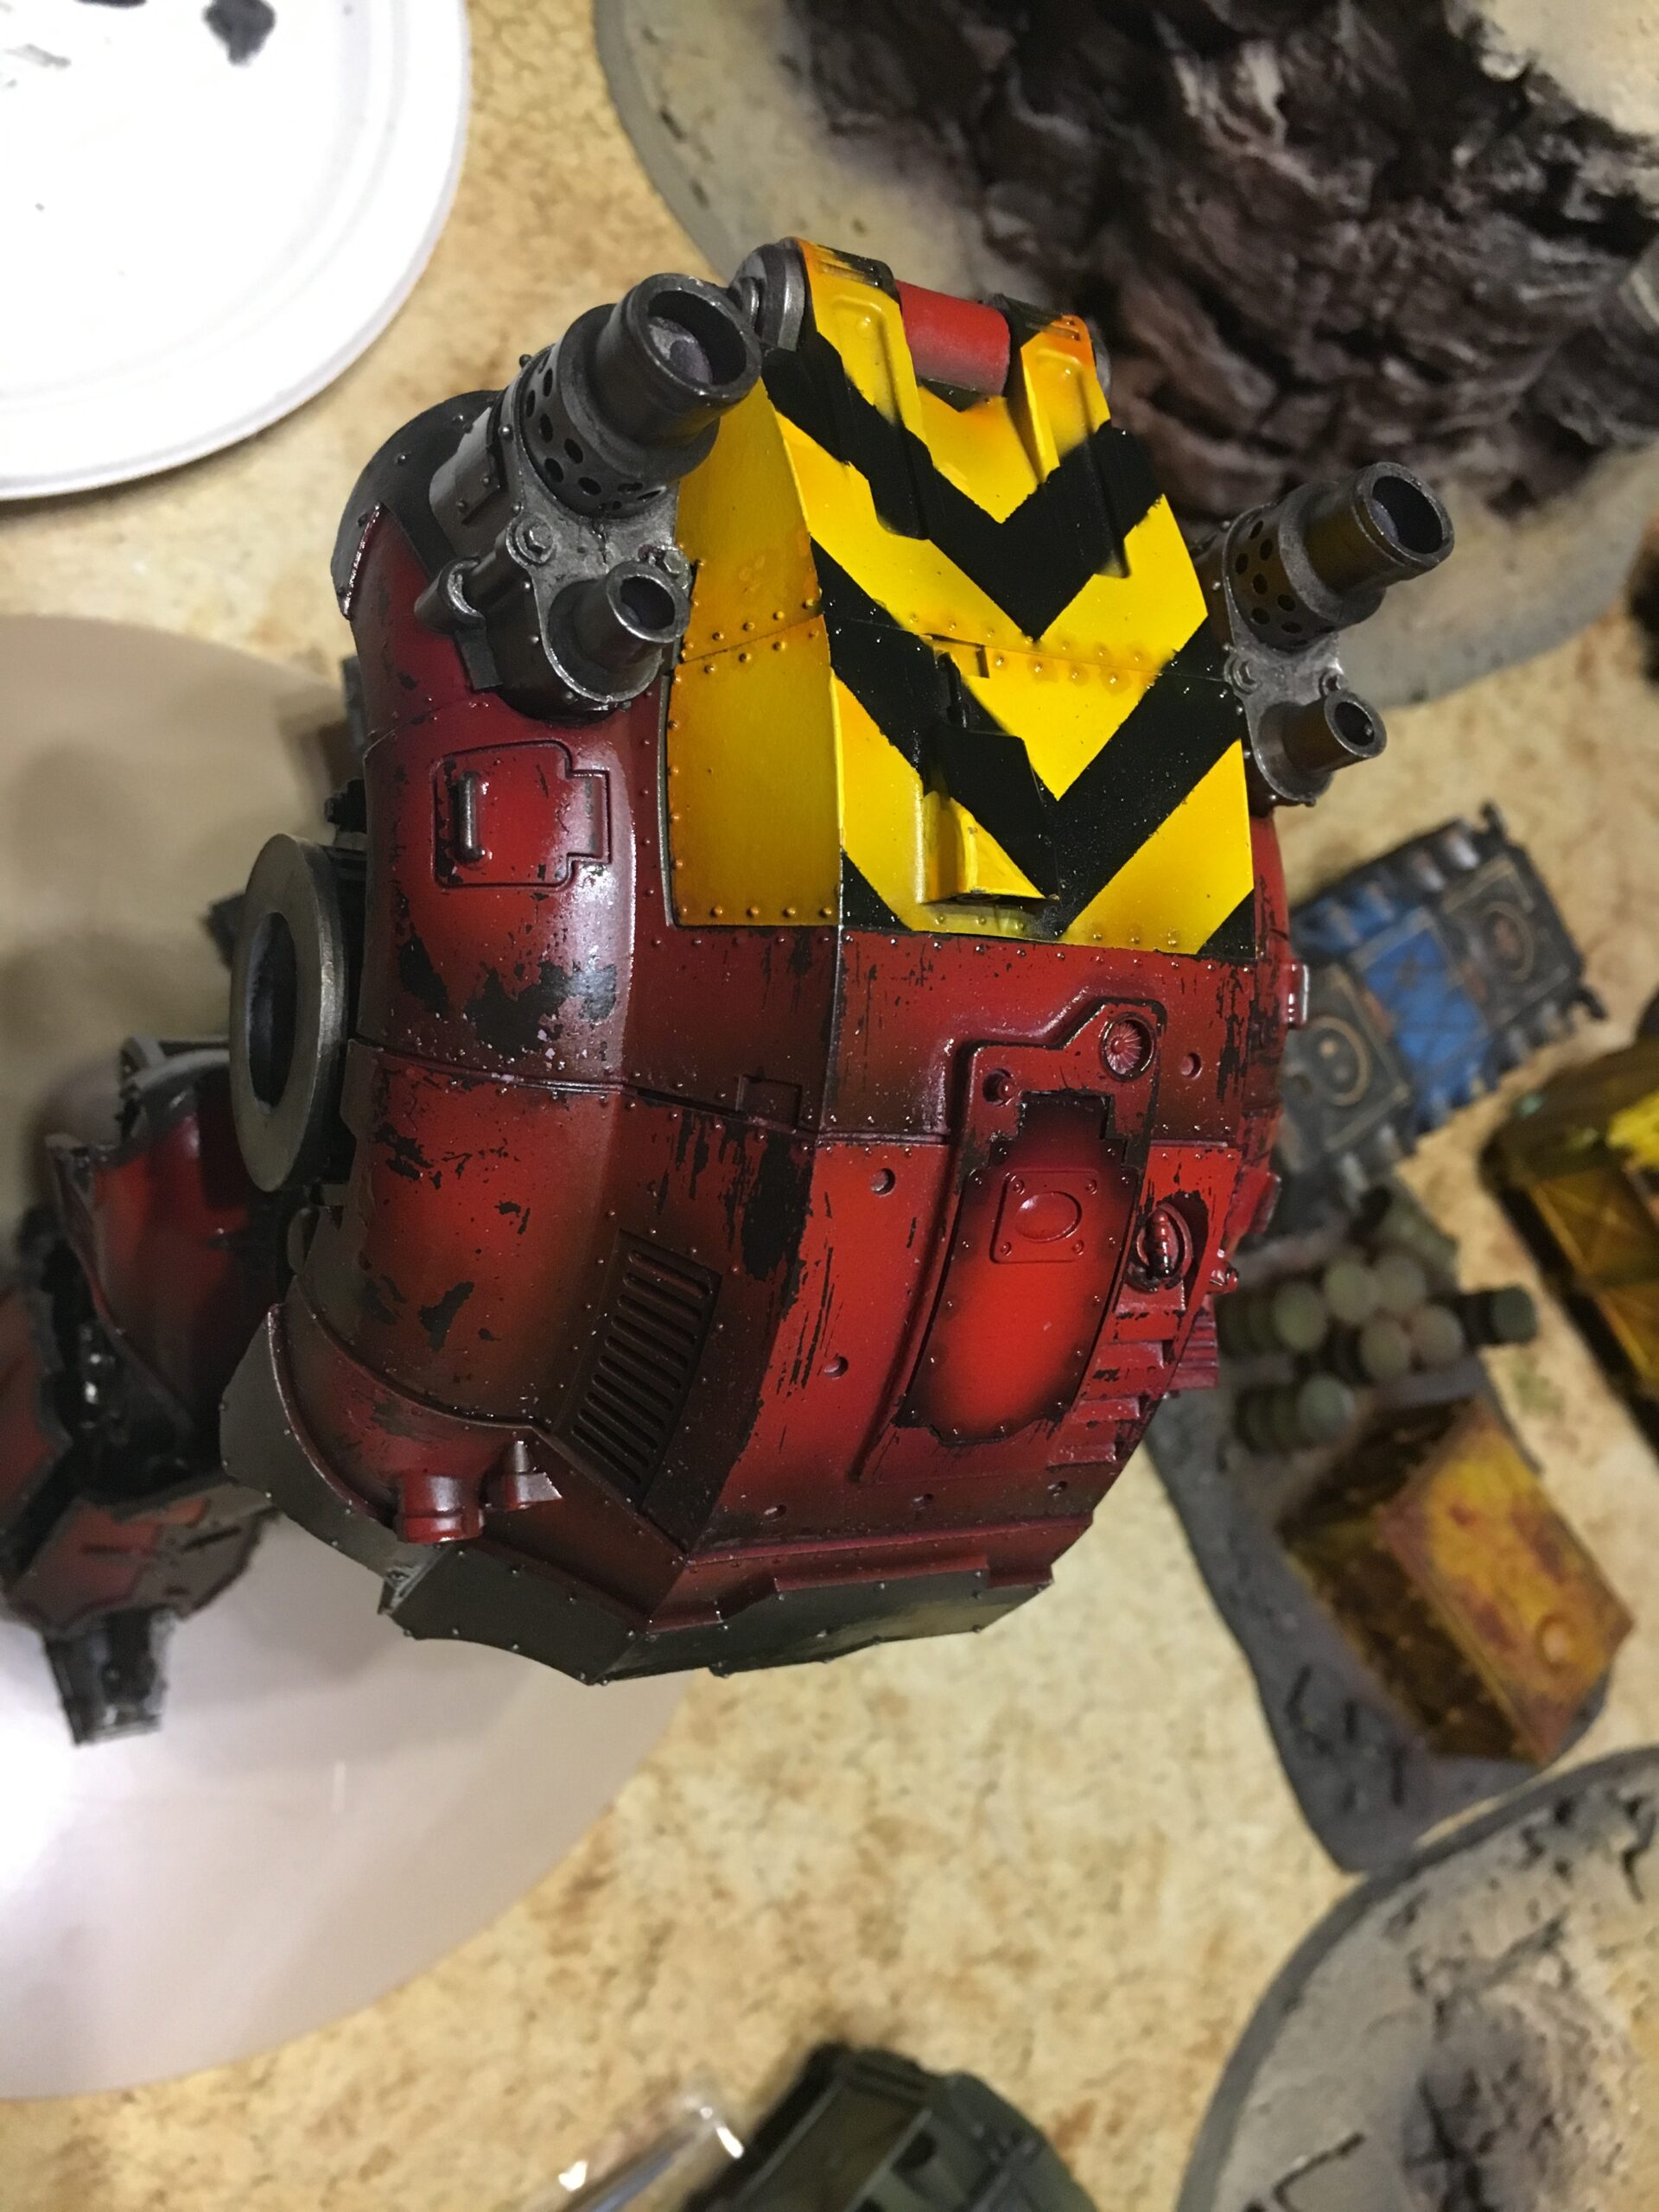
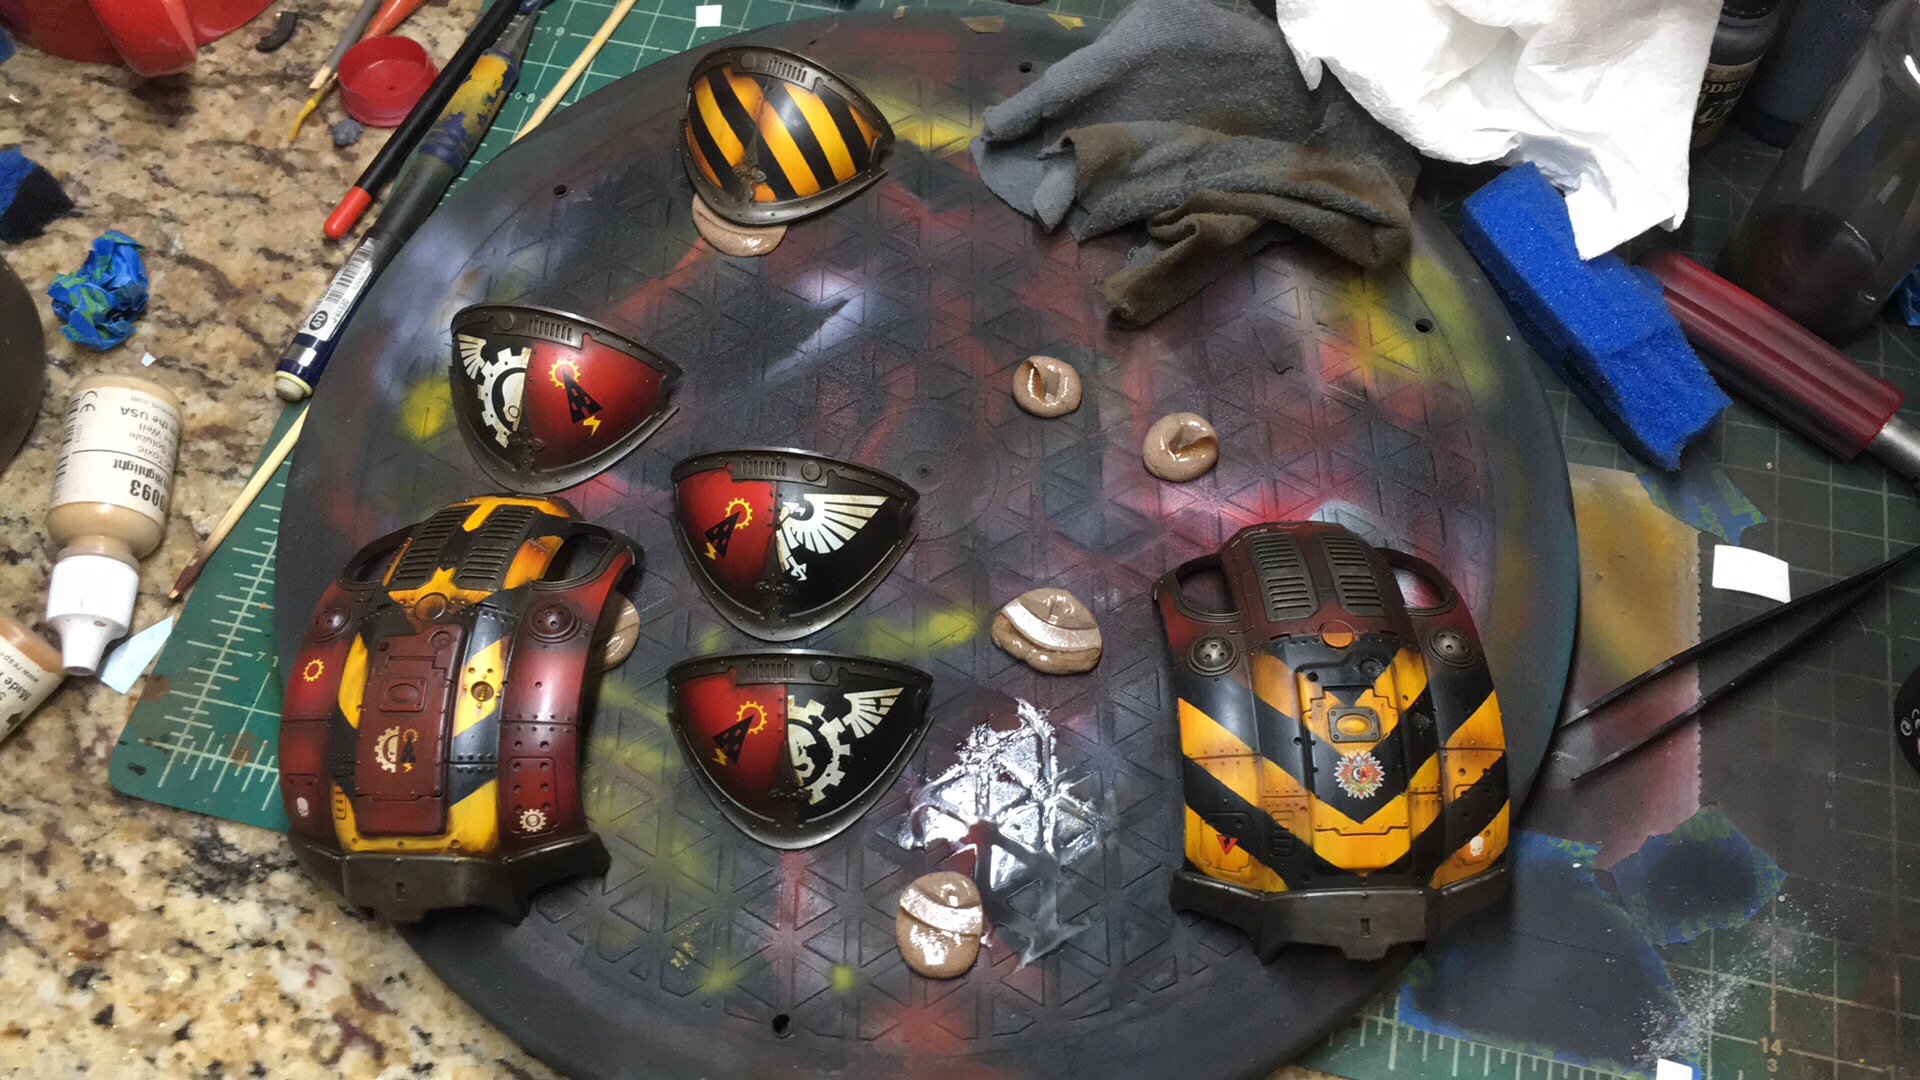
*On the tractor of the Ulator you can actually see where I made a mistake with the black over the yellow. That white touch-up is a spot where I’m prepping to add back yellow.
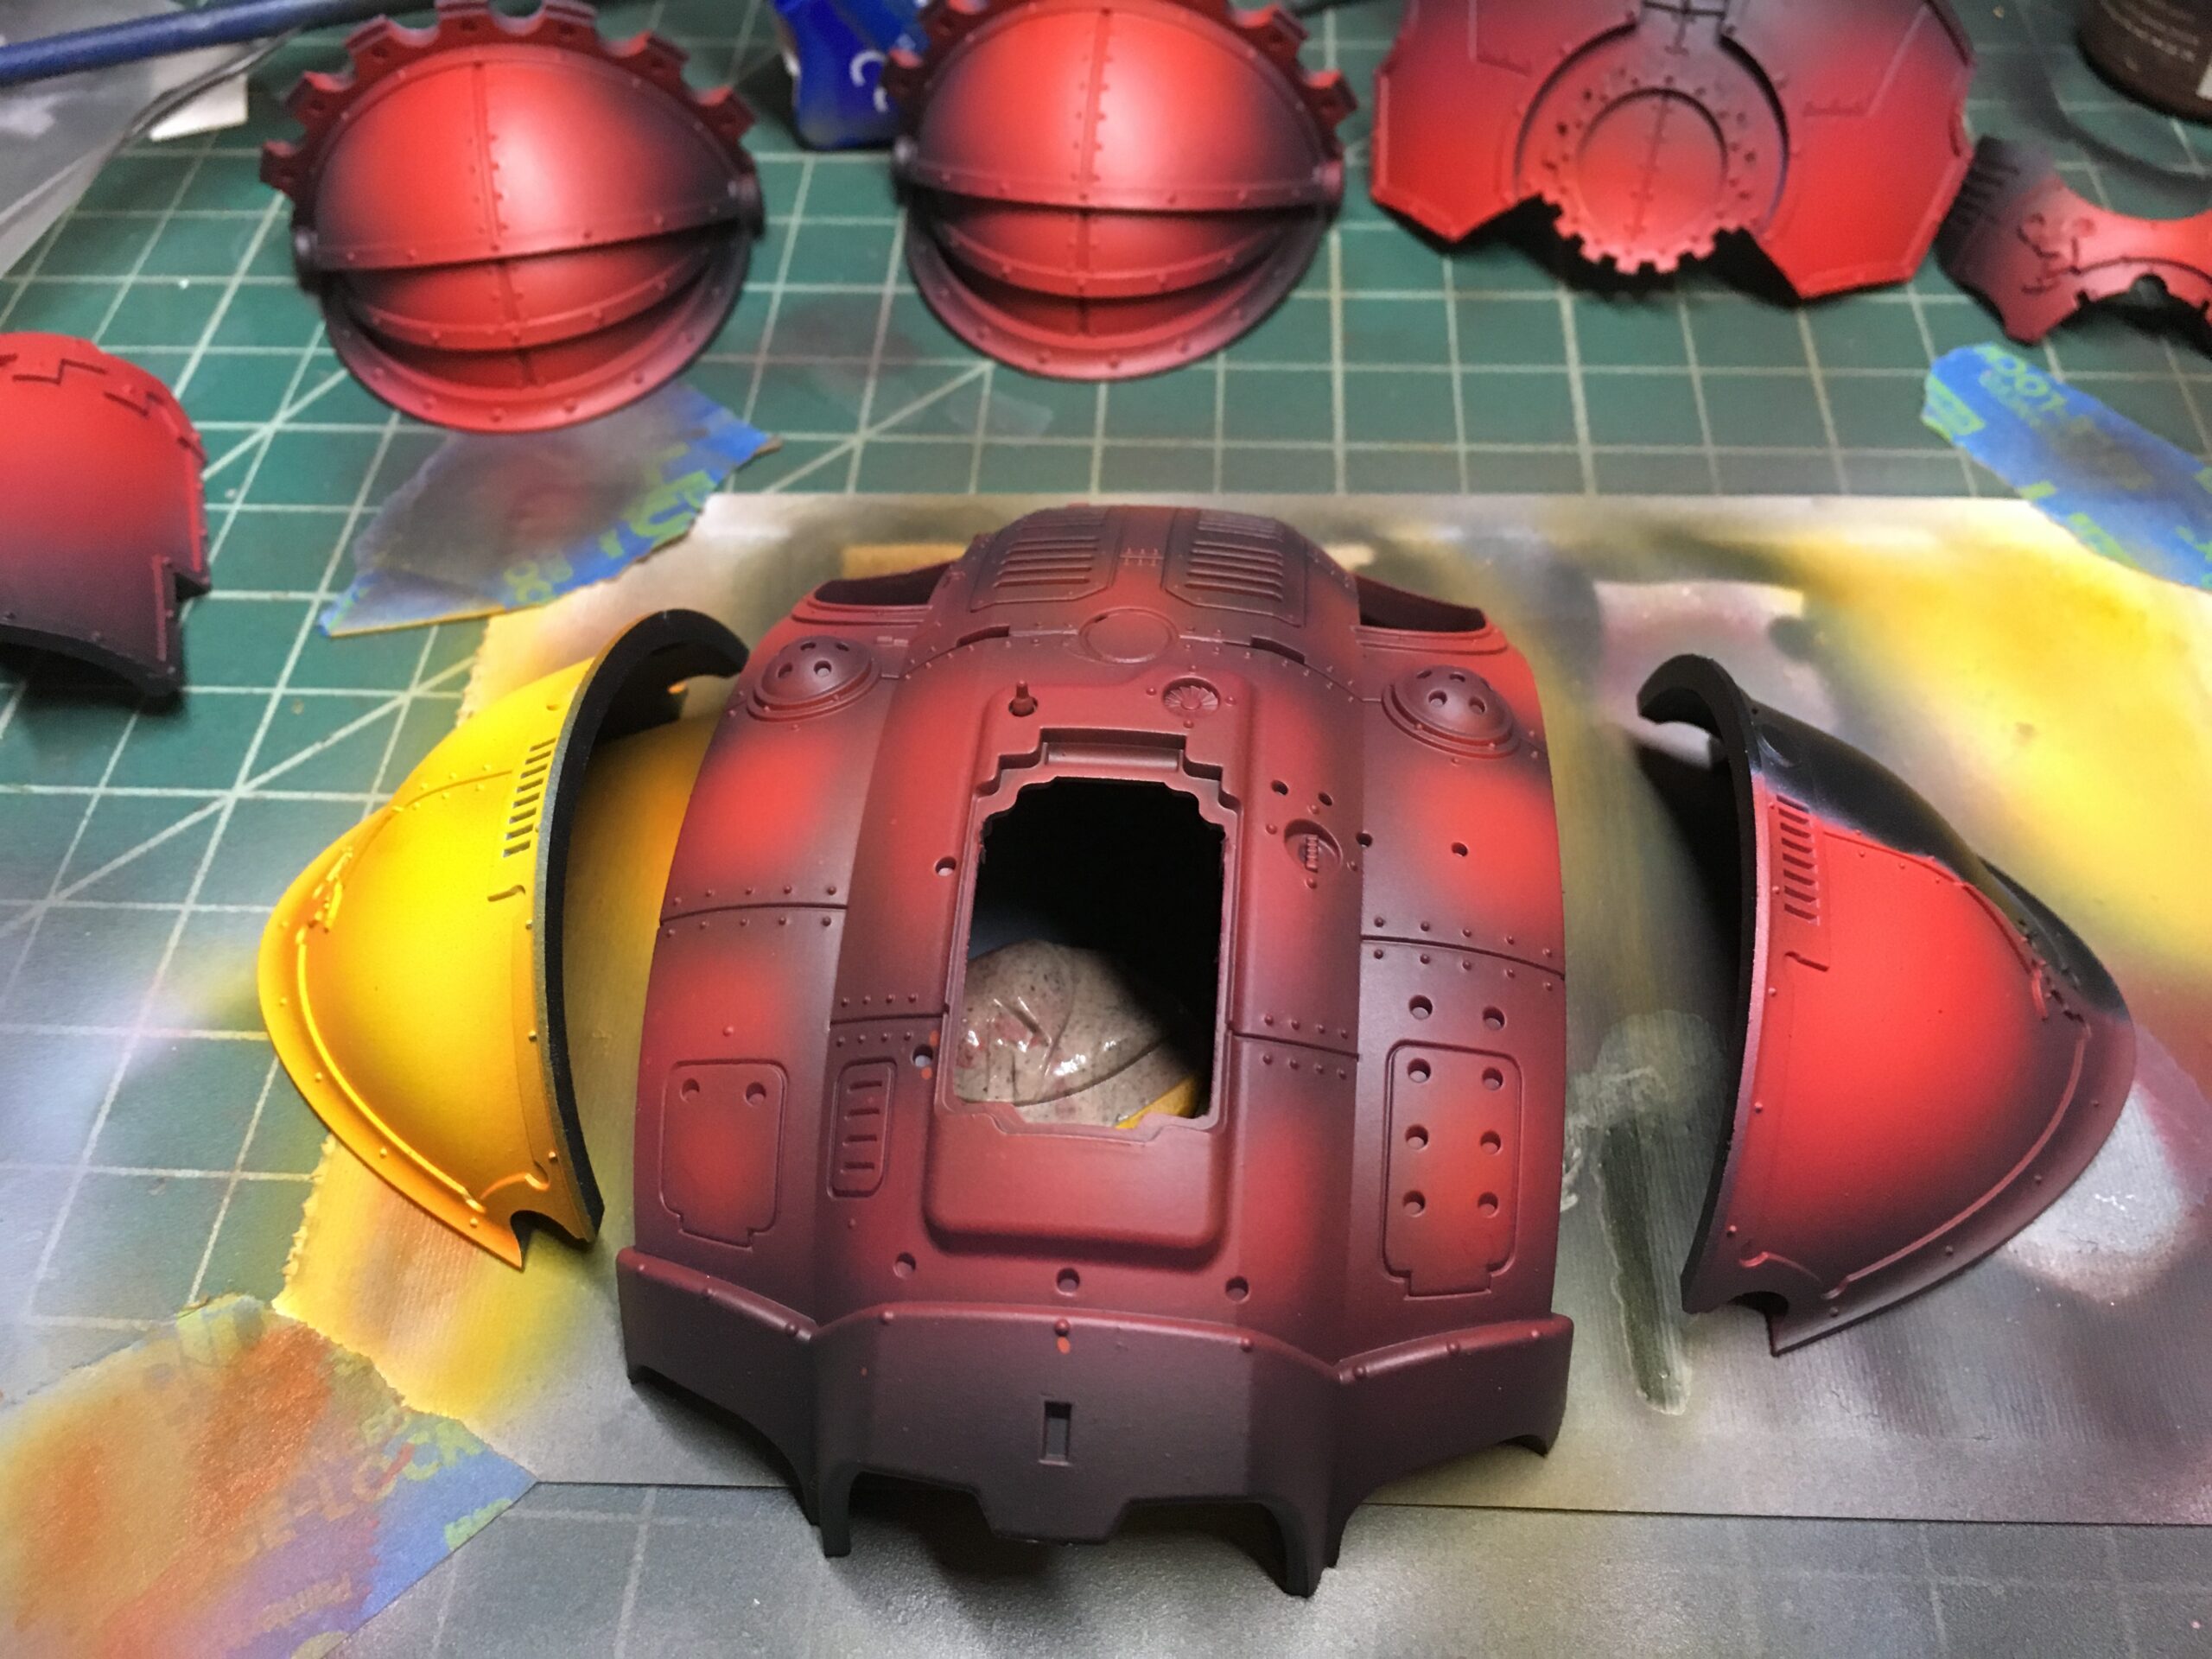
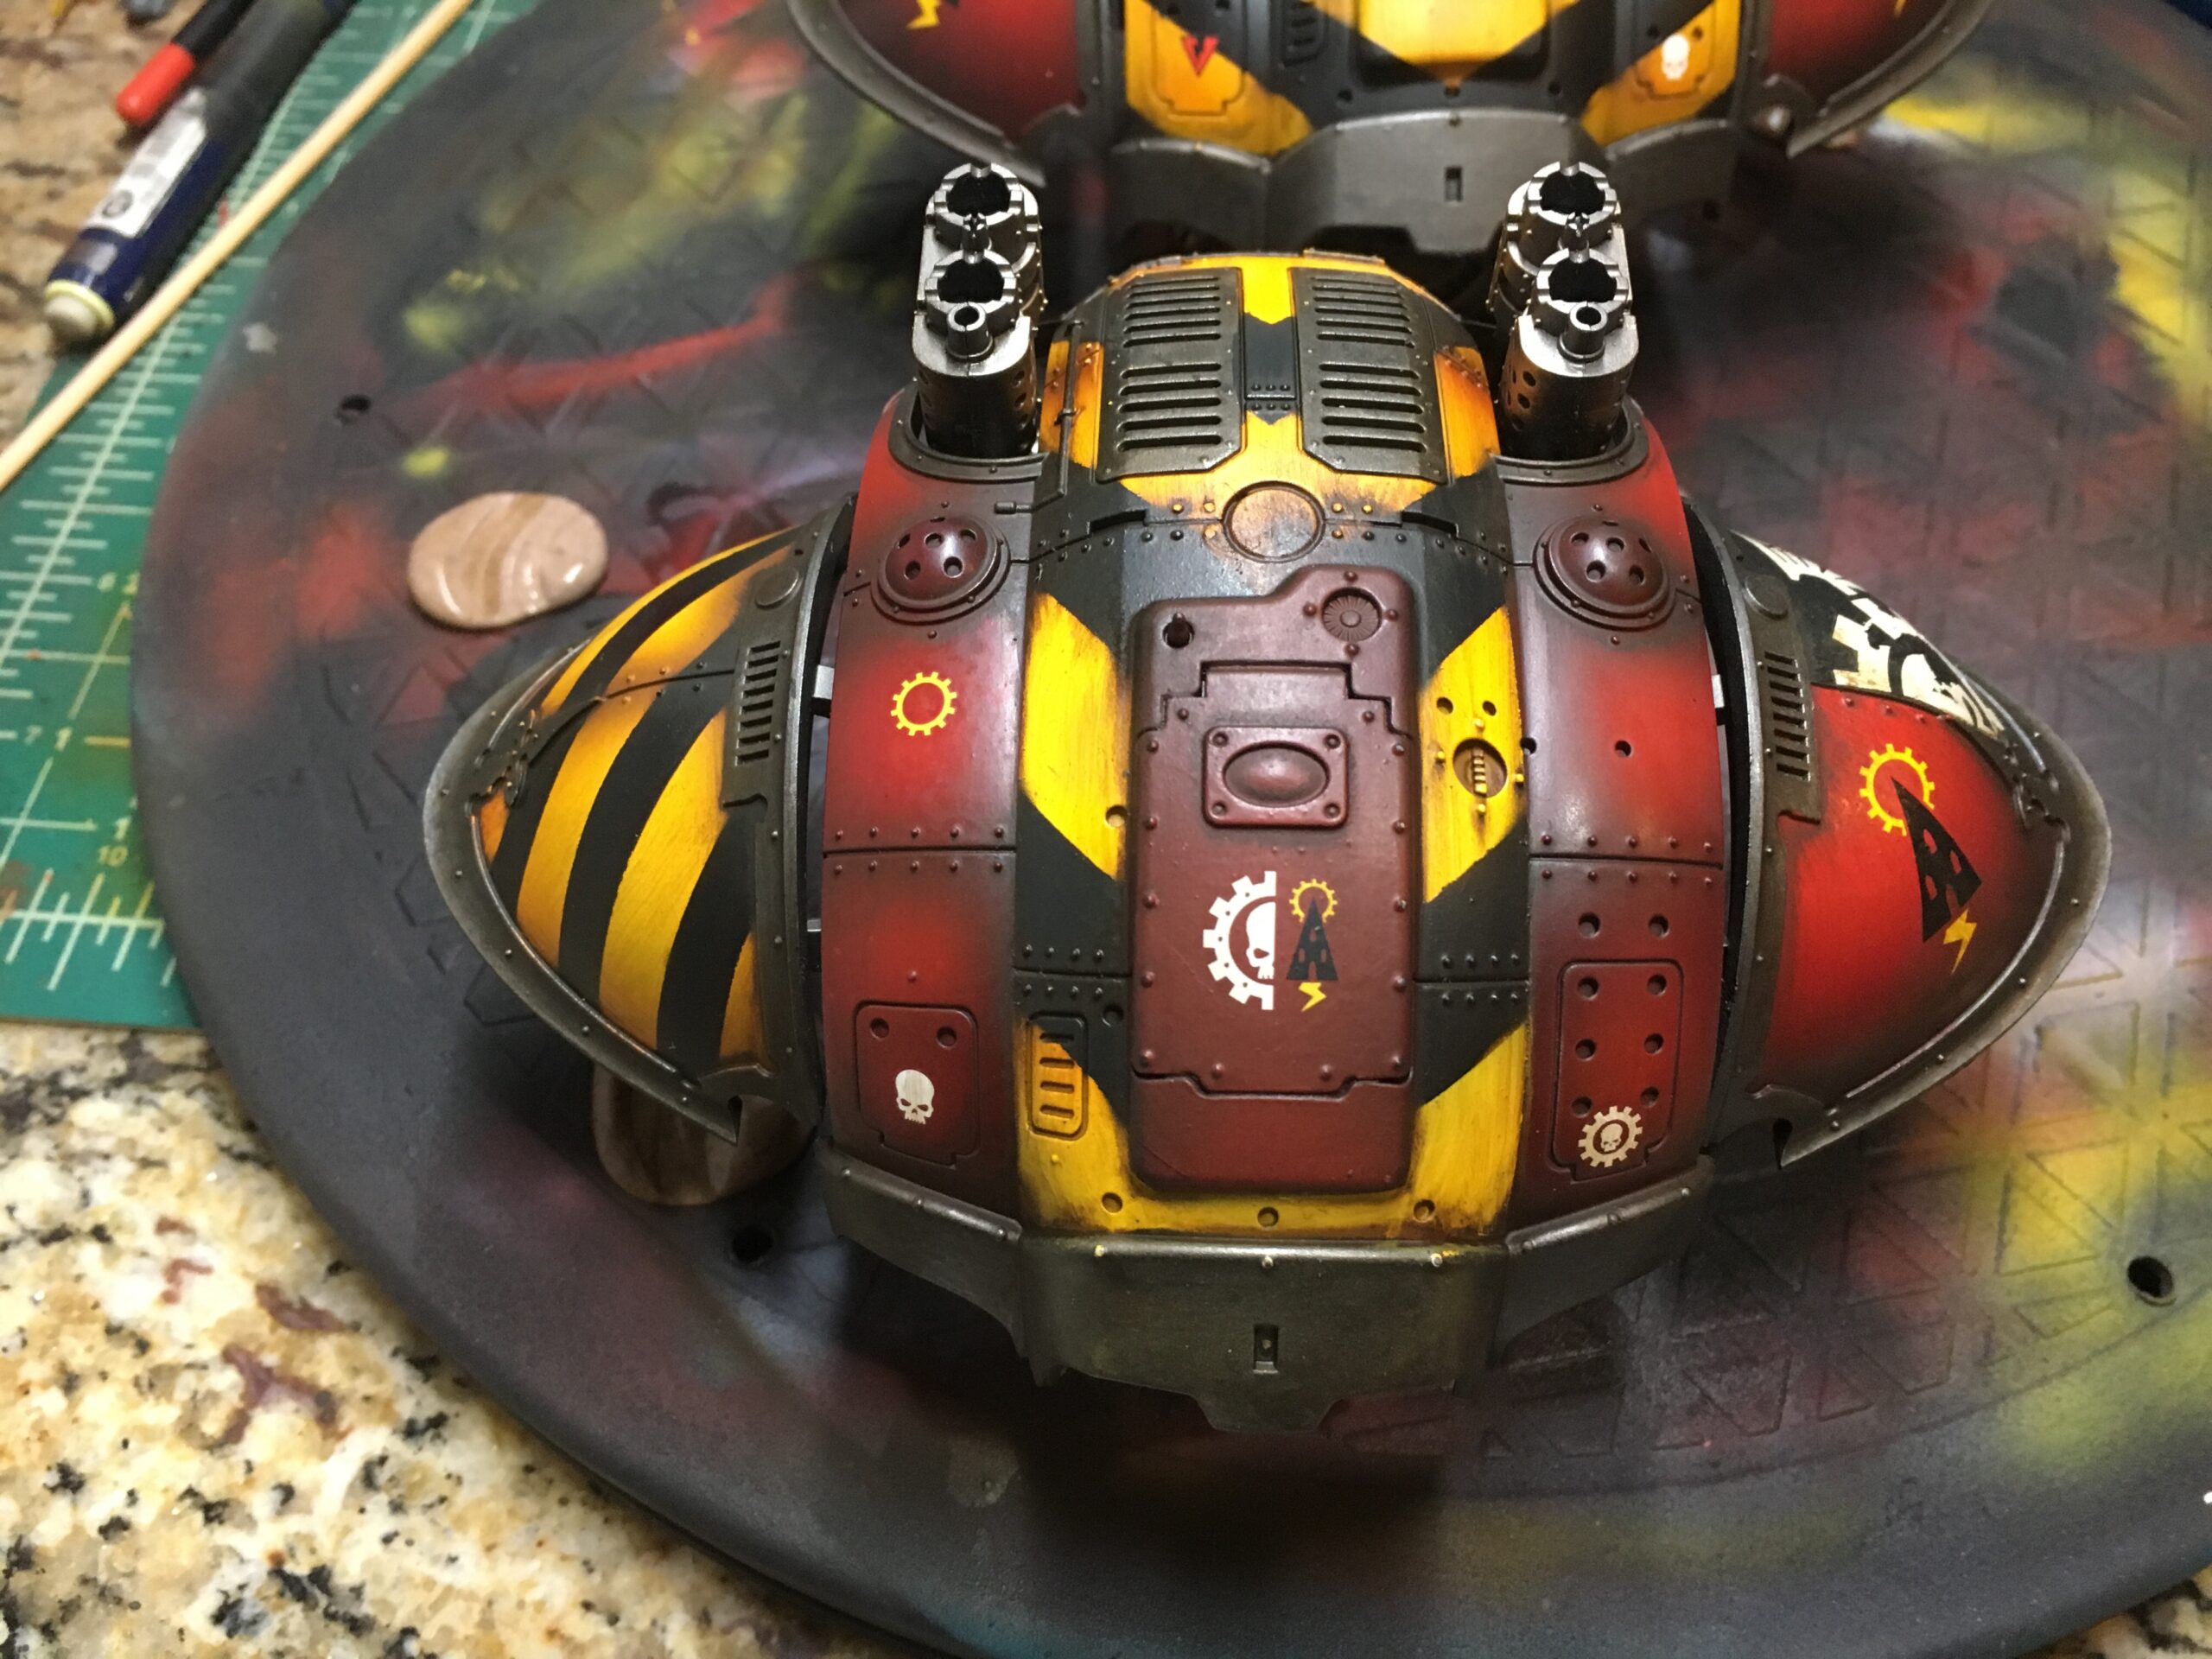
Hazard Stripes
*Tape off areas that you want to apply Hazard Stripe to. Cover the red areas you want to retain w/ masking tape (stick tape to your shirt a couple times to remove some of the adhesive quality so you’re not pulling paint off the models you’ve just painted).
- Apply white paint to the panels you want to add yellow to. Use two coats of Imperial fist yellow over the white base layer. Another option is to airbrush on Tamiya Lemon Yellow
- Finally, add a glaze of orange around the recesses of the yellow armor w/ an orange contrast paint, ink, or shade.
- Let dry thoroughly, and add strips of Tamiya masking tape or masking tape that you’ve cut to width in a hazard stripe pattern. Make sure that if you’re doing hazard stripes the pattern is roughly 45 degrees to the perpendicular plane of the model. The high point of the stripe should come from the center of the model in a chevron pattern.
Time for Decals
*Above you can see a cog decal that has had the skull painted over to leave behind just the cog emblem. Using paint to modify placed decals is a good way to either add weathering or create custom designs and iconography.
- With larger models, we want to add something to the large flat panels. In this case, I’m opting for transfers to give a sense of decorum and regal status. Other options include freehands, extensive weathering, or battle damage. While you don’t want the thing to look like a NASCAR, add things that make sense, cogs, gears, imperial symbols etc. Something to tell the story of your knight.
- Trim the transfer from the transfer sheet larger than the decal itself, soak it in water, and test pliability with a paintbrush. If you can move the transfer with little effort its ready to go.
- Apply a thin sheet of water on the model in the area you want to apply the transfer.
- Now grip the edge of the paper with tweezers and hold the wetted transfer close to the model. Slide the transfer off the paper and onto the wetted spot. The transfer will be floating on top of the sheet of water. You should be able to easily move the transfer across the surface of the model and into position. Once it’s in position w/ a Q-tip, roll the Q-tip over the transfer removing all the excess water and securing the transfer in place.
- OPTIONAL – Some areas, such as marine shoulder pads, are compound curves and can create creases and problems getting the transfer to lay flat. A product called MicroSol(vent) and MicroSet can be used to help alleviate these problems. Follow the directions on the side of the bottle.
- Once all of your transfers are in place and the model is complete dry go ahead and gloss the areas again with pledge floor polish. This will ensure that they cannot move and won’t silver or distress over time. They are now on your model forever!
Weathering
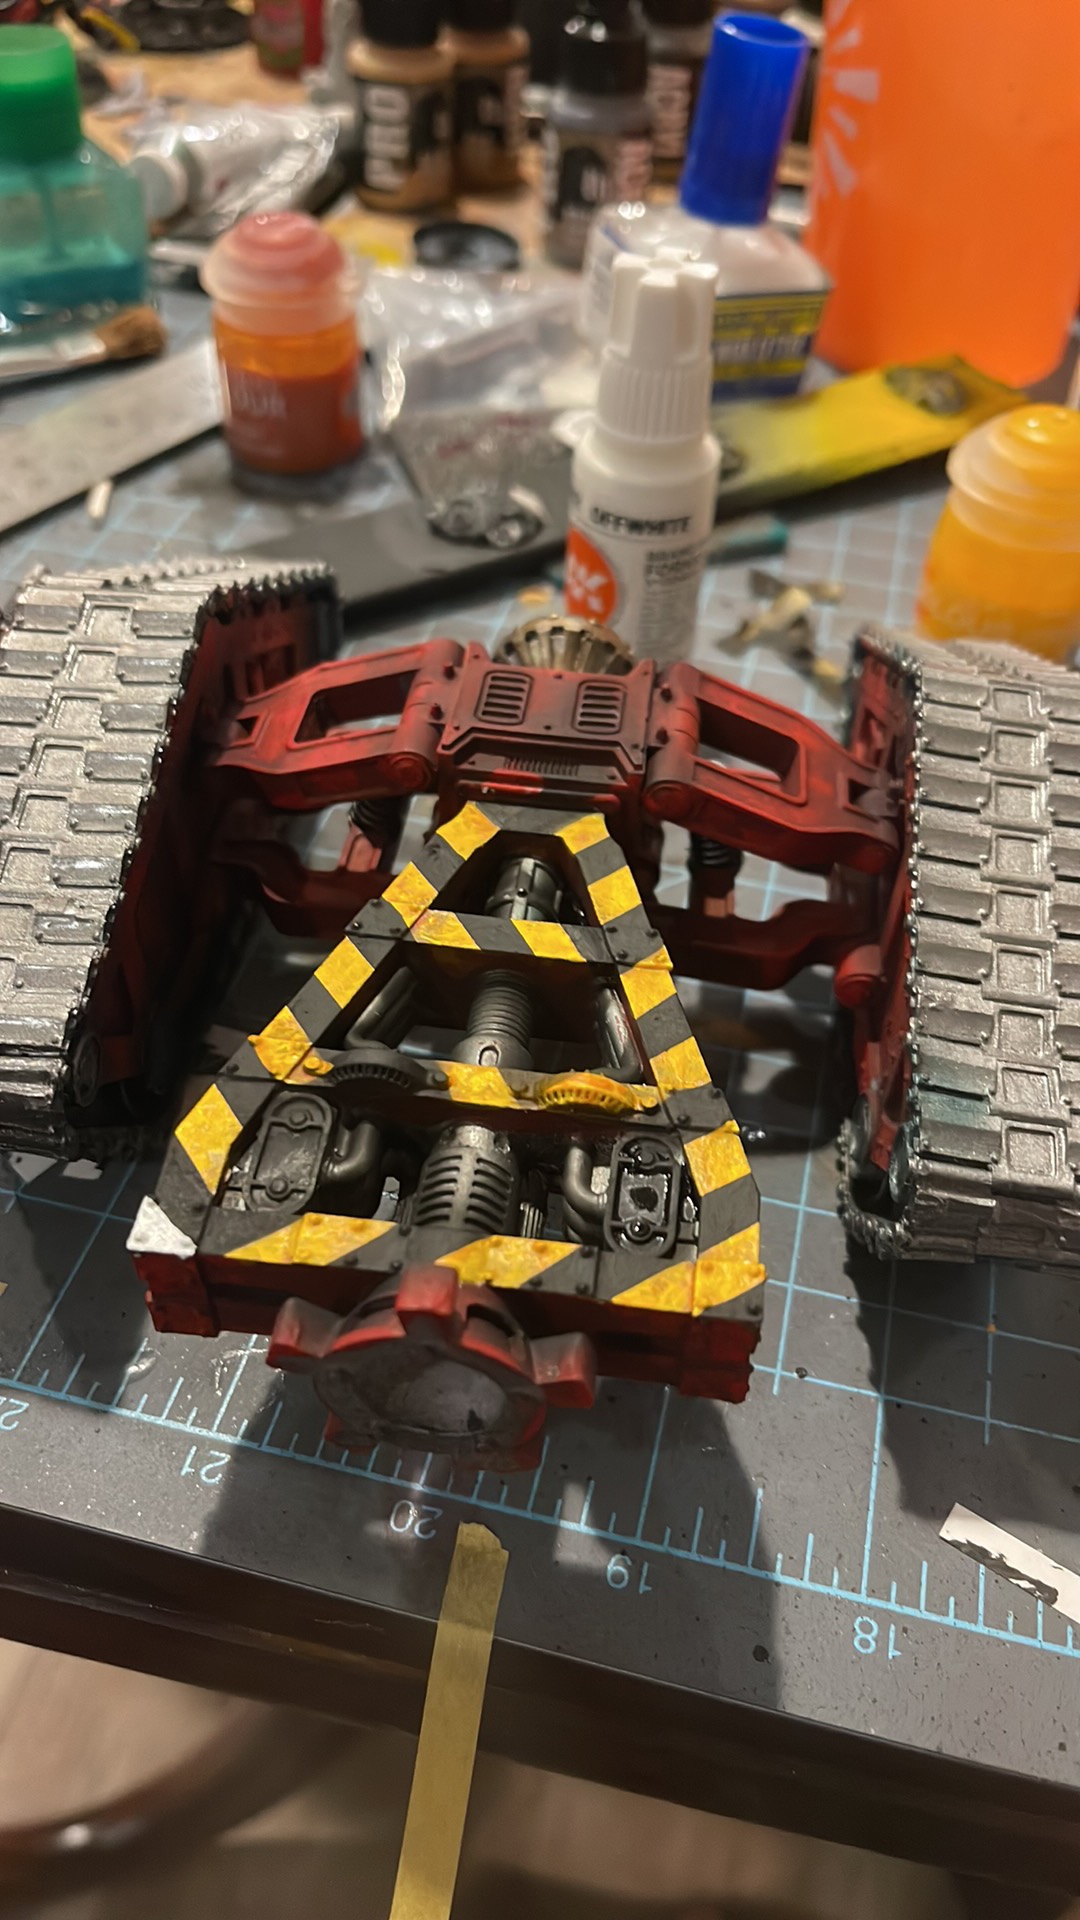
Chipping
- Using Typhus Corrosion apply to the edges and main armor plates via sponge. Make sure you’re not smearing or wiping the paint but simply dabbing along the armor. Your sponge should be nearly dry, as we’re opting for small scratches and flakes.
- This really shows up well against the yellow, so make sure you apply it to those hazard stripe areas and on the feet.
Sludge Wash/Oil Wash
- Mix a sludge wash, dab of Burnt Umber oil paint in a small dish w/ white spirits, to a wash consistency. You don’t want this overly thick for this model. You want it about the consistency of the usual GW washes.
- Apply liberally across the entire model, metal, armor plates, weapons, feet wherever you think the Omnissiah isn’t going to notice. Let it sit 20mins. Make a sandwich…eat sandwitch, contemplate existence. Contemplate your future as Warhammer Best-painted at your next event. Hobby to victory, victory through paint scores!
- Now w/ a rag dampened w/ white spirit begin wiping down the main armor plates to remove much of the oil wash, you’ll notice that the wash is clinging to the recesses and crevices. On harder-to-reach places such as the chassis use a Q-tip w/ oil wash applied. Remove as much or as little as you desire.
- Inspect the model top to bottom and ensure there are no areas where oil or enamel has pooled, make corrections
- Let everything dry.
Pigments – Vallejo Dark Rust and Orange Rust
- I use 2 pigments on this model to simulate the texture and color of rust. A dark reddish brown pigment as a base w/ an orange oxidized rust as a highlight. Apply with a small brush to areas where you’d normally find rust. Things like the feet, legs, behind armor plates and on the chain sword and chain are excellent places to put rust patches. I also apply liberally to my base.
- Let everything dry for 24hrs at least.
- Matte varnish
- Done!
That’s a Wrap!
Well that’s a wrap on my brief hobby series about painting up my Mechanicum force. Once you have this all down, your things paint up pretty quickly. I’d say that it’s a difficulty of 5/10, and that score is only that high because of some products that people might not be familiar with. This is easily used on anything from Blood Angels and Mechanicum to 40k World Eaters and Demons. If you’re an Iron Hands player, I’m confident that the Hazard Stripes recipe will come in handy.
With winter here what are you working on over the holiday season? What armies and miniatures are you prepping for event season starting in Spring?