Hordes Conversion: Custom War Hog

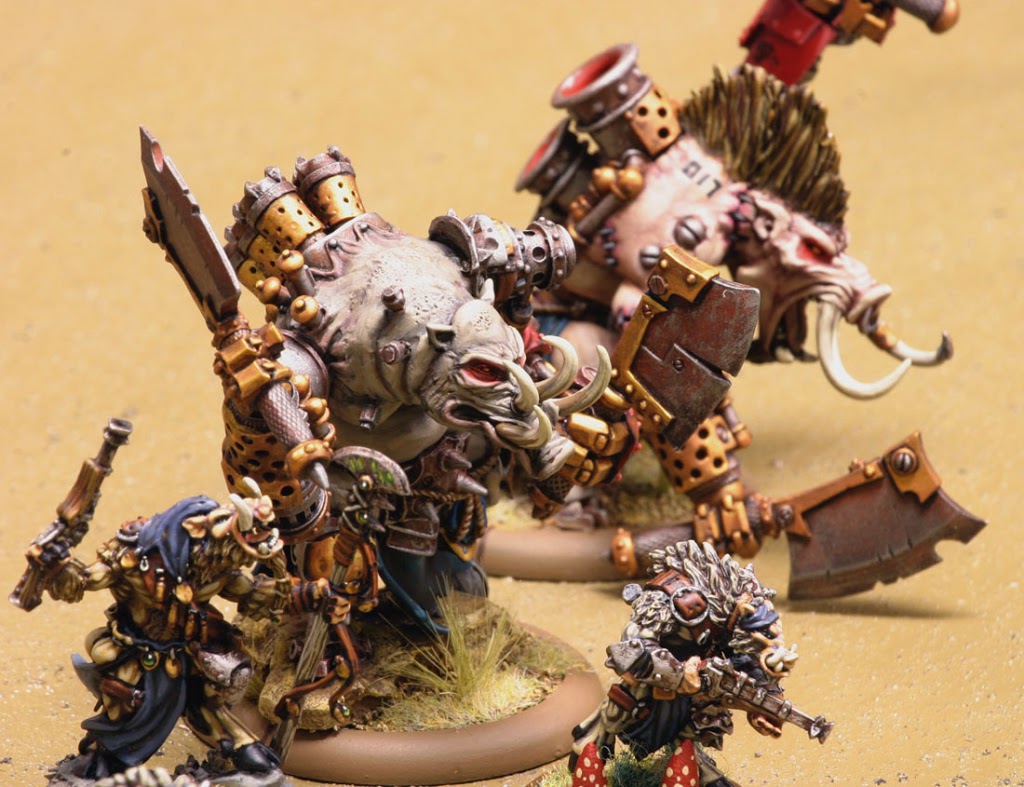
So a couple of pictures of my custom War Hog have already appeared on BoLS and I know more than a few of you have been curious about how I made the thing. Well those of you who guessed that Green Stuff played a large role were dead on.
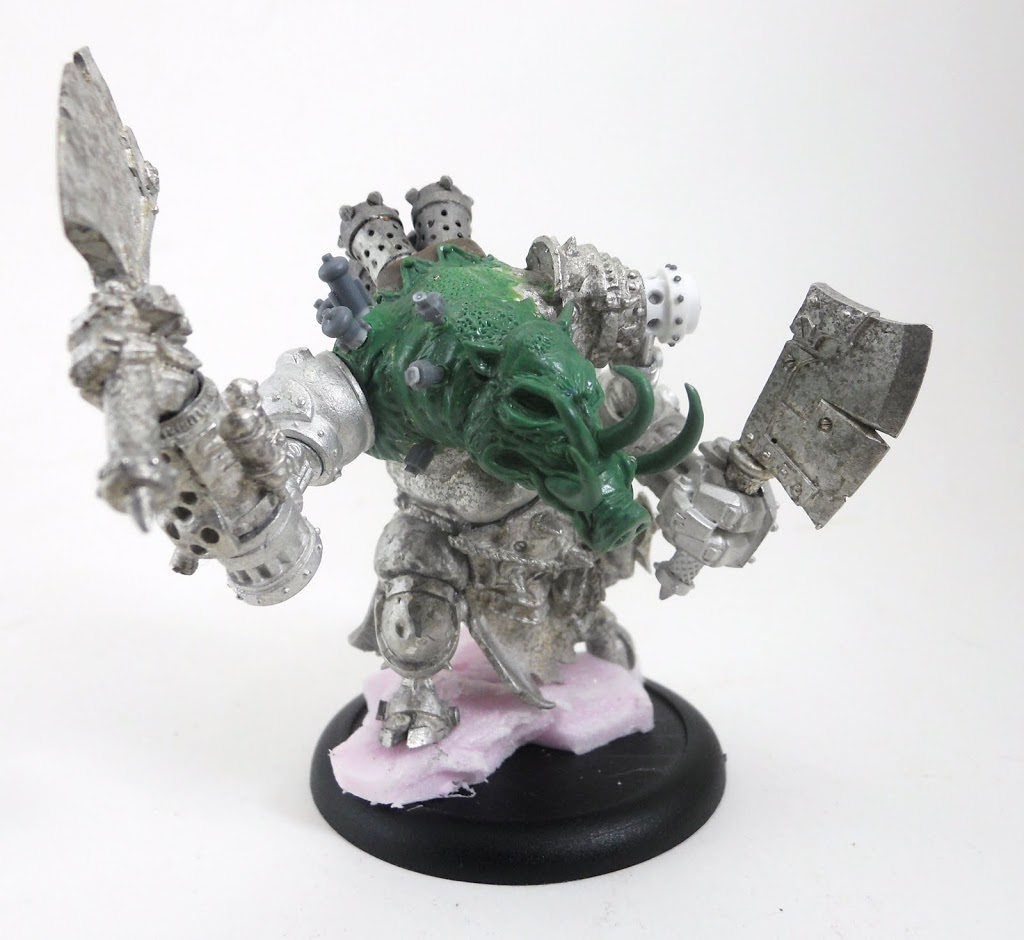
The War Hog represents a still more ambitious sculpting project than the previous ventures of my Warjack conversions. The skull for Goat Jack was a fairly complicated piece but a fully organic head, with the requisite need for a readable facial expression was an entirely new test of my skill.
But before I could even begin I needed to find a way to make a really unique piece. Our world is full of suidae, the scientific term for the hog family, so I had plenty of choices to pick from. The stock War Hog is most similar to the familiar Razorback, while Brine is something of a mix between that and the African Warthog. For my second War Hog I chose a peculiar looking genus from southeast Asia, the Babirusa. These strange creatures sport impressive dual pairs of tusks, one of which curves upward through the skull to emerge through the snout. It hasn’t escaped my notice that in my custom War Hog I may very well posess the only anthropomorphised Babirusa on earth, and almost certainly the only one with mechanikal augmentation.
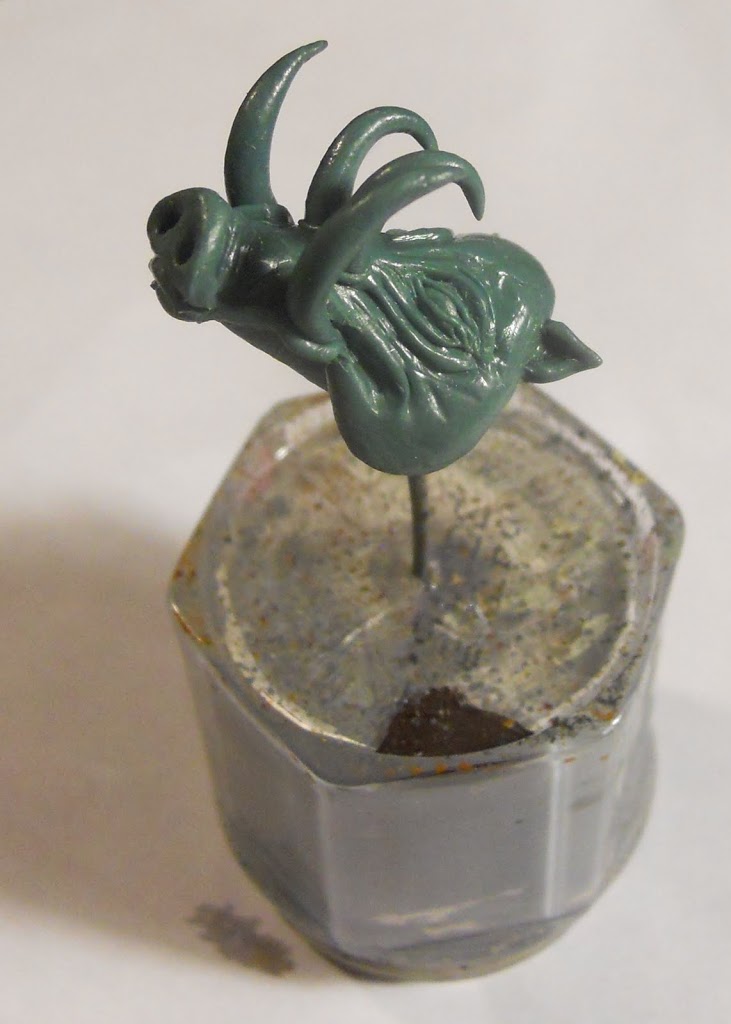
I began with the head, and started with a very simple piece that would be the base for all the detail to follow.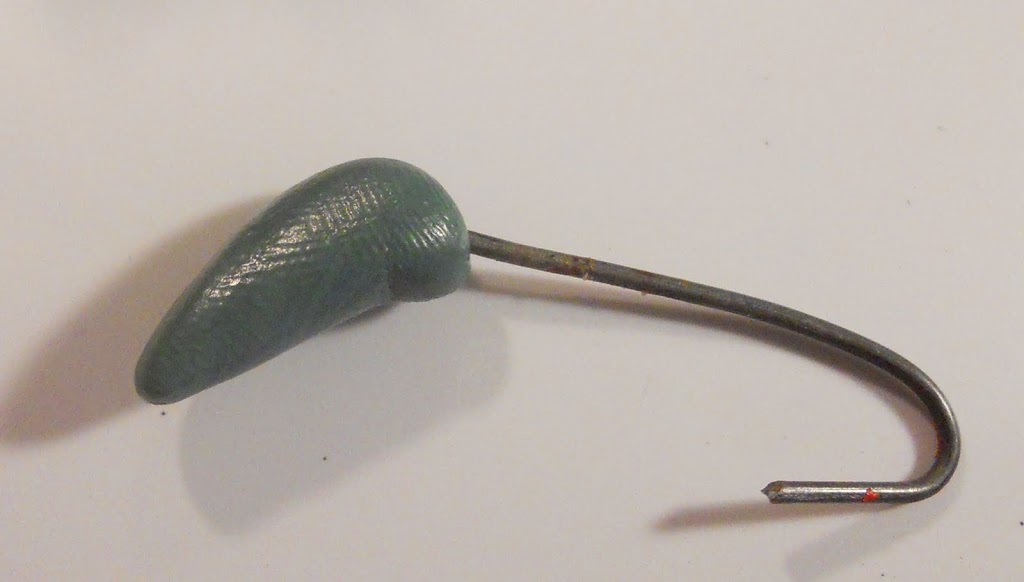
I sculpted the tusks separately to be applied later. Whenever you sculpt extras apart from a main piece, make sure to pay keen attention to scale. Its very easy to make a piece much bigger or smaller than it needs to be.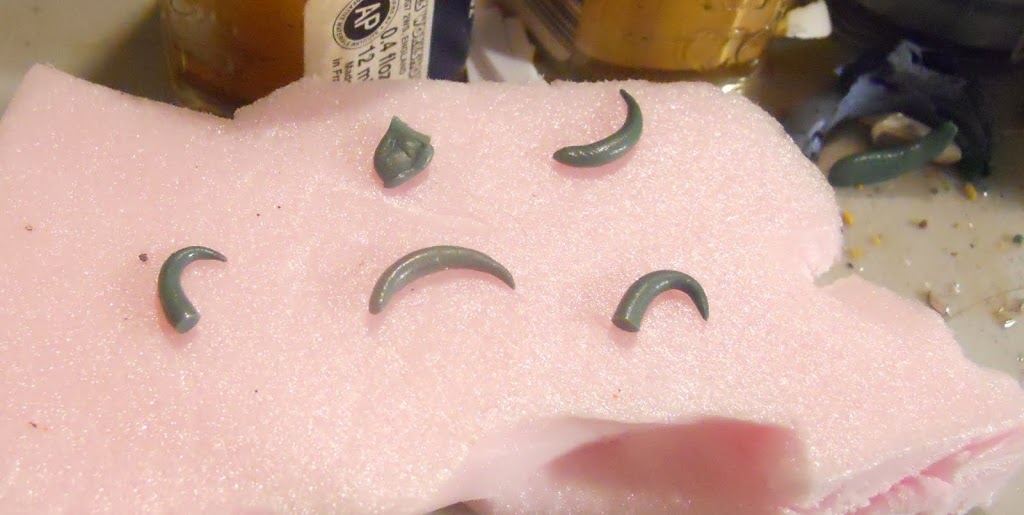
Details were added on in 3 separate steps. The second head pictured was originally “done” but in the end I wasn’t satisfied. After the head had been attached to the body for a while I went back in and added a little more body to his cheeks, and centered the eyes a bit to make them more forward facing. This is a bit of a divergence from the real world animal I’m basing it on, but I think it makes the piece more successful as a whole, so I’m ok with that.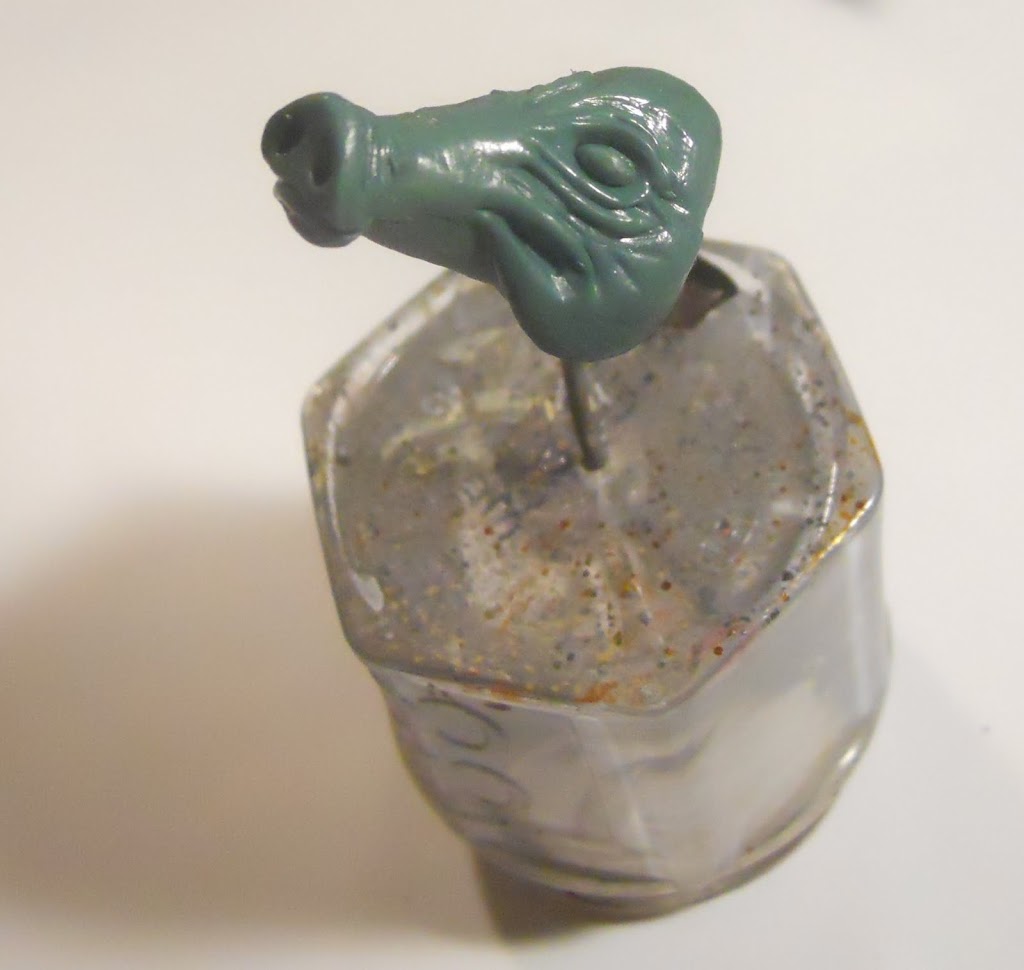
A lot of sawing, filing, and Green Stuff was required to attach the head to the body. I gave him some nice folds of fat under his neck to add some character. Just like the face I would end up becoming unsatisfied with how the head attached to the body. I ended up removing it, trimming a bit off the neck, and reposing the head with a bit more green stuff to face a bit more to the side, making it more dynamic. Meanwhile, I wanted to change up the appearance of his pose without having to modify too much of his body. To this end I sculpted a rock for him to stand on out of pink foam, and pinned his feet to the base in such a way as to have him leaning back a bit more than the very hunched standard Hog. I was pretty pleased how this comparably simple step really went such a long way to changing the overall appearance of the warbeast.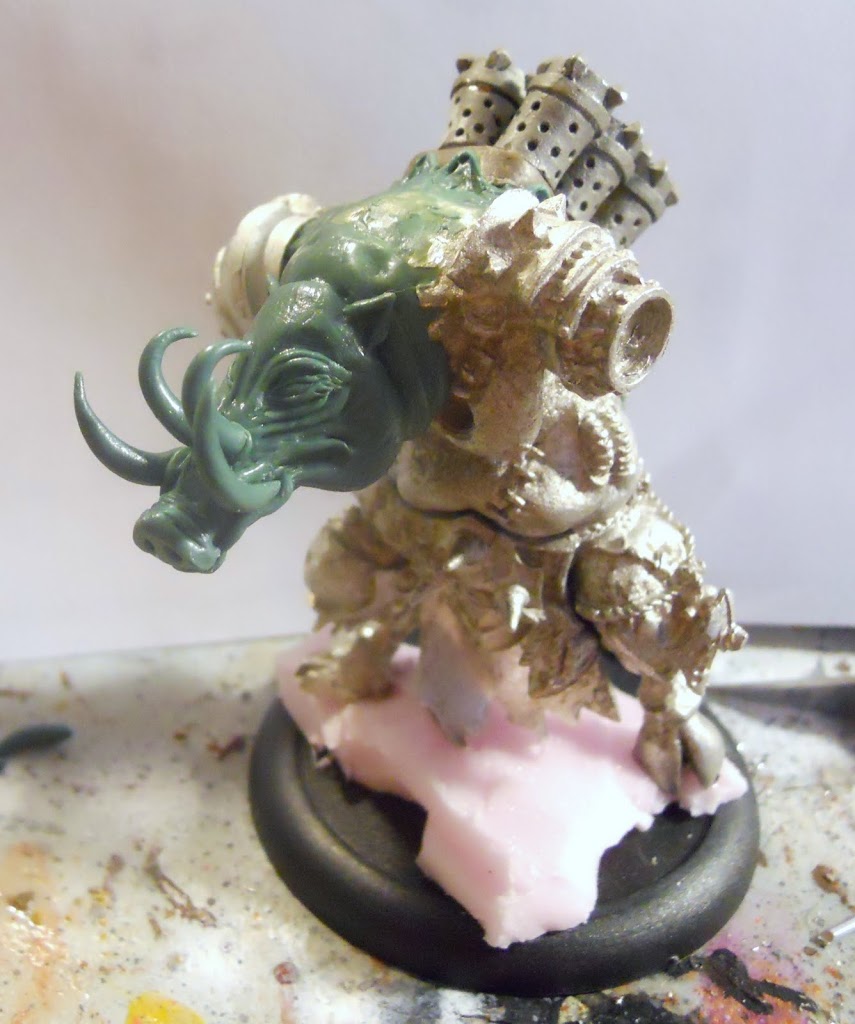
I replaced the Juggernaut arm with one from a berserker I haven’t gotten around to painting yet. While the arm makes for a good swap, I had to come up with a good way to attach it. Once again some of the plasticard tube I had around came in perfectly. I drilled holes in the top of the berserker arm to attach them to the new socket. I drilled some holes in the inner tubes, and used some model train rivets to make the piece more interesting overall. the tubes were stuffed full of green stuff, and pinned to the body in two places to support the arm’s weight.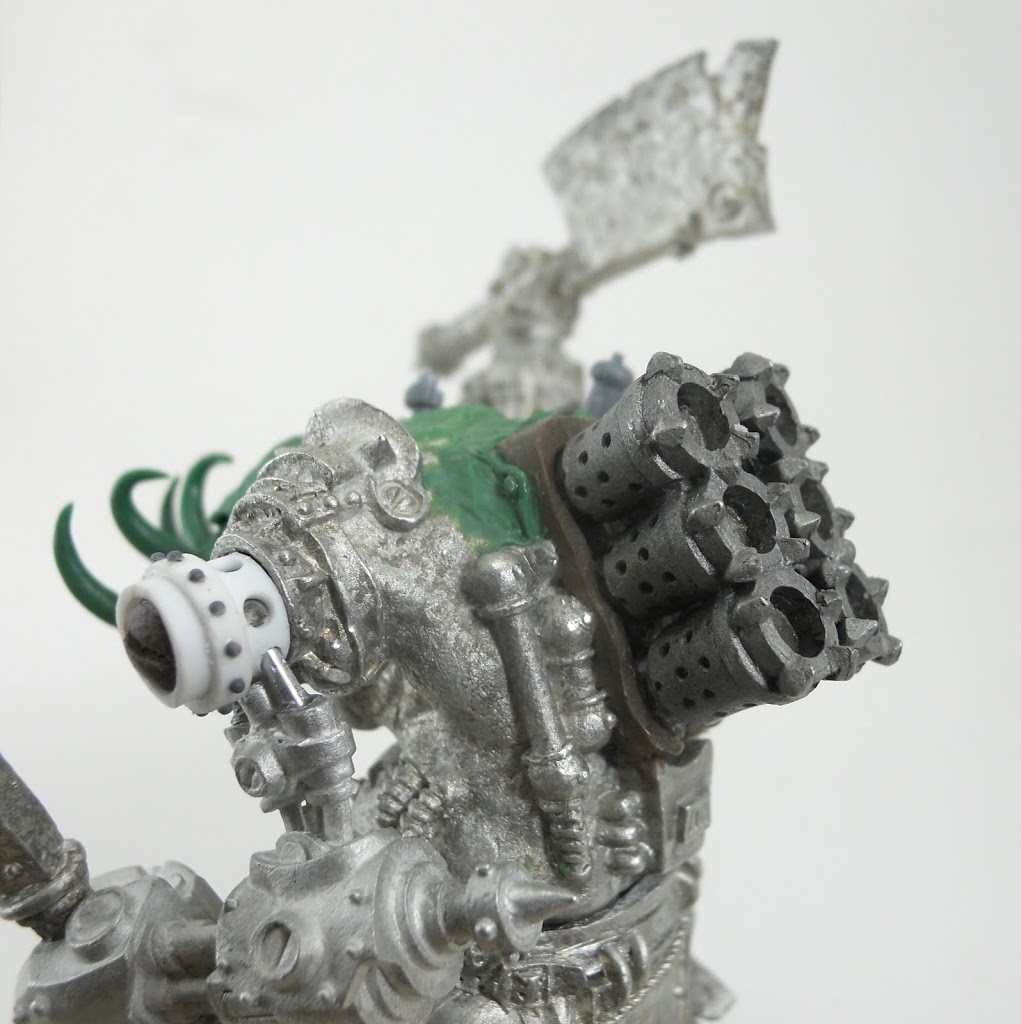
For his left arm I chose to make it easy on myself, and used the top section from a Driller arm since its shoulder would easily fit flush with the War Hog’s body after I’d sawed off the original arm. I really wanted to get this guy on the table and didn’t feel like it was time to test out my musculature sculpting skills trying to give him a new flesh and blood arm. The forearm is the same one from the stock hog, and after a little sawing and filing it fit rather snugly to its new arm. To add a bit of a gruesome twist, I tried to sculpt the connection to make it appear that the creature’s skin has been painfully shoved up under the mechanikal piece.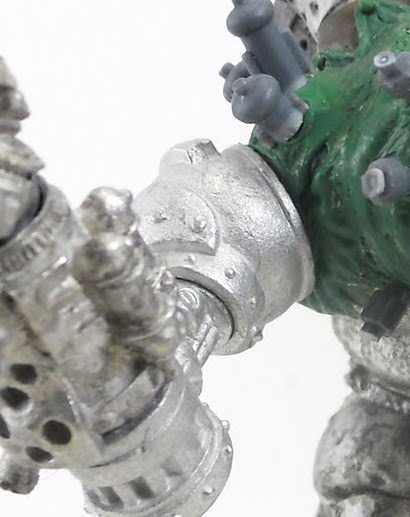
For a replacement smokestack I chose bits from Karchev the Terrible, mostly since he was another piece I had lying around waiting to be painted. They also fit rather snugly into the space required, and unlike most smokestack bits, they didn’t need to be hacked off of anything first. I used Brown Stuff to create the housing for the pipes, rolling out a strip, and then cutting it to the right size after it had cured for awhile to make sure it stayed rigid. I sculpted on flaps of Green Stuff skin stretched and tacked to the housing. The rivets were added after the skin had cured completely.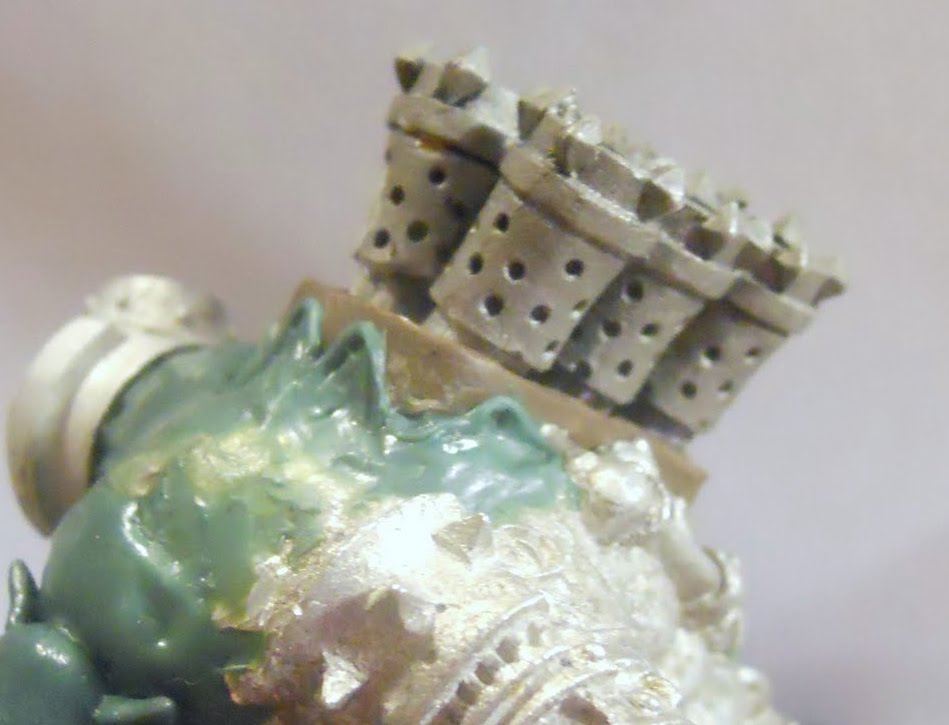
After the piece was completely assembled, I couldn’t help but feel like all the bare skin was just a little boring. I figured why limit myself to just neck bolts and ended up giving him all sorts of weird bits of metal protruding from his skin. These came from an old Leman Russ accessory sprue I had lying around. Still not satisfied, I mixed up a little more green stuff and smoothed it very thin in a few areas on his head and neck before poking it repeatedly with my sculpting tool to give his skin some texture.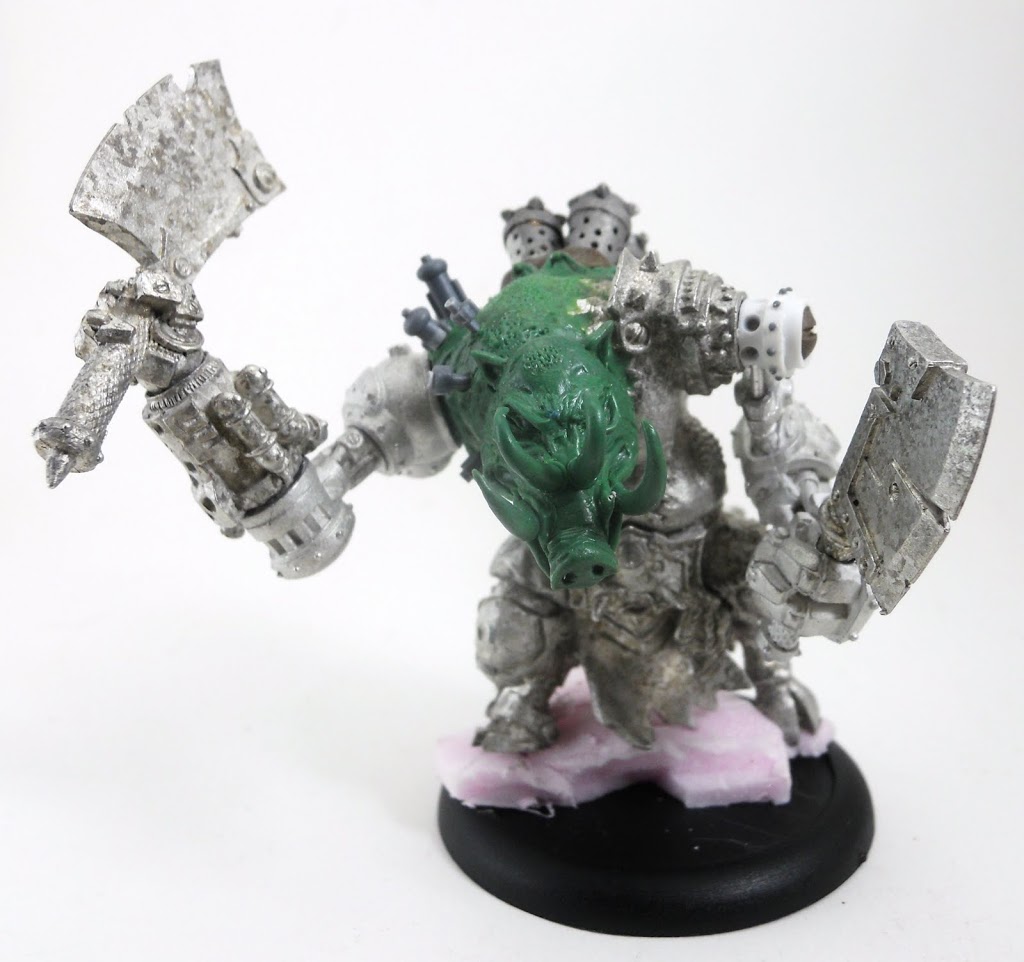
 ~ So there you have it. A lot of fun and some very satisfying results. I’ve decided if I ever need a third War Hog the challenge will be to sculpt one completely free of Mechanikal parts- a natural beast free of the tender cares of Dr. Arkadius. But before that happens, its Crocktober, which means its time to get to work on my Blindwater Covenant army.

