HOBBY: A New Take on Painting Metallics

Those of you that have been following this blog for long enough will remember me touching on this subject ages ago, but I have always wanted to come back and give it its own article. Metallics have a well deserved reputation of being difficult to work with. There are two basic ways most people tend to paint metals. One is to simply drybush them over black, and the other is to paint solid metallics on a surface and put a wash over them. These methods can be effective enough but they have their share of problems. First there is really only so much you can do with any color drybushed over black. At the same time, metallic paint can be difficult to work with directly. It has a contradictory nature, being both thick in consistency and thin in coverage. Directly applied metallics may take several layers of application to cover properly, meaning you can easily lose finer details. Also metallic paint tends to dry with a very smooth surface which can be less than ideal for ink to adhere to. It can often lead to problems like patchy and uneven coverage.
The simple solution is to begin with a standard non-metallic color and drybrush your metallics over the top. The base color, if applied properly should not fill in finer details and will provide a more porous surface for an ink layer to adhere to. The ink should be less inclined to cling to the metallic areas due to their smoother surface, and will be more likely to gravitate to the nooks and crannies. So here’s a quick overview of how to get a nice clean simple metal; the kind you might want for knight’s armor or the exposed mechanical parts on a dreadnought or warjack. Start with a neutral gray like Codex or Ironhull gray for the basecoat. Drybush with a mid range metallic like chainmail. Then apply a simple ink wash like a slightly thinned Badab Black or Armor Wash. Depending on the results you want you can follow it up with more drybrushing for stronger highlights. To get it even brighter you can drybrush it again with a lighter metal like mithril silver or radiant platinum.
But the real beauty of this technique is how many different effects you can achieve by changing up the basecoat or ink. Imagine starting with a blue, brown or even a purple instead of a gray. For my example I’m using one of the new Trollblood Runeshapers, and I’ve started with blazing orange in order to end up with an aged rusty look.
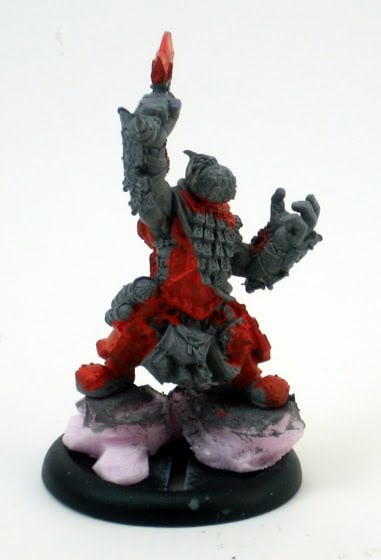 To darken it up a bit the next step is to give it a drybrush of dark flesh.
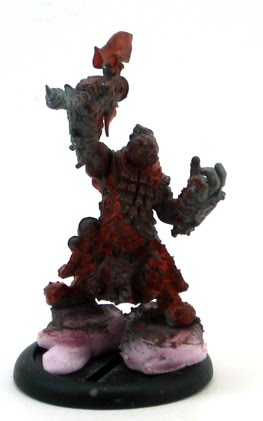 After the dark flesh is applied, there will often be areas of concentrated orange where I don’t want them, usually on the sides of armor plates or other places like that. Since I only want orange in certain recesses where it will look most natural, I will try to cover up these patches with scorched brown at this point. Now I’m ready to give it the chainmail drybrush.
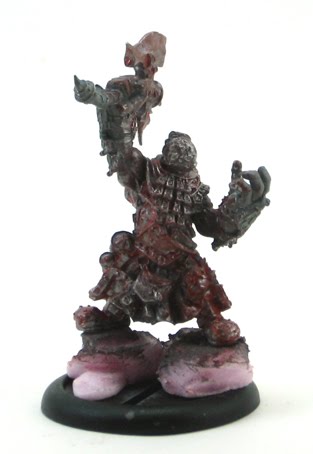 Now for a wash of Devlan Mud.
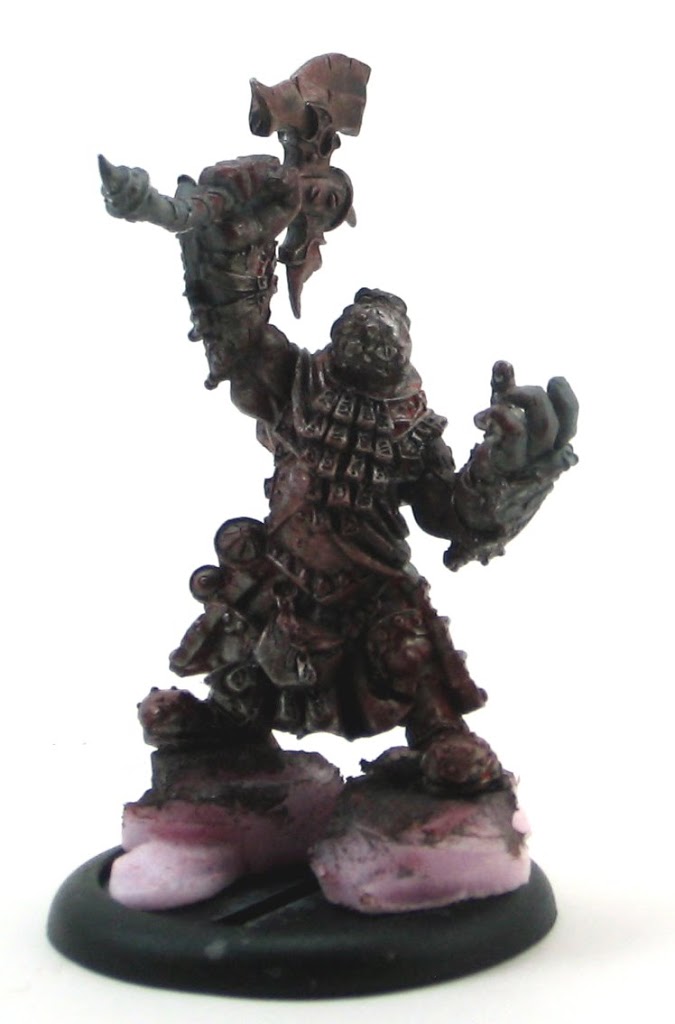 Since its a bit darker than what I want, I go in for a second drybrush of chainmail.
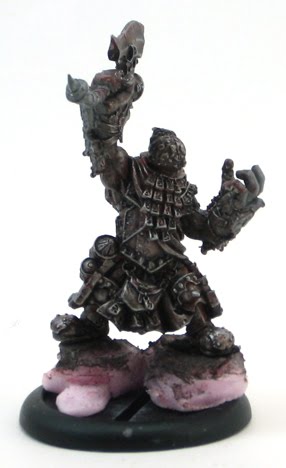 Its a bit hard to make it all out in this pic, but showing through the metal are flecks of red and orange, that along with the wash, give me exactly the aged look I’m after. If you want a rustier look take it easier on the Dark Flesh and Chainmail when you drybrush it on.
Now I move on to the gold I want as a secondary metal. I paint those areas with snakebite leather first.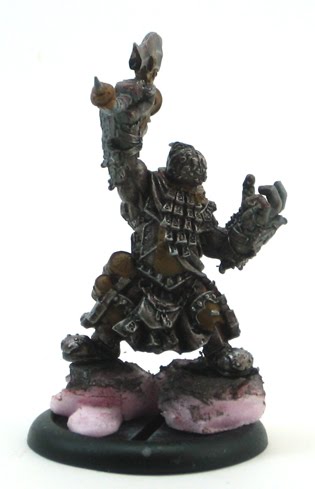 And then I drybrush them with shining gold.
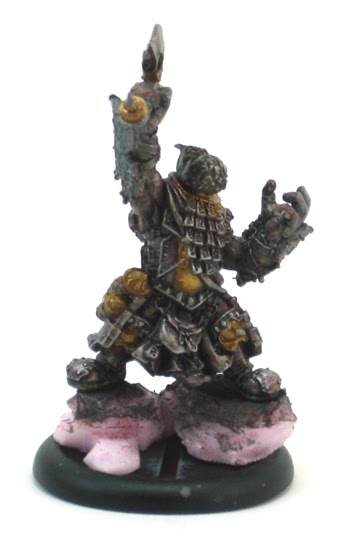 Next is to hit them with a mix of PP armor wash with some added Asurmen Blue and just a bit Brown ink. The whole mix is diluted to about 40% water, and some matte medium is added to help bind it and keep it from ringing. You can use something like Flesh Wash or Gryponne Sepia to get a warmer look for your golds, but I’ve chosen inks in the cooler spectrum of colors since I think it fits the natural feel of the Trollbloods.
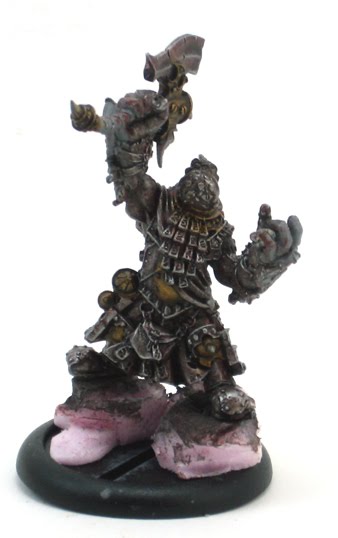 Once again, its a bit darker than I want, so I drybrush it again with shining gold and then give it a light drybrush of burnished gold. Finally I pick out a few key areas with shining gold manually to make them really pop.
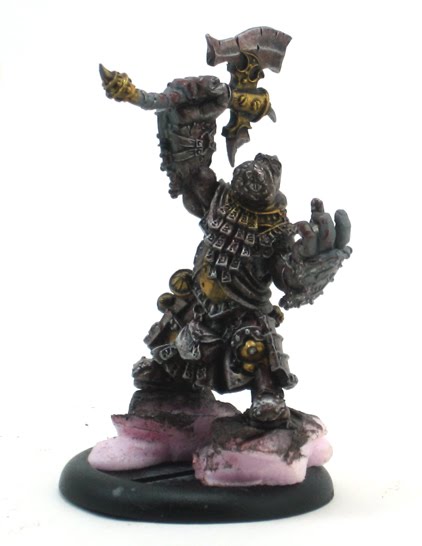 And here’s one more quick example from my most recent project: Rorsch and Brine.
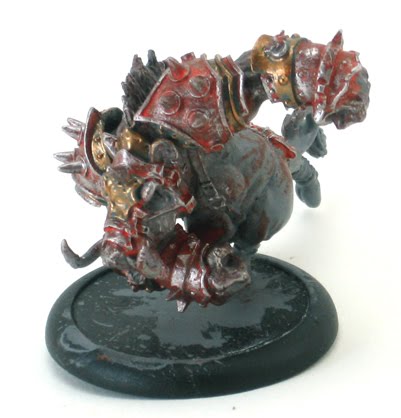 As you can see this is right before I hit the pig with the ink wash. I want him rustier than I wanted the runeshapers so I’ve drybrushed on less dark flesh and metal. If he’s not rusty enough after the ink wash, I’ll take one of my older brushes and carefully stipple on some more little patches of Blazing Orange. You will also notice his armor has bronze as a secondary color, rather than gold. For the bronze, I mixed up a dull turquoise for the basecoat so it will end up looking a little oxidized as well.
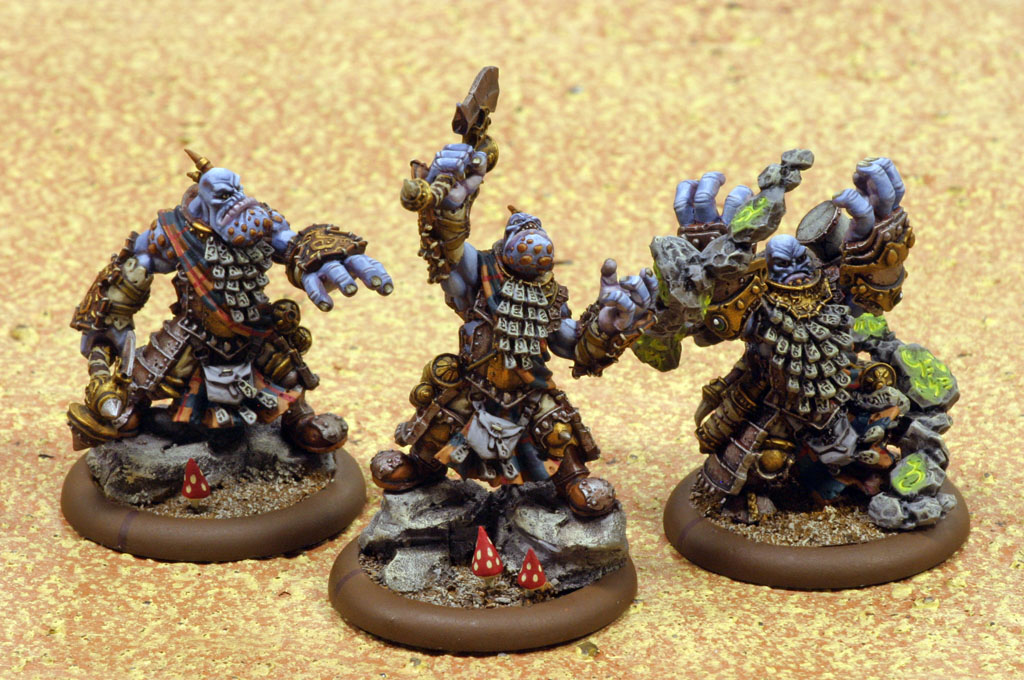
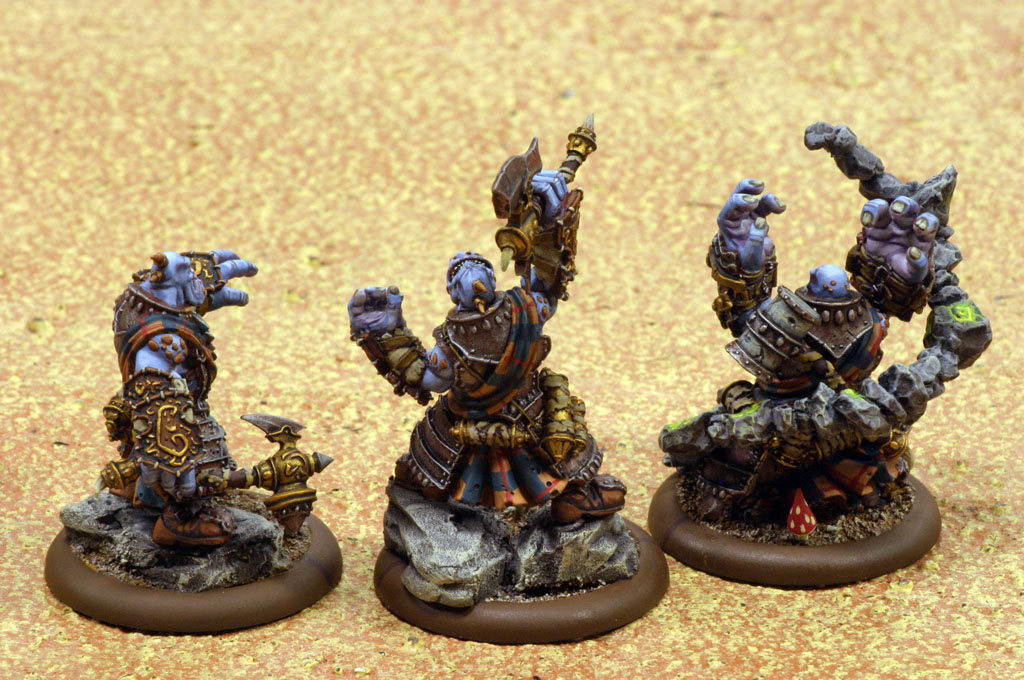
And finally, here are pics of the completed Runeshapers taken with Bigred’s superior camera. Hopefully Brine’s picture will end up somewhere on bols eventually when I’ve finished painting him, but for now he’s got a ways to go.
~I hope this article helps get everyone’s brushes moving. And since I’m not so vain as to believe I’m the final authority in all things painting I think it would be great to get other people’s hints and tips in the comments section. I’m sure there are plenty of other great ways to paint metal.


