Hobby: Freehand Tips
3 Minute Read
May 17 2010

Advertisement

Written by: RealGenius
Here are a few freehand hints from my fantastic class at Adepticon 2010 taught by James and Cathy Wappel. I’ve always been a little weary of freehand designs because I haven’t had much success for with them. The main reason I didn’t have success was planning and practice.
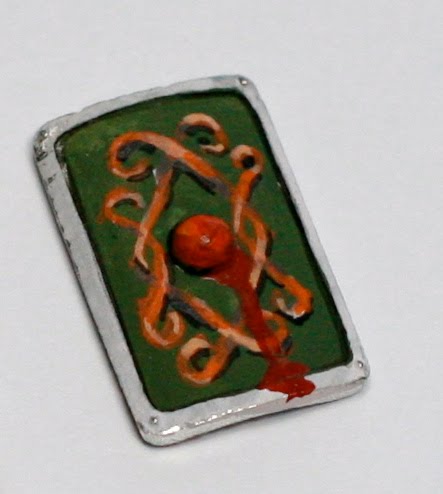
The tip that helped me the most, especially with more complex designs, is to first draw out a few samples to get an idea of what you want to do. I experimented with different versions of the shield pattern from the Wappel’s class: squared, counter-swirls, etc. Plan the design and plan how it will fit on the surface of your model, being sure to account for curves and details. In this case there’s a nub in the middle of the shield I had to work around. It wasn’t too difficult to work with in the design phase, but when painting sometimes that nub would be right where I wanted my brush to be.
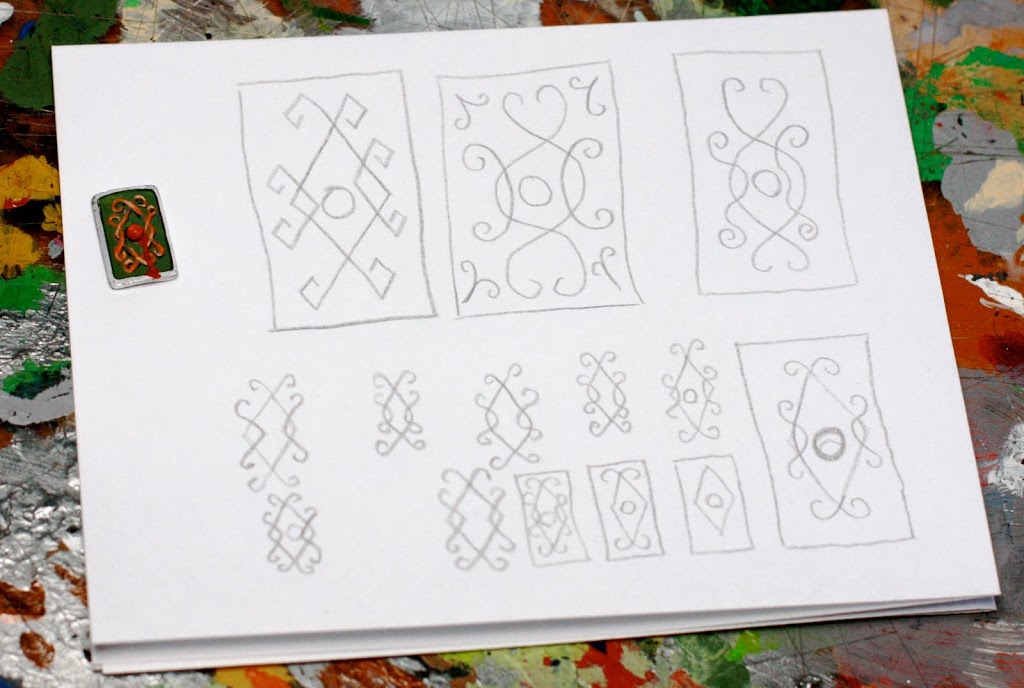
Once you get an idea for a design you like, start drawing it at (or near) scale so that you can practice the movement your brush will make when you paint the design. As you can see in the sketches above, I had trouble getting the directions of the curl right in a few instances. By practicing the design on paper before you put paint to model, you reduce the chance of an “oops” ruining your day.
After you’ve mastered (or at least practiced it plenty of times) on the smaller scale, time to put it down on the model. You can either trace the pattern lightly with a pencil or use thin line of watered down Chaos Black. I’ve found the black works better for me since it gets my hands thinking about painting thin, controlled lines.
When selecting a model or spot for a freehand design, don’t chose an area or a model with excessive detail. Large flat areas like cloaks work well because there’s no surface texture. A cloak with a scale texture detail will be much more difficult to paint a design on, but you can paint a scale freehand on any flat cloak.
And finally here’s a great tip for when things go awry: If you mess up, you’ve just created a perfect spot for weathering, battle damage or a bit of gore. On the shield above you’ll notice the bottom right curl doesn’t quite come al the way down to the bottom of the shield. A little bit of blood pooling and the mistake is a lot less noticeable.
Want more? Then don’t forget to visit The Painting Corps for regular updates with tips for the newest wargamer to the most grizzled veterans. There’s something for everyone. Head over and join the conversation!
Author: Real Genius
Advertisement


