WFB: Hobby – Painting Fur and Feathers pt. 2

This is the second part of the tutorial on how to paint fur and feathers, this part covers brown fur and feathers.
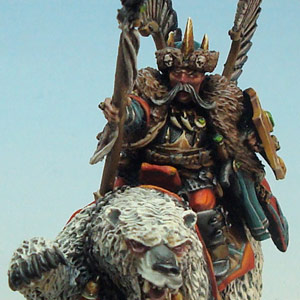
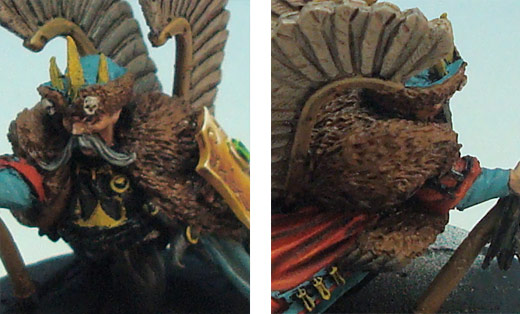
First off lets take a look at how to paint Tsar Boris fur pelt. Before starting to paint the model was primed with black.
Step 1
The fur was first given a few coats of thinned down Calthan Brown (GW), as a foundation paint. It covers the black primer very well and helps create a base for the real base coat – in this case Bootstrap Leather (P3). Because of the first layers of Calthan Brown I only needed about two layers of Bootstrap Leather to cover the fur parts properly. When using a foundation paint this way just go with the color that is closest to your intended base coat color.
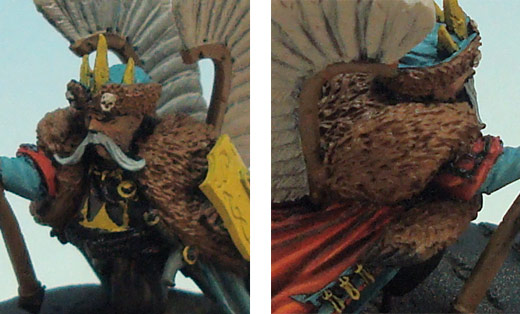
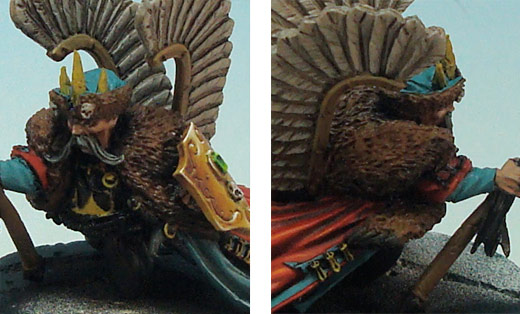
Step 2 – First Shade
For the first shade I used thinned down Battlefield Brown (P3) that was brushed into the areas to define the shape of the fur and into the recesses of the fur.
Step 3 – Second Shade
The next step was to mix black with Battlefield Brown and shade smaller and smaller areas – trying to define the shape more and more, and give some real shade to the fur, as with the lighter fur you can exaggerate the shadows.
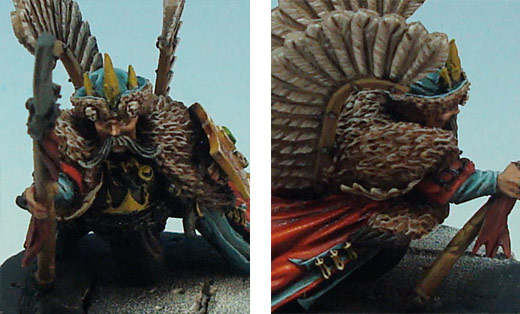
Step 4 – Highlighting
To highlight the fur I mixed the basecoat with Fortress Gray (GW) – I use gray instead of a white or a cream because the gray adds to the age of the fur. As both hair and fur grow gray with age. I overlapped the shading a bit to help smooth the shades out. The highlight was applied in stages with more fortress gray added to the mix at the top parts of the fur. This step can be dry brushed on but since the hairs on this pelt were so fine I preferred to pick them out one by one. This sounds more tedious than it is as the pelt isn’t too large.
Step 5- Glazes
Just as with the lighter fur I wanted to give the fur both a warm and a cold glaze: one to add some color reflection and one to make the fur look a little dirty. I use the warm glaze to add some variation in the tones of the fur and the cold glaze to add some dirt/make the fur look worn. I used Bloodstone (P3) for the warm glaze and Cryx Bane Base (P3) for the cold. Unfortunately the effect of the glazing is lost somewhat in my photos, but at least you can see the added warmth of the warm glaze in some parts. The glazes were applied in the same way as they were on the bear’s fur.
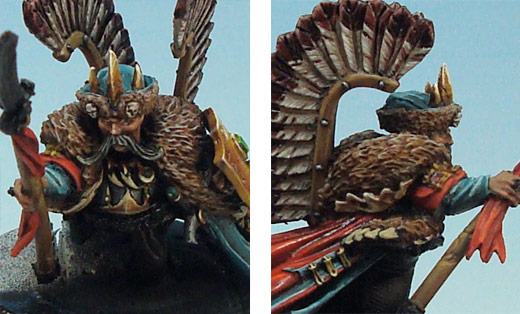
Next up are the feathers.
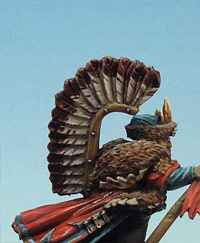
Step 1 – Base Coat
The feathers were given a basecoat of Dheneb Stone (GW) in a few thin coats. Just as a note I also used Dheneb Stone as a basecoat for the blanket underneath Boris. I try to use the same colors across a miniature to bring harmony to it, by shading/highlighting them with different colors or give them different roles (a color that is used as a basecoat on one surface might be used to highlight another and so forth) they come out looking a little different while I still get the effect I am after.
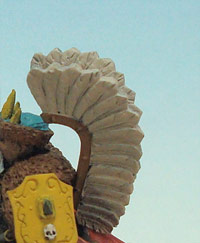
Step 2 – Wash
To help define the details in the feathers and to shade them I gave the whole wing a generous wash of Devlan Mud (GW) mixed 2 parts wash with 1 part water.
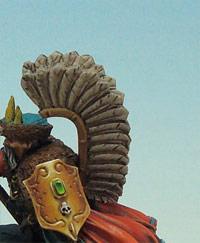
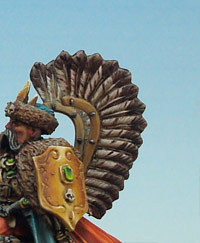
I want to give the tips of the feathers some color, as well as pick out a few of the deeper recesses/details in the feathers. I wanted a very warm deep brown/red so I used a 1/1/1 mix of brown ink, black ink and water. Then I picked out all the tops of the feathers – trying to keep a pattern but still have some variations. I added a few strokes here and there as well as give some definition to a few of the shadows. The end result comes out very shiny – which is the difference between a wash that dries matte and a ink – I use a dull coat spray to remedy this but there are other ways to fix this (will have to cover them another time.)