HOBBY: Painting the Galleon

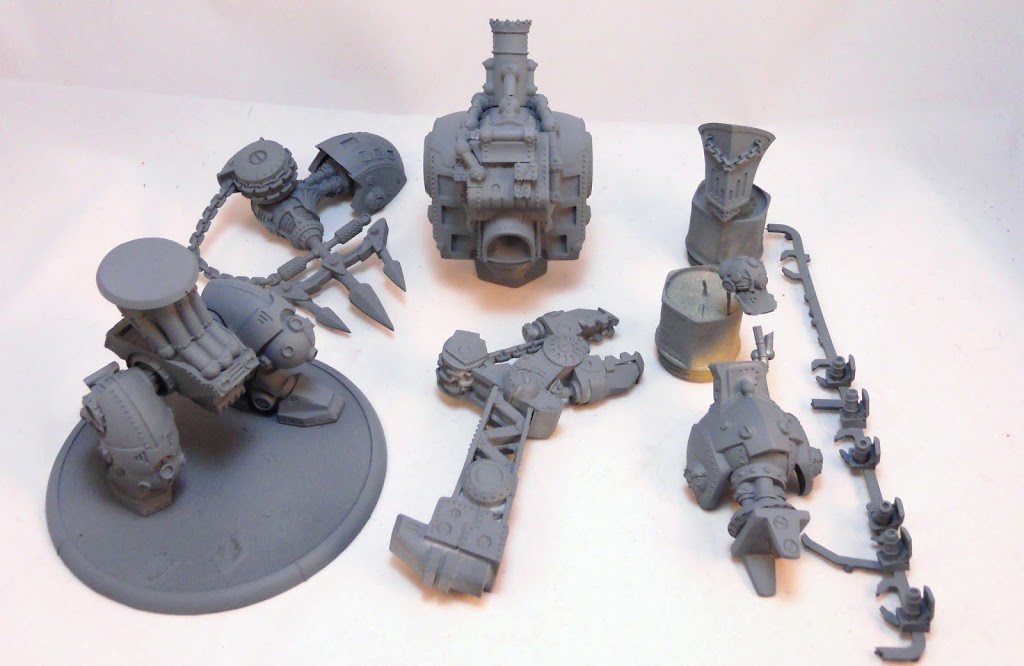
First I cleaned everything with a tooth brush and Simple Green to make sure the paint would adhere properly. Next there were mold lines to file away and gaps to fill. After that it was on to assembly. I always try to assemble as much of the model as possible but with anything this big, I always end up with several pieces to paint. All Colossals are just too big to be able to paint if you fully assemble them first. You need pieces small enough to manipulate. If you’re having trouble figuring out what that is off to the right, I was concerned that gluing the gun ports into place would make them more difficult to paint. I glued them all to an old plastic sprue to give me something to hold onto. After I had everything sorted out, I sprayed it all with some Model Master gray primer. Now it was time to start doing some real painting.
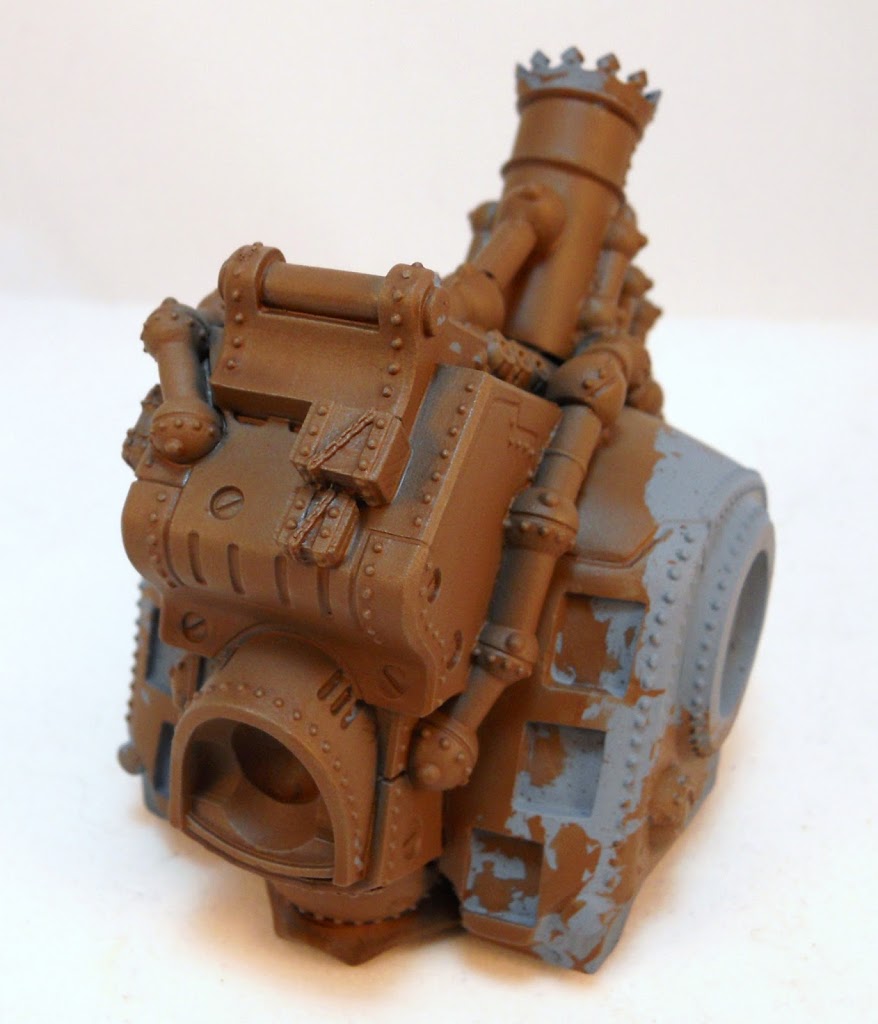
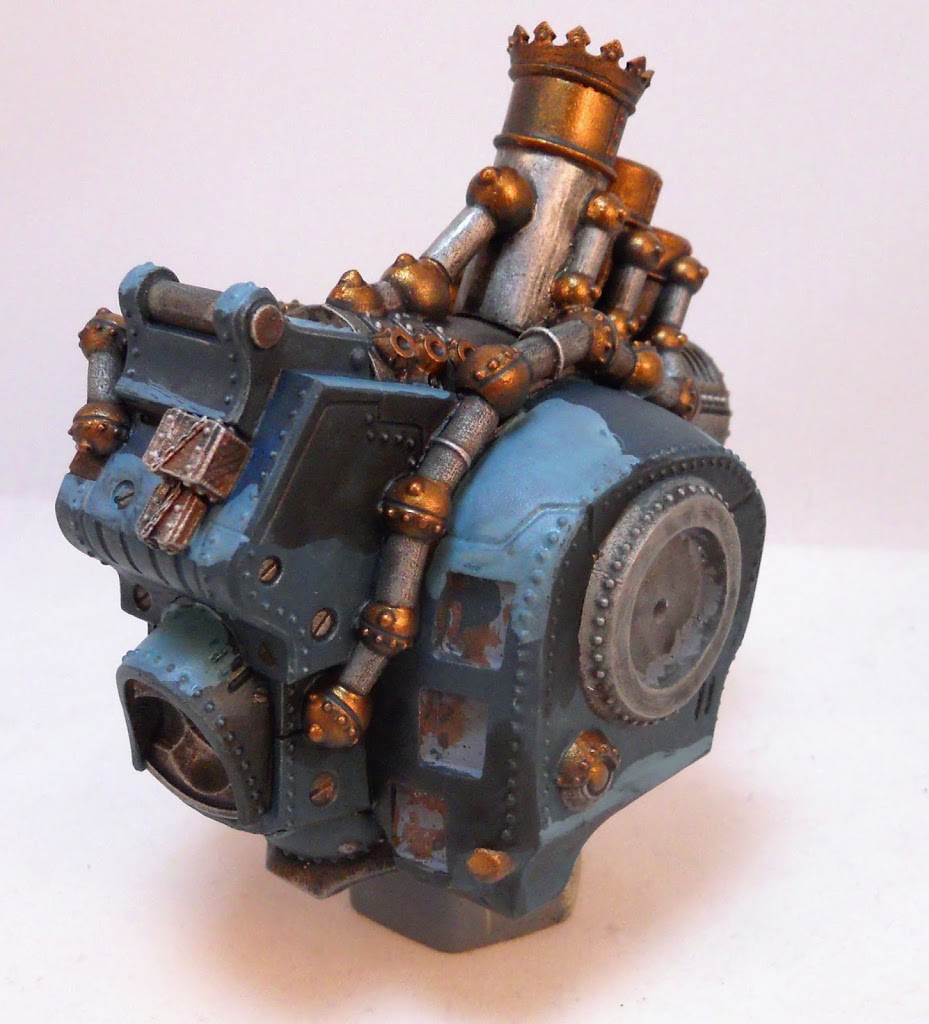
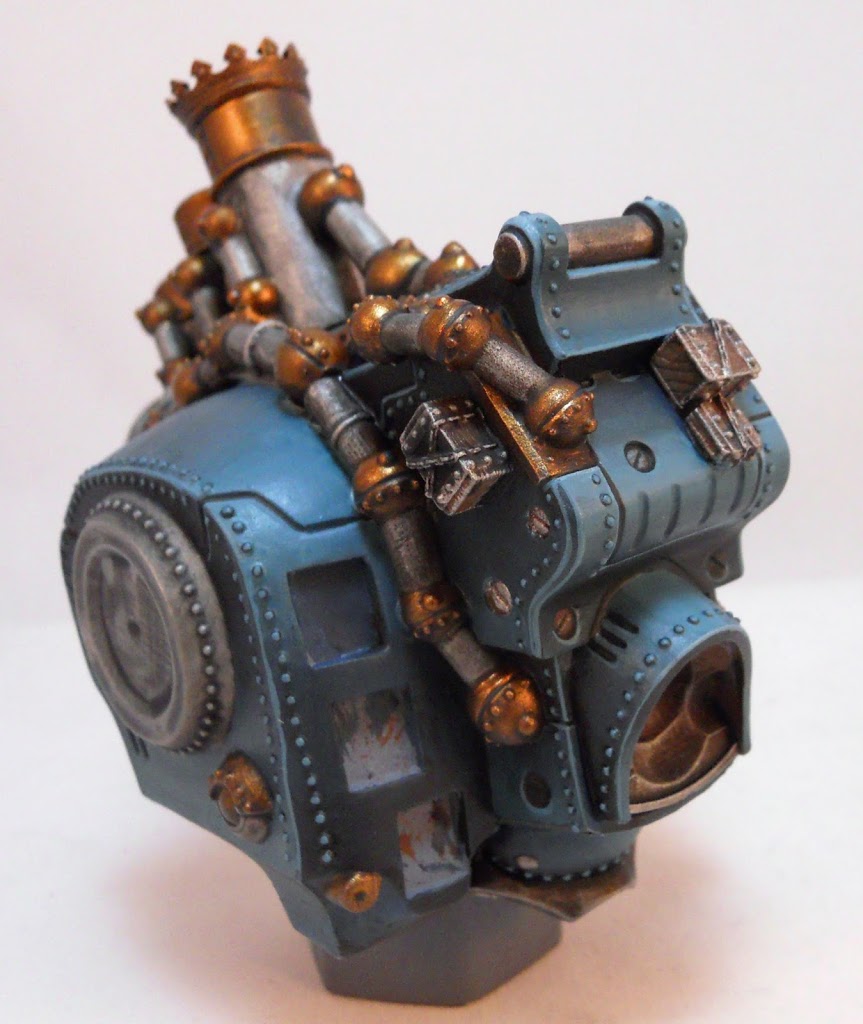
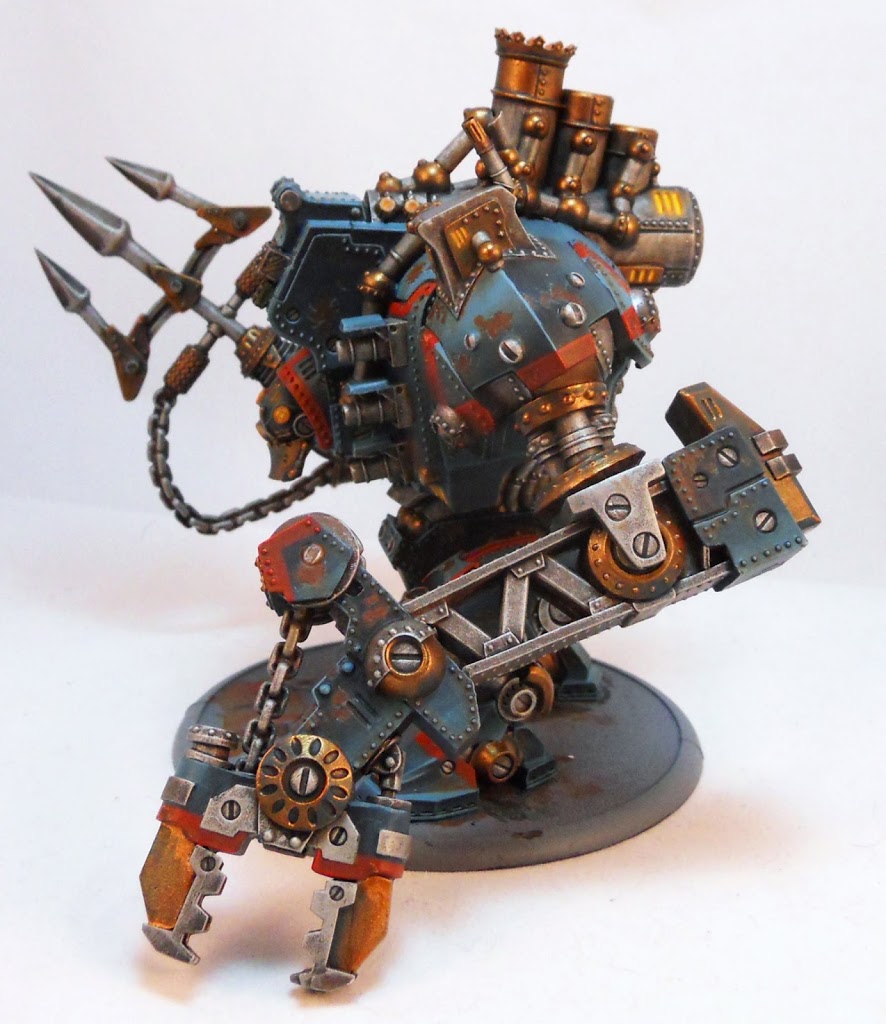
Whenever possible I like to do my metallic areas with a simple drybrushing technique. And since drybrushing is messy, I always do those metals first. I start with a nice reddish brown basecoat for all my Merc metallics since it gives the appearance of a bit of patina. For the brown I used an old pot of GW’s Calthan Brown. It’s mostly going to be P3 colors from here on out though, unless I mention otherwise.
I drybrush the brown with Chainmail before giving it all a coat of a custom wash I use for most of my metals. This wash is mixed from 1 part water, 2 parts Agrax Earth, 1 part Nuln Oil, and 1 part Asurmen Blue – all washes by GW. I add a couple of drops of matte medium to it to make sure it binds properly.
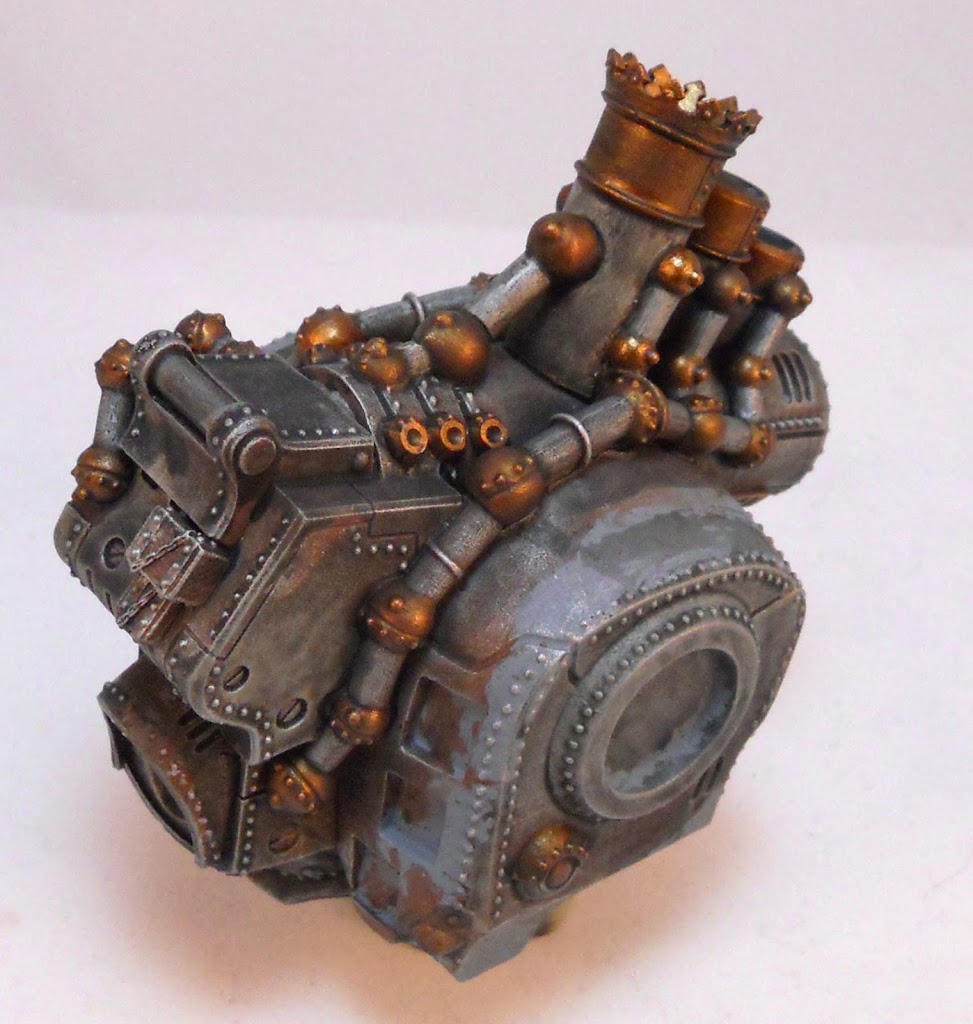
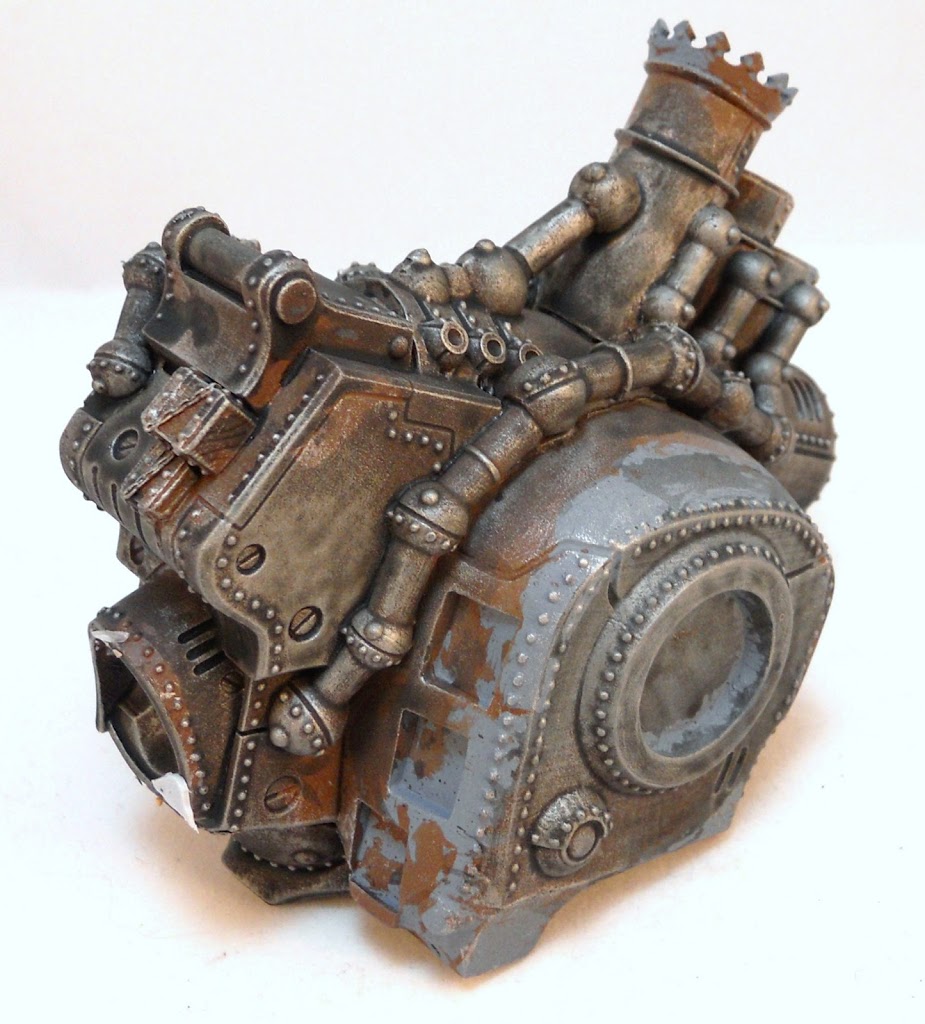
After the wash has dried I give it another light drybrushing with Chainmail. Then I start on the bronze areas. These get a basecoat of Umbral Umber before being drybrushed with Molten Bronze. Then these areas get a coat of the same metal wash from before.

I clean up the bronze areas by touching them up with more Molten Bronze. I shade the bronze by blending some Coal Black in with it. And speaking of Coal Black, I use that same color as a basecoat for the dark blue that will be the main color on the rest of the Colossal.
Now it’s time to start shading this thing. I begin by quickly slapping on some areas of light and dark paint to establish zones of highlight and zones of shadow. For the lighter areas I use Trollblood Base, and for the shaded areas I use Thamar Black.
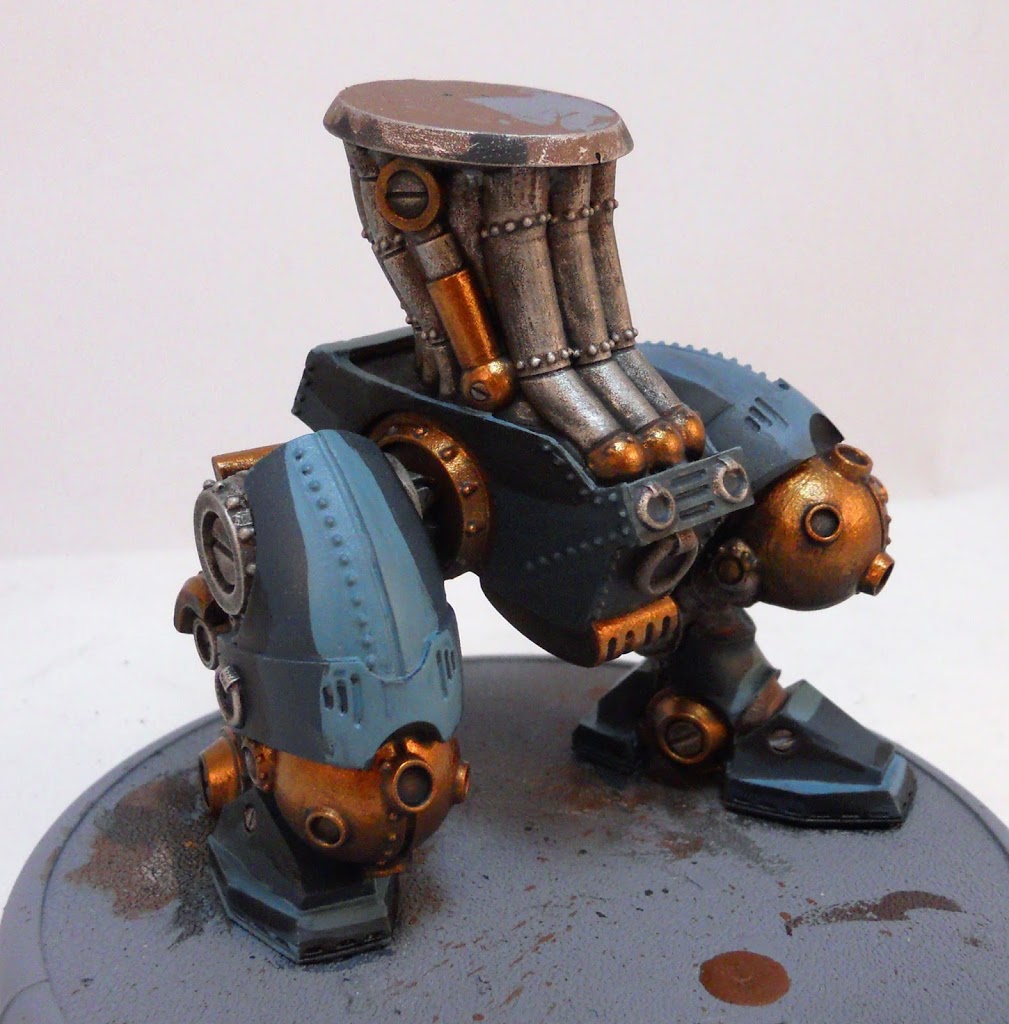
Next I wet blend these areas together with the help of a pallette and a little bit of Matisse Drying Retarder. Everything in the picture above this one is covered up during this step. The previous colors served only as a guide.
Here’s a look at the torso during the same step. I try to give all the hard edges a thin line of Trollblood base to help define everything.
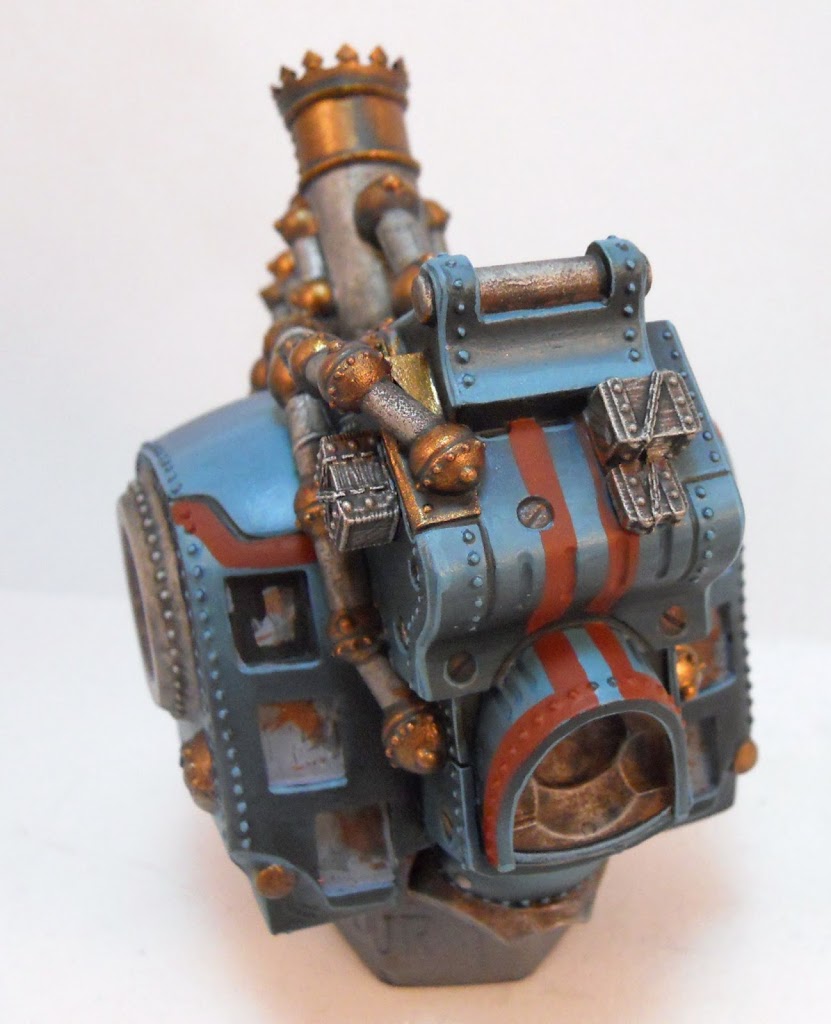
Next I add all the red detailing. I base this with a 50/50 mix of GW’s Blood Red and Vallejo’s Dark Sienna.
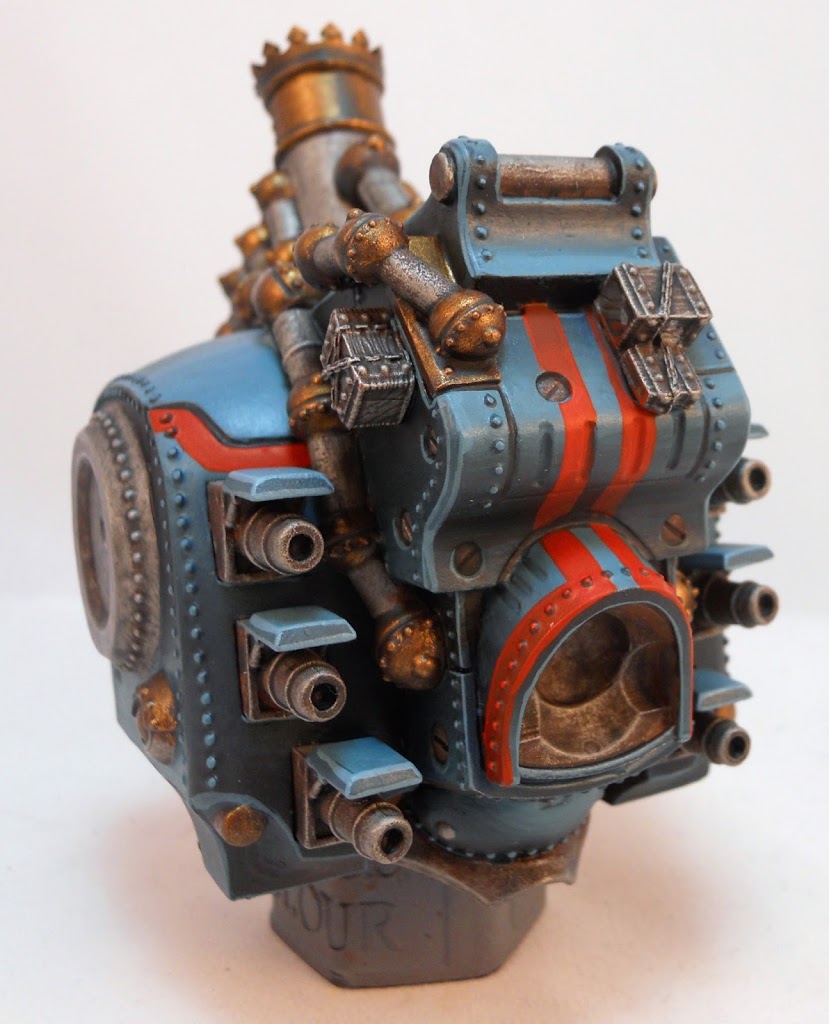
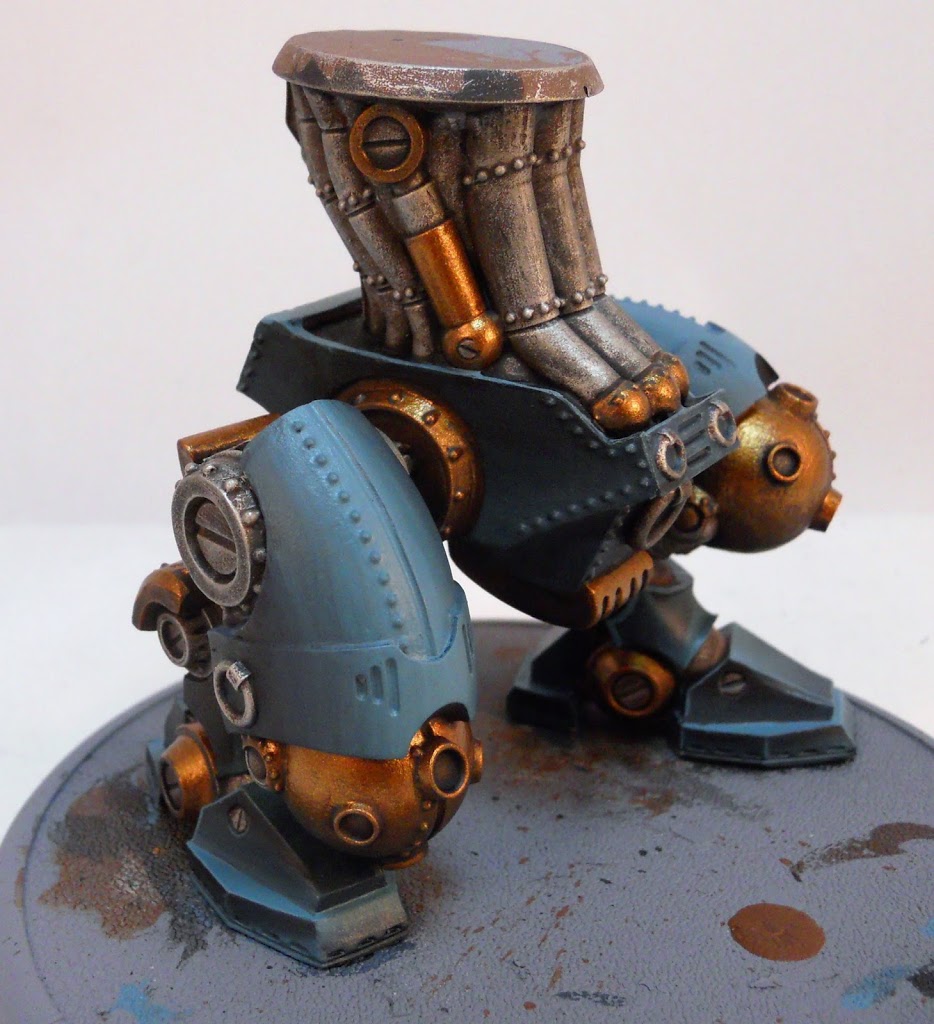
Battle damage and weathering not only looks cool, but it can be extremely helpful for covering up any mistakes – like less that perfect blending. To create areas of chipped and distressed paint, I start by using an old brush to stipple on a lighter color than the background. Next I take some Umbral Umber and use it to paint over the lighter color leaving only a thin line of it at the very bottom. This thin line represents light reflecting off the hard edge of the chipped paint creating kind of an illusion that the brown area is deeper than the surrounding paint. I’ve begun this step over on the left side of the torso here so you can see it.
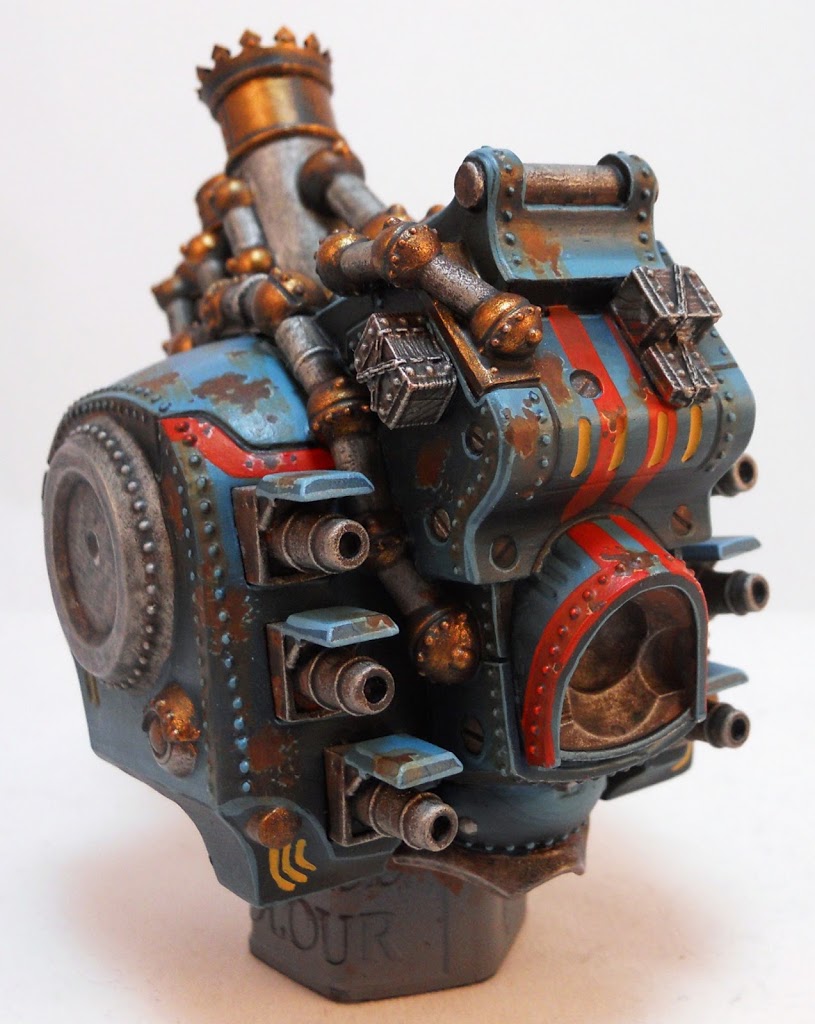
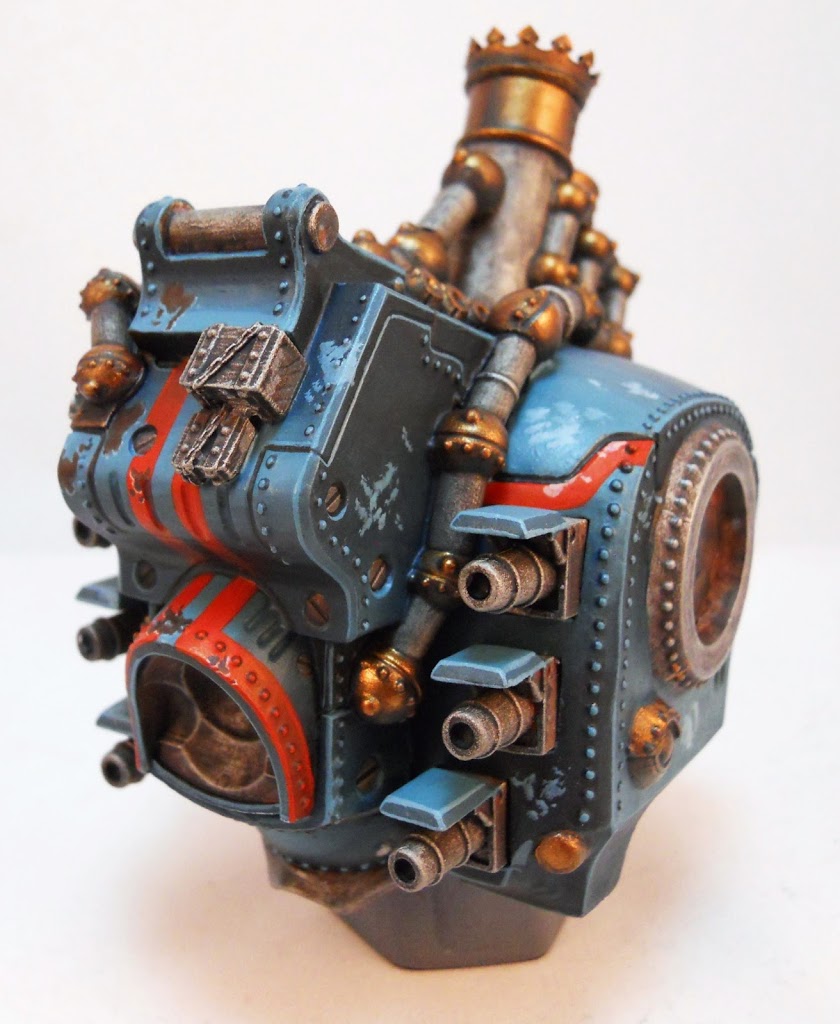
Next it’s time to add some rust. I make a thin wash of Bloodstone and stipple it on over the distressed areas. I also add some downward streaks of the wash to represent drips of rust. be careful to keep it thin since it may look a bit off if it pools and rings when it dries. The Umbral Umber areas might require a couple of applications of the Bloodstone wash for the rust to really show through. I also begin to paint the furnace glows, starting them off with a base of Iyanden Darksun – an old GW foundation color. Without these incredibly opaque foundation paints it would take multiple coats to get a good yellow base started.

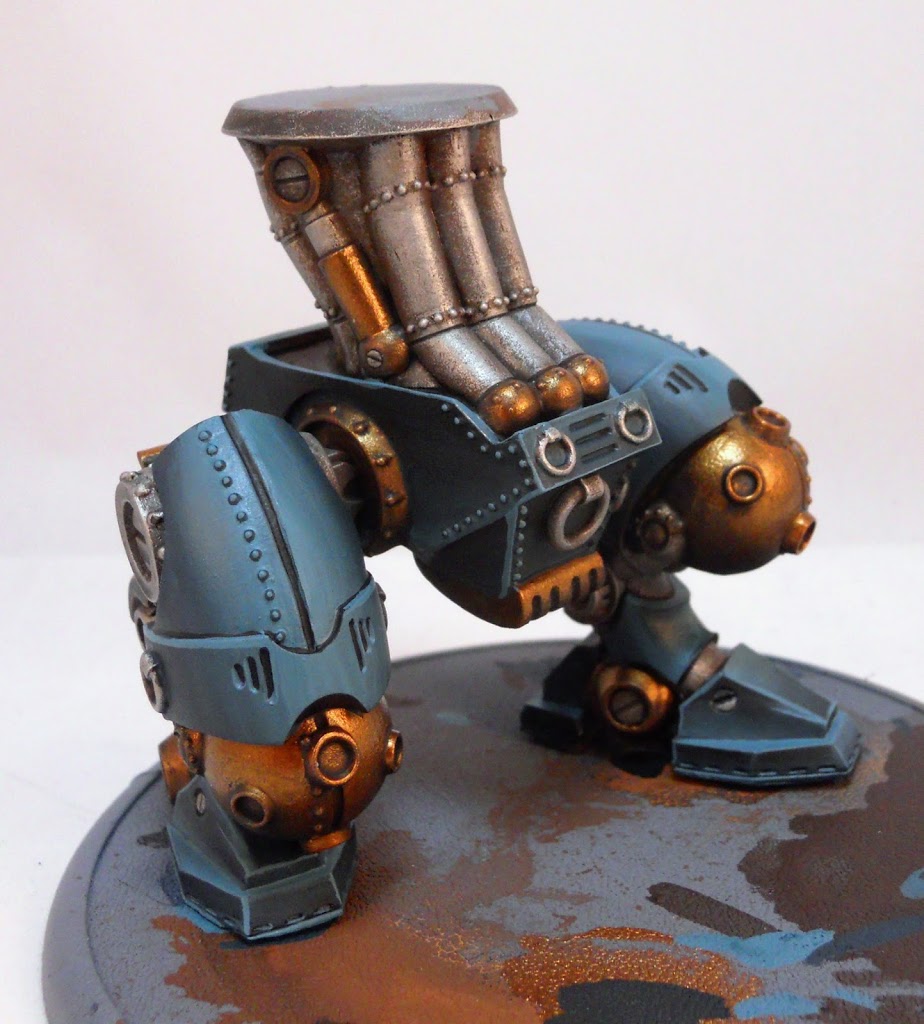
On top of that base, I apply some Cygnus Yellow with just a tiny bit of Heartfire added. I blend this out towards the edges darkening it by adding more heartfire. I outline the vents with a thin line of Heartfire mixed with Bloodstone. To create the appearance of a haze around the vents, a thin wash of this mix is also applied around the vents. The same color is also used on the slats around the Galleons eye/s.
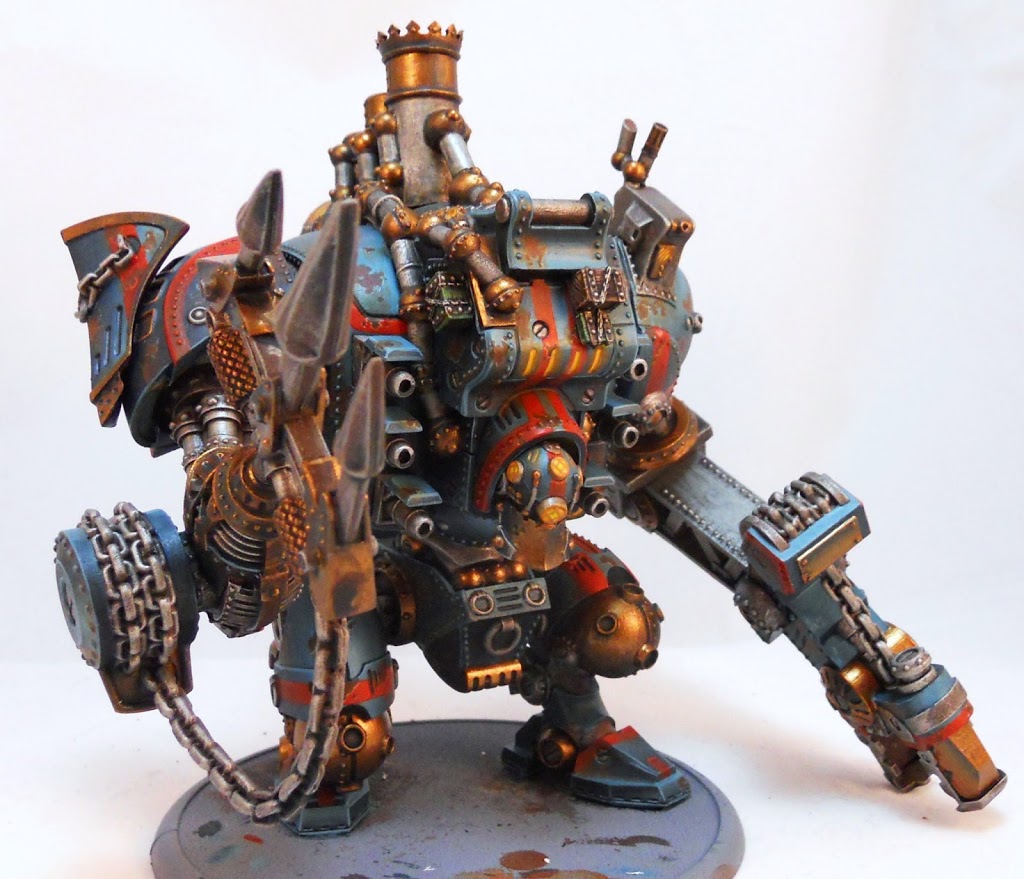
With the glows completed, all that’s left is to assemble the monster.

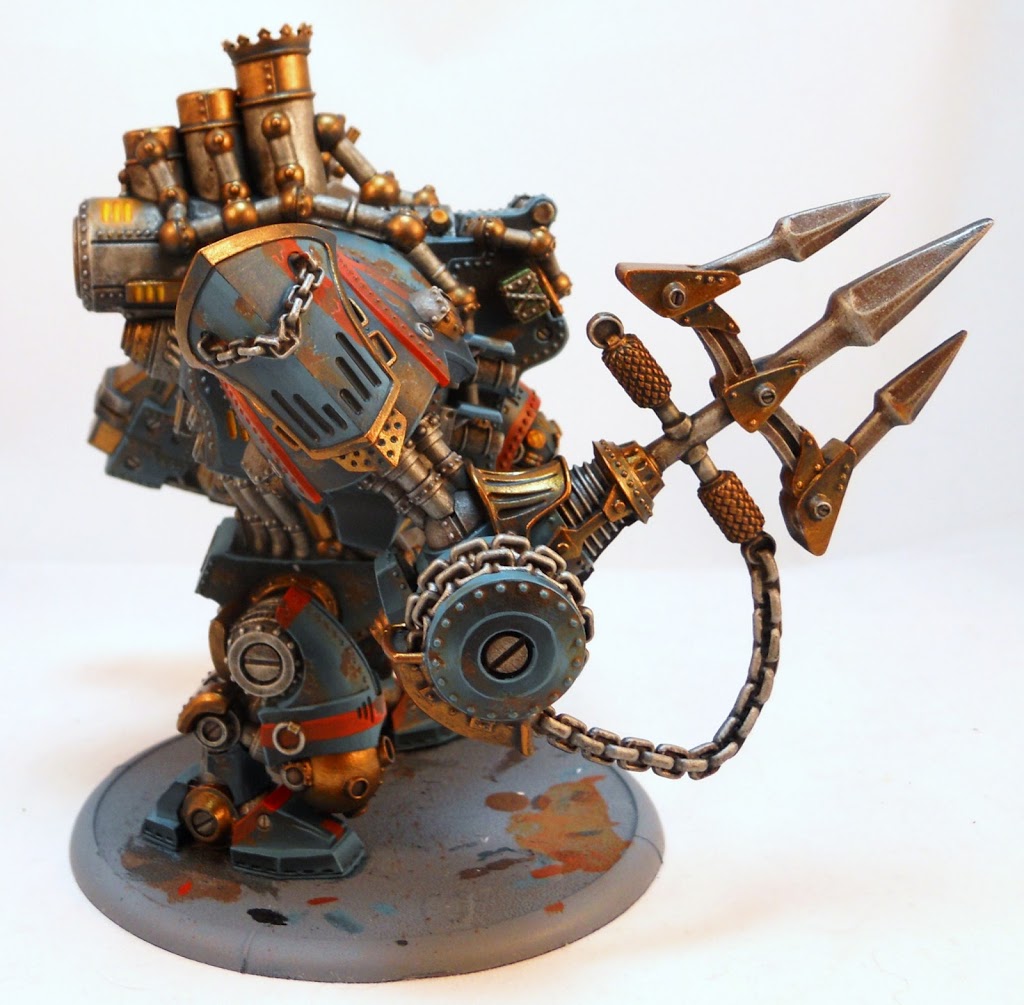
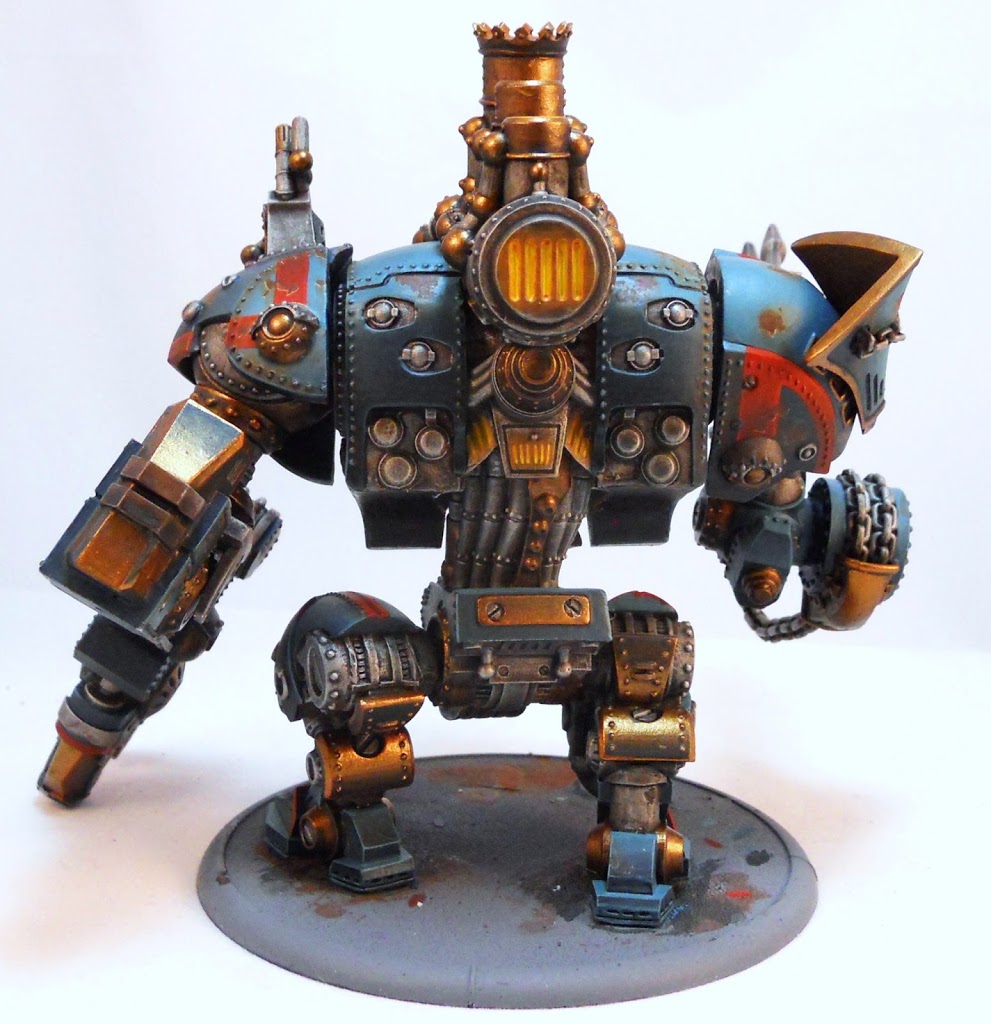
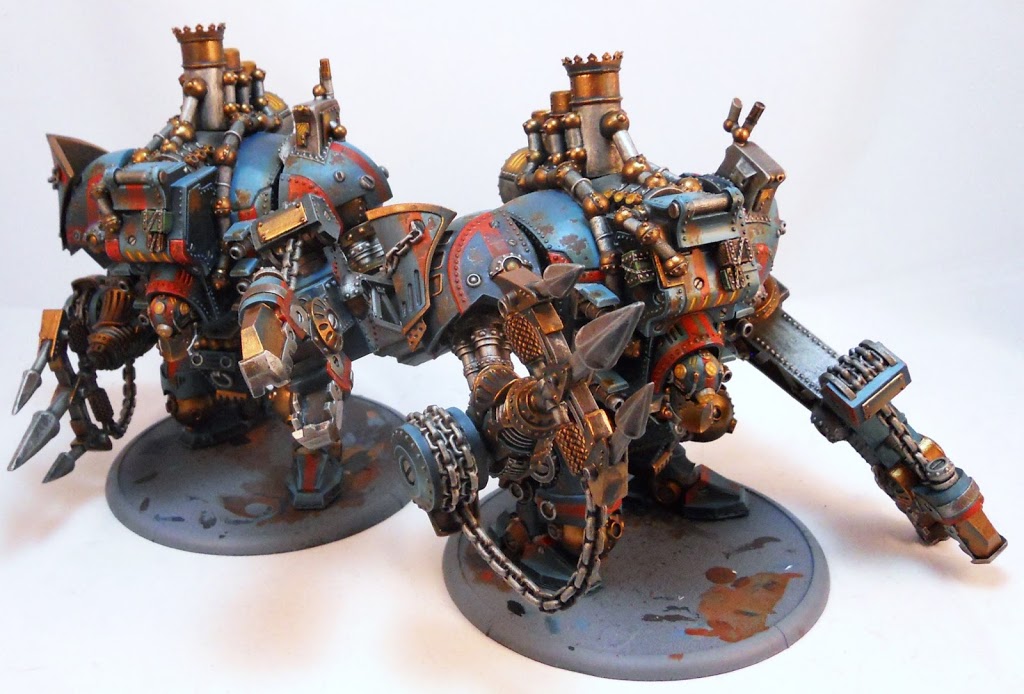
Of course I’ve heard it’s worth taking two of these guys, so I did a second one too.
~ And there you have it! Of course there’s still the small issue of basing the duo. But I have something special planned for that. So keep your eyes peeled for a Galleon basing turorial.


