X-Wing: Let’s Play a Game
I find a lot of gamer people know about X-Wing but have never actually played a game. If you’re wondering what all the fuss is about- meet me after the jump:

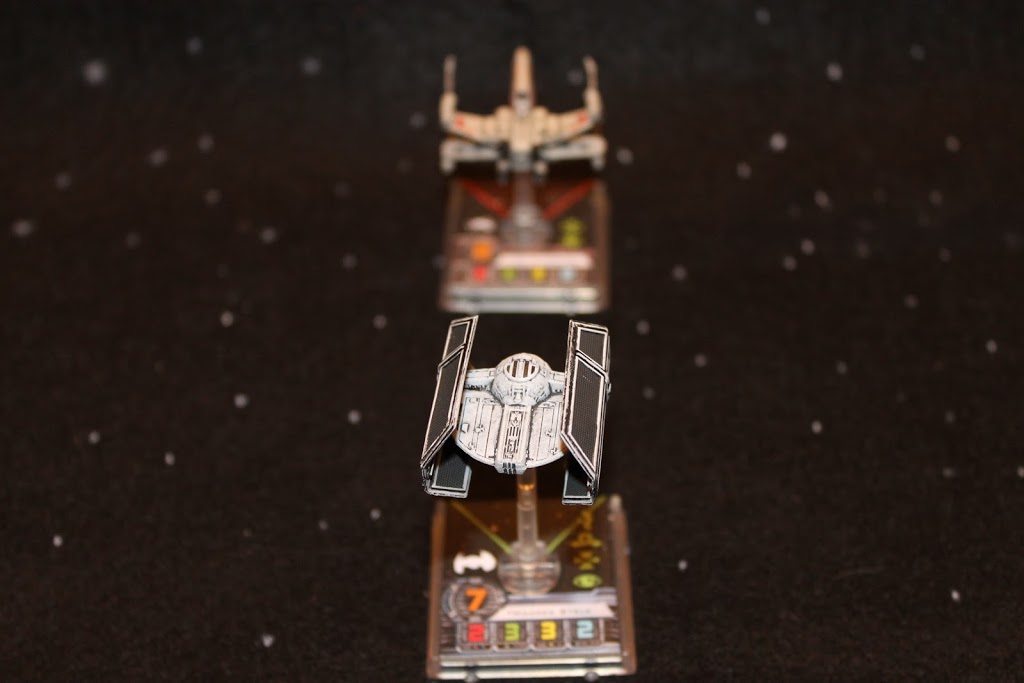
In order to keep this series of articles under a million words, this game is a 30 point game (note that tournament standard for X-Wing is 100) using only the stuff in the Core Set and playing a scenario from the rules rather than a standard dogfight. Like all of the rule book scenarios, you can play them with more than just the Core Set ships, but we used only the suggested pilots from the Core so people looking to get into X-Wing could get a good feel for it without needing to buy a bunch of additional ships. BC wanted to be Rebels, and as such, he would be using a lone Red Squadron X-Wing, with Proton Torpedoes and R2-F2. This left the Imperials for me- one Obsidian Squadron TIE Fighter and one Black Squadron TIE Fighter with the Determination Elite Pilot Skill.
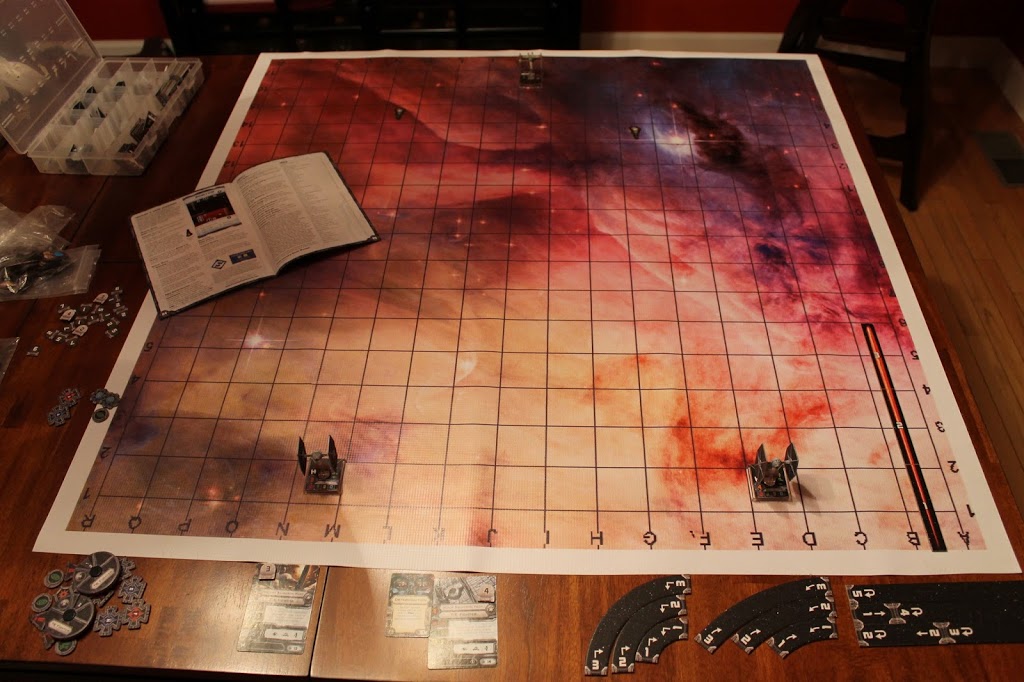
That settled, we started putting our stuff together, picking out the counters and tokens we’d need for our match, getting out the movement templates, and pulling dice out. We also set out the cards representing our ships, and BC placed a couple of Shield Tokens on his X-Wing card to represent the state of his shields. As my TIEs fly without shields, my cards don’t have them.
Note: This may seem a little weird, the way we do things, but keep in mind we play over Google Hangout, so don’t let the grid map in the pictures and the fact that none of BC’s cards and maneuver dials and whatnots are on my table throw you off.
A quick read through of the scenario reveals our objectives/ win conditions. As the Imperials, I’m supposed to “scan” some satellite counters. I do this by overlapping (I’ll talk more about what exactly this means later, I promise) the satellite counter then opting to “scan” instead of attacking that round. Once I’ve scanned a satellite, I pick the counter up and put it on my ship’s base, then try to fly back to my own board edge. BC is supposed to prevent me from doing this. Should he lose his lone Red Squadron X-Wing, he can add a Rookie Pilot “reinforcement” in the current turn’s end phase (which is also when you clean off most of the Action tokens).
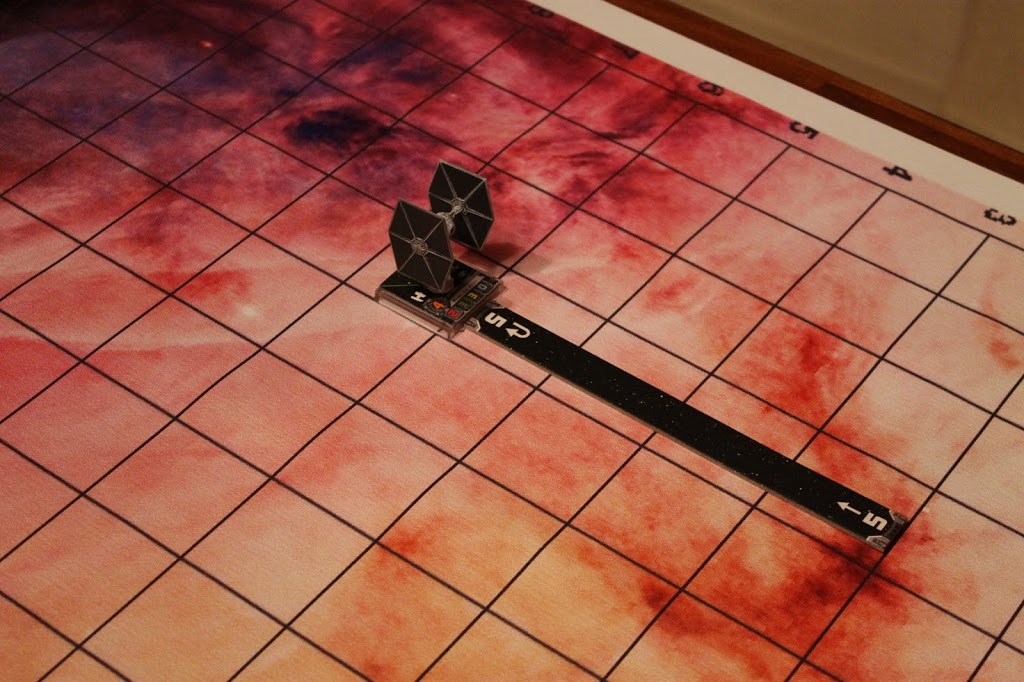
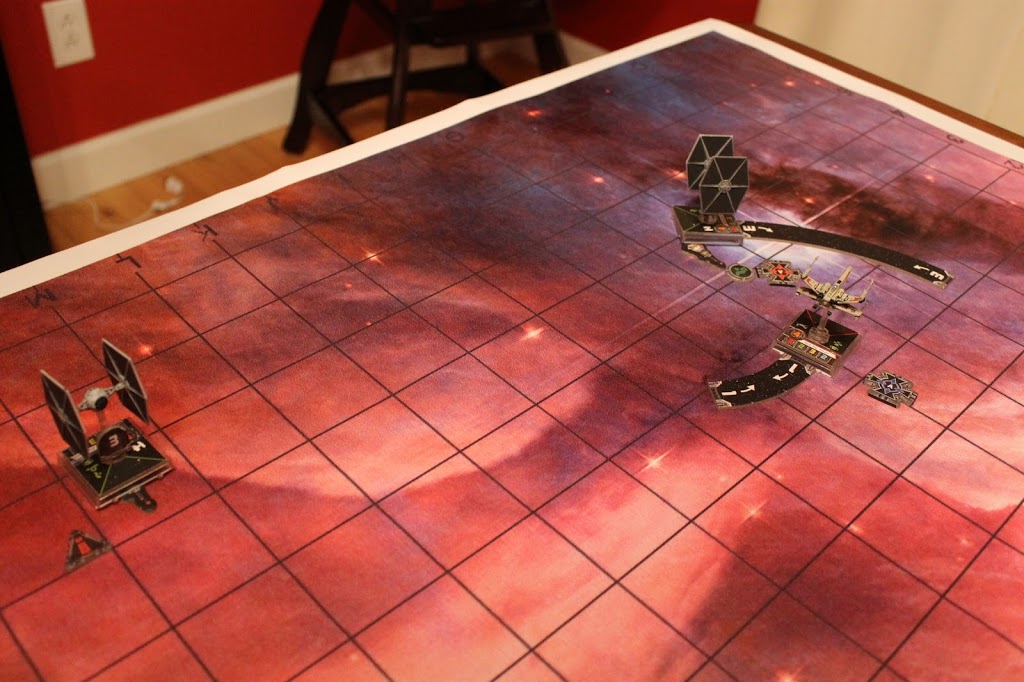
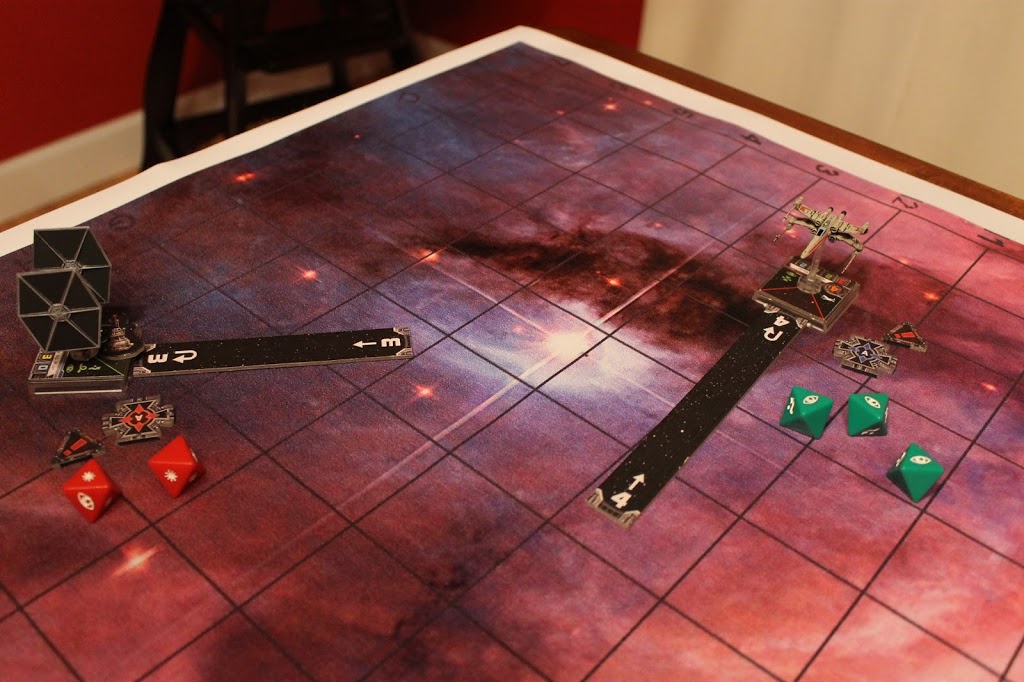
Ship setup is fairly standard- our deployment zones start at our table edge and end at Range 1 towards the center of the table. You can see my Range Ruler there on the left side of my table.
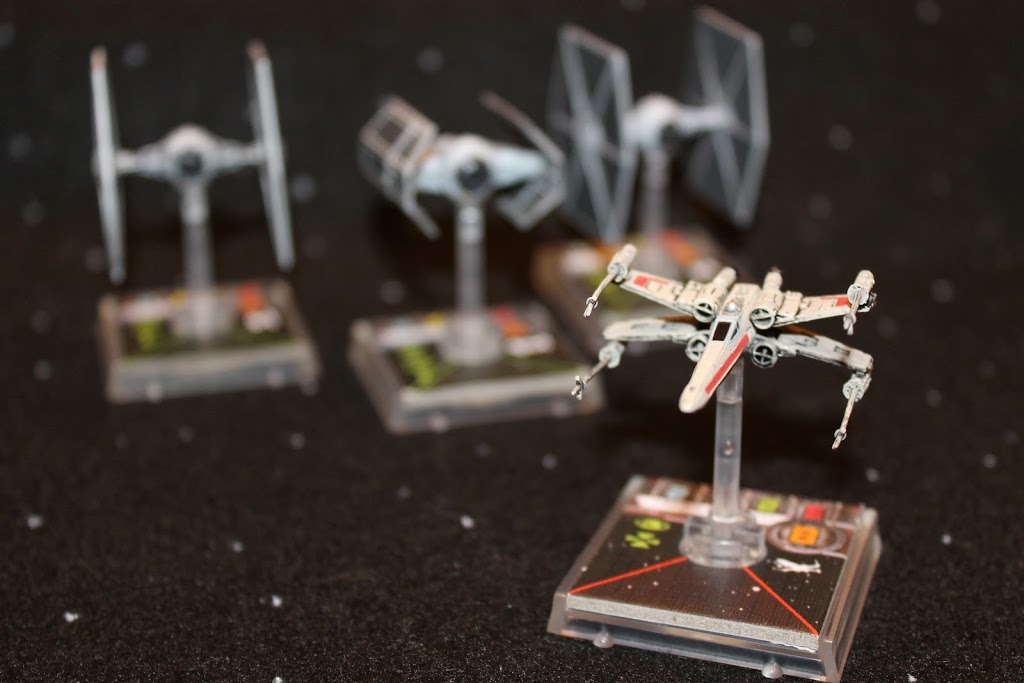
In X-Wing, the order you deploy ships is (usually) dependent on your pilots and your opponent’s pilots Pilot Skill rating. It’s represented on both the card and the little cardboard insert that actually sits on the miniature’s base. I talk about it a lot in this article about Pilot Skill, but the short version is, lower Pilot Skill pilots move first and shoot last, while conversely, high Pilot Skill pilots move last and shoot first. For deployment purposes, it also sets the order in which you place your ships on the table. My Obsidian TIE is Pilot Skill 3, so he goes down on the board first. In the picture above, he’s the one on the left. My Black Squadron TIE and BC’s Red Squadron X-Wing both have a Pilot Skill of 4. When you have a tie like this, you refer to a tie-breaker mechanism called “Initiative.”
Now that we’re all set up and we’ve got everything deployed on the board, the game kicks off normal mode with the Planning Phase. We colloquially refer to this as, “Spinnin’ wheels.” That is, it’s when you pick up your ship’s maneuver dial and assign a maneuver to it. You do this in secret, and once you’ve picked your move, you set the wheel face-down near either the miniature for your ship or near the ship/ pilot card so that your opponent knows which ship that wheel is referring to. Once both players have set maneuver dials for all of their ships, you then reveal the dials one by one, in Pilot Skill order, from lowest PS to highest completing the maneuver and assigning an Action (if appropriate) before moving on to the next ship/ pilot.
X-Wing represents how nimble a ship is by having different maneuvers available on the maneuver dial and they are most definitely not the same from ship to ship. While all the ships have quite a few maneuvers available to them (around 12-14), the more maneuverable ships will have less maneuvers that are represented by red arrows (which cause you to incur Stress when you execute them) and more maneuvers represented by green arrows (which remove Stress as well as trigger other in-game stuff) in addition to having a more maneuvers than their slower, more ponderous brethren.
I figured my best bet for winning this game was to try and capitalize on my TIEs’ superior speed and handling by focusing on completing the objective rather than go toe-to-toe with an X-Wing, especially since he’d get one back almost as soon as I’d killed it (assuming I even could). As such, I figured for my first set of maneuvers, I’d just scream in and try to get to those satellites as quickly as I could. BC would definitely move to engage one of my ships, but hopefully I’d be able to dance around a bit while the other ship scanned his satellite and vamoosed for my board edge before the X-Wing could kill both of my TIEs. With that in mind, I set my maneuver dials and told BC I was ready. He set his single dial and it was time to start the show.
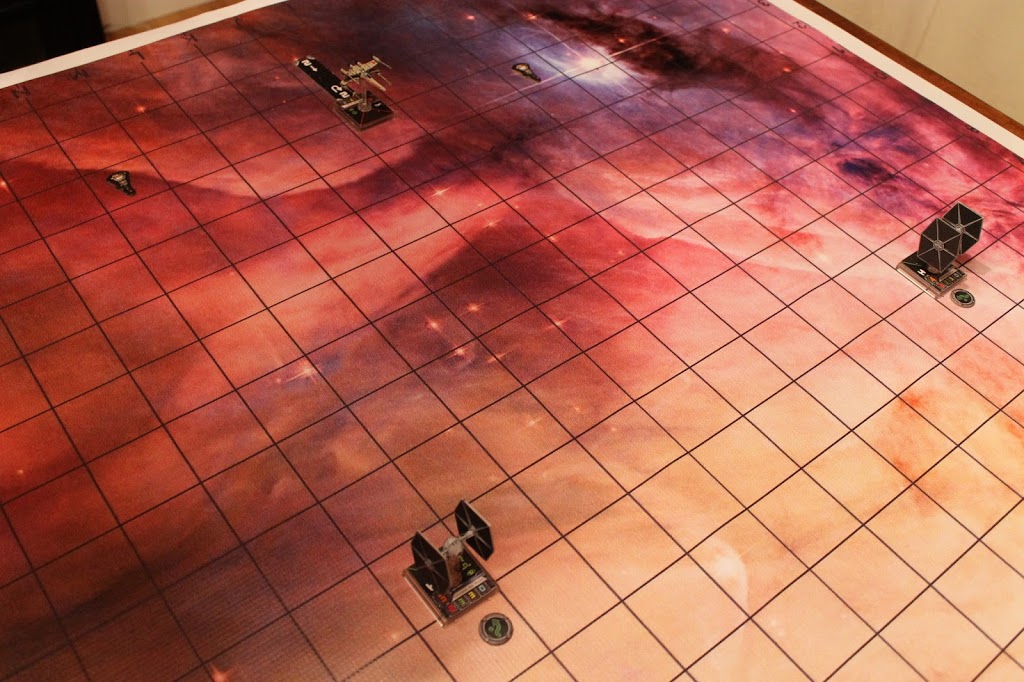
I had the ship with the lowest Pilot Skill (the Obsidian TIE), so I turned his dial over first, revealing the “Straight 5” maneuver I’d selected. I picked up my straight 5 template, placed it at the front of my Obsidian TIE’s base between the little template alignment nubs, picked the ship up, and dropped it at the end of the template, aligning the template with the alignment nubs on the back of my TIE’s base.
After performing your maneuver, if your pilot isn’t Stressed (usually by performing a stressful, red arrow maneuver, but can also be triggered by other stuff in the game), you can elect to Perform an Action. On both the ship/ pilot card as well as the cardboard base insert, there are some symbols that represent the Actions available to the ship. My TIEs have Barrel Roll, Evade, and Focus available to them. BC’s X-Wing has Focus and Target Lock. I talk about all of those save for Barrel Roll in the Three Main Actions article (and if you’re mainly an Imperial player, stress out over the fact that I didn’t include Barrel Roll and make it four main actions). Of course, they’re also in the rule book as is the particulars of using Barrel Roll.
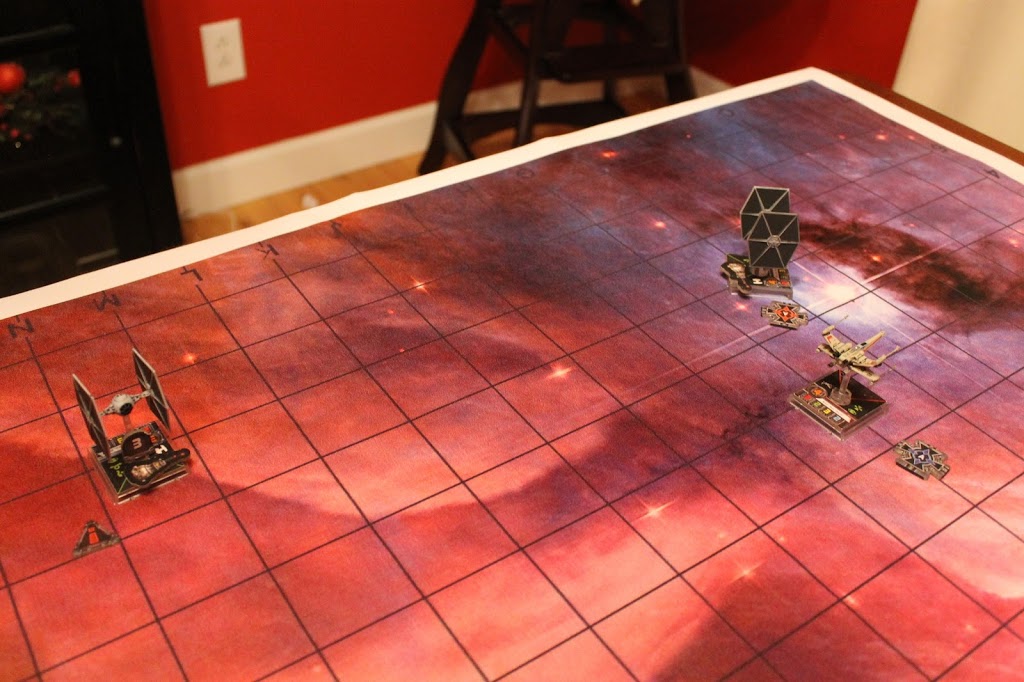
Not knowing how far up the mat BC’s X-Wing was going to move, I went ahead and selected “Evade” as the Obsidian TIE’s Action just to be on the safe side. I placed an Evade Token near my miniature then revealed Black Squadron’s maneuver dial- also a straight 5.
For BC’s turn, he pulled a Straight 2 and found he was just short of being able to Target Lock either of my ships, so he elected to take no Action as we were at the end of this game turn.
To Target Lock, a ship has to be within at least Range 3 of the ship doing the Target Locking. As this is currently the maximum range for ship weapons in X-Wing, since neither of my TIEs were in Range 3 of BC’s X-Wing to provide a Target Lock, we also knew they weren’t in range to shoot or be shot at. That’s why we skipped the subsequent Combat Phase entirely.
At this point, BC said, “So, spinnin’ wheels?”, and we picked up our maneuver dials and assigned our next set of moves to our ships.
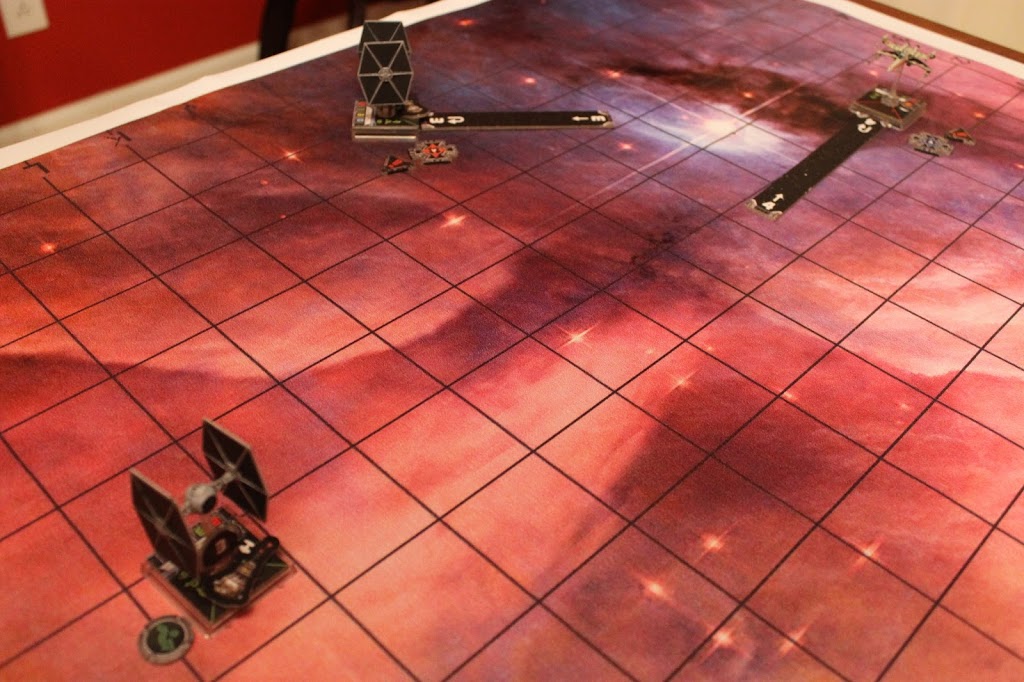
I picked my maneuvers and set my dials, while BC did the same. After we both indicated we were ready, I revealed the dial for Obsidian TIE, who you’ll recall had the lowest Pilot Skill of the ships on the board and therefore would maneuver first. I had selected another Straight 5 maneuver, then picked Evade for my Action, again hoping to scan those satellites and high-tail it outta there, hopefully without being blown out of the firmament. Black Squadron TIE revealed his maneuver next since he had Initiative over BC’s Red Squadron X-Wing, also showing a straight 5 on the dial and also selecting Evade hoping to minimize any shots coming his way. BC decided to maneuver to engage Black Squadron revealing a Bank 1 on his dial, then choosing to Target Lock my Black Squadron TIE.
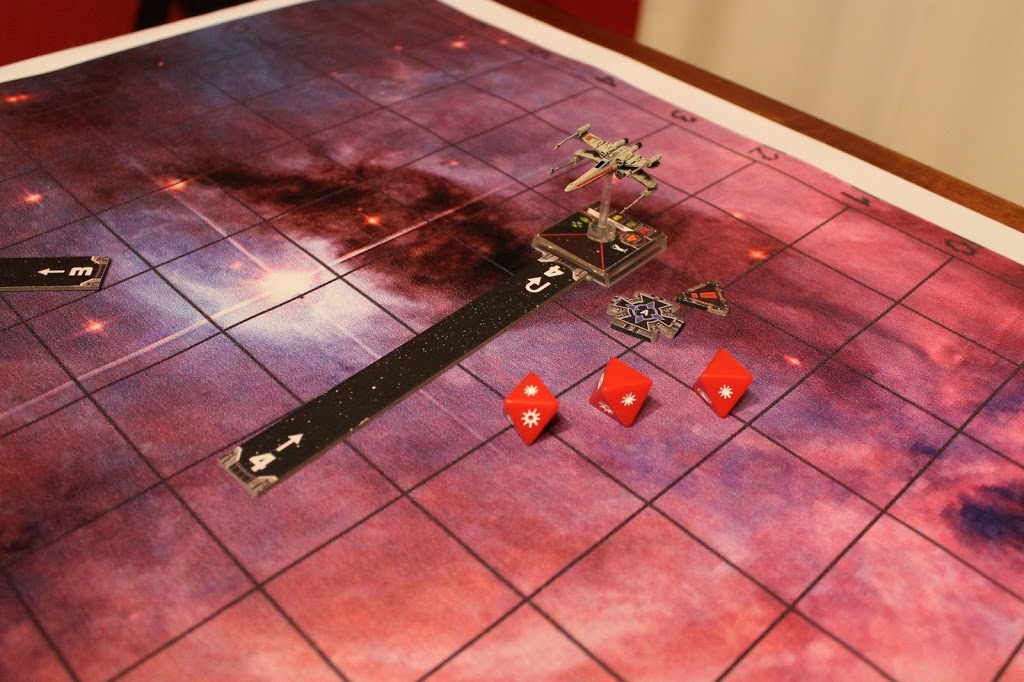
The game’s first Combat Phase began with Black Squadron, but BC’s cagey maneuver had put him outside of Black Squadron’s firing arc (probably can’t see them in the picture above, but there are a couple of lines on the cardboard insert that illustrate a ship’s firing arc), so the only shooting for the turn fell to Red Squadron.
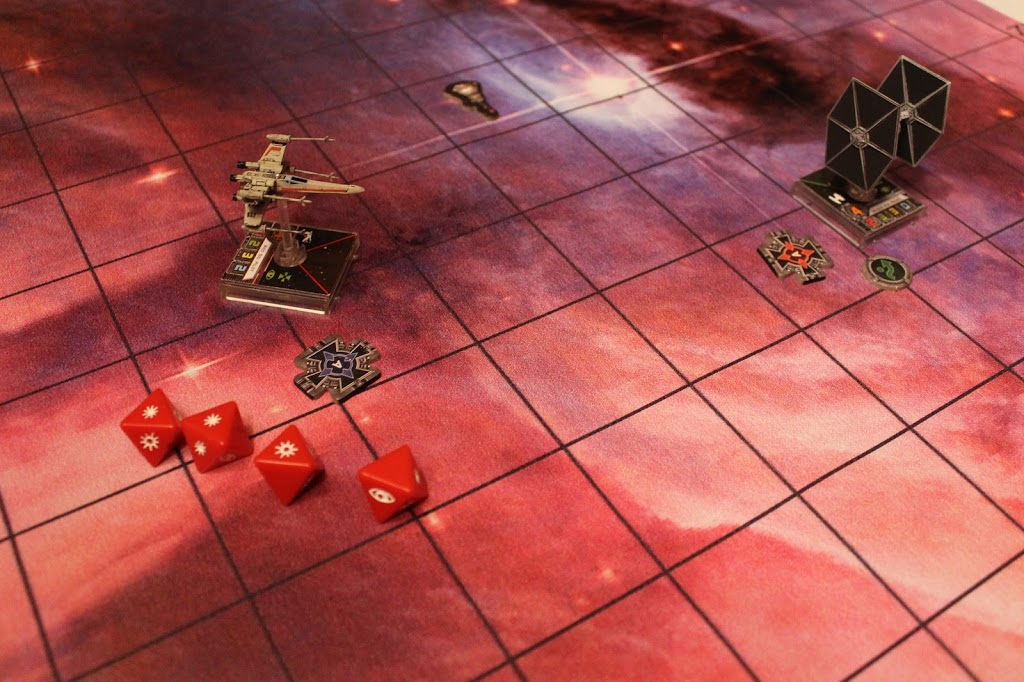
BC checked range and found Red to be at Range 2 from Black. Hoping to get one of my ships out of the way early, BC elected to fire his Proton Torpedoes which would get him 4 Attack dice (one more than he’d have been able to roll had he just used the X-Wing’s primary weapon) as well as some other side benefits depending on what he rolled (for the particulars, click the Proton Torpedoes link there). His roll netted two filled explosion symbols, or “hits” as we usually call them (whole other subject- click to read The Combat Phase Explained! for more details), an unfilled explosion symbol, or a “crit” as we call them, and a blank.
A TIE fighter has an Agility of 3 standard, which means I got to roll three of the green dice to hopefully mitigate the effects of BC’s shooting. For every wavy arrow symbol the defender rolls on the green dice, he gets to cancel one hit result on the red attack dice.
For my defense roll, I ended up with two wavy arrow symbols and a focus symbol (or “eyeball” in local parlance). Normally, this would mitigate both of BC’s “hit” results (you mitigate normal hits before “crits”), but since I’d also declared Evade as my Action, I elected to use my Evade token to also mitigate the ‘crit.”
Net result? No damage to my Black TIE. This turn’s Combat Phase was now at the end as my Obsidian had no shot on BC’s X-Wing. We entered the End Phase where most unused tokens get removed. In this case, it was Obsidian’s Evade token going back to the pile.
Spinnin’ wheels again, I was definitely going to be in range to try and overlap those satellite tokens. This is where things were going to get tricky; if I didn’t overlap the tokens, I couldn’t try to scan them, so I took a long hard look at the table and tried to visualize the maneuvers I needed to overlap both satellites with both TIEs. I figured BC’s X-Wing had plenty of firepower to one-shot one of my ships before it could escape, but it was unlikely he’d get both of them running away. We selected our maneuvers and concluded this turn’s Planning Phase when I revealed Obsidian TIE’s maneuver.
Obsidian TIE started pretty much straight across from the satellite token he was going after. As BC’s X-Wing seemed to be much more focused on taking out Black Squadron TIE, I decided go for the gusto and attempt a Koigoran Turn, which is the fancy pants X-Wing Miniatures term for a straight move that ends in a 180 degree turnaround. TIE Fighters can do a K-Turn at the end of a Straight 3 or a Straight 5. I wasn’t entirely sure a 3 would get me on top of the token, and seriously considered selecting a 5 instead. I knew that maneuver would cause me to overshoot the satellite, but I could easily ‘lap it on the way back. The problem was, it would be an extra turn that BC would possibly have time to destroy my other ship, then come after this one, so I decided to pull the Straight 3 K-Turn instead.
Black Squadron TIE wasn’t directly across from the satellite he was after, but again, after taking a long look at things, I figured a Bank 3 ought to get me pretty dang close, and hopefully even if I didn’t end up on top of the satellite, it’d at least put me out of BC’s firing arc.
Probably should have mentioned this before now, but when you’re selecting your maneuver in the Planning Phase, you can’t pre-measure the maneuver you select- it’s all your spatial awareness versus the other dude, as well as guessing what you think your opponent is thinking. It’s a really cool mechanic that sort of makes a poker game out of the maneuver phase as a well selected maneuver can very literally set you up to win the game.
BC indicated he was ready to go, and I flipped over Obsidian TIE’s maneuver dial.
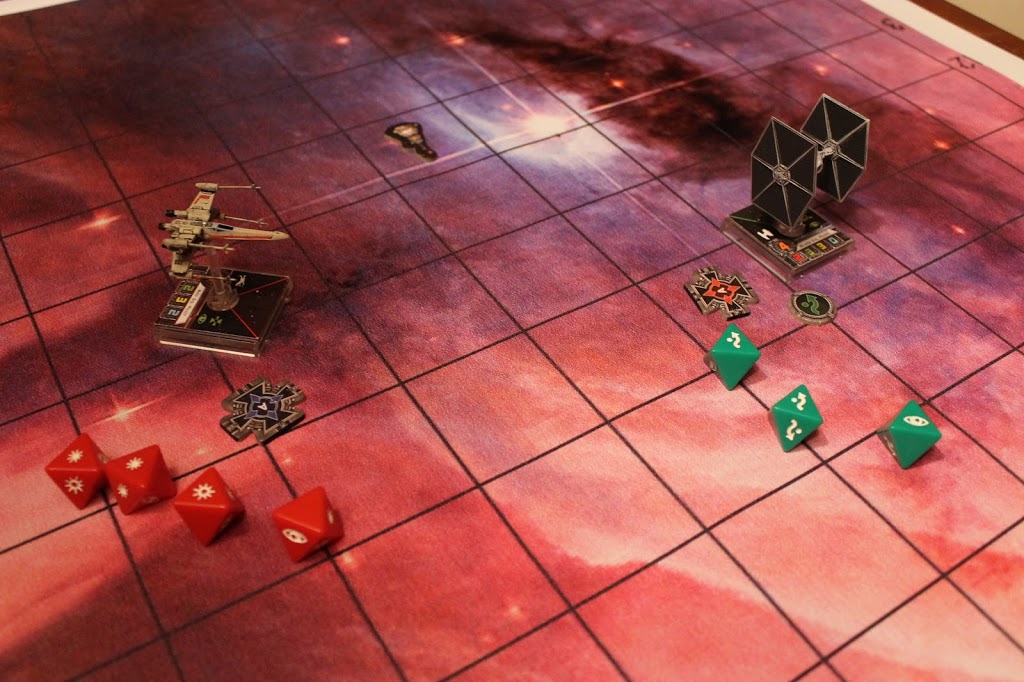
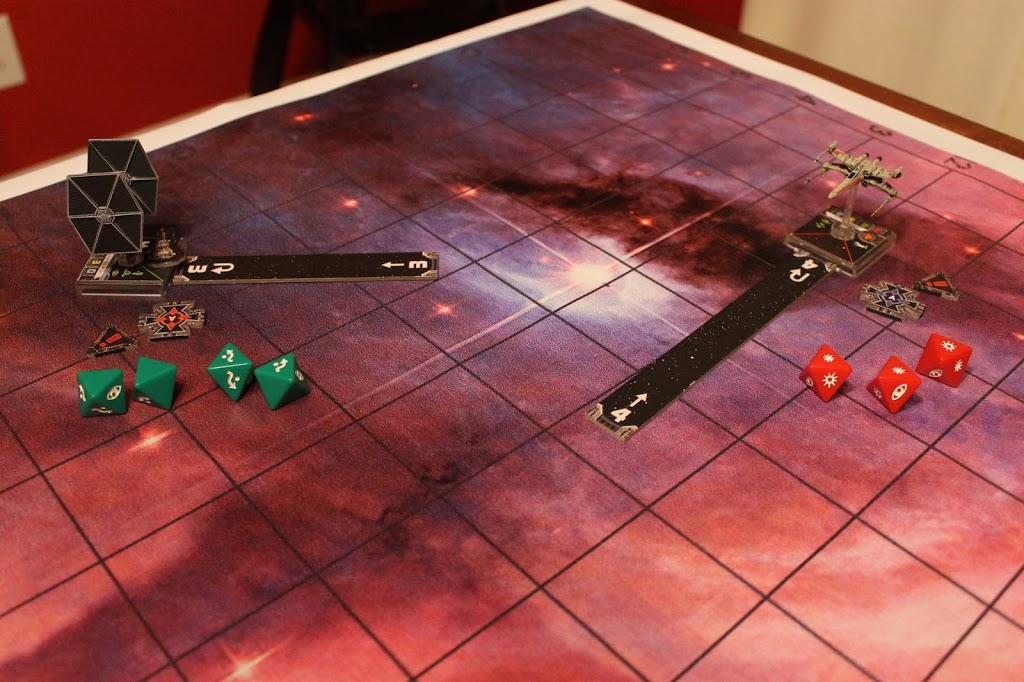
What a stroke of luck! Er, I mean, what a great couple of maneuvers picked by me! Both maneuvers put both ships right on top of their satellites. Since a K-Turn is red on a TIE Fighter’s maneuver dial, I had to place a Stress token next to Obsidian which meant he couldn’t declare an Action this turn. Since Black had just pulled a white maneuver, I elected to Evade again in case BC was going to be firing on me. BC elected to pull a 1 Bank to the right and as he was well within Range 3 of Black, decided to declare Target Lock for his Action.
Note: If you look closely, you’ll see that Black ended up outside of BC’s firing arc. While he would be unable to fire upon me this turn, the Target Lock Action only requires that the target ship be within Range 3- it does not have to be within the ship’s firing arc.
We entered the Combat Phase of the game turn and I elected to have Black Squadron Pilot Scan the satellite. Red Squadon had no valid target, so we moved on to Obsidian who also scanned the satellite he was overlapping.
Moving into the End Phase, Black’s Evade token left the board, but BC’s Target Lock remained in play as it’s a persistent type of Action, and Obsidian’s Stress Token would be sticking around until he pulled a green maneuver.
Spinnin’ wheels again, I liked my chances of getting at least one of these TIEs off the board with the intercepted Rebel comm transmissions. I figured my best shot at this would be to fly Obsidian straight back towards my board edge and have Black try to engage the X-Wing. I didn’t figure I’d kill it, but I thought if I could at least hold him up for a round or two, Obsidian would have an easy time escaping. That in mind, I didn’t want to just pick a straight 5 for Obsidian because of his Stress Token. Instead, I picked a Straight 2 as it’s the fastest, straight maneuver available to a TIE that’s still a green maneuver. That sorted, I decided Black Squadon would pull a 3 K-Turn and attempt to engage the X-Wing. I set my dials, BC indicated he had chosen his maneuver and we moved from the Planning Phase to the Activation Phase.
Obsidian performed his maneuver, which being a green maneuver, allowed him to discard the Stress Token he picked up last turn. With the Stress Token gone, he was free to select an Action in his Perform Action step. I chose to Evade again. Black then pulled his 3 K-Turn, a red maneuver, which Stressed him out and with the Stress Token attached to him, he was unable to declare an Action this turn. BC pulled a K-Turn of his own with Red; also a Stressful maneuver, but one that left Black in his firing arc and vice versa- the Combat Phase was upon us!
After measuring with the Range Ruler (forgot to take a pic, sorry!) Black Squadron found himself at Range 3 from his quarry and fired on the Red Squadron X-Wing. TIE Fighters have an Attack value of 2, so I grabbed two red Attack dice and rolled a “hit” and a blank. BC now had the opportunity to mitigate this damage with a his X-Wing’s Agility of 2, but he was able to roll a third green die since I was using a primary weapon to attack him at Range 3. He produced a roll of three Focus results, so my hit landed upon his ship and removed one of his two shield tokens.
Now, it was his turn to attack me back. His X-Wing has a primary attack value of 3, so he grabbed 3 red Attack dice and rolled them scoring a single hit and two blanks. Not the greatest roll in the world, he opted to spend his Target Lock token which allowed him to re-roll whatever dice he wanted, one time. He left the hit on the table and picked up the two blanks to roll again.
This time, the results were more favorable. Net result? Two hits and a crit. I grabbed my three green Defense dice because of my TIE Fighter’s 3 Agility and added another for being at Range 3 and being attacked by a Primary Weapon. I scored two wavy arrows and two blanks. As I’d declared a Stressful move, I had no Evade Action Token to save my butt this time.
My two Evade results cancelled both of BC’s hits, but that crit went against my hull which caused me to not only draw a Damage card to represent the damage, but also to flip it face-up and observe whatever the card said.

As the card was a “Ship” critical damage card, my Determination did nothing for me. Nope, I was going to have to take a Stress token any time Black Squadron TIE performed a Turn maneuver at any speed for the rest of the game! Bummer for me! Still though, it was only 1 point of damage and a TIE Fighter has a hull value of 3, so I could take two more unmitigated hits, then I’d be done for.
Since Obsidian had no valid targets, we entered the End Phase, discarded any remaining Action Tokens, and that game turn ended.
That’s all for part 1- check out the result in Part 2 coming soon!
If you want to get into X-Wing Miniatures but don’t know your Evades from your Target Locks, by all means, stop on by the hippest pilot bar in the galaxy- TheMetalBikini.com. We serve all kinds (yeah, even droids- they’re the best tippers), and have a whole bunch of articles from breakdown summaries of every single card released so far, to tactics articles, to our Bikini Battle Basics new player guides- all served up with a heapin’ helpin’ of my own personal brand of slang and humor. Can you dig it?


