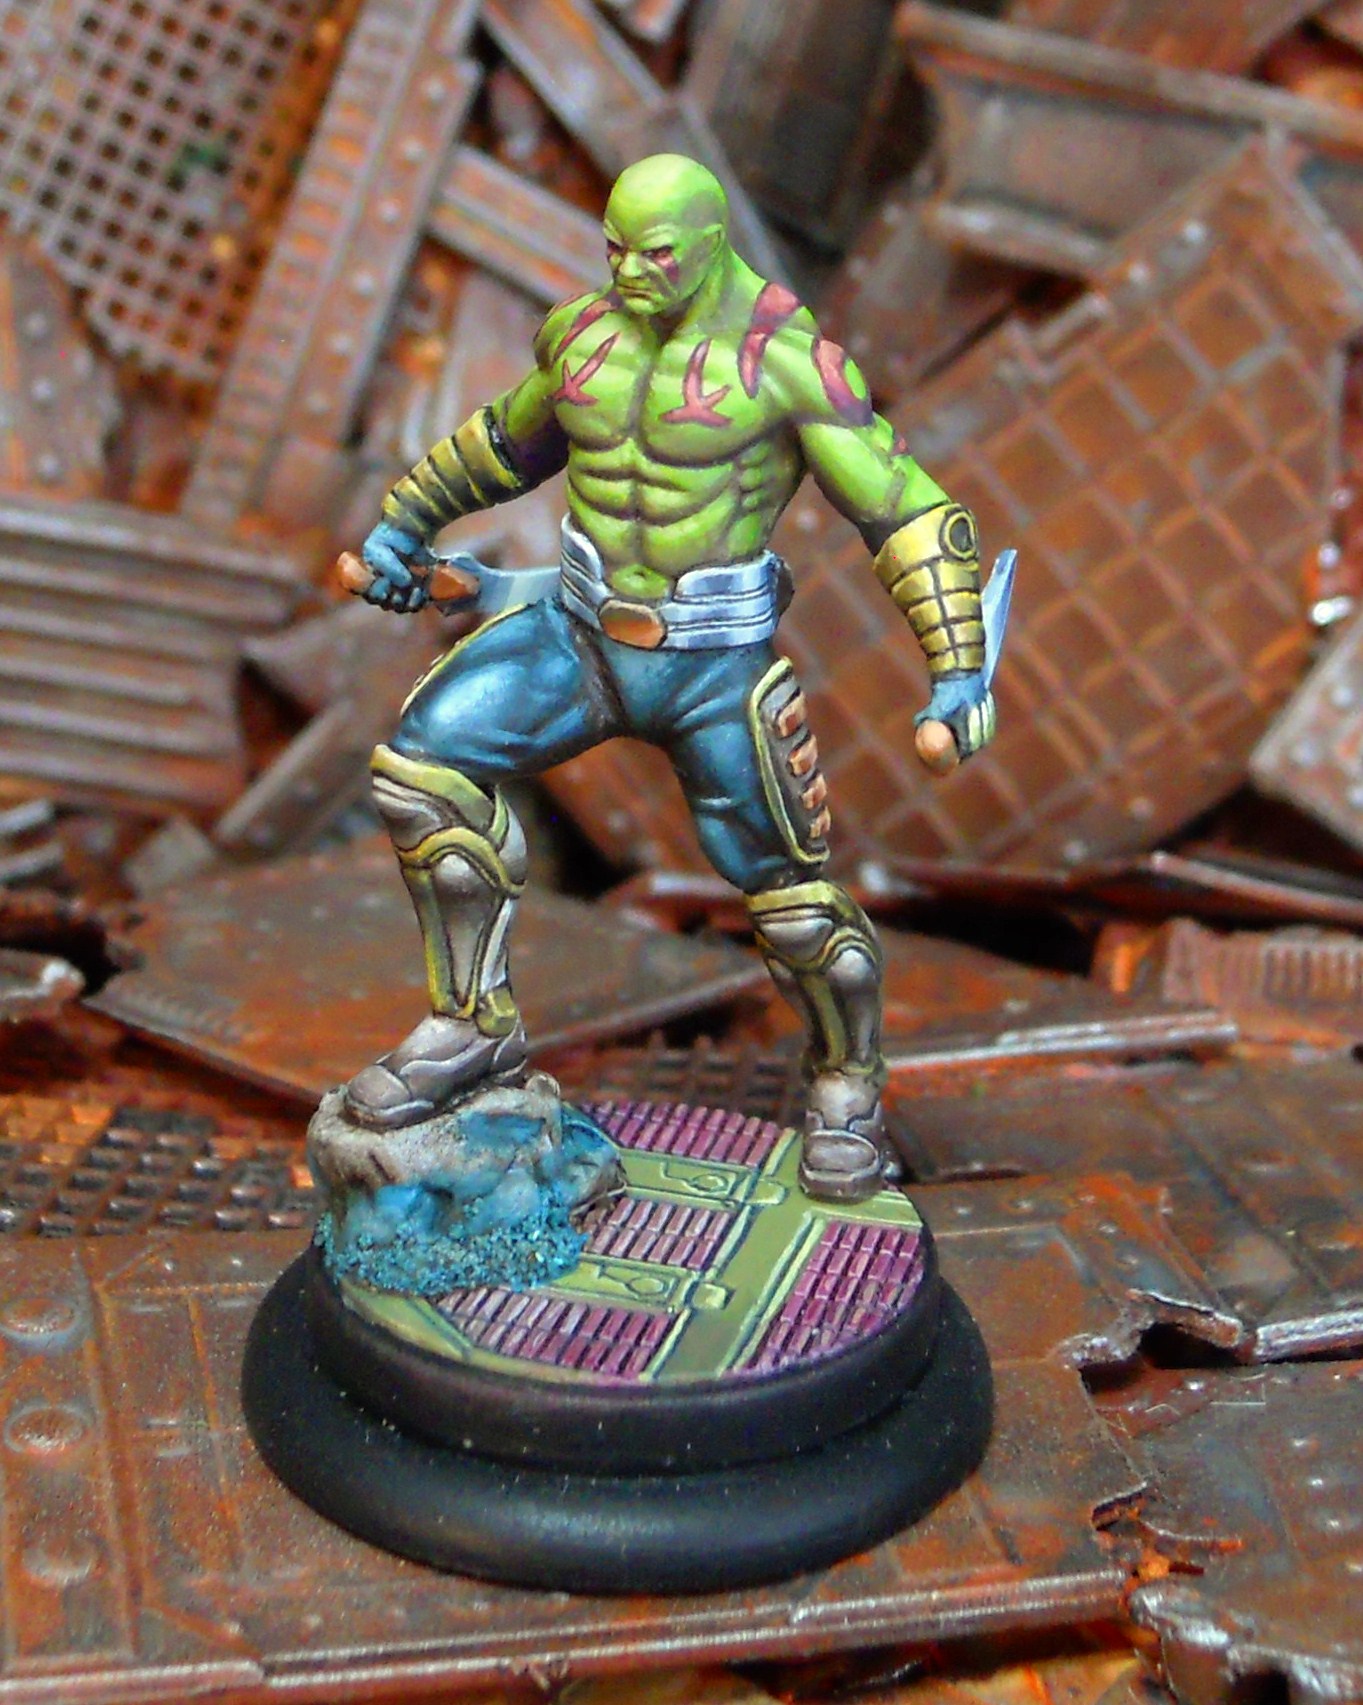
Knight Models Marvel Miniatures: Painting Drax


Nothing goes over my head. My reflexes are too fast. I would catch it.
As I was writing up my last Knight Models painting article, the rumors were already swirling that the company had lost the license to produce would no longer be producing their Marvel range. The day the article went live, they posted this message: Knight Models will no longer make products based on the Marvel Universe licence. You can read the whole message here on their Facebook page. They may not be making these models anymore, but they can’t make me stop painting the ones I already have.
The truth is I actually painted Drax here back in December. Writing these articles takes awhile between correcting for the light and color on all the photos, cropping them, scaling them down to a reasonable size, and of course adding the words. Since I already had most of the work done for Drax I figured I would go ahead and write the article – even if most of you poor folks will have a royally hard time finding a Drax of your own to paint.There are still plenty of things to learn here for models other than a Drax. Plus there’s a new Guardians of the Galaxy movie headed to theaters soon so I know they’re on everybody’s minds. Right?
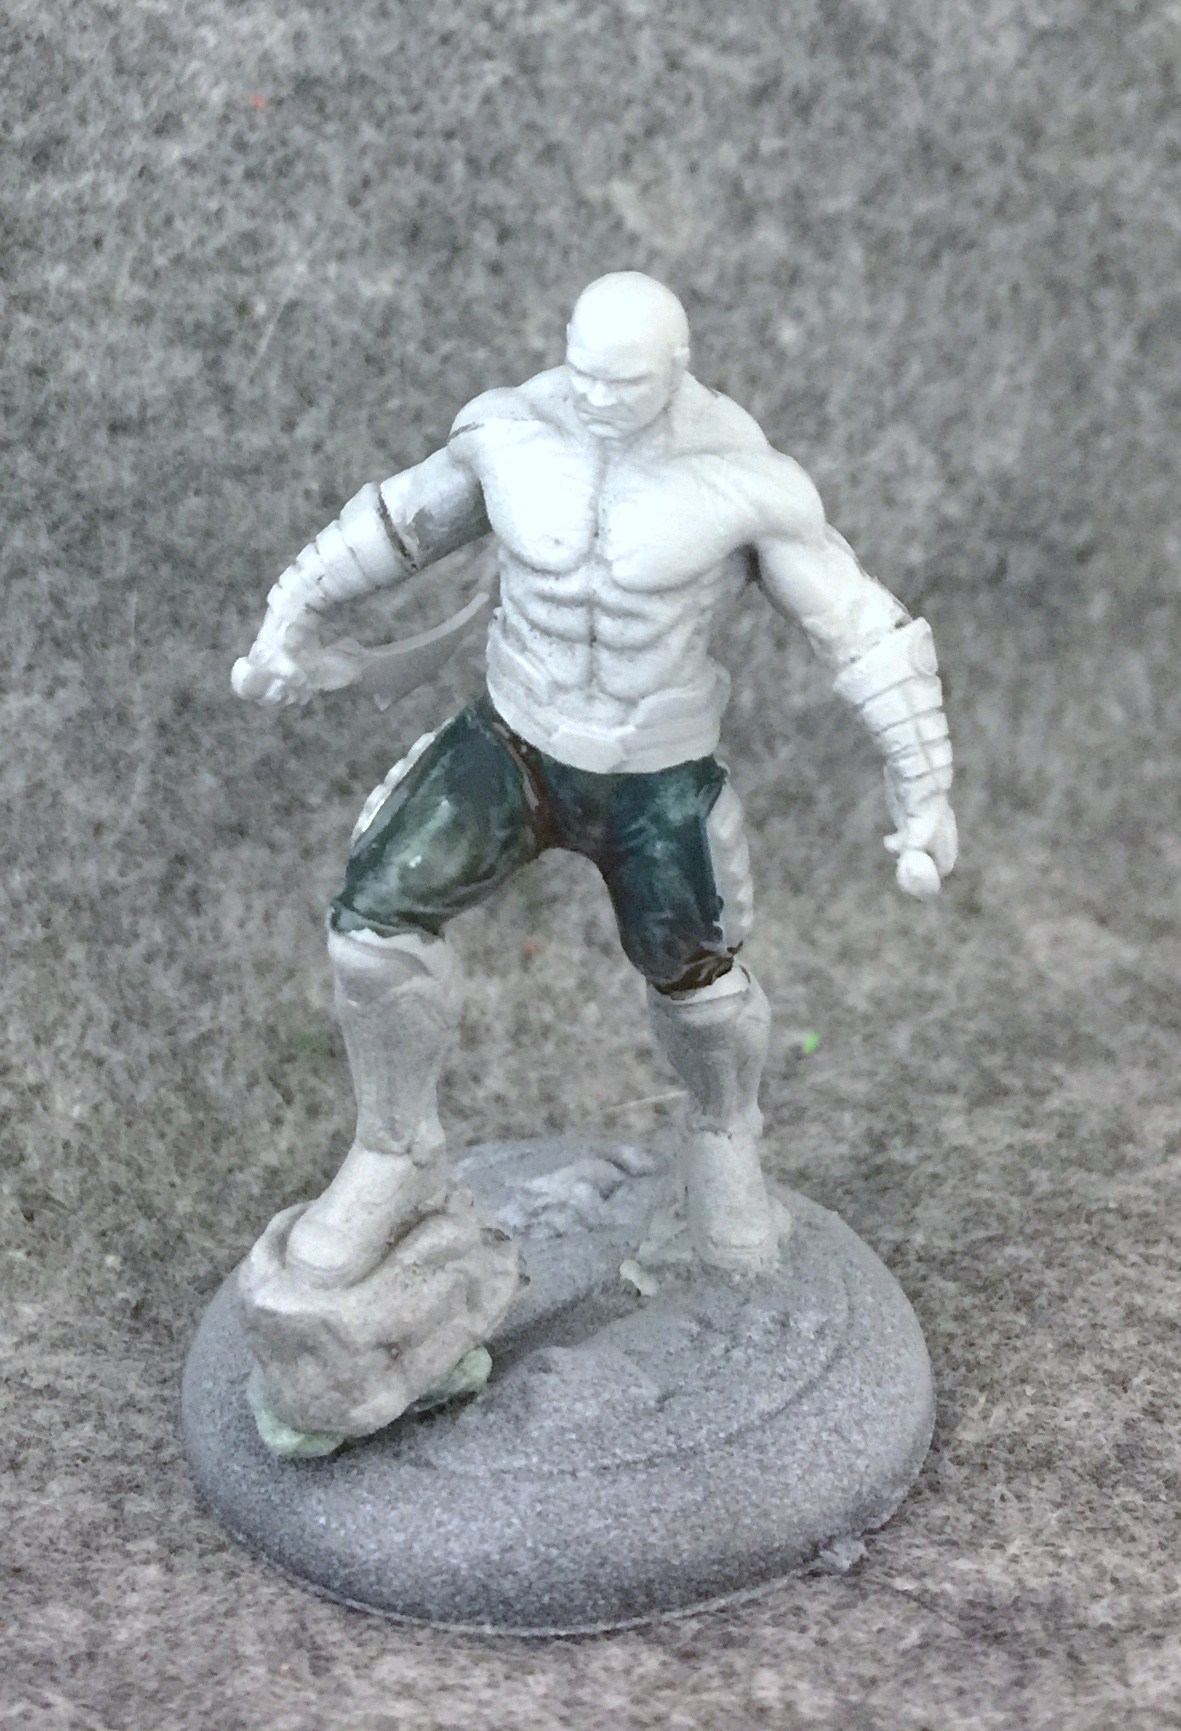
First: the pants. A quick base coat of P3 Coal Black is shaded with Thamar Black that has been toned with P3 Red Ink and some Bloodstone. I think that adding some warmth to the Thamar Black adds a nice contrast to the bluish Coal Black.
After smoothing out the Coal Black and warm-toned black layers, I add some more highlights with Underbelly Blue
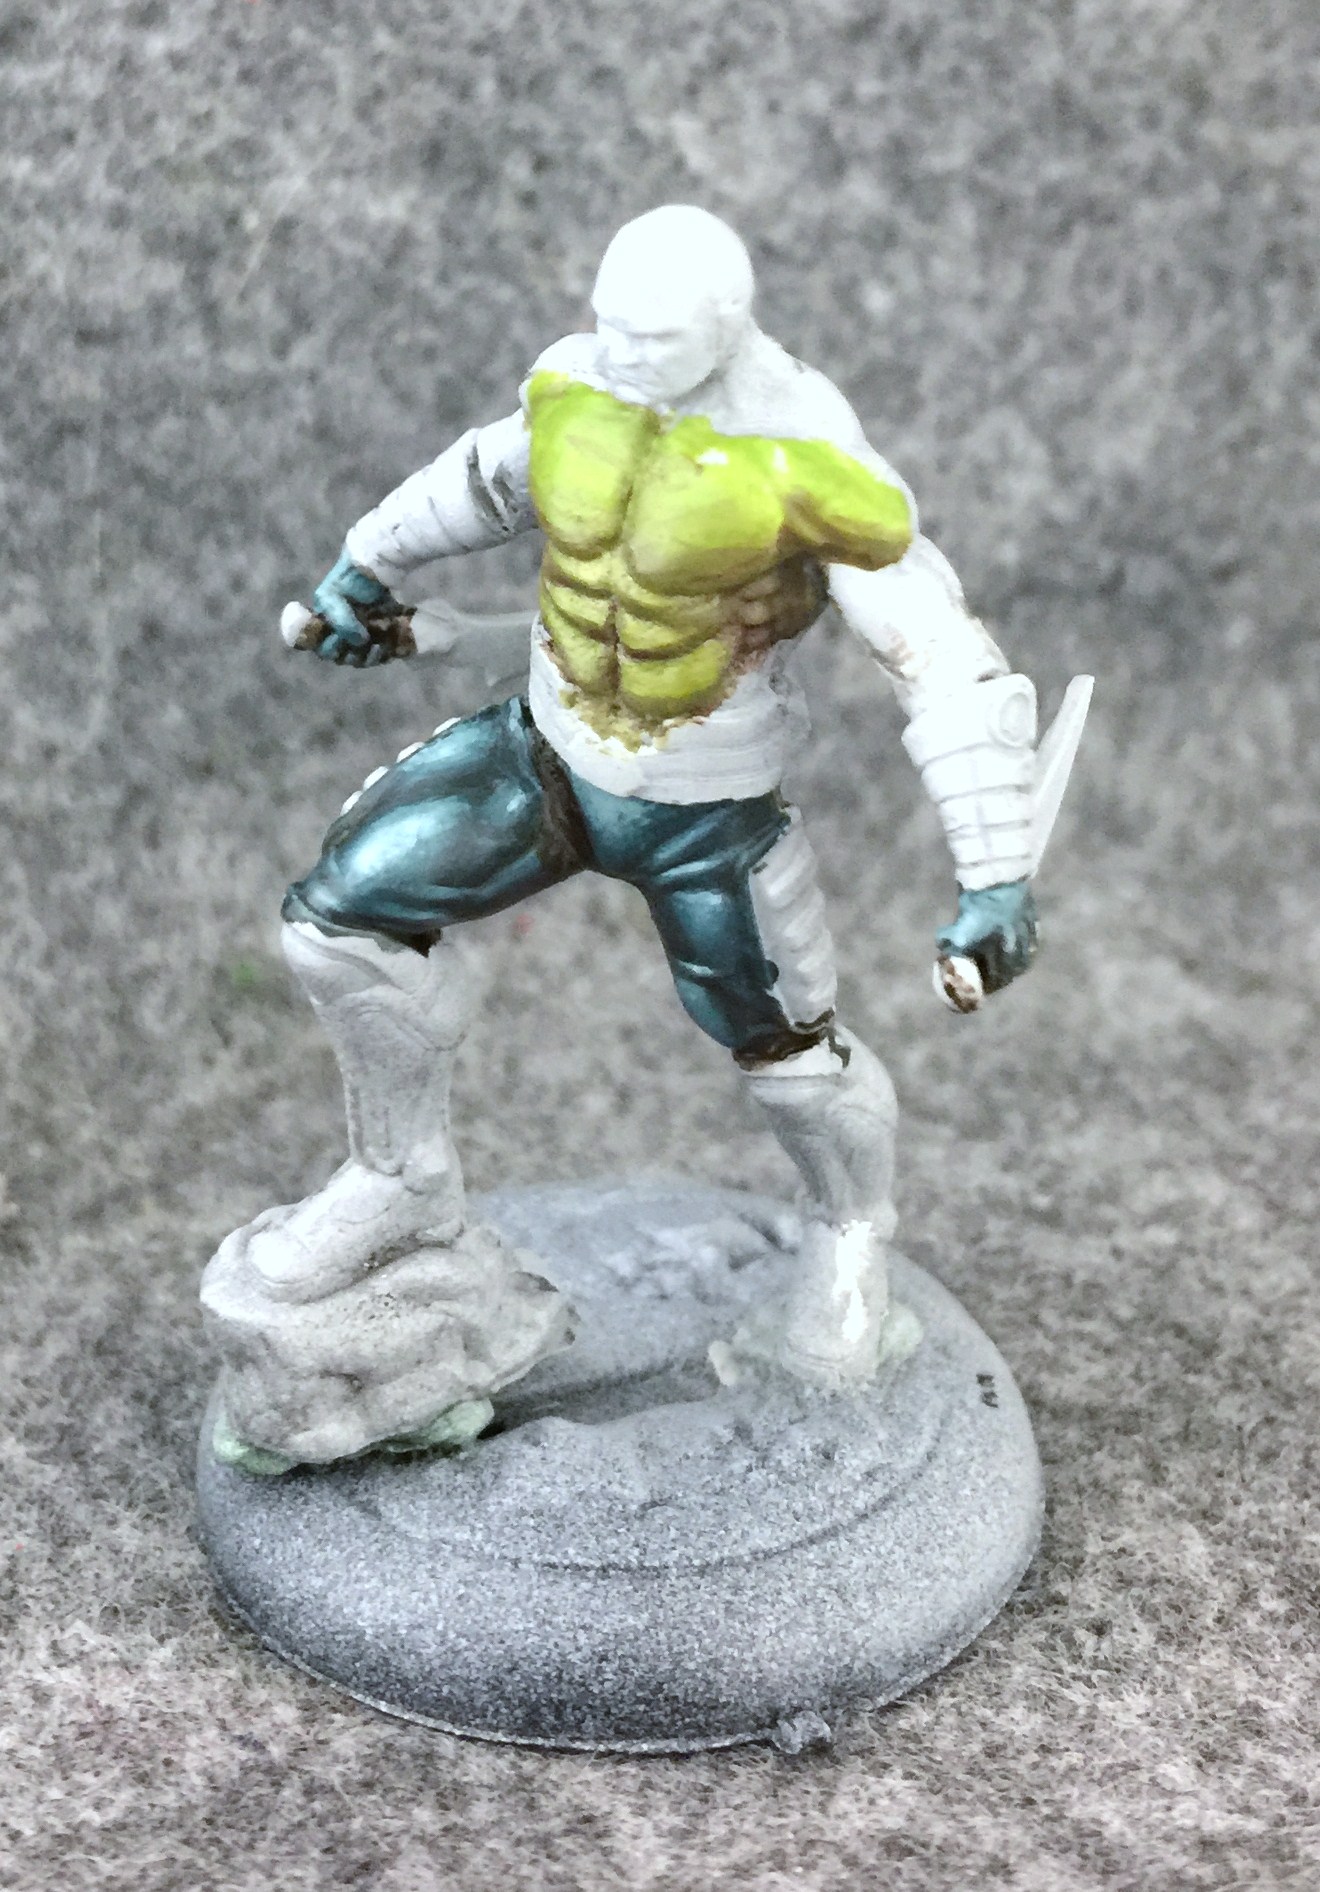
I push the Underbelly blue highlights a little further, and decide to go ahead and give him gloves of the same color. Then I move on to his green skin. The first step is P3 Wurm Green which is shaded with a mix of Beaten Purple and Umbral Umber.
Then I begin adding some highlights to the Wurm Green with Menoth White Highlight.

I keep smoothing it out and blending it more.
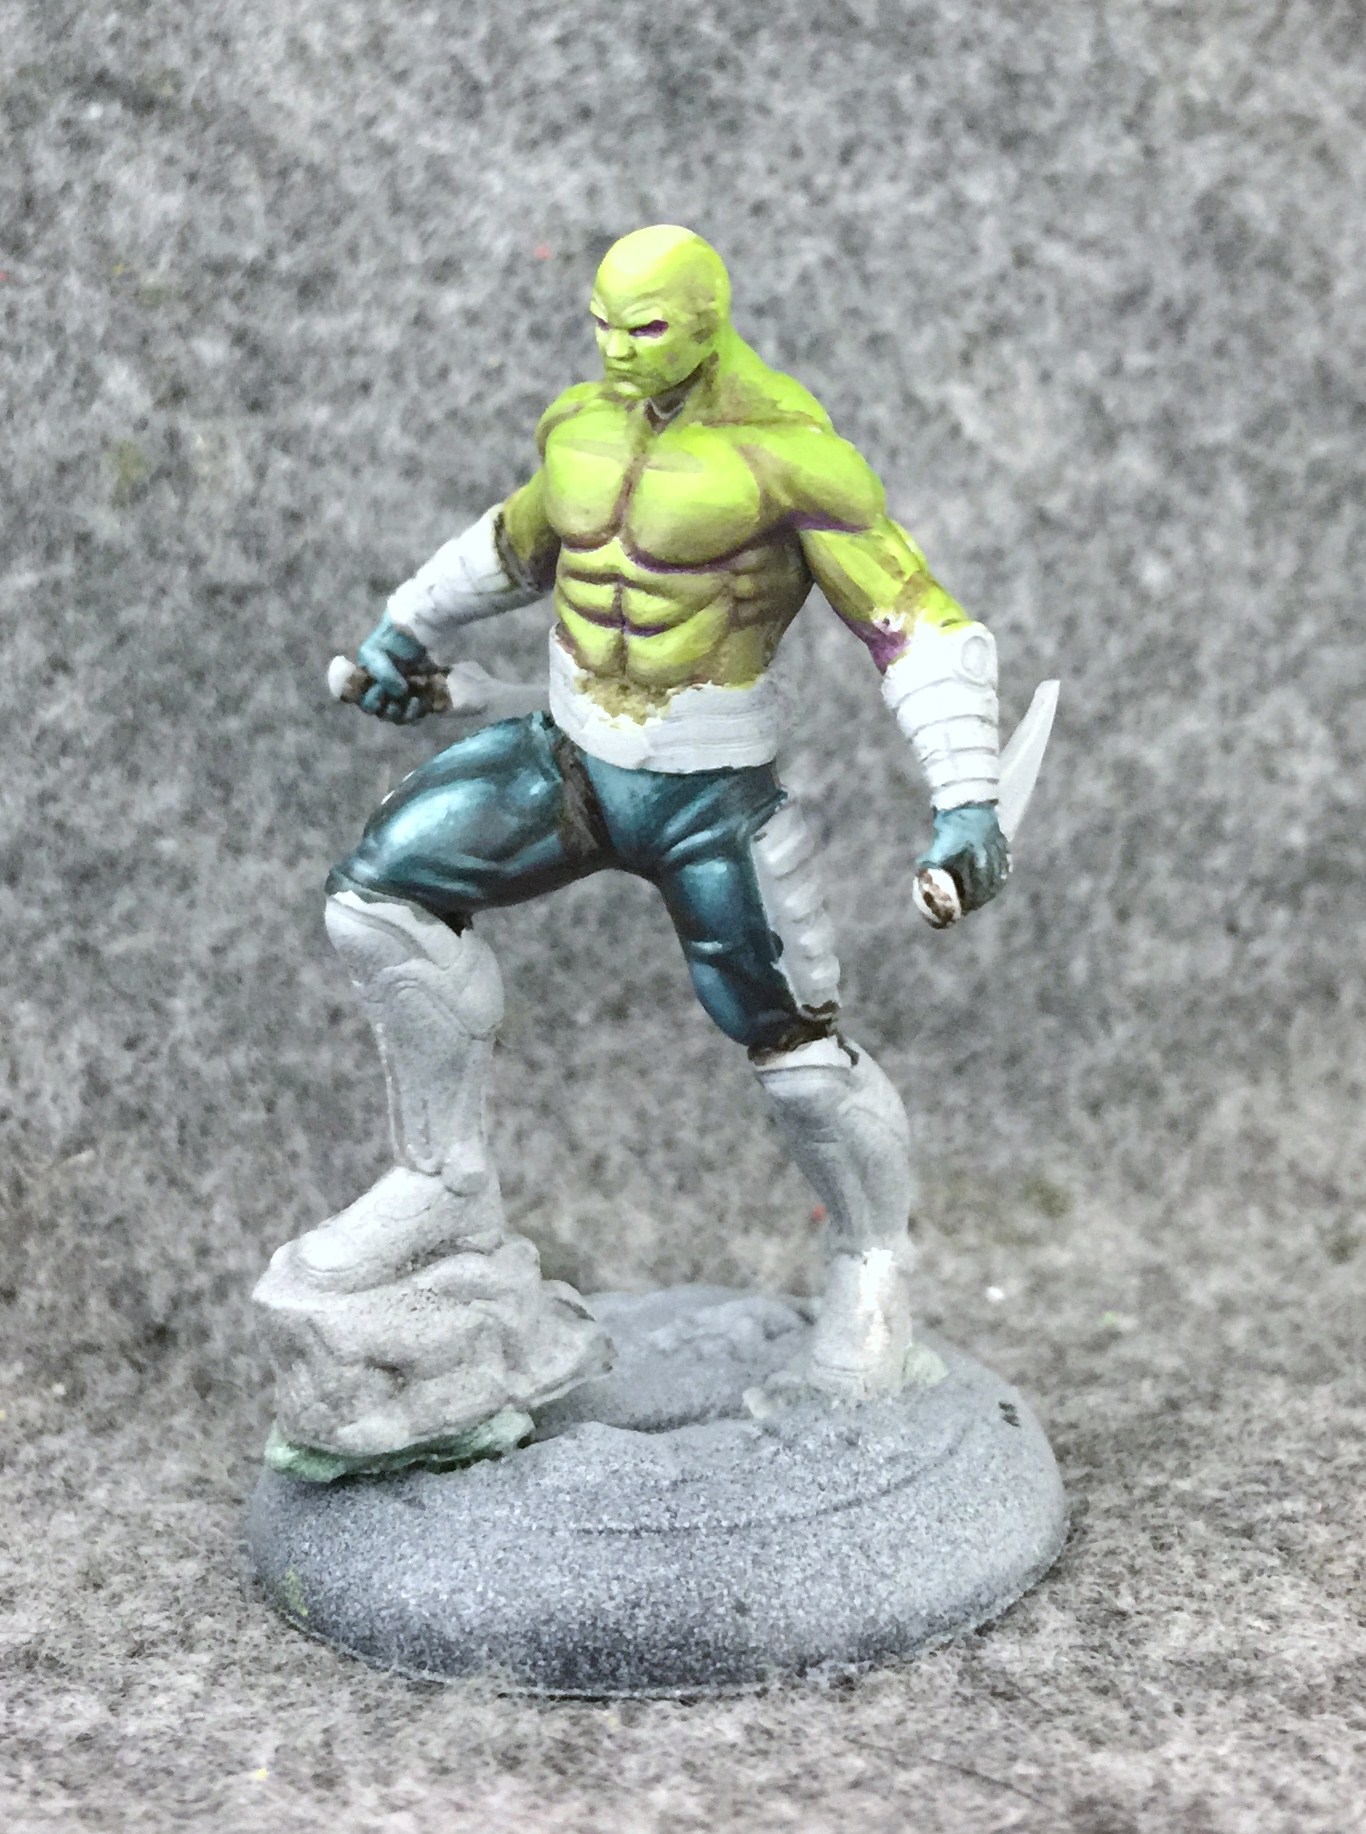
Eventually I move up to the face.
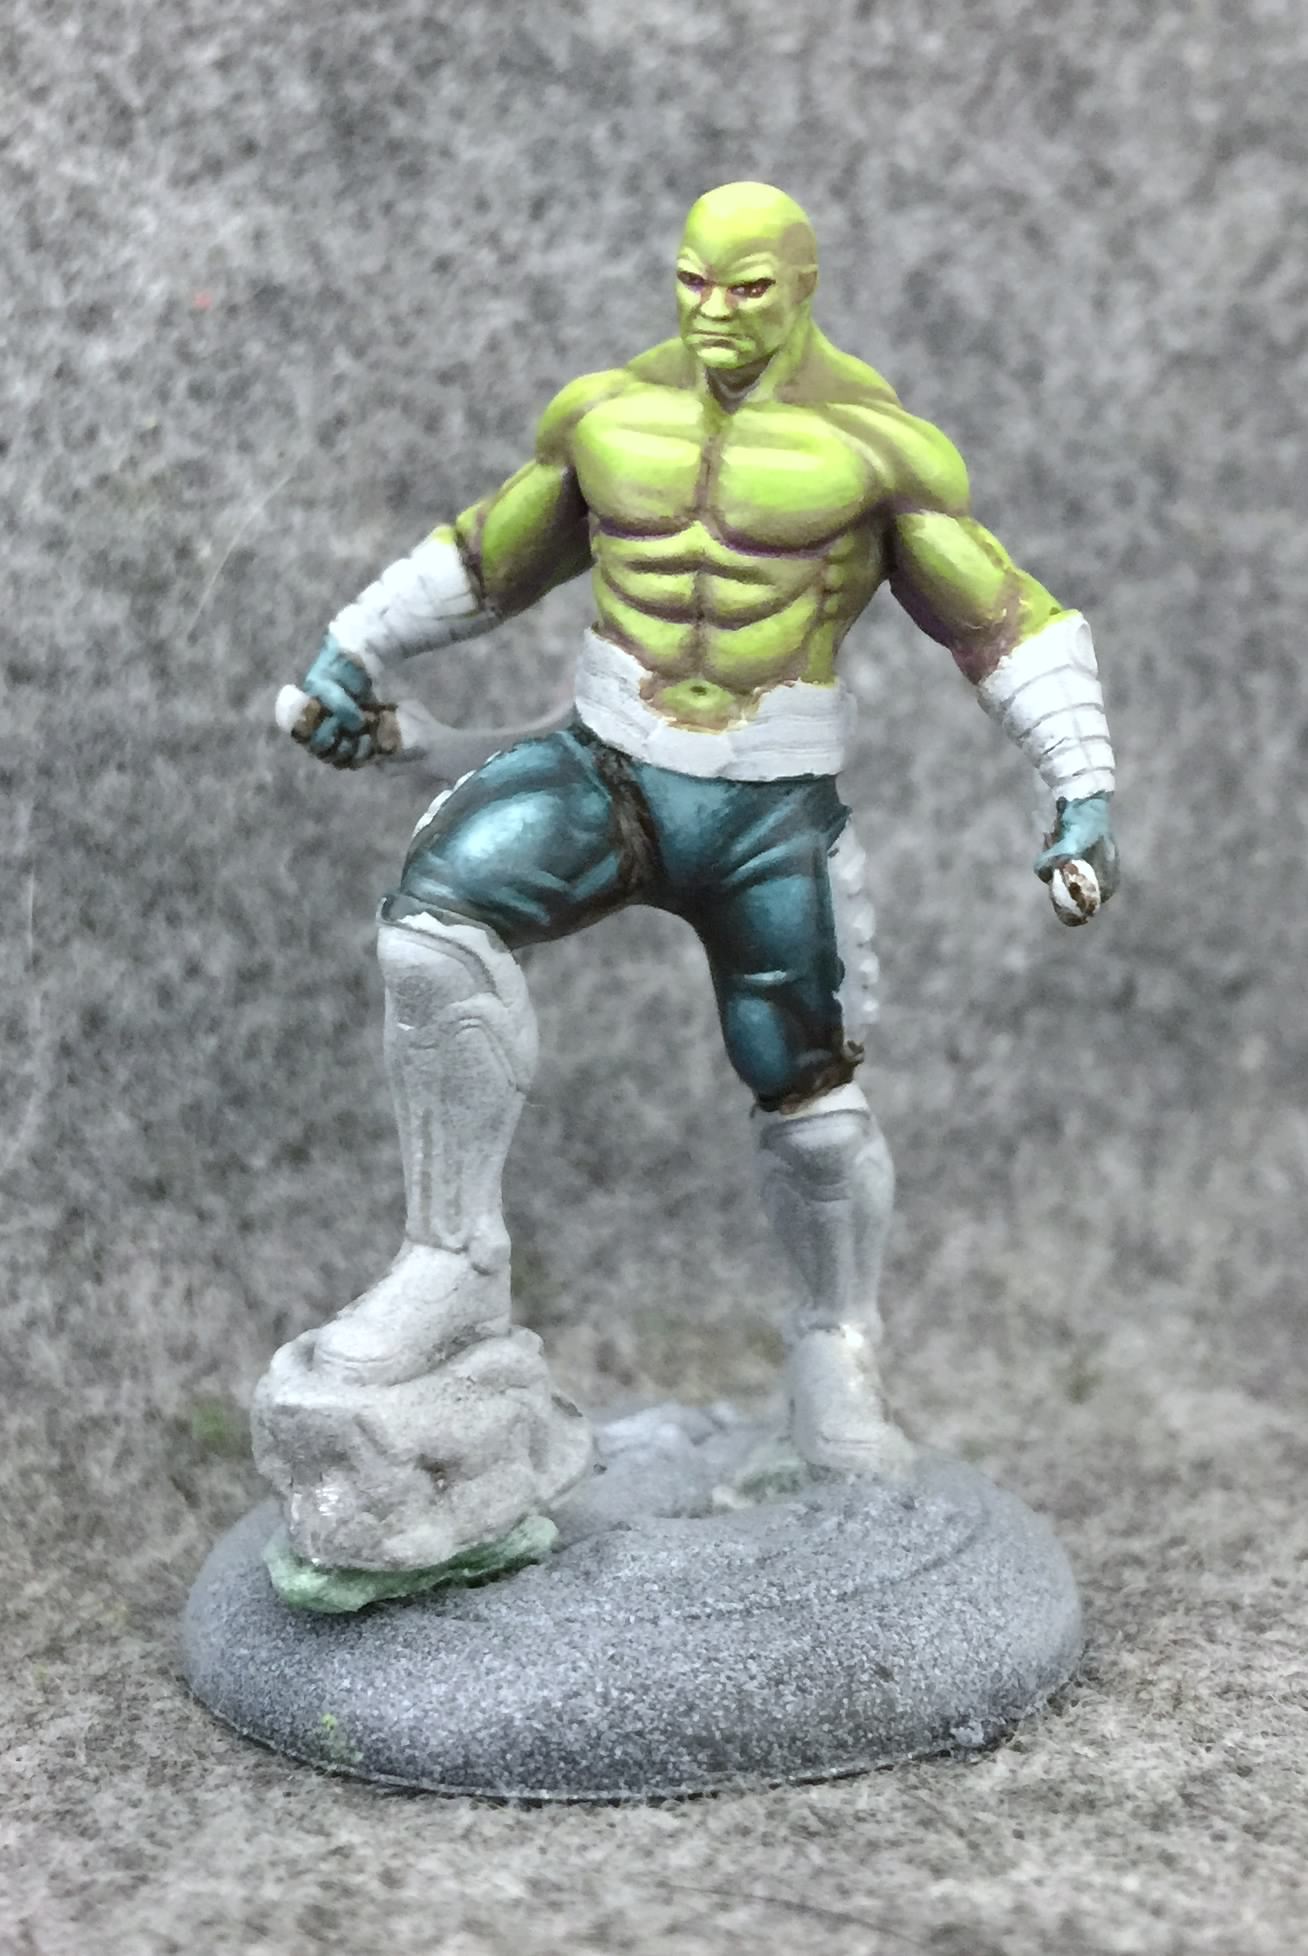
After a lot of blending and evening out the shadows and highlights, I’m finished with the skin.
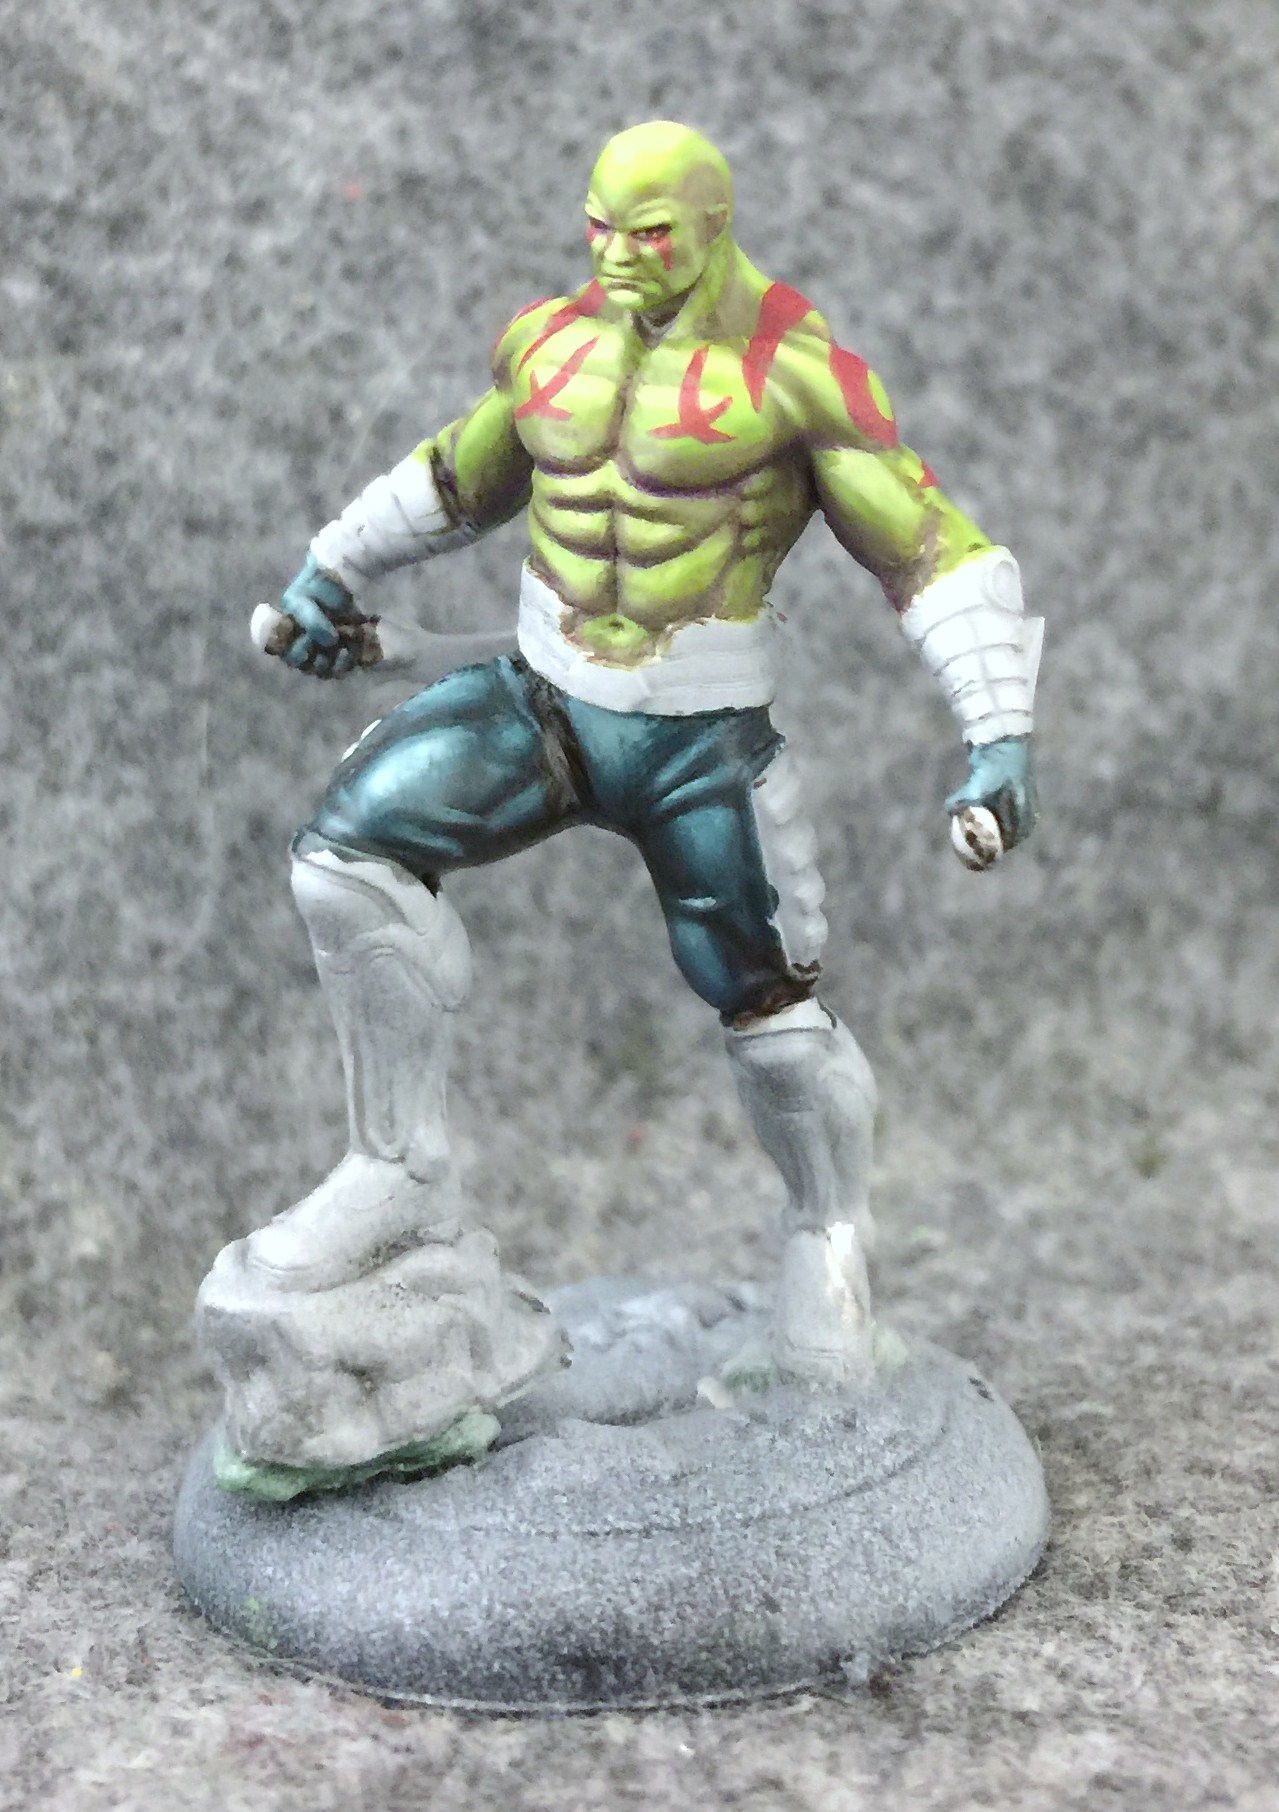
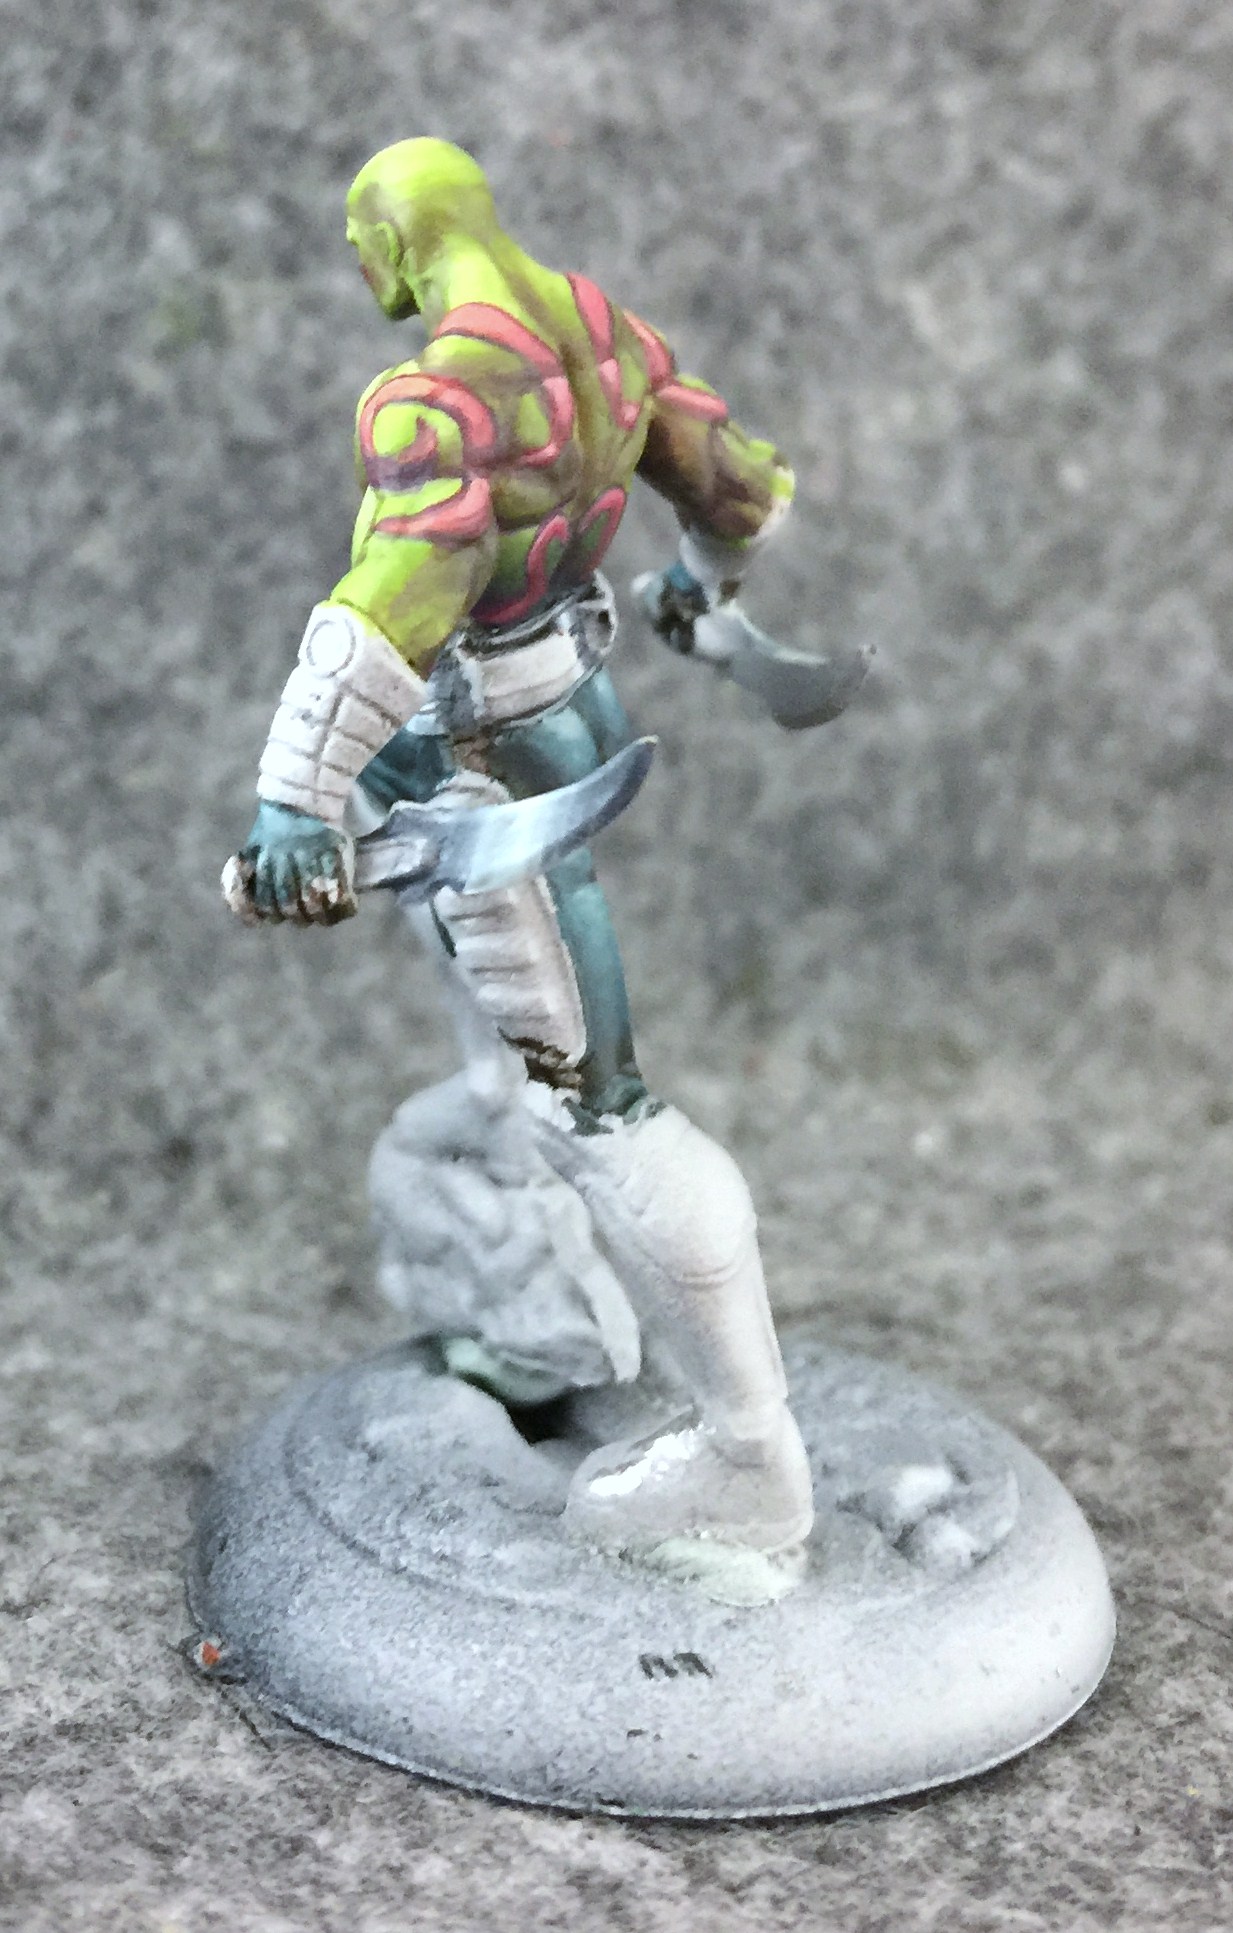
Well… almost. I haven’t read enough comics to know if Drax’s markings are tattoos, warpaint, or just something every member of his species is born with. Come to think of it I don’t even have the first clue what species he is. Regardless, I start these markings with a basecoat of Sanguine Highlight. Fwiw, the ones on his back and arms are part of the model, while the ones on his chest were added by myself. The area just seemed a little bare without them.
I added highlights to the markings with increasing amounts of Sulfuric Yellow before painting an outline back in around them with more of the Sanguine Highlight.
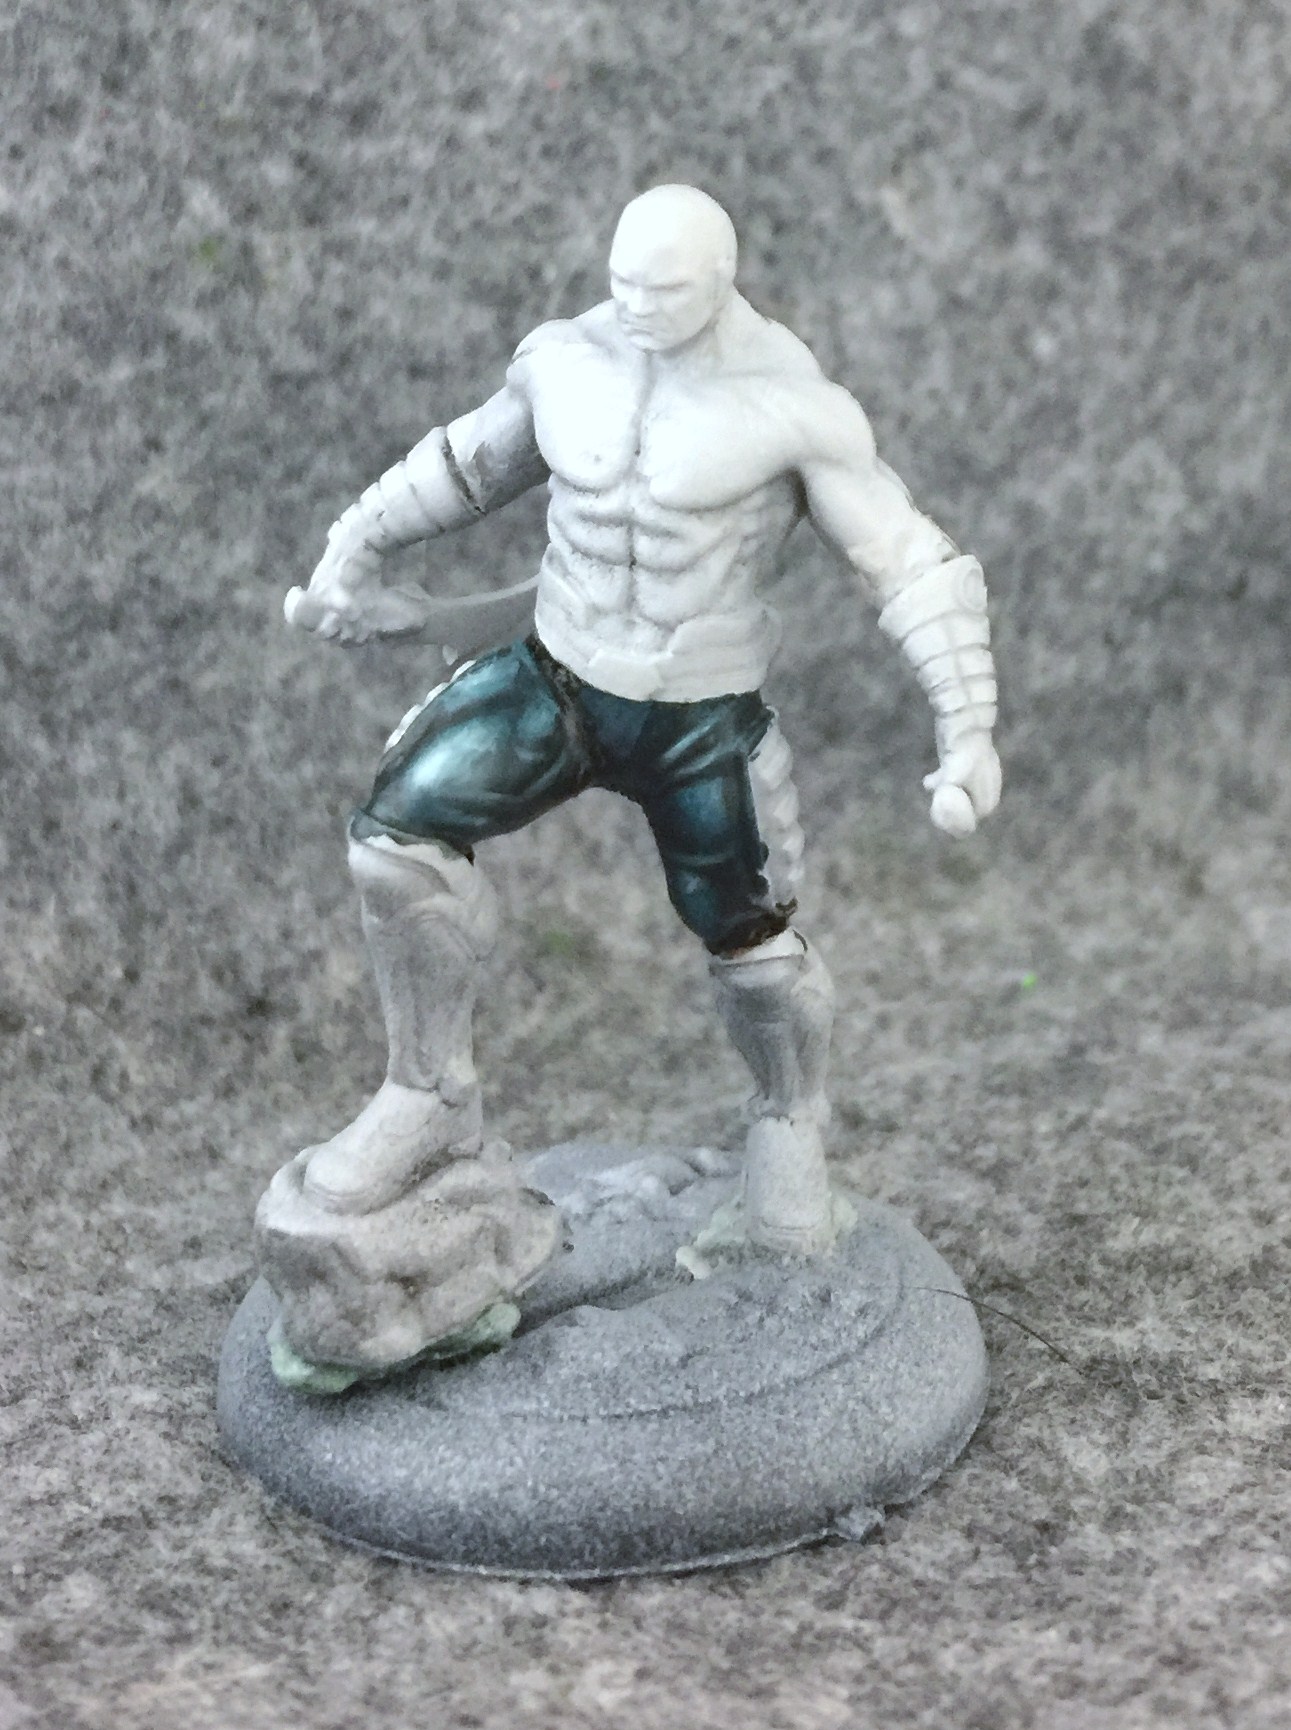
Now I’m working on that belt. There’s a group of about five or six colors (depending on how you look at it) that I’ve come to rely on whenever I want to do steel or chrome. The most important is a mix of Exile Blue and Umbral Umber that gives me a nice dark navy color. I highlight this with a bit of Thornwood Green followed by Underbelly Blue then Menoth White Highlight. The idea is that this mix of warm and cool tones, while subtle, will create a more vibrant NMM than just a range of grays.
Next I add a thin highlight of Underbelly Blue mixed with Menoth White Highlight along each ridge of the belt. This helps complete the metallic illusion.
Then there’s the painstaking task of defining those little recesses in the belt with thin lines of navy (umbral umber mixed with Exile Blue).
Here are the same colors used on the knives. The brightest highlight is in the center, and I blend darker as I go outwards to each edge.

For the sharp edge, I reverse the gradient: dark in the center blended out to the lightest highlights. Every edge also gets a thin line of highlight just like the belt.
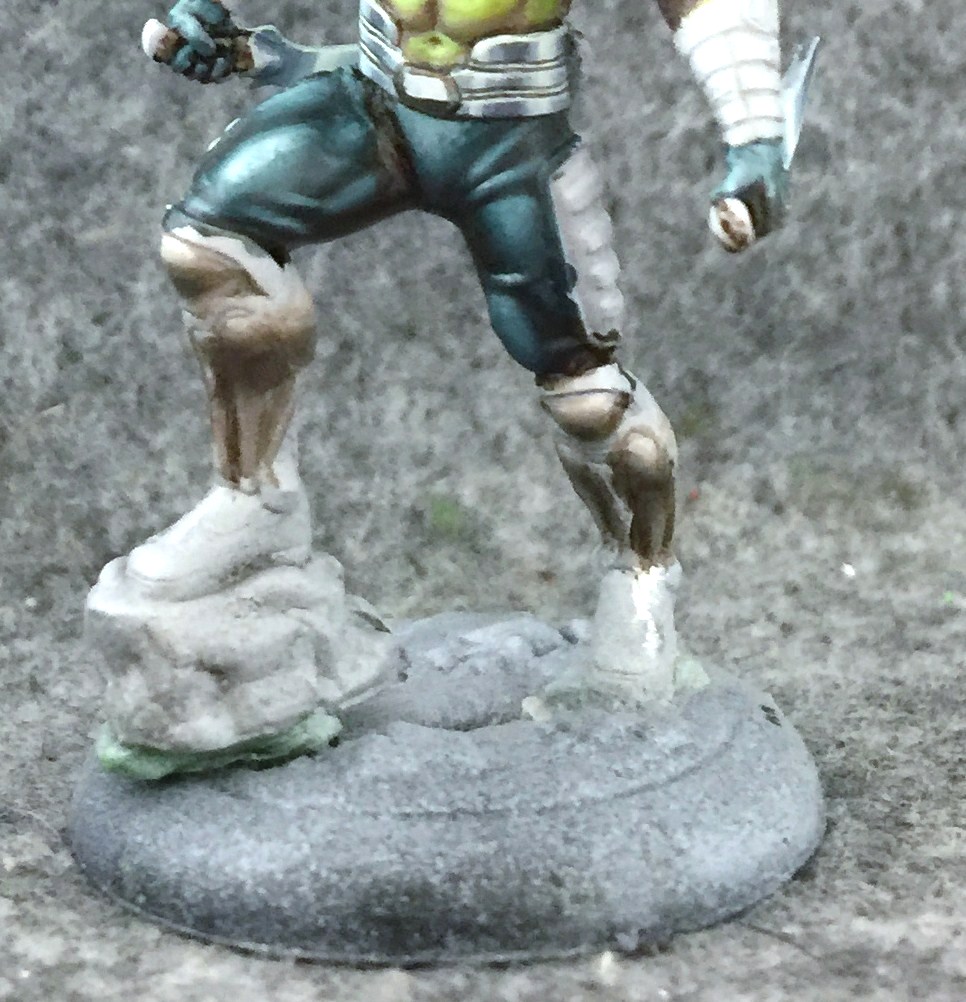
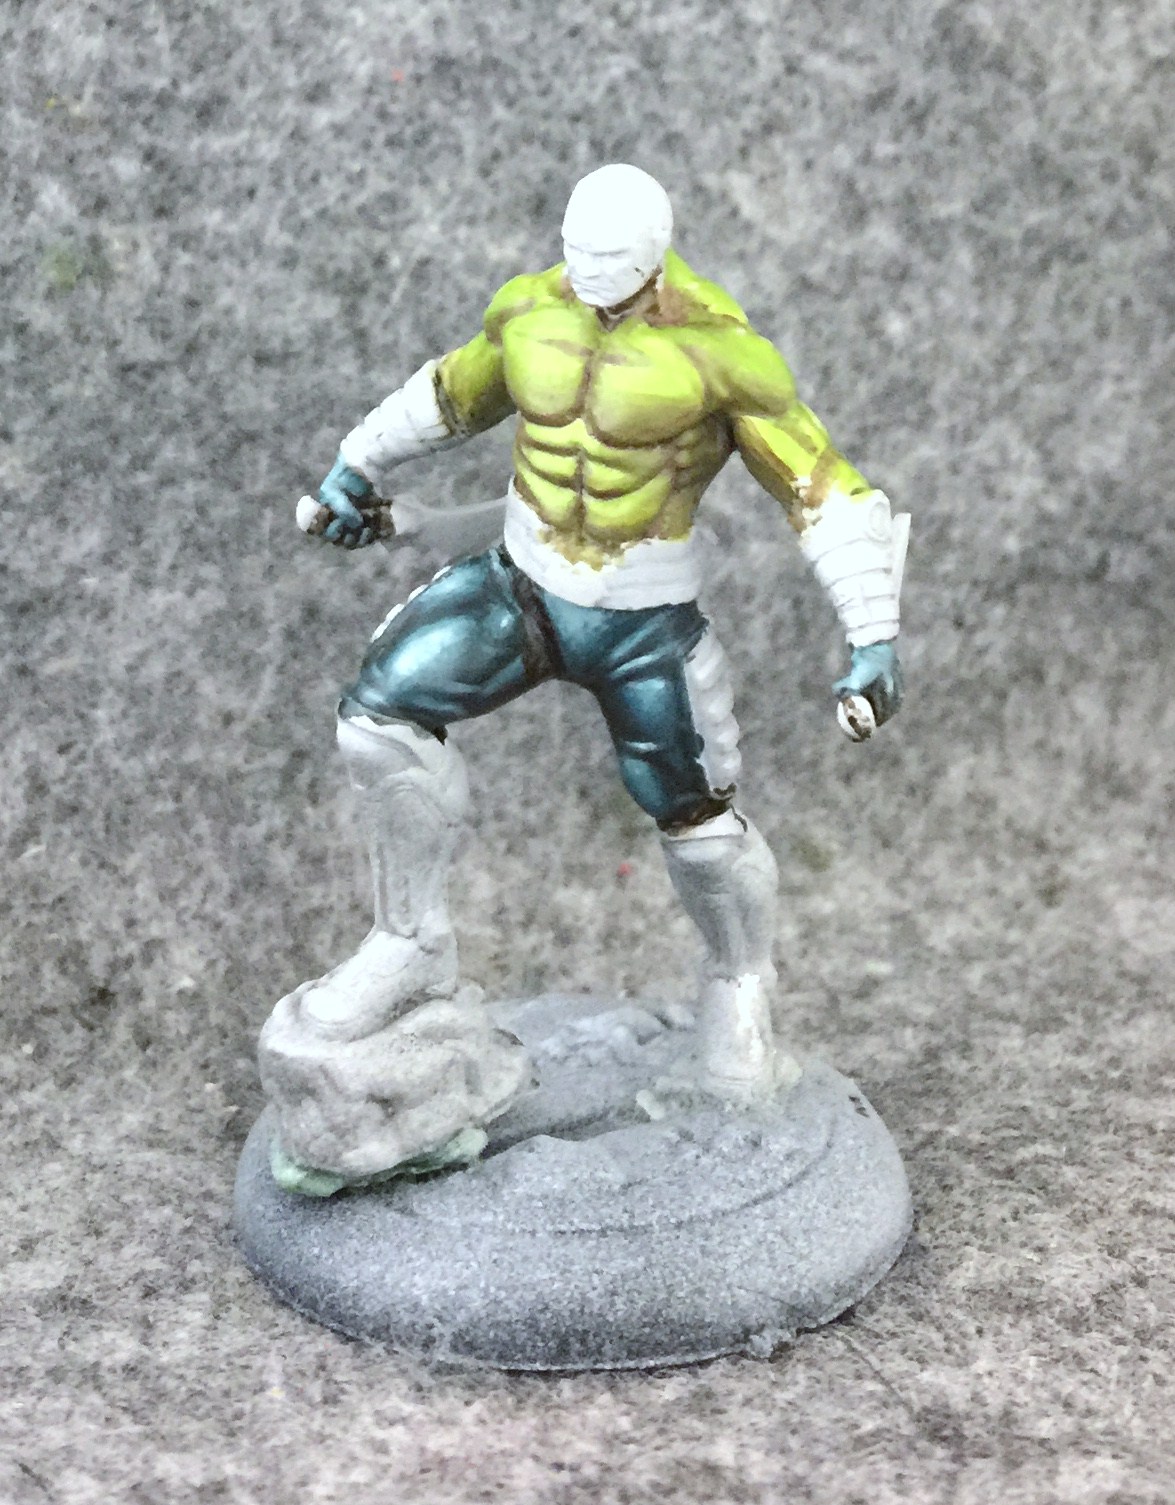
Then there were the boots. Really I guess we should call them greaves. These may have been the most time consuming step of the model. Unusual shapes are always the trickiest part to get right with NMM, but eventually I mapped out all the highlights and shading in a way I could live with. I treated the kneepads like an orb shape giving them a strong central highlight separated with a dark line from a secondary “highlight” of reflected light along the bottom edge. It was the same basic idea for the two “cone” shapes on either side of Drax’s shins. For the colors I used a basecoat of Trollblood Highlight shaded with the warm toned Thamar Black from earlier and highlighted with my favorite – Menoth White Highlight.
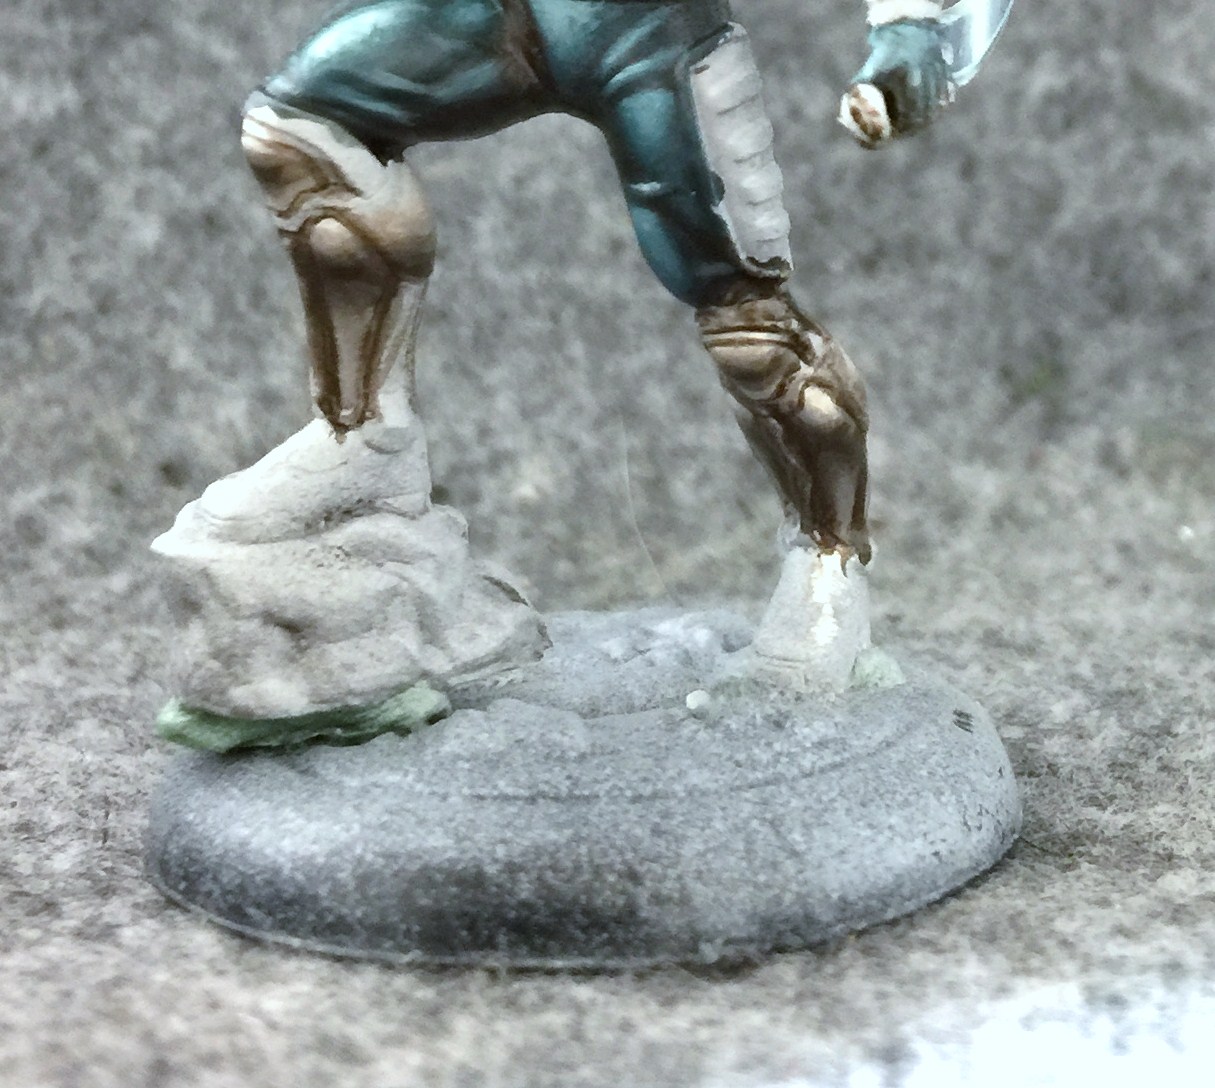
Then I blocked out the other elements of the greaves with more warm black. Barely a step in and of itself, but you can see the metallic effects pretty well here.

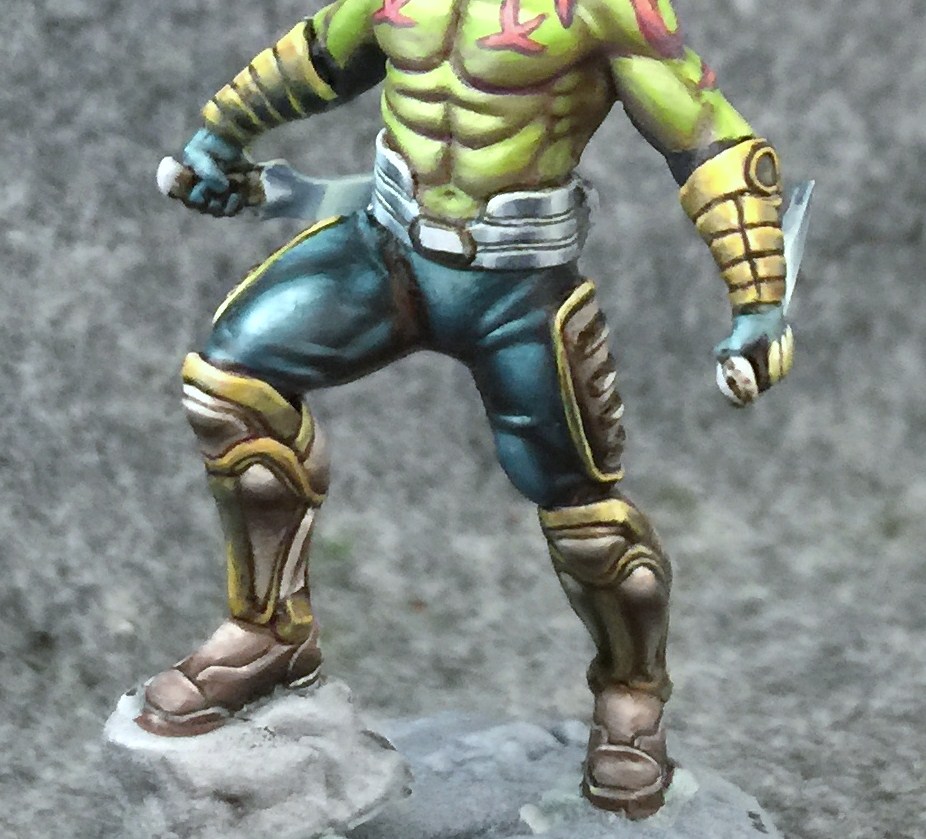
The next step for the greaves was all the first step for the bracers. I had more NMM planned but thins time I wanted more of a brassy feel. I started by wet blending on a gradient of Thornwood Green to Sulfuric Yellow to a light central streak of Menoth White Highlight – but only on the bracers so far. The greaves had only just gotten a basecoat of Sulfuric Yellow mixed with Thornwood Green.
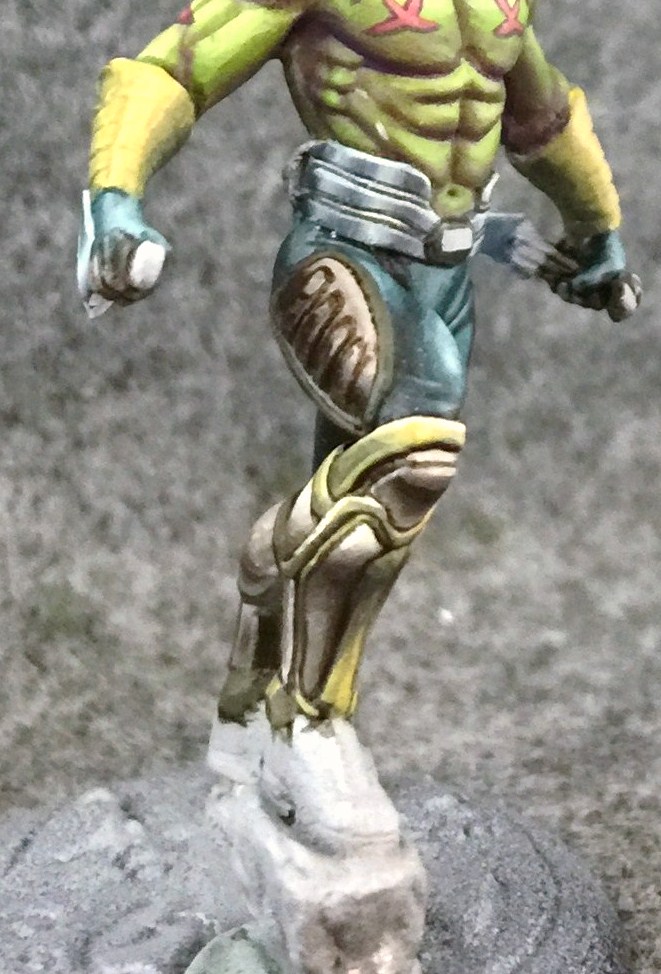
Here they are highlighted up with more Sulfuric Yellow and Menoth White Highlight.
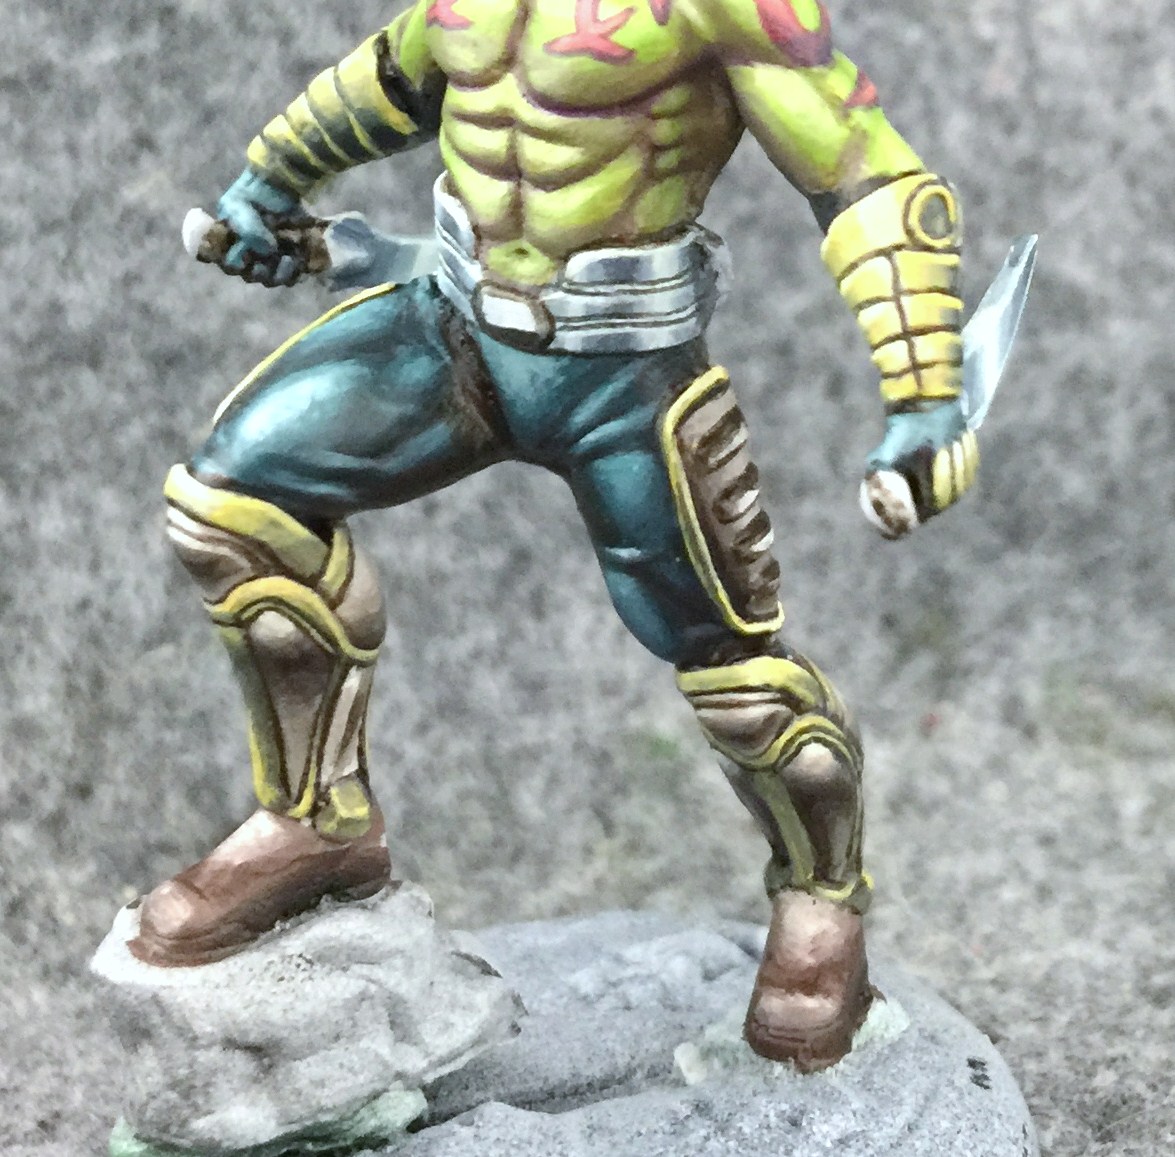
And now with all the highlights and shadows done, it’s time once again to define every little recess. I line them all with the warm black I’ve been using. Then there are the boots themselves: Umbral Umber highlighted with Ryn Flesh.
Several different individual strips make up the boots and each of these needs its own little defining black line and highlight line.
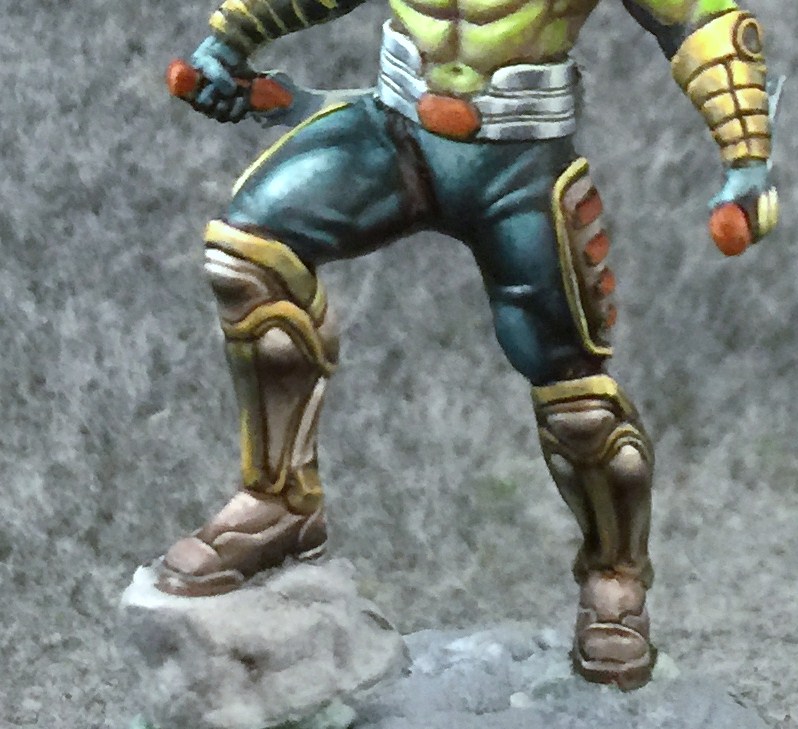
The final step is one last NMM effect on some of the plates of the leg armor as well as the pommels of Drax’s knives. We’ve burned through nearly all the rest so this time it’s copper. I start the copper with a basecoat of Bloodstone.
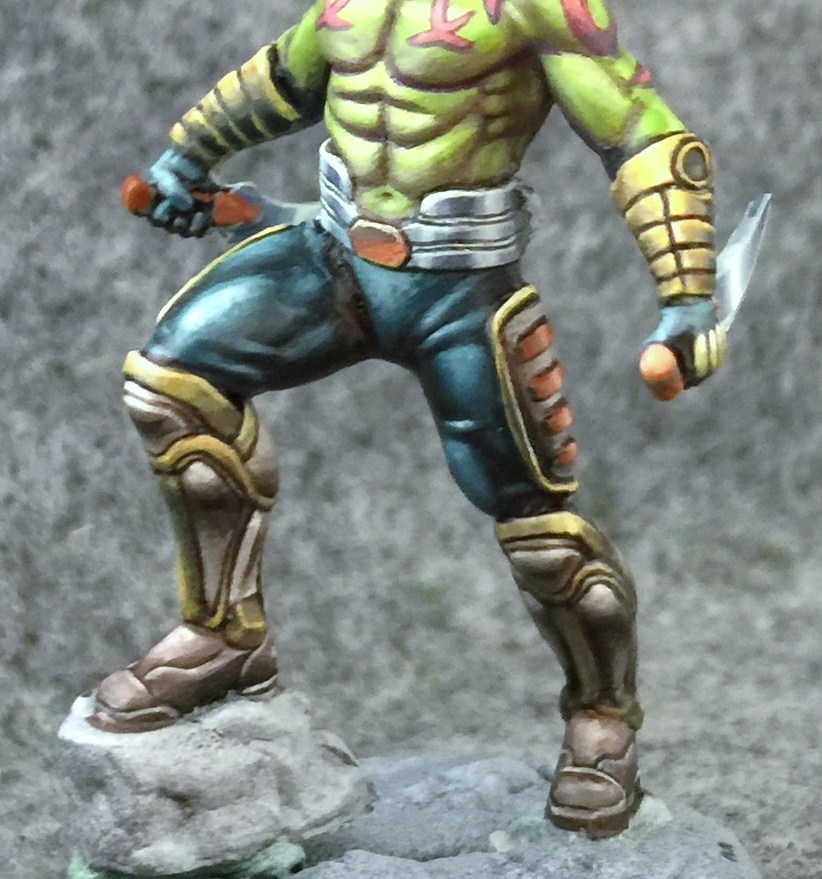
The Bloodstone is shaded with Coal Black and highlighted with Ryn Flesh, then Menoth White Highlight.
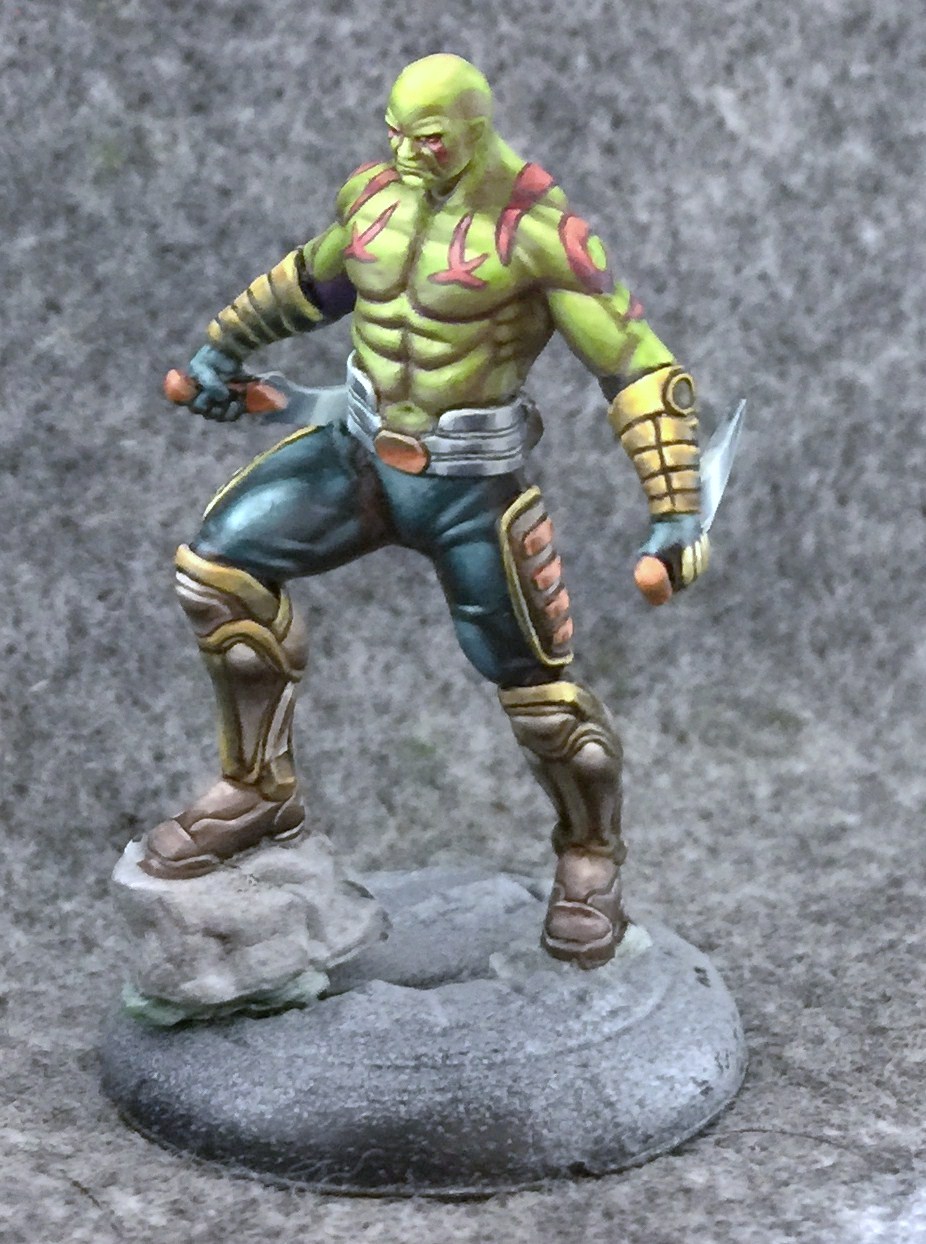
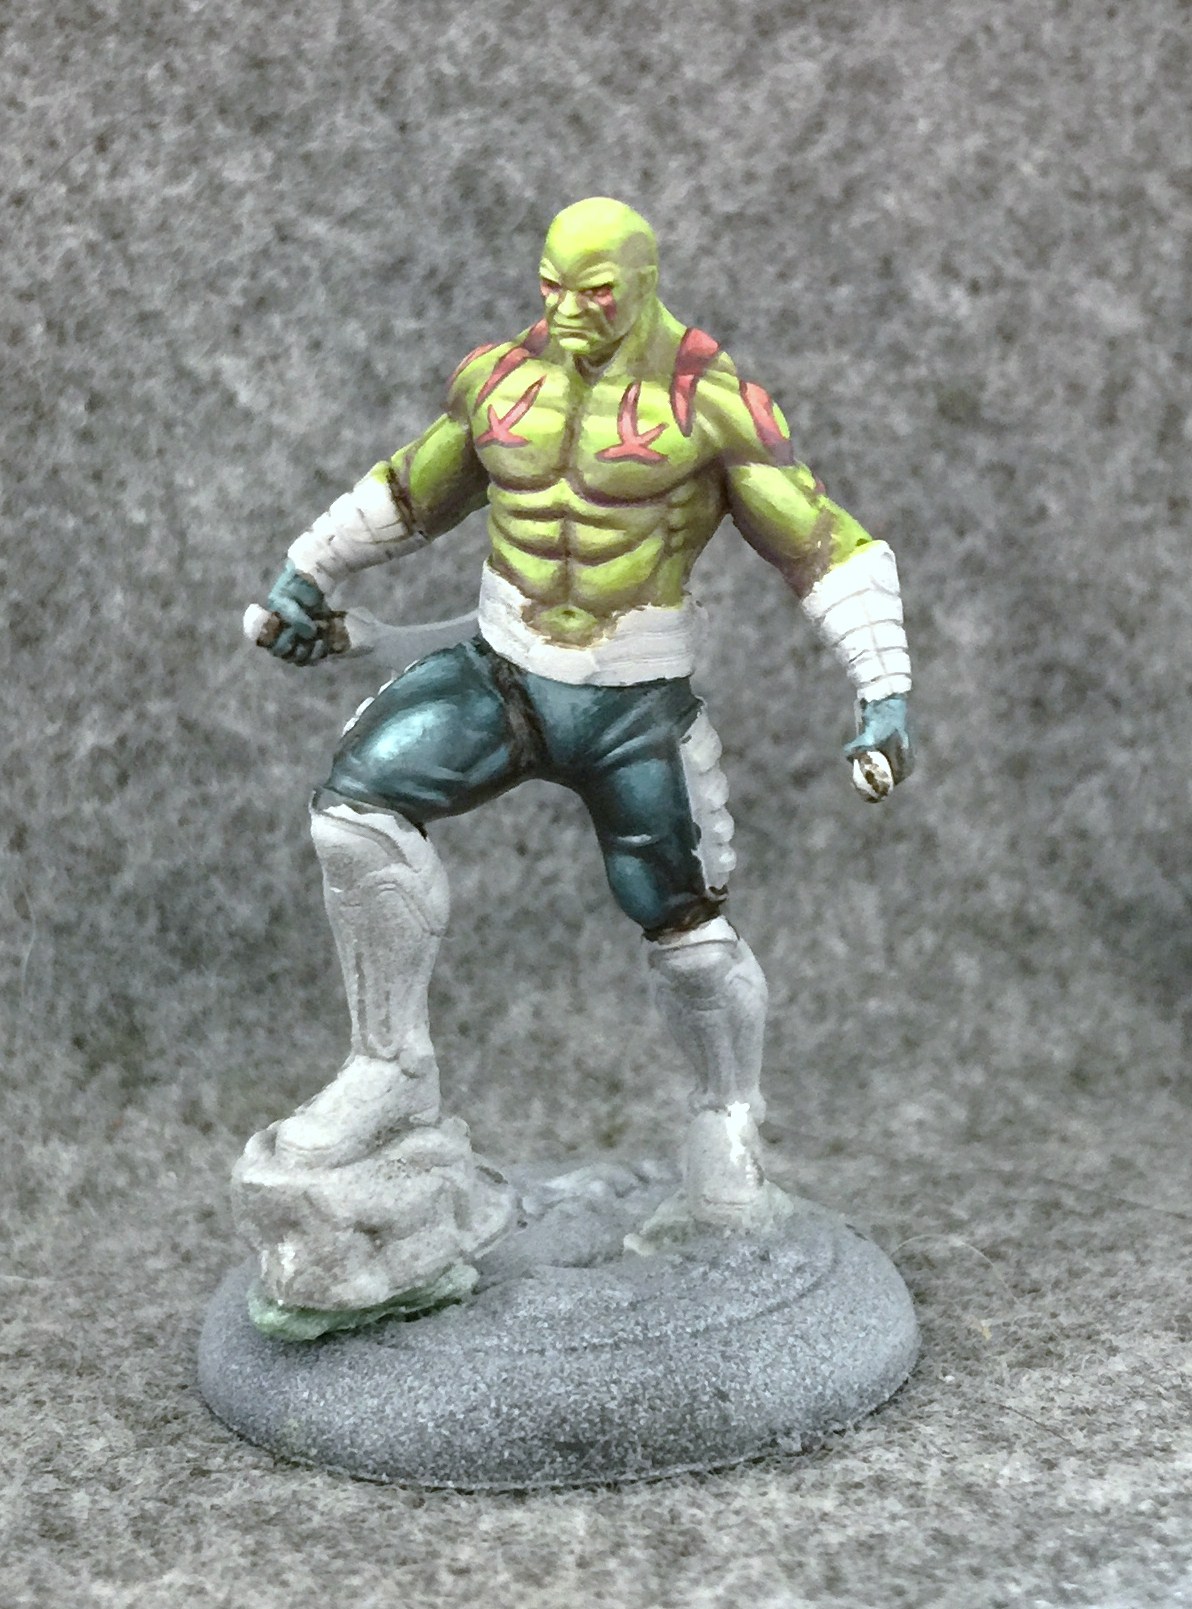
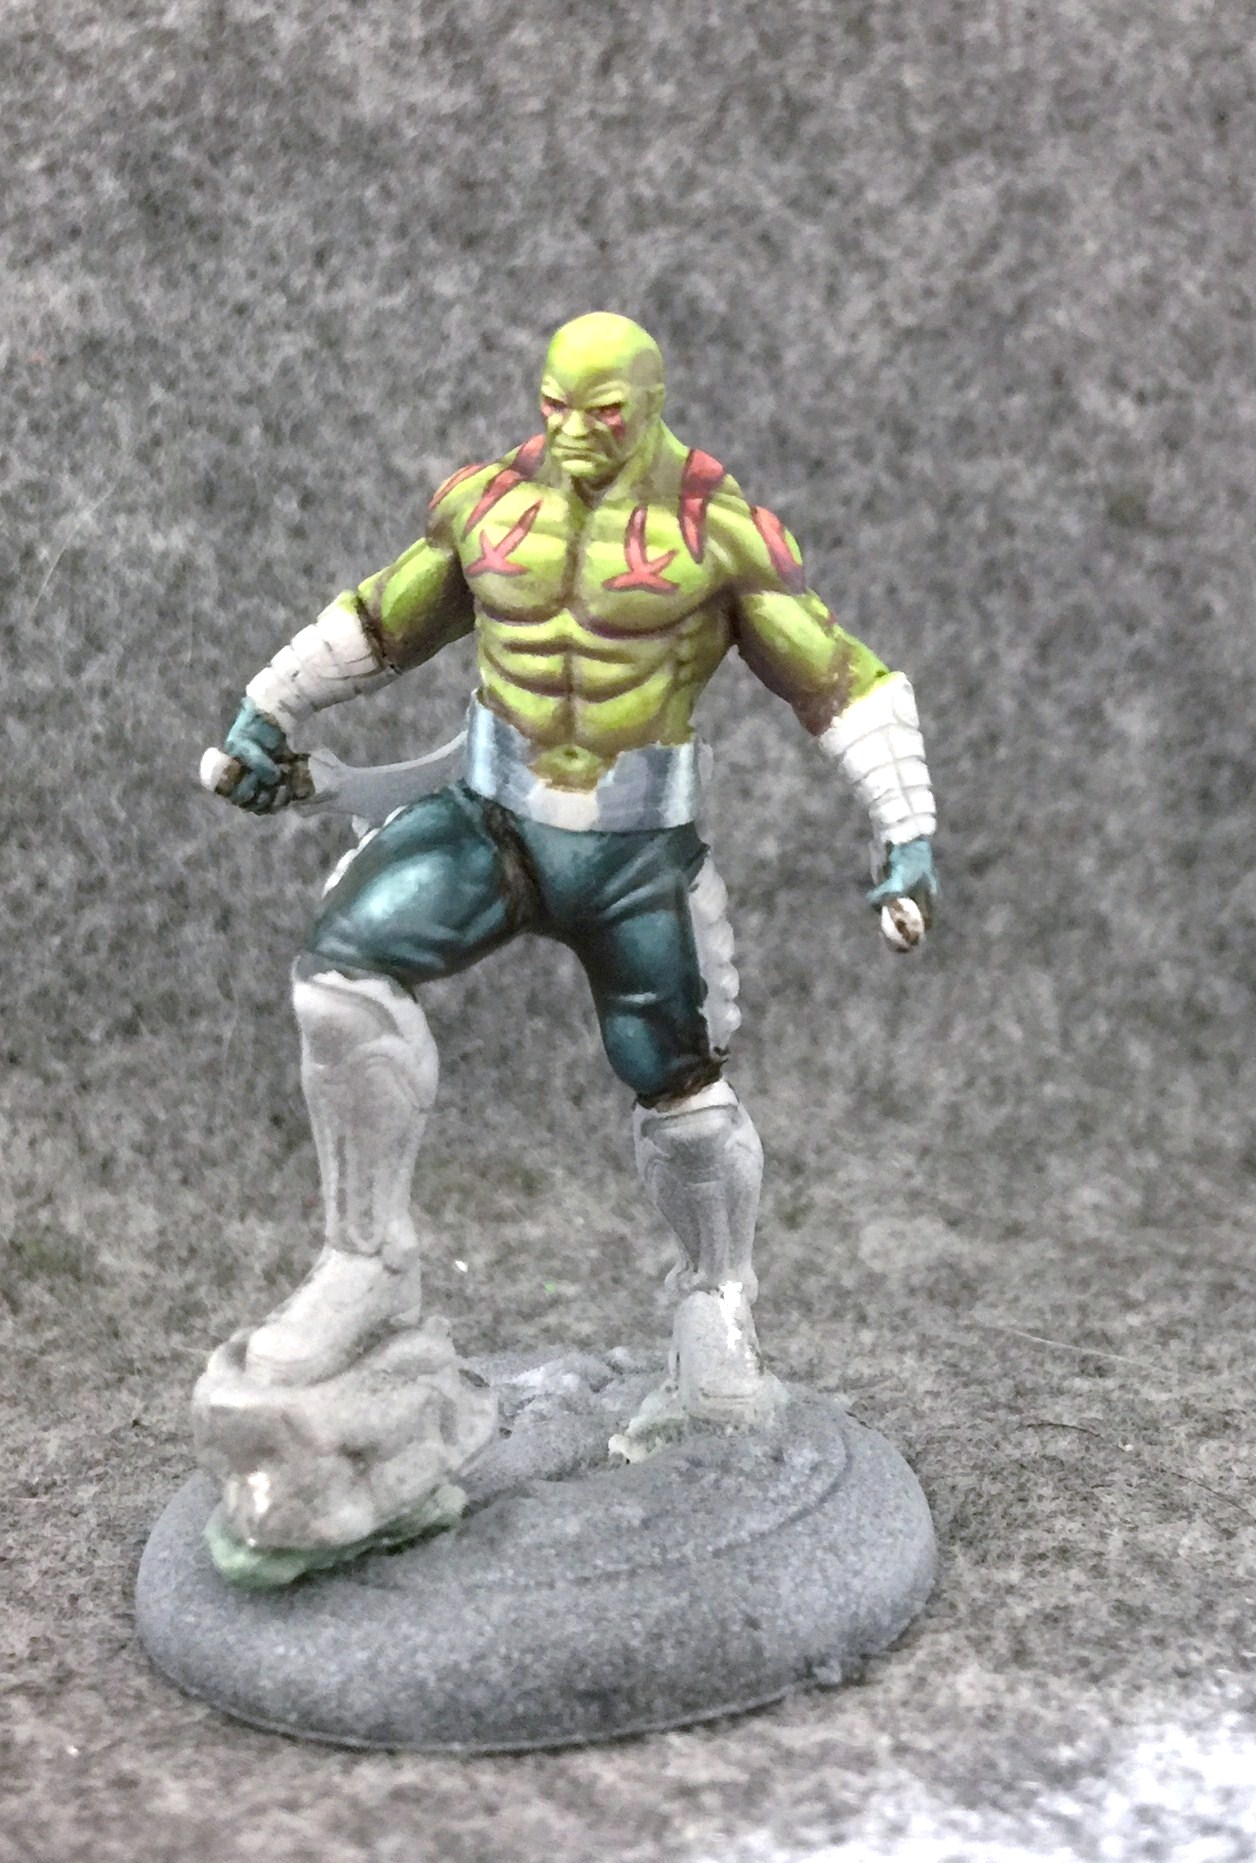
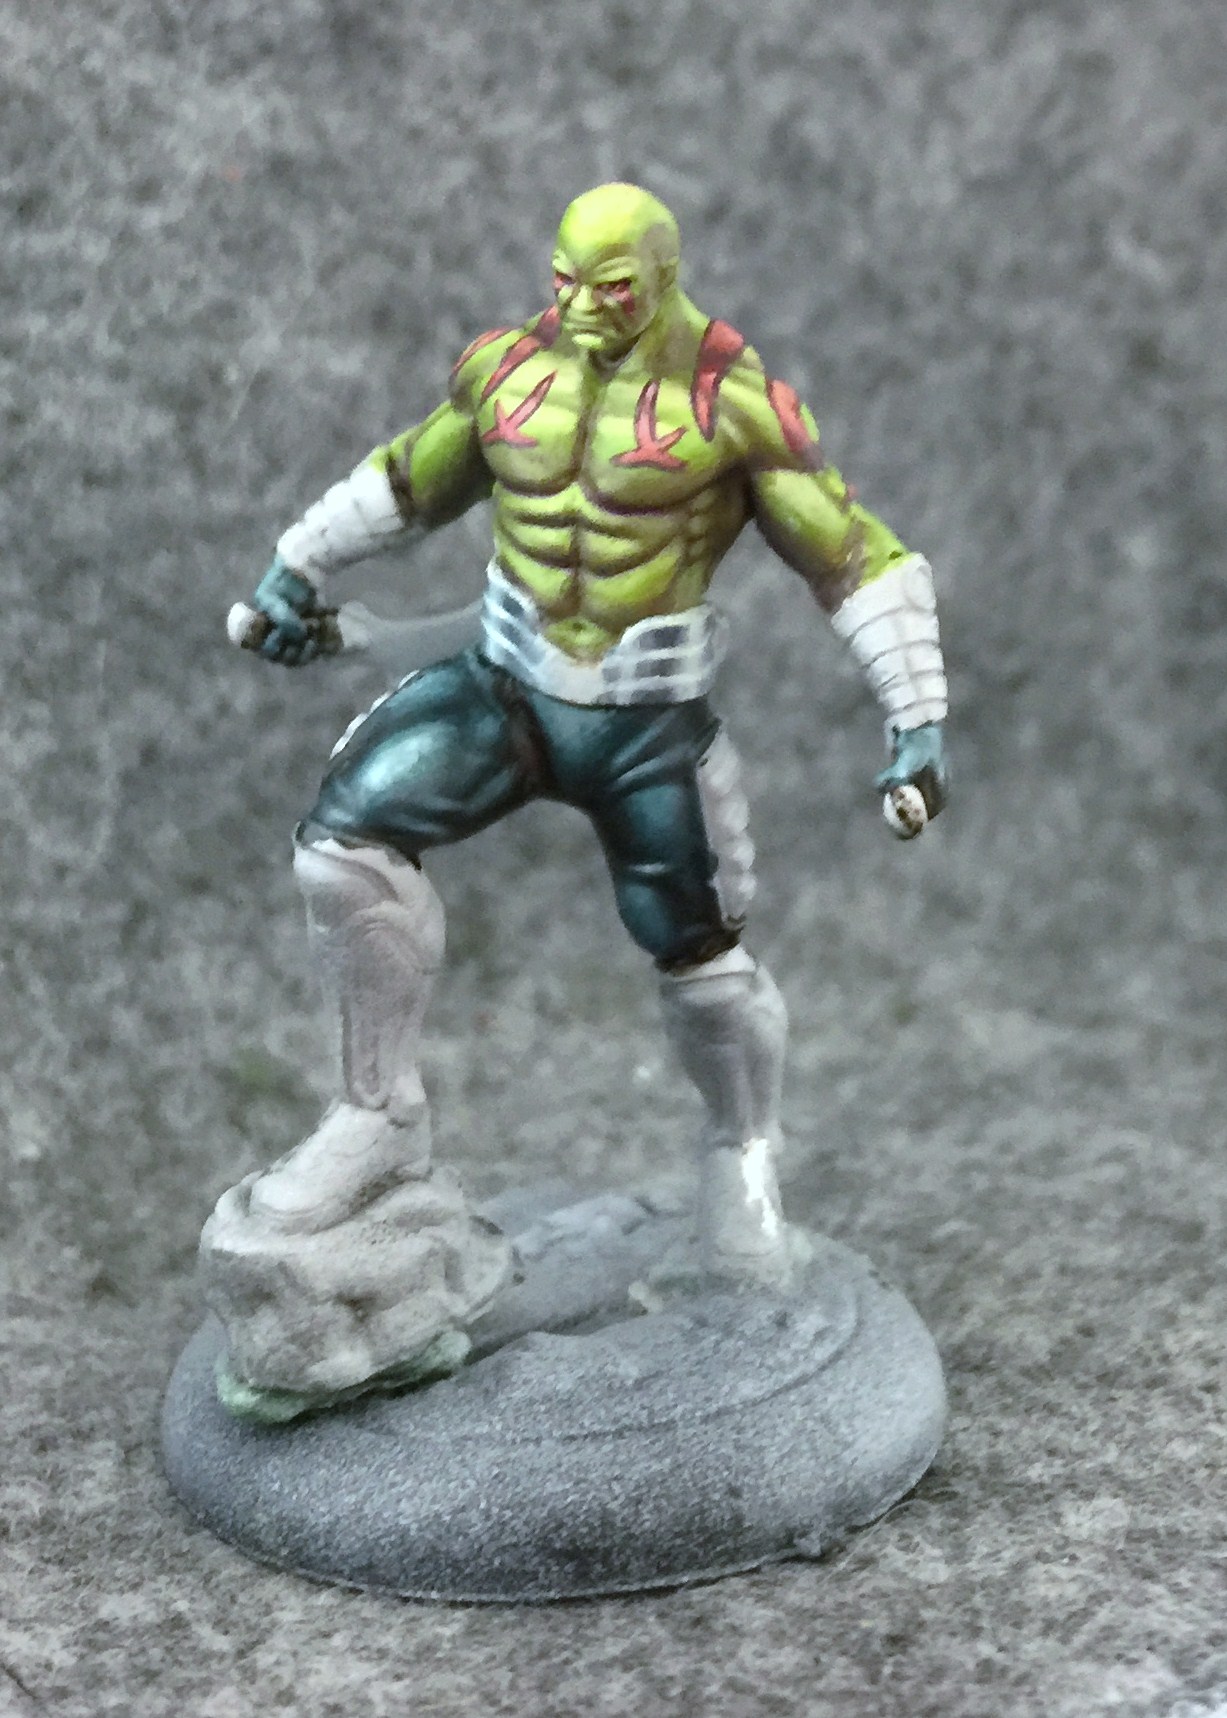
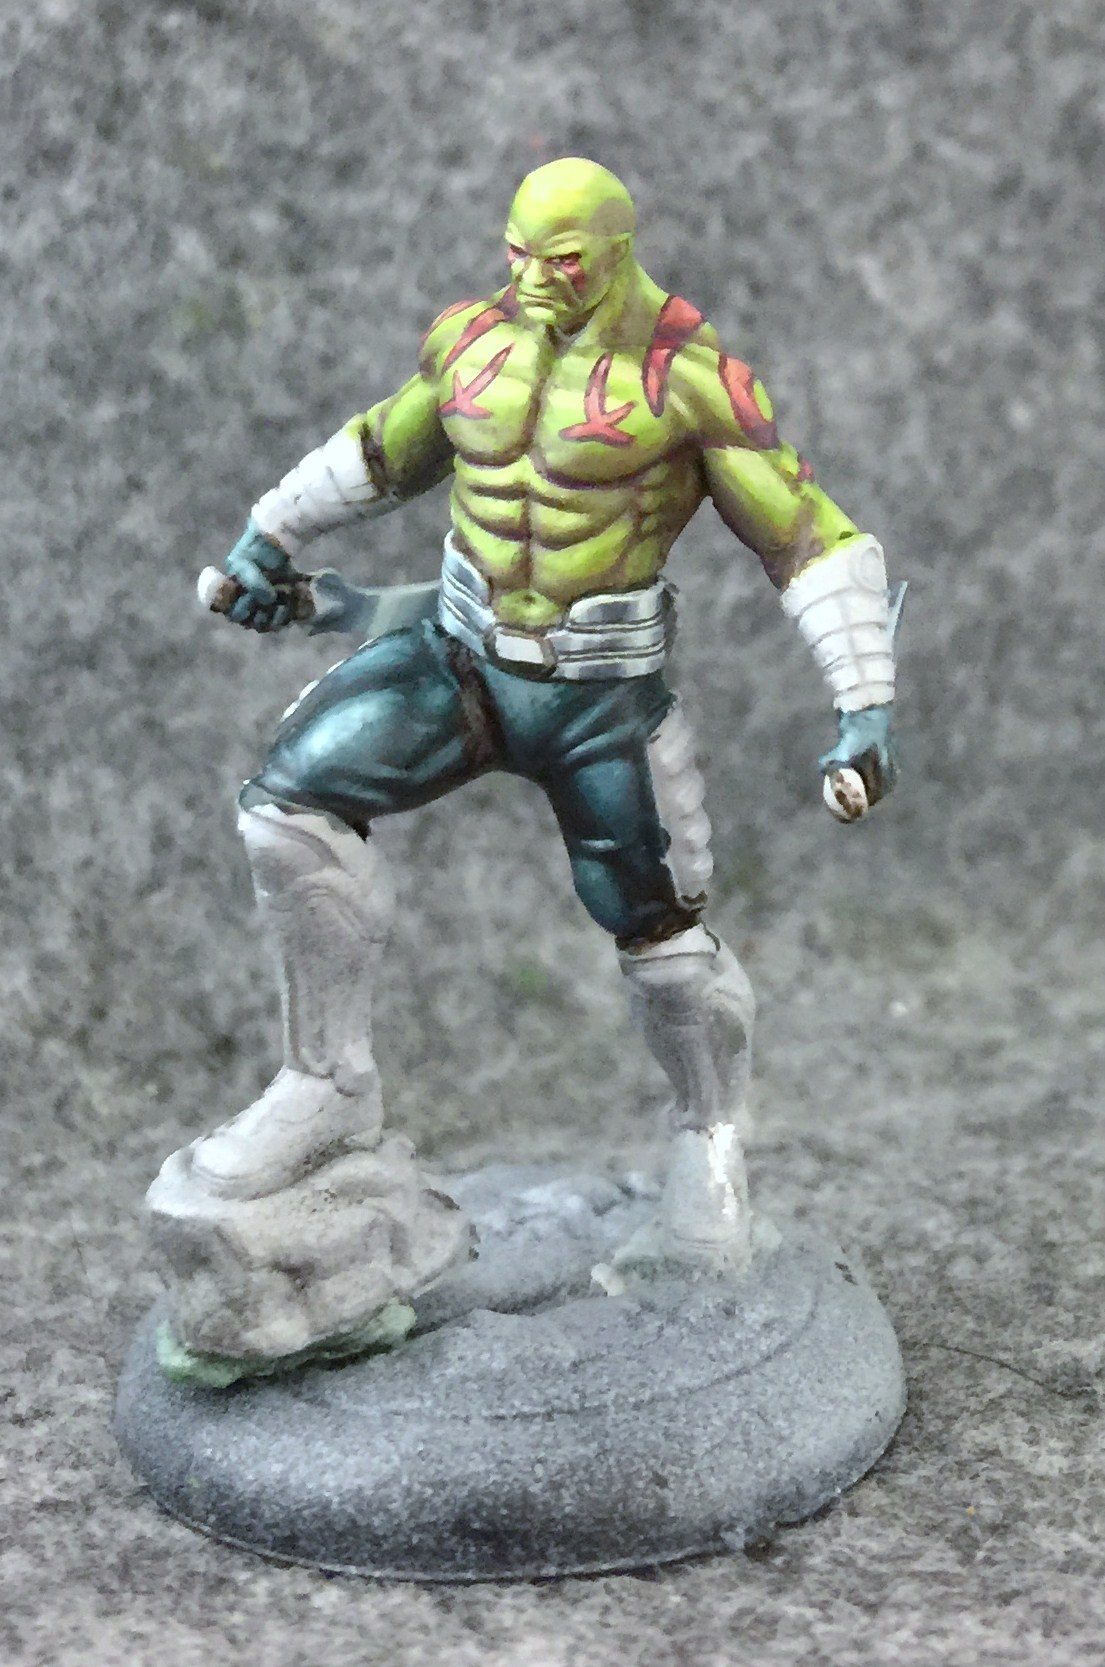
Each strip of copper gets a line of Ryn Flesh along its edge for that last illusion of reflected light. Here’s out hero right at the end before the basing was completed.
I painted the base in advance before gluing on Drax and his “tactical rock.” I added a little sand around the rock, and painted on some Trollblood Base – mixed with a little Underbelly blue this time. This makes it look “space-y” enough that it feels a little less out of place.
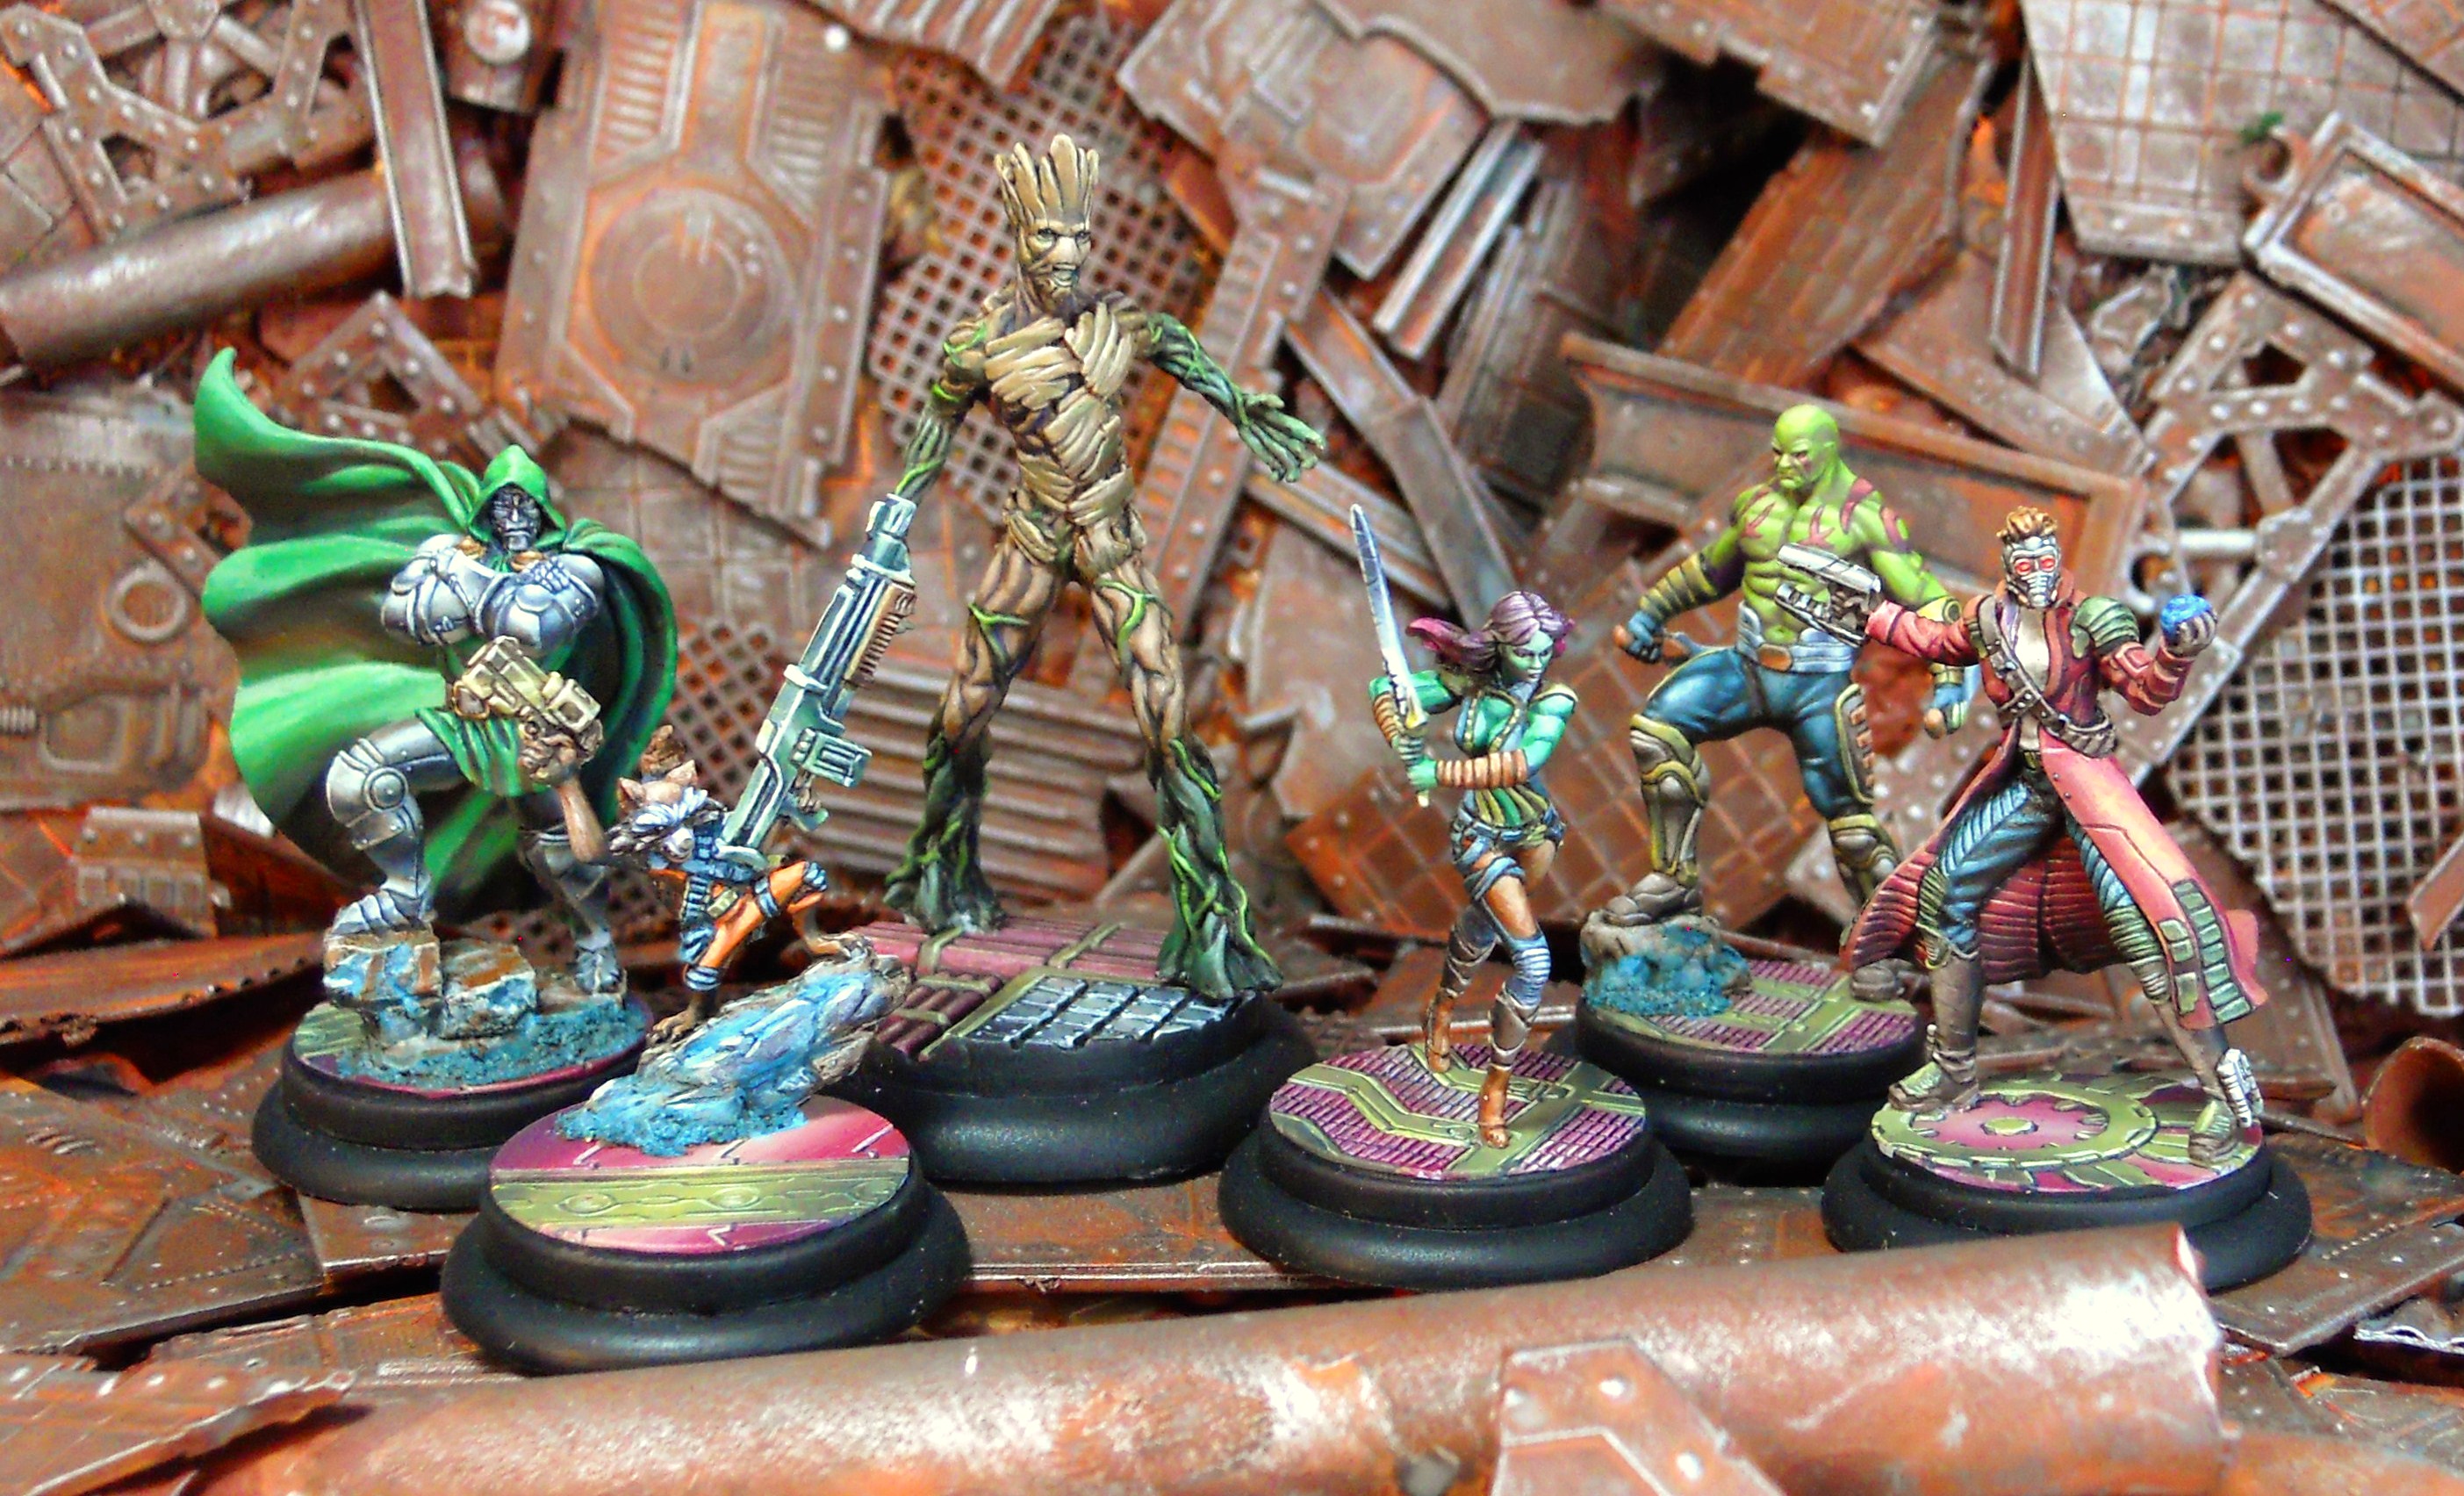
~Hope you enjoyed the article. I have a lot more WiP shots I took before I knew this miniatures line was doomed. Every model in this shot was documented, along with a bunch of X-men. I think they could still make for some great articles, but what do you guys think? If you want to see them I’ll happily start the work to make the articles. If not, there are some Dark Age and Bushido models I could be working on. Let me know in the comments.


