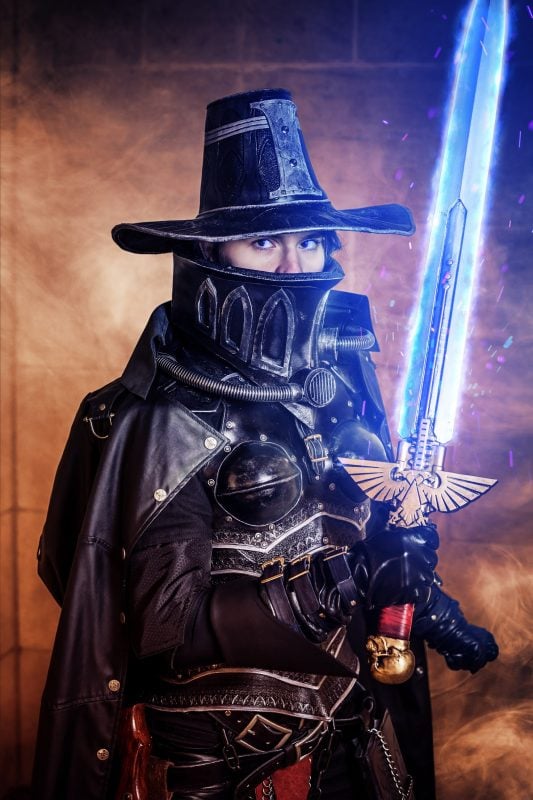
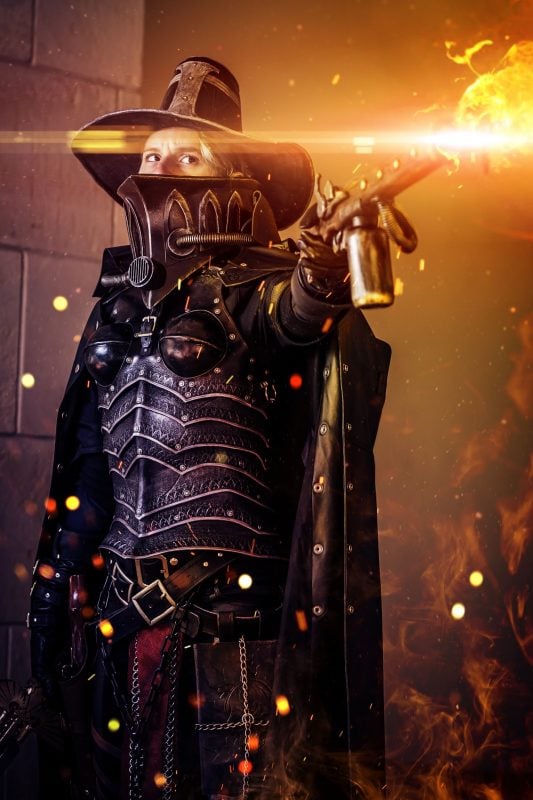
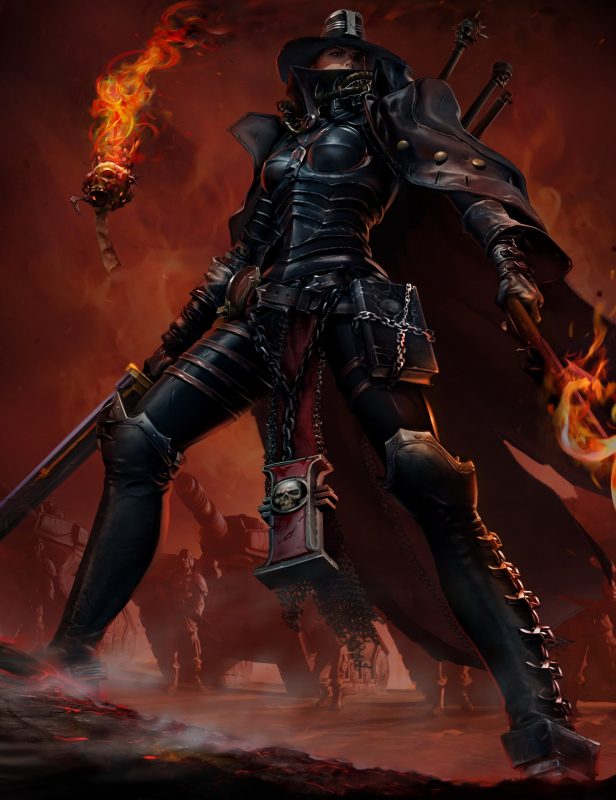
This week we dive deep into the Ordo Hereticus, taking a close look at the construction process for the Inquisitor Adrastia created by artist JAFantasy Art. This artist delves deep into her creation process and inspiration for us, so we’re doing a three part feature of her complete build and technique. Check out her Cosplay and contact her for your next Warhammer 40k Cosplay project!
Advertisement
The Inspiration
“Inquisitor Adrastia is a character I have wanted to cosplay since I first played Dawn of War 2 Retribution years ago in college. At the time, I knew I would not be able to do it the justice it deserved, so I put it in my list of costumes to make “eventually”. For PAX south every year, my partner and I make and debut a new costume and we usually end up rushing and getting them done in 3-4 weeks. The first step was collecting screenshots from different angles, which was easy with the game camera. The box art also gave me a lot of inspiration. I tracked the hours on this build and it totaled up to about 180 hours of work, and about 80 hours of 3D printing.”
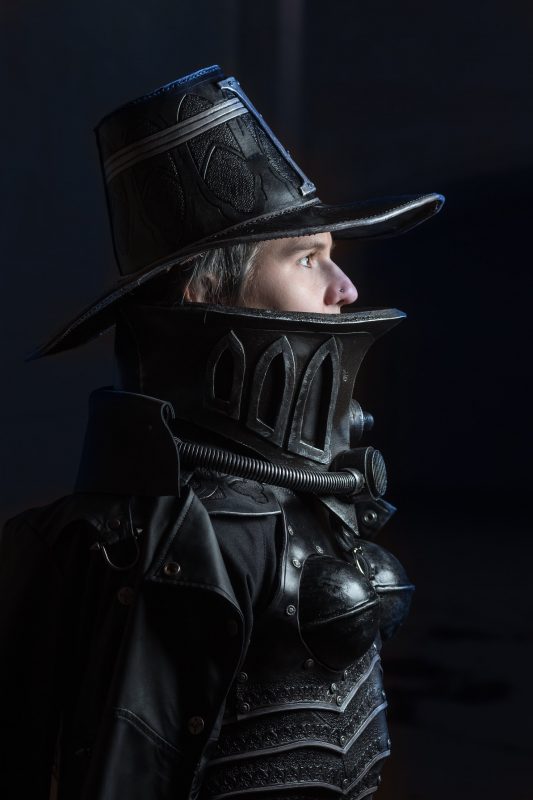
The Hat and Leatherwork Process
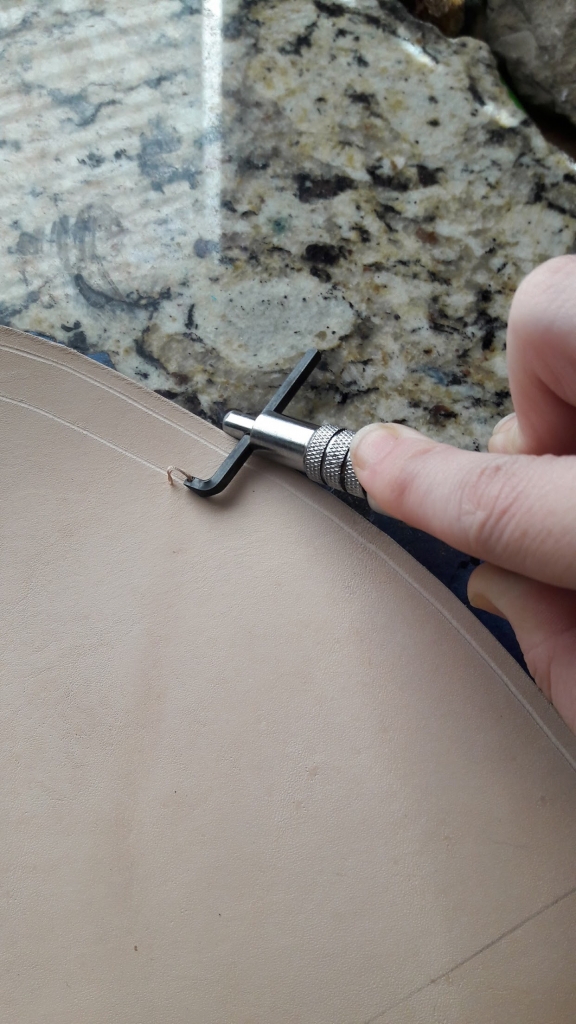
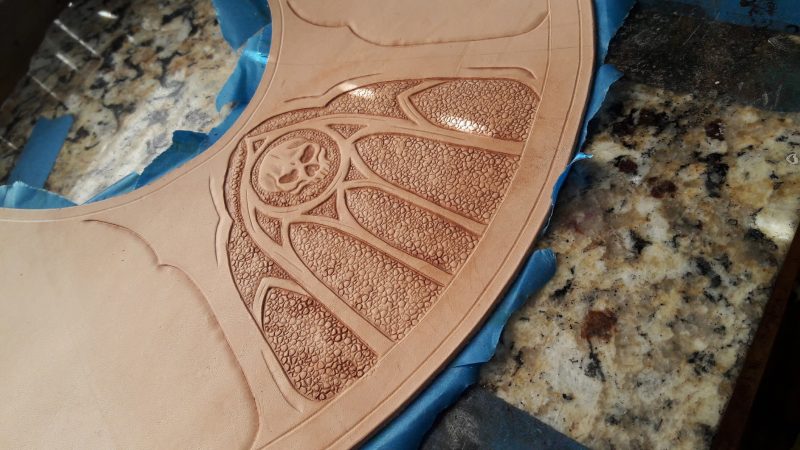
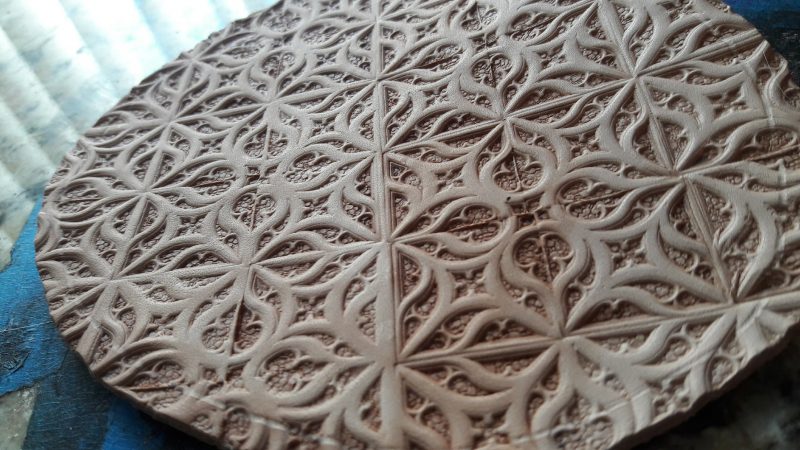
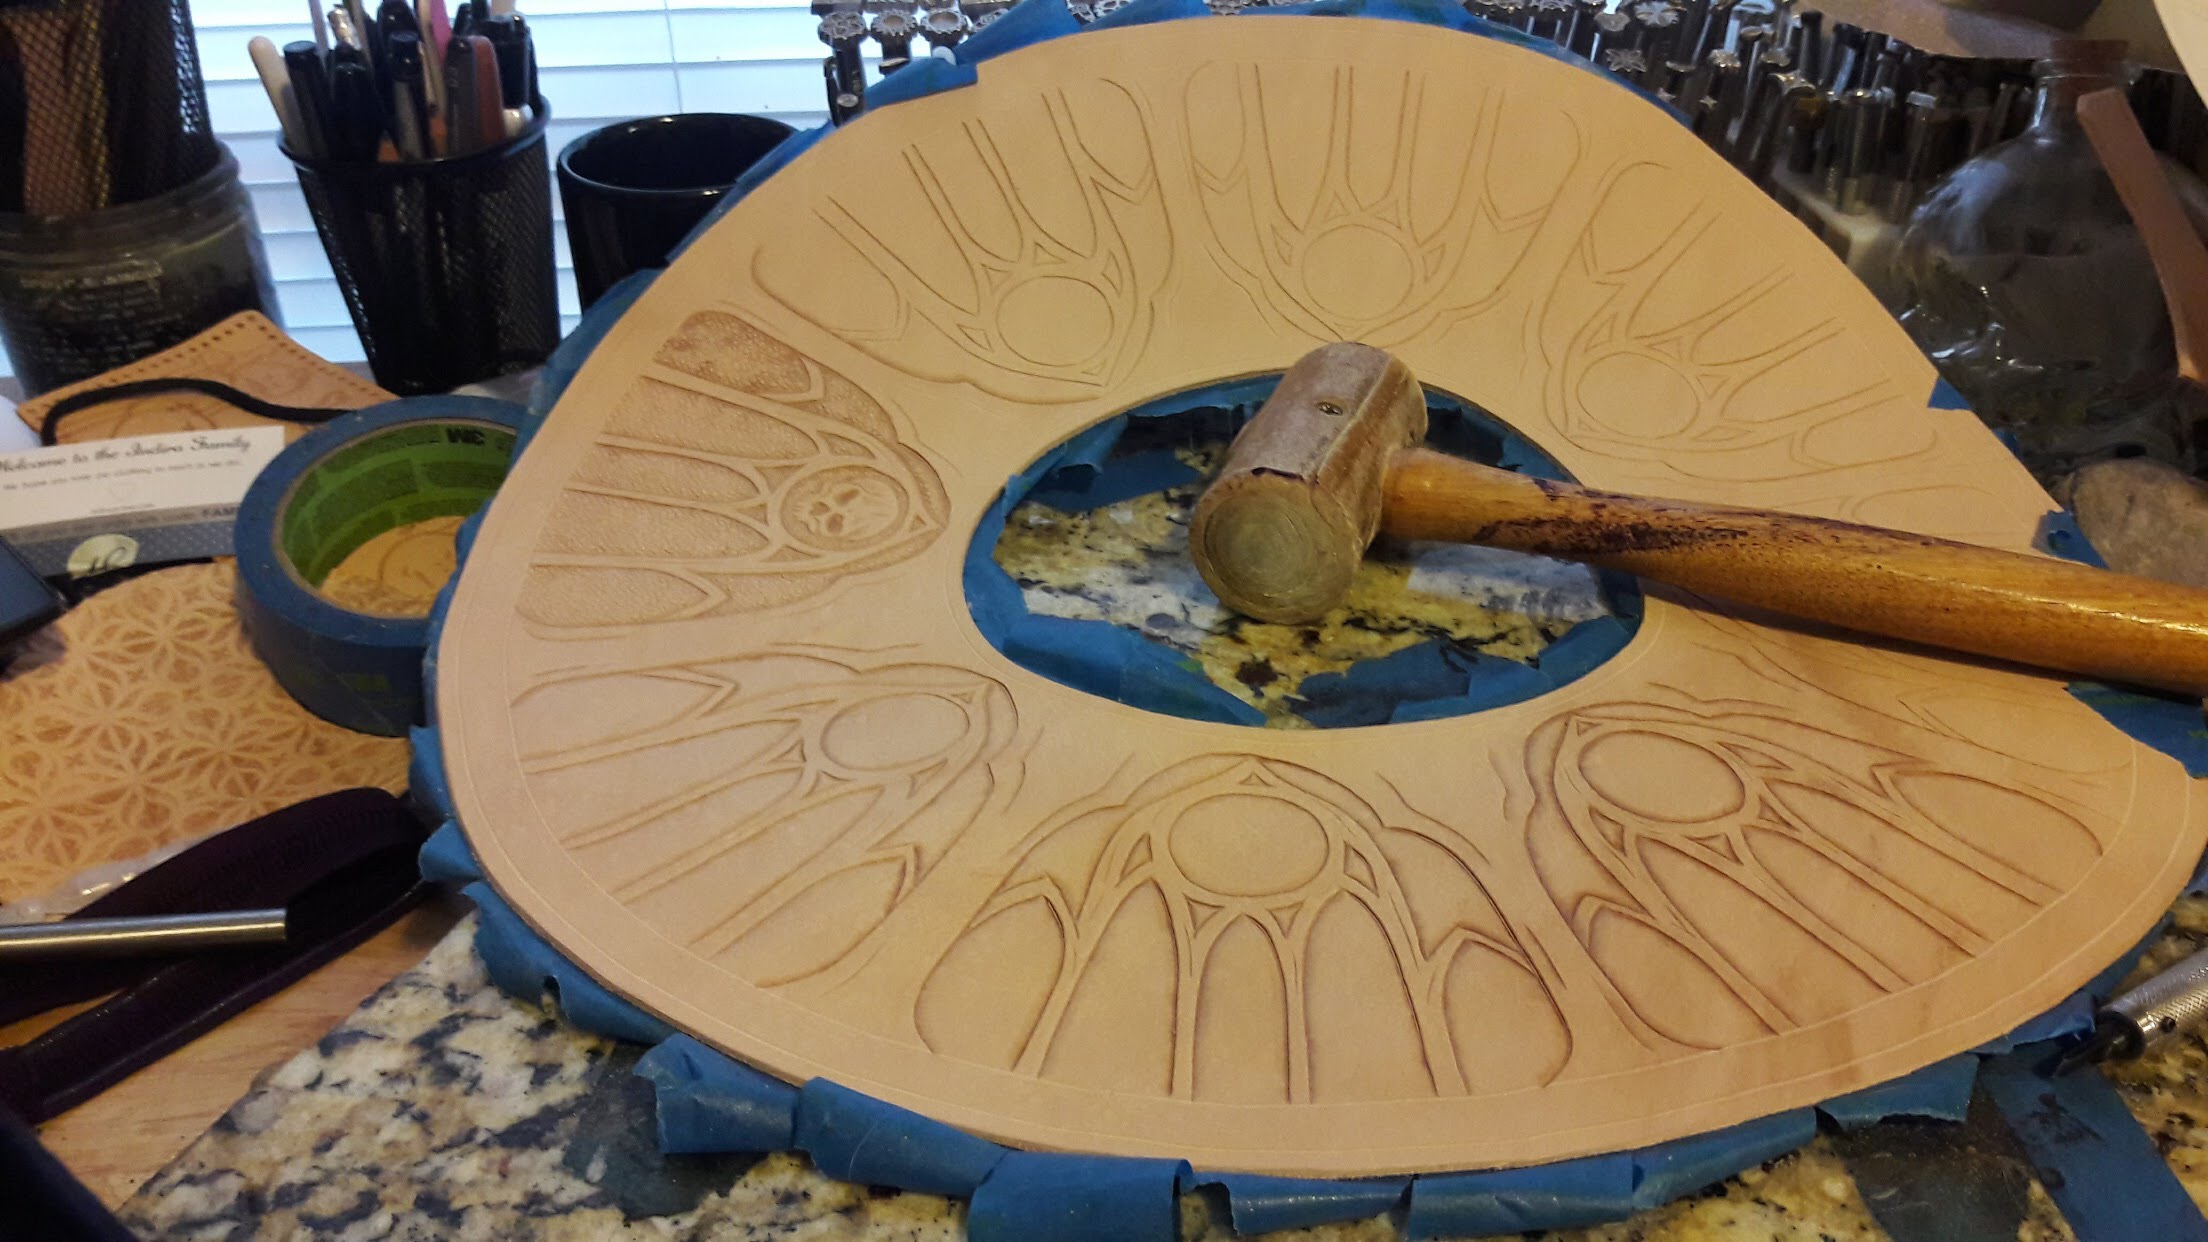
I decided to get the big challenging pieces done first, so the hat was on the top of the list. This was the first hat I have ever made but after some research and sketching, I had a good idea of what process to use. Adrastia’s armor is smooth and sleek, but to add a personal touch of detail and elegance, I decided to put stained glass designs all over the armor. I have some custom made stained glass brass stamps for the small details but for the larger elements, I had to hand draw and design them, adjusting and resizing to make them fit all the way around the brim of the hat. (You can see my sketch of the hat brim and side panels). I used the pattern to transfer my designs onto the leather with a stylus and added edge lines along the edges of the hat for stitch lines. (As shown in the photo).
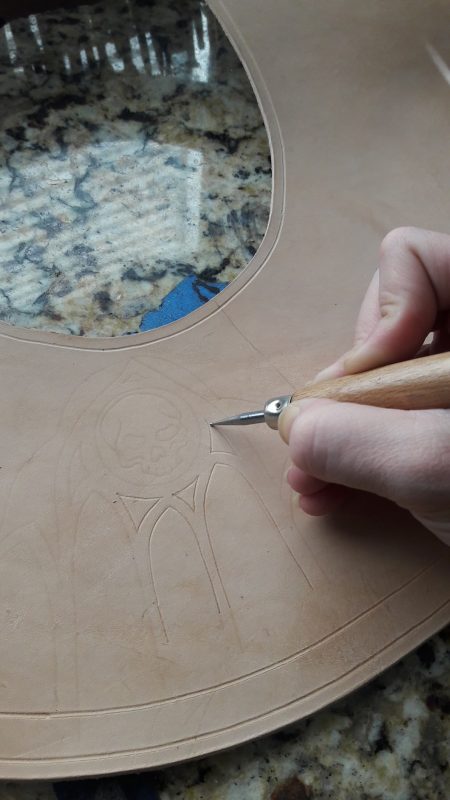
Once the designs are drawn on the leather, I wet it and use a small knife to cut the drawn lines into the leather and guide my tooling. It is what allows the tooling to make the designs look so three dimensional.
For the tooling on this whole suit, I used eight different tools. For anyone who has never seen leather tooling before, it is like hammering a very small texture stamp until it makes a pattern or design.
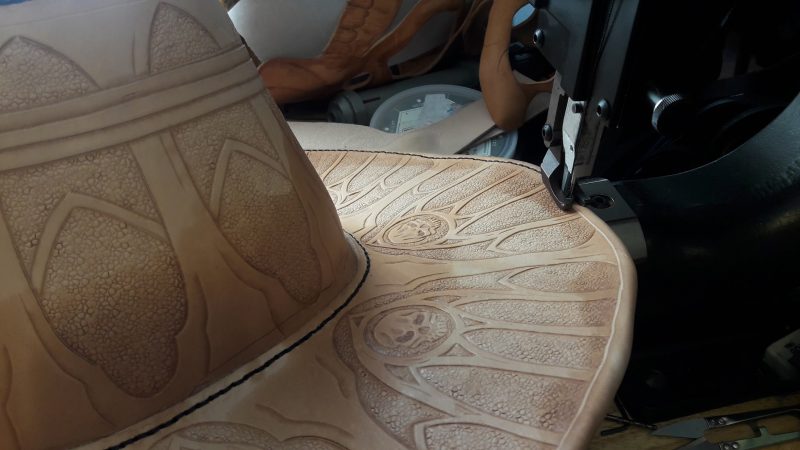
Once each piece was finished, I had to test them with the paper pattern to make sure they all fit together properly.
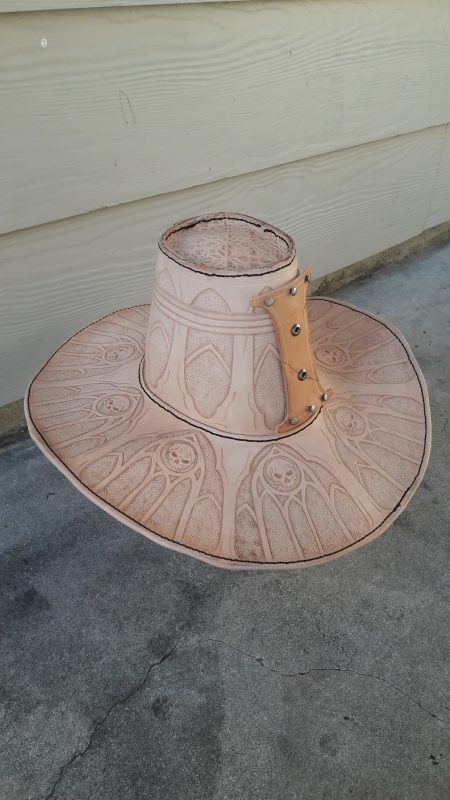
It usually takes 3-4 different pattern adjustments to get it right. The outer rim of the hat was sewn with a manual saddle stitcher, but the center and top portions were both hand sewn.
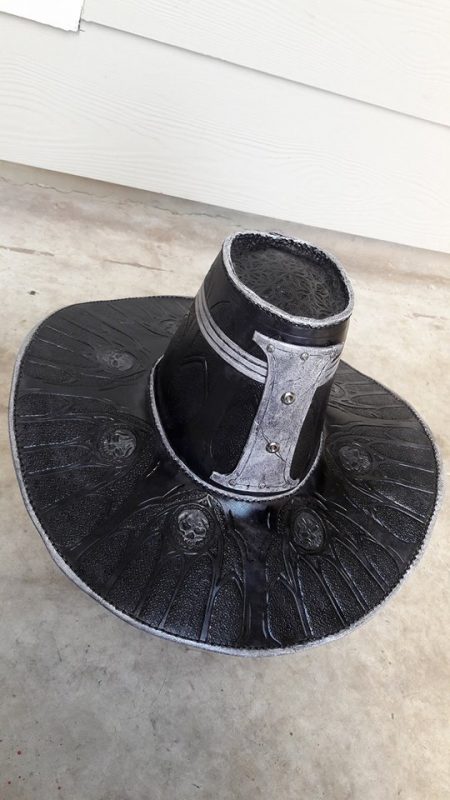
The final step was to dye it all.
If you are interested in learning more about leather-working, chatting about the process or want to commission a piece of your own, you can reach anywhere on social media or on the web at:
Jennifer aka "Mayhem's Muse" is the Cosplay Editor for BoLS and manages Ad Sales and Communications. Her cosplay awards include the RTX Judge's Choice Award and Dragon's Lair Austin's Cosplay Symposium.
Jennifer has been a Cosplay Guest Judge at RTX, Tacticon and Genghis Con in Colorado. She regularly attends conventions to cover cosplay for BoLS. Her cosplay work has been featured in publications such as Girls Who Love Monsters, Geek Fuel, and Renaissance Magazine. Jennifer has modeled in the Her Universe Fashion Show, Precision Camera's yearly Precision Camera University, and has taught several workshops for photographers about partnering with cosplayers and creative muses/models.
Jennifer is a lifelong enthusiast of retro video games and loves Dungeons & Dragons, urban fantasy, tabletop games, VR technology, and historical archery. She has set National Records through USA Archery’s Traditional Division for Asiatic Bows and earned 4th Place in the World Nomad Games in Kyrgyzstan in 2018 for Women’s Korean Archery. Jennifer is currently studying for her Masters's Degree in Organizational Leadership.

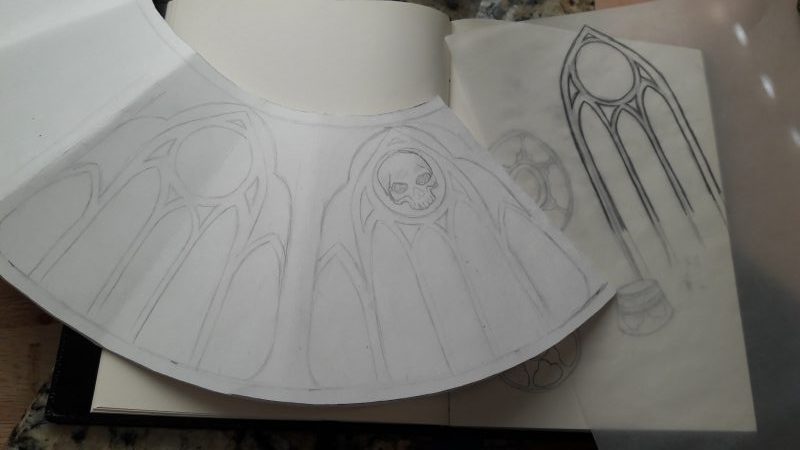 I have some custom made stained glass brass stamps for the small details but for the larger elements, I had to hand draw and design them, adjusting and resizing to make them fit all the way around the brim of the hat. (You can see my sketch of the hat brim and side panels). I used the pattern to transfer my designs onto the leather with a stylus and added edge lines along the edges of the hat for stitch lines. (As shown in the photo).