X-Wing: Why Why Bullseye
Today we talk about how repositioning can dramatically expand your bullseye coverage and how to maximize it.
Last week, we took a pictorial tour of the bullseye arc to make clear a few points. First: because the bullseye arc is so skinny, it’s hard to bullseye stuff, especially at long range. Second: bigger targets are easier to bullseye. Third: repositioning can dramatically expand your bullseye coverage.
The third point is our topic for today. Repositioning, of course, takes an action to accomplish, and we exist in an action-constrained game. Every time you barrel roll, you’re not taking a focus token. Every time you boost, you’re not taking a target lock. (Yes, I know linked actions exist. I’m being generic.) This is known as the opportunity cost—we lose accuracy in our attack to achieve bullseye.

That begs the question: when is it worth our while to chase bullseye, and when should we simply take a token?
Let’s go case-by-case and see what we can find. We’ll ignore for now that repositioning could mess up your maneuvers for subsequent turns or help out the enemy’s offense; we’re only concerned with this attack, and we’re treating repositioning to achieve bullseye as an offensive mod. When is bullseye a better offensive mod than a focus token?
Warning: there are two considerations when going through this list. First: there is always a chance that you will miss if you chase the bullseye, in which case you’ve incurred the opportunity cost (you used your action) without getting the bullseye benefits. This is especially true at long range, where you have greater odds of missing. If it’s not clear you’ll make bullseye, it’s not worth chasing bullseye over taking a humble focus token, no matter how many bullseye effects you’ve stacked. Second: I won’t speak much about card combos. This is because the number of combinations is potentially very high. Just note that any combination of effects that privilege bullseye dramatically increases the gains of achieving it (and also increases your resource wastage if you miss).
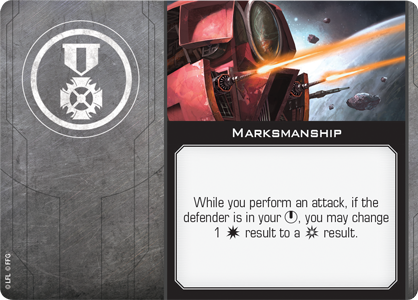
-Marksmanship
Worth it: generally no
Why: chasing crits is usually a mistake compared to trying to push damage straight-up. You have to penetrate the target’s defenses (which is much harder without offensive tokens) and then draw into a crit that actually matters. There are plenty of times you won’t—e.g. Fuel Leak or Hull Breach on a ship with one hull left, Damaged Cockpit against an Ini1 ship, etc. Marksmanship should be treated as a fun outcome when it happens, not something to chase.
There is a corner case: shooting against a zero-agility, reinforced target (e.g. a Ghost or Decimator). In that case, an extra point of damage may just get negated by the reinforce action, whereas the right crit might be crippling. Even then, be wary of whiffing completely if you opt against the token.
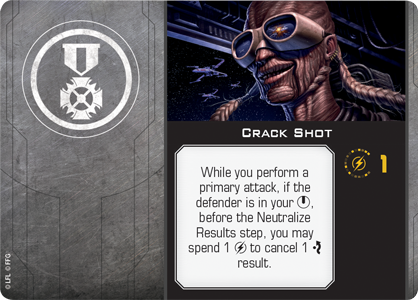 -Crack Shot
Worth it: Tepidly yes
Why: This one is perverse. Crack Shot is better the *more* tokens the enemy has, because those are the cases the foe will roll at least one evade that you can cancel with Crack Shot (or Jedi mind trick your foe into overspending). On the other hand, if the enemy rolls too many evade results, Crack Shot won’t let your damage get through– especially given that chasing bullseye has nerfed our offense.
That being said, Crack Shot does perform better than a focus token in most situations. It’s worth chasing. Then again, it’s cheap enough– and one-shotty enough– that you don’t have to make a habit of chasing bullseye, and in many cases can wait for it to come to you. You’re not losing nearly as much value waiting to use Crack Shot because it’s a one-use attack anyway. Thus, my recommendation would be to not chase bullseye with Crack Shot, and let it happen naturally. Because, though Crack Shot is better than a focus token, Crack Shot *with* a focus token is better still.
-Predator
Worth it: no
Why: rerolling one die is not as good as, say, re-rolling all of them by taking a target lock. Like Marksmanship, Predator is a nice-to-have, nothing more. Its chief virtue is that it can stack with other bullseye effects.
-Heavy Laser Cannon
Worth it: no
Why: if cannons still disregarded the range 3 defensive bonus, things might be different. As it is, straight-up trading an action for a die has never been a good deal, and it’s still not now. Note that “Scourge” (TIE Fighter pilot) has a pilot ability that works the same way, and the same logic holds. Also note that stacking a HLC with Predator does make it worth the reposition, though not by much. For a three-attack ship, your average hits rise from 2.25 to 2.5, though your variance is much bigger. Probably good enough for a TIE Defender, overall (especially since that pairing is only six points and Defenders are super-linear).
Corner cases: An HLC-equipped Scyk should always, outside of range one, attempt to achieve bullseye, because it’s trading an action for *two* dice. (Note: this is not an endorsement of HLC Scyks.) The only other two-attack cannon ship is the Assault Gunboat, but it can reposition only by SLAM-ing, and the new Assault Configuration limits you to three-dice shots when you SLAM. Therefore, it’s back to action-for-die, which is no good.
Proton Rockets
Worth it: yes if you can
Why: The trick of this is that you can only use PRockets if you’re already focused, in which case you can use that token to modify your shot. When that’s so, what we’re really comparing is a single-modified ordnance shot against a double-modified shot with some other weapon. And if you haven’t done *that* analysis before you’ve equipped these weapons, you’re doing things backwards.
That said, if you’re a focused A-Wing at range 2 and you don’t use your ship ability to reposition and launch PRockets, Psycho Tycho will personally break your kneecaps.
Soontir Fel
Worth it: situationally
Why: If you can nail the bullseye with a single re-position, the payoff is a focus token—the same focus token you would get if you’d sat. In this case, if you only need one token, it makes no difference whether you bullseye your target or not, and your greater positioning needs are decisive. I would not double-reposition just to get the bullseye; in that case, you’re taking a stress to get the focus token you could have gotten the old fashioned way. Again, Soontir’s larger positioning needs are likely to be decisive; he can’t afford to compromise his arc-dodging to chase focus tokens.
If you’re in an enemy arc and can’t dodge it, there’s profit in taking an evade, then using a reposition action to chase bullseye for a focus token. Similarly, if you’re going to single reposition to dodge an arc, and you then realize you can score bullseye with a second reposition, then that too becomes a good idea.
Time will tell if we’re better off taking a bullseye EPT on Soontir or something more obvious like Lone Wolf or even Outmaneuver. I’m skeptical putting too much emphasis on bullseye for Soontir, just because there are plenty of times you’re better off *not* chasing bullseye, but we’ll see.
Kimogila
Worth it: less often than you think.
Why: even more than some other entries on this list, the OG Bullseye Ship depends on high initiative to get good value out of the bullseye. This is because opponents that are higher initiative than you can make informed decisions to avoid the consequences of being bullseyed—say, by taking a target lock instead of a focus token. Conversely, the enemy’s actions can dictate whether there’s any profit in chasing bullseye: if the other guy moves first and doesn’t focus, don’t bother getting him Dead to Rights. There’s also a significant amount of squad dependency in play. Say you’ve got a Kimogila at Ini4, and another ship at Ini2. When the Kimo shoots, it can ignore the defender’s token—but then the defender can turn around and use it to mitigate the Ini2 shot. You’re only coming out ahead if the Kimo’s shot is stronger than the Ini2 ship’s shot (say, a quadjumper at range 3).
So, if you have a squad that supports bullseying your foe, and you can tell when it’s going to actually deny token use… is it worth it now? Answer: only if your target throws 3+ dice or is evading. A defensive focus is as powerful as an offensive focus in terms of the number of hits it subtracts or adds. In a 3-attack vs 3-defense scenario, forsaking a focus token to deny your opponent a focus token boosts your damage output by less than one percentage point; below that, you’re doing the defender a favor by chasing bullseye instead of focusing/locking. On the other hand, an evade token is a much stronger defensive tool than a focus token at normal numbers of dice. If a ship is throwing 2+ dice and evading, it’s worth your effort to reposition to chase bullseye.
All of which is to say, run Torani Kulda, for whom the rule is “always go for bullseye unless you can already see they’ve got no tokens”.
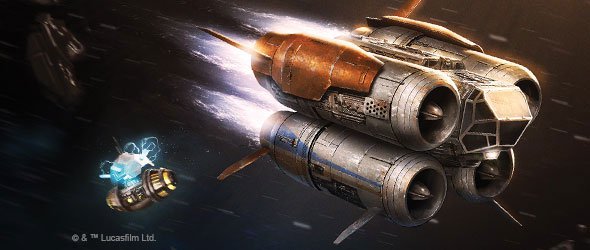
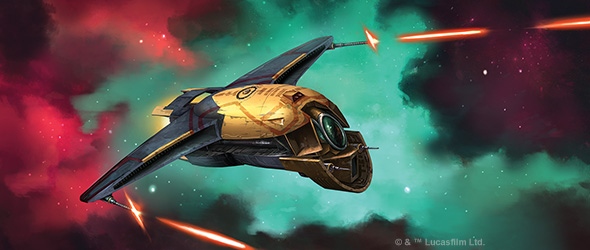
Quadjumper
Worth it: if going for a medium ship. *Possibly* when gunning for a large ship if you’ve got another source of tractor.
Why: Good news: In 2.0, throwing ships around isn’t limited to small ships. You can drag medium and large ships onto rocks, too. Hooray! Bad news: you need multiple tractor tokens to do it. Good news: one Quadjumper tractor beam in the bullseye can grant two tractor tokens, enough to throw Boba Fett onto a rock by itself. More good news: bigger ships are easier to bullseye. Bad news: without another source of tractor, one Quadjumper still can’t throw a large ship solo. Good news: Ketsu Onyo exists.
(The implication here is that you’ve got action support, because otherwise spending an action to reposition to use an action more effectively is, well, you get the idea.)
Corran Horn
Worth it: it depends.
Why: what makes this tricky is the target. The lower-agility your target, the more damage you’ll reap because you’re fighting fewer dice each time. That’s always been the case; what’s changed our calculus in 2.0 is the reduced availability of offensive mods and the need to bullseye, which imposes the costly repositioning action.
At range one, scoring the double-tap is always worth it. Conveniently, that’s also where it’s easiest to accomplish. High agility targets at range 3 can actually get away better from a single-mod/unmodded double-tap than they could against a single double-modded attack. This is worrisome, as you still incur the downsides of Corran’s ability even when you use it sub-optimally. We can change the game, though, by changing how we mod our attacks. More than any example thus far, Corran demands you go all-in on his ability and, by extension, the bullseye mechanic. That’s because his price point is so high you’re really losing out if you don’t. If you grab an HLC for four points and don’t fire it, meh, four points, not a great thing to waste but you’ll survive. You don’t want to waste 74 points (base) of Corran Horn.
So we’re talking Predator and Fire Control System, which has solid synergy with Experimental Scanners; together they can approximate the 1.0 Fire Control System. Now we have solid mods on both attacks. Now we can double tap more freely, while reasonably using our action for repositioning or defense. Is this any good? I don’t know! It’s pretty expensive and can’t lean on the infinite-regen crutch anymore. This sort of thing was good in 1.0, to be sure, so there’s probably a chance. I know I’ll try it.
~Fly casual!