Star Wars Armada: Flying High As A (Star)Hawk
Admirals, let’s take a look some Rebel lists using the upcoming Starhawk.
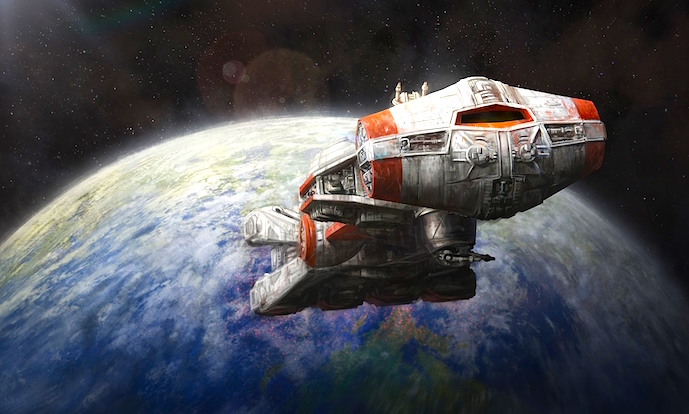
Armada Wave 8 is coming up soon and I am super excited for it. The Rebels are getting a new powerful ship in the Starhawk, a post-RotJ ship from the new EU. I’ve gone over what it can do already, and have been excited to build some fleets using it. Now sadly in a 400 pt game you don’t have enough to take 3 of them and recreate the Rebel fleet at Jakku, though I’d love to play a 6-800 sector fleet battle with three Starhawks vs an SSD. Anyway, here are a couple of lists I’ve come up.
The Raddus Suprise

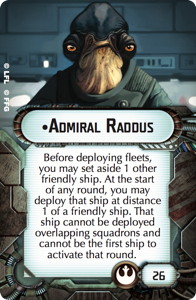
Commander: Admiral Raddus
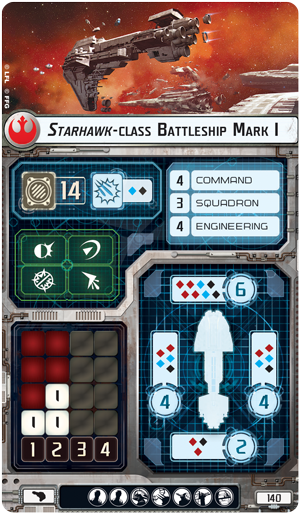
Starhawk-class Battleship Mark I (140 points)
– Concord ( 12 points)
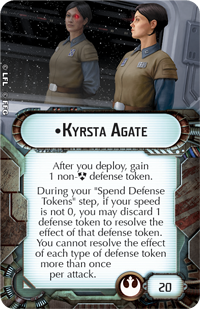
– Kyrsta Agate (off) ( 5 points)
– Raymus Antilles ( 7 points)
– Gunnery Team ( 7 points)
– Quad Laser Turrets ( 5 points)
– Spinal Armament ( 9 points)
– Leading Shots ( 4 points)
– Magnite Crystal Tractor Beam Array ( 10 points)
= 199 total ship cost
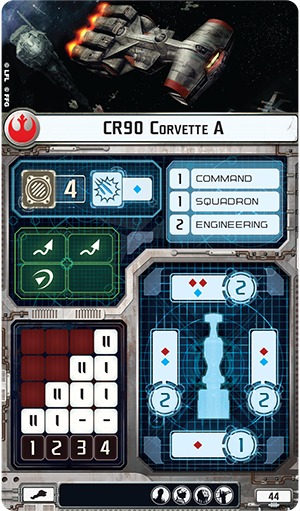
[ flagship ] CR90 Corvette A (44 points)
– Admiral Raddus ( 26 points)
= 70 total ship cost
7 YT-2400s ( 112 points)
= 112 total squadron cost
Faction: Rebel Alliance
Points: 381/400
Risky Flying
This fleet is fairly straight forward. The plan here is use the speed of the CR90 to deliver the Starhawk to the heart of a fight. Conceptually think of a lone scout CR90 guarding a convoy of light transport ships. The Imperials attack only to find that the transports are armed and a Starhawk was waiting nearby to jump right into the fight, the ambush is sprung! The Starhawk is set up to take a pounding a get off a lot of shots. Between the Concord title and Agate it should be able to salvo a bunch, getting in extra hits to make up for the low ship count, combined with quad laser turrets and even squadrons can’t just pick on it without worry. A group of 7 YT-2400s provide some independent squadron escort and can take the fight to enemy ships as well. It’s a bit of a risky fleet, lose the CR90 before you bring in the Starhawk and its over, but could be fun to mess around with.
Raddus Version B
Commander: Admiral Raddus
[ flagship ] Starhawk-class Battleship Mark II (150 points)
– Admiral Raddus ( 26 points)
– Unity ( 10 points)
– Strategic Adviser ( 4 points)
– Kyrsta Agate (off) ( 5 points)
– Gunnery Team ( 7 points)
– Quad Laser Turrets ( 5 points)
– XI7 Turbolasers ( 6 points)
– Leading Shots ( 4 points)
= 217 total ship cost
Starhawk-class Battleship Mark I (140 points)
– Amity ( 6 points)
– Damage Control Officer ( 5 points)
– Raymus Antilles ( 7 points)
– Gunnery Team ( 7 points)
– Hardened Bulkheads ( 5 points)
– XI7 Turbolasers ( 6 points)
– Leading Shots ( 4 points)
= 180 total ship cost
Faction: Rebel Alliance
Points: 397/400
Heavy Hitting
This is a variation on the first list. Again the plan here is to use Raddus to deliver a Starhawk in the heart of enemy fleet. In this case however instead of riding on a fast CR90, Raddus in in a Starhawk of his own. This gives you two very powerful ships to hit the enemy with, and with Raddus you’ve got some tricks up your sleeve. On the down side, once both ships are down you’re not super fast, and will lack board coverage. Still in a straight up fight this would be a brutal list to fight.
Aggressive Ackbar
Commander: Admiral Ackbar
[ flagship ] Starhawk-class Battleship Mark II (150 points)
– Admiral Ackbar ( 38 points)
– Gunnery Team ( 7 points)
– Leading Shots ( 4 points)
= 199 total ship cost
CR90 Corvette A (44 points)
– Slaved Turrets ( 6 points)
= 50 total ship cost
CR90 Corvette A (44 points)
– Slaved Turrets ( 6 points)
= 50 total ship cost
CR90 Corvette A (44 points)
– Slaved Turrets ( 6 points)
= 50 total ship cost
CR90 Corvette A (44 points)
– Slaved Turrets ( 6 points)
= 50 total ship cost
Faction: Rebel Alliance
Points: 399/400
A Swarm
This list is a new take on using my favorite ship in the game, the CR90. I’ve talked before, a lot, about why I love the CR90 in this combo. Basically, between, Slaved Turrets and Ackbar, you get to put out side shots of 5 red dice (1 base+ 1 for slaved turrets + 2 for Ackbar + 1 for Concentrate Firepower) and 1 blue dice at mid range. This makes it one of the most efficient point per dice ships in the game, and with its high speed and lots of turns, it can be where it wants when it wants. Taking four of them lets you surround a target and hit it with 20 red dice at long range, outshooting a whole fleet of Star Destroyers.
Added to the mix is the Starhawk, its a super though ship and is meant to draw fire off of the corvettes, as its a much more obvious target. In addtion it can put out some pretty deadly firepower of its own, with just enough points spent on upgrades to let it shot twice and with good effect. Now it may seem like Ackbar doesn’t do a whole ton for the Starhawk, since it’s not a ship that really wants to be to side on to the enemy. However I think Ackbar is actually a good match for the ship as he makes it a lot more flexible, increasing the power of its side arcs to be about on par with the front. This means that you can try to try to double arc an enemy, or take two front shots, or take two side shots and all these options are deadly. Because the ship is slow and doesn’t turn great this makes it a lot harder for enemies to flank. Overall I think this list has good hitting power, and a lot of board control, and 5 activations, making it pretty solid.
Lets us know what you think of these lists, down in the comments!


