BattleTech: Alpha Strike – Understanding The Basics
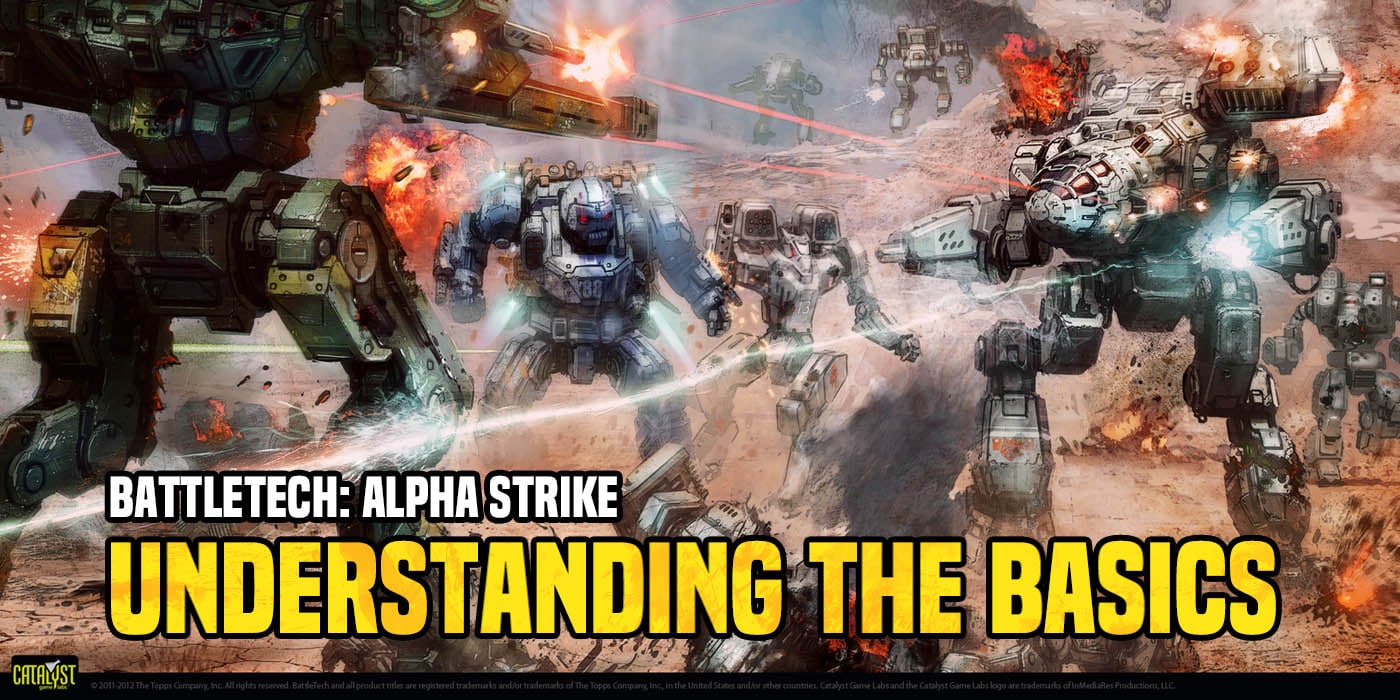
The hardest part about getting started in BattleTech: Alpha Strike is finding a starter box. All you really need is to understand the basics.
BattleTech: Alpha Strike is a newer, more digestible way to play BattleTech. You don’t have to be a “Real Gamer” to pick-up and play this game because anyone can learn in with some basic understanding of the game. It’s a great intro point into the universe and also takes place in the most current part of the timeline.
Catalyst Game Labs has released an updated version on the Alpha Strike box and today we’re going to tackle some of the basics of Alpha Strike and what makes it different from Classic BattleTech. This isn’t a “one is better than the other” argument — they both have their charms. We’ll probably cover a Classic version of this later on but for now, we’re focusing on how to play BattleTech: Alpha Strike.
Getting Started With BattleTech: Alpha Strike
Aside from getting your hands on ‘Mechs or the starter box, the real core of playing the game comes from understanding the ‘Mech cards and the attack modifiers. If you’ve got a grasp on those two things you’ll be up and piloting your ‘Mechs in no time. “But what about the Core Rules?” The entire system is based off a very simple 2D6 dice system. If you’ve played Monopoly and know how to roll 2 dice at the same time you’re almost there. With that in mind, let’s tackle the first thing you’ll need to understand: The ‘Mech cards.
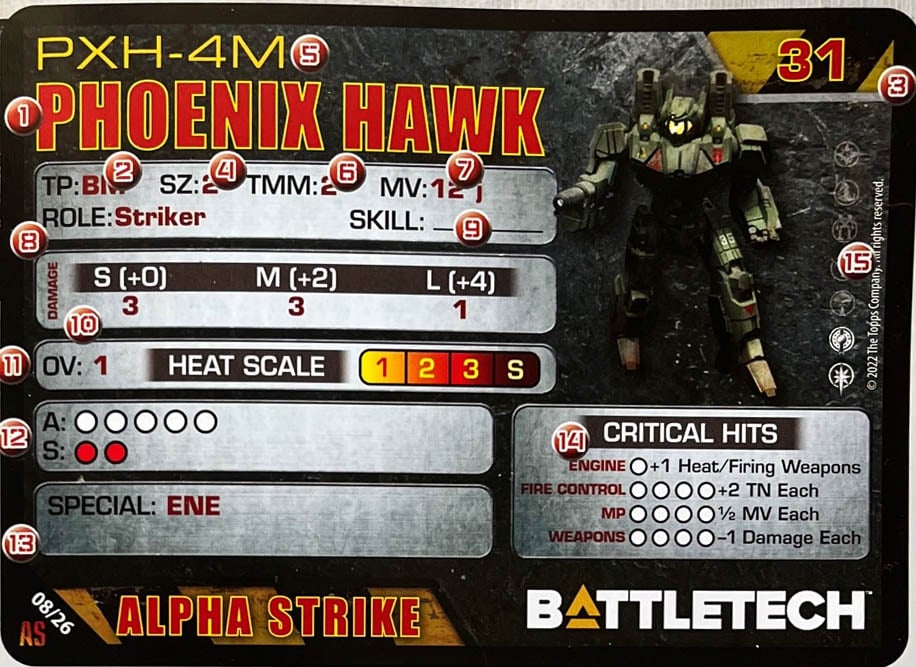
This image is from the BattleTech: Alpha Strike quick start rules from the boxed set
Here’s a blown-up version of a ‘Mech card. It might look like there’s a lot going on but it’s all pretty easy to interpret. Let’s go over each number super quick.
1 – Unit: This is just the name of the ‘Mech
2 – Type: This is the type of unit this card represents. BM stands for BattleMech. There are other unit types, but don’t worry about that for now.
3 – Point Value: This is the cost in points this ‘Mech requires to run. A typical game of Alpha Strike is around 250 points but you can play whatever points limit you and your opponent agree on. This is also a rough measurement of a ‘Mech’s battlefield strength.
4 – Size: This is a measurement of the numerical value of the ‘Mech’s weight class. (1) Light, (2) Medium, (3) Heavy, (4) Assault.
5 – ‘Mech Variant/Configuration: ‘Mechs are actually pretty modular with various loadouts and options. This is just a designation of which load-out this particular ‘Mech has.
6 – TMM: Target Movement Modifier: This is an attack modifier. Remember this number for later.
7 – Movement (Move (MV)): This is how far the ‘Mech can move in inches. It also indicates if the ‘Mech has jump jets or not — in this case it does. This is denoted by the “j” next to the number.
8 – Role: The typical style of combat role of the unit. These are more like guidelines or “tips” on how to use the ‘Mech effectively in combat.
9 – Skill: This is a blank spot on the card where you’ll write in the agreed upon MechWarrior skill value. A Skill value is also the default target number for many attacks your ‘Mech will take. Remember this number! It’s typical value is somewhere between 4 and 0. The lower the skill value the better.
10 – Damage Value (DV): The numbers underneath the Range Stat indicate the amount of damage this ‘Mech can cause in their respective range. In this case, it can do 3 damage at Short (S) range, 3 damage at Medium (M) range, and 1 damage at Long (L) range. These are a simplification of the weapons on the ‘Mech. We’ll cover ranges down below.
11 – Overheat Value (OV) and Heat Scale: The OV indicates if the ‘Mech can opt to overheat for an attack and provides a damage boost to Short or Medium attacks in exchange for an equal increase in heat. In this case, the Phoenix Hawk can generate 1 extra heat to cause 1 additional damage for an attack. The Heat Scale is from 1-4 (or ‘S’) which represents how many levels of heat this ‘Mech can generate before it shuts down. We’ll talk about dropping heat later.
12 – Armor and Structure (A/S): The white bubble represent how much armor your ‘Mech has while the red bubbles indicate the internal structure of the ‘Mech. When a unit takes damage you mark the bubbles off. If the ‘Mech loses all it’s structure bubbles it’s considered destroyed.
13 – Special Abilities (Special): These are special battlefield abilities the ‘Mech has access to. The various abbreviations represent different abilities the ‘Mech has. The full list is in the Core Rules. But don’t worry about that for now.
14 – Critical Hits: When a ‘Mech takes a critical hit, this box helps track the type of critical it has taken. These have increasing detrimental effects on the ‘Mech’s preformance.
15 – Era Availability: This is the Era in which the ‘Mech is from. Don’t worry about this for now.
Alright, I know that might seem like a lot but once you start moving ‘Mechs around and making attacks it’s all going to click. Trust me. The next thing we need to cover are the Attack Modifiers. Thankfully, there’s a super handy table to follow:
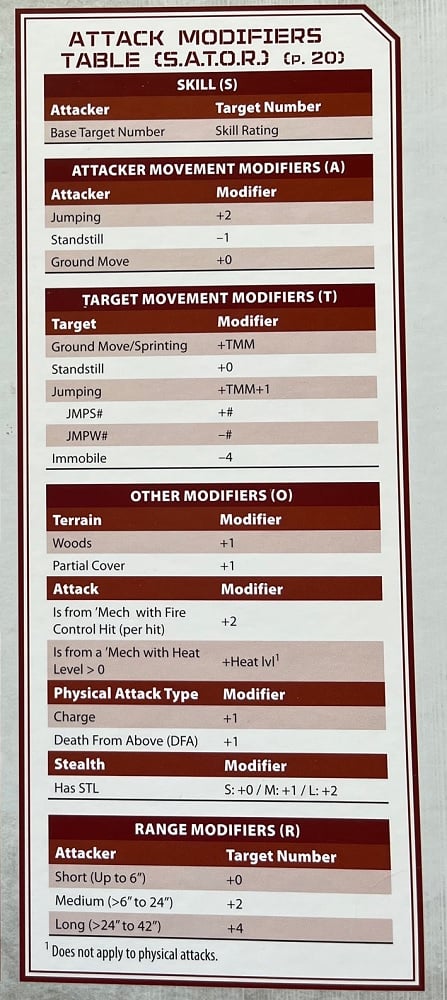
S.A.T.O.R. is a mnemonic device that will help you remember the Attack Sequence.
S – Skill rating of the attacker
A – Attacker Movement Modifier
T – Target Movement Modifier
O – Other Modifiers (like terrain, cover, overheat, etc)
R – Range Modifier
If you follow the chart above it takes you through each section. Again, you’re just trying to meet or beat the target number for the attack. Let’s do a quick example using the Phoenix Hawk above shooting at medium range with a skill of 3 at another Phoenix Hawk.
S – Skill of the attacker in this case would be 3.
A – Let’s assume the Phoenix Hawk just moved normally (Ground Move) so that’s a 0.
T – Let’s pretend the target was moving normally as well (Ground Move/Sprinting) = the Target’s TMM in this case it would 2.
O – Keeping it simple this is a wide open shot with no cover, no heat, or extra modifiers.
R – Medium Range (>6″ to 24″) is a +2 modifier.
That brings our target number to…7. Now we roll 2D6 and see if we score a 7 or greater to hit. It’s that easy.
At this point you’re ready to play BattleTech: Alpha Strike. Is there more to the game? Yes. There’s a whole lot more — but this is just an overview of the basics. If you’re looking for more corner case stuff or special rules that’s what the Quick Start Rules are for. That link is to the previous version online but it’s still accurate.
Let’s Talk Heat
Each level of Heat is applied after the round. So if you Overheat, you won’t take the penalties until the following round. Each level of heat makes it more difficult for your ‘Mech to make it’s attacks. So how do you dump your heat levels? If you’re in Water, your ‘Mech will lose 1 level at the end of a round during the Cooling Down End Phase.
Your ‘Mech will also lose all it’s heat if it didn’t make an attack this turn. Alternatively, if you pushed your ‘Mech to Shutting down on the previous round (and it was a sitting duck for an entire turn) you remove all heat and restart the ‘Mech.
What About Death From Above, STLs, Cover, And…
Whoa, whoa, whoa — yes, as mentioned there’s more to the BattleTech: Alpha Strike. Again, go check out the Quick Start Rules if you have more questions. However, at this point, you’ve got a basic understanding of the ‘Mech cards and also the Attack Modifiers. Get a lance together with a buddy and start playing! It will all make sense once you start rolling dice.
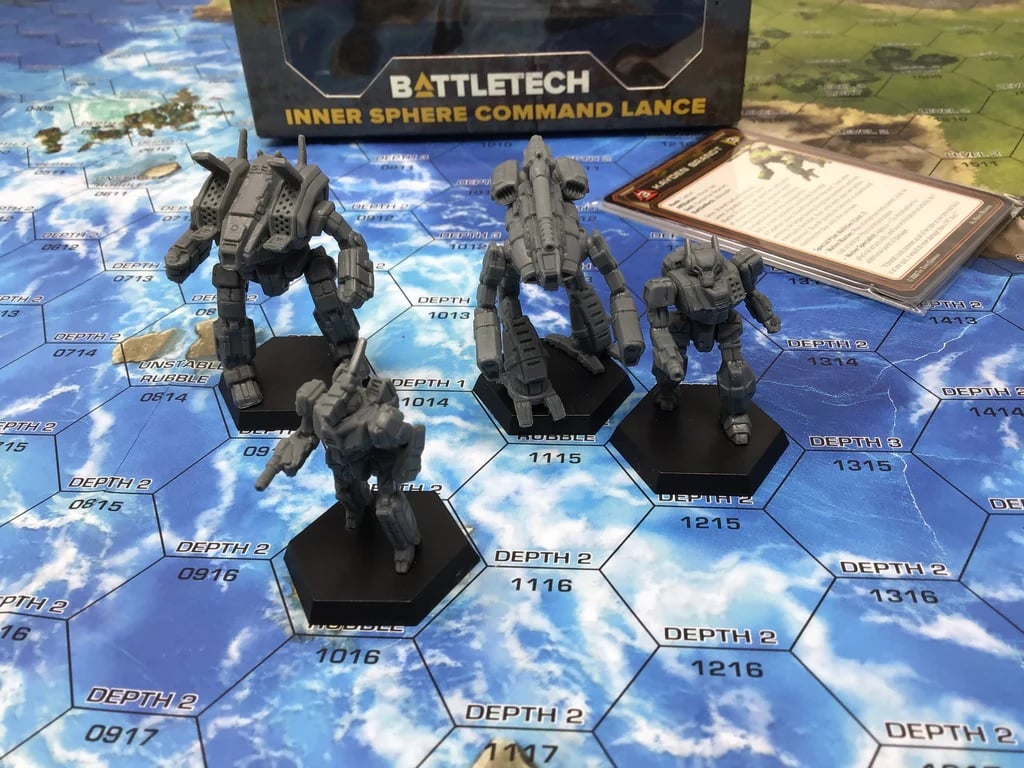
The new Lance packs come with awesome plastic ‘Mechs and the cards you need to run them in Alpha Strike. Yes, it’s that simple.