Age of Sigmar: Painting a Kruleboyz Marshcrawla Sloggoth
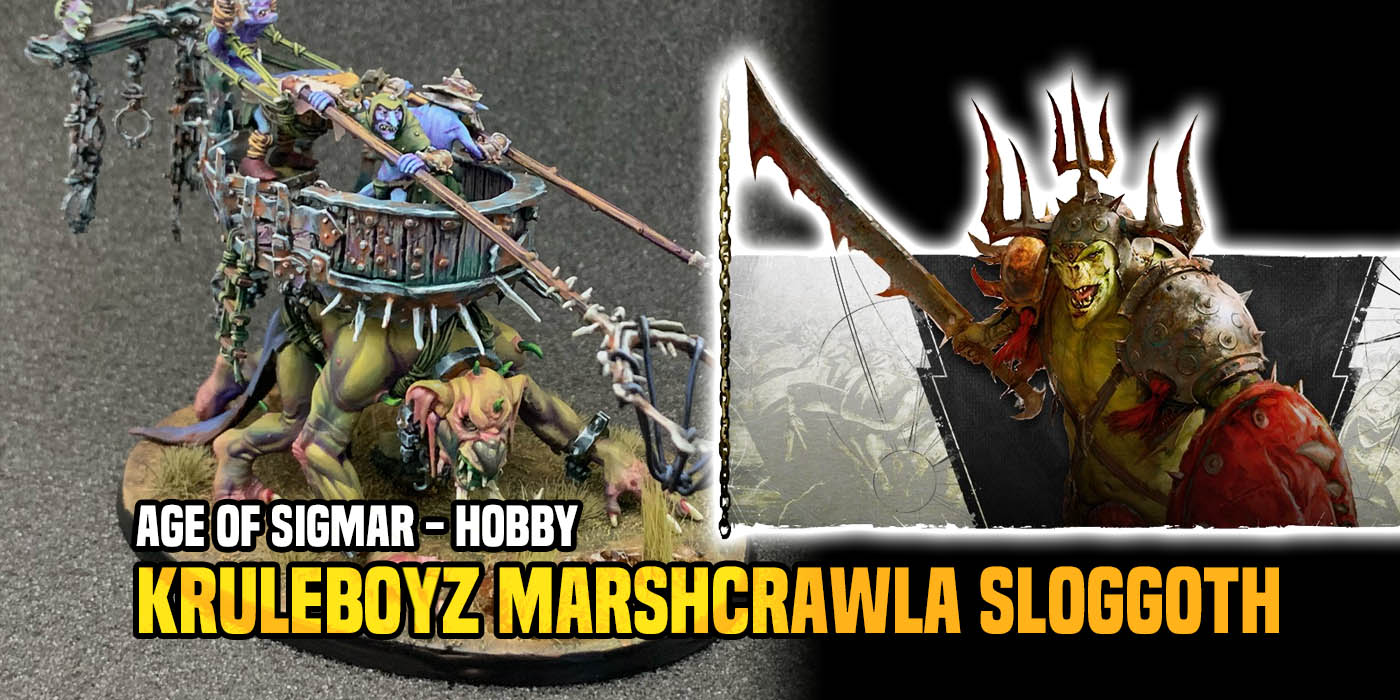
GentleBen is back with a new painting project. This time it’s a how to for a Kruleboyz Marshcrawla Sloggoth!
Seems like not so long ago I was starting a new army. But my first Age of Sigmar army, my poor Gloomspite Gitz, just can’t seem to catch a break. I decided to add a few more things before I shelve them for awhile. And what could help an ailing army more than an 18″ +1 to hit aura? Maybe this hulking brute will finally lead the squigs to a win. Not to mention the fact I always liked the model. Lets just hope it doesn’t prompt me to buy a Kruleboyz army and further derail my Lumineth aspirations.
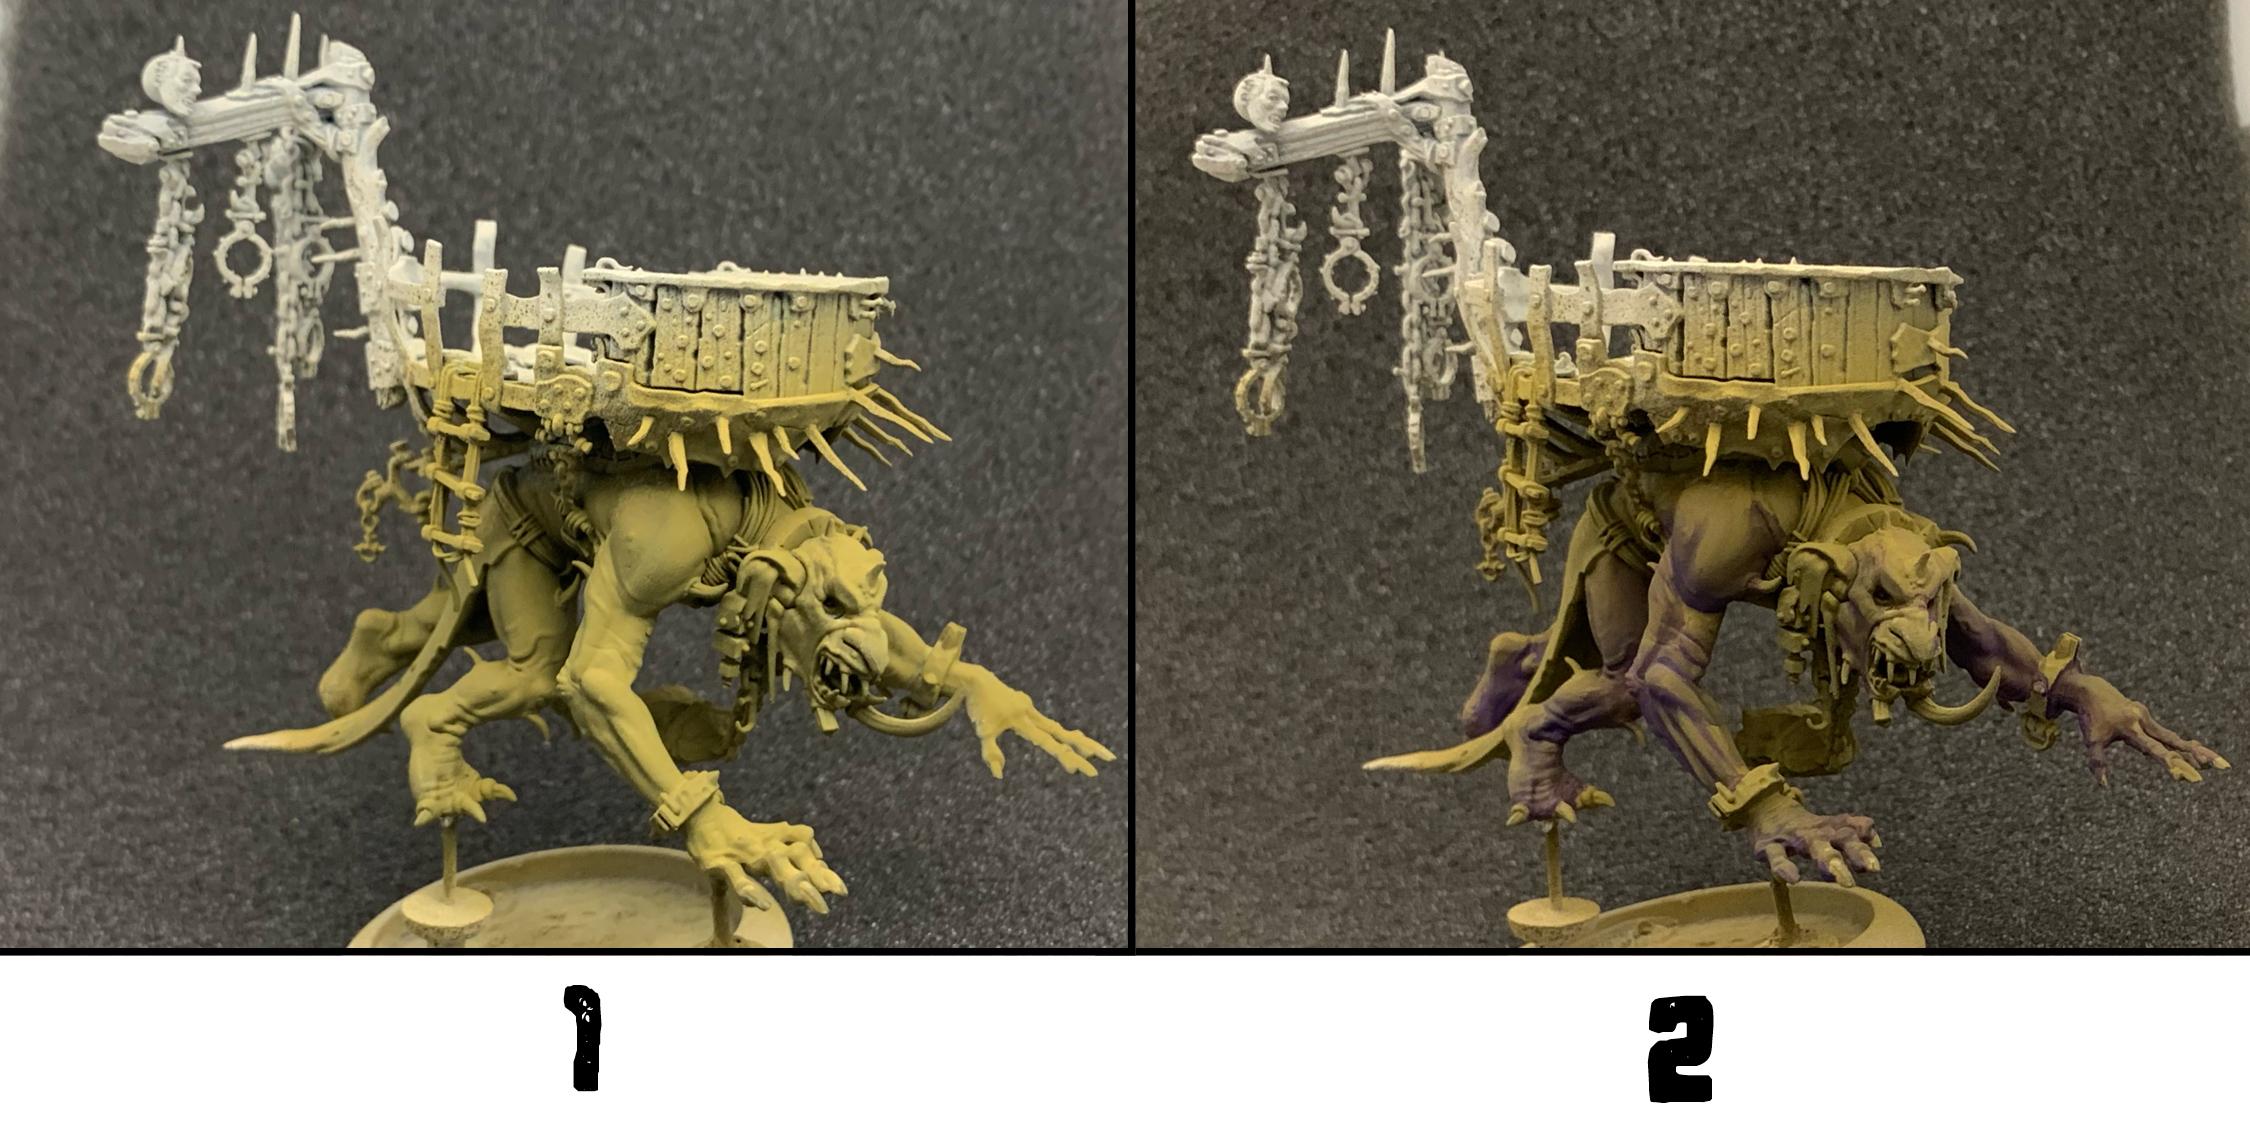
1) As I sometimes do I decided to start this project off with an airbrushed basecoat. I started with AK Camouflage Green and blasted it with a highlight of AK Ochre.
2) Then it was time to take conventional brush out. I added some Camouflage Green shading back in before darkening the recesses even more with some AK Amethyst Blue (which, fwiw, I would really describe more as a bluish purple than a blue).
3) More highlights were also needed so I blended in some more Ochre to add more contrast to the muscles and other raised areas. I also added some color variation to the shading, glazing some AK Esmerald into some of the recesses.
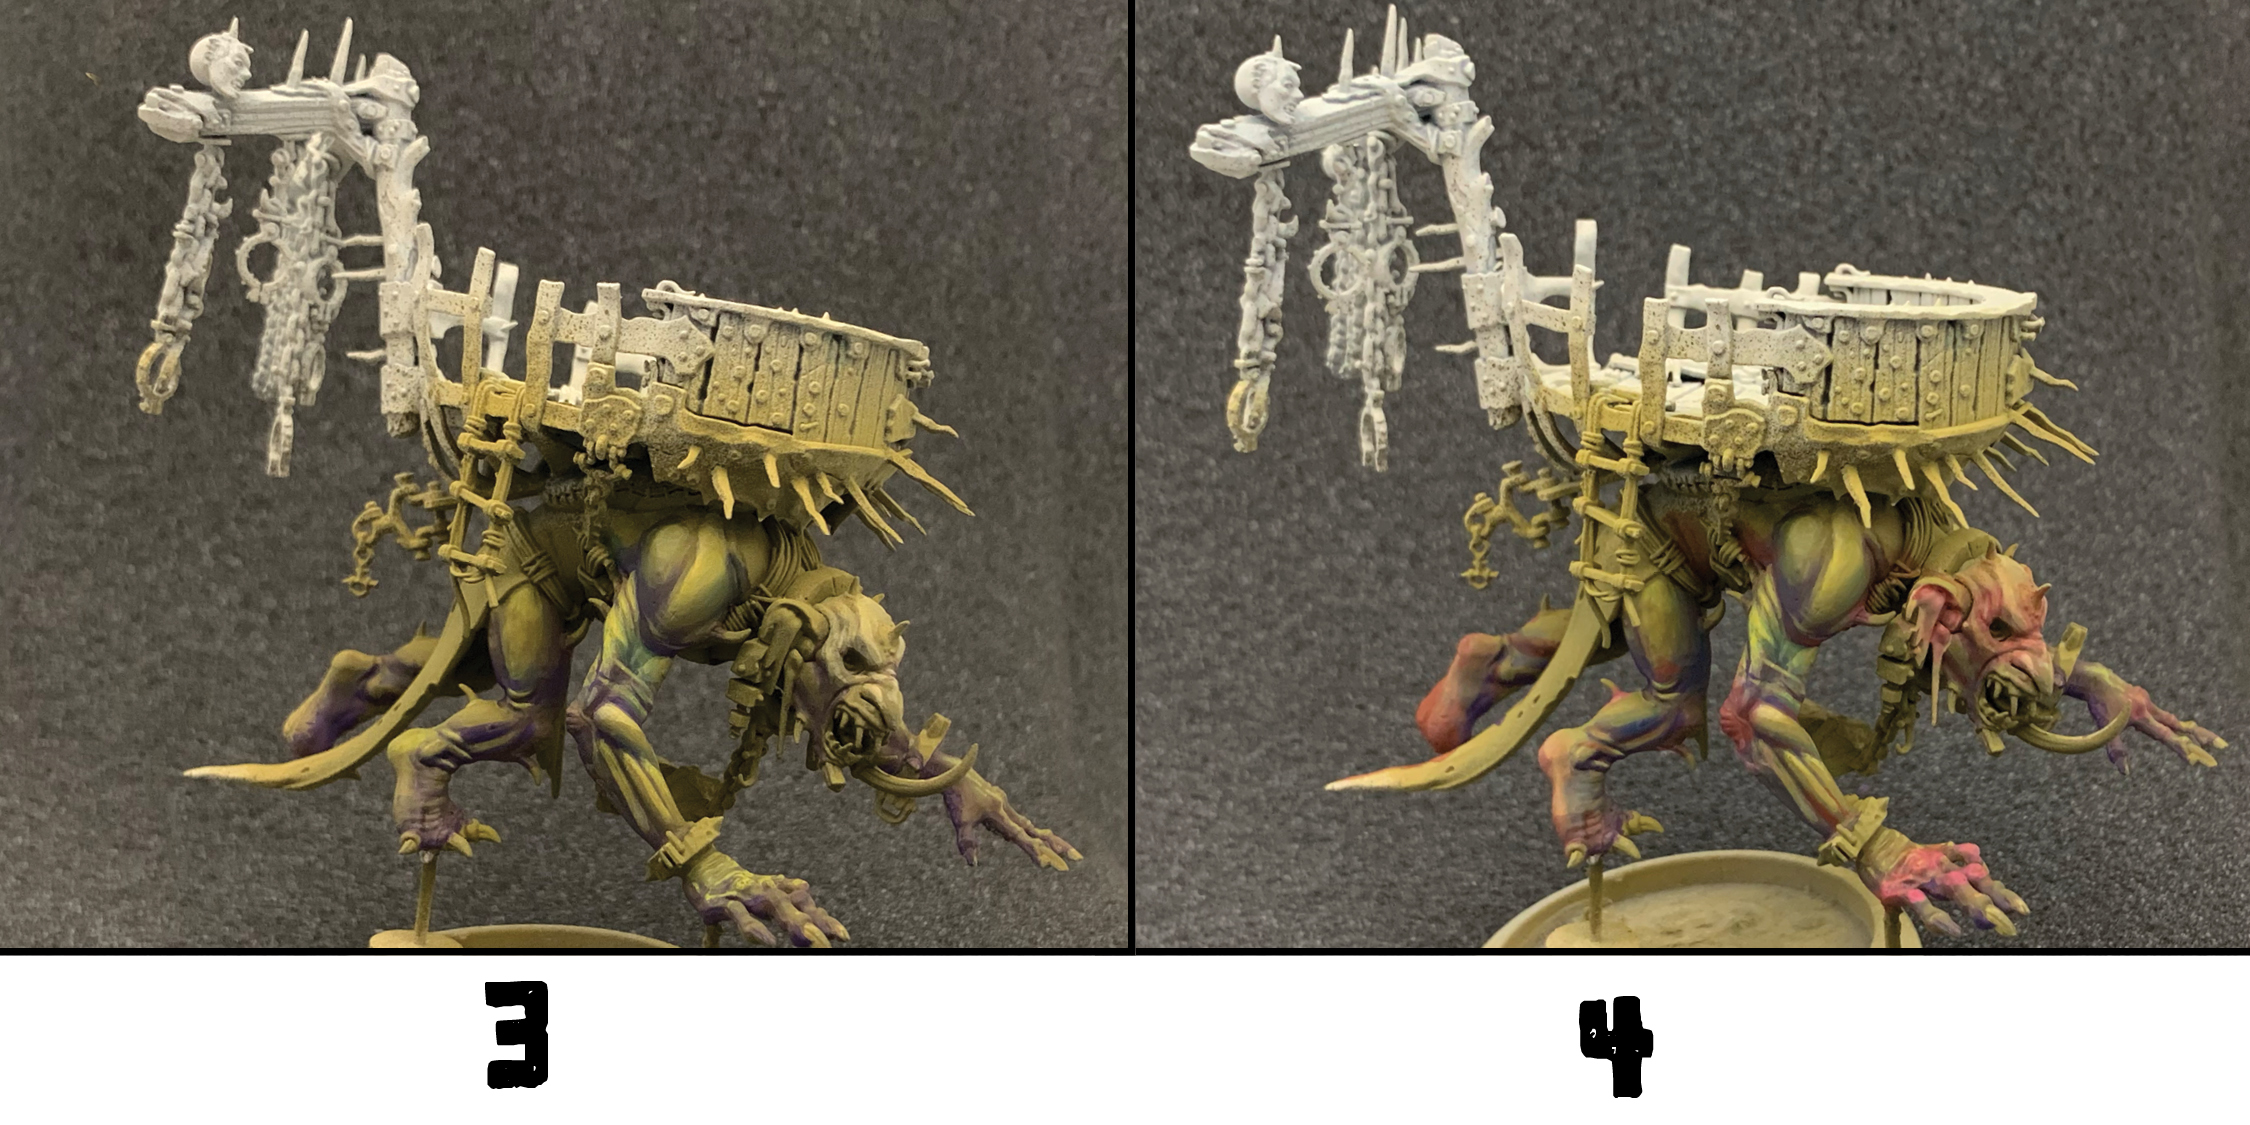
4) To help make the Sloggoth look more organic and alive, I added AK Salmon to some key points around the model.
5) The Salmon areas were highlighted with some AK Basic Skintone and Shaded with some AK Wine Red.
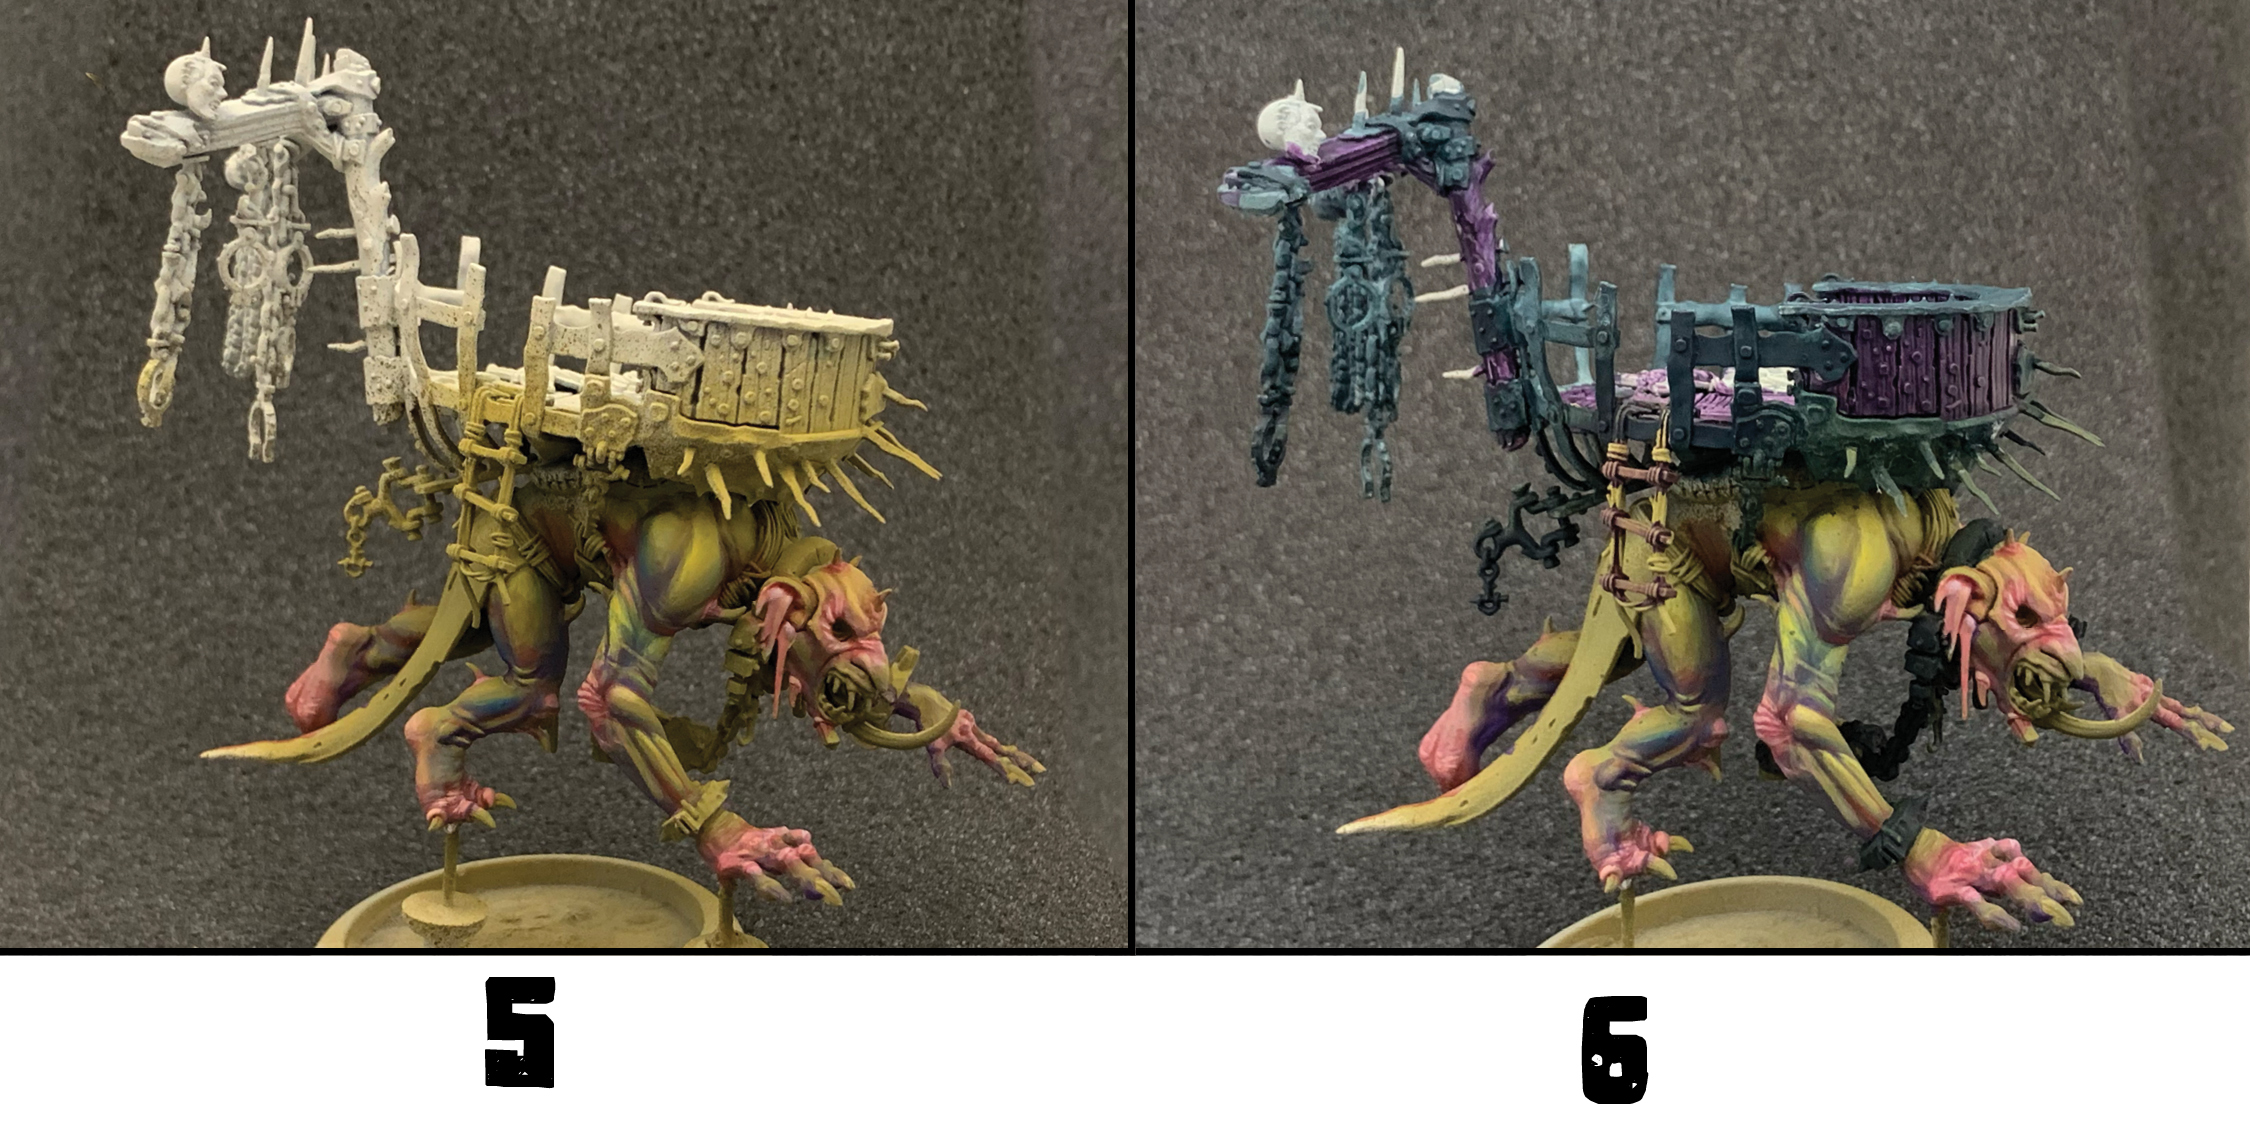
6) Even though there was more work to do on the beast itself I found myself really wanting to move on to the platform on the back. I painted the wood with Reaper Imperial Purple and the metal areas with a mix of AK Dark Sea Blue and Black.
7)I used the side of my brush to pick out the wood grain with Vallejo Green Grey and then a little Vallejo Stone Grey to lighten it up even more. The little studs got in the way of the brush some but it also meant they got nice highlight lines all around them in the process.
8)To highlight the metal I mixed some Snow Blue in with the original basecoat of Dark Sea Blue and Black. I still find rough shapes like these tricky to do an NMM effect on. It can be hard to know exactly where to put the highlights. I just make sure every curve gets one and try my best to imagine the pieces are metal.
9) I increase the amount of Snow Blue in my highlight mix to brighten the metal up further, then add thin lines along the ridge of every surface. Then I stipple some watered down AK Light Rust in recesses all over the metal areas. You don’t have to hit every recess and I actually think it feels a little more random and natural if you miss some.
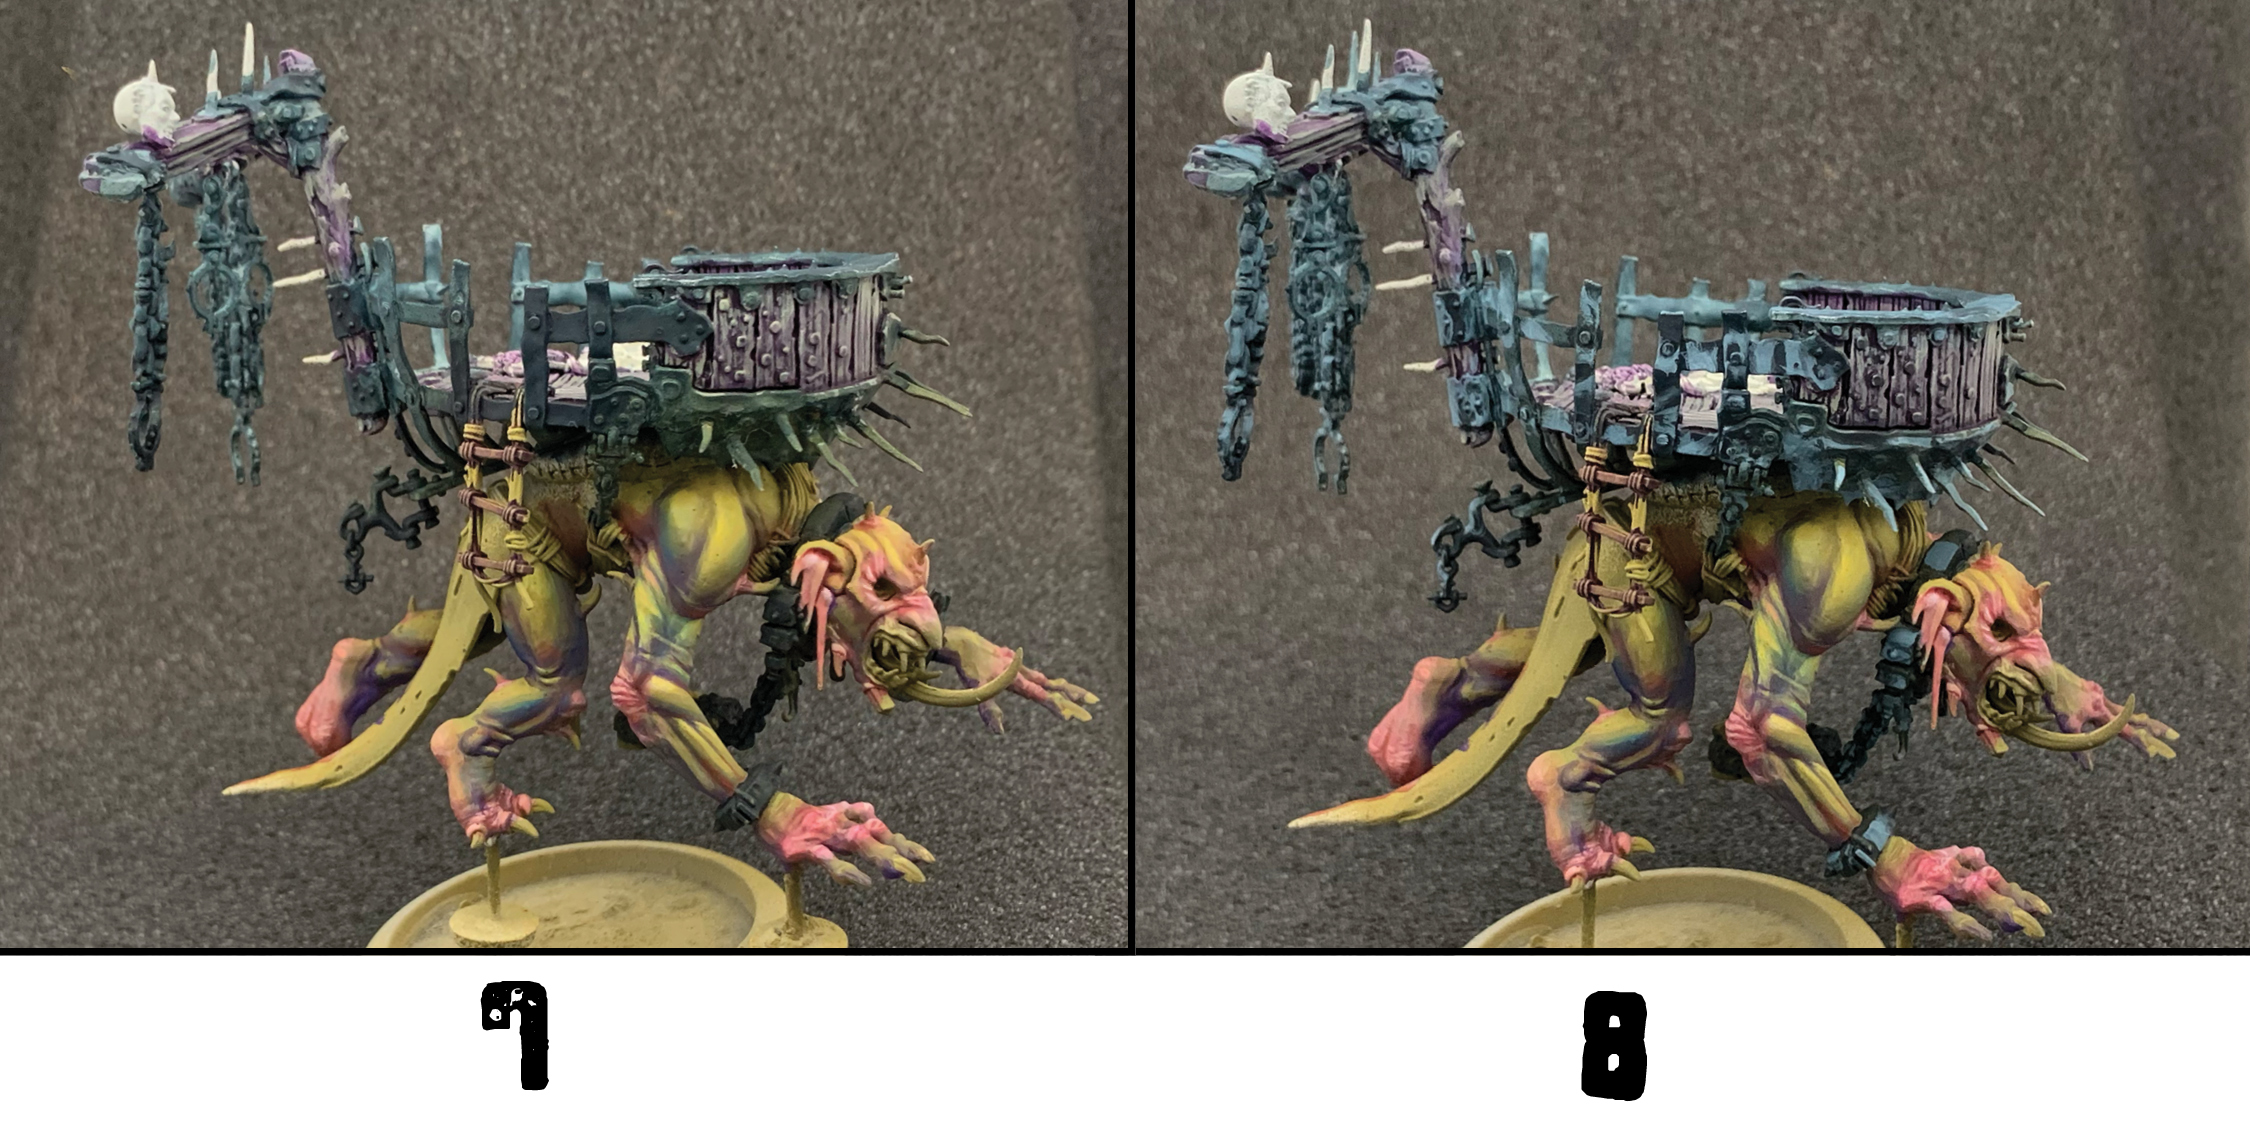
10) I give the chains and some of the other more detailed areas a Nuln Oil wash to help the detail pop, then give some sparing highlights of pure Snow Blue to some spots of the metal to add a final bit of definition and sparkle. I also decided to make the nose black, as well as the loincloth (be thankful it’s wearing one), and the interior of the mouth was painted with AK Dark Green. I also used a thin wash of Dark Green on the wood to give an algae growth appearance.
11) I painted the spines across it’s body AK Dark Green as well, and used Black Green as a basecoat for the ropes. I used AK Frog Green for the decapitated head and hands, but there wasn’t much left of it showing when I was finished. I also painted the teeth and claws with AK Dark Sand.
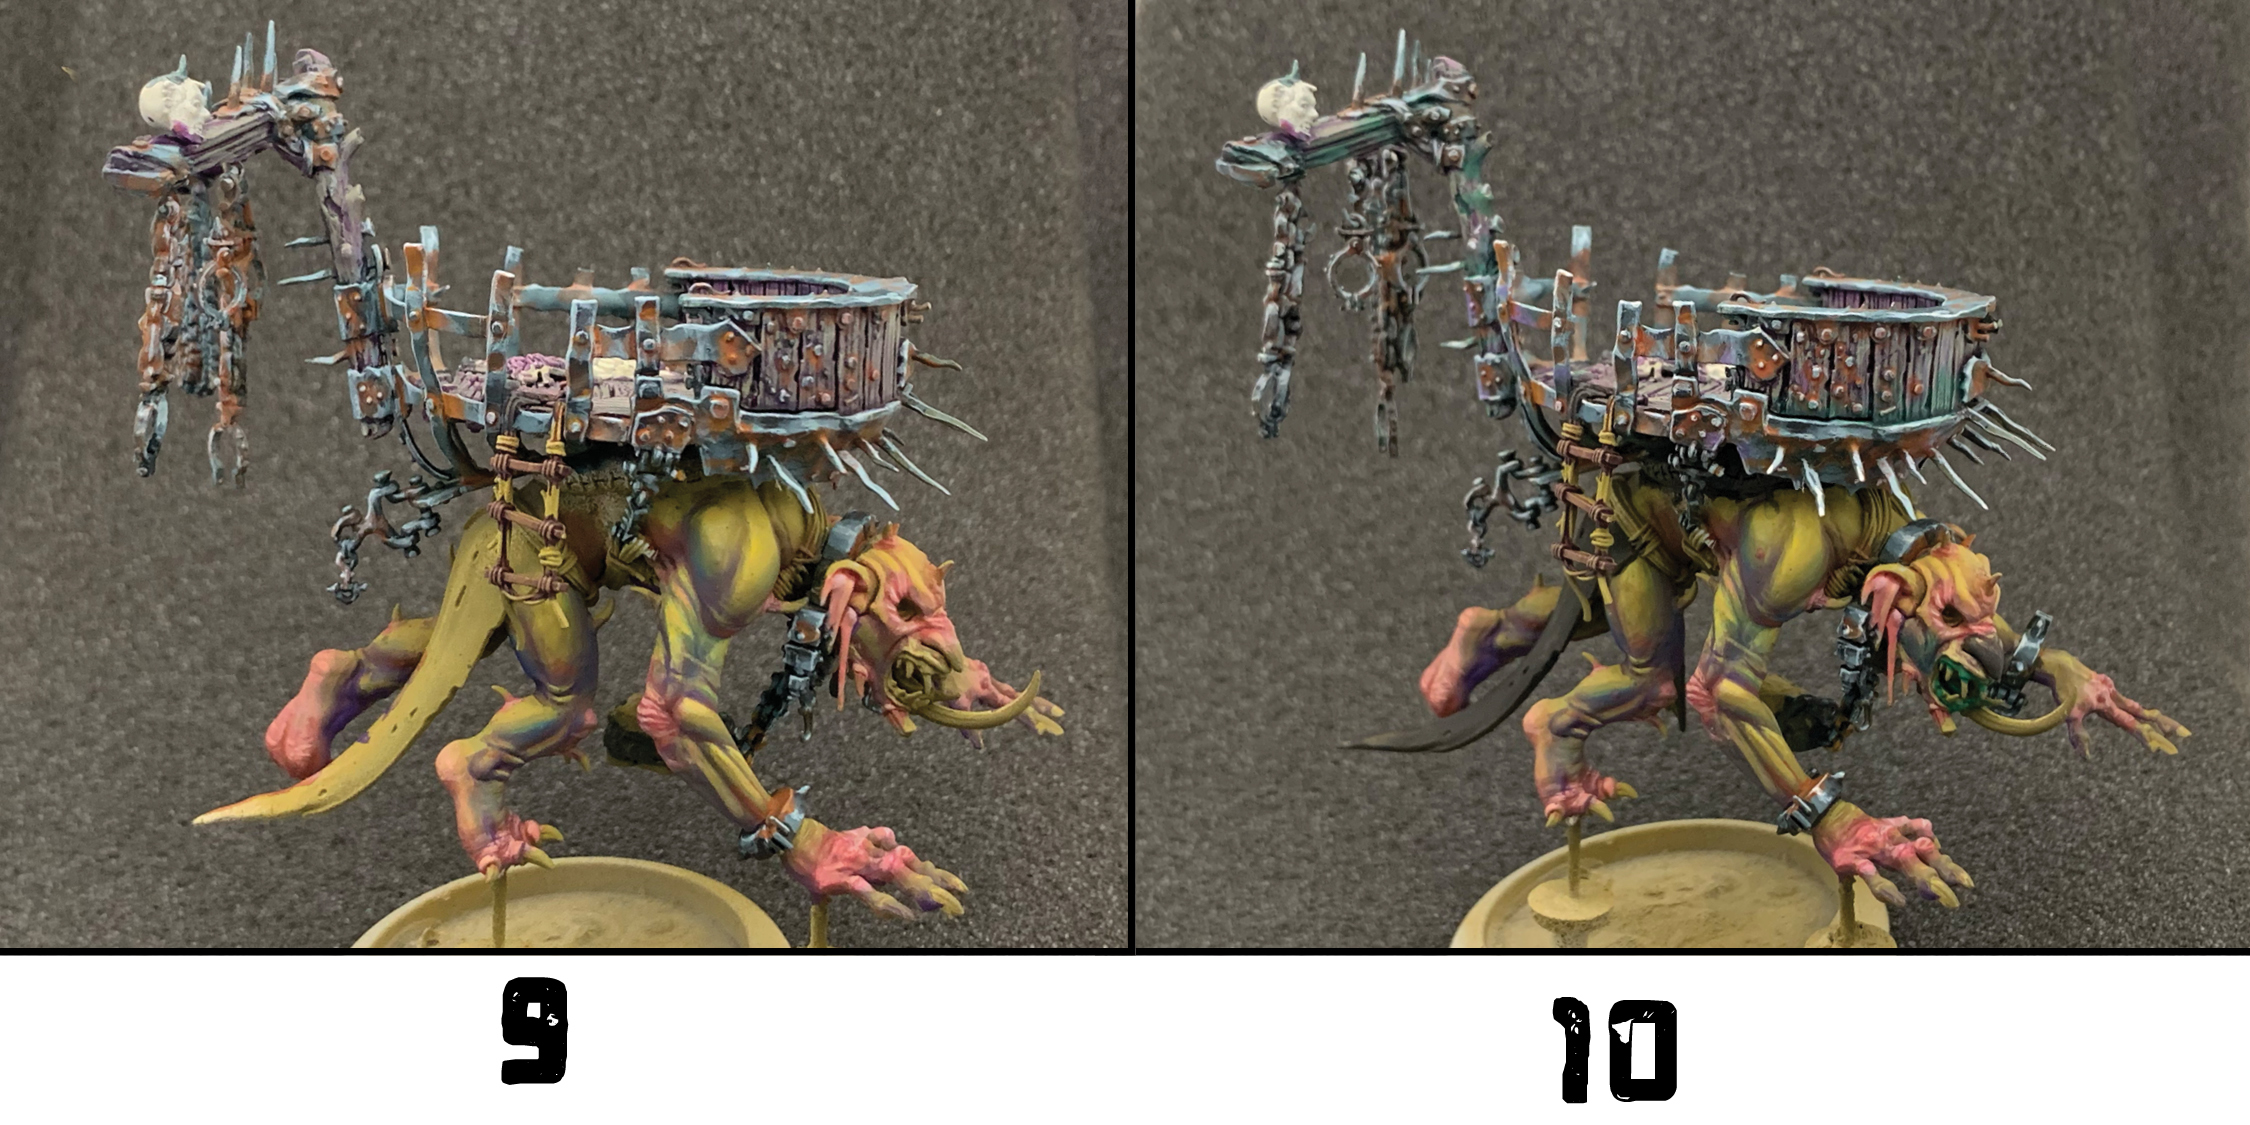
12) I drybrushed AK Ochre over all the ropes to define all the strands. The black loincloth was highlighted with AK Oxford, then AK Grey Blue. A little Snow Blue was mixed in with the Grey Blue for a final highlight on the loincloth. The spikes were highlighted with AK Deep Green and then AK Frog Green. The severed head was shaded with a very thin glaze of Reaper Brick Red, then highlighted with Snow Blue. The claws and teeth were highlighted with AK Ivory. Then a thin line of AK Wine Red is added along the skin separating the fingers/toes and finger/toenails.
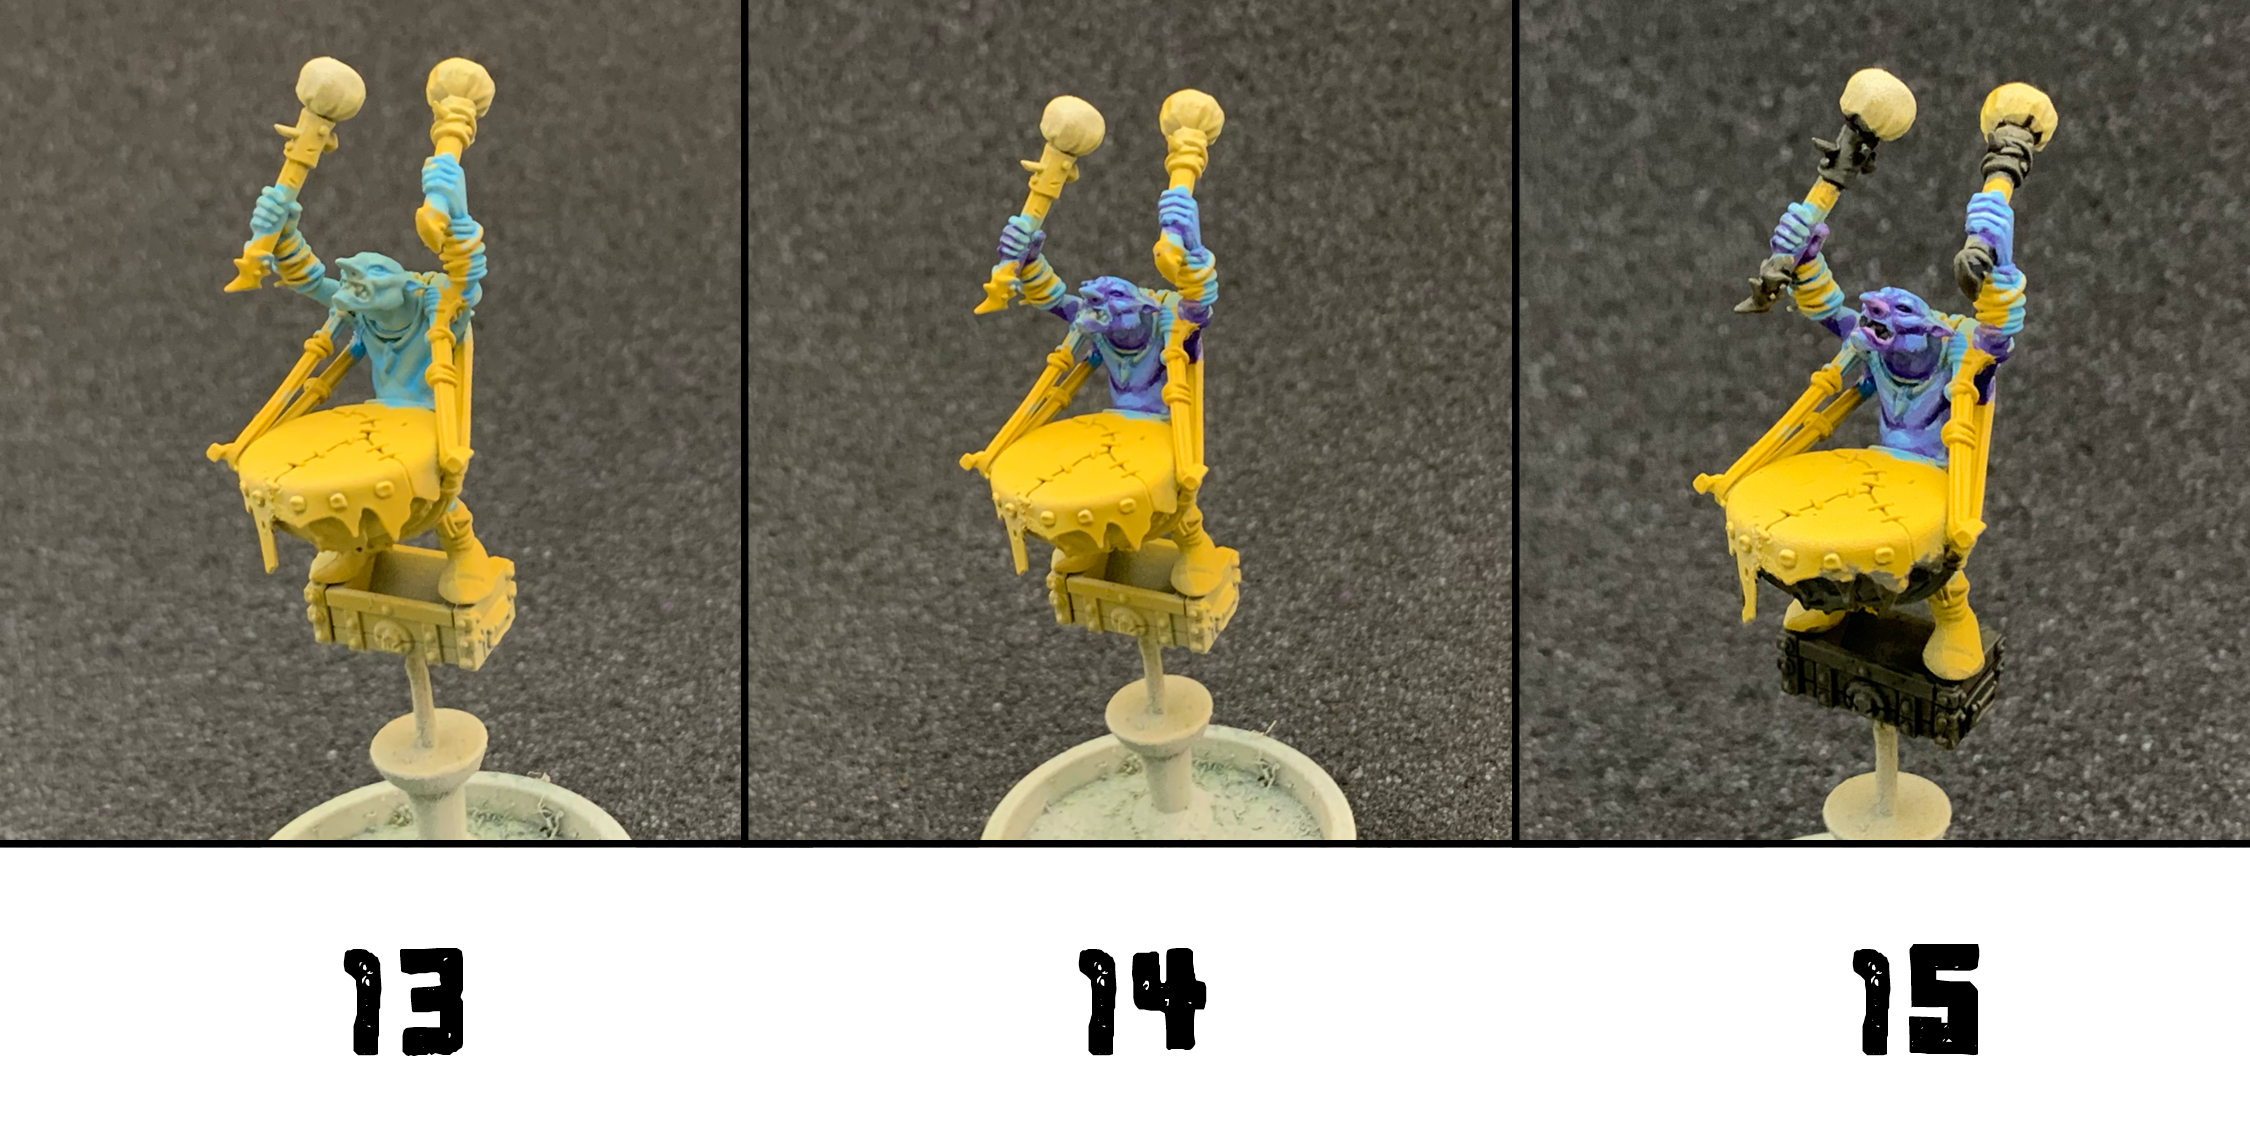
13) That still leaves the crew. I had planned to paint the grots yellow but since that was so close to the Sloggoth itself I went with a basecoat of AK Deep sky over that initial yellow airbrush basecoat.
14) After another coat or two of Deep Sky I began shading the skin with Amethyst Blue.
15) I blended some Basic Skintone into the Deeps Sky basecoat for some highlights, then painted the nose and palms with a mix of AK Deep Purple and Basic Skintone. This is highlighted with more Basic Skintone. Additionally all the metal areas are basecoated with Vallejo Green Grey which is then washed with Nuln Oil.
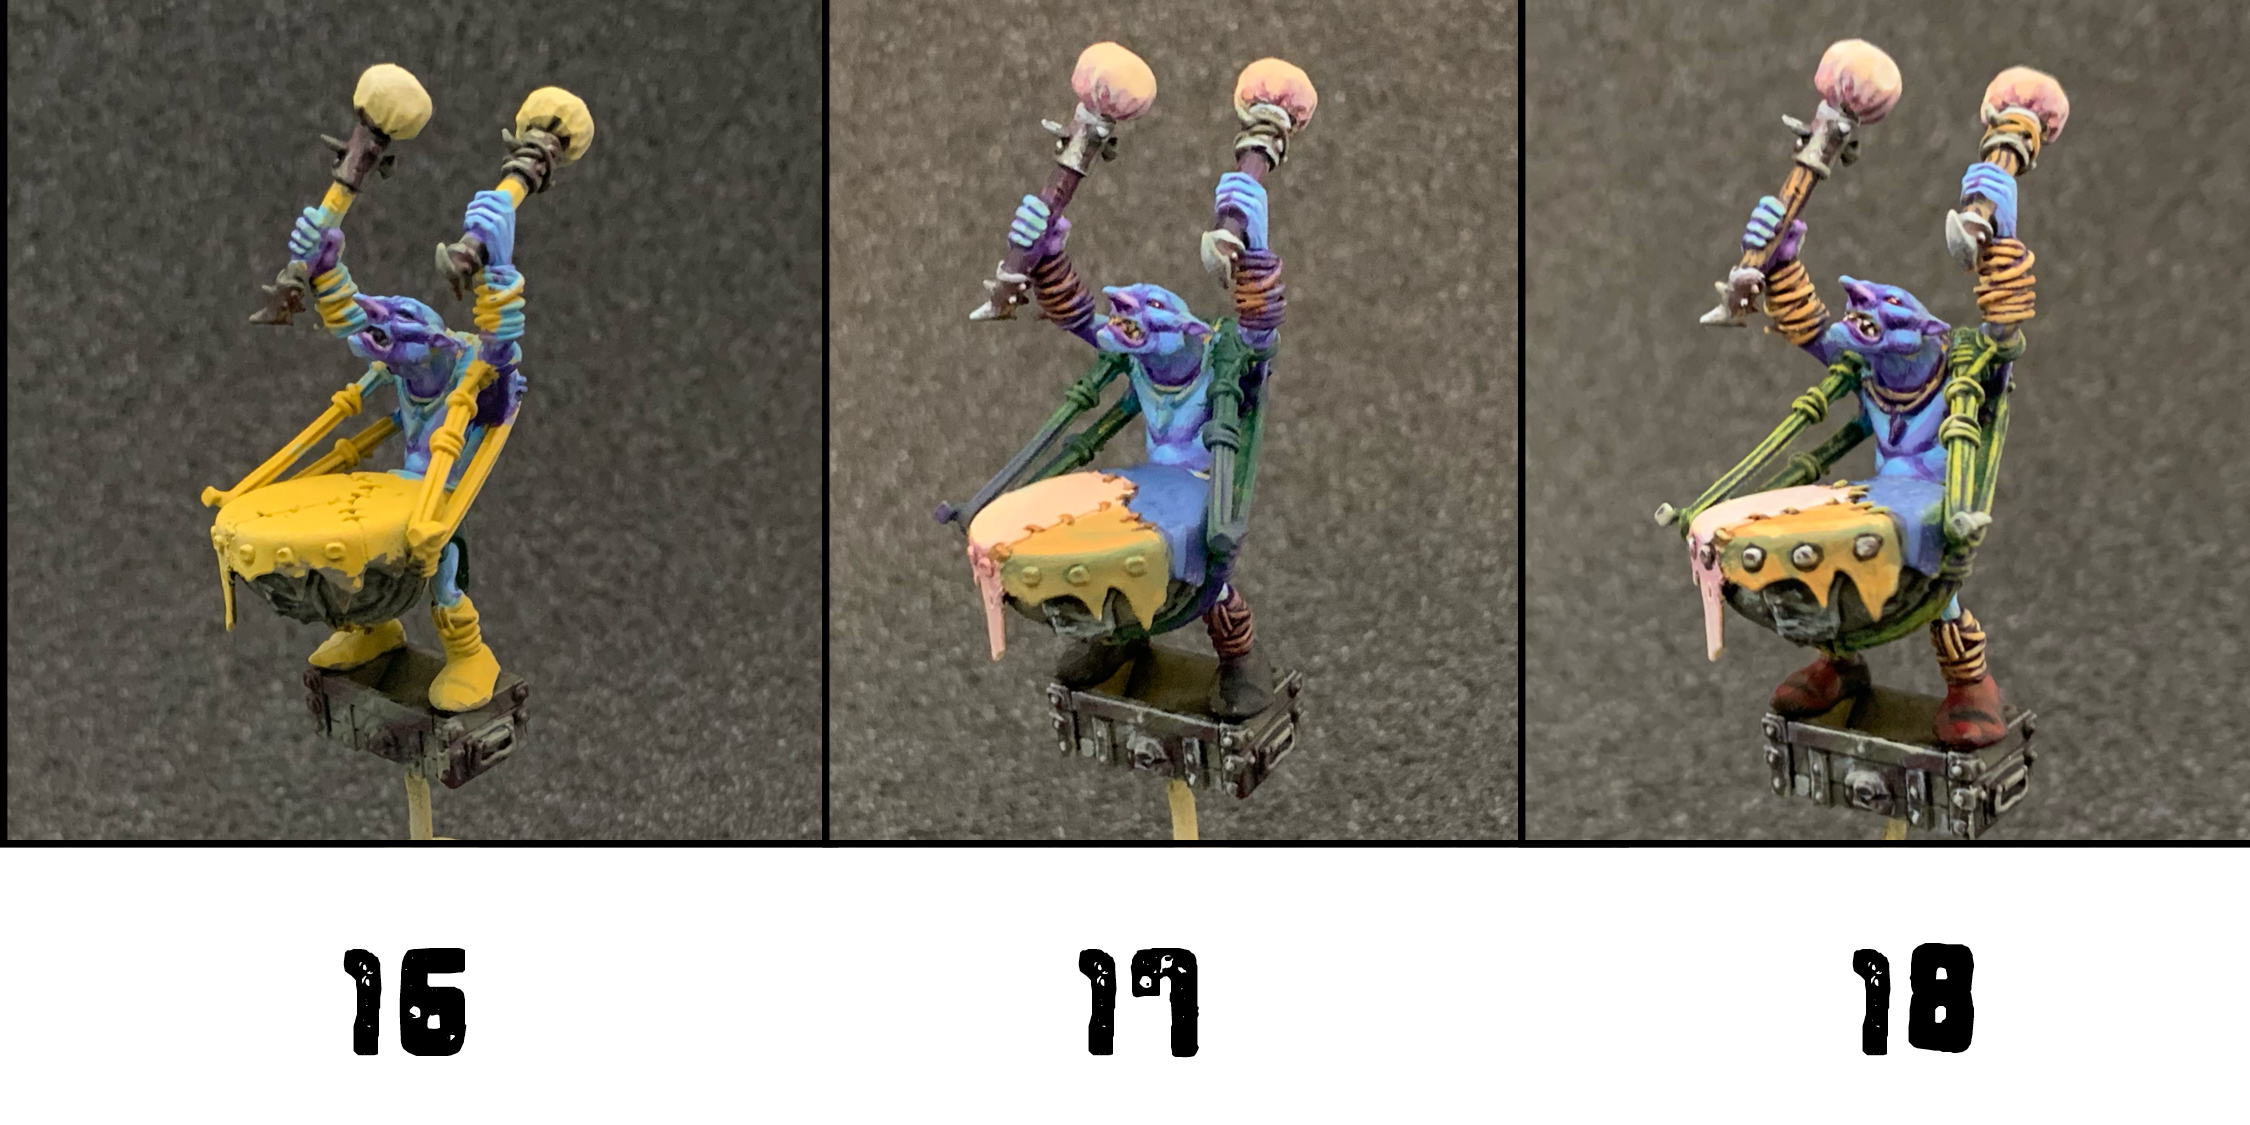
16) I add some highlights back in to the metal areas with Green Grey and Stone Grey, and add a little Red Brick to the shadows for a little dark red color
17) I went for a three-tone drum skin. The mid-tone third is AK Light Brown shaded with a small amount of AK Light Prussian Blue blended in for shading. The darker third of the drum skin is AK Grey Blue shaded with Oxford. Finally the lighter third is Basic Skintone shaded with a little Reaper Imperial Purple. These are the same colors used for the drumstick heads. The wooden drumstick shafts were painted with Imperial Purple. I also added some lighter shiny highlights with AK Ivory to the metal parts. The cords connecting the grot to the drum were painted with AK Black Green. The boots were painted black. The teeth were painted with a bit of Ochre. Each eye got a tiny dot of Ivory. Finally I gave the wrist and ankle wraps a wash of Druchii Violet.
18) The wooden handles and wrist/ankle wraps and rope cords were drybrushed with Light Brown, then a little Ochre. So was the necklace which I forgot about in the previous picture. The boots got a little highlight of Wine Red. Then I followed all the NMM steps from the earlier for the studs and nails on the drum. Lastly, the teeth got a final touch-up of Ivory.

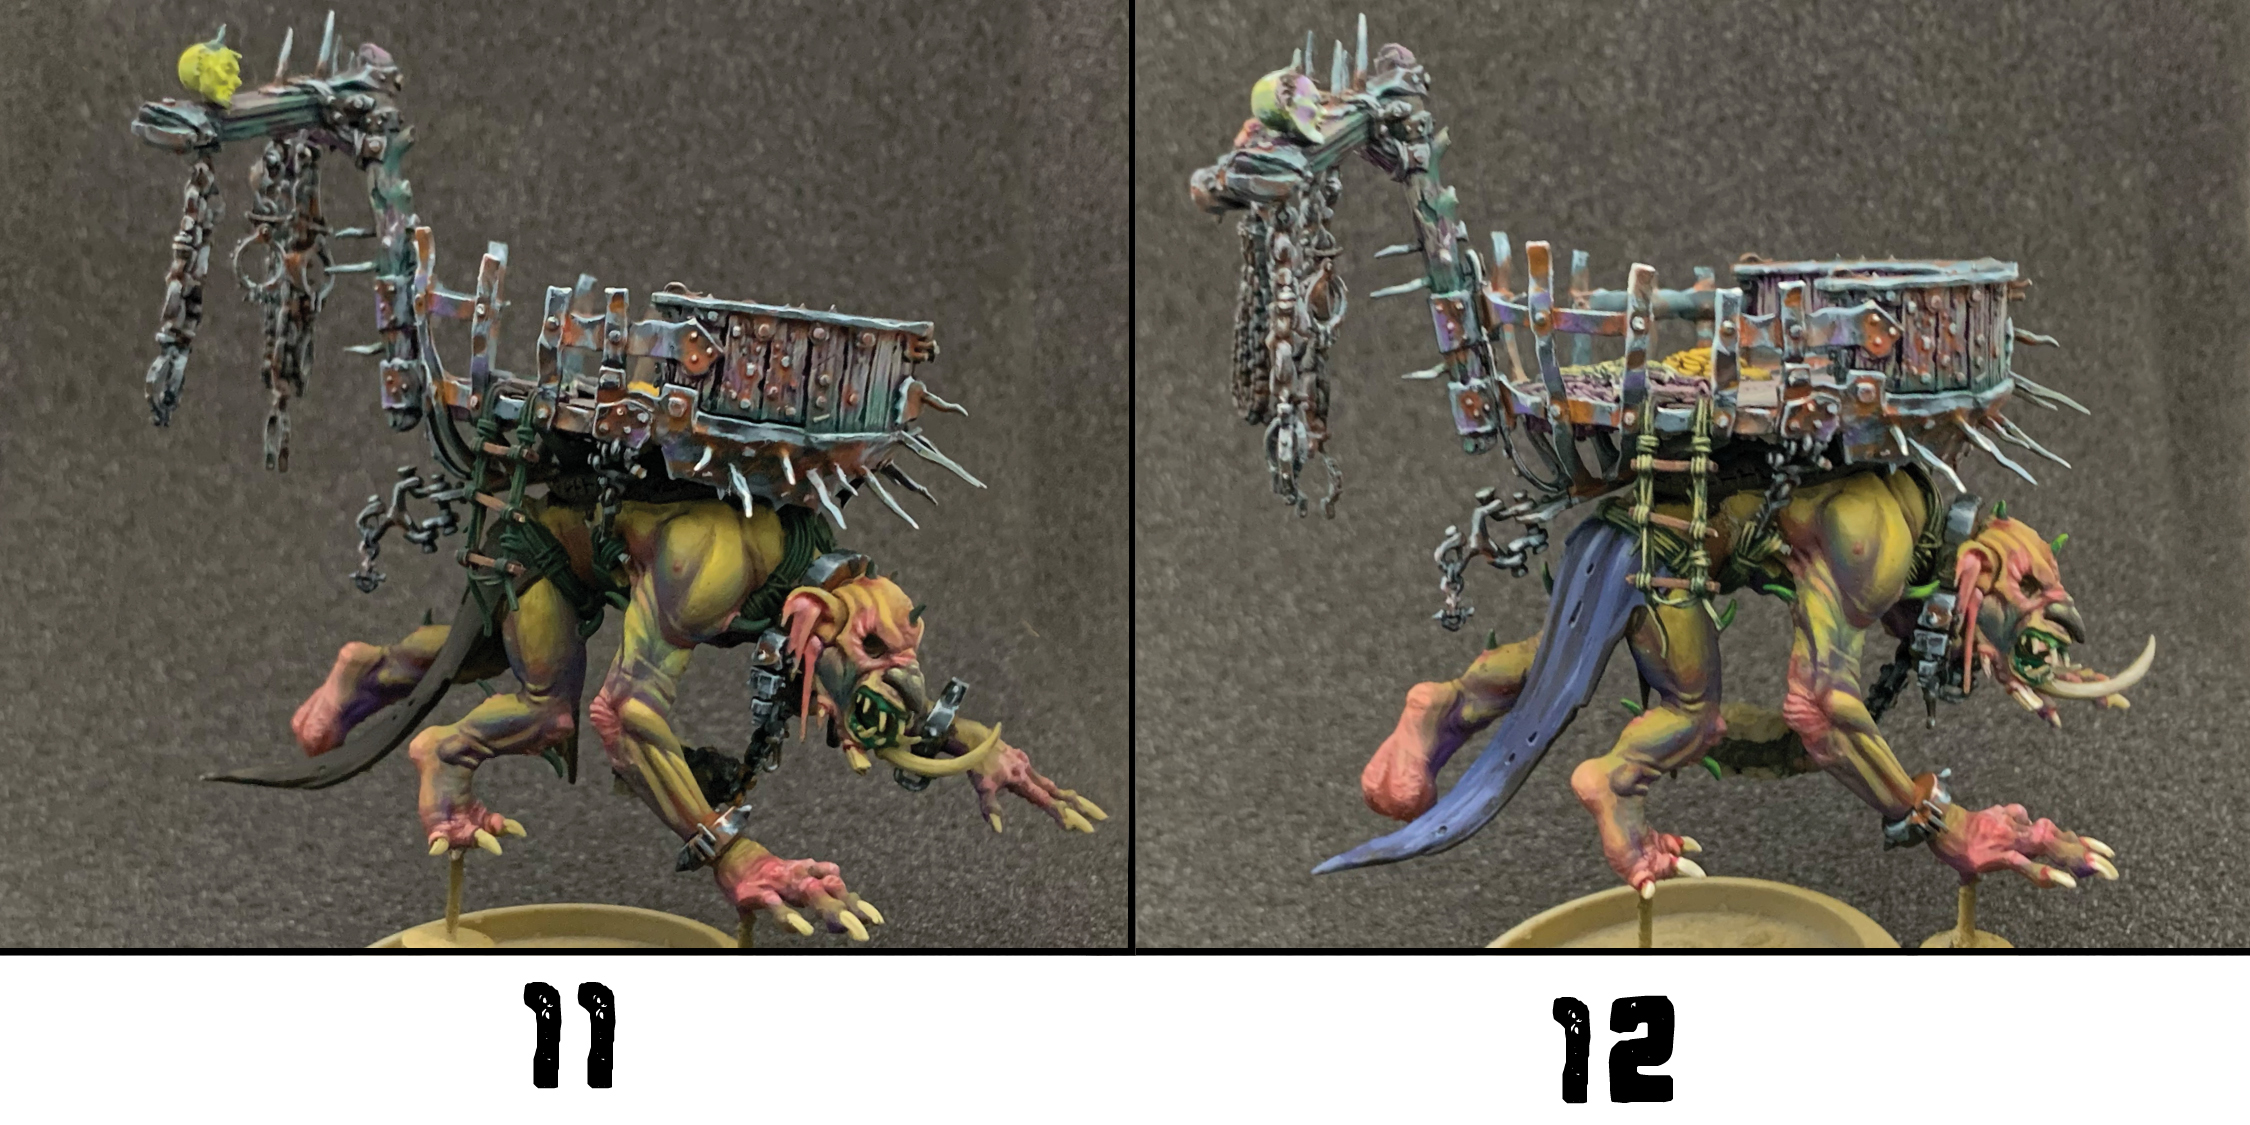
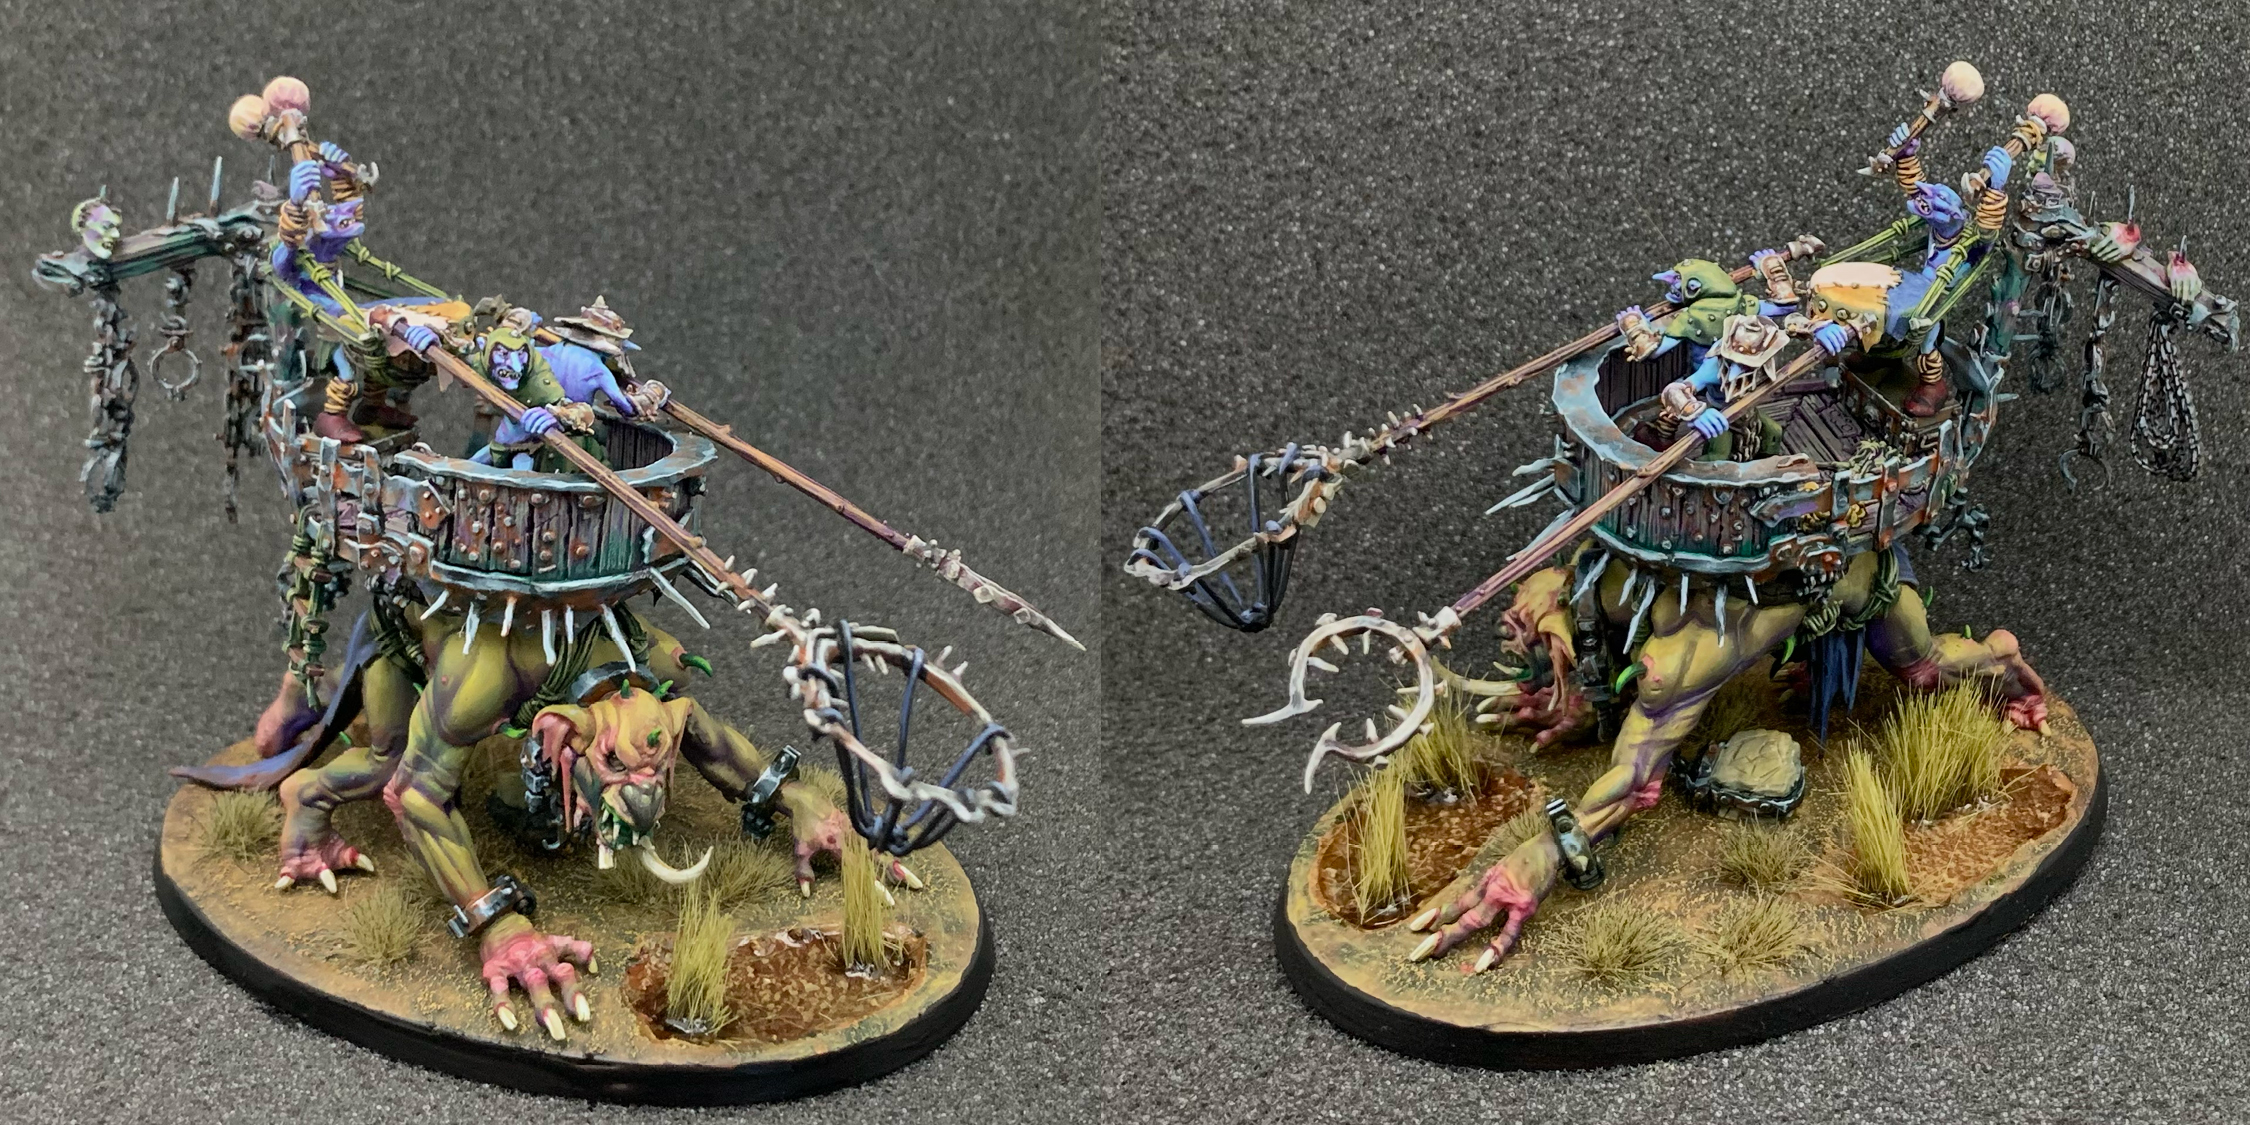
Here’s a shot of all those wacky grots. In hindsight maybe the one on the left would have made for a better tutorial because there was more metal to whoe in his armor. But he was my proof of concept for the color scheme so there was a bit too much experimenting to do steps with.
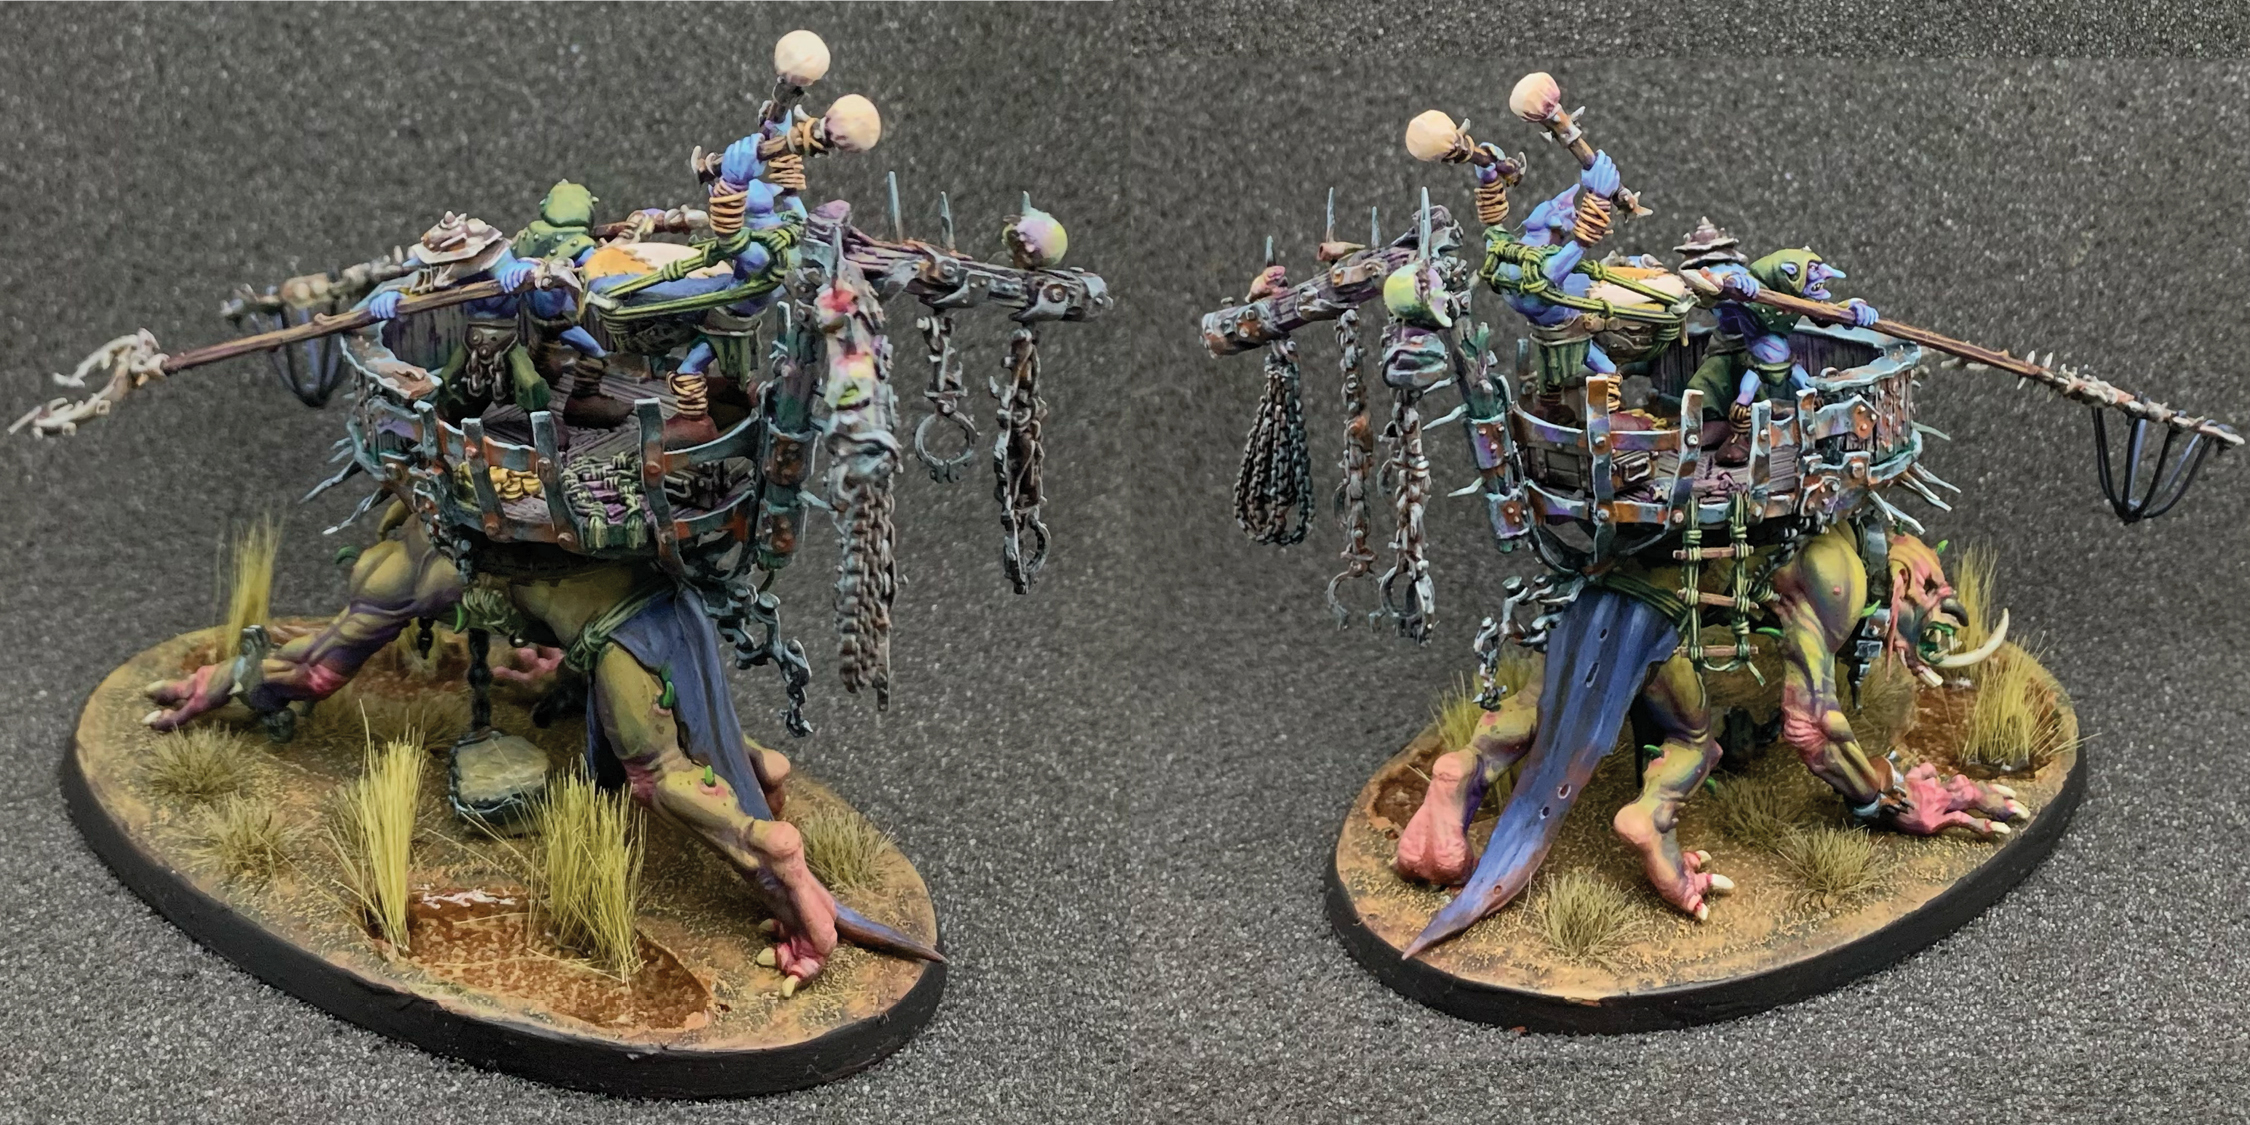
I did something similar on the base to what I had done for Braggit, making a hollow then filling it with resin. I used a little brown color in the resin but I really think I need something more opaque for a good cloudy look. Surely there’s something out there that will work…
All that’s left now are finished shots!
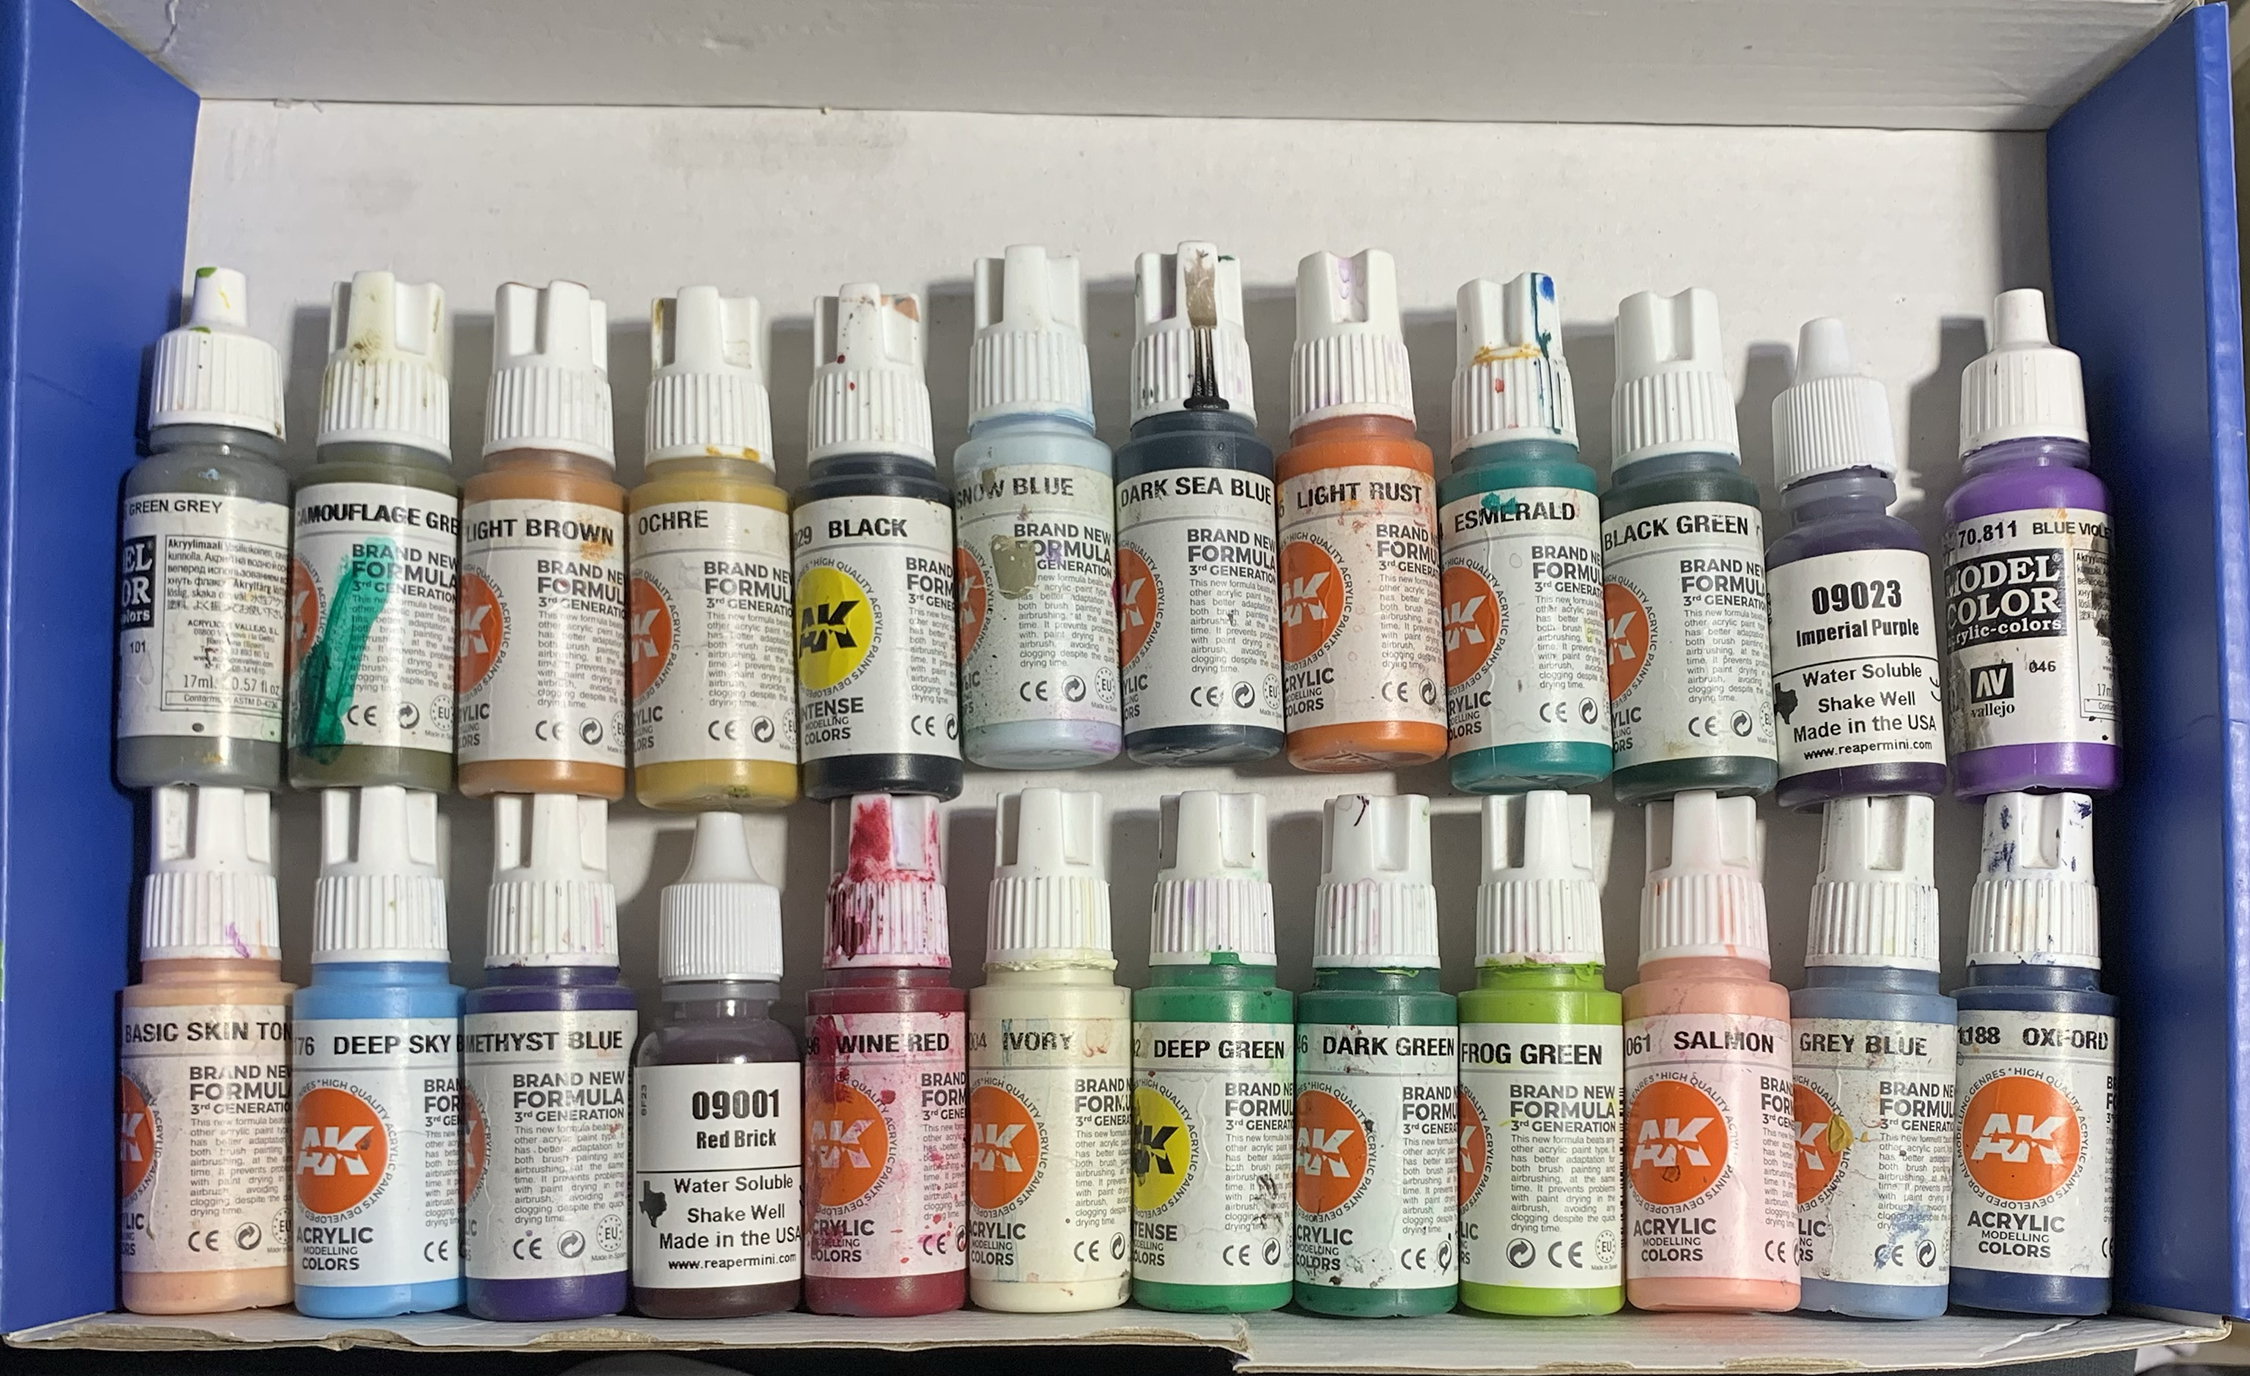
Oh yeah and here are all the paints I used… well most of them. Looks like I left out the Vallejo Stone Grey, and the AK Light Prussian Blue.
~Hope you enjoyed the article! You can follow me on Instagram if you like pics like these. I go by @t00mini. Thanks for looking!