Constructing an Angel: Bringing Blizzard’s Auriel Cosplay to Life

From Diablo to Hearthstone, this divine character is the inspiration for heavenly Auriel cosplay.
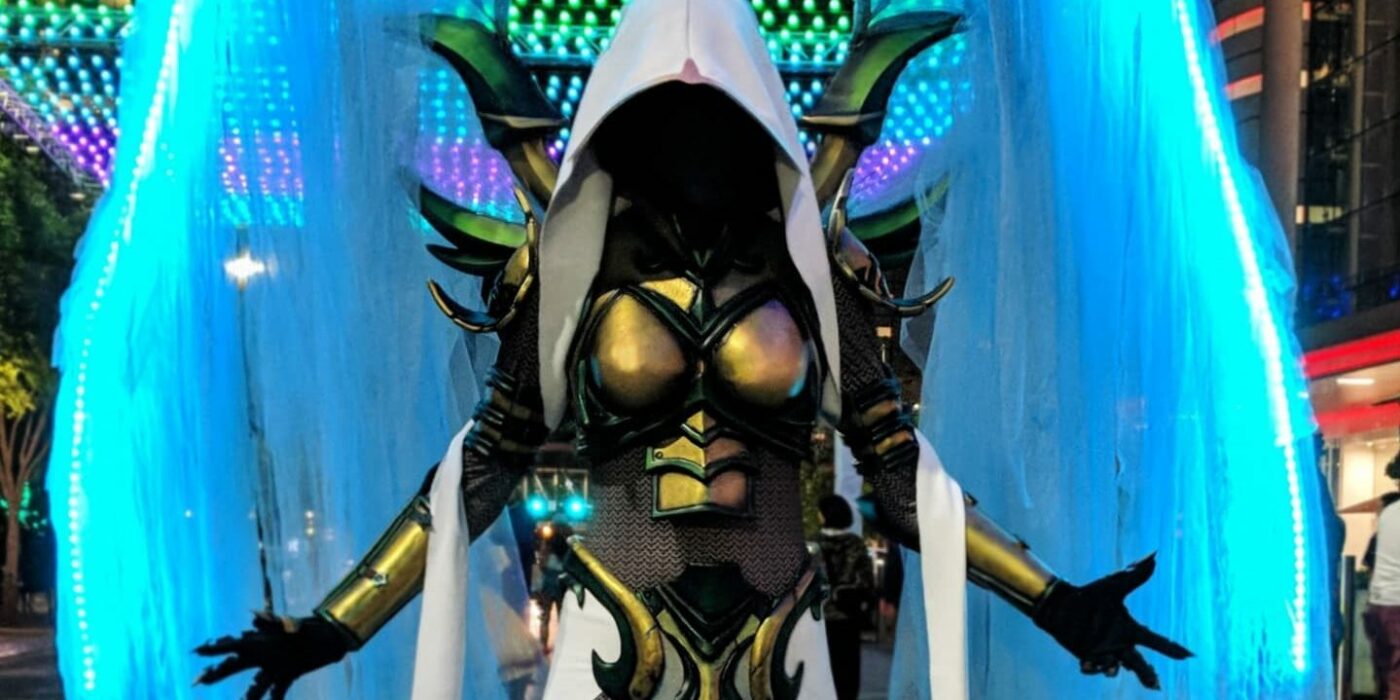
Video games are a rich source of inspiration for cosplayers. Vivid colors and shapes are tempting creative fodder. Tiffany Gordon Cosplay uses LEDs and excellent foam crafting to bring Auriel to convention floors. Take a sneak peek at the process behind this sensational cosplay!

Constructing an Angel: The Creative Goals
For this cosplay, I wanted to learn how to make armor from EVA foam, which I had barely worked with prior to this. I also had won an airbrush kit from a cosplay competition and decided to learn to use that as well, so the whole cosplay was my first attempt at learning to airbrush (I usually hand paint everything with acrylic paint). The last goal I had was to have the whole cosplay disassemble and fit inside a suitcase. Below is more info on how I fabricated specifically my shoes, boot covers, belt & skirt, breastplate & of course, my wings.

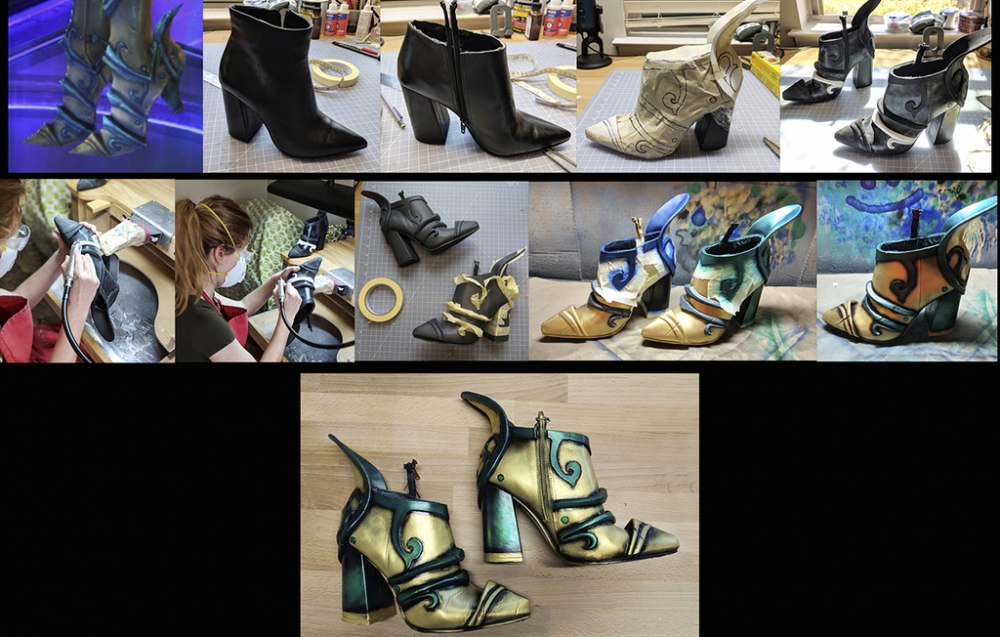
Auriel Cosplay: Making the Shoes
I took in-game screenshots from Heroes of the Storm from every angle and compiled them into one single reference image. I covered a shoe in saran wrap and masking tape to draw on my template. Then, I cut out EVA foam parts and shaped everything using my jeweler’s rotary tool. I heat-sealed all EVA foam parts with my heat gun, attaching the pieces using contact cement. The next step was to coat the shoes in three coats of Plasti Dip. For the paint job, I masked off sections and airbrushed the shoes with gold paint. Once dry, I remasked the gold parts and did a base coat of blue and then a final coat of green. The final details were airbrushed in black.
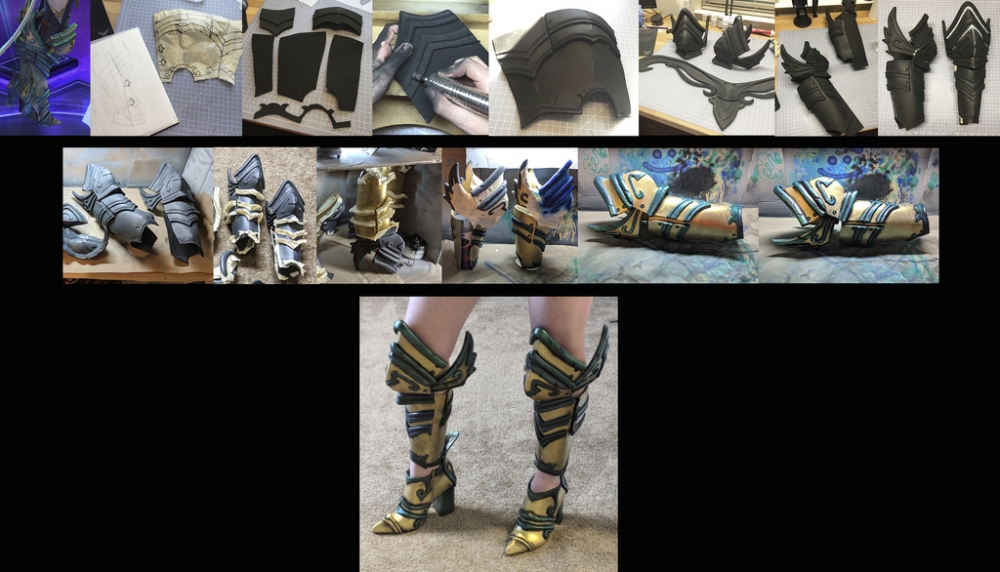
Adding the Boot Covers
I cut out my shapes from different thicknesses of EVA foam and shaped them using a sanding drum in my flex shaft. Gluing all the pieces together using contact cement, I heat-treated and bent the boot cover into the desired shape. For the more open seams, I filled them using Kwik Seal and wiped off the excess with a paper towel. The next step was to cover the boot covers with three coats of Plasti Dip. I used the same painting process as the shoes discussed previously. I used Velcro on the inside seam of the leg and added final leather detail pieces to finish off the boot covers.
Auriel Cosplay: Making the Belt & Skirt
Making the belt and skirt parts was a little more complicated. I created templates in Adobe Illustrator. The belt is in two pieces made from EVA foam and painted with an airbrush. In order to get in and out of this piece, I had to make it all easily detachable with Velcro.
For the skirt portion, I made templates again in Adobe Illustrator and transferred them to brown paper to determine sizing. Once I was happy with the size, I cut them out of white deerskin leather & sewed the pieces together with my sewing machine. For the detail parts on the skirt, I hand-dyed natural leather with gold Eco Flo Cova Color leather dye. To glue leather pieces to the white leather skirt I would typically use a glue called Leather Weld, unfortunately this glue did not adhere to the white leather as well, so I used contact cement instead.
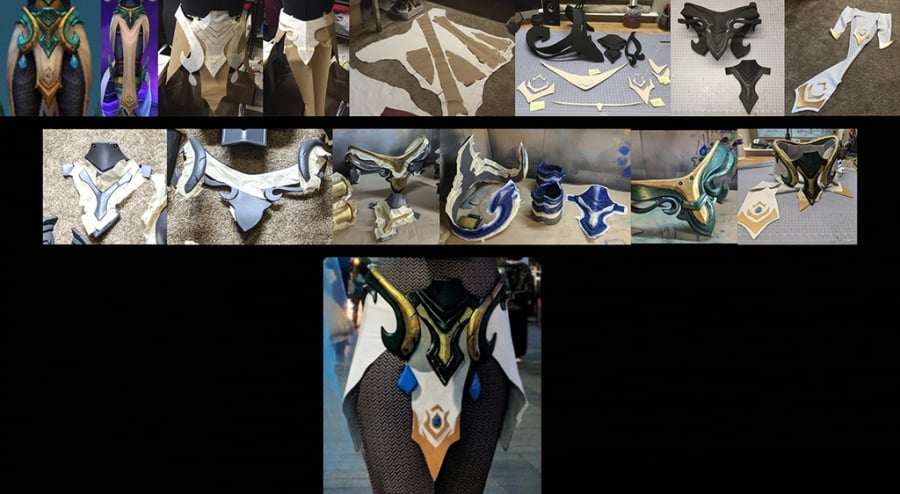
For the final parts of the skirt, I bought clear stones from Michael’s and painted them with blue acrylic paint. They were then sealed using Satin Crystal-Clear Enamel spray paint and attached with contact cement to the skirt and leather thread to the belt.

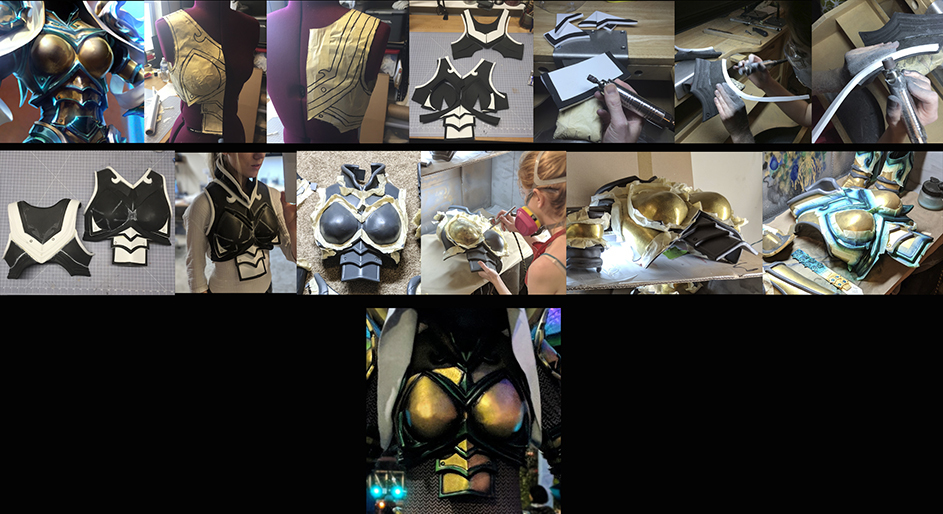
Making the Breast Plate
To create the breastplate, I wrapped one of my dress forms in saran wrap and masking tape to draw my templates. I used EVA foam and craft foam to construct each section and sanded them with my sanding drum. I used contact cement to glue all the pieces together and heat-treated each part with my heat gun. To fill any unwanted seams & cracks I used Kwik Seal again and then covered the breast plate with three coats of Plasti Dip. Once dry, I taped off my piece and painted the breastplate gold using an airbrush. After drying, I masked off the gold areas and did a base coat of blue followed by a main coat of green and then added details with black airbrush paint. The final step was to add Velcro to attach the breastplate to the back plate.
Auriel Cosplay: Making the Wings
The wings took the longest time to construct and plan out. I wanted the wings to be lightweight enough and disassemble to fit inside a suitcase with easily removable LED lights. First, I needed to figure out my scale. I drew a basic size template in Adobe Illustrator and traced the scale onto brown paper to determine the best proportions for my height.
For the smaller wings, I made to-scale templates in Adobe Illustrator and then imported them into a 3D modeling program called Rhino5 and built my 3D version. Once I was happy with the final 3D model, I spliced each wing into 6 sections to print on my Prusa i3 mk2 printer. Once all the pieces were printed, I glued them together using two-part epoxy and left them to dry. I covered the wings with a Flexible Spackling Dap and sanded smooth.
To smooth the pieces even more I then covered them with two coats of sandable spray paint and sanded smooth. I used masking tape and painted the wings with gold airbrush paint. I then masked the gold areas and did a base coat of blue & then a final coat of green. The last part of painting the wings was to add the black detail paint with the airbrush.
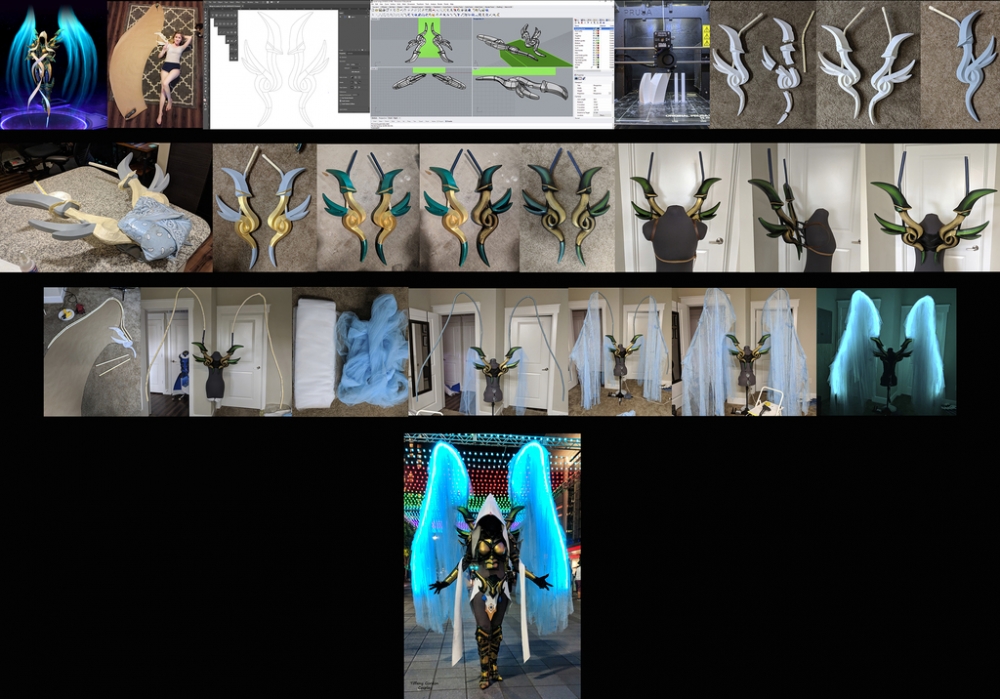
Adding the Harness
For the harness, I created a 3D-printed backplate in which I glued carbon fiber tubes to easily allow the smaller wings to come on and off. I used leather as the strapping and a one-side squeeze buckle for attachment.
For the larger wings, I made a to-scale template with Adobe Illustrator and transferred it onto brown paper. From this shape, I bent CPVC pipes with a heat gun & heat-resistant glove. I then measured out the maximum length that would fit into my suitcase and cut the pipes of each wing into manageable segments. I then used CPVC slip couplings glued on one end to allow each part to easily disassemble. Next, I painted the pipes a grayish-blue color with my airbrush to camouflage the structure. Afterward, I added Velcro on the underside of each pipe to attach my LED light strips. It was critical to be able to easily put on and remove the lights for travel.
For the wings’ fabric, I used different types of white tulle and cheesecloth-like fabrics and hand-dyed them with various shades of blue acrylic paints. Once all the fabric was the color I desired, I glued the fabric onto each pipe section using hot glue, being careful to glue only to the top side of the pipes so as not to interfere with the LED lights below.
Tiffany Gordon Cosplay Social Media

~Join us next week for more cosplay coverage~
Have a Cosplay question you would like Mayhem’s Muse to answer?
Know a Cosplayer you’d like to see featured? Send an email here!