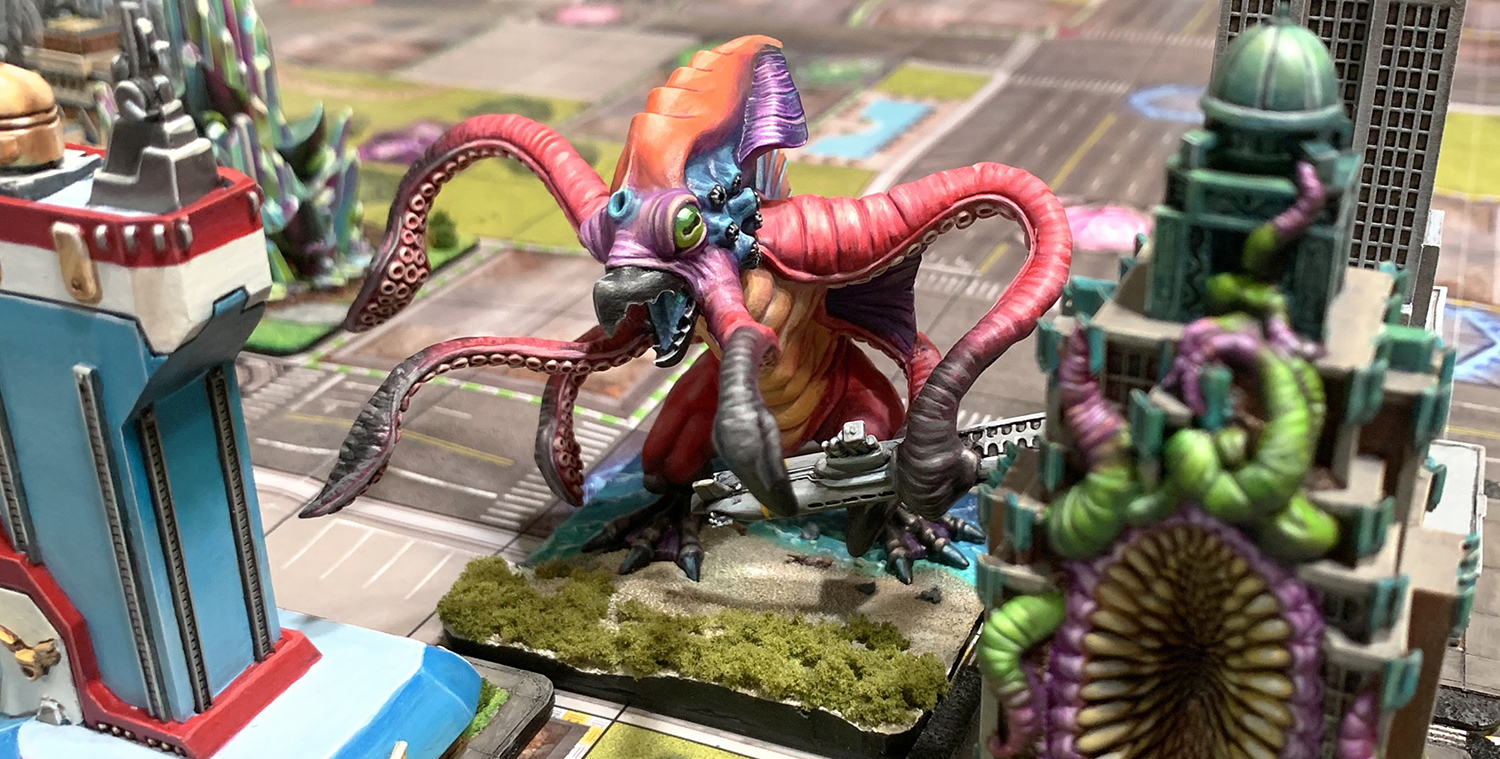
Monsterpocalype: Painting Krakenoctus
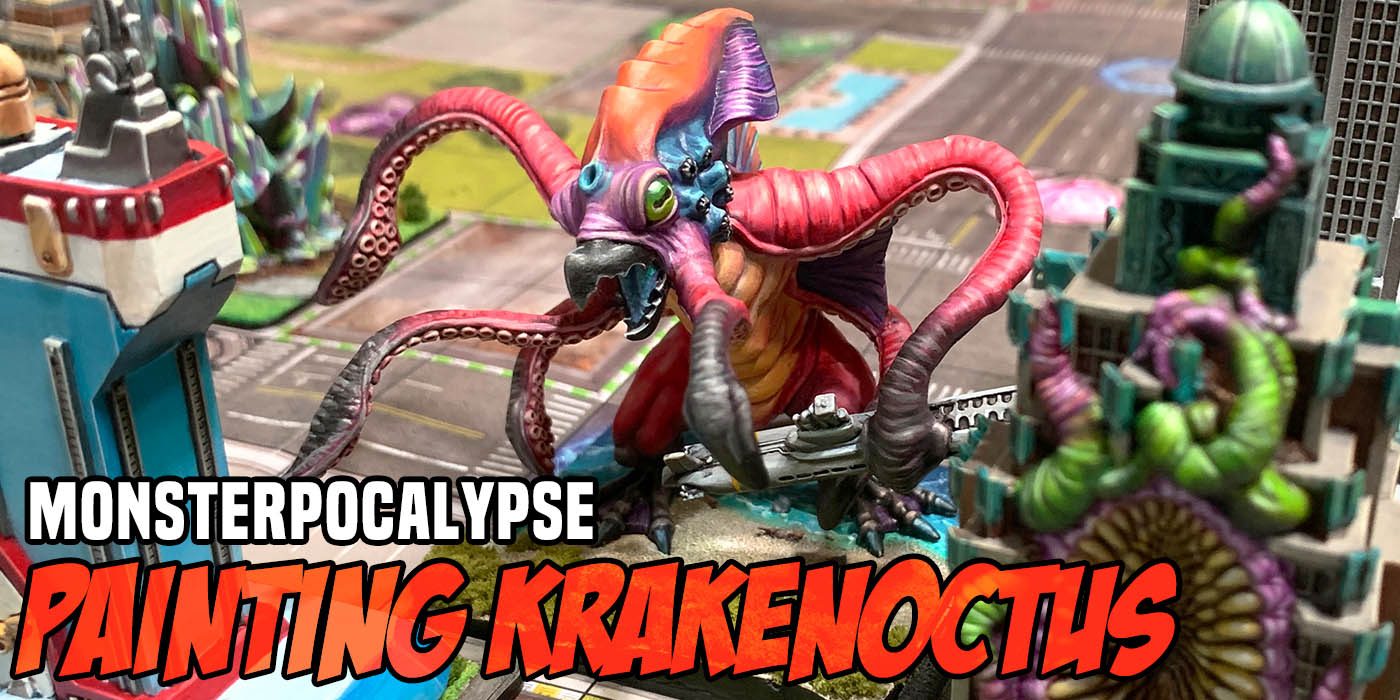
Let’s paint up this big honking squid man.
Wow! This is my first Privateer Press painting article in over four years! I still haven’t found my way back to Warmachine, but I was a huge fan of the 2008 version of Monsterpocalypse, so I guess it wast only a matter of time before I picked up the new version. Step-by steps in just a moment, but first here’s a picture of a bunch of paints:
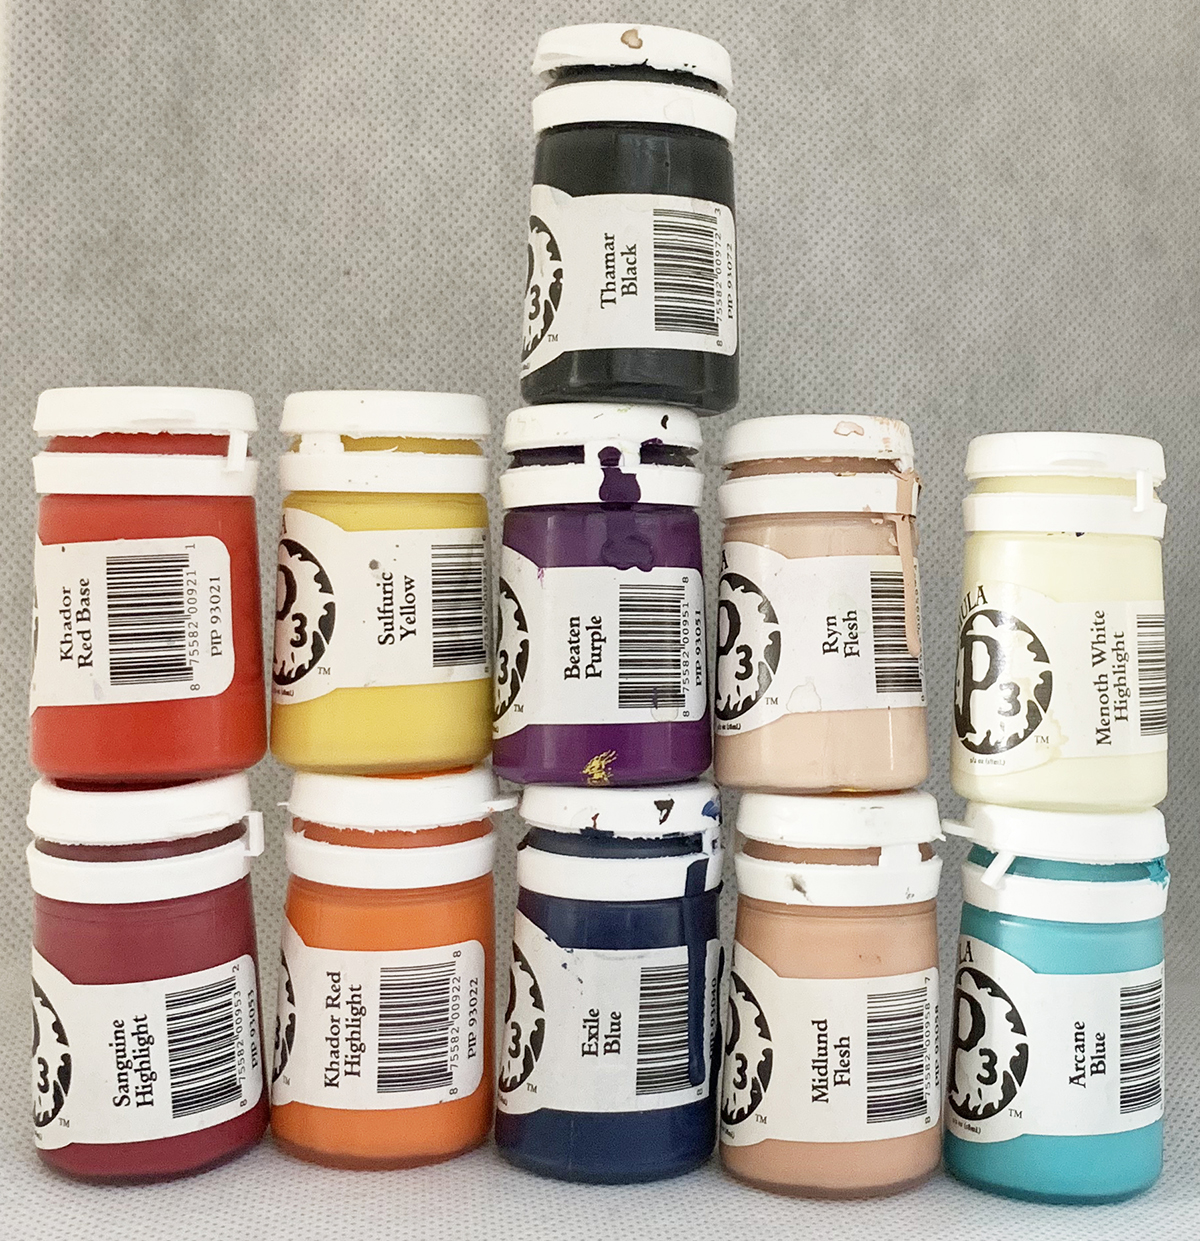
All of these were used at some point or another so this will count as my paint list. I am using P3 paints again. I recently scored the entire set of P3 paints (or very nearly the entire set) at a swap meet for $10. I forgot how much I loved them. Such vibrant colors and clean blends.
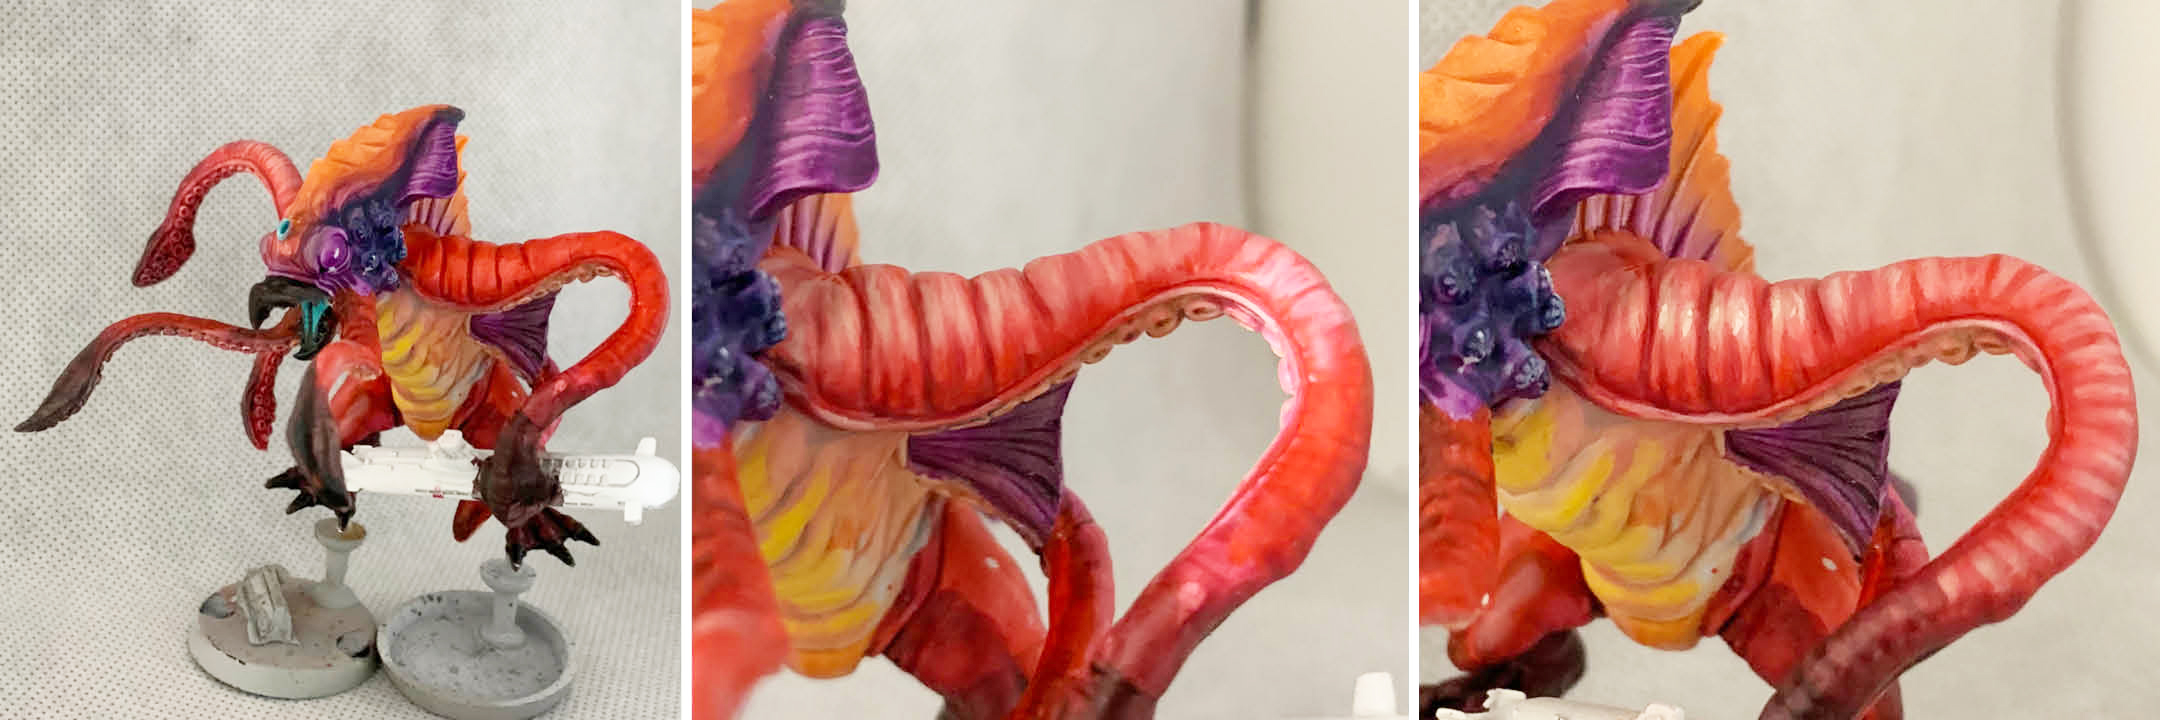
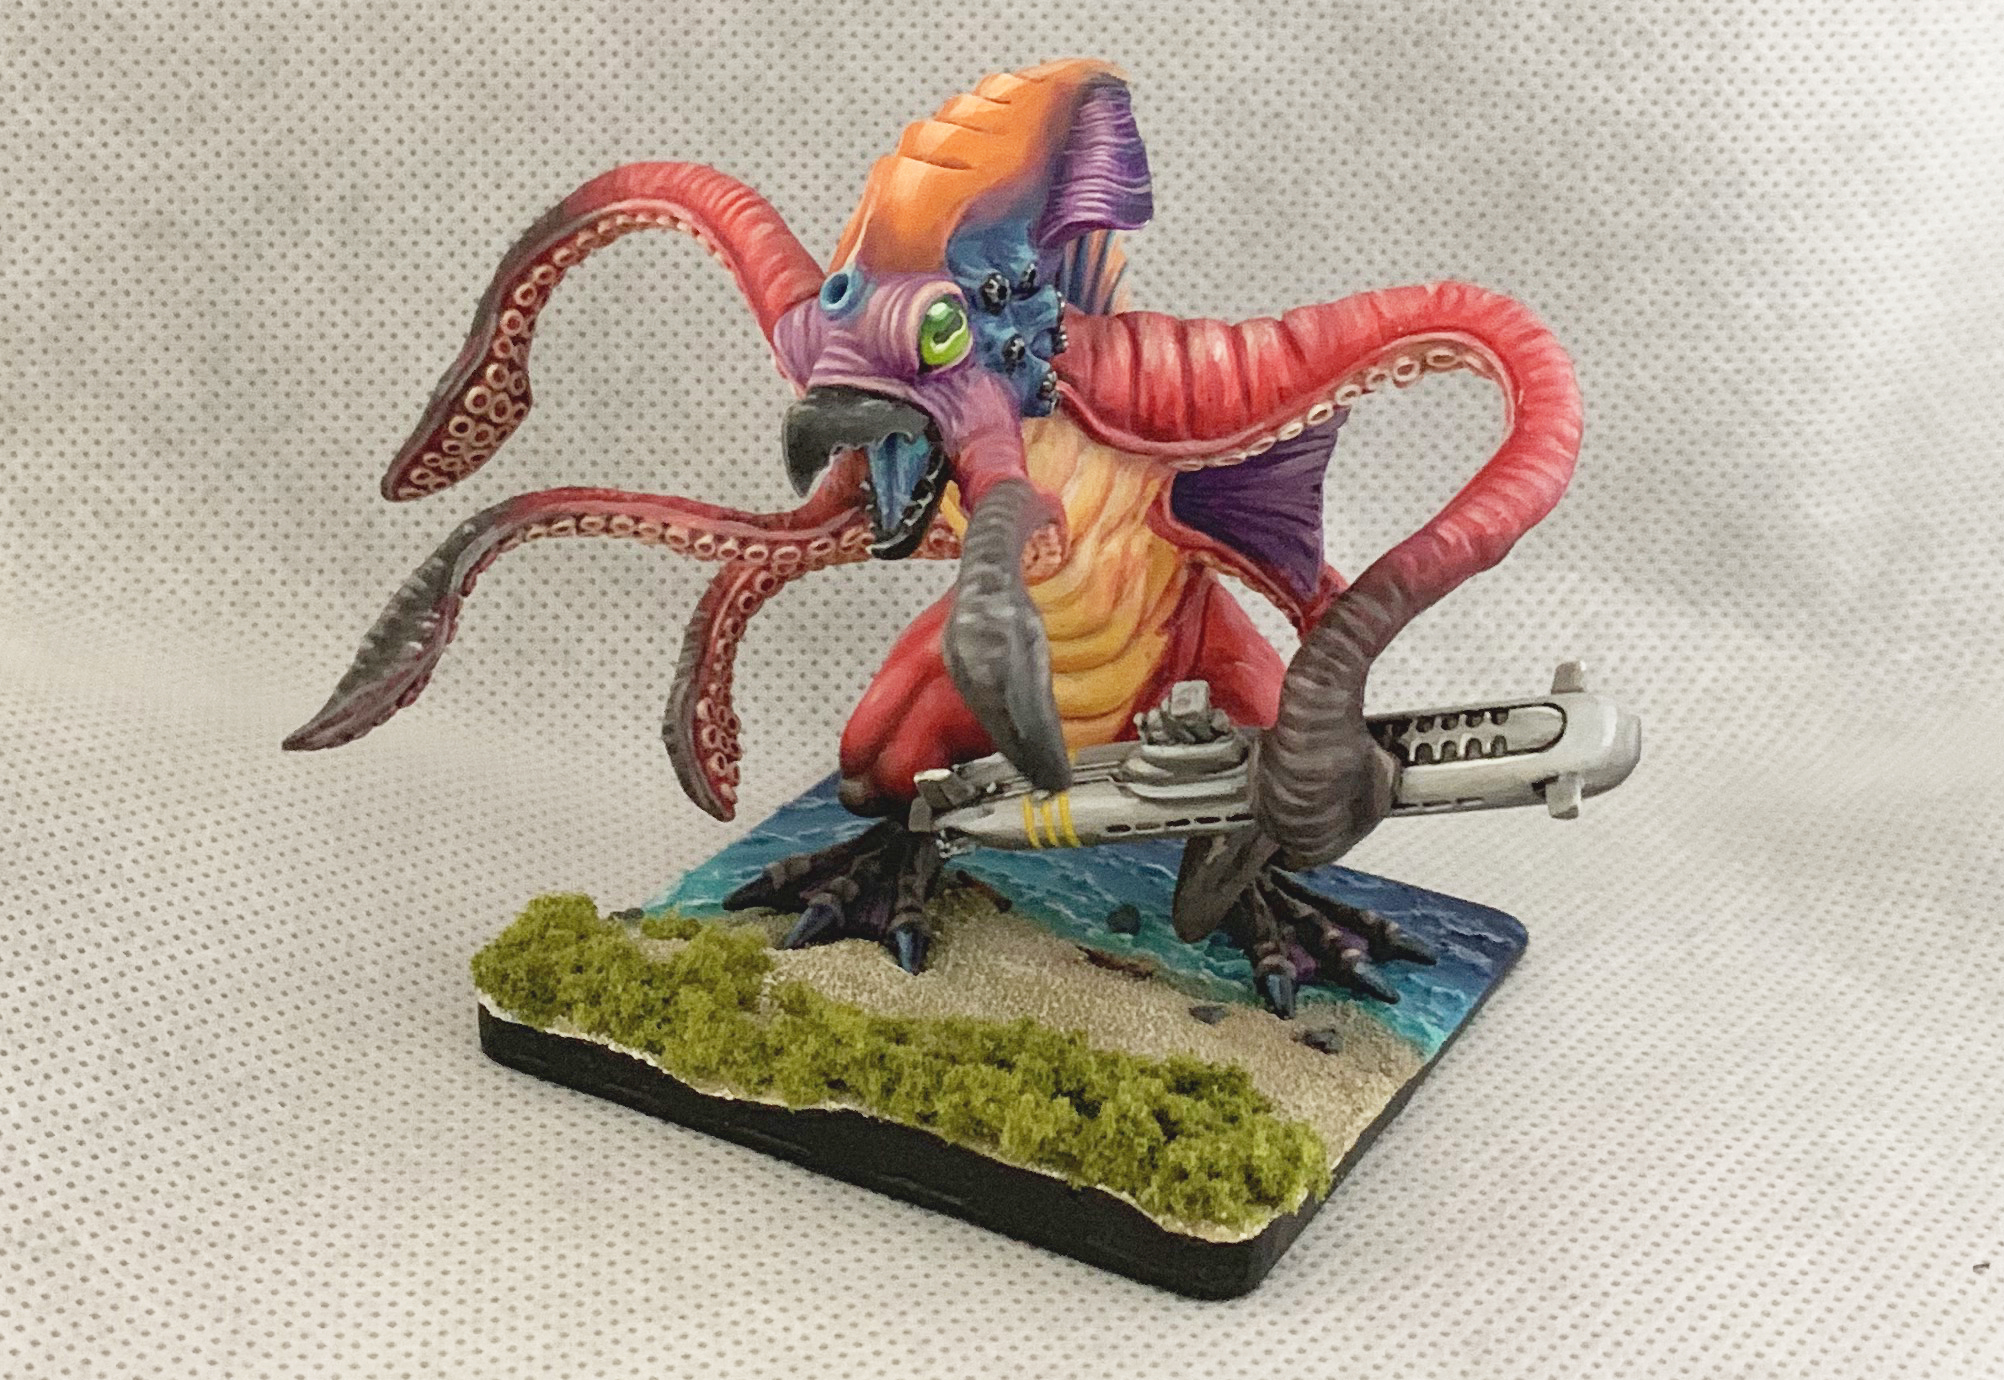
But enough about that, let me body slam you right into this painting article. First I used thinned down paints to undercoat the whole model. Most of it was Sanguine Highlight blending in Khador Red Base as a highlight. (still not sure why the deep red Sanguine is a “Highlight” and the lighter Khador Red is a “base.”) I used Exile Blue for those weird anemone-mouth-ears, Beaten Purple for most of the fins, and Khador Red Highlight (orange) for the head and back fin. I also carefully blend in some Thamar Black with the red on the tips of the tentacles and feet, making sure its not too dark. Sulfuric Yellow and Midlund Flesh are used on the belly.
Once I have all the base colors in place, I start adding highlights to the red and purple. Midlund Flesh is used first, then it’s blended up into Ryn Flesh with final tiny “hotspots” of Menoth White Highlight in a few select places to try to give an illusion of glistening tentacle slime.
I start working the highlights out into the blackish areas, adding small amounts of Thamar Black and Sanguine Highlight to Midlund Flesh for a highlight consistent with these darker areas. I also blend some Ryn Flesh highlights into the orange head to begin building up some volume there
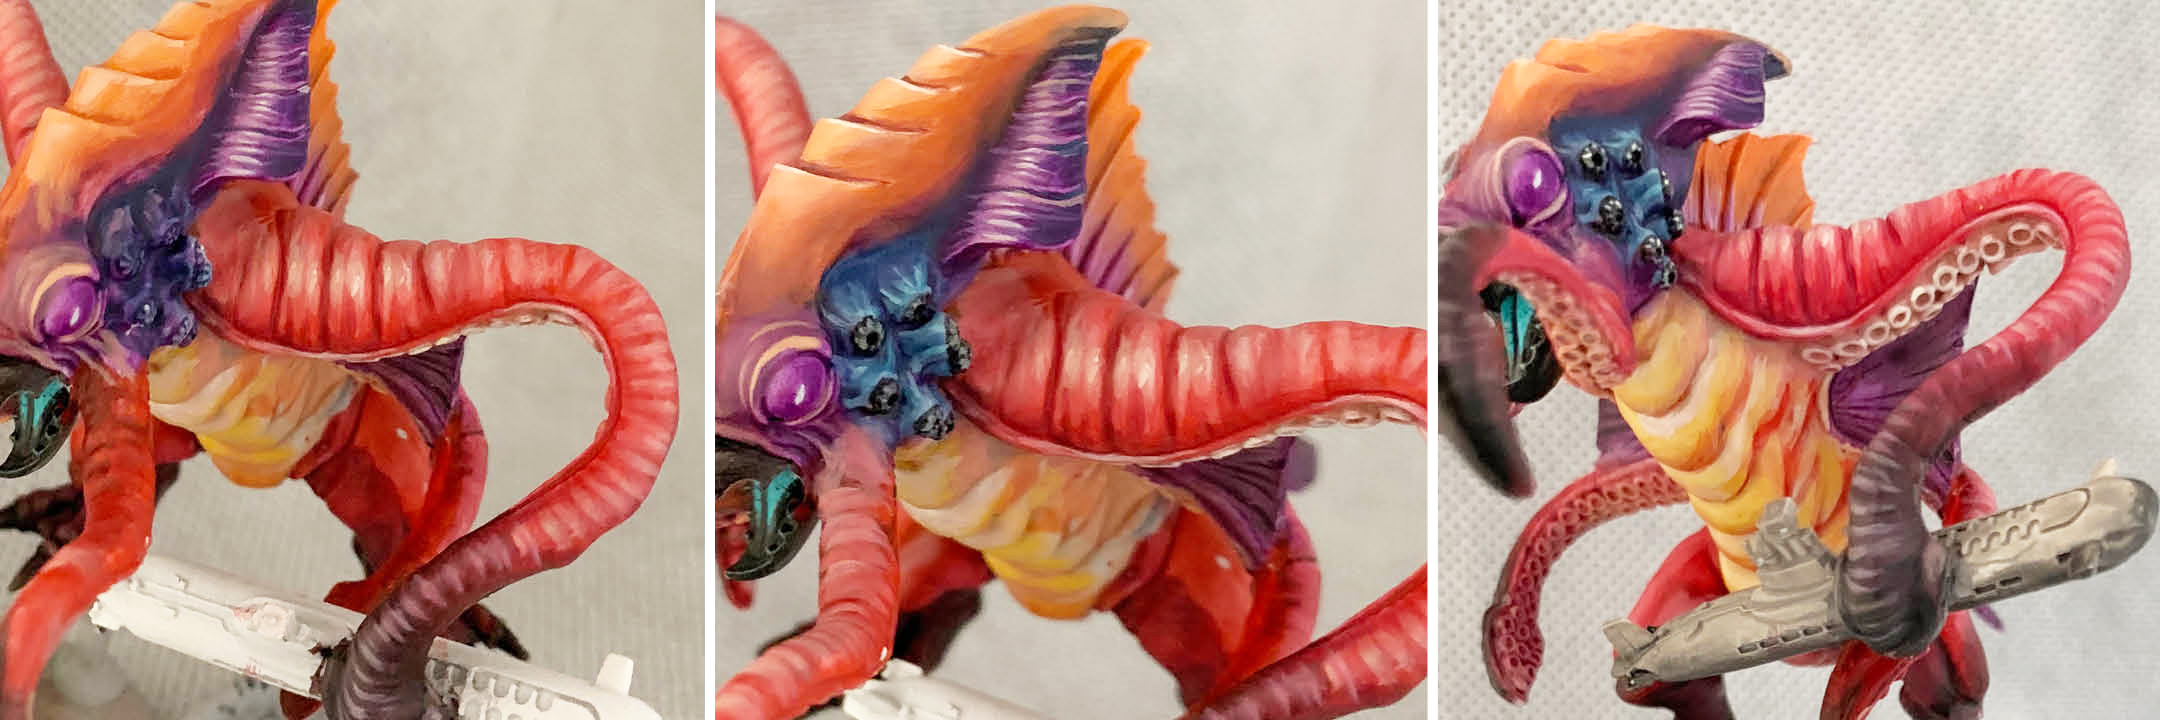
Next I begin highlighting the “ears,” blending Arcane Blue into the Exile Blue base. I also add just a little bit of blue to the head fins to give them a more complex appearance. I add highlights of Midlund Flesh to the area around the eyes to add some definition to the folds of skin.
I gently drybrush some Ryn Flesh onto the suckers, using Menoth White highlight in a few places to add a little more definition. Then it seems like it’s time to paint the submarne. I give it a basecoat of Trollblood Highlight, shading it with Thamar black while it’s still wet.
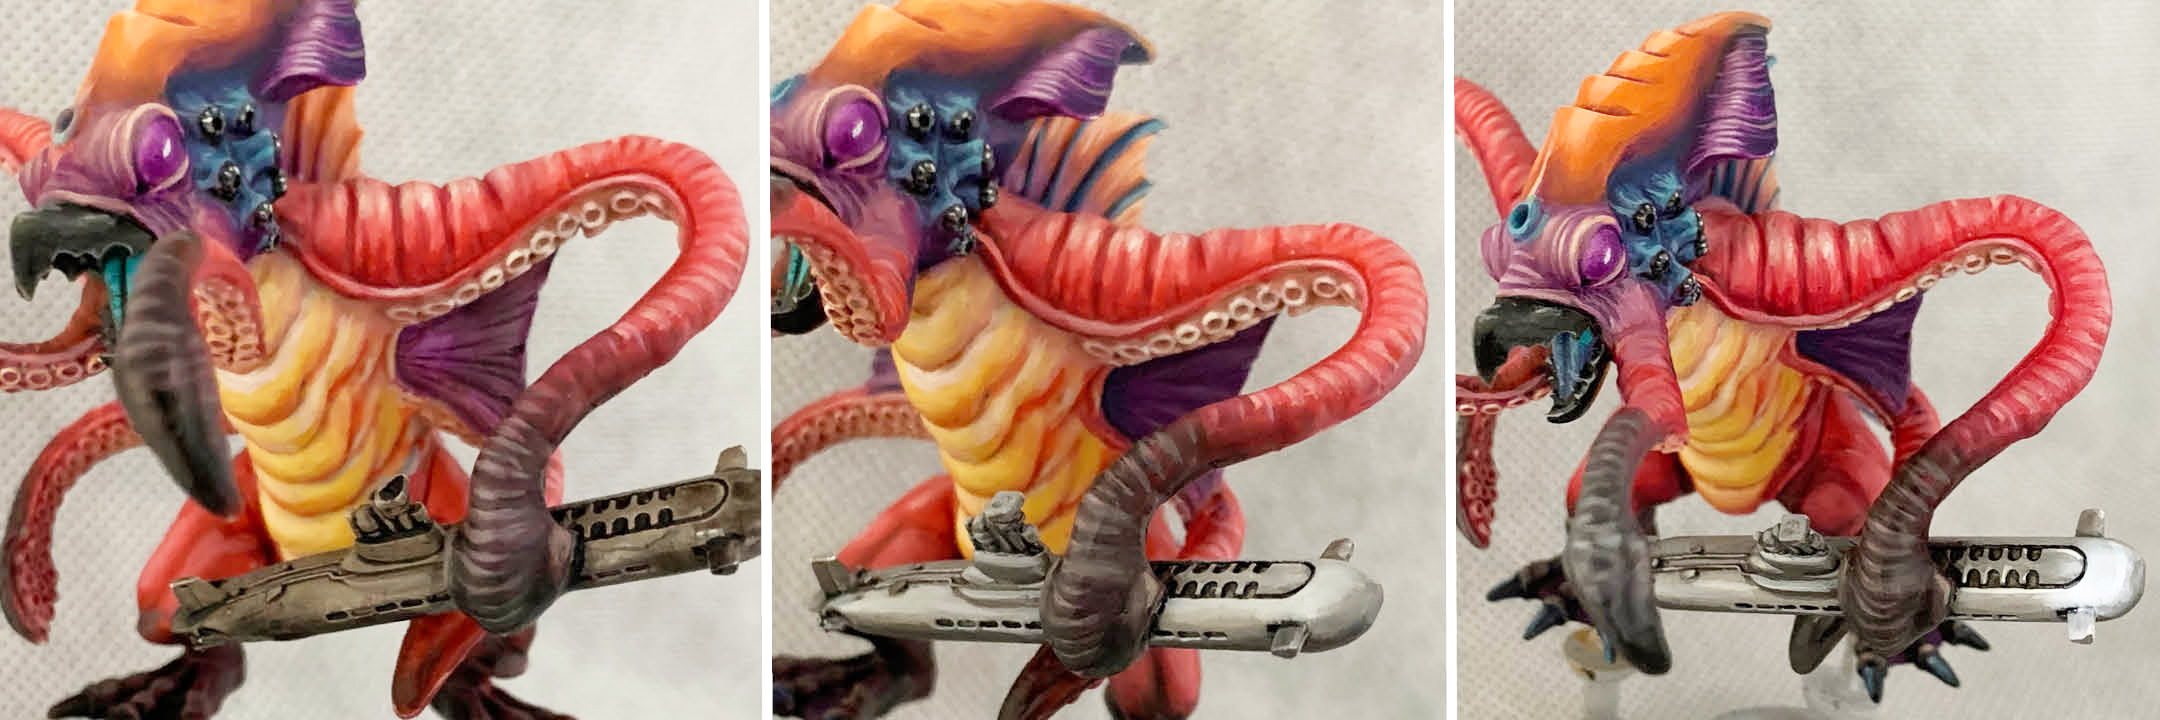
I give the sub a wash of P3 armor wash then build the highlights back up with more Trollblood Highlight and Frostbite. to finish the sub I give every edge a thin line of Frostbite.
I also work on evening out the belly, adding more layers of Sulfuric Yellow highlighting it with Ryn Flesh and Menoth White Highlight.
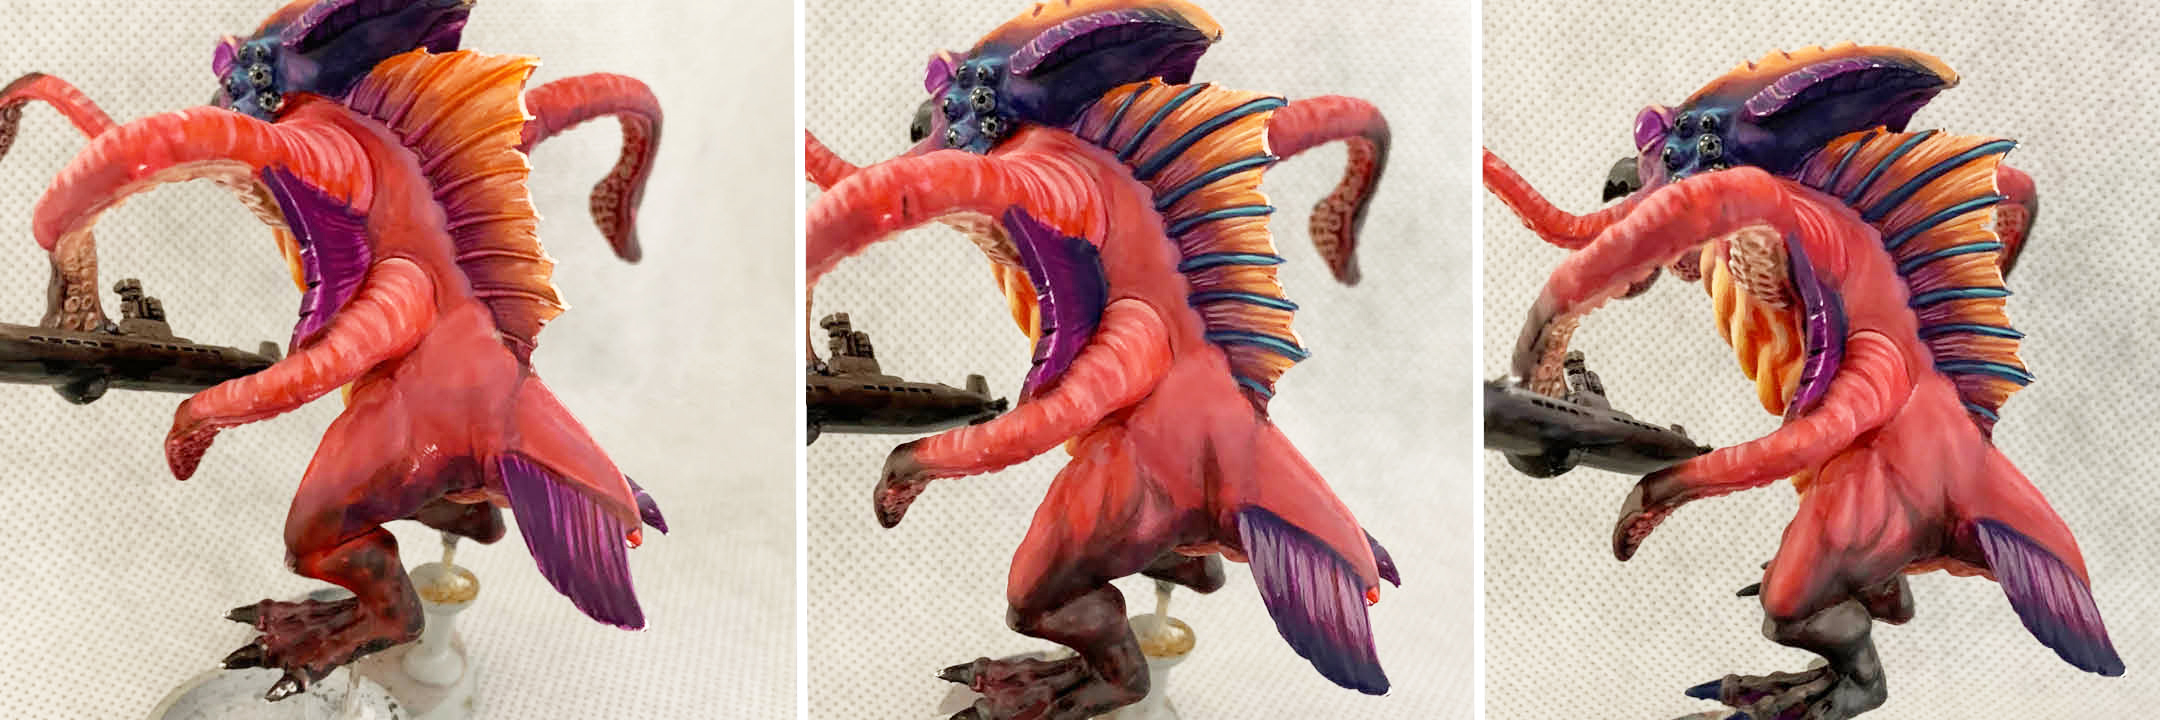
Here’s a look out how the highlights were gradually built up on the back, particularly on the black portions of the feet. The same colors mentioned earlier were used to highlight these areas as well.
We’re also looking at the fin. I used a base of Khador Red Highlight shaded at the bottom with Beaten Purple. Thin lines of Khador Red Highlight mixed with Menoth White Highlight were added to accentuate the ribbing on its surface. Pure Menoth white Highlight was used to accentuate the area even more.
For the spines along the fins I used Exile Blue, highlighted with Arcane Blue.
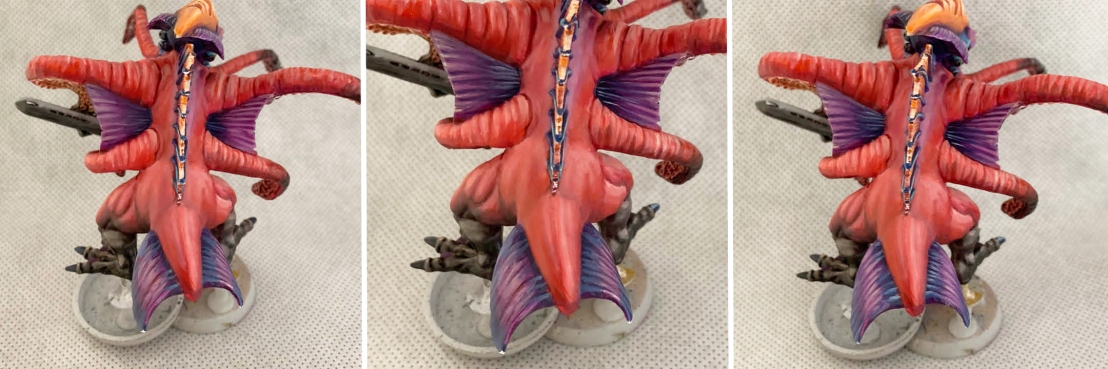
Here are the rest of the purple fins. As with the head fins, they start with a basecoat of Beaten Purple with highlights of Midlund Flesh and a little Ryn Flesh – used sparingly.
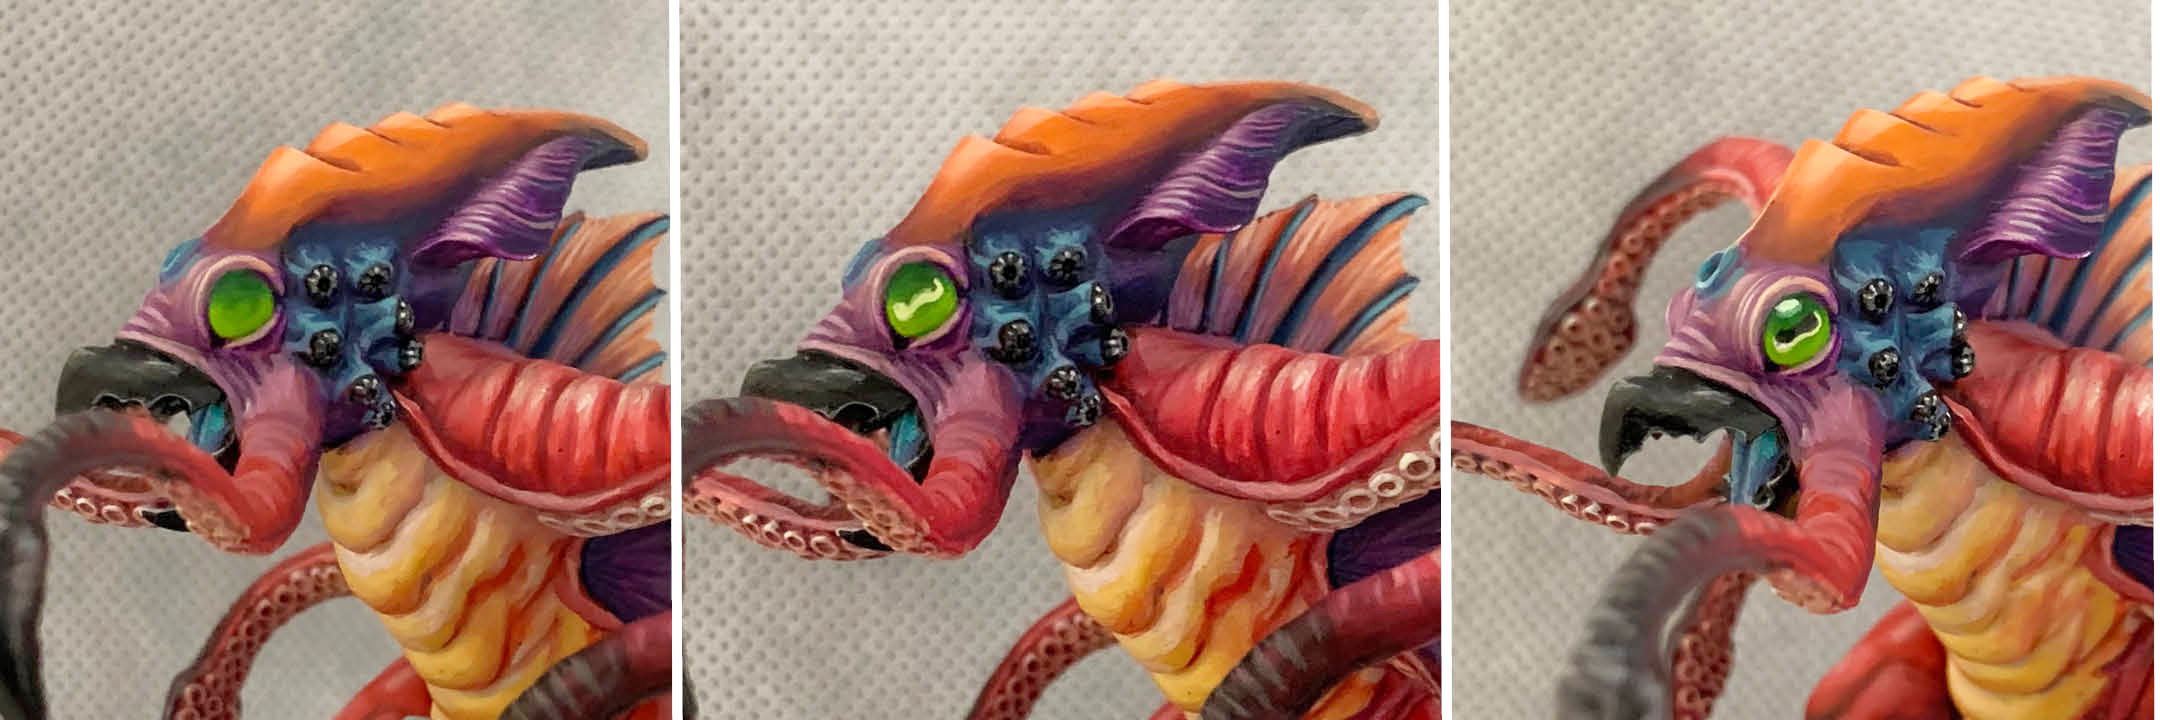
Last of all I go for the eyes. I think I often do them last because they add that final spark. I find it interesting that some people go the opposite route, painting the eyes first then using them to anchor the rest of their progress. For big clear retinas like these one, of the best options is to use a technique similar to a gem illusion. A lighter color (Necrotite Green in this case) is used at the bottom. This is blended up into a darker color (Gnarls Green) as it progresses towards the top.
I add a blob of Necrotite mixed with Menoth White Highlight to start defining the pupil.
Then a black blob in roughly the shape of a sideways 8 goes over the original light green shape. A dot of Necrotite Green followed by a smaller dot of Menoth White Highlight above it goes at the top of the eye.
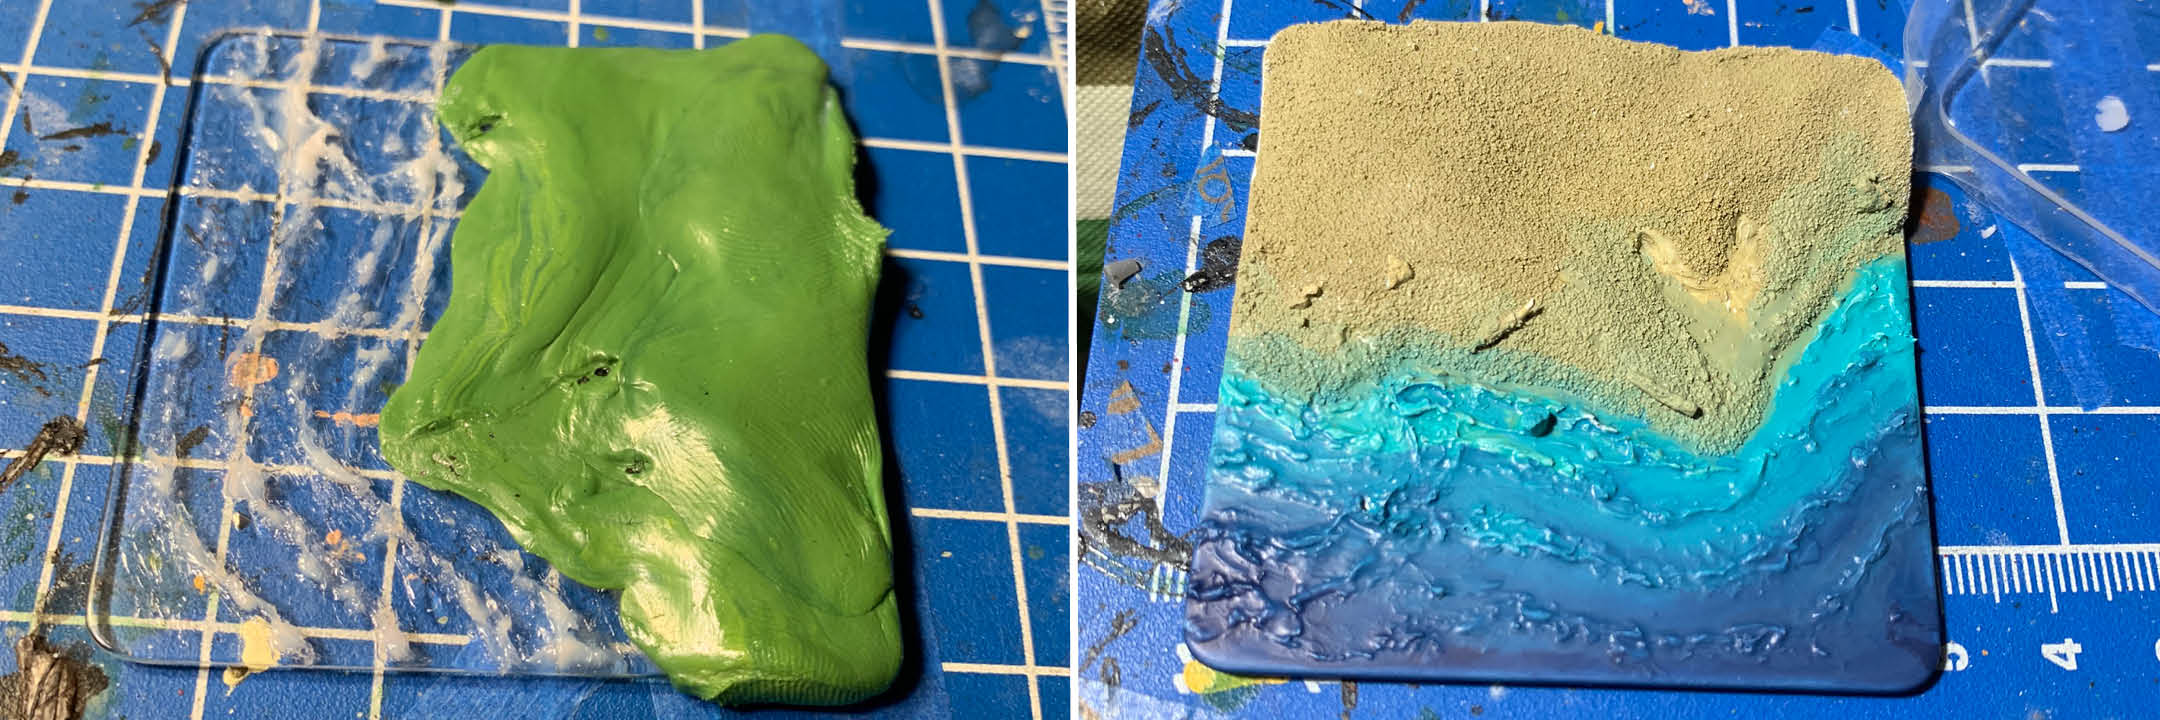
I’m not a fan of transparent bases. I know there’s a reason for them (they let you see the map underneath) but when I see a model glued to one of these things they just don’t look finished. I decided to model something for Krakenoctus.
I sculpted a shoreline out of green stuff (complete with monster footprints), then added some waves to the “sea” with Liquitex Gloss Heavy Gel Medium. White glue is used to add a thin layer of fine grain “beach” sand (you can find it in hobby stores to make scenes with sea shells in jars) over the green stuff before painting the shore Hammerfall Khaki. The water starts with Arcane Blue and is blended into Exile Blue as it gets “deeper”
I use the edge of a brush to paint thin lines of Frostbite along the crest of the waves. The sand is drybrushed with Menoth White highlight. While each grain of sand would at least the size of a basketball in Monsterpocalypse scale, I think it looks better with the bit of texture than it would have without it. Some clump foliage finishes it off before the edges of the base are painted Thamar Black.
I’ve been painting a lot more Monsterpocalypse lately. Find me on Instagram (#t00mini) for what I’m up to day to day. I also have a blog: [email protected], but I don’t post there as much as I used to.
~Who else out there tried the new Monsterpocalypse?

